The Fresh Loaf

A Community of Amateur Bakers and Artisan Bread Enthusiasts.

4akitchenblog's blog

4akitchenblog's picture
4akitchenblog

I LOVE wine.

I drink wine every single day.

And, I am addicted to baking bread....

Why not!?

My favorite combination : Wine + Bread = Yum :-)

I added chopped cranberries, too.

Sourdough Wine Baguette & Batard 

Thanks to wine and cranberry, it has a nice sweet and tangy flavor and definitely goes well with blue cheese!

I can't stop drinking & eating wine!

———————————————————————

Sourdough - Wine Baguette + Batard

Makes 1 baguettes and 2 small batards

—————————————-

Ingredients

102 g 100% hydration starter

287.8 g Gold Medal All-purpose Flour

80 g Water

123 g Red Wine

6.7 g Salt

80 g Dried Cranberries

—————————————-

Formula

338.8 g Gold Medal All-purpose Flour (100%)

 131 g Water (38.6%)

123 g Red Wine (36.3%)

6.7 g Salt (1.98%)

80 g Dried Cranberries  (23.6%)

—————————————-

Directions

  1. In a bowl, mix flour and Wine + Water roughly, cover it with plastic and Autolyse for 12 hours in the fridge.
  2. Add Sourdough starter and mix by folding dough in the bowl.
  3. Add chopped Cranberries and mix by folding dough in the bowl.
  4. Add Salt and Slap & Fold for 3 - 4 minutes or until the dough becomes a ball.
  5. Bulk fermentation at room temperature, 1 sets Stretch & Fold (1 set = right over left, left over right, bottom over the top, top over bottom) every half hour until enough strength has been developed.
  6. Let it rise until the dough starts showing the 'activity' and becomes about a third in size. It takes about 6 hours total in winter time (it depends on the season) in my kitchen.
  7. Put it in the fridge for 16 – 18 hours.
  8. Pull it out of the fridge and leave it out for 1 hour.
  9. Divide into 2 equal parts and preshape the dough.
  10. Let it rest for 15 - 30 minutes.
  11. Shape into baguettes / batards and place onto a floured couche, seam-side up.
  12. Preheat the oven to 500°F
  13. Final fermentation for 45 minutes - 1 hour.
  14. Score the top of the baguettes / batards using a lame or a sharp, serrated knife.
  15. Place the bread in the preheated oven, pour the water onto the brick blocks and shut the oven door immediately. Turn down the oven to 480°F, bake the bread around 20 minutes.
  16. Let them cool onto a rack.
  17. Ready to eat!

The time and temperature will be changed depends on the season.


4akitchenblog's picture
4akitchenblog

Hi there!

Today, I would like to talk about my favorite bread ---- Baguettes!

I love baking/eating baguettes...

I was into baguettes so much and I tried many recipes. I baked with a lot of different methods and finally I found the perfect one which worked in my kitchen, with my oven :-) 

-----

The other day, I baked baguettes with my favorite method for the first time in a long time, and...

Ok, I will be honest here.

I messed up ;-)

Since I’ve acquired a lot of new knowledge, method and information about baking bread recently, I unconsciously changed steps little by little… and it turned out a big difference compared to the original way.

So, this post is a reference in the future. 

-

From Flour To Baguette

Based on Anis Bouabsa’s baguette

Makes 2 Baguette

—————————————-

Formula

287.8 g All-purpose Flour (100%)

0.518 g Active Dry Yeast (0.18%)

215.8 g Water (75%)

5.18 g Salt (1.8% )

—————————————-

Mix flour and water to a shaggy mass.

(Save a very small amount of water for salt.)

Cover and let it rest (Autolyse) for 30 minutes.

Add Yeast and mix by folding dough in the bowl, then Slap & Fold for 1 minute.

Add salt and pour the water on the salt to distribute evenly.

Mix by folding dough in the bowl, then Slap & Fold for 1 minute.

Cover and bulk rise at room temperature until it has about a third in size.

Stretch & Fold every half hour until the gluten has been developed.

This is the dough right after the third time Stretch & Fold.

 When the dough has gained about a third in size, put it in the fridge for 18-21 hours.

-

Take the dough out of the fridge. The dough should be doubled in size.

If not, take more time to rise at room temperature.

This ↑ is the dough I let it rise for 2 hours at room temperature after I pulled out of the fridge.

Take the dough out onto the floured surface and divide into 2 pieces.

Pre-shape and let it rest for 20 minutes.

1 hour before baking, preheat the oven 500°F.

Shape and final proof for 30-60 minutes.

Score the surface and ready to bake baguettes!

-

Bake with steam at 480°F 11 minutes, 460°F 9 minutes without steam.

About 5 minutes, oven spring will happen.

If not, well…you won’t have oven spring, BUT taste will be good :-)


I wish I could have more open crumbs, but it turned out nice this time!

Yuko


4akitchenblog's picture
4akitchenblog

Hi all,

I am new here and this is my first post on The Fresh Loaf!

Today I would like to share my first attempt at baking Sourdough Boule with Japanese Clay Pot.

Japanese Clay Pot (a.k.a. Donabe) is a symbol of comfort food for Japanese people.

(Oh, by the way, I am Japanese :-))

Family members or friends come together around the table and share a meal out of one pot, so that you can build a sense of closeness, warmness...

I live in Santa Monica, California and my all family members live in Japan...Therefore, I felt all warm inside when I happened to find this Donabe.

"I want to bake BREAD with this clay pot!"

This idea just popped in my head :-)


The best part of using a clay pot (of course, a cast-iron pan, too) is you don't need to create the steam in your oven.

Because a closed clay pot trap all of the moisture from the dough, and that creates STEAM you need to get a perfect crust!

It's like a "masonry oven" inside your oven, if you will.


Ok, let's bake Donabe-bread!

This is a Sourdough Boule made with 36 hours fermentation.

————————————

Sourdough Boule

Makes 1 small loaf

Submitting this post to YeastSpotting

————————————

Recipe

225 g Bread flour

162 g water

4 g Salt

67.5 g 60% Firm sourdough starter

————————————

Formula

266.3 g Bread Flour (100%)

188.3 g Water (70%)

4.8 g Salt (1.8% )

————————————

Directions

1. Making the preferment dough --- In a mixing bowl, combine Bread Flour, Water and Sourdough seed starter / culture. 

    Let it preferment at room temperature for 12 hours.

2. Meanwhile, mix flour and water, cover it with plastic and Autolyse for for 12 hours.

3. Next day, mix starter into the dough and slap & fold for 1 minute.

4. Add salt and slap & fold for 1 minute or until the dough becomes a rough ball.

5. Let it rest for  30 minutes.

6. 1 set Stretch & Fold (1 set = right over left, left over right, bottom over top, top over bottom)

7. Let it rest for  30 minutes.

8. 1 set Stretch & Fold

9. Let it rest for  30 minutes.

10. 1 set Stretch & Fold

11. At a cooler place, let it rise until the dough just starts showing the yeast activity, about a third in size.

12. Put it in the fridge for 18-24 hours.

13. Pull it out of the fridge and leave it out for 1 hour.

14. Pre-shape the dough and let it rest for 15 minutes.

15. Shape into Boule and place into a mixing bowl lined with well-floured tea towel, seam-side up.

❉ Since I didn't have a round banneton, I used a mixing bowl lined with a tea towel and it just worked very well!

16. Final fermentation for 60 - 90 minutes.

17. 1 hour before you plan to bake, place your Donabe / Closed clay pot (must be completely DRY) on the middle shelf in the oven and preheat to 500°F.


18. Flip the bowl over so that the dough sits on the middle of a parchment paper.

19. Score the top of the Boule using a lame or a sharp, serrated knife.

20. Very very carefully open the lid (it's HOT!) and put the bread in the preheated Donabe, replace the lid and slip it back into the oven.

21. Turn the heat down to 480°F and bake the bread for 30 minutes with lid.

22. Turn the heat down to 450°F and bake for 10-15 minutes without lid.

23. Once the boule is nicely brown, turn the heat off and remove the boule from the Donabe and place directly on a rack in the oven for another 5-10 minutes.

24. Let them cool onto a rack.

Here is my first Donabe-Bread!

It turned out super nice! I got an amazing crust and silky-fluffy-holey crumb.

To be honest, I was quite surprised by this result. 

Even though I knew this "closed clay pot (La Cloche)" method through this post on a website BREAD IN FIVE,

I was not sure if I could get the same result with this Japanese Donabe or not...

No baking stone? No steam? Really?!
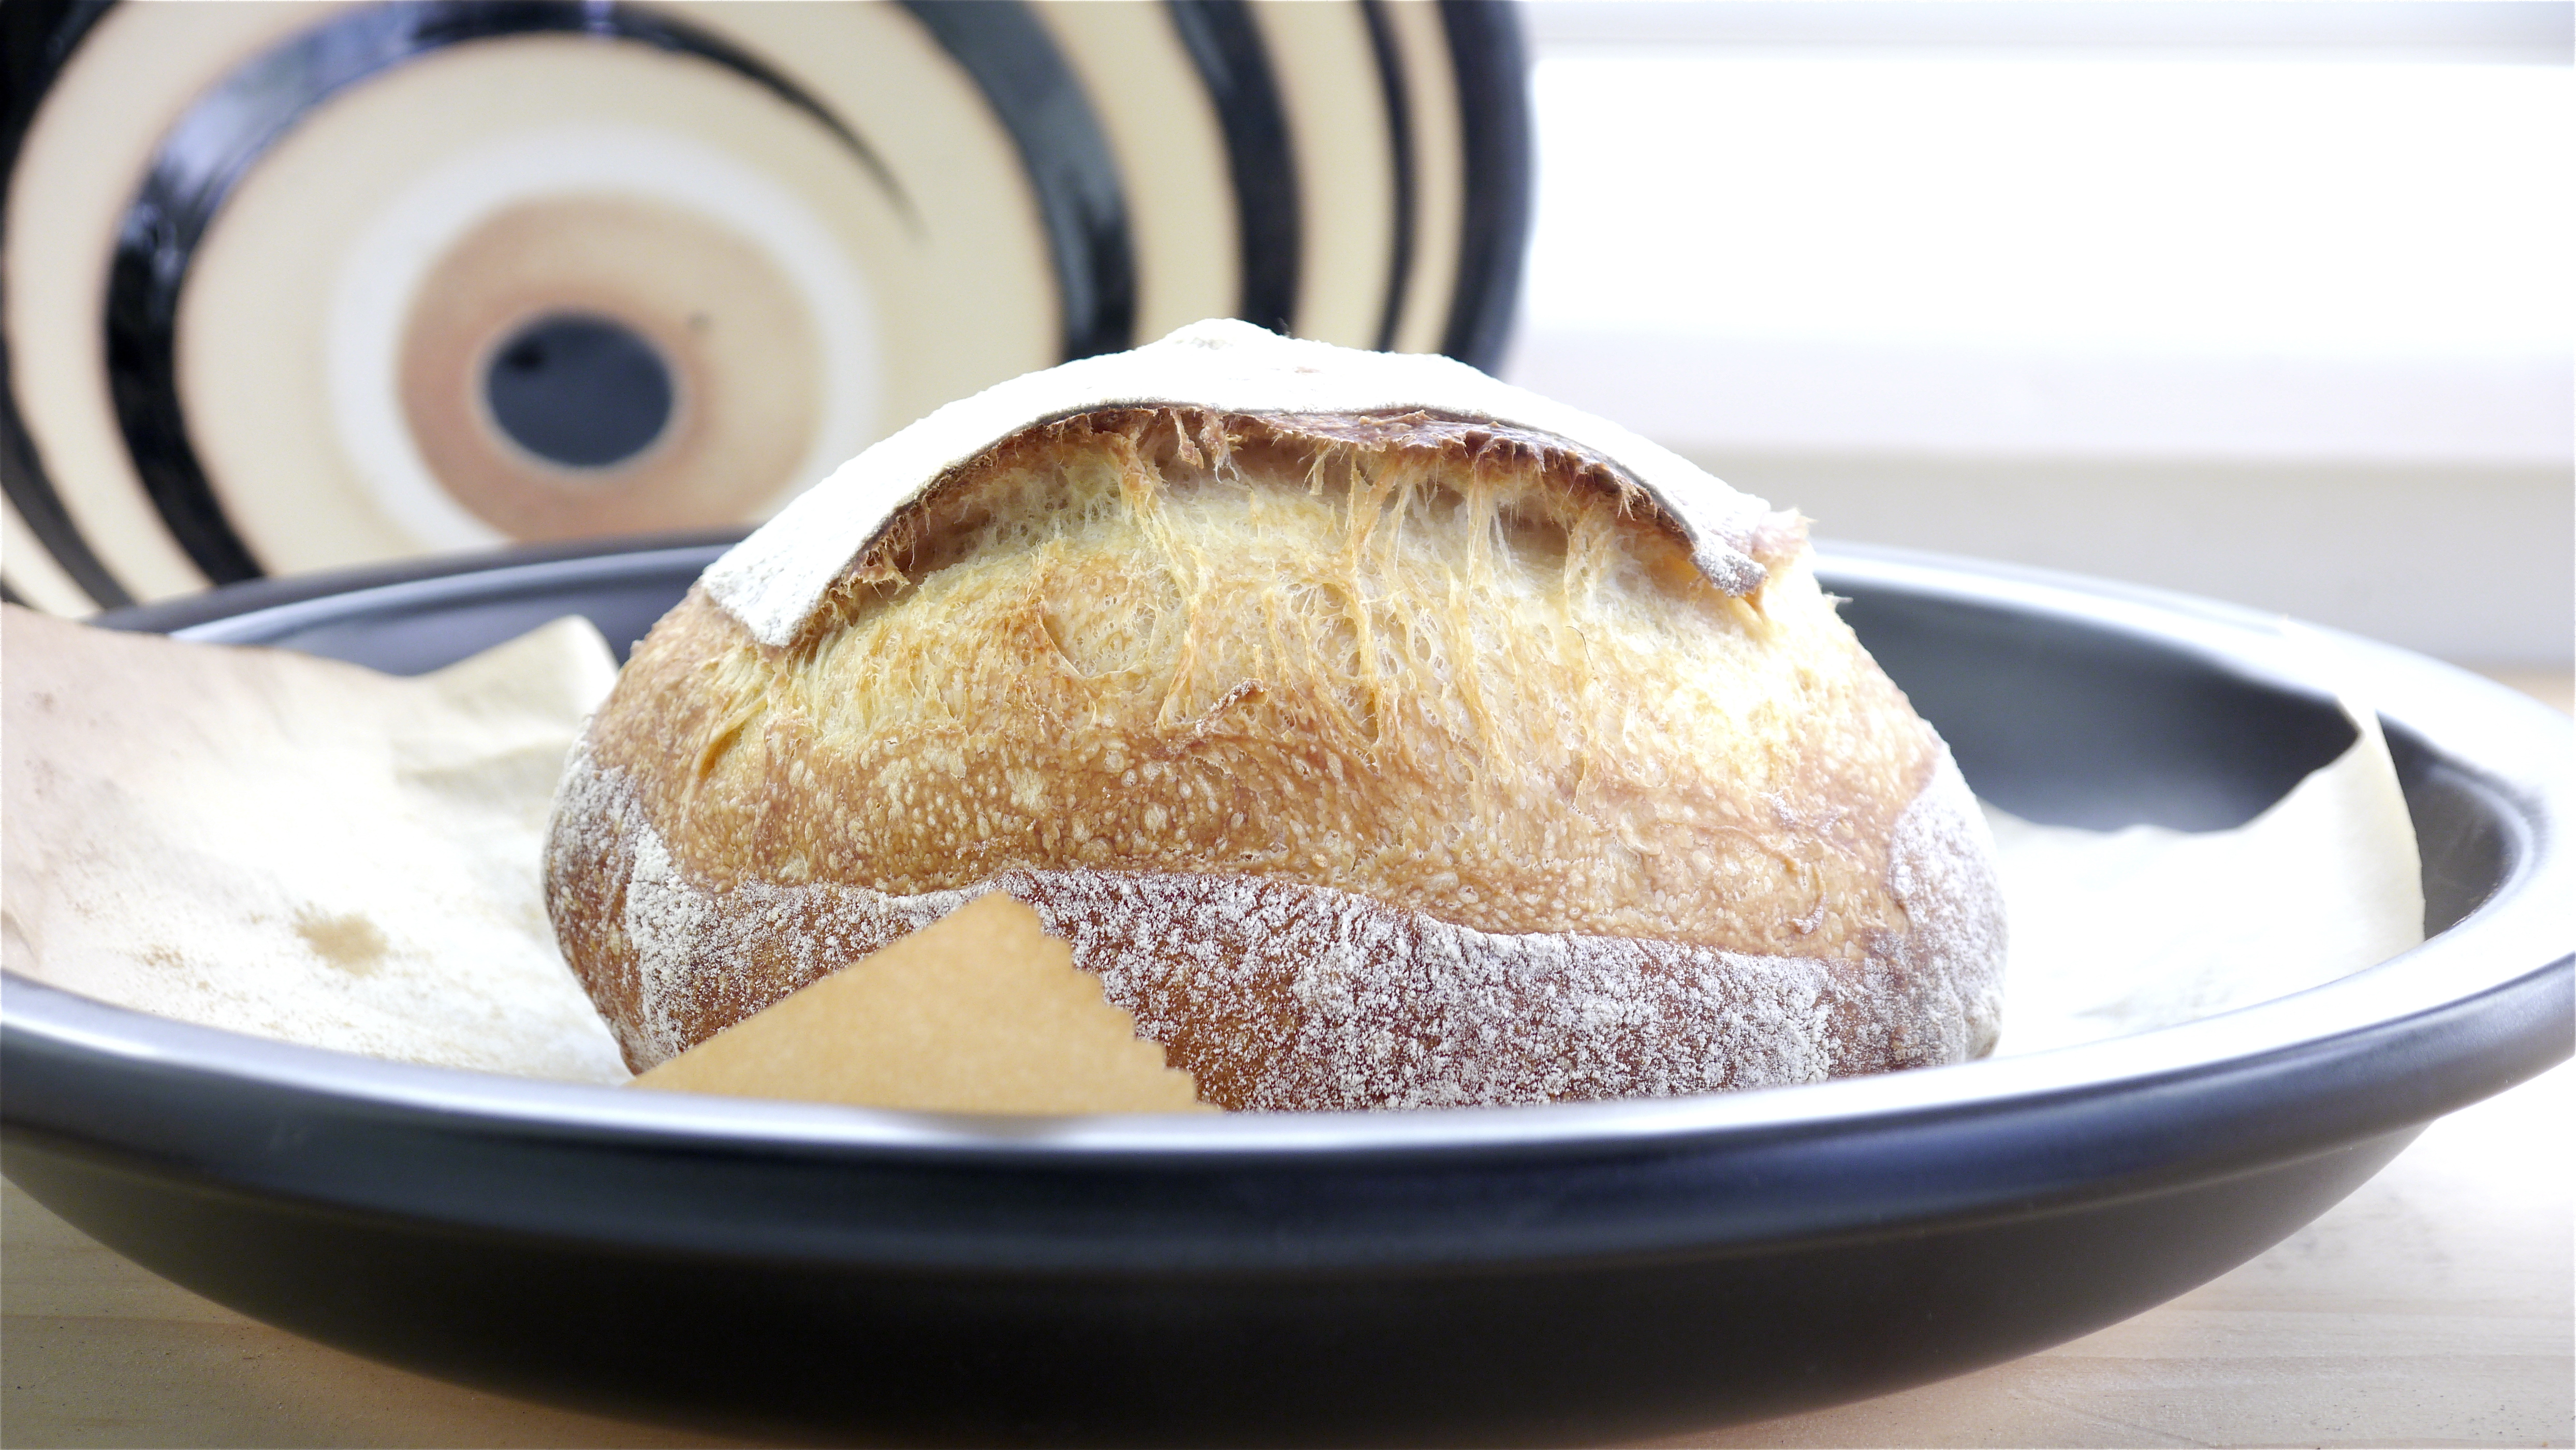
Yes, it really works! Donabe-bread is a new comfort food for me!

Yuko


Subscribe to RSS - 4akitchenblog's blog