The Fresh Loaf

A Community of Amateur Bakers and Artisan Bread Enthusiasts.

dmsnyder's blog

dmsnyder's picture
dmsnyder

We like hummus and generally buy it "homemade" at a neighborhood Armenian deli. We also buy the pita bread they sell, which is made locally but not in the deli. It's sold in plastic bags, six to a bag. It's not terrible. 

I recently checked an Israeli cookbook out of the library. It had a recipe for pita, not the first I had seen, but the book made a big deal about the superiority of fresh-baked pita over the kind I had been buying. So I made a batch.

Know what? Fresh-baked is better! In fact, home baked is better than store bought, even after freezing and thawing. Why should I be surprised?

I am not posting the recipe, because I am not convinced what I baked cannot be improved upon. Stay tuned.

Yesterday, I baked a couple 1kg loaves of sort of  Ken Forkish's "Overnight Country Brown." The only "overnighting" was cold retardation of the formed loaves. And, rather than boules baked in cast iron Dutch ovens, I made bâtards, baked in my usual manner, on a baking stone with steaming via ice cubes dripping onto pre-heated lava rocks. I'm posting the photos just to remind us that the DO method, while producing wonderful loaves isn't the only way to do so with the Forkish (or Chad Robertson) formulas. These loaves have a delicious crunchy crust and tender crumb. Wonderful whole wheaty flavor with mild tang.

Between this bread with 30% WW and the Forkishish Pain de Campagne I make with WW and whole rye, it's hard to choose a favorite. They are both so good!

Happy baking!

David

dmsnyder's picture
dmsnyder

Nothing new and exciting baking here this week, except my wife's French Plum Crisp. I baked a couple of my go to breads. My version of Forkish's Pain de Campagne, very different from his, actually. I do use his baking procedure, although it's really Chad Robertson's. Oh, well. It makes really good, crusty bread.

And a couple loaves of San Joaquin Sourdough. Here's one of them, just to make a point:

  \ See the point?

Happy baking, every one!

David

dmsnyder's picture
dmsnyder

A relatively new TFL member recently asked how to make a sourdough bread. His description of the desired characteristics brought to mind a bread we made in the San Francisco Baking Institute Artisan II Workshop on sourdough baking. It was a decidedly French-style pain au levain with minimal acidic acid tanginess but a creamy, sweet complex flavor. It was the preferred bread of the SFBI faculty. The special features of this white bread were a liquid levain fed every 12 hours that made up about 30% of the total flour in the final dough.

My bake differed slightly from the original, but I give the SFBI formula as it was given to us.


Total Dough Formula 

Baker's %

Wt (g)

AP flour

99.2

641

Rye flour

0.8

5

Water

68

438

Instant yeast (optional)

0.1

0.5

Salt

2.1

13

Total

170.4

1097.5


Levain

Baker's %

Wt (g)

AP flour

95

102

Rye flour

5

5

Water

100

108

Liquid starter

40

43

Total

240

258

Note: for the starter feedings, including the levain mix, I actually used my usual starter feeding mix of 70% AP, 20% WW and 10% Rye. So, in the levain, rather than the AP and Rye specified in the SFBI formula, I used 107 g of the above mix.

  1. Mix ingredients thoroughly.

  2. Ferment 12 hours at room temperature. (Note: Because of my own scheduling needs, I refrigerated the levain overnight before mixing the final dough. This was not the procedure at the SFBI, and it would be expected to make the bread somewhat more sour. If you can, omit this levain retardation.)

Final Dough

Baker's %

Wt (g)

AP flour

100

517

Water

60

310

Instant yeast (optional)

0.1

0.06

Liquid starter

50

259

Salt

2.5

13

Total

212.6

1099.06

Procedures

  1. In the bowl of a stand mixer with the paddle attachment, pour in the water, add the liquid starter and mix to dissolve the starter.
  2. Add the flour and mix to a shaggy mass.

  3. Let rest, covered, for 20-60 minutes.

  4. Add the salt (and yeast, if you are using it) and mix with the dough hook at Speed 2 for 5-6 minutes. Adjust flour or water to achieve a medium consistency. (Note: I did not use added instant yeast.)

  5. Ferment for 2-3 hours at 76ºF with 1 or 2 folds, as needed to strengthen the dough. (Note: The fermentation time depends on whether you use the instant yeast and on your fermentation temperature. As usual, “Watch the dough, not the clock.” The dough should end up expanded by 25-50% and should be light and gassy. If you ferment in a transparent container, your should see the dough to be well-populated with tiny bubbles.)

  6. Divide the dough into two equal pieces and pre-shape as boules or cylinders.

  7. Let the pieces rest, covered, for 25-30 minutes.

  8. Shape as boules or bâtards.

  9. Proof for 90-120 minutes at 80ºF. (I had a class to teach, so I refrigerated the loaves for 3 hours, then proofed for 2 hours at 80dF)

  10. Bake at 460ºF with steam for 25 minutes. ( I baked at 460dF with steam for 12 minutes, then another 16 minutes at 435dF convection bake in a dry oven.)

  11. Leave in the turned-off oven with the door ajar for another 10 minutes. (Optional)

  12. Cool thoroughly on a rack before slicing.

I also baked a couple loaves of a Pain de Campagne. It is based on the one in FWSY, except I leave out the instant yeast and boost the whole grain flours a bunch. For today's bake, I halved the recipe in the book to make 1100g of dough and divided that into two. We are traveling next week, and I wanted to take a small loaf along for breakfasts and picnics.

Happy baking!

David

dmsnyder's picture
dmsnyder

Wifely complement of the week: "What do you call this bread … so I know how to ask you to make it again?" Well, I couldn’t think of what to call it. I have made it before … sort of. It is based on Forkish’s “Pain de Campagne” from FWSY, except with a different flour mix, no commercial yeast and a different fermentation schedule. I’ve generally called such breads “in the spirt of …” whatever my starting point was.

Anyway, it is awfully good bread - very moist, wheaty and only mildly sour.


Since it is still berry season, and we have been getting really tasty, local, organic blueberries, I also made some muffins.


Happy baking!

David

dmsnyder's picture
dmsnyder

Hansjoakim's Pain au Levain with Rye Sour

June 3, 2016

Hansjoakim contributed this formula to TFL a bit more than two years ago. (Sourdough bread and fyrstekake) It was added to my “to bake list” right away. Well, I am finally getting around to baking it, since I had extra ripe rye sour looking for a meaningful role, and I was in the mood to try something new.

I have baked breads which had both rye- and wheat-flour based starters, but I had not yet baked a mostly wheat flour-based bread leavened by a rye sour alone. It's about time!

I have used Hansjoakim's formula without modification. However, I have rounded his ingredient weights to the nearest gram, reflecting the limitations of my kitchen scale. The procedures described are what I did. Hansjoakim's procedures may have differed somewhat.


Total Dough


Ingredient

Wt. (g)

Bakers' %

AP Flour (11.7% protein)

350

80

Whole Rye flour

55

12.5

Whole Wheat flour

33

7.5

Water

306

70

Salt

8

1.8

Total

752

171.8


Rye Sour


Ingredient

Wt. (g)

Bakers' %

Whole Rye flour

55

100

Water

55

100

Ripe rye sour

11

20

Total

121

220

  1. Dissolve the ripe rye sour in the water.

  2. Add the whole rye flour and mix to a paste.

  3. Cover and ferment at room temperature for 12 hours.


Final Dough


Ingredient

Wt. (g)

AP flour

350

Whole wheat flour

33

Water

251

Salt

8

Rye sour

110

Total

752

Procedure

  1. Pour the water into the bowl of a stand mixer, and add the rye sour. Mix at Speed1 for a minute to disburse the sour.

  2. Add the flours. Mix at Speed one to a shaggy mass. Cover and let rest for 30-60 minutes.

  3. Sprinkle the salt over the dough, and mix with the dough hook for 2-4 minutes at Speed 2.

  4. Transfer the dough to a lightly oiled bowl and cover.

  5. Ferment for 2-2.5 hours with one stretch and fold after 1 hour.

  6. Transfer to a lightly floured board and pre-shape as a ball. Cover and let rest for 20 minutes.

  7. Shape as boule or bâtard and place in a floured banneton or brotform. Alternatively, place on a linen couche.

  8. Cover the loaf well (place banneton in a food safe plastic bag, or with a fold of the couche material).

  9. Refrigerate overnight or at least 8 hours.

  10. Take the loaf out of the refrigerator. Proof at 80ºF for 1-2 hours.

  11. Pre-heat the oven for 45-60 minutes at 500ºF with a baking stone and steaming apparatus in place.

  12. Transfer the loaf to a peel. Steam the oven, and transfer the loaf to the baking stone. Turn the oven temperature down to 460ºF.

  13. After 15 minutes, remove the steaming apparatus. If you have a convection option, switch to convection bake at 435ºF. Otherwise, leave the oven at 460ºF.

  14. Bake for another 25-35 minutes. The loaf is done when it is nicely colored, it sounds hollow when thumped on the bottom and the internal temperature is at least 205ºF.

  15. Transfer to a cooling rack, and cool thoroughly before slicing.


Photo Gallery


Tasting Notes

The crust was crunchy with a nice nutty flavor. The crumb was quite open – well-aerated. It was surprisingly chewy, given how little machine mixing I did and only one stretch and fold. The flavor was very similar to Hamelman's Pain au Levain with Whole Wheat Flour but more sour. I suppose this is the result of using the rye sour for leavening. This makes me want to try using a rye sour with some other flour mixes and other fermentation approaches. Stay tuned!

I expect there will be some evolution of the flavor profile. I have tasted it just a few hours after it came out of the oven. But based on this first taste, it is most definitely a keeper! I recommend it highly.

Happy baking!

 David

dmsnyder's picture
dmsnyder

Two of my favorite breads

David Snyder

30 May, 2016


Last weekend's bakes were two of my favorite breads.  One is Hamelman's Pain au Levain with Whole Wheat Flour. I have blogged on my bakes of this delicious bread several times over several years.

The other is a  Walnut-Fig Sourdough, which is a bread I first made in the San Francisco Baking Institute Artisan II workshop as a Walnut-Raisin sourdough. I just substituted figs for raisin. We like it better that way. I am posting the formula and my method for that one. 

Walnut-Fig Sourdough Bread: Variation on a favorite from SFBI Artisan II


Total Formula

Baker's%

Wt. (g)

AP Flour (11.7% protein)

71.57

383

Whole Wheat Flour

19.77

106

Rye Flour (Medium rye)

8.66

46

Water

67.62

362

Yeast (Instant)

0.08

1

Walnuts (toasted)

15.81

85

Dried Calmyrna figs

19.77

106

Salt

2.13

11

Total

205.41

1100


Firm Levain

Baker's%

Wt. (g)

AP Flour (11.7% protein)

95

77

Rye Flour (Medium rye)

5

4

Water

50

40

Active firm starter

60

48

Total

210

169

  1. Dissolve the firm starter in the water.

  2. Add the flours and mix and knead until there is no visible dry flour.

  3. Shape into a ball. Place in a clean bowl. Cover tightly.

  4. Allow to ferment overnight (12 hours at room temperature).

  5. Toast shelled walnuts, broken or chopped coarsely, at 350ºF for 8 minutes. Allow to cool then place in a jar or bowl and cover.


Final Dough

Wt. (g)

AP Flour (11.7% protein)

275

Whole Wheat Flour

106

Rye Flour (Medium rye)

42

Water

305

Yeast (Instant)

1

Walnuts (toasted)

85

Dried Calmyrna figs (diced)

106

Salt

11

Firm Levain

169

Total

1100


Procedures

  1. Pour the water into the bowl of a stand mixer.

  2. Add the flours and mix with the paddle attachment at slow speed until a shaggy mass is formed. The dough should be medium soft.

  3. Remove the paddle. Scrape the dough together. Cover the mixer bowl and let it rest for 20-60 minutes.

  4. Cut the hard stems off the dried figs. Cut the figs into medium dice (about the size of raisins). Place the diced figs in a fine sieve and run water over them, mixing them with your fingers and separating the pieces stuck together. Place the sieve over a bowl to drain until ready to mix the figs into the dough.

  5. Sprinkle the salt and the yeast over the dough. Add the firm levain in several pieces. Mix with the hook attachment at slow speed for 1 or 2 minutes, then increase the speed to Speed 2 and mix for 5-8 minutes. D.D.T. is 78-80ºF.

  6. When moderate gluten development has been achieved, scrape down the dough. Add the figs and walnuts to the mixer bowl and mix with the hook at slow speed for 2 to 3 minutes.

  7. Transfer the dough to a floured board and knead it for a couple minutes to better distribute the nuts and figs. Then transfer it to a lightly oiled bowl and cover.

  8. Ferment for 2 hours at 76ºF.

  9. Divide into two equal pieces and pre-shape as boules. Cover and let the gluten relax for 20-30 minutes.

  10. Shape as bâtards and place, seam-side up, in floured brotformen or onto a linen couche.

  11. Cover and proof for 90 to 120 minutes at 80ºF.

  12. Pre-heat oven to 500ºF with baking stone and steaming apparatus in place for 45-60 minutes before baking.

  13. Transfer loaves to a peel. Turn down oven to 460ºF. Score the loaves as desired. Steam the oven. Load the loaves onto the stone.

  14. After12 minutes, remove the steam source. If you have a convection oven, switch on the fan and reduce the temperature to 435ºF. Bake for 12-14 minutes more. The loaves are done when nicely browned, they sound hollow when thumped on the bottom and the internal temperature is over 205ºF.

  15. Optionally, leave the loaves on the baking stone with the oven turned off and the door ajar for another 8-10 minutes to further dry the crust.

  16. Transfer to a cooling rack and cool completely before slicing.

Photo Gallery

Pain au Levain with WW flour:


Walnut-Fig Sourdough Bread:


Happy baking!

David

dmsnyder's picture
dmsnyder

Whole Wheat Sourdough

5/21/2016

This bread is a first trial of a mostly whole wheat sourdough bread leavened with my standard liquid levain rather than the one prescribed by Forkish or Hamelman, or Suas for their versions of a pain au levain with a high percentage of whole grains.

My levain is built in two feedings from my refrigerated “mother” which is kept at 50% hydration and is fed only every 3-4 weeks. I did an activation feeding of 30g Starter, 75g Water and 75g Flour mixture (See my note, below.) This was very ripe in 10 hours. I then did a second feeding to make 280g of Levain, enough for this bake and also for a batch of San Joaquin Sourdough baguettes. That starter was very ripe in 6 hours. The portion for this bake was refrigerated overnight.


Total Dough


Ingredient

Wt (gms)

Bakers' %

AP flour

103

21

Whole Wheat flour

378

77

Whole Rye flour

9

2

Water

400

82

Salt

10

2

Instant yeast

1/8 tsp (<1)

<1

Total

900

184


Levain


Ingredient

Wt (gms)

Bakers' %

AP flour

52.5

70

Whole Wheat flour

15

20

Whole Rye flour

7.5

10

Water (80dF)

75

100

Active liquid starter

30

40

Total

180

240

  1. Dissolve the starter in the water.

  2. Add the flours.

  3. Mix thoroughly.

  4. Transfer to a clean container and cover tightly.

  5. Ferment at 76dF for 6-12 hours (until moderately ripe)

  6. Refrigerate overnight.

Note: My sourdough starter “food” is a mixture of 70% AP, 20%WW and 10% Rye. I keep a mixture of these floors in a liter jar. I use it for my stored “mother” in the refrigerator, which I feed every 3-4 weeks, and to activate the mother when I am preparing to make bread.


Final Dough


Ingredient

Wt. (gms)

AP flour

40

Whole Wheat flour

360

Water (80-90dF)

310

Salt

10

Instant yeast

1/8 tsp (<1)

Levain

180

Total

900


Procedure

  1. Heat enough water for the dough and a few cc's extra.

  2. In the bowl of a stand mixer, dissolve the Levain in the water.

  3. Add the flours and mix thoroughly at low speed with the paddle. (Speed 1 for a minute or two.)

  4. Scrape down the bowl. Cover it, and autolyse for 20-60 minutes.

  5. Sprinkle the instant yeast and the salt on top of the dough.

  6. Mix at low speed for 6-10 minutes. The dough should be soft and tacky – almost sticky – but not runny. Adjust water or flour in small amounts as needed. There should be some gluten development, but the dough will not completely clean the wall of the bowl.

  7. Transfer the dough to a lightly oiled container and form a ball. Cover tightly.

  8. Ferment for 2 1/2 hours at 76dF with stretch and folds at 50 and 100 minutes. By the second S&F, the dough should have good strength. It will still be soft and a bit tacky.

  9. Transfer to a lightly floured board and pre-shape round or oblong. Cover with a cloth, and let the gluten relax for 10-20 minutes. (If you want smaller loaves, you could divide the dough into two equal pieces before pre-shaping.)

  10. Shape a bâtard or a boule and place in a floured banneton or brotform. Or place the loaf on a sheet pan on bakers' linen with folds to support the sides.

  11. Refrigerate overnight.

  12. Take out of refrigerator and proof at 80dF for 1-2 hours (optional)
  13. Pre-heat the oven to 500dF for 45-60 minutes with a baking stone and steaming apparatus in place.

  14. Transfer the loaf to a peel. Score as desired.

  15. Turn the oven down to 460dF. Steam the oven. Load the loaf onto the baking stone.

  16. After 15 minutes, remove the steam source.

  17. If you have a convection oven, turn on convection at this point, and reduce the oven temperature to 435dF.

  18. Bake for an additional 25-35 minutes or until the crust is nicely browned, the loaf sounds hollow when thumped on the bottom and the internal temperature is at least 205dF.

  19. Transfer to a cooling rack and allow to cool completely before slicing.

Photo Gallery


San Joaquin Sourdough Demi-baguettes and Whole Wheat Sourdough: Today's baking

Whole Wheat Sourdough cut profile

Slices


Tasting Notes

I sliced the loaf about 6 hours after it was baked. The crust was chewy. The crumb was remarkably open considering the flour mix. The aroma was nutty/wheaty and just a bit sour. In the mouth, the crumb was cool, moist and tender. The predominant flavors were sweet, nutty, wheaty, and milky. Of course there were neither nuts nor sweetener nor any milk product in this bread, just flours, water, salt and levain. I love it when a bread offers such complex good flavors!  When a thin spread of unsalted butter was added, it amplified both the sweetness and the lactic acid sour of the dough.

When I started making this bread, I expected it to be a first try and anticipated going through 5 or 6 adjustment before I got it “right.” Based on this first tasting, I now think I'll stick with this version. If I change it, it will likely be to add some solids – seeds, nuts, dried fruit and the like. I bet it would go well with dried figs and walnuts. 

David

dmsnyder's picture
dmsnyder

I was visiting the King Arthur Flour web site last week and, as I usually do, wandered into the "Professional" section of the site to see what might be new. There, I found a new formula for "Harpoon Miche." You know, with a name like that, I had to check it out. It sounded like a bread that would stick in your ribs ... if you weren't careful.

It turned out the "Harpoon Miche" is a sourdough bread made with both wheat flour-based and whole rye-fed starters, and about half the liquid in the final dough is dark beer. Well, "Harpoon Miche" fizzed its way right to the head of my "to bake list." Now, I assume the "Harpoon" refers to the brewery from whence the KAF bakers get the dark beer they use. Not being in Northern New England but in Northern California, I used a favorite dark beer from San Francisco's Anchor Steam brewery. So, let's call what I baked today " Brekle's Brown Miche."

Here is a link to the KAF "Harpoon Miche" formula:       Harpoon Miche   

This is an 80% hydration dough, and it is downright gloppy. Even with good dough strength, it spreads like crazy. So, I decided to bake my loaves in cast iron Dutch ovens à la Tartine Bread. I think it worked quite well.

Cooling miches


Cut loaf profile

Crumb close-up

Slice

 I cut one of the loaves about 4 hours after they were out of the oven. The crust was still crunchy. The crumb was moist but well-baked. The bread had a definite aroma of dark beer. I tasted it first plain. The crumb was tender-chewy. The flavor was typical of mixed flour sourdough breads, but with the added winey flavor of the Brekle's Brown beer. I then had a slice with some lovely Cotswold cheese, and that was a fabulous combination. We had some more with dinner (baked salmon, chard, potatoes roasted with aglioni and roasted beets in mustard vinaigrette.) 

This is a delicious bread with a complex and somewhat novel flavor. I'll see how an overnight rest changes it. As of now, I think it is best suited to accompany cheeses, smoked meats and winey beef or lamb braises. I wonder how it will be with my usual breakfast almond butter.

Happy baking!

David

dmsnyder's picture
dmsnyder

This morning, I baked two loaves of Pane Tipo di Altamura (1kg each) and one loaf of my Pugliese Capriccioso (1 kg) in my friend J.S.'s Wood-Fired Oven. The breads were baked for a potluck lunch for about 25 most of whom are Italian-Americans.

Both breads were cold retarded in bannetons after final shaping for about 18 hours.

First, the bad news. We forgot an important lesson learned last year: You have to take the hot coals out of the oven before loading bread into it. Consequently, although the oven floor was a reasonable temperature for baking bread (around 500 dF), the heat from the fire resulted in a seriously charred crust. After the loaves cooled, I took a knife to them and scraped off most of the char. What was left still looked pretty nasty, but did not impart any bitter or otherwise off flavors to the bread.

The good news - and most of the news was good: First, I got the Altamura shaping right, finally. (Thanks to mwilson for his very helpful advice after my last bake of Pane di Altamura.) Second, there was terrific oven spring, and the final loaf shape was close to the classic folded Altamura shape. Third, (and most important) the bread was fabulously delicious! The flavor was more complex than any of my previous bakes, with nutty, sweet and tangy notes. The crust was crunchy. The crumb was cool, tender and chewy.

The bread was greatly appreciated by all, including the one attendee whose opinion I value most, a woman who immigrated from Apulia as a young adult. She and her husband had a very good Southern Italian restaurant and pizzeria in town until they retired some years ago.

So, here are some photos of the Pane di Altamura. The loaf is ugly as sin to look at. You will have to take my word that it was delicious to eat.

J.S. and I have already discussed our next bake in her WFO when we will remember to sweep out the coals before loading the bread. I also want to bake Pane di Altamura with an overnight retardation again in my oven. I think the retardation  enhances this bread's flavor a lot.

By the way, the Pugliese Capriccioso was also (charred but) delicious.

David

dmsnyder's picture
dmsnyder

Pane Tipo di Altamura

20 April, 2016

David Snyder


This is the latest bake in my series of attempts to produce a good looking and good flavored Pane Tipo di Altamura. I have continued to make modifications based on my experience to date and the experience and resources shared by other TFL members who are also working on this style of bread.


Total Dough

Wt. (g)

Baker's %

Semola Rimacinata (Fine Durum flour)

559

100

Water

391

70

Salt

11

1.8

Total

961

171.8


Lievito Naturale Madre Build 1

Wt. (g)

Baker's %

Semola Rimacinata (Fine Durum flour)

25

100

Water (80-90ºF)

17

70

Semola Rimacinata mother

10

40

Total

52

210


  1. Place the mother in a medium bowl.

  2. Add the water and mix well.

  3. Add the flour and mix until there is no dry flour and the lievito feels like a bread dough.

  4. Place the dough in a clean bowl and cover tightly.

  5. Ferment for about 8 hours at 77ºF.


Lievito Naturale Madre Build 2

Wt. (g)

Baker's %

Semola Rimacinata (Fine Durum flour)

25

100

Water (80-90ºF)

17

70

Semola Rimacinata lievito madre

10

40

Total

52

210

  1. Place the mother in a medium bowl.

  2. Add the water and mix well.

  3. Add the flour and mix until there is no dry flour and the lievito feels like a bread dough.

  4. Place the dough in a clean bowl and cover tightly.

  5. Ferment for about 12 hours at 80ºF.


Lievito Naturale Build 3 (Final)

Wt. (g)

Baker's %

Semola Rimacinata (Fine Durum flour)

60

100

Water (80-90ºF)

42

70

Semola Rimacinata lievito madre

12

20

Total

114

190

  1. Place the mother in a medium bowl.

  2. Add the water and mix well.

  3. Add the flour and mix until there is no dry flour and the lievito feels like a bread dough.

  4. Place the dough in a clean bowl and cover tightly.

  5. Ferment for about 6 hours at 77ºF.

  6. Refrigerate overnight.


Final Dough

Wt. (g)

Semola Rimacinata (Fine Durum flour)

500

Water

350

Salt

11

Lievito Naturale

100

Total

961


Procedures

  1. Mix the Lievito Naturale and water well in the bowl using the paddle. (I used a KitchenAid mixer.)

  2. Add the flour and then the salt. Mix at Speed 1 for 20 minutes. The dough should (nearly) clean the walls of the bowl. It will form a medium windowpane.

  3. Transfer the dough to a lightly oiled bowl. Cover tightly.

  4. Ferment for 90 minutes at 76dF.

  5. Transfer the dough to a lightly floured board and pre-shape as a moderately tight boule.

  6. Cover with a cloth and rest for 30 minutes at 76dF. (I covered the dough with baker's linen and placed it on a quarter sheet tray which fits nicely into my proofing box.)

  7. Pre-heat oven to 500dF with steaming apparatus in place.

  8. Return dough to the board and pre-shape again as a moderately tight boule.

  9. Cover with a cloth and rest for 30 minutes at 76dF.

  10. Return dough to the board.

  11. Using the sides of your two hands, make a wide groove down the middle of the loaf. Dust the top of the loaf lightly with durum flour.Then fold the loaf at the groove so that the upper half over-laps the lower half 3/4 of the way. Do not seal the seam between the upper and lower layers. Rather, seal the fold at the “back” of the loaf.

  12. Transfer the loaf to a peel.

  13. Turn the oven down to 460ºF, steam the oven and transfer the loaf to the baking stone.

  14. Bake with steam for 15 minutes.

  15. Remove the steam source from the oven. Turn the oven temperature down to 435ºF (or 420ºF convection bake).

  16. Bake for another 18-22 minutes. The loaf should be nicely browned. It should sound hollow when the bottom is thumped with a knuckle. The internal temperature should be at least 205ºF.

  17. Transfer the loaf to a cooling rack and cool thoroughly before slicing.


Picture Gallery
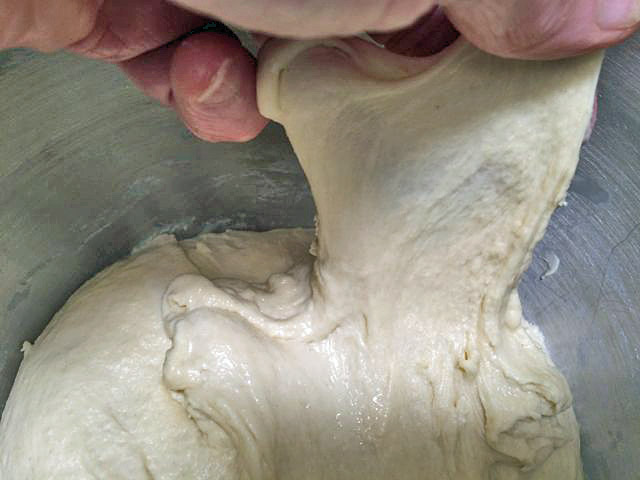
Windowpane after mix of 20 minutes at Speed 1 
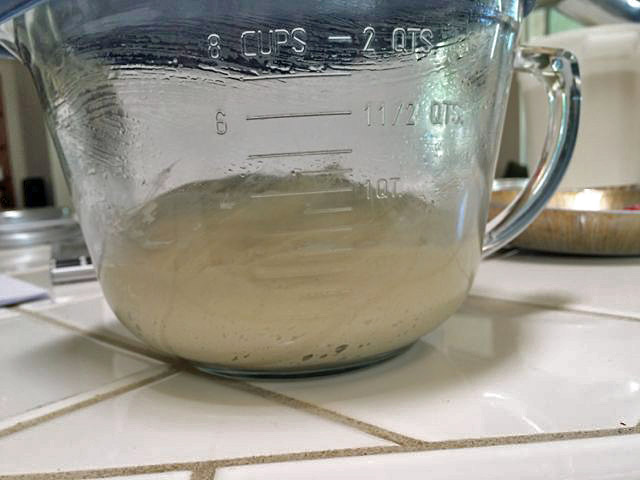
 

Dough at start of bulk fermentation 


Dough after bulk fermentation. Ready for first pre-shaping

After first pre-shaping and 30 minute rest

Baked loaf

A Slice

Crumb close-up

Tasting Notes and comments

I knew this bake was different as soon as I took the bread out of the oven. The aroma was heavenly! It was nutty/wheaty. It was an archetypal “Fresh-baked Bread” aroma. The two previous bakes both had had a yeasty aroma.

The crust was soft, right from when it came out of the oven. (Maybe I really should try not steaming the oven at all.) I left the house to do some errands. When I came home about 3 hours later and got the groceries put away, the loaf was cool, and I cut a slice from the middle.

The crumb was a bit less yellow than my first bake. Maybe this was due to the longer mix, although that was entirely at low speed. Maybe it was the different flour (Central Milling versus KAF). The crust was chewy with a nice nutty flavor. The crumb was pleasantly chewy but not dense-feeling. There was absolutely no sourdough tang, just a remarkably sweet, wheaty flavor that was quite delighful. I ate most of a slice plain, then a bit with some fresh Cotswald cheese. I will have some more with dinner dipped in EVOO and some toasted for breakfast with almond butter.

Clearly, Durum flour obeys a different set of rules than “regular” hard Winter wheat and soft Winter wheat. As mwilson has been saying, the flavor depends on the starter even more than with other flours, and a full fermentation is needed to develop flavor complexity. I am also struck by the absence of acidity. If I fermented my usual mixed flour starter as I did this lievito naturale, the resulting bread would be extremely sour. In fact, perhaps I should try an overnight cold retardation with my next attempt. Before the first pre-shaping? After the final shaping?

The lievito naturale full fermentation also has enormous benefits for dough consistency and, especially, extensibility. This lesson was reinforced greatly by several of the videos of Altamura bakeries at work in which you can really appreciate the expected dough consistency and how it is handled.

At this point, while my loaf shaping still has a lot of room for improvement, the most significant area I want to improve is crust consistency. I have been reluctant to forgo oven steaming for fear of reducing oven spring, but maybe that is what I should try next. A hotter oven is probably worth trying as well.

So, I am very pleased with the improved taste of today's loaf. I still have a lot to work on to get this bread as I believe it should be.

David


Pages

Subscribe to RSS - dmsnyder's blog