The Fresh Loaf

A Community of Amateur Bakers and Artisan Bread Enthusiasts.

greedybread's blog

greedybread's picture
greedybread

Not a yeasty I know BUT i hope I will be forgiven as I wanted to share it with you all....

Mainly because we all like to make complex breads etc and sometimes, especially at Xmas when we are pushed for time, its nice to have something that is quick and easy!!

And impresses the hardest MOTHER IN LAW!!! 

The Drunken Bastard trifle….Otherwise known as….

Michelle’s Marvellous Hokey pokey Trifle…..BOOZE FREE….

Before some of you all get flustered, you CAN easily adjust and add in the BOOZE!!!

Phew!!! Keep the pants on!!

Mmmmm trifle

Ok, so are we all good now????? Booze can be added!! 


It is called the drunken bastard trifle because in earlier days when I would have a pre Xmas Tipple (before children and responsibility arrived!!), I could still make this while being half cut!!

Lovely… and I did used to put in HEAPS of sherry, in fact I was asked if I wanted sponge with my sherry.

VERY RUDE, I THOUGHT:)

Err has no fruit either…. Much too fiddly for drunken fingers….

hmm, not quite this bad but you get my drift…

VERY VERY BAD ….But its good and its lasts longer and no excess fluid leaks out as it does with fruit in it….

No yellowy bananas or soft fruit bits….

Hokey Pokey Choc is a recent addition too (Thanks Whittakers!!) used to be grated chocolate or flake, but that was when Cadbury’s was in my good books!!

Now the photos in the next few weeks are not going to be the best as  plumpy (my baby) has the camera in Dunedin with my lovely Brother who has taken him on holiday….

So hubby’s phone camera will need to suffice….

Yum yum yum

Do the Hokey Pokey….

What will you need????

1 sponge square….or a jam roll or even a chocolate sponge roll…

I packet of raspberry jelly

1 bar of hokey pokey chocolate ,****DON’T BE MINGY LIKE ME….GET A BIG BAR!!!

Jam for spreading

1 bottle of cream

1 container of vanilla custard or make your own….

Sprinkles too if you want and even scorched almonds if you want….

yummy yum yum

Spread the sponge with jam and cut in half and place on top of each other.

Cut into small pieces and arrange nicely in a clear glass bowl or container…

Boil the jug and make the jelly with 2 cups of water.

*****IF YOU ARE USING BOOZE….use less water in the jelly….

So if you want to say put in a cup of sherry, tip it over the sponge and then make the jelly but with less water….

You can also put the sherry in with the jelly when it is cool and do it that way….I like that!!

Pour it over the sponge, covering it all…

Place in the fridge to cool and set.. I like to leave it for at least 6 hours….

So see you start the trifle before you drink ….6 hours later!!! enough said…

layer it baby!!

Anyways…take it from the fridge and pour your custard on top…

You can add in fruit if you must BUT DRAIN IT very very well.

I like to also add in grated chocolate here or scorched almonds or something yummy….

Choices are endless….

I like to poke holes with a knife all over the sponge so the custard seeps down in places too…

Then I put it back in the fridge for a while…an hour or so….

No sprinkles yet…

Whip your cream…I like to be naughty here too and add in icing sugar….

I mean if you are going to be bad, GO ALL THE WAY!!!

Then I place this on top of my trifle as is….

Next I put sprinkles or chocolate on it or both….

And then have another nip of Sherry….Well not now but I would have years ago…

If you want…

Then I place in the fridge ready to be EATEN!!!

DIG IN!!!

ENJOY, ENJOY, ENJOY!!

http://greedybread.wordpress.com/2012/12/30/the-drunken-bastard-trifle-otherwise-known-as/


greedybread's picture
greedybread

Stollen is one of my favourite Xmas breads, in fact all breads.

Not surprising given my fondness for fruit, cherries and marzipan….

Not fond of dark rum though…a tipple of white rum, yes!!

Sublime…


Just gorgeous with Marzipan

The one I make has fruit that has been sitting in rum for a week or so….

It is also chocka block with fruit and cherries and my favourite, marzipan…

I have to say that I feel this years Stollen is magnificent:)

It has been sitting for ten days wrapped up, now it is ready to unleash!!

The first one, I scoffed in a few days….

Delish!!

You do need patience, so don’t think it is a quick bread.

It is also BEST left for a week or so to ‘mature’.

This is why the recipe I will give you, makes 2 big ones….One for now and one for later.

One last wee thing…..
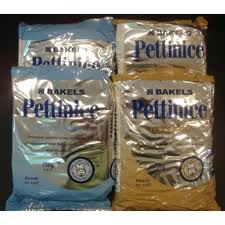
NO NO NO !!

Don’t even think about it!!!

DONT USE THAT HIDEOUS WHITE ICING , FONDANT OR ALMOND ICING THAT IS NOT PROPER MARZIPAN!!!

I will know and come round to your house!!

Sorry to be an arse but it makes it taste like crap and it ruins it….

You are probably thinking “food nazi” but seriously, why take the time to make this beautiful only to ruin it with something that is wrong for the bread.

You wouldn’t use substandard choccy for a brownie, so NO ICING!! or make meringues with granulated instead of castor sugar.

So use marzipan or mandorle (almond paste)  or make your own almond paste or marzipan…

Marzipan is made from the almond paste, it just has more sugar in it.

NO ICING, FONDANT, ALMOND FLAVOURS ETC ETC ETC…NO, NO, NO. NO!!!

Grind them, baby!!


So without any further blathering…….and lecturing…

*******You need to soak the fruit at least a week before hand**********

YOU WILL NEED!!

500 g cake mix

1/2 cup of chopped up Glace cherries

1 cup of black rum

20 g of dried yeast.

200-300 g marzipan.

1 cup of milk warmed

1 cup of flour -(any is ok….err no wholemeal)

2 tsp sugar

4 cups of strong bakers flour

Pinch of salt

2 tbsp cinnamon

2 tsp cloves

2 eggs

100 g butter softened

soaking the fruit…

First you need to soak your fruit and cherries in the dark rum a week before hand.

Cover and place in fridge!!

SEE YOU IN A WEEK:)

Stollen sponge

Warm milk, stir in sugar and add yeast.

Mix well and leave to become frothy for 10-15 minutes.

Add in 1 cup of flour and stir well.

Cover and leave for an hour.

Drain any liquid off the soaking fruit.

Reserve liquid and pour into spongey mix after an hour.

Stollen dough….time to rest:)

Add all dry ingredients into a mixing bowl and stir through.

Beat eggs and pour into yeasty mix with excess rum liquid from fruit.

Toss fruit very lightly in a little flour and set aside.

Pour eggy yeasty mix into dry and form a dough.

Knead for 10 minutes, adding in the softened butter until smooth and combined.

Some people put their fruit in before kneading and then knead with the fruit….I don’t like that.

You can ,once the dough is formed and kneaded as above, then lightly mix the fruit through, in 2-3 batches.

I usually wait until after it has risen and do it then.

Place marzipan in dough…

So once the dough (fruit or no fruit) is ready, place in a lightly oiled bowl and cover and leave for 2 hours.

Turn out dough on lightly floured board/ bench.

I will now incorporate my fruit, in 2-3 batches and then cut the dough in half.

You could make three of these instead of two as this gives you two BIG stollens.

I then lightly push dough out to form like an oval shape.

The beauty of stollen, is that it is supposed to resemble a sort of crescent BUT there is no hard and fast….

It’s supposed to be mishapen etc…

roll up dough over the marzipan

I place my marzipan roll up near the edge of the dough and fold dough over it, pinching in the ends in the middle.

I then bring the edge closest to me, into the middle as well and then tweak together.

roll the dough fully…

You definitely want it to be humpy/lumpy looking.

Place the crescent-shaped loaves on a tray with baking paper.

I like to brush them with melted butter now and cover with gladwrap lightly and then a tea towel.

Leave to rise for about 90 minutes.

pre rising…

rising….full of cherries and fruit…

Preheat the oven to 180 celsius.

Gently remove gladwrap and place stollen in the oven.’

Bake for 20 minutes and then turn the stollen around so it is evenly baked.

I find that 40-45 minutes, until goldy brown, is enough…

Remove from oven and allow to cool.

When cool, dust with icing sugar.

If you are keeping one, then wrap tightly in a muslin cloth or tinfoil.

Ready to bake..

Cooling….

Wrapping the one for later…

dusted and ready to eat!!

See the marzipan….

Fully dusted….

Tasty…

ENJOY, ENJOY, ENJOY

MERRY XMAS….

This stollen recipe is an old family one, passed down through my eldest son, whose paternal family is German.

Tweaked a little for NZ conditions so to speak....

Peter Reinhart does a lovely Stollen and I found this one the other day which I will try next Xmas.

Well I will probably make a mid year one:)

It is richer and needs a good month or so prep…so be warned:)

http://www.thefreshloaf.com/node/25407/dresden-christmas-stollen

Just gorgeous with Marzipan

 http://greedybread.wordpress.com/2012/12/27/sublime-stollen-german-xmas-bread/#more-2297

greedybread's picture
greedybread

Mmmmm. Very, very morrish.

delicious cornbread

Don’t like to blow my own trumpet but this far exceeded my expectations.

I have never warmed to the idea of cornbread, even though I like corn.

This is really tasty, you could eat it alone with a nice salad.

I slightly rewarmed it today and had it as my lunch with a salsa type salad….Scrummy:)

When I was making chili the day before,  I thought “Why not cornbread, to mop up all the gravy ?”

very tasty

Cornbread, which is of course the traditional accompaniment to chili.

It really did just hit the spot.

The original recipe had Chili in it as well but I left that out because my chili was quite HOT and I thought it would be chili overload………strangely enough:)

 I would give it a go with the chili in the recipe when accompanying a dish that perhaps wasn’t spicy and maybe needed a bit of juzzz to it.

Maybe with a nice hearty stew or casserole?

Or alone?

Gorgeous with Chili or alone

Caramelise the onions..

So what will you need?

1 can of corn kernels or 2 cobs of fresh corn.

1 onion

Salt and pepper

1 cup of polenta/ cornmeal

1 cup of flour

2 eggs

1 cup milk

1/2 cup of Parmesan cheese

Good slug or two of Olive oil.

Add the corn in

This is basically like a batter.

Chop up the onion and fry it gently in a fry pan with the Olive oil until golden and caramelly then add in the corn and fry for a further 5-10 minutes .

While the corn and onion is cooking, break eggs into a bowl and whisk.

Add in milk, polenta, salt and pepper, flour, and baking powder.

Mix well and place to the side.

Cornbread batter

Remove corn and onions from element and leave to cool.

Pre heat the oven to 180 Celsius.

Grease a heavy skillet pan if you have one, if not,  a cake tin is fine.

I used a 20 inch cake tin but make sure it is well-greased.

I wouldn’t line the tin as it will then take away the possibility of it having a crunchy bottom as well.

Pour corn mix into the batter..

Pour batter into the prepared skillet/ tin and place in the oven.

After 15 minutes, open the oven and sprinkle the cheese on the top.

Cook for 35 minutes in total until golden brown.

Remove from oven and allow to cool a little in the pan.

When cool enough to touch, remove from skillet/tin and cut into pieces and serve warm if possible.

Place in the oven

Ready to eat

Have another piece…

full now!!

Now the beauty with this recipe is that you can alter it and add to it.

I think it would be nice with capsicum in it as well and you could even make it a meal on its own with maybe spicy salami in it?

Up to you but great as versatile.

This served 6 of us .

Recipe was adapted from Chilli Cheese Cornbread in Jamie Oliver’s “Jamie’s America”.

http://greedybread.wordpress.com/2012/12/02/ole-mexican-cheesey-cornbread/

greedybread's picture
greedybread

Bready for Rewena??

 Yep, NZ Bread.

I can hear you non NZer’s going ‘what’ ??????? What is Rewena ?

It is yeasty beasty people, a NZ bread.

We call it Maori bread or Paraoa bread.

It is made with a starter like sourdough or an Italian Biga but it is made out of Potatoes and flour………..My uncles used to make it and they used to make fried bread too but I can’t remember if the fried bread was made from the rewena, I think not, I can remember a very sticky dough in the fry pan……….. and I will do that one another day.

Rewena has an almost sour tang to it because there is a fermentation period, similar to sour dough.I have heard of people keeping it like a sourdough starter but I am not 100% sure about this, I would have thought it would go rotten!! Now 2 of the recipes below have a touch of yeast and one is yeast free.


SO WHAT ARE WE AIMING FOR???

Rewena Bread

My recipe is an old family one so I am unable to share it but there is two very good recipes below that will give you similar if not exact results:)

Sorry, I can share the bread, the process and the photo’s but not the recipe as its not mine to give!!

As I have said in prior posts, Dean Brettschneider, a NZ baker also makes one and his recipe is in his book “Global Baker”.

http://amessykitchen.blogspot.co.nz/2011/03/bbb-rewena-paraoa-maori-bread.html

http://curiouskai.blogspot.co.nz/2007/01/rewena-bread-beginning.html

http://www.kaitime.co.nz/index.php/recipes/desertsabreads/150-paraoa-parai–rewena-bread    (Yeast free)

 LETS LOOK ATHE PHOTOS!! Gorgeous!! and the taste……..

Start with this!!

Ready for first rise.

top

Ready for last rise…

Kiwi Template

Ready to eat!!

mmmmmmm

yummmmmmm

One more for luck

And you know what I am going to say now!!!

Enjoy, Enjoy, Enjoy!!or  as we say in NZ , SWEET AS!!

Will start hunting down the fry bread recipe:)

greedybread's picture
greedybread

Just the thing for Xmas….

Mmmm buttery, flaky brioche…Delicious!!

It is an everyday bread, well the French eat it everyday…

but I have to say I ate this everyday, I would be a porker!!

Don’t get me wrong, it would be VERY VERY easy to eat this daily…

Maybe after a while I would learn moderation????

Not sure if I want to test it….

Anyway gorgeous for the festive season and as you know, its great after a few days, where you can recycle it with puddings, toast, desserts:)

Gorgeous….

Now I used the recipe here….

http://greedybread.wordpress.com/2012/05/26/are-you-feeling-beasty-today/

NZ Brioche:  I have made three brioches with this recipe.

2 with chocolate and one without:)

1/2 cup of strong bread flour

2 tsp yeast

1/2 cup of warmed milk

1 tsp sugar

NB: Just reminding everyone that we don’t want the yeast water/milk (any recipe) to be too hot or cold.

Too hot will kill the yeast basically and too cold will not activate it.

Lovely choccy

Lovely ChoccyWarm milk and stir in sugar

Add in yeast and flour

Cover and leave for 20 mins in a warm area (hot water cupboard) or until frothy like.

I like to use a wee bit of sugar in this (above) as it helps to activate the yeast and give it something to feed from:).

I have found it gives me a better outcome.

6 eggs beaten

3.5 cups of strong bread flour

2 tablespoons of sugar

pinch of salt

220 grams of butter

1 egg/milk beaten for egg wash

In the fridge overnight!!

Method:

Add beaten eggs to the spongy mix created above

Whisk until blended

Place flour, salt, sugar in separate bowl and mix through

Slowly add dry mix to the egg mixture, a little at a time

Rest for 10 minutes

Slowly add butter, 20-30 grams at a time

Make sure butter is distributed evenly

Dough should be very smooth and moist

Place dough in lightly oil bowl or in an oiled  plastic bag and cover with gladwrap.

Leave overnight in the fridge.

Remove from fridge and shape while its cold.

Add in the chocolate at this stage!! 

If the dough gets warm at any stage, return to the fridge.

Put the choccy in:)

brioches…

Brioche loaf

Make sure the tins/moulds are well-greased.

Place dough in the moulds/tins, I  usually fill  just over half the tin/mould with dough.

Cover lightly with gladwrap that is lightly oiled.

Leave to prove for 2-3 hours or until the dough nearly fills the tins/moulds.

Preheat oven to 190-200 Celsius

Brush with egg wash

Bake for 20 minutes or until golden brown for the small ones and then 35-40 minutes for the larger ones.

Remove from the tins as soon as they come from the oven and cool on racks for at least 30 minutes (unless you are a greedybread person like me and scoff it within 5 mins of coming from the tins).

Ready to bake…

All baked and ready to cool…

Brioche bottom

Brioche sliced…

Mmm delicious….

With Chocolate

With oozey chocolate

Oozey loaf…

Yummm

Have a bite:)

greedybread's picture
greedybread

My all time favourite..Pandoro!!! Merry Xmas….

This has to be my favourite of favourites if that makes sense.

Of course, I was very greedy and made this mid year when I was on my xmas bread mid winter binge…

But fear not, I will be making again next week, i just wanted to share now:)

Golden and gorgeous!!


What is Luscious, Golden and yummy?

ha ha many, many things!! BUT nothing is as luscious as the PANDORO…..

From the Veneto region, it is the regions equivalent of the Panattone.

I had some mini ones from the supermarket in Lucca and Venice but I knew they would not be like a homemade one.

The Italian supermarkets, sell huge boxes which have Pandoro in them but I still think, can’t beat homemade……

So without further ado………………….

What are we aiming for?????

Pandoro……….

I did not have a Pandoro tin though, so I used a brioche mould and a panettone mould.

I think they looked great but it was the crumb and crust that blew me away!!

See this is a deceptive bread, as it looks pretty plain………..

Ahhhh but there in lies the beauty of it.

Pandoro Kiwi style

Be warned, this does take a while, it’s an all day process.

Not an all day standing round but you start in the morning, and it will be ready at night…

Lets get yeasty beasty!!

I am VERY EXCITED about this one!!

Wait till you taste it!!

What do you need?

Patience, my friends, patience……………….

This is done in 3 stages.

Stage 1 : Pre-ferment

5 teaspoons of dried yeast

1/2 cup of warm water

1 large egg

2 tbsp sugar

3/4 cup of Strong bread flour.

pre ferment Pandoro

Mix yeast into warm water along with sugar and mix until dissolved.

Sit until creamy and frothy, about 10 minutes.

Add in egg and flour and mix till smooth.

Cover tightly with gladwrap and sit for 30 minutes .

First dough stage

Stage 2: 1st Dough stage:

3 cups of strong bakers flour

3 cups of cake flour

1 tsp dried yeast

1 tbsp warm water

1/4 cup sugar

2 eggs

60g butter

First stage dough after rising

Mix the yeast into the warm water and allow to sit for 10 minutes until creamy.

Mix flours together and put aside 2 and 1/2 cups of the flour for this dough.

Add yeast, flour, sugar and eggs into the pre ferment, combining well.

Add the butter and make sure this is blended in well.

Cover with gladwrap again and allow to rise for 45-60 minutes.

2nd dough, ready to rise

Stage 3: Second dough:

4 large eggs

2 egg yolks

1 cup sugar

flour left from prior (3 and 1/2 cups)

1 tsp salt

2 tsps Vanilla

1 tbsp lemon zest

1/2 cup od candied citron

300g butter at RT

extra half cup flour

After 2nd rise

Add the eggs, yolks, sugar, lemon zest, vanilla and flour to the first dough and mix well.

Gradually add the butter, 25g at a time, blending well.

Toss the candied citron in flour and put in the dough, combine well.

Change to the dough hook and mix for 8 minutes on low-speed, gradually adding in extra flour in needed.

Dough, will be soft, very buttery and sticky.

Place dough in lightly oiled bowl and wrap with a towel.

Allow to rise until doubled, usually about 2-4 hours, dependant on the temperature.

After 2nd rising and shaping…

Turn out dough on lightly floured area with your hands well floured.

Lightly shape dough into a ball and place in moulds.

NB: Moulds must be very very well oiled!!

Dough should take up 2/3rds of mould.

Place moulds on a tray and cover with a tea towel and rise until almost at the top of the mould, usually 2-4 hours again.

30 minutes before this is ready, preheat oven to 200 celsius.

Ready for baking…

Place pandoro in the oven and bake for 30 minutes.

Turn down the heat to 170 celsius and bake for a further 20-25 minutes.

Allow to cool and then remove carefully from moulds.

Fabulousness…………

Pandoro in the panettone mould:)

When this is cool, slice a wedge, and ENJOY, ENJOY, ENJOY!!

Absolutely divine!!

It is so light, yet rich but not overly…………

It is less buttery in taste than brioche but tastier………..

It is just heavenly!!

I like this better than Panettone

I can only dream of how gorgeous it would be at Xmas with rum flavoured mascarpone in between slices, like a xmas tree!!

LOVE IT!!!

Well worth the effort involved and it makes 3 good sized pandoro.

Look at the crumb!!

Gorgeousness, in all its glory!!

Can you handle it???

Recipe adapted from the wonderful Carol Field’s ” Italian Baker”, 2 Ed, 2011.


greedybread's picture
greedybread

Fou…Fou…Fougasse….Fresh from the oven…

Carrying on my crush on lovely Richard Bertinet, I decided I really should try his Fougasse as it looks so easy!!

Very yum!!

This recipe is from his first book “Dough”.

It seems to be quite simplistic, but for people who have never baked bread before, he gives you delicious recipes, confidence and a full belly..

And before you know it, you are onto the complex buggers like Gubana or Panettone!!

“You are on your way baby…”

I like to call it the breaking in book…If I have a crappy baking week, I choose one of his recipes to give me a boost!!

Very fougasse!!

looking like the mask in Scream!!

This bread does though remind me of the mask in Scream.

Can you see it? Or am I mad?

Anyhow enough blathering…you will not believe how easy this recipe is!!

LETS GET YEASTY!!!

What will you need?

15g dried yeast

500g Strong Bakers flour

10g Salt

350 mls water..

Easy peasy dough…

Warm the water and add in the dried yeast and allow to become frothy.

Combine flour and salt and give it a mix, then add in the yeasty water and form a soft dough.

Knead for about 10 minutes until smooth and elastic.

Place in lightly oiled bowl and cover, standing for an hour.

Scream!!

ready to bake..

Preheat oven to 250 celsius.

Sprinkle semolina on the baking tray paper  or onto the baking stone but if doing on the stone, do 5 minutes before bread goes in:)

Turn dough out on floured bench/ board.

Cut into 4 pieces .

Be very gentle and roll out or use fingertips to spread out the dough as my pictures above show.

There is no right or wrong shape really.

Then slice 4-5 cuts in the dough and pull apart.

Place on baking tray. and sprinkle with a little flour or semolina.

cooling…

Open oven, give a quick mist on the walls, place the tray in the oven and shut the door.

Turn the heat to 230 celsius and bake for about 10-12 minutes or until golden brown.

Remove from oven and cool on racks.

look at it!!

ready to eat!

Someone has had a bite!!

And another…almost gone.

I will try a more complex recipe that I have, and let you know how that goes.

A wheaty one too maybe nice….maybe I could slip in the wholemeal again:)

Great bread for dips and salsa’s.

ENJOY, ENJOY, ENJOY!!

Gorgy!!

greedybread's picture
greedybread

The Xmas bread (but also festivals) of Lake Como.

Mataloc is also offered as a dessert………with a bit of mascarpone

This is what we want!!

This bread is chocca block with goodies and not so much butter that its too rich.

Very similar to panettone but the taste is a little different.

This bread needs a serious warning!!

Seriously addictive….

So light, yet not overly sweet, so that you can munch away and OHHHHH its all gone !!

Squisiti!

What do you need? 

The willpower of Job not to eat it all……………..by yourself…………

You will need to allow time to make this…. best start at night as it needs overnight 1st proving or at least 8-10 hours to rest.

So without further ado…

LETS GET YEASTY!! VERY MUCH SO TODAY!!


Ready for first rise…

For Pre- Ferment:

2tsp of dried yeast

Half a cup of warm water

Half a cup of Strong bakers flour

For dough:

Half a tsp of yeast

1 tbsp honey

1/4 cup of warm water

1 cup castor sugar

3 large eggs

3 cups of Strong bakers flour

Pinch of salt

2 tsp fennel( or anise) seeds

Grated zest of 2 oranges

Grated zest of 2 lemons

160g butter

chopped and flour dusted fruit and nuts


Fruit/ nut mix:

1 cup hazelnuts

1 cup pecans ( i prefer but you can use walnuts)

4 dried figs chopped

1 large cup raisins

1 tbsp flour


After first rise


Stir yeast (pre ferment) into warm water and leave 15 minutes until creamy.

Add flour and mix well, cover and let stand for an hour.

Place in mixing bowl, 2nd amount of yeast, with water and honey.

Allow to stand for 10 minutes until creamy.

Stir in the sugar and eggs, then add in pre ferment.

Add in the zest, fennel, salt and flour.

Mix the butter into dough .

Knead in mixer for 5-6 minutes until smooth but sticky.

Place in a well oiled bowl and cover with gladwrap and leave at room temperature overnight to double in volume.

Ready to add fruit and nuts

Lightly turn out dough on lightly floured area and press out the dough.

Toss fruit and nuts in flour and spread 1/3 of fruit etc on the flattened dough.

Roll up dough and flatten again, repeating the above process until all fruit and nuts are incorporated in the dough.

Allow dough to rest ten minutes in between additions of fruit and nuts.

Adding the yum!!


When all fruit is incorporated, place in well oiled mould.

I use a big casserole dish (see below) I have that happens to have tall sides!!

THE BIG BLUE BEASTIE!!

But I have to say that the only disadvantage to this , is that you can’t hang the cake upside down to cool.

www.thefreshloaf.com

It is so light, you need to hang it to cool so it doesn’t collapse in, which mine did slightly……..BUT my panettone hasn’t as yet:)

Panettone moulds are good.

In fact, I could put them inside my big blue beasty as I do have paper moulds…..

But they need to be WELL GREASED!!

I will use my blue dish to make monster panettone.

Panettone papers/ moulds


Ok, back to recipe…

Cover and allow to rise for 3-4 hours until doubles in size.

Heat oven to 210 celsius and place Mataloc in the oven.

Bake for ten minutes and reduce heat to 190 celsius and cook for another 45-60 minutes.

Remove from the mould and allow to cool on rack or try the hanging method above.

Lovely and golden


As soon as you are able….

Enjoy, Enjoy, Enjoy!!

A lick of mascarpone ?

Have a wedge (or two)


Dont be shy now!!

See the zest and the plump raisins………..

Big bite!


Recipe Adapted from Carol Field’s “The Italian Baker”, 2 Ed, 2011.

greedybread's picture
greedybread

Gubana…Friuli Venezia Festival Bread

Now this beauty LOOKS complex but I promise it’s not.

A little time is needed but you can come and go in between , so are you ready?

Gorgeous!!

Jam packed with fruit, nuts, rum and spices, it is delicious.

A wonderful combination of bread dough spiked with liquers….Not too buttery and yet still moist with a gorgeous flaky like crust.

It sort of looks like a pie but when you slice it, it’s surely a bread!!

Keeps like a dream,I am on day 4 and it’s still good and I am not toasting it yet:)

Not a greedyboy concoction, as they don’t like nuts but more for me to eat.

Definitely a greedygirl bread!!

Just like a snail but MUCH more delicious:)

So lets stop waffling and let’s get YEASTY!

What will you need?

A bit of patience to make it, as there is 3 stages but you know what they say!!

Patience is a virtue….

     *********************************************************

OOPS,  THIS MAKES TWO BIG GUBANA’S SO YOU COULD HALF THE RECIPE IF YOU WANTED!! 


Stage one:

2 tablespoons of dried yeast

3/4 cup warmed milk

1 tsp sugar

1 cup of Strong bakers flour.

Stage one sponge

Stir the yeast and sugar into the warmed milk and leave to become frothy.

Usually 10 minutes does the trick!

Stir in the flour and cover tightly and leave for an hour.

STAGE 2:

2 eggs

2 yolks

1 cup of sugar

1/4 cup of milk

4 cups of Strong bakers flour

Pinch of salt

Zest of 2-3 lemons

3 tsp of vanilla essence/ extract

150g softened butter.

Dough all elasticy…

Add the eggs , yolks, sugar and milk to the yeasty beasty mix and stir well.

Add in flour, 1 cup at a time.

Stir in the salt, lemon zest, vanilla and a little more milk if needed.

Combine well and knead for about 5 minutes.

Place dough in well oiled bowl.

Cut up the butter(as below) and place on top of the dough, slightly pressing into the dough.

Cover and allow to rise for 3 hours in a warm place.

I usually  always use the hot water cupboard in winter.

Place the butter on top

STAGE 3:

Now its gets VERY interesting!

2 cups of chopped hazelnuts

1 cup chopped walnuts

1 cup of chopped almonds

1 & 1/2 cups of cookie, cake or sweet bread crumbs

1 cup of raisins

1/2 cup of apricot jam

zest of one lemon

2 tsp of cocoa powder

2 tsp cinnamon

4 tbsp of sherry/ Marsala or similar

2 tbsp grappa

4 tbsp of rum

2 tbsp of amaretto

1 tsp of cherry liqueur

1 large egg

Fruity, nutty mix

Combine all the fruit, zest, nuts, jam, crumbs, liqueur and alcohols in a bowl and mix well.

On a lightly floured board/ area, work the butter into the dough and knead for 2-3 minutes to get a nice consistency.

On the lightly floured board,  cut the dough into two pieces.

Roll dough to about 35cm by 20 cms rectangular.

Beat the egg with a little milk and brush on the rolled out dough.

Spread the fruity mix on the rolled out dough (see below).

Dough already to go…

Roll up the dough

Then from the longest width, roll up the dough tightly as you would a Chelsea bun .

You should then have a big long log of dough.

I did one bread in a cake tin to help retain the shape and one free on a baking tray.

The one on the baking tray was not less formed than the cake tin one.

So grease a cake tin well if you use it.

I lightly egged the inner side of the log that I would roll up to help it stick.

Roll the log up like a snail, pinching the ends in and place in a tin or on a tray.

In the cake tin or….

or not……..freestyle!!

Cover bread with tea towels and place in warm area to rise for 2-3 hours until puffy but not quite doubled.

Preheat the oven to 200 celsius.

Lightly poke a few holes in the bread with a skewer to let air escape as we don’t want pockets of air.

Lightly egg wash the bread when its ready and pop into the oven.

Bake for 25 minutes on 200 celsius and then reduce heat to 170 for a final 25 minutes until golden brown.

Remove from the oven and cool on racks.

When cool or at least sliceable….have a piece and ENJOY, ENJOY, ENJOY!!

M mmm ready

Freestyle cooling …

Have a slice:)

Love the spiral…

http://greedybread.wordpress.com/2012/09/19/gubana-fruili-venezia-festival-bread/
greedybread's picture
greedybread

But you might cry and these are simply soooooooo yum, words escape me.

Mmmmm

I have been twiddling round with sweet doughs and Chelsea bun typey things for years..

This is my favourite…

As you can imagine,  these went…

Seriously, I turn around and GONE!!

Caramely swirly

This is why Hubby and I resort to hiding food.

This is shameful but those greedyboys, just suck it all in and then its gone…

Russian fudge, 2 batches, gone in a day…I had to put some in a container and hide it in the veg drawer for hubby…

Sad!!

Often I say to Hubby, “Come and get some now before I call the boys”..

He hesitates and by the time he comes…Gone!!

Get some before they all go!!

So what will you need?

Oooooh , Love these, so soft and yummy and cinnamony:)

Sorry….10g dried yeast

1/2 cup of castor sugar

1 cup of warmed milk

2 eggs

Pinch of salt.

4 cups of Strong baking flour

160 g softened butter.

Sweet sweet sweet Dough ….

For the filling:

200g softened butter

1 & 1/2 cups of brown sugar or light muscovado

3 big tsp of cinnamon

1 sprinkle of cloves

Pinch of Nutmeg.

Buttery sugary filling…bad!! but sooo good

Now there is some more options with this recipe but I will tell you at the end as I didn’t do them today….

But the words more caramel , come into it!!

Take your milk and warm it and add in the sugar and make sure it is dissolved, then add in yeast and stir well.

Stand 10-15 minutes until frothy, then add in the beaten eggs.

Combine all dry ingredients in a bowl and mix through, then add in the yeasty egg mix and form a soft dough.

Knead for a few minutes then add in the butter.

Mix butter through well and knead for about 5-7 minutes until well combined and elastically.

Place in lightly oiled bowl, cover and stand for 2 hours.

Ready to roll…

While you are waiting, mix all your filling ingredients together, blending well and then stand aside.

Turn dough out on bench/board and roll out into a large rectangle.

I think for this one I did 25cms width by 50 odd cm long.

You can do a bit more of a bit less but don’t make the dough too thick.

Place filling on the dough and spread out, leaving a 2cm gap on the edges of the length.

Rolling out

Spread that filling!!

See the slight edging???

Option of putting some raisins in….

Start from the edging closest to you and start to roll, as tight as you can, taking care though not to squish out the filling:)

Roll right up and then lightly dampen edges with butter or a little milk and join seams together and turn seam side down.

I usually let it rest for about 10-15 minutes now…

Rolling, Rolling, Rolling

All rolled and resting…

When cut….

Rolls…Rolls….

Into the pan….

Swirly Swirly yum yum

Now I like to cut 12-15 rolls in total. I am not going to tell you i measure my rolls as I don’t.

If you want to be anal, you can be but I do it by looking and it works pretty well.

So cut the rolls, work quickly, and place in the dish, don’t handle the dough too much.

I use an old black roasting dish that is about 30cms by 20cms i think…

Well greased, I usually put in 12, that I find gives them ample room to grow:)

But you could do 15 rolls but I find they are not as high that way….But no right and wrong here.

Proving….

I now leave them for 90-120 minutes dependant on room temperature.

Usually 90 minutes is enough…by then the greedyboys are moaning for me to hurry up!!

About 30 minutes before end of time, preheat the oven to 180 celsius.

See the size difference!! ready to bake

When time is up, brush the dough lightly with a milk wash….still using Bobbi’s brush I am too!!

Place in the oven and bake for 35 minutes until very brown.

While they are baking, I like to make a little sugar syrup of 1/4 cup water and 1/4 cup of sugar and bring to gentle simmer.

As soon as the buns come out, I brush them with this.

You don’t have to do this but it adds a little gloss if you are not then adding a white drippy icing later, which I am not today:)

Mmmm all ready…

Yummy yummy

Lovely….

Remove and allow to cool in the tin.

These easily pull apart when you want to eat them…

Best eaten warm….Alone i think

But with some cream if really bad or when cool with butter as my shameful husband does!!!

Now you can make a drippy white icing ( icing sugar, milk and a wee bit of butter) and I drip it all over the buns, if you want to.

The other option is to make a caramel sauce and pour it over the buns as soon as they come out of the oven….Very caramely ooey gooey then:)

You can also add in fruit at the stage where you saw me put on the raisins…grated apple is nice!!

So a few choices to think about…

But don’t forget……

ENJOY, ENJOY ,ENJOY!!!!

Lovely side view

Very tasty….http://greedybread.wordpress.com/2012/12/06/you-better-not-laugh-ooooey-gooey-cinnamon-swirly-buns/

And just in case you are really bored….here is my Chelsea bun recipe…

http://greedybread.wordpress.com/?s=chelsea

Pages

Subscribe to RSS - greedybread's blog