The Fresh Loaf

A Community of Amateur Bakers and Artisan Bread Enthusiasts.

HeiHei29er's blog

HeiHei29er's picture
HeiHei29er

The list of bakes from other TFL'ers I want to do keeps piling up, so I decided to start trying a few of them.  First up on the list was Benny's swirl milk bread.  Didn't execute it as well as the master, but didn't come out too bad for the first attempt.  :-)  Followed the method exactly as outlined in the post link below.  Only change...  I did not have black sesame seeds, so opted for black chia seeds.  I couldn't find a purple sweet potato, but I found a Garnet yam, and the color from the yam held nicely.

https://www.thefreshloaf.com/node/67840/purple-sweet-potato-black-sesame-swirl-sourdough-milk-bread

Overall, the bake went well.  Had a bit of a blowout on one side.  Looks like I might have rolled the white dough a little too thin in that spot.  The only real trouble was the chia seeds.  I didn't realize how much water they absorbed, and I only had about half of them in when the dough became unworkable.  I started to add water back in, and then realized that chia seeds are "mucusy" too.  Turned into a slimy mess.  But...  slowly but surely got enough moisture back into the dough to make it pliable and workable.  So, my black is more of a charcoal gray, but the flavor is good!


HeiHei29er's picture
HeiHei29er

Tried a new method on a standard bake for me with the best results so far (on the outside anyway).  Beginner's Luck?  Will have to see if I can repeat it.

When it comes to folds and shaping, I kind of feel like I'm all thumbs.  When to fold?  Which fold to do?  How hard to stretch? How hard to degas? Which pre-shape? Etc.  Skills I need to develop, but I'm not very consistent yet.

I started doing this technique, and it just makes sense to me.  I can feel when the dough starts to change.  So for this bake, I used this technique, but spread it out over 9 hours.  Rather than worrying about how my gluten is holding up and what fold I should do to keep it built up, I just kept slowly developing it as fermentation progressed, and the end of the 4th set was my pre-shape.  From there, the concept follows Dan's Simple Loaf Pan technique.  Place in banneton or pan and let it ferment till 90+% on the aliquot.  You can let it go that long because you fully degassed and punched it down during the 4th set of kneading.  Technique probably won't produce an open, lacy crumb, but I'm usually looking for an airy, sandwich crumb anyway. 

Both of these loaves were for a friend, so no crumb shot.  Asked to have one sent, and will post it if I get it.  By far the best oven spring I've got in both loaves.  Free standing is 15% WW.  Pan loaf is 15% rye.  Formula is for the WW, but just swap out the WW for rye on the other loaf.  I did the exact same method.  Prepared both loaves side-by-side last night.  Friend wanted one free standing and one pan loaf.

HeiHei29er's picture
HeiHei29er

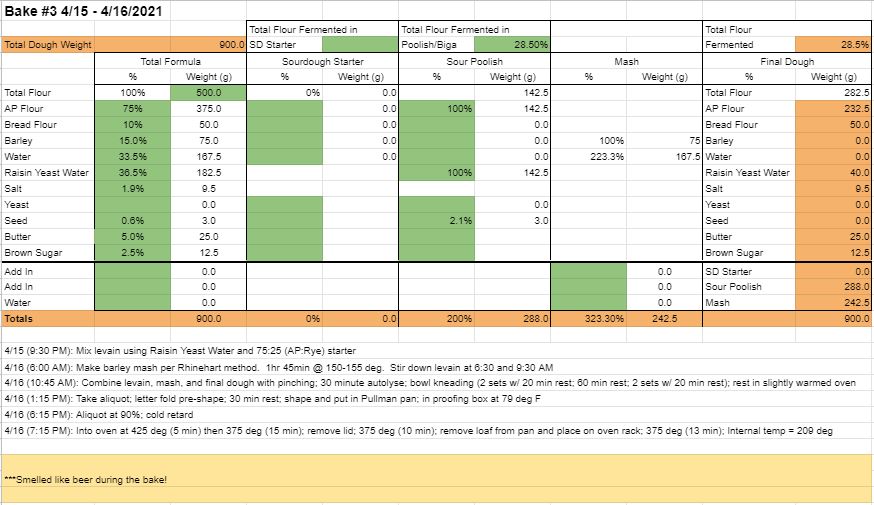
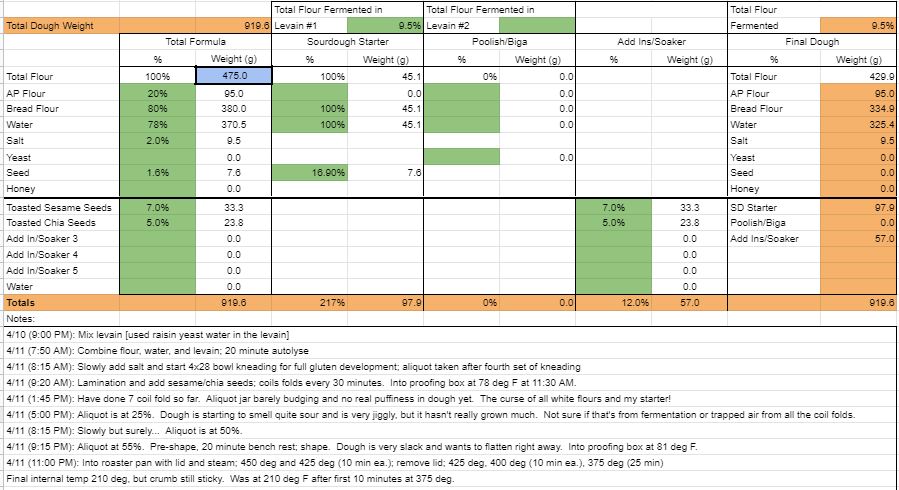
Had planned to try a white sandwich loaf with 10% barley flour today, but my copy of Rheinhart's "Whole Grain Breads" arrived yesterday.  Skimming through it and his section on mashes caught my eye.  What could make better mash than barley?  :-)

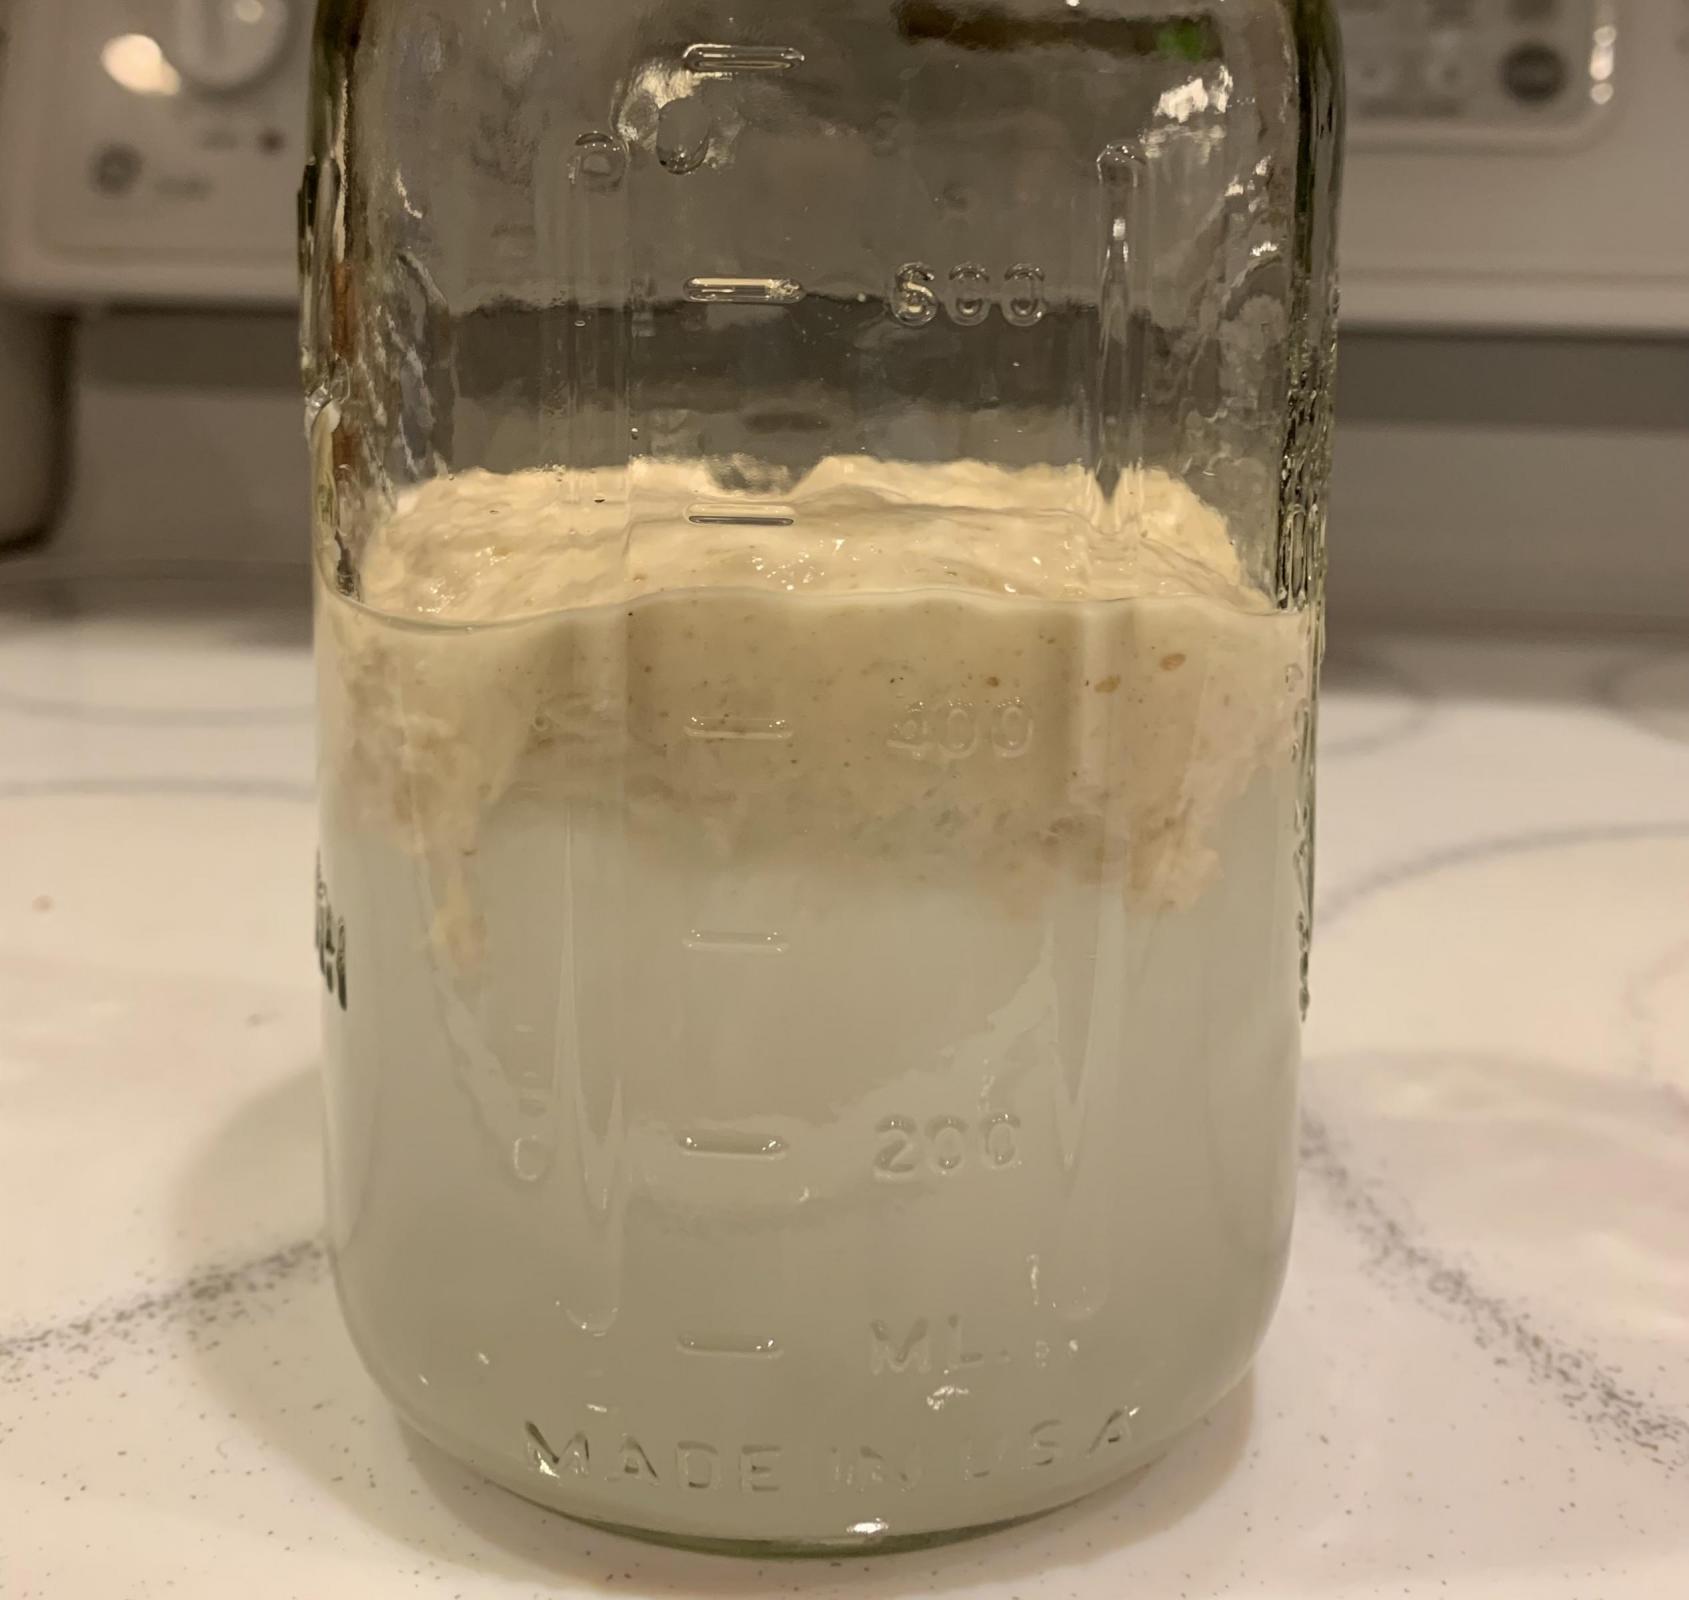
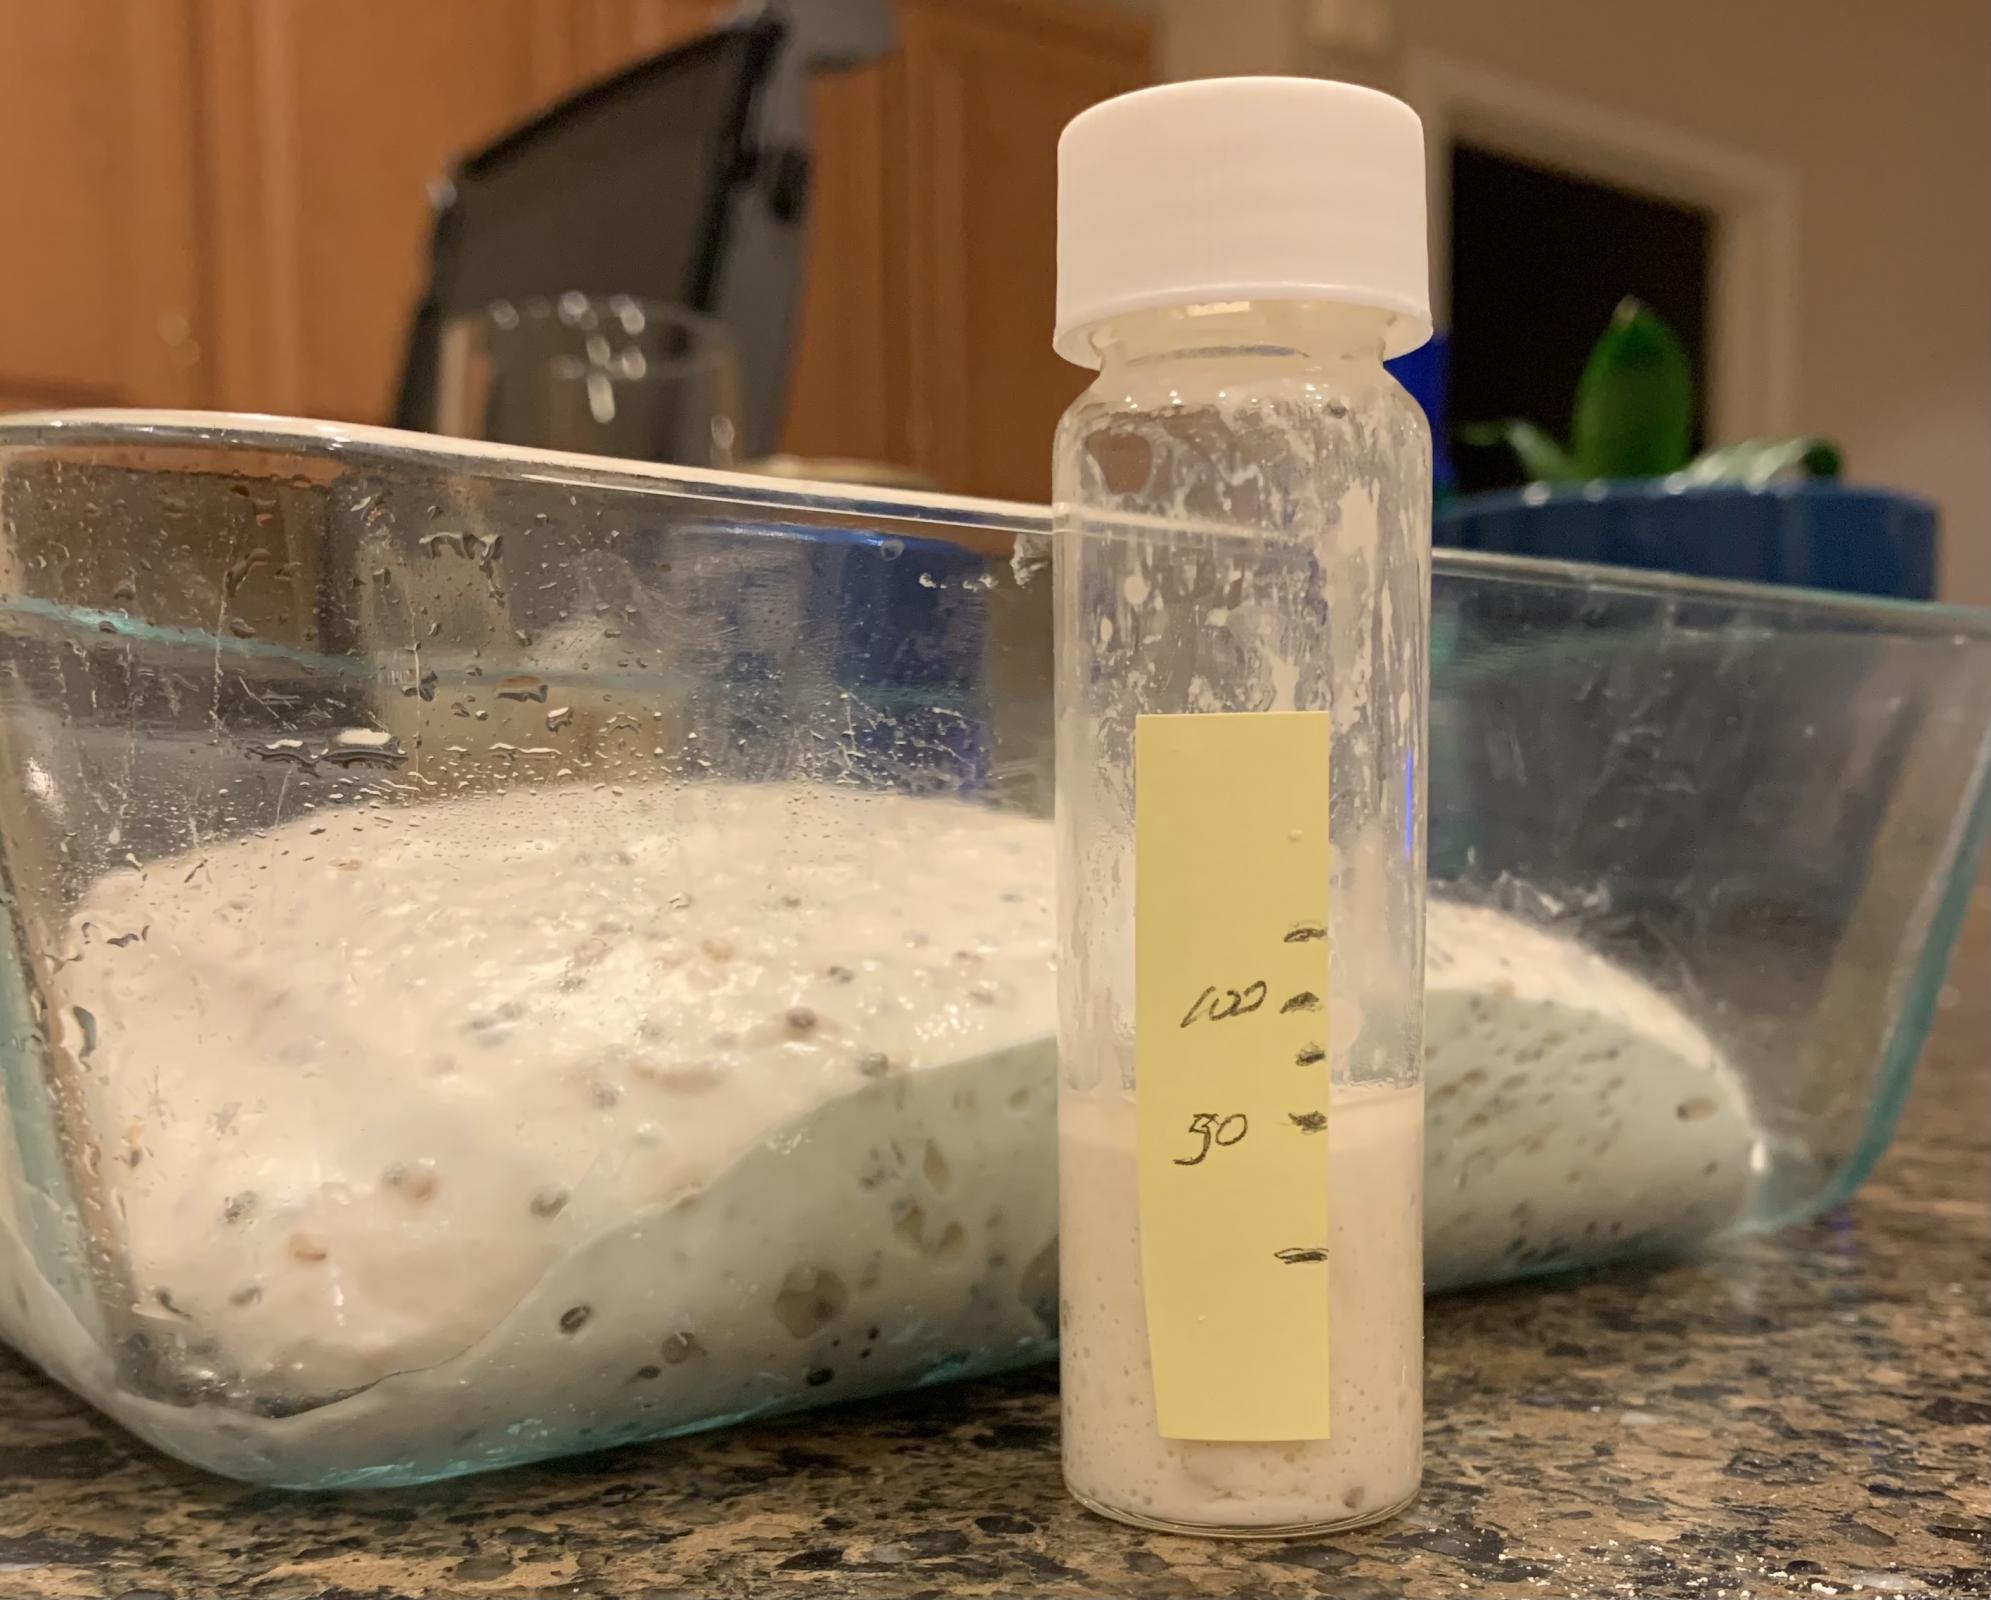
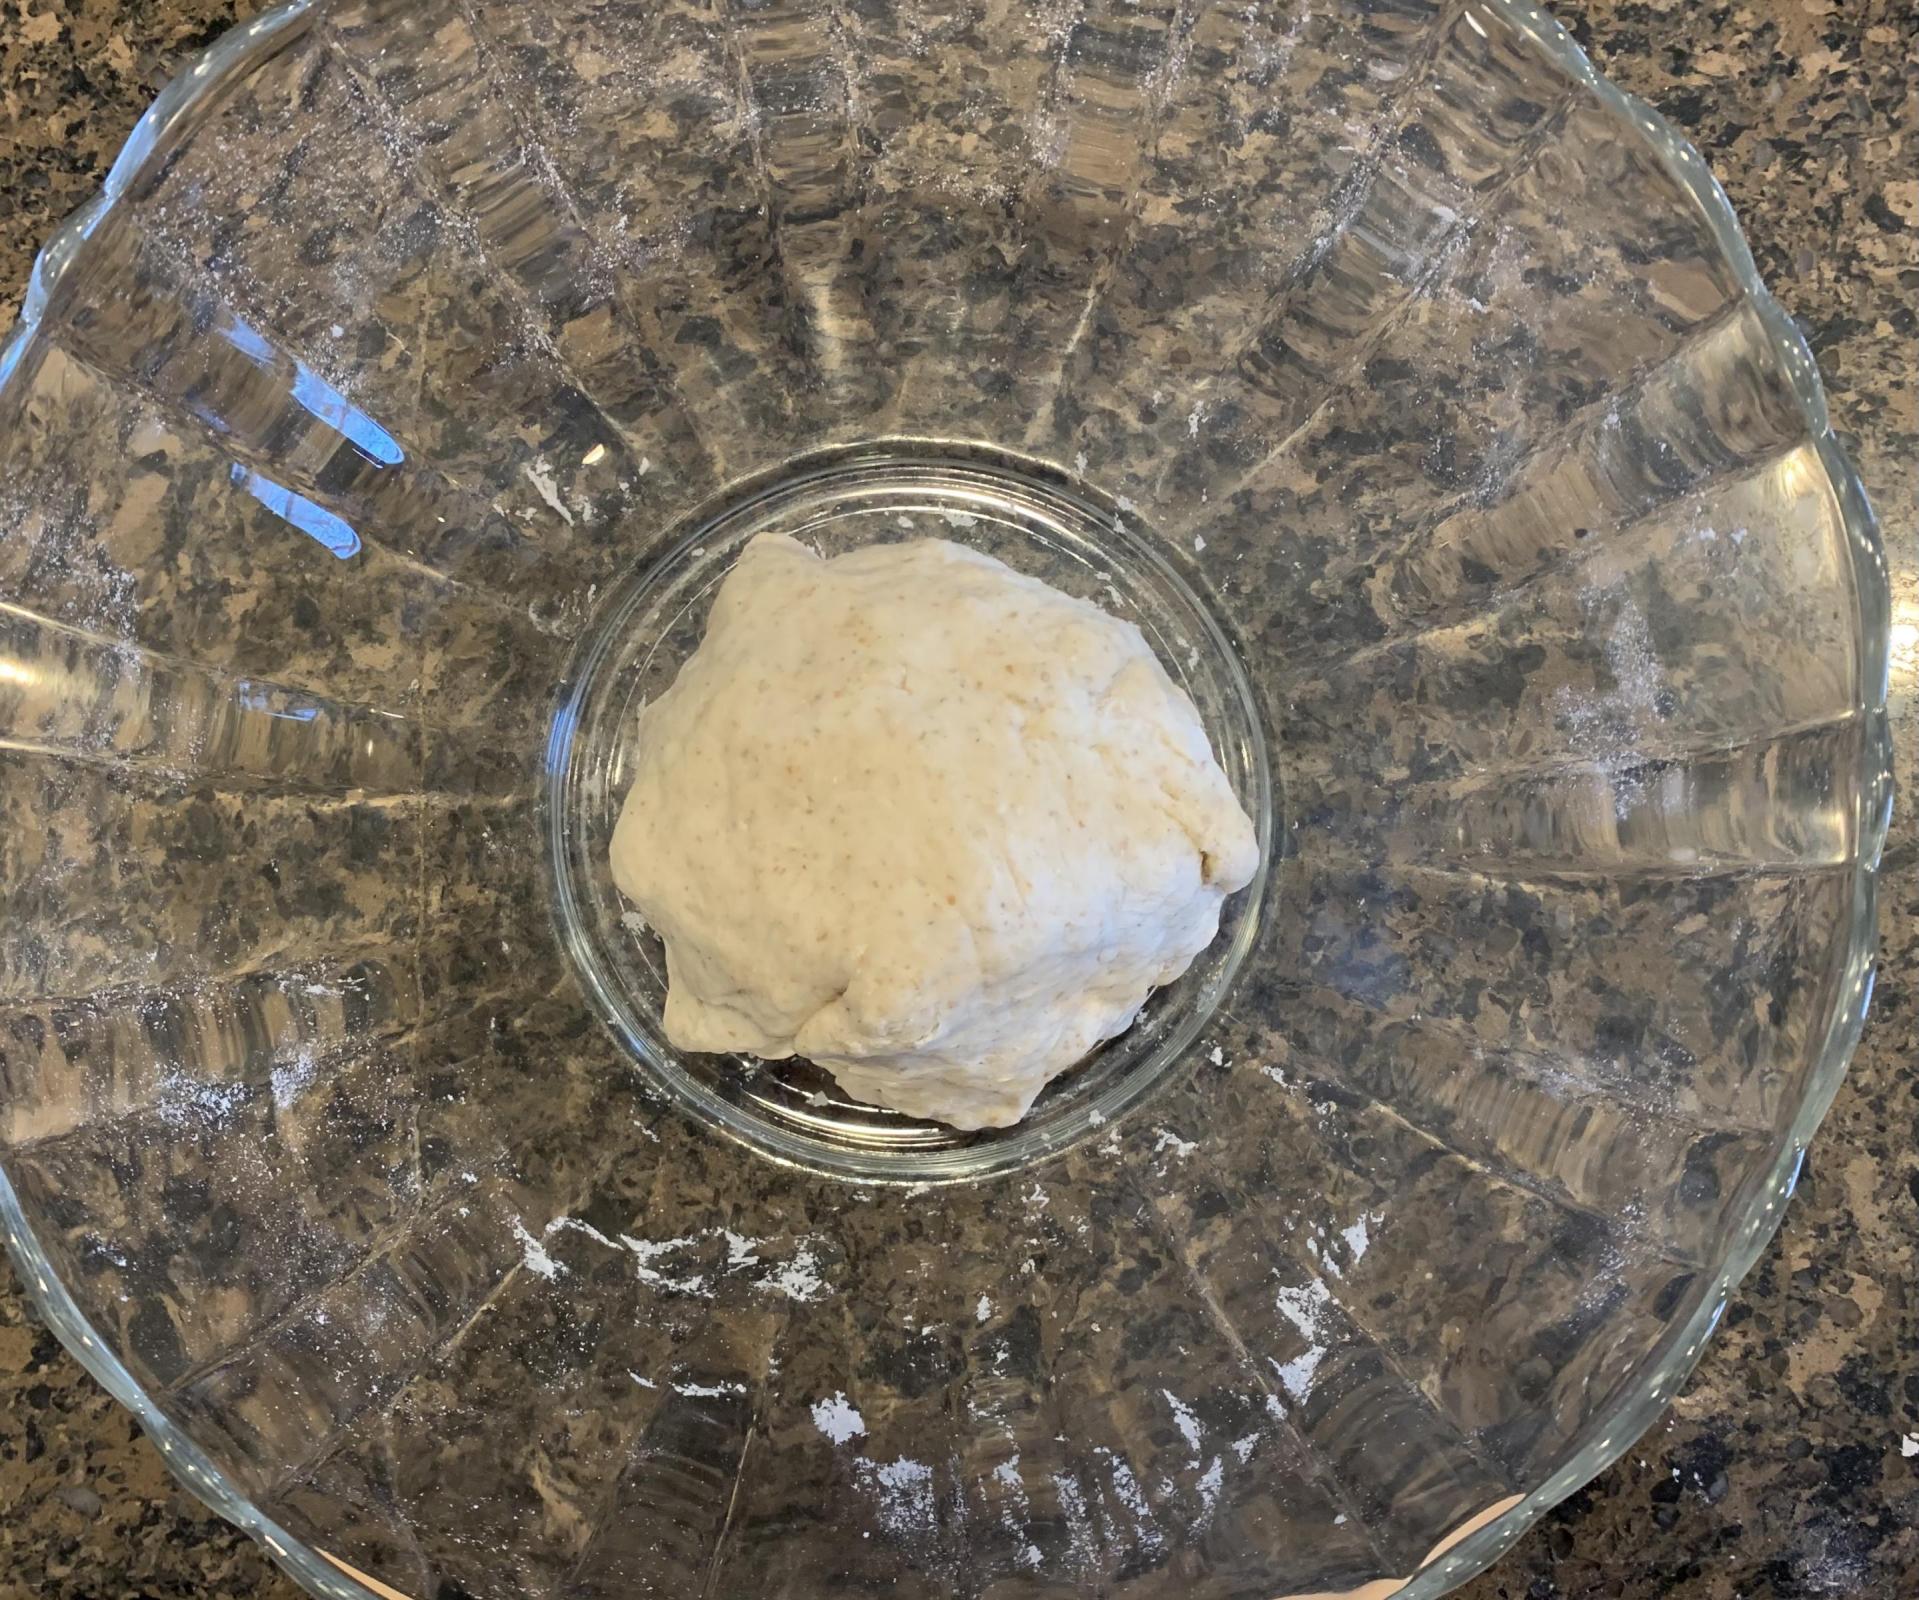
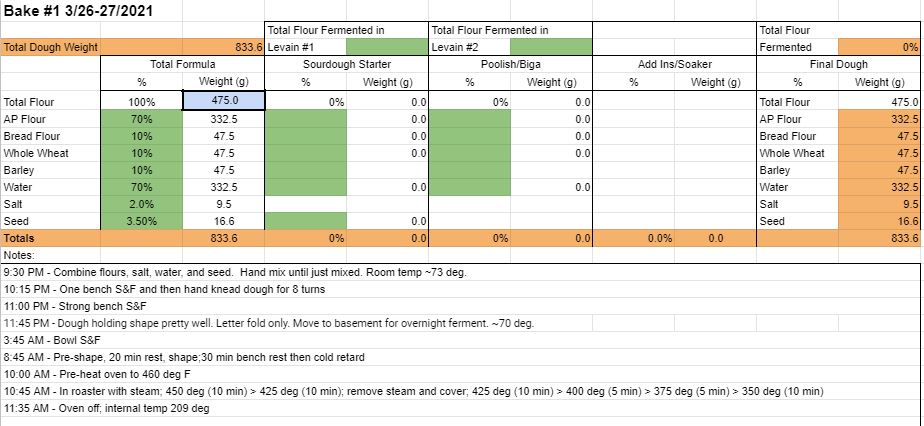
I've been messing around with using RYW and mother starter for my levains lately, and I continued that with this one.  I also added some juiced up RYW to the final dough (40g refrigerated RYW with 1g brown sugar added and then let come to room temp).  For the mash, I prepared per Rheinhart's method (I did not add the diastatic malt and increased the flour by that amount).  My initial hydration was 230%, but I lost a little due to evaporation.  I weighed the final mash and subtracted the weight loss from the water to get the final mash percentages.

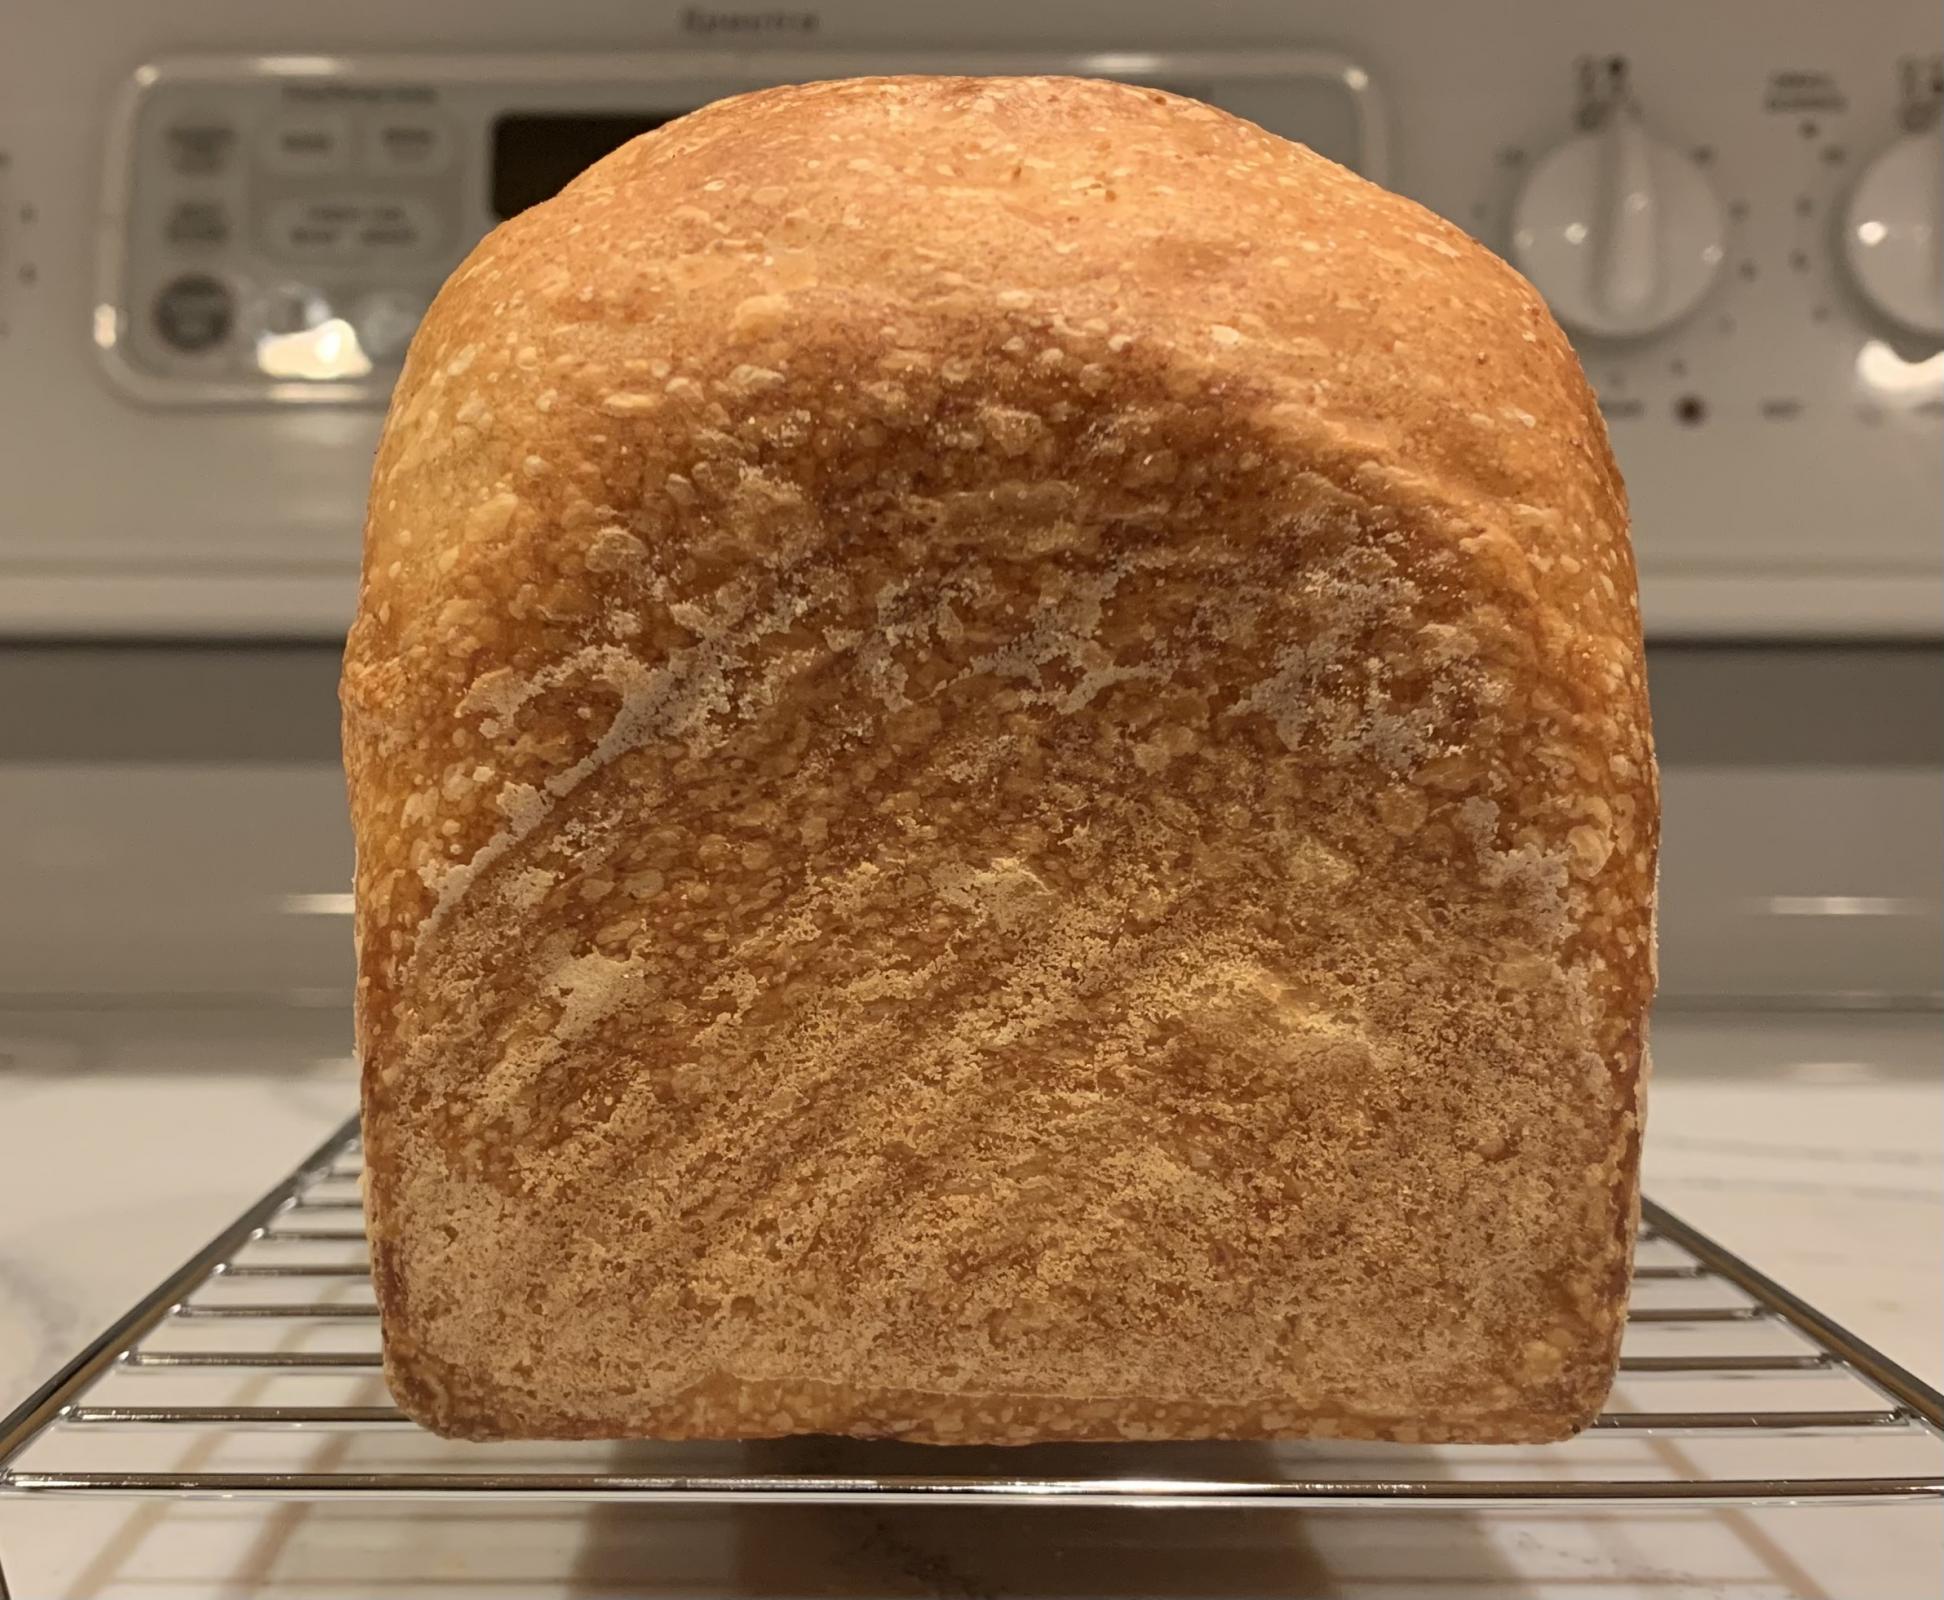
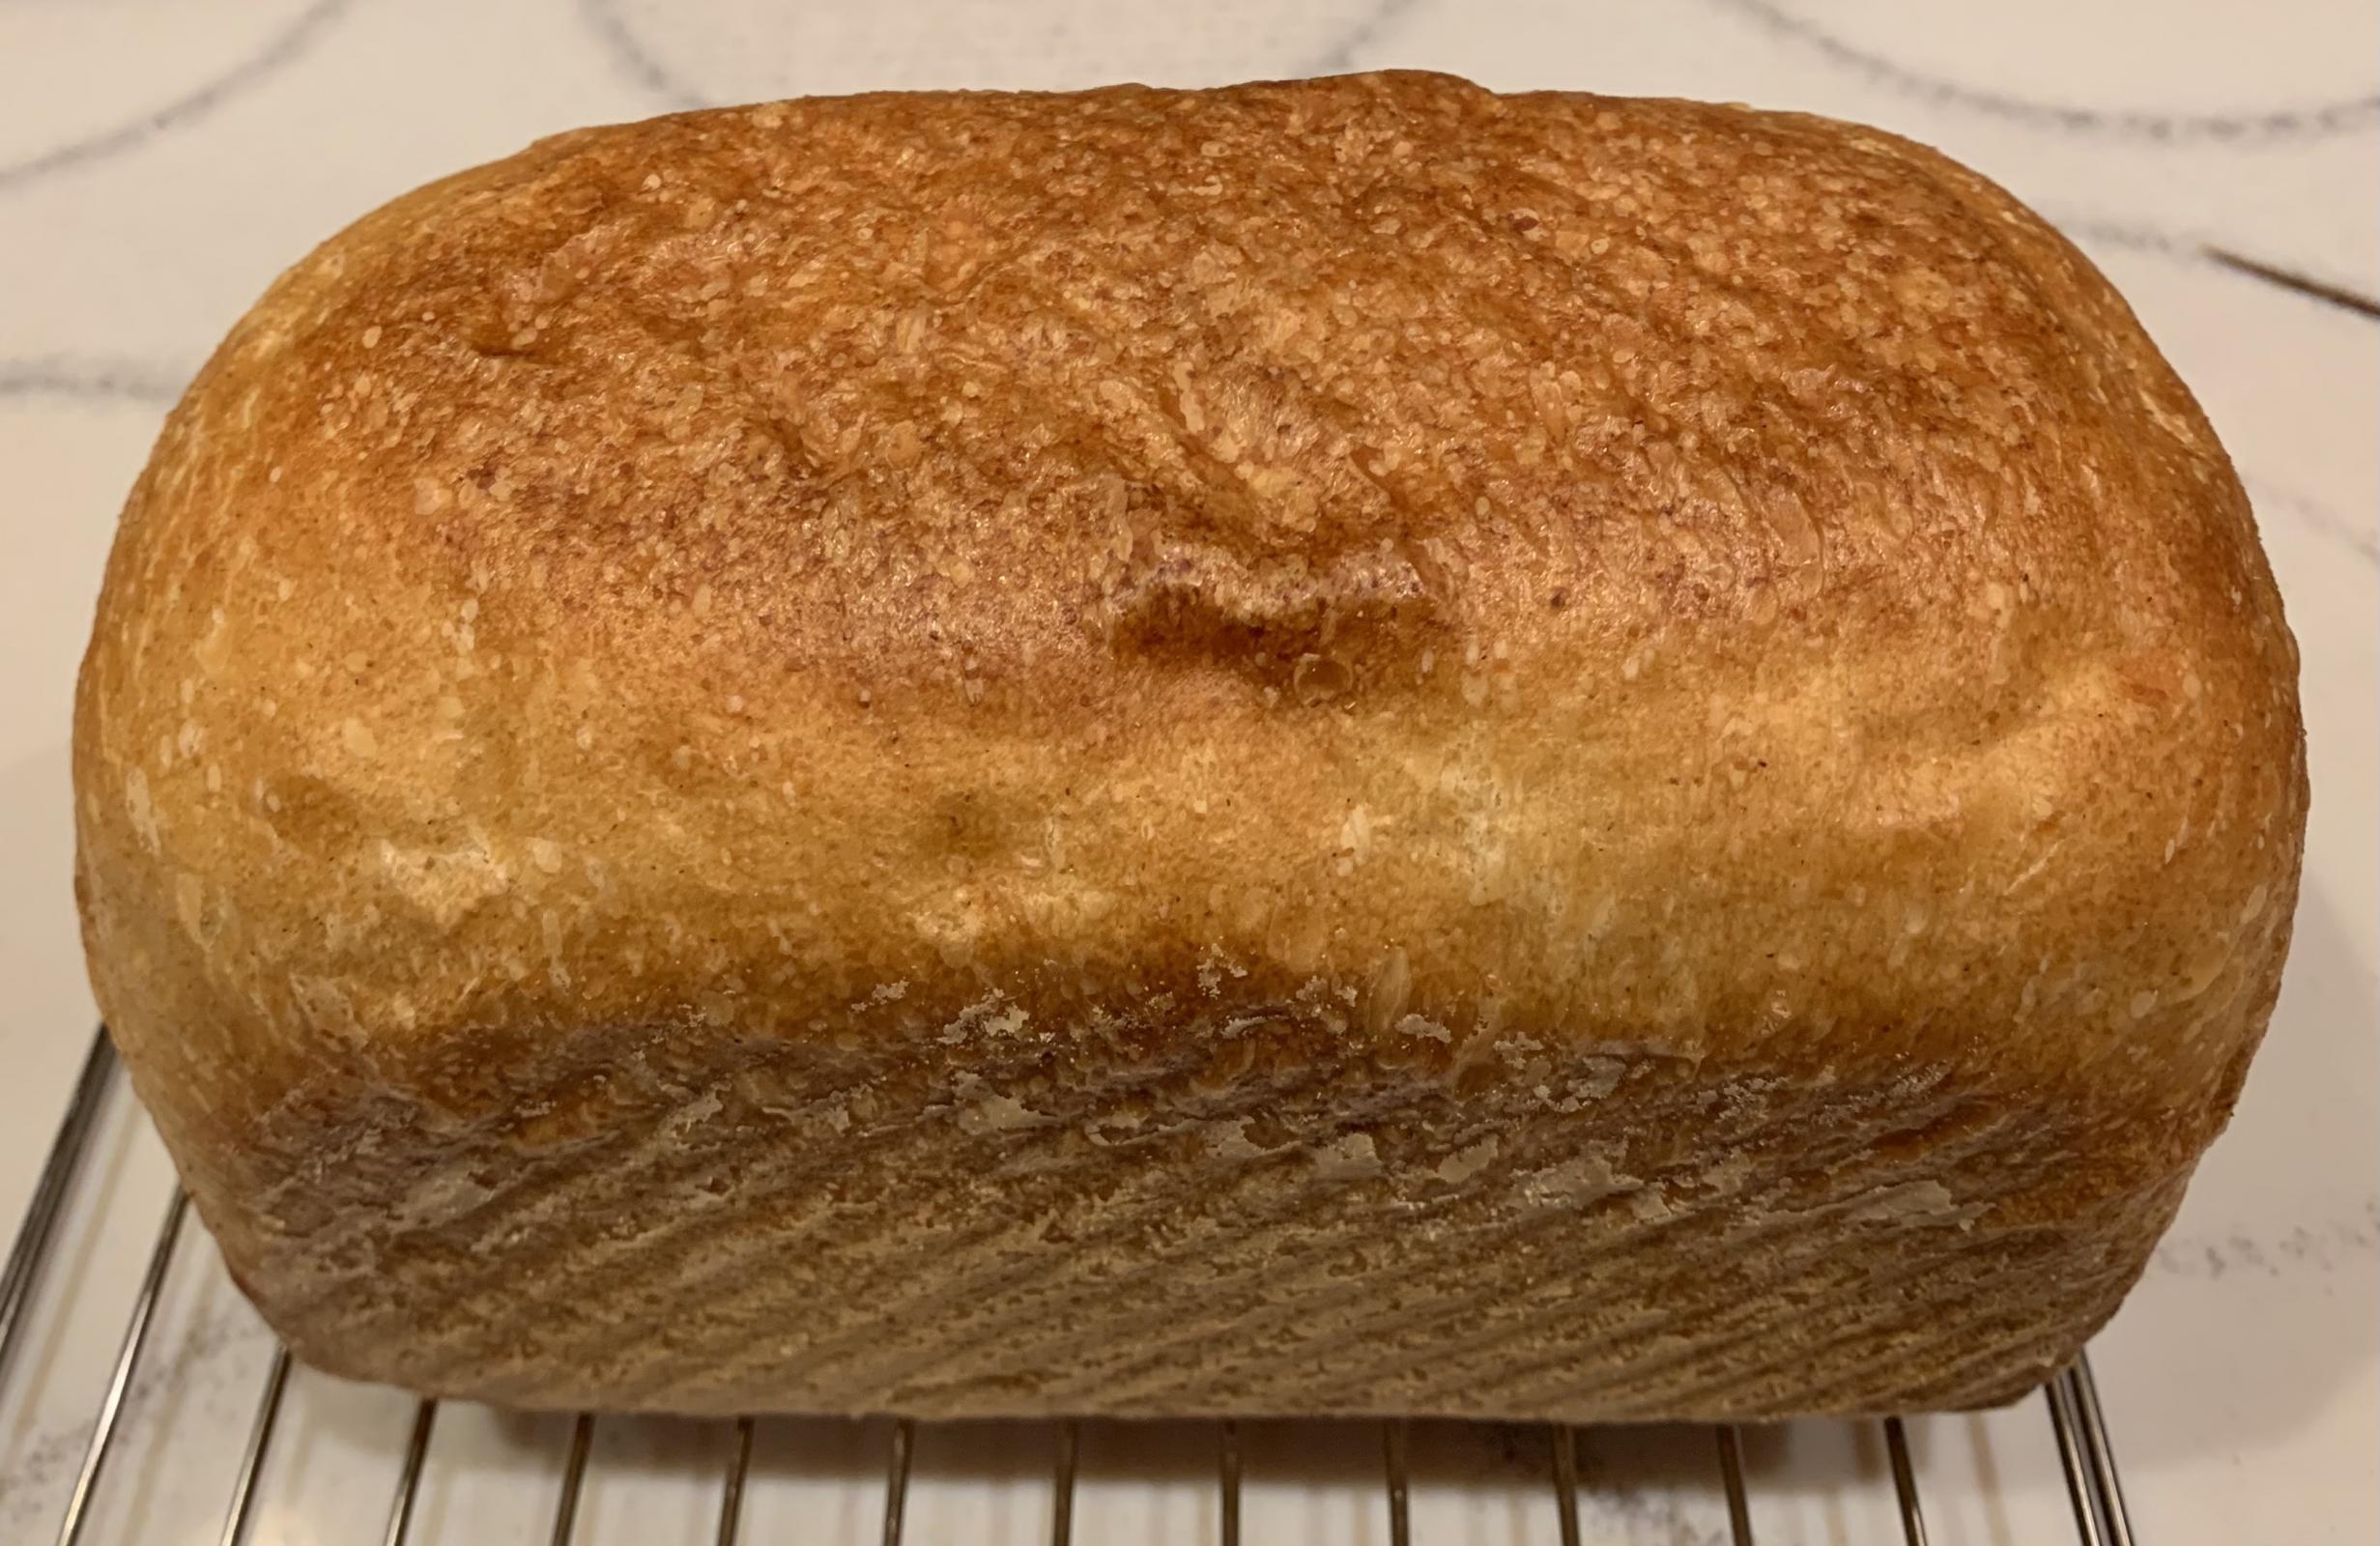
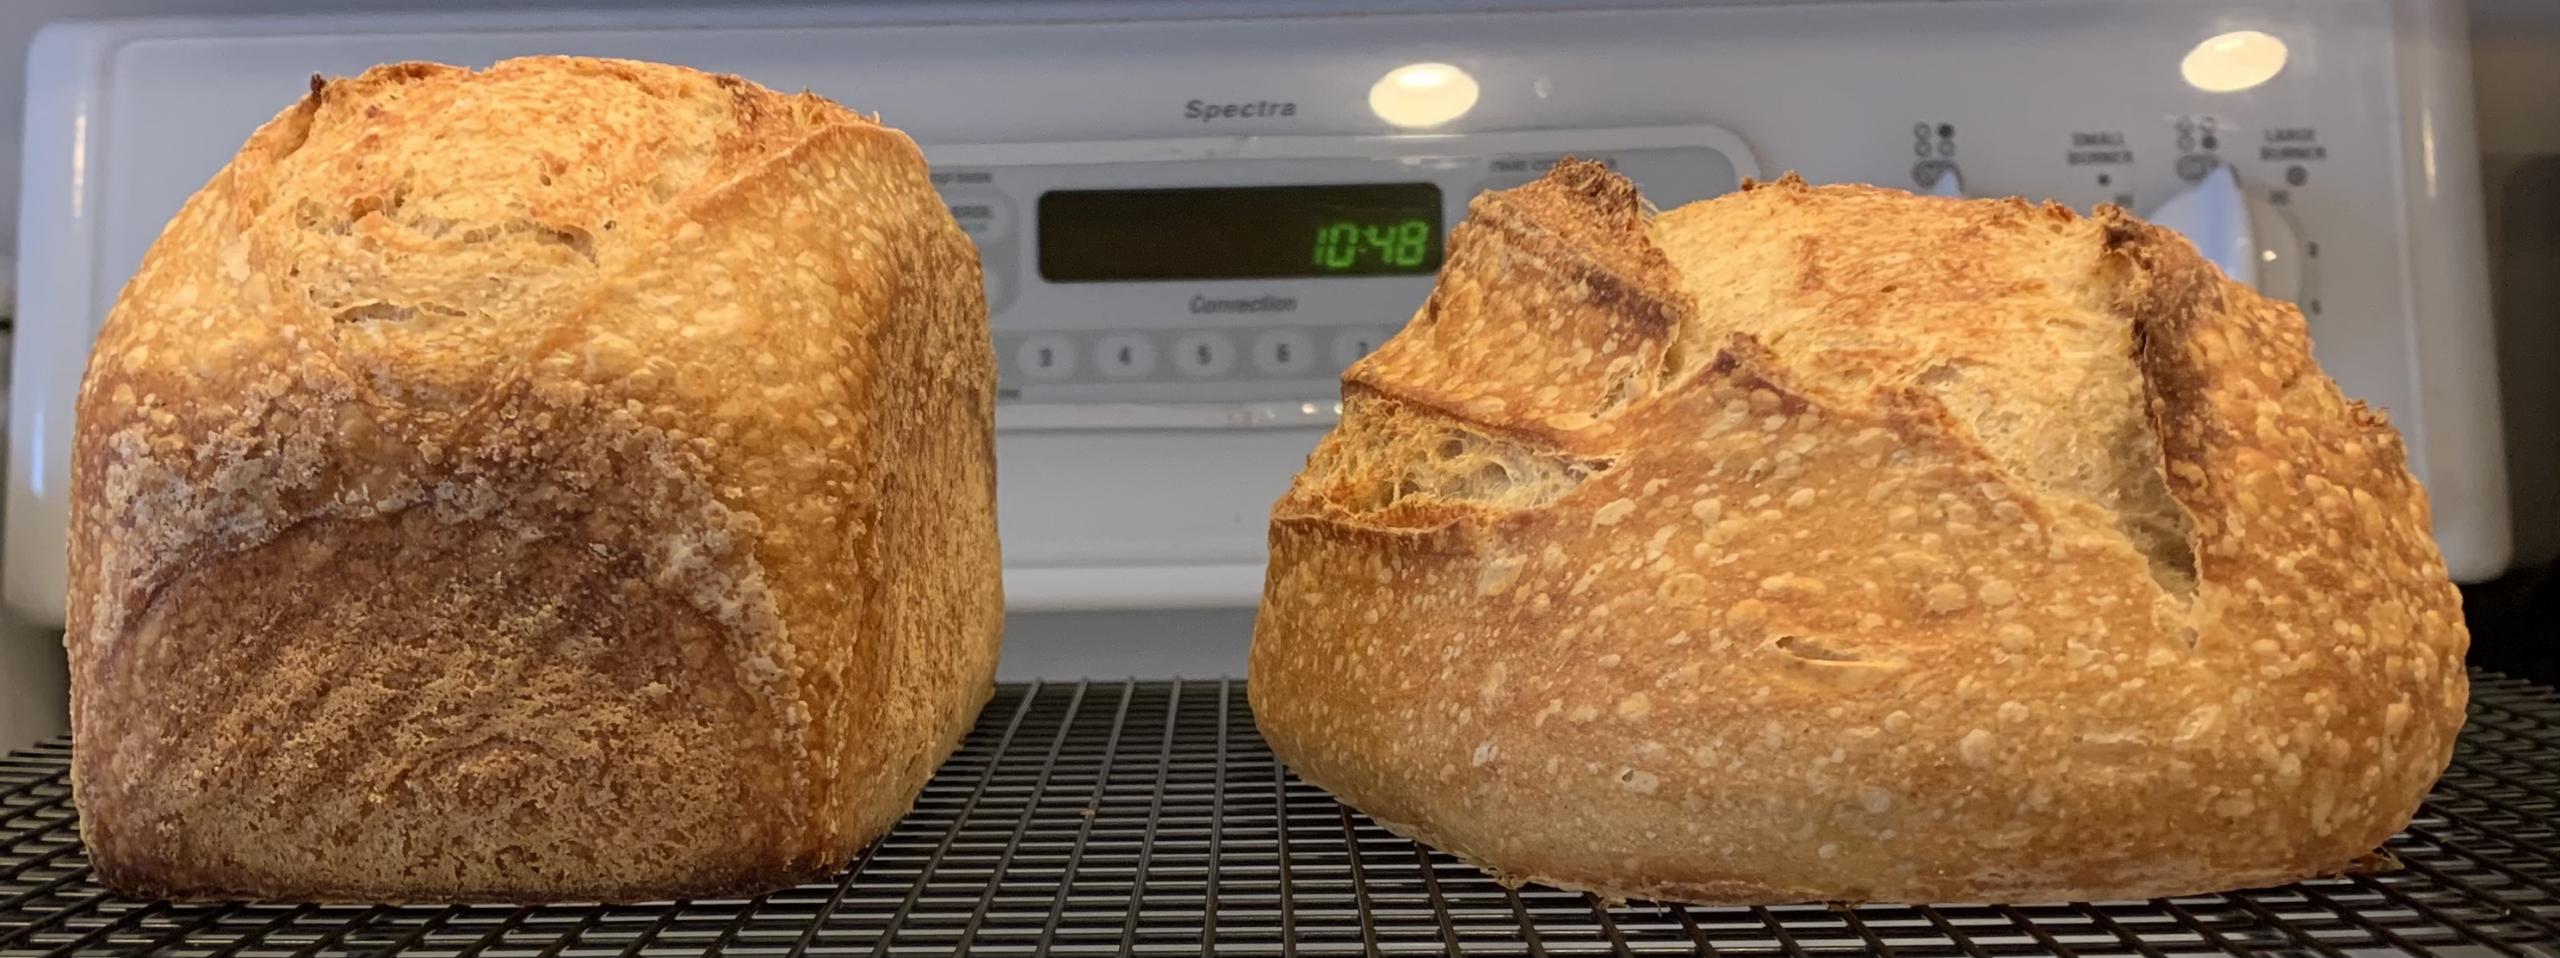
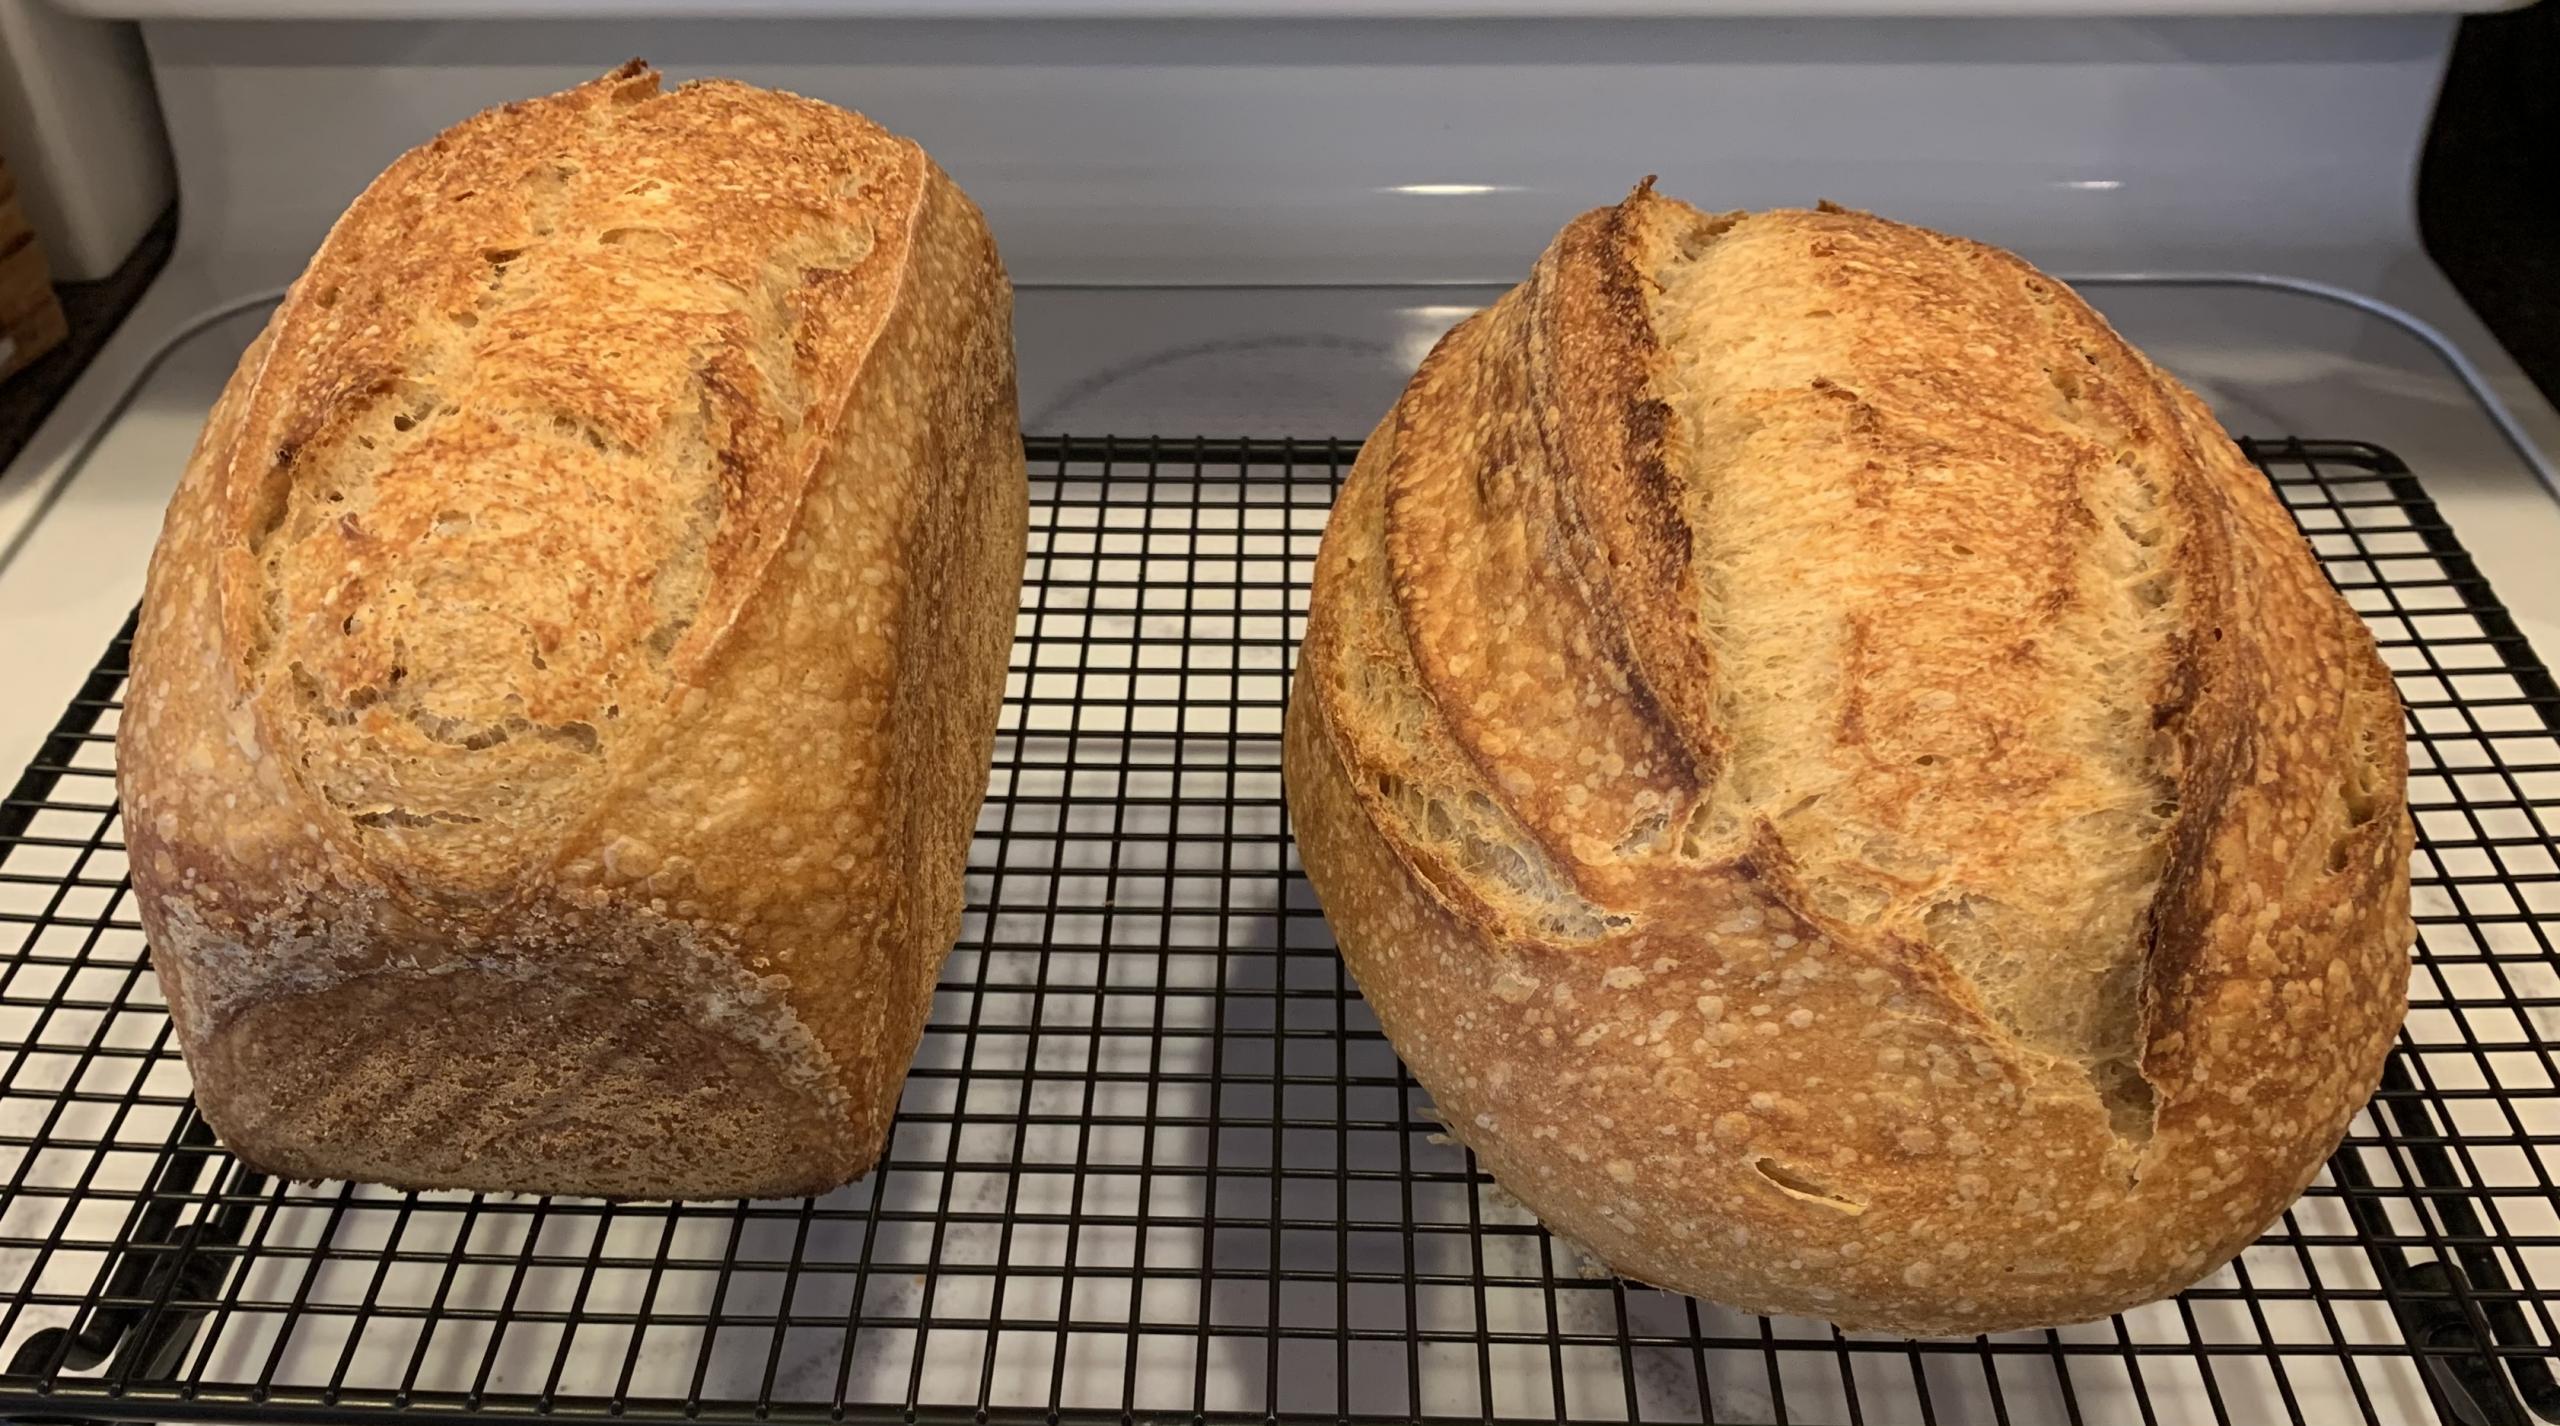
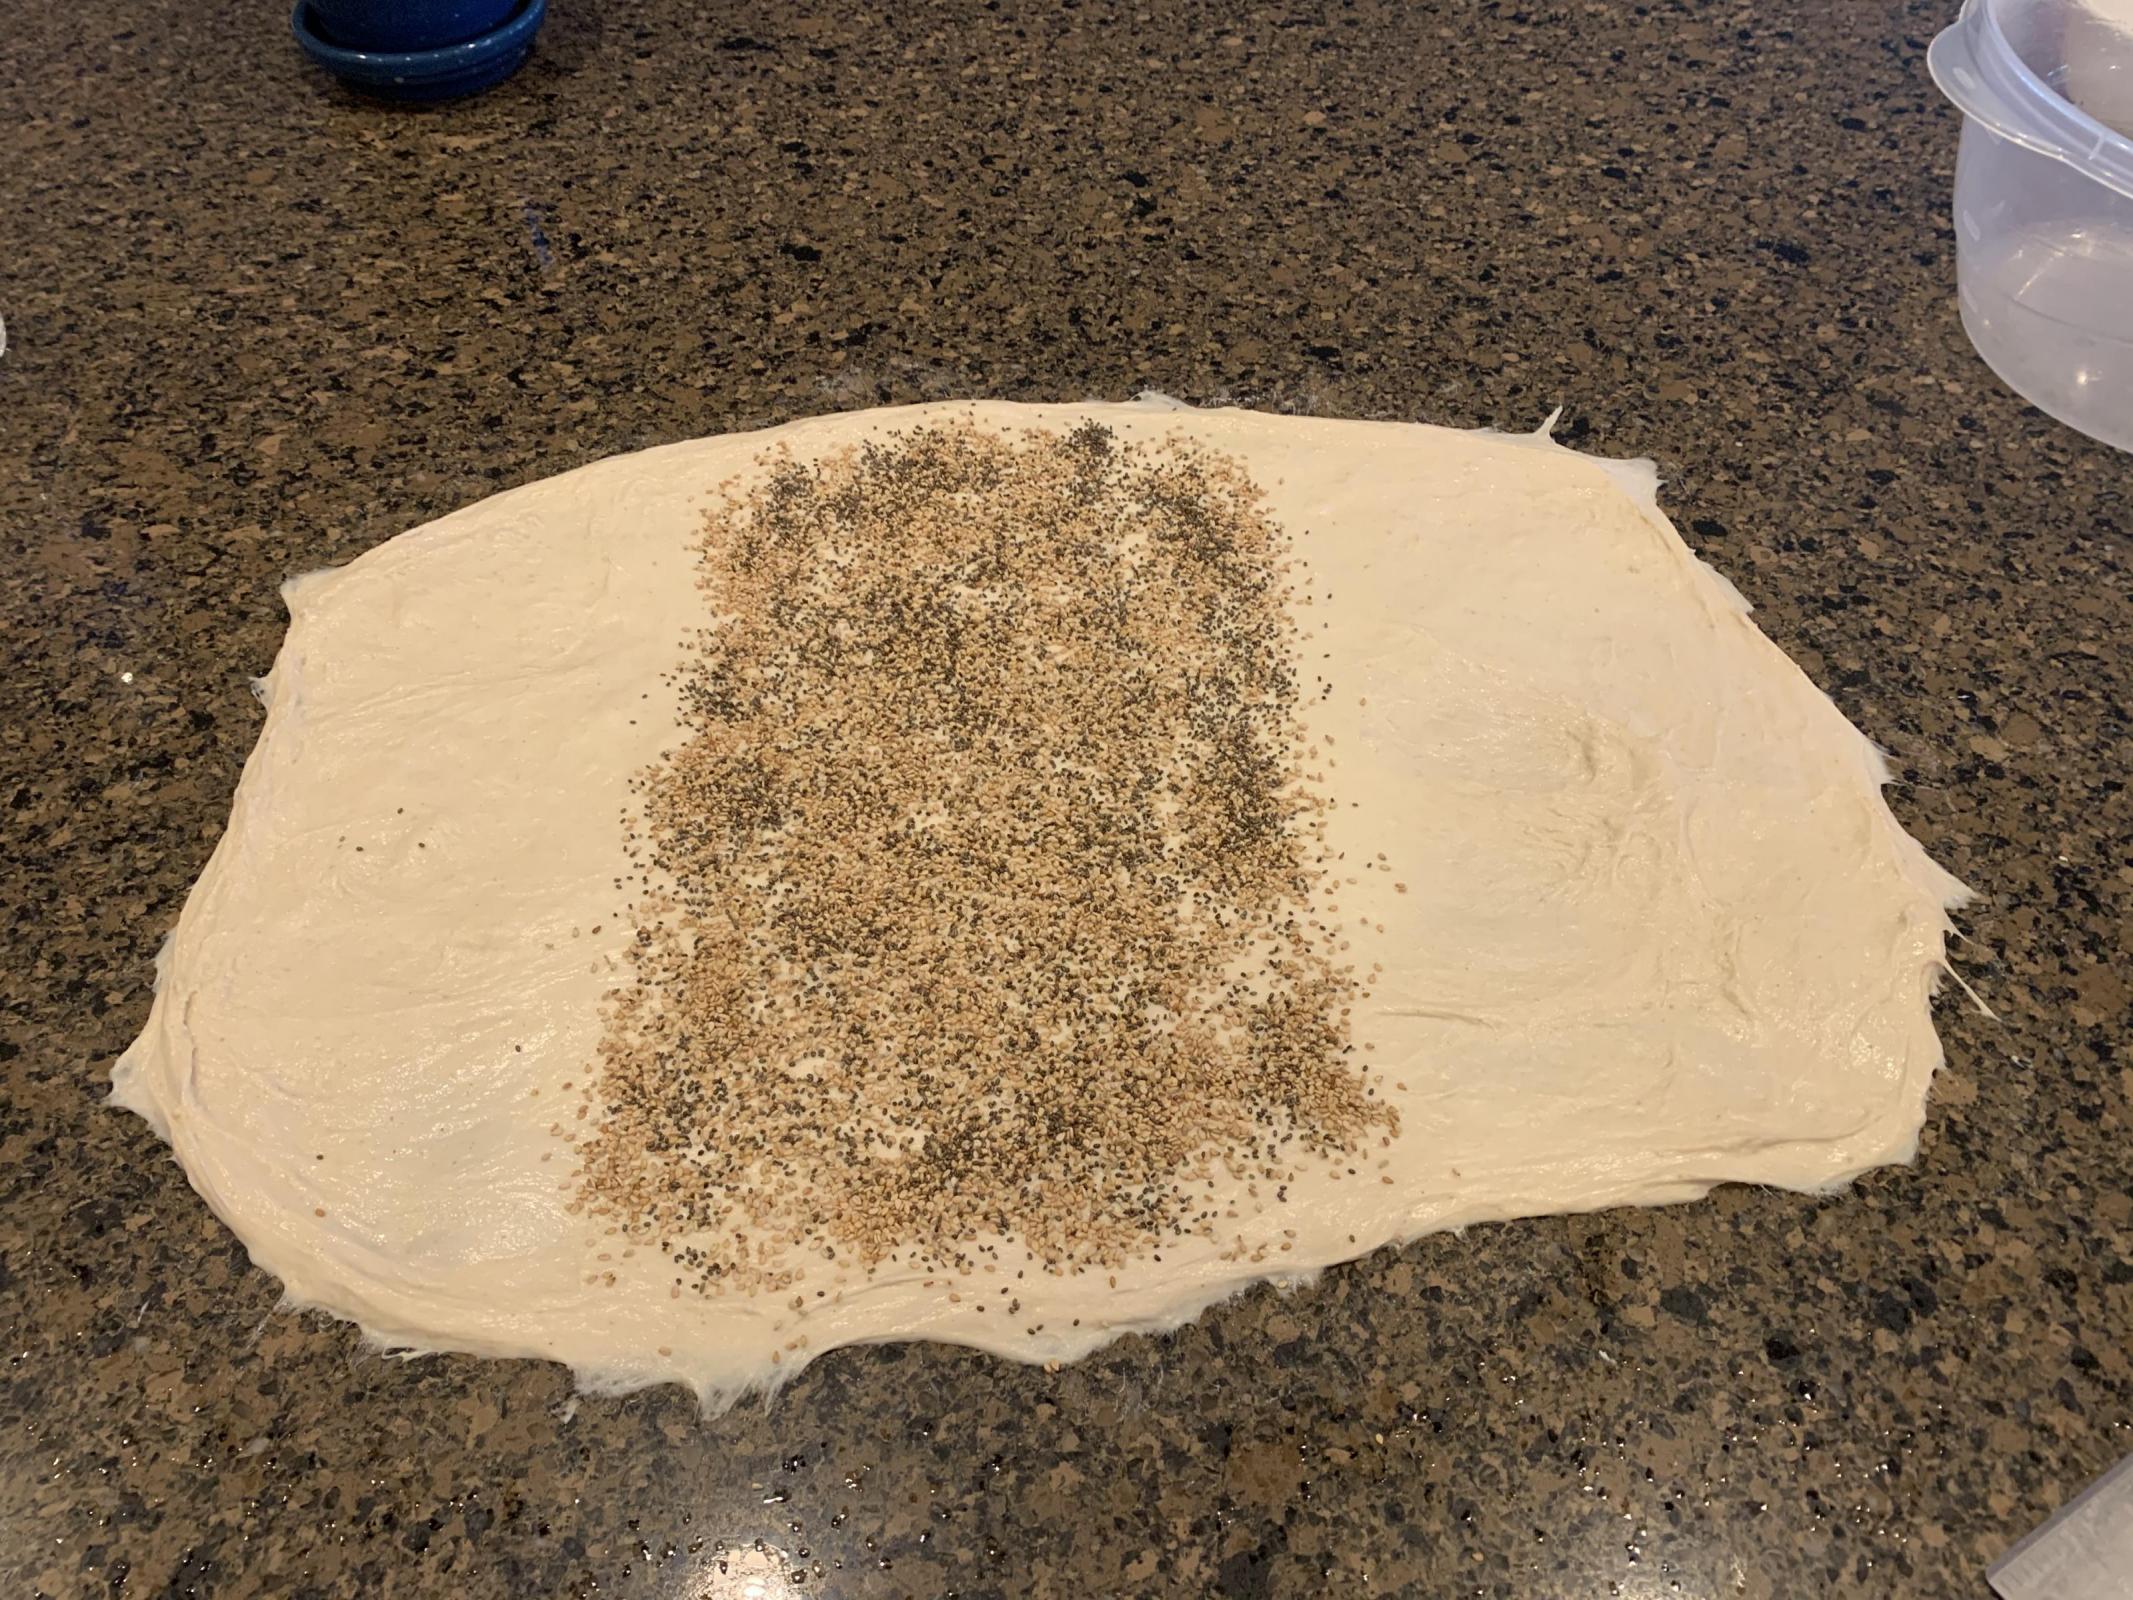
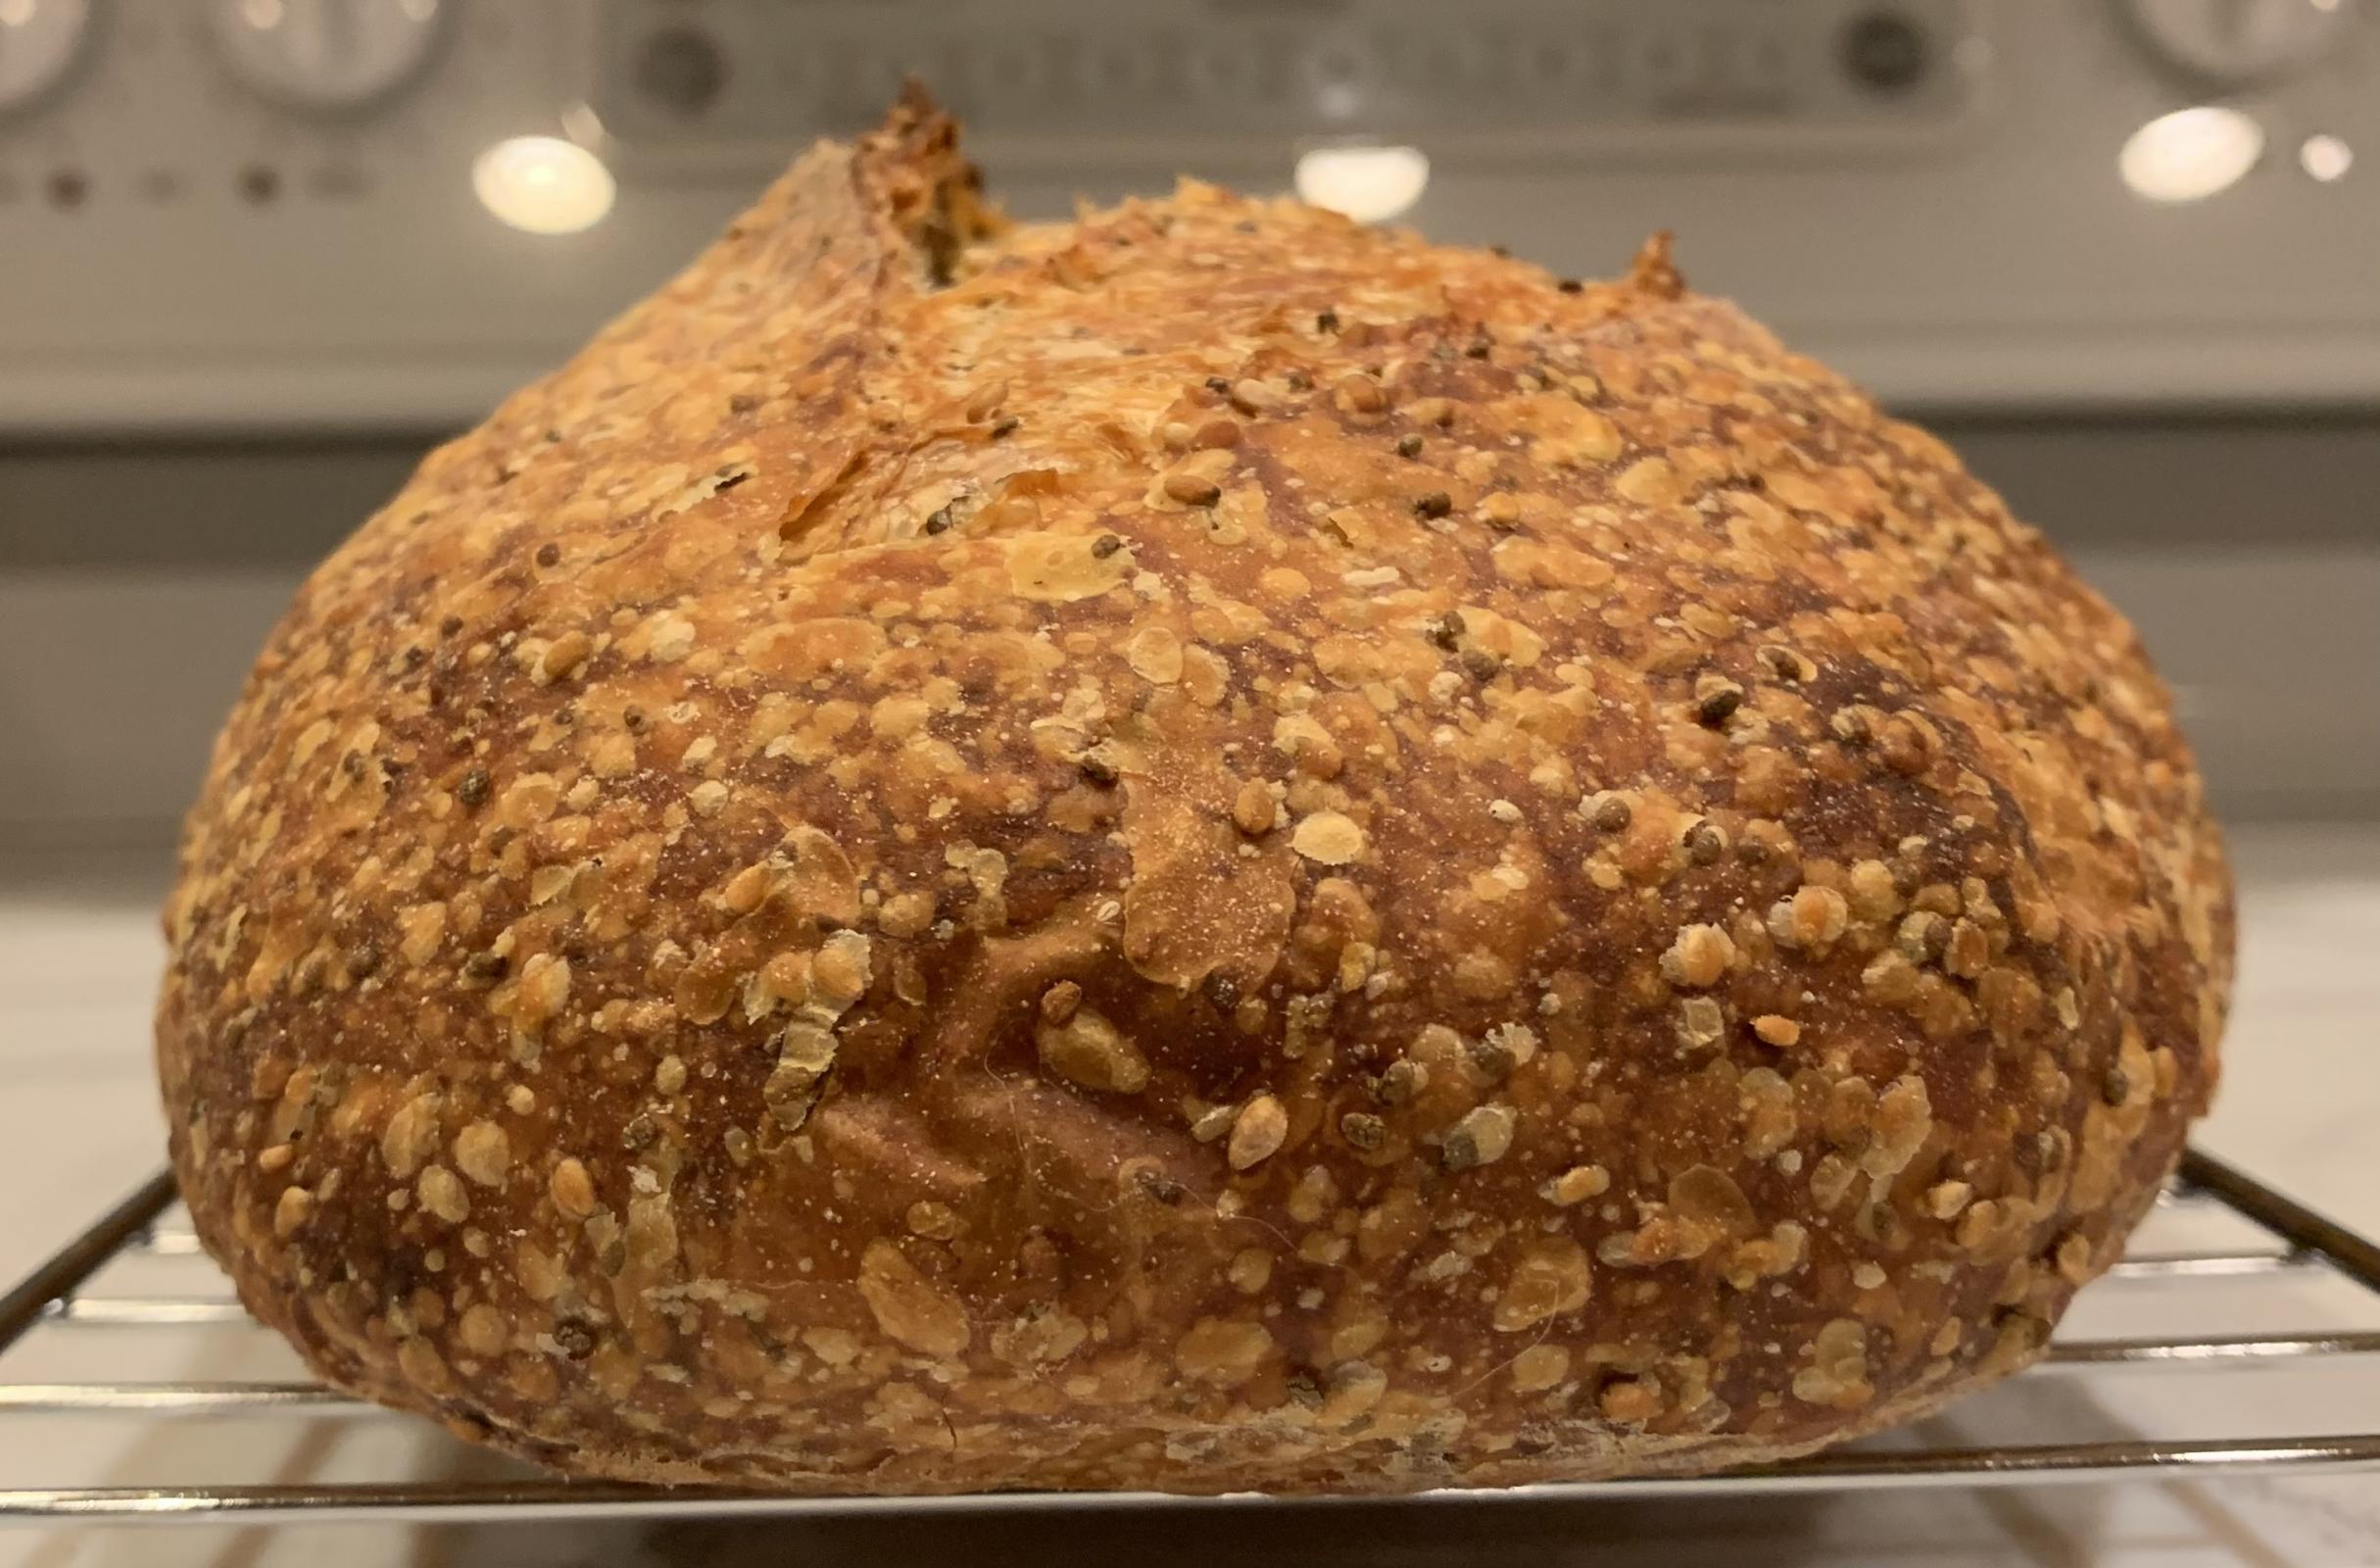
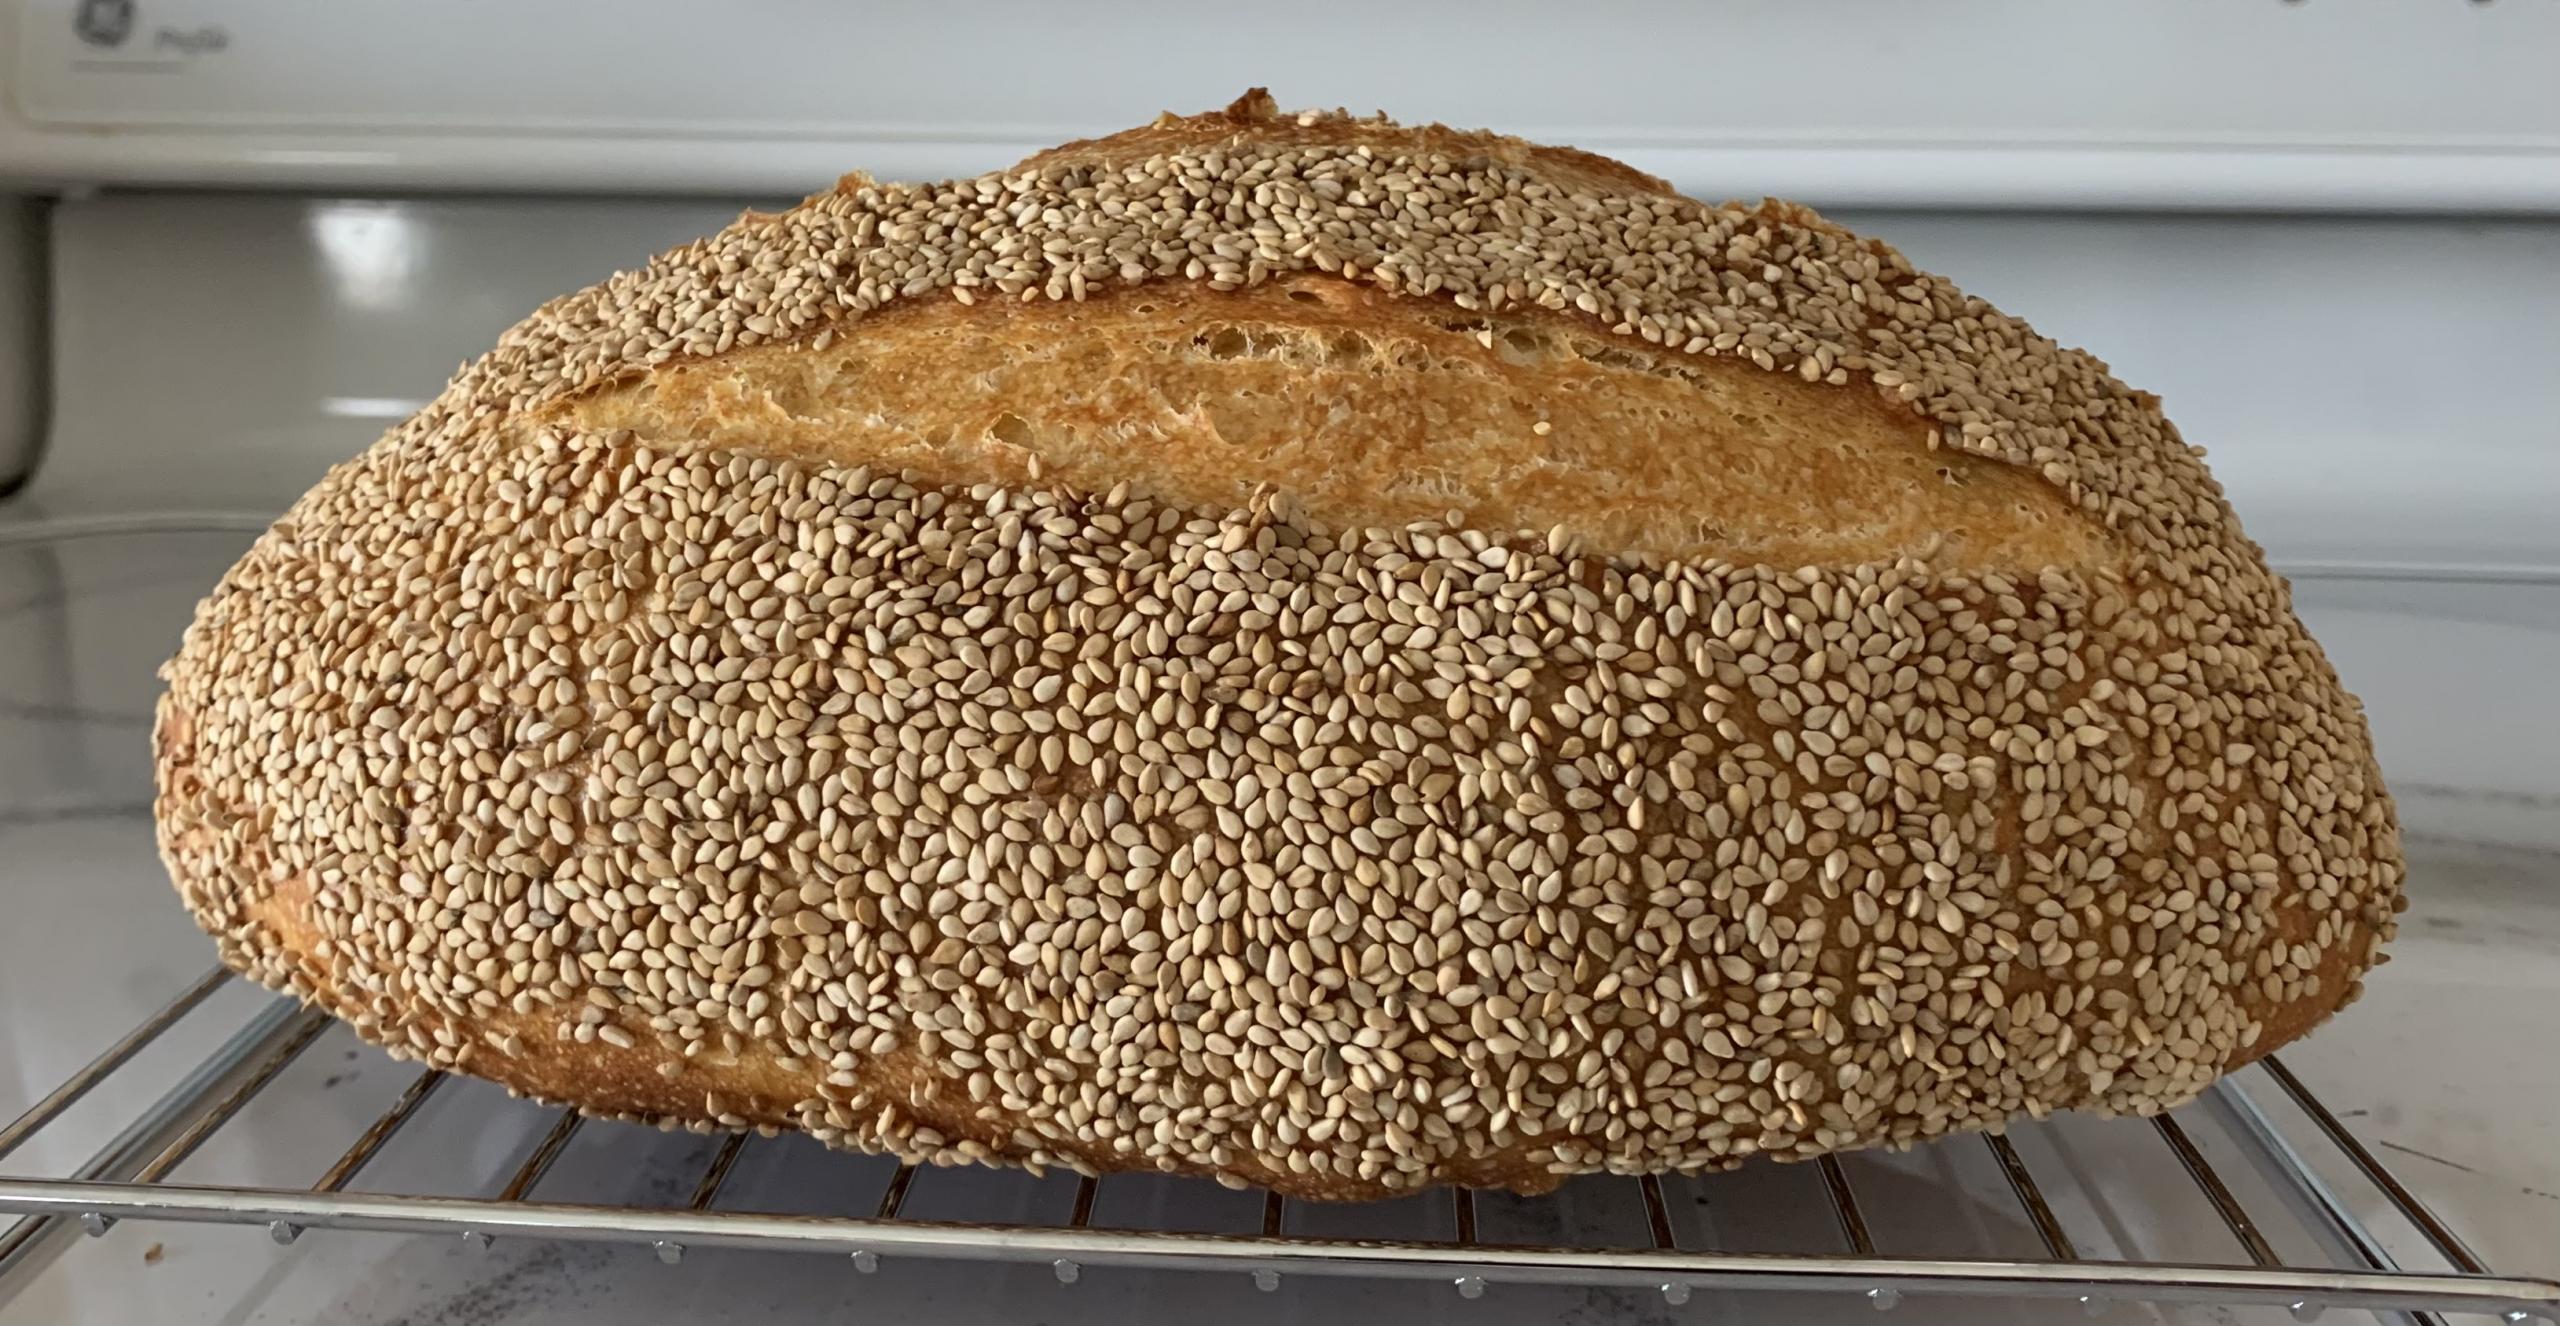
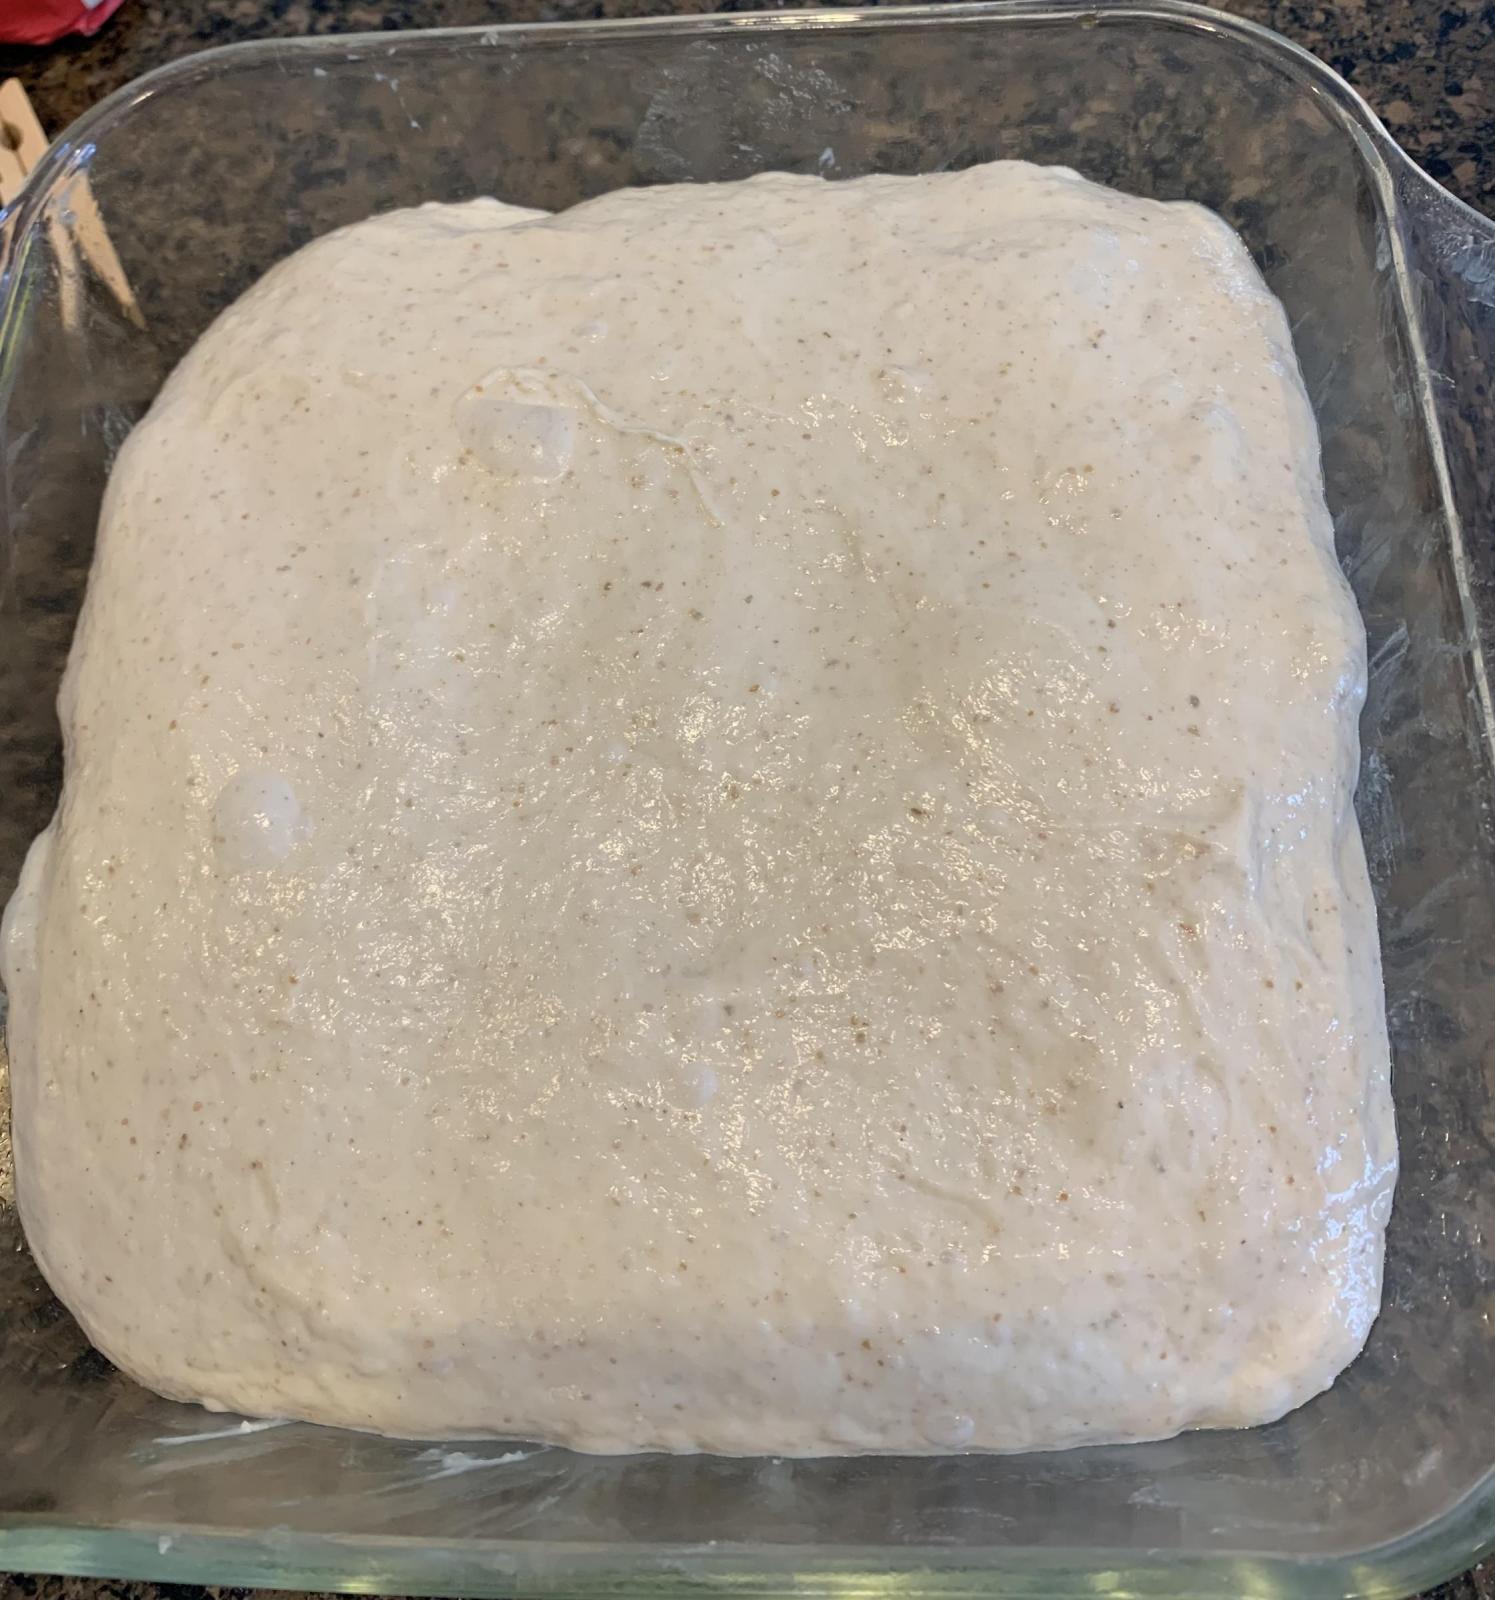
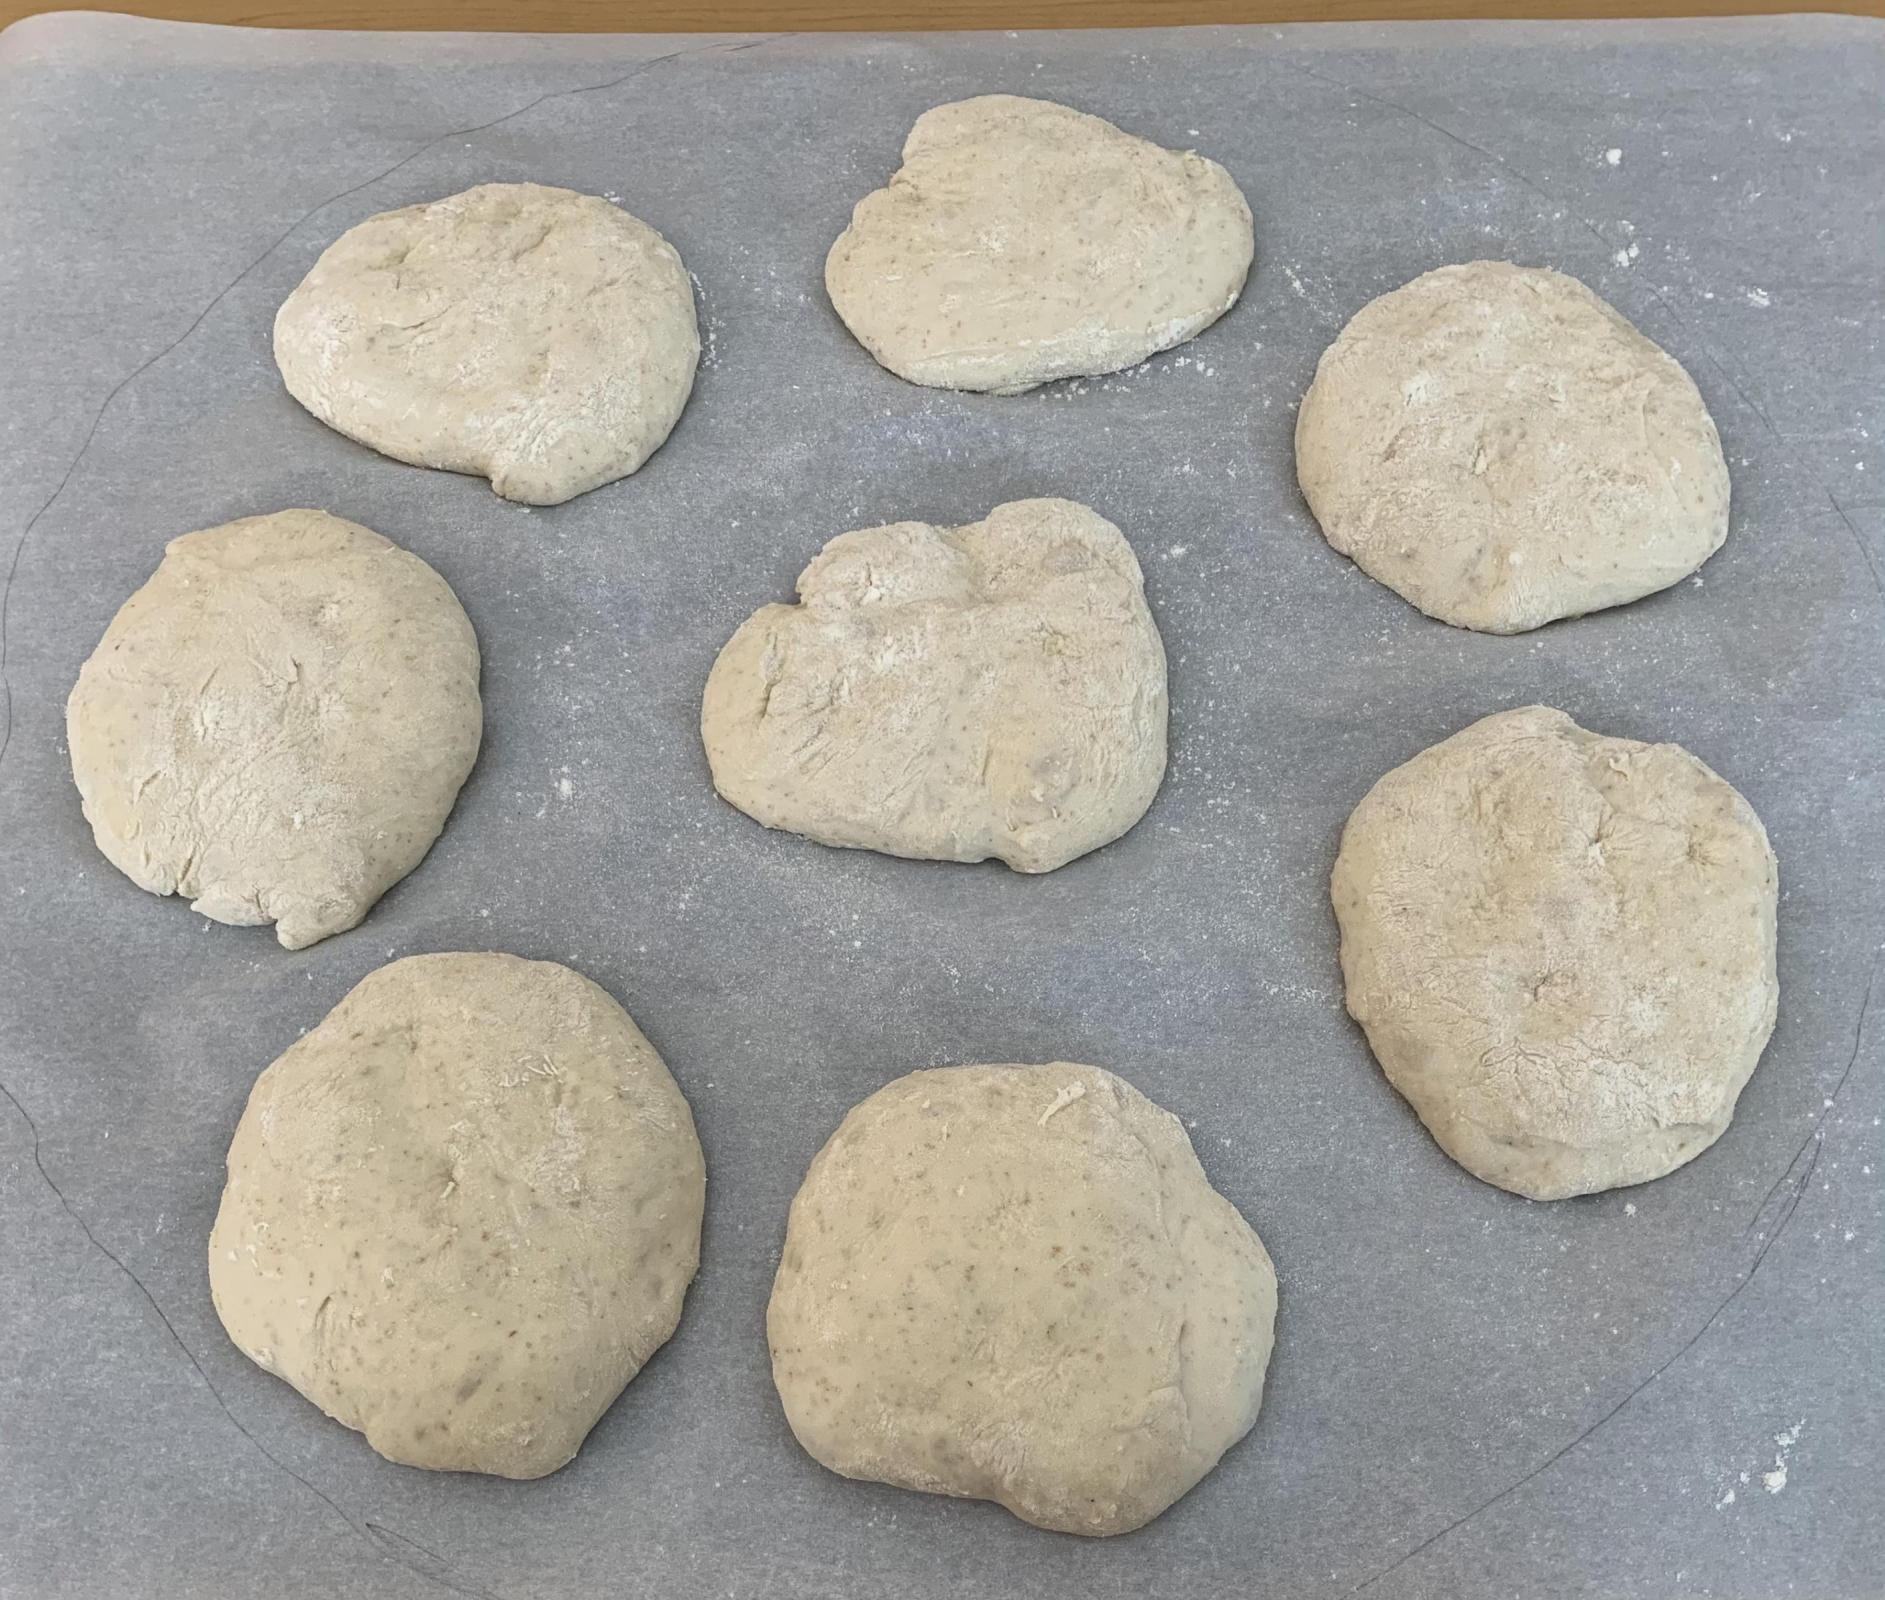
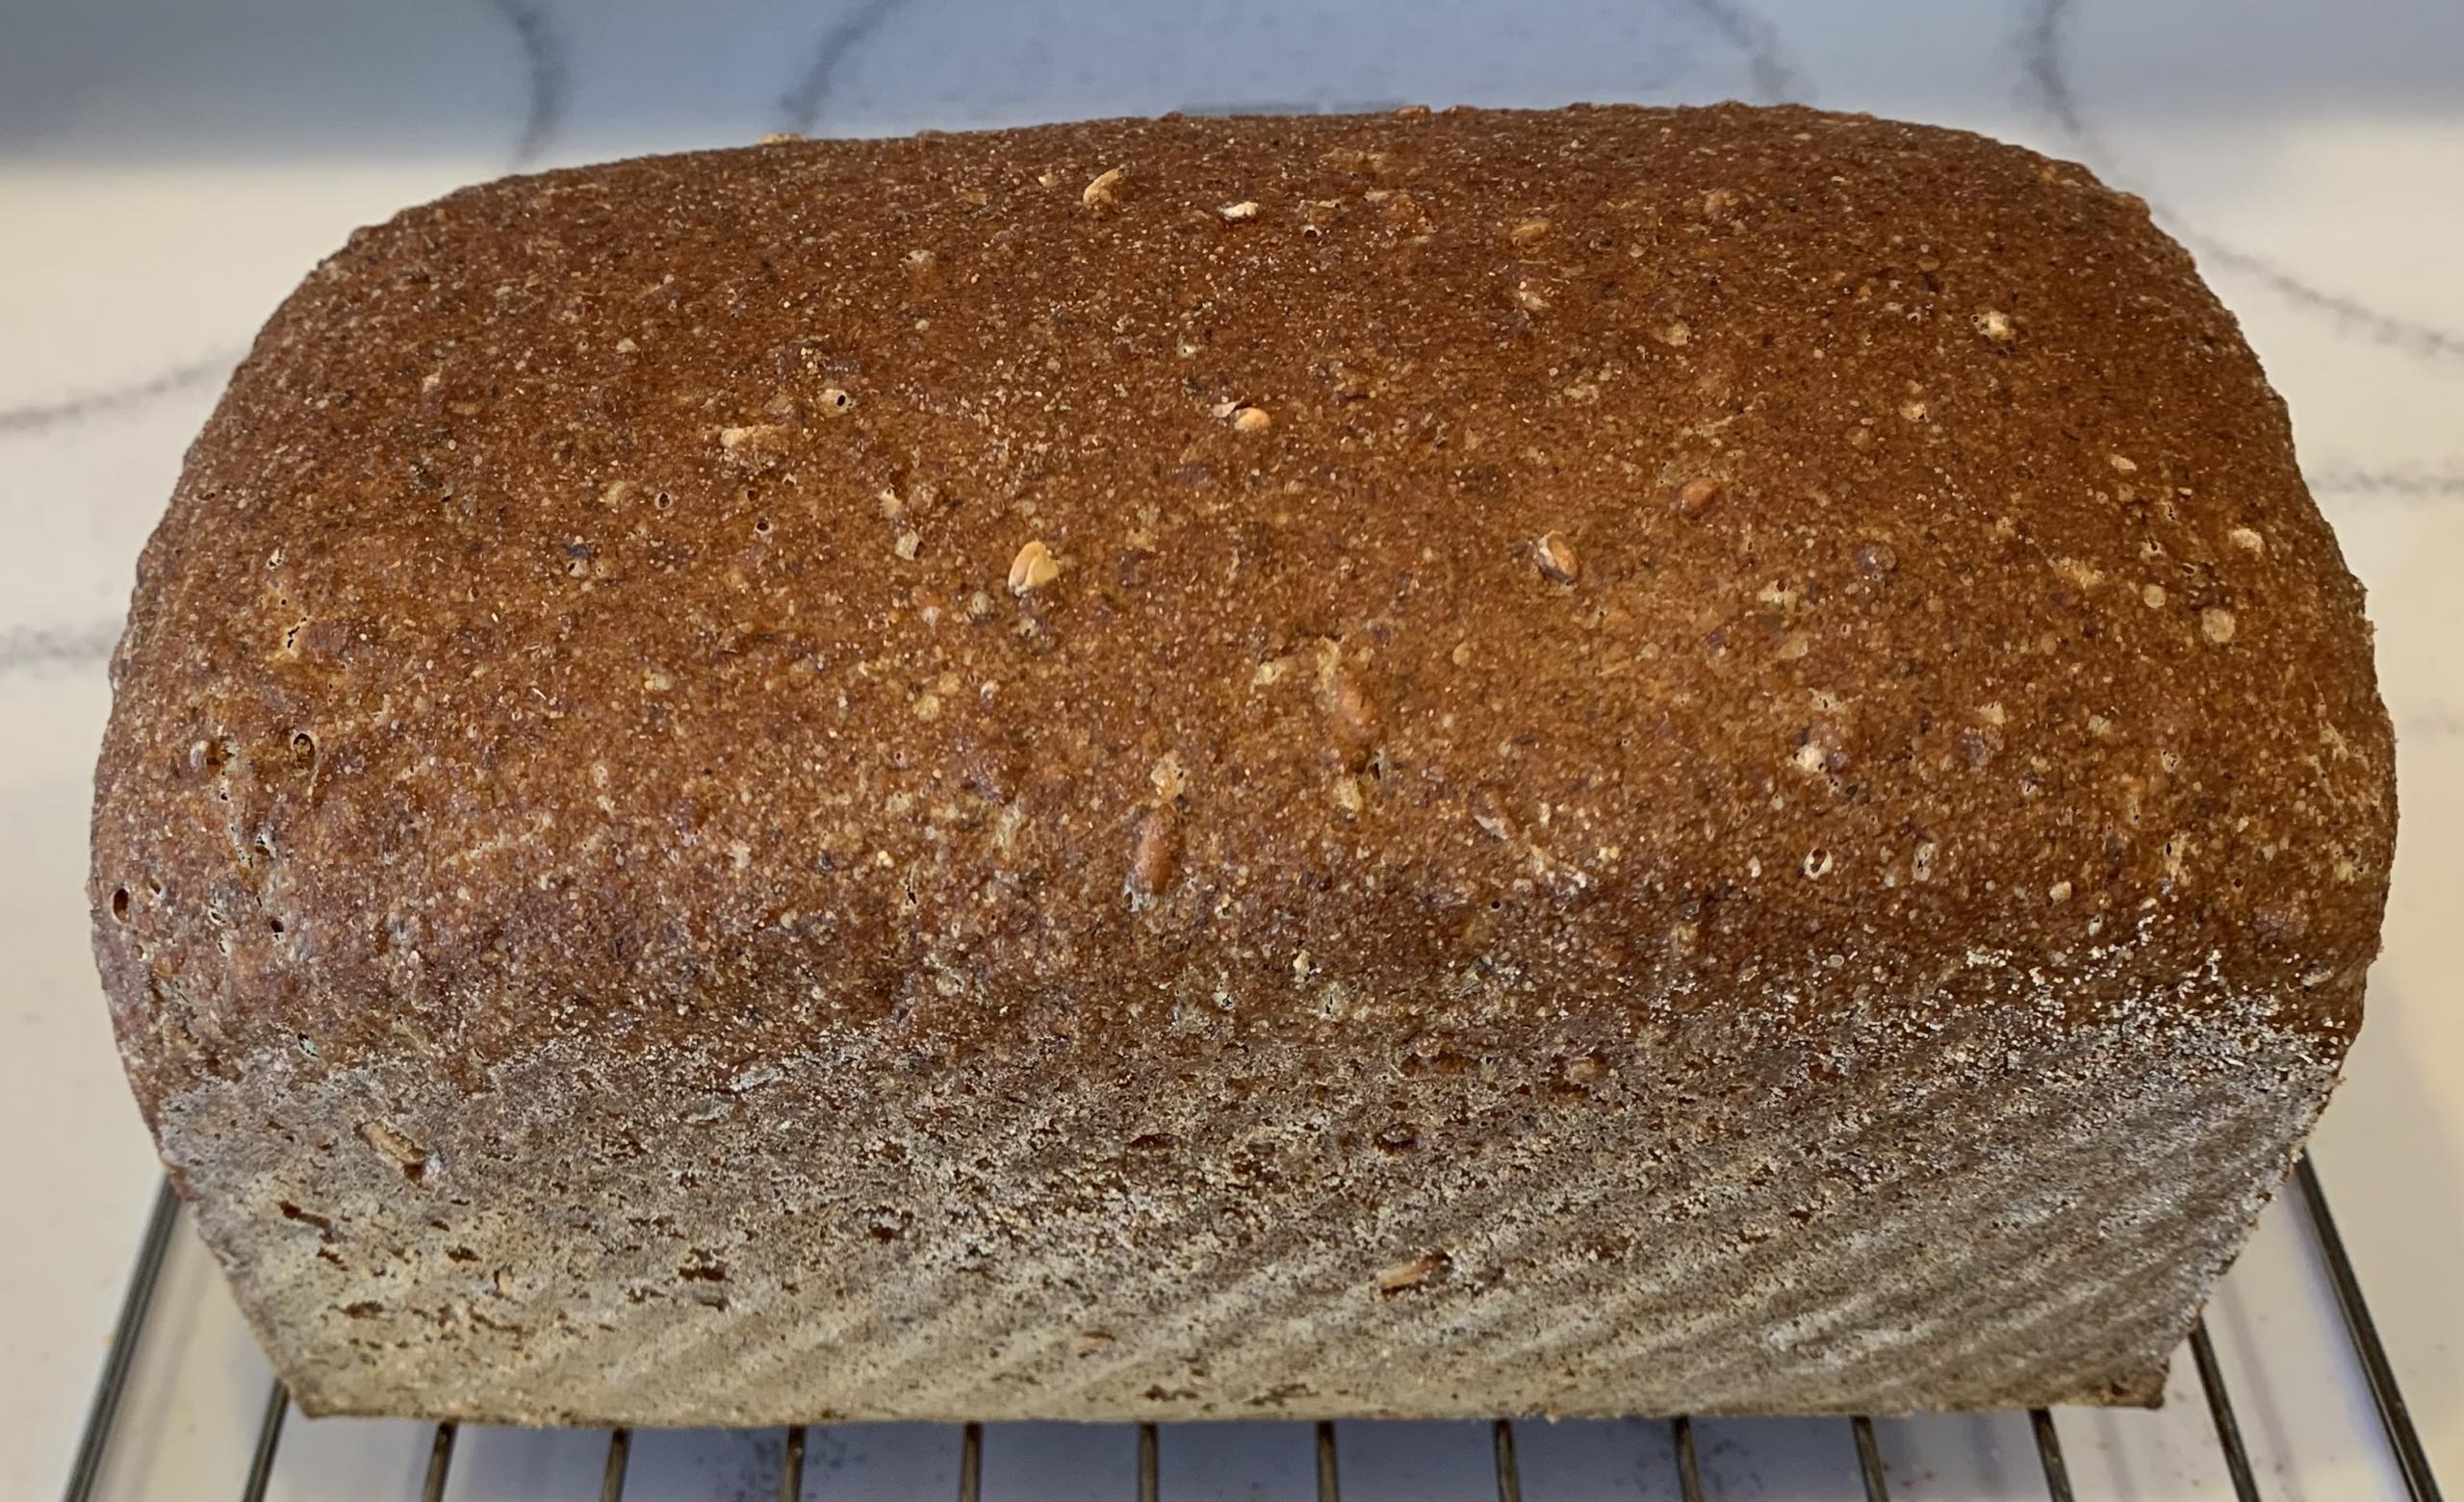
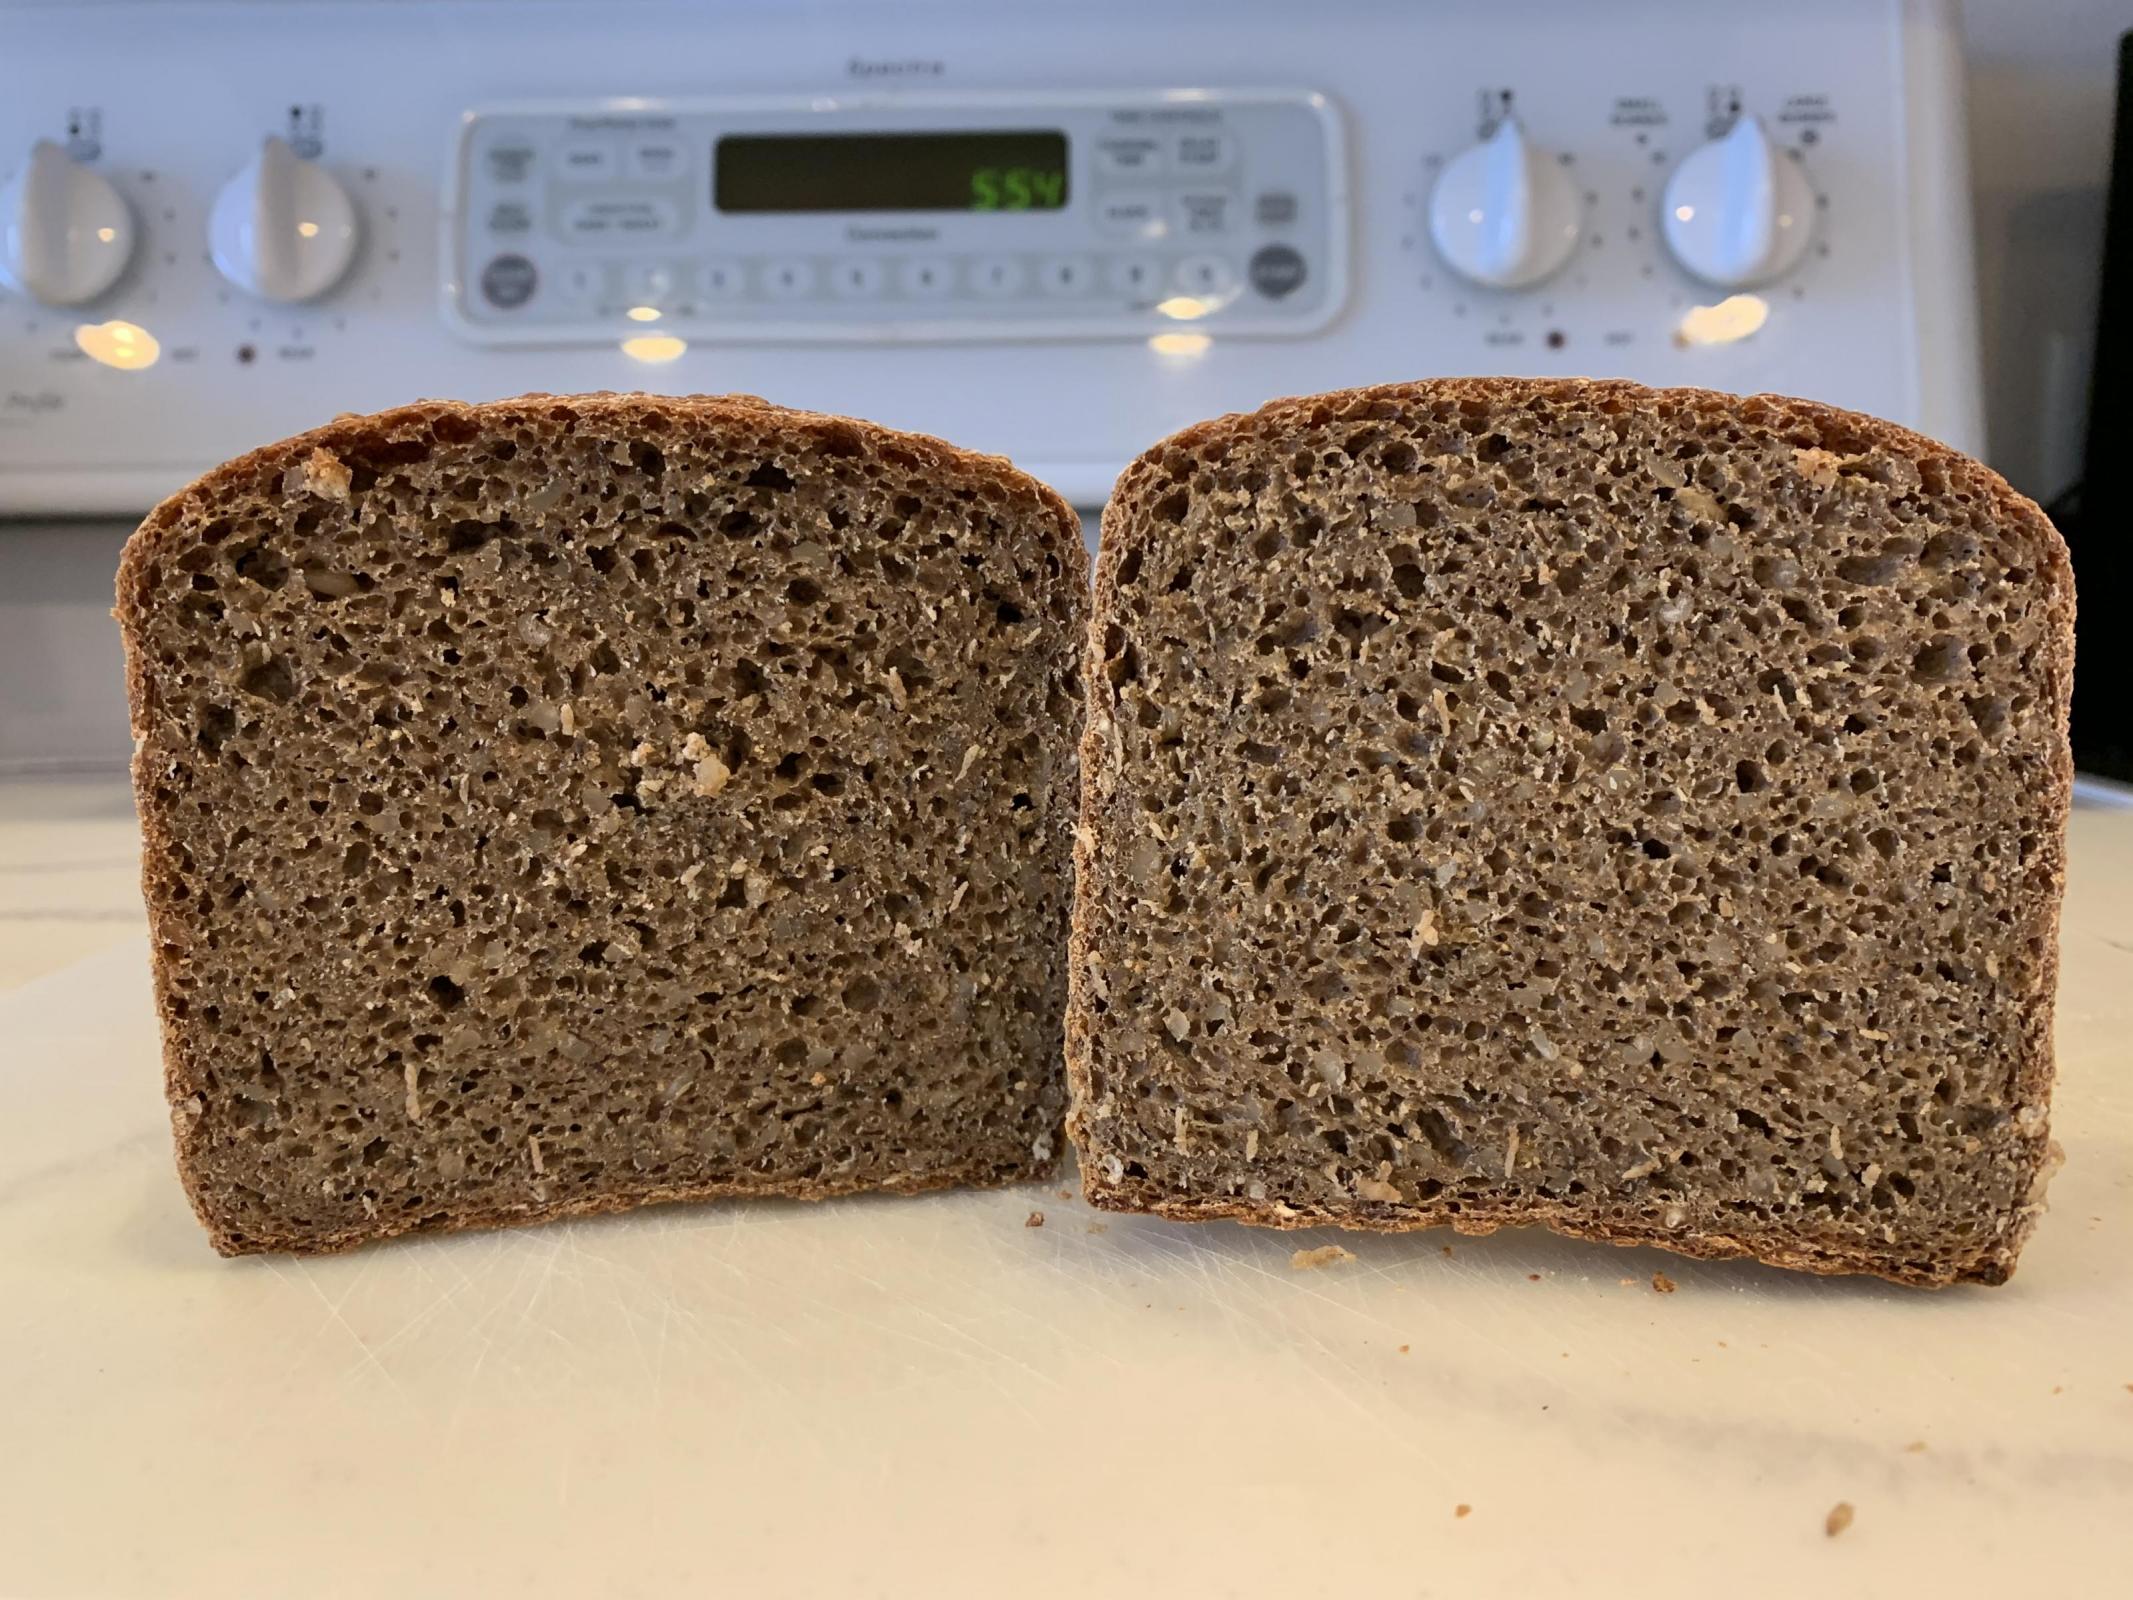
I used the simple pan method and immediately moved to shaping after a long, slow gluten development.

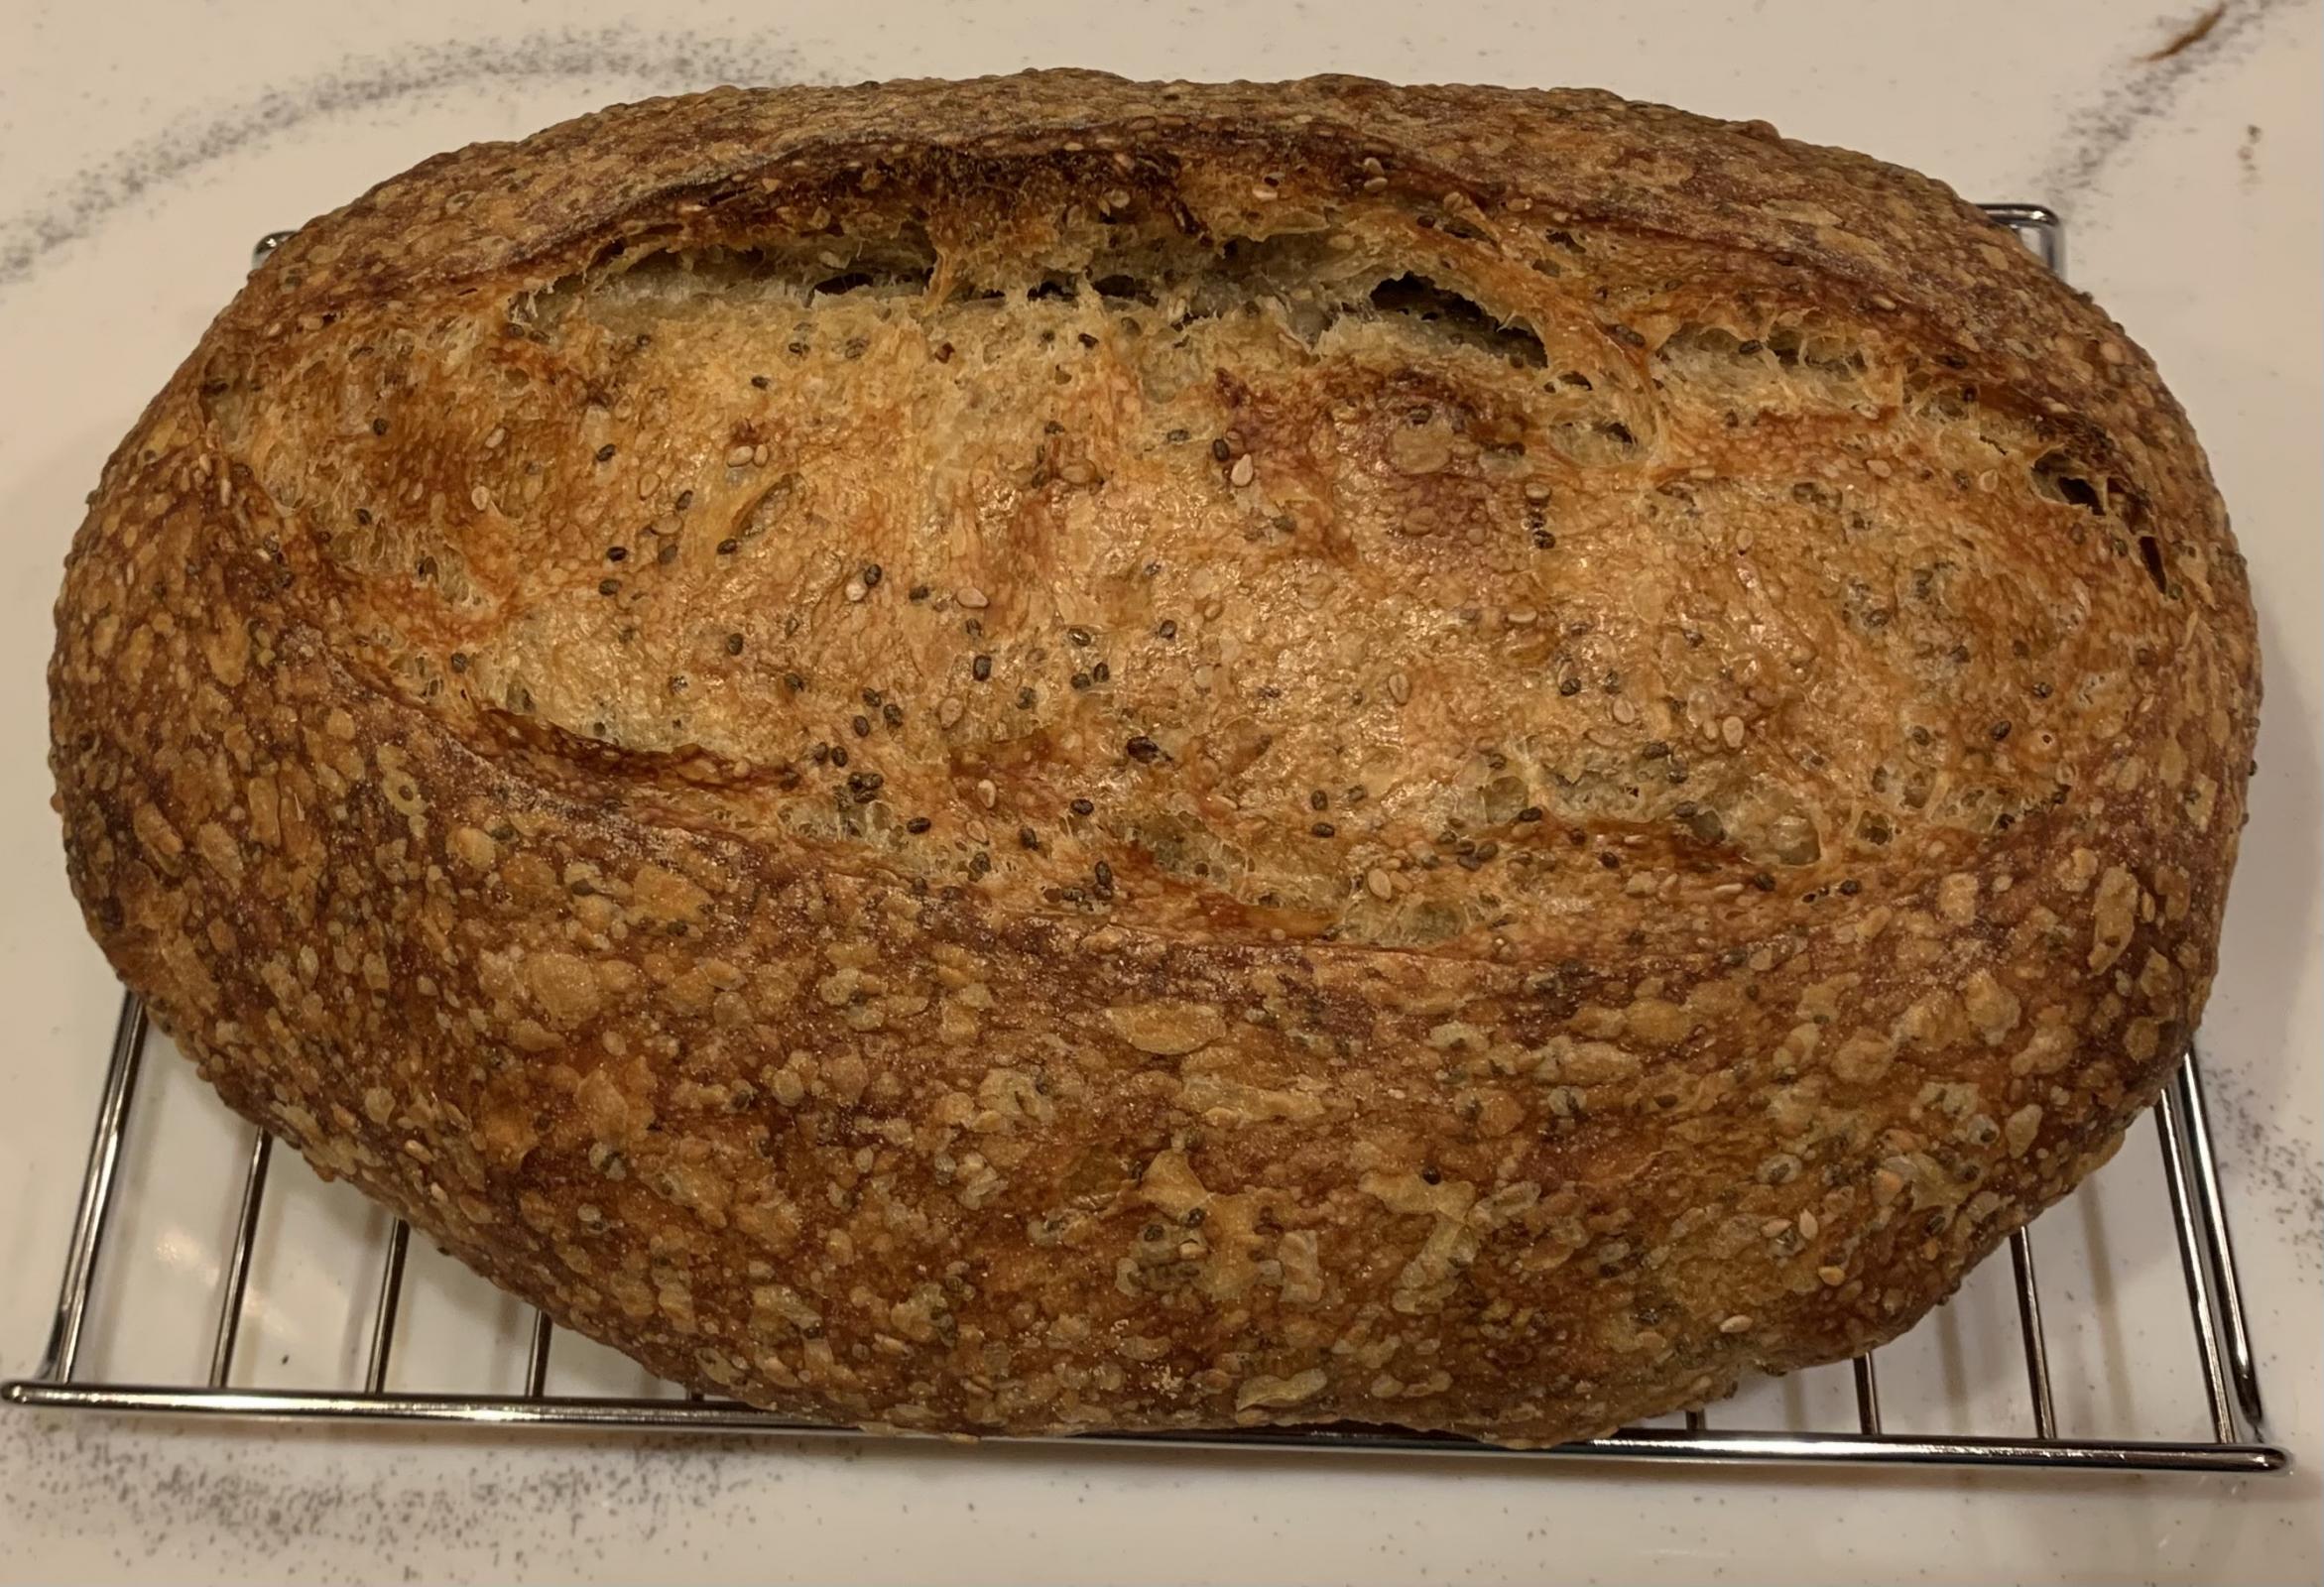
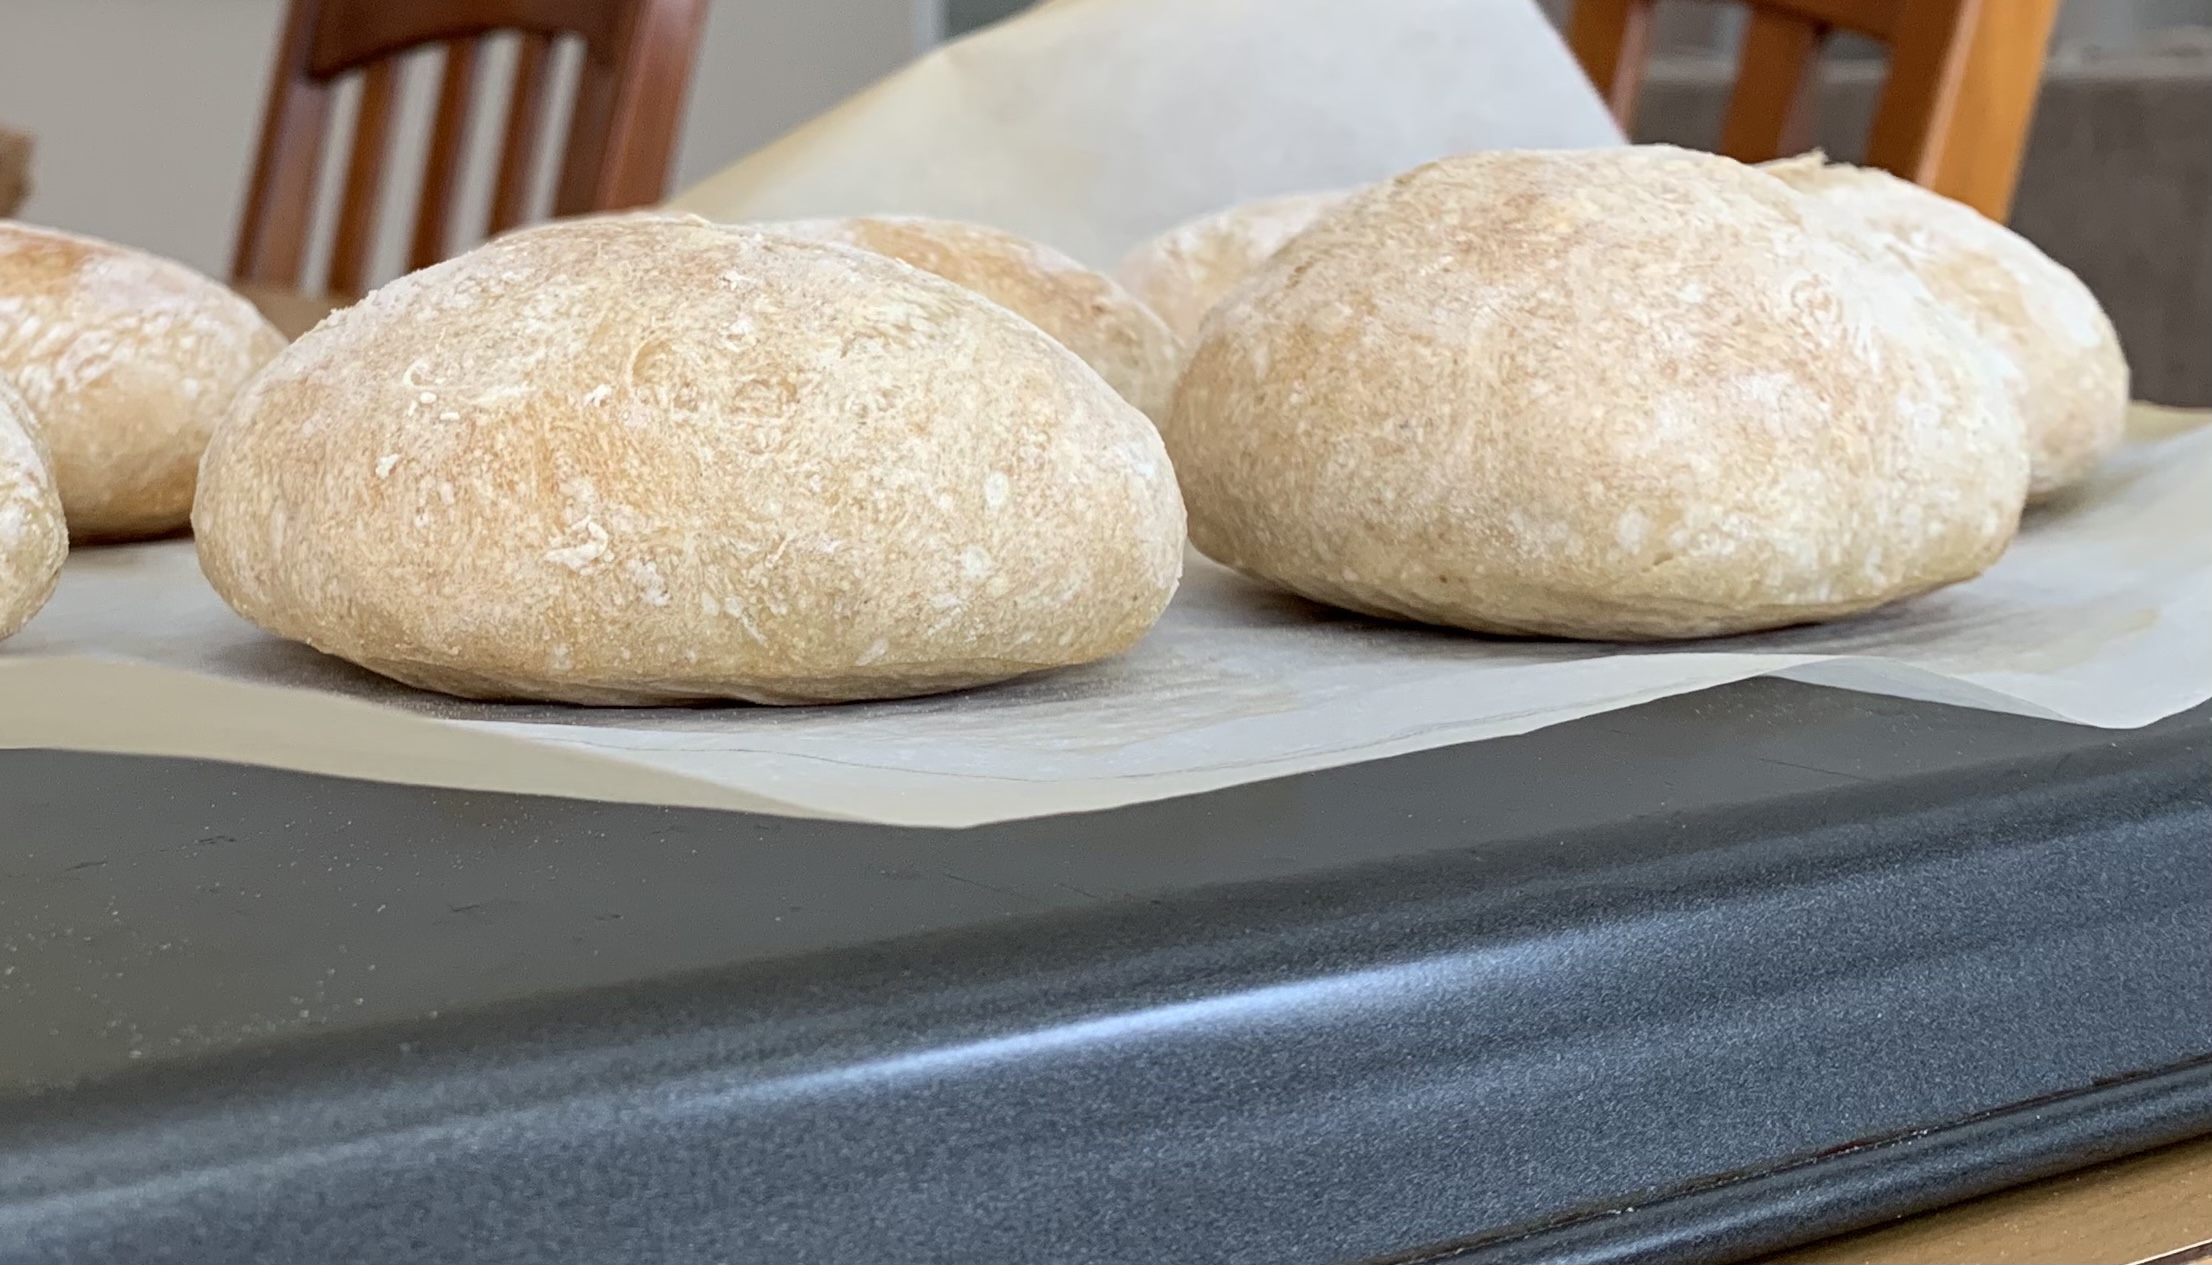
The bread smelled like beer throughout the first half of the bake.  Very easy to recognize!  

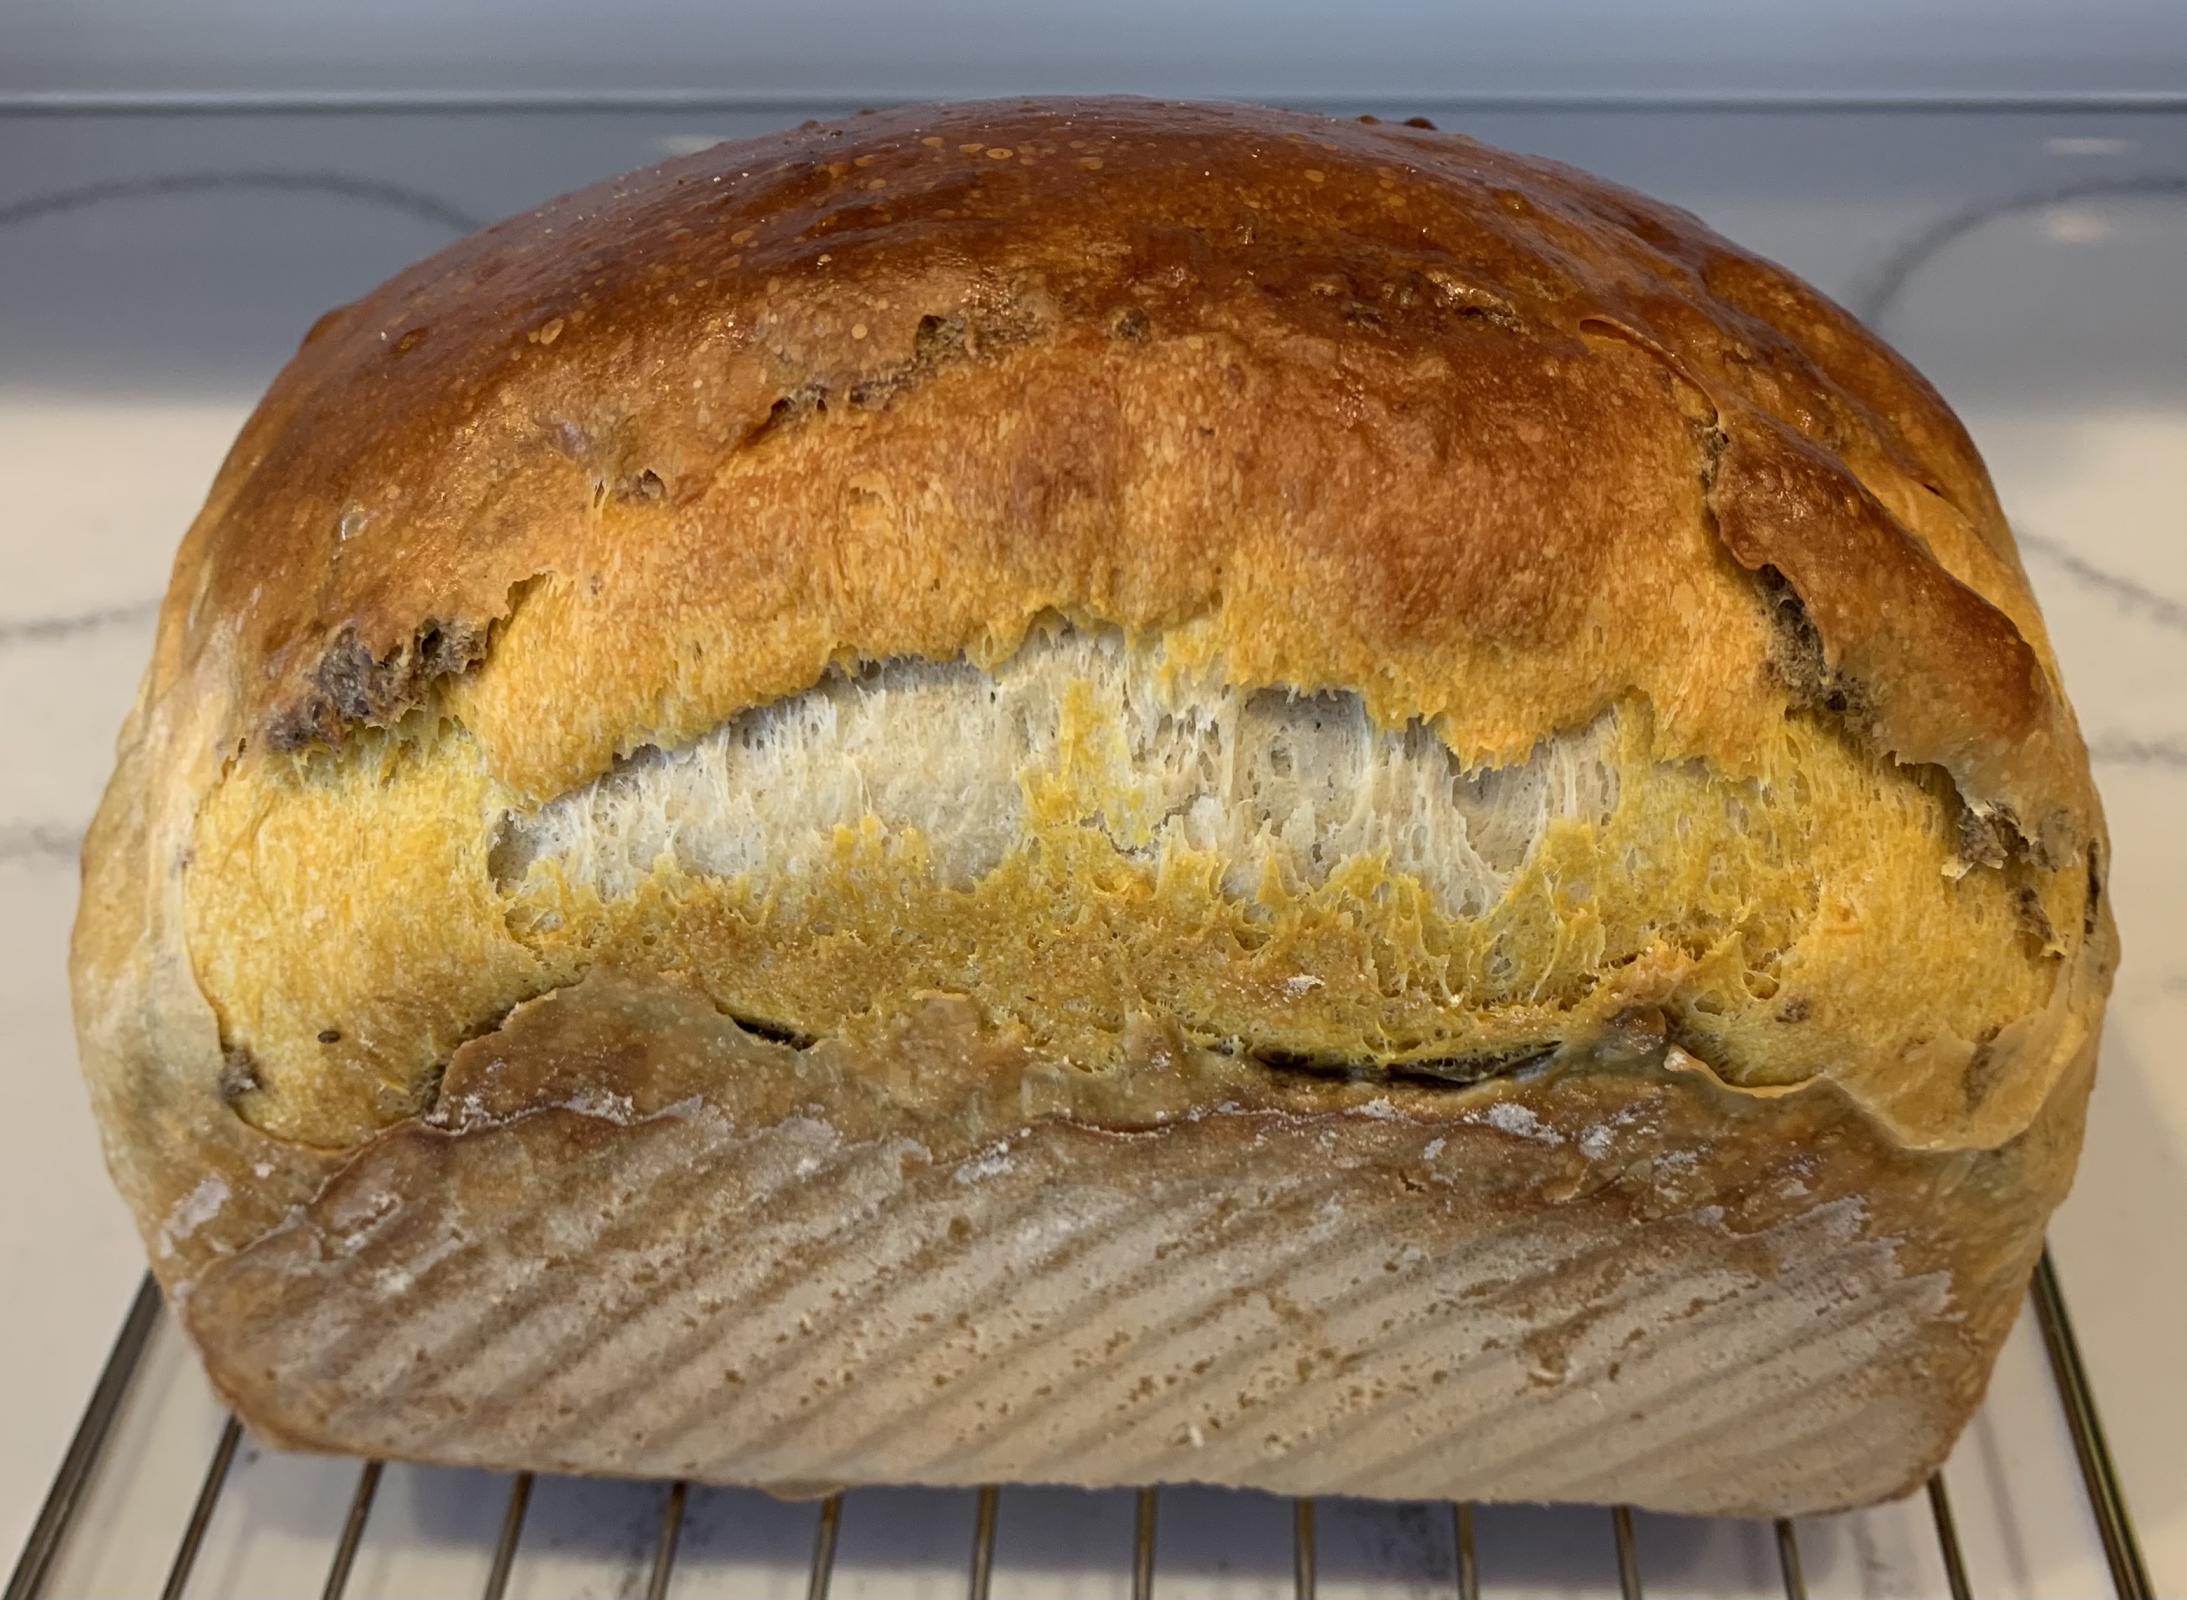
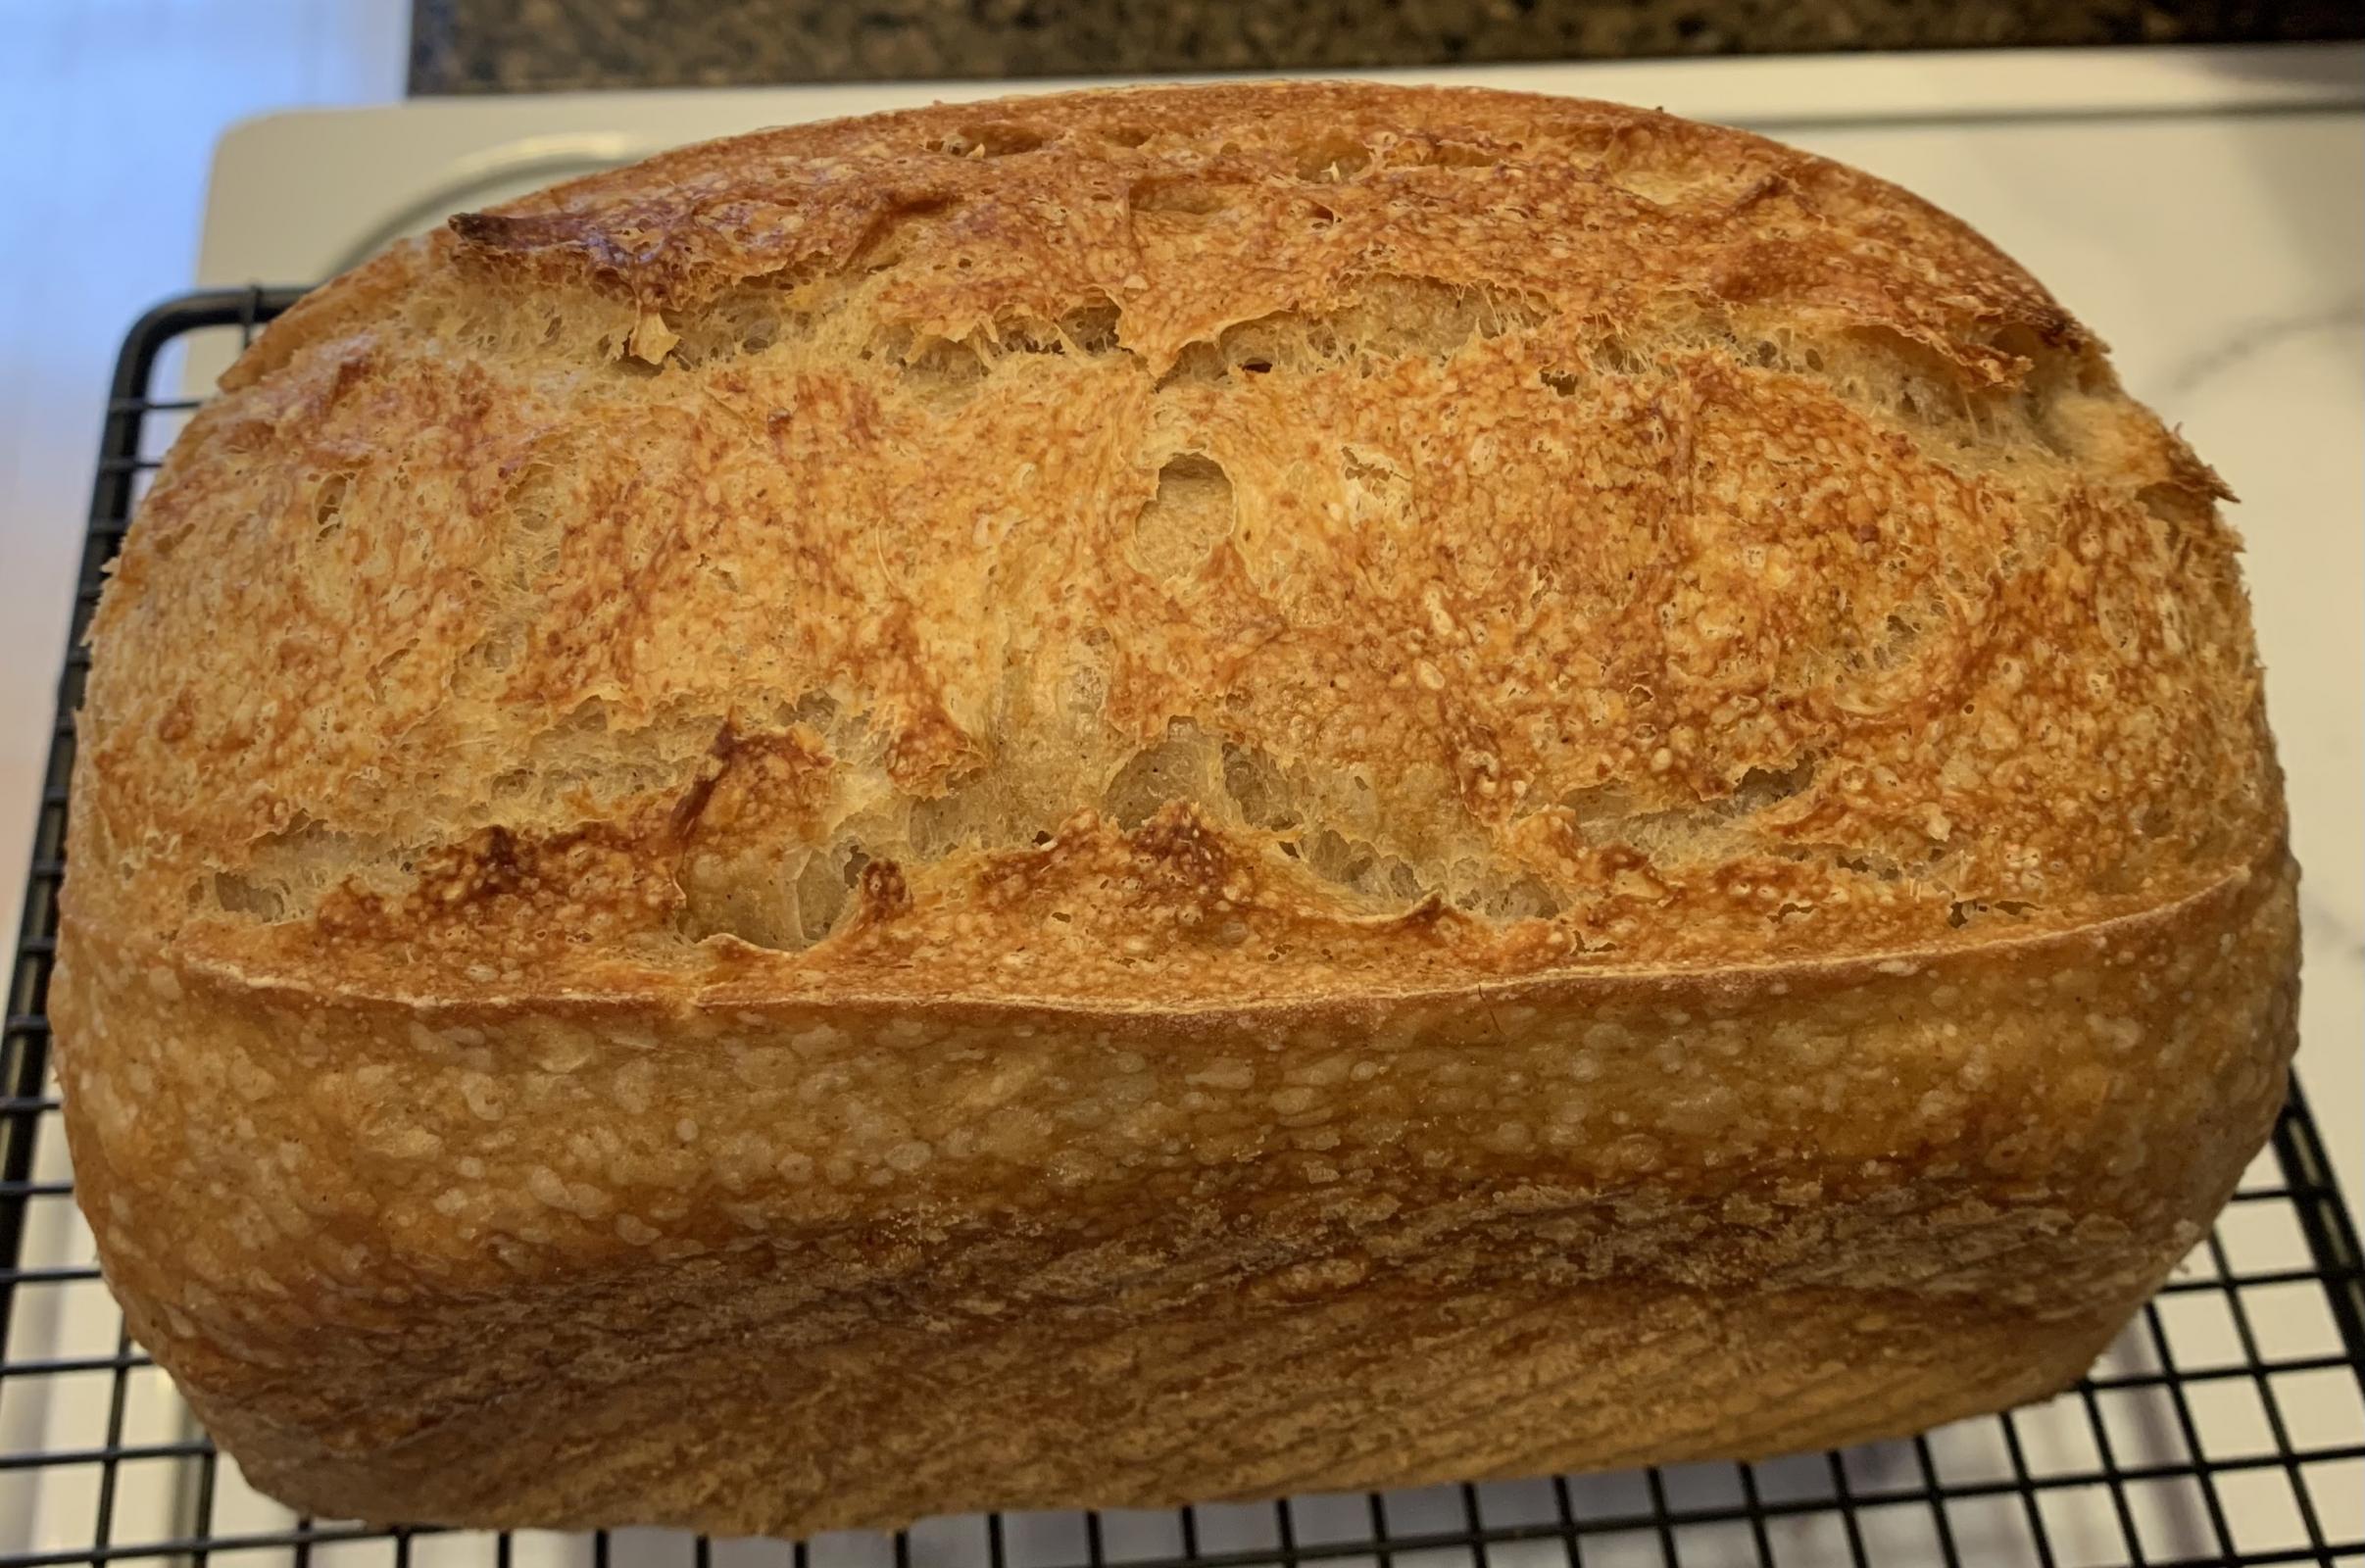
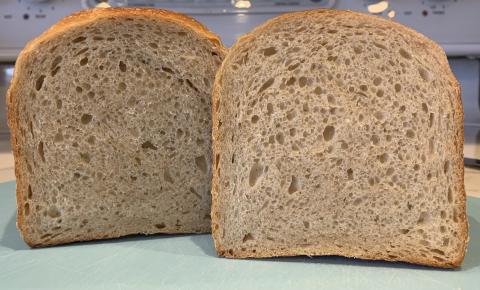
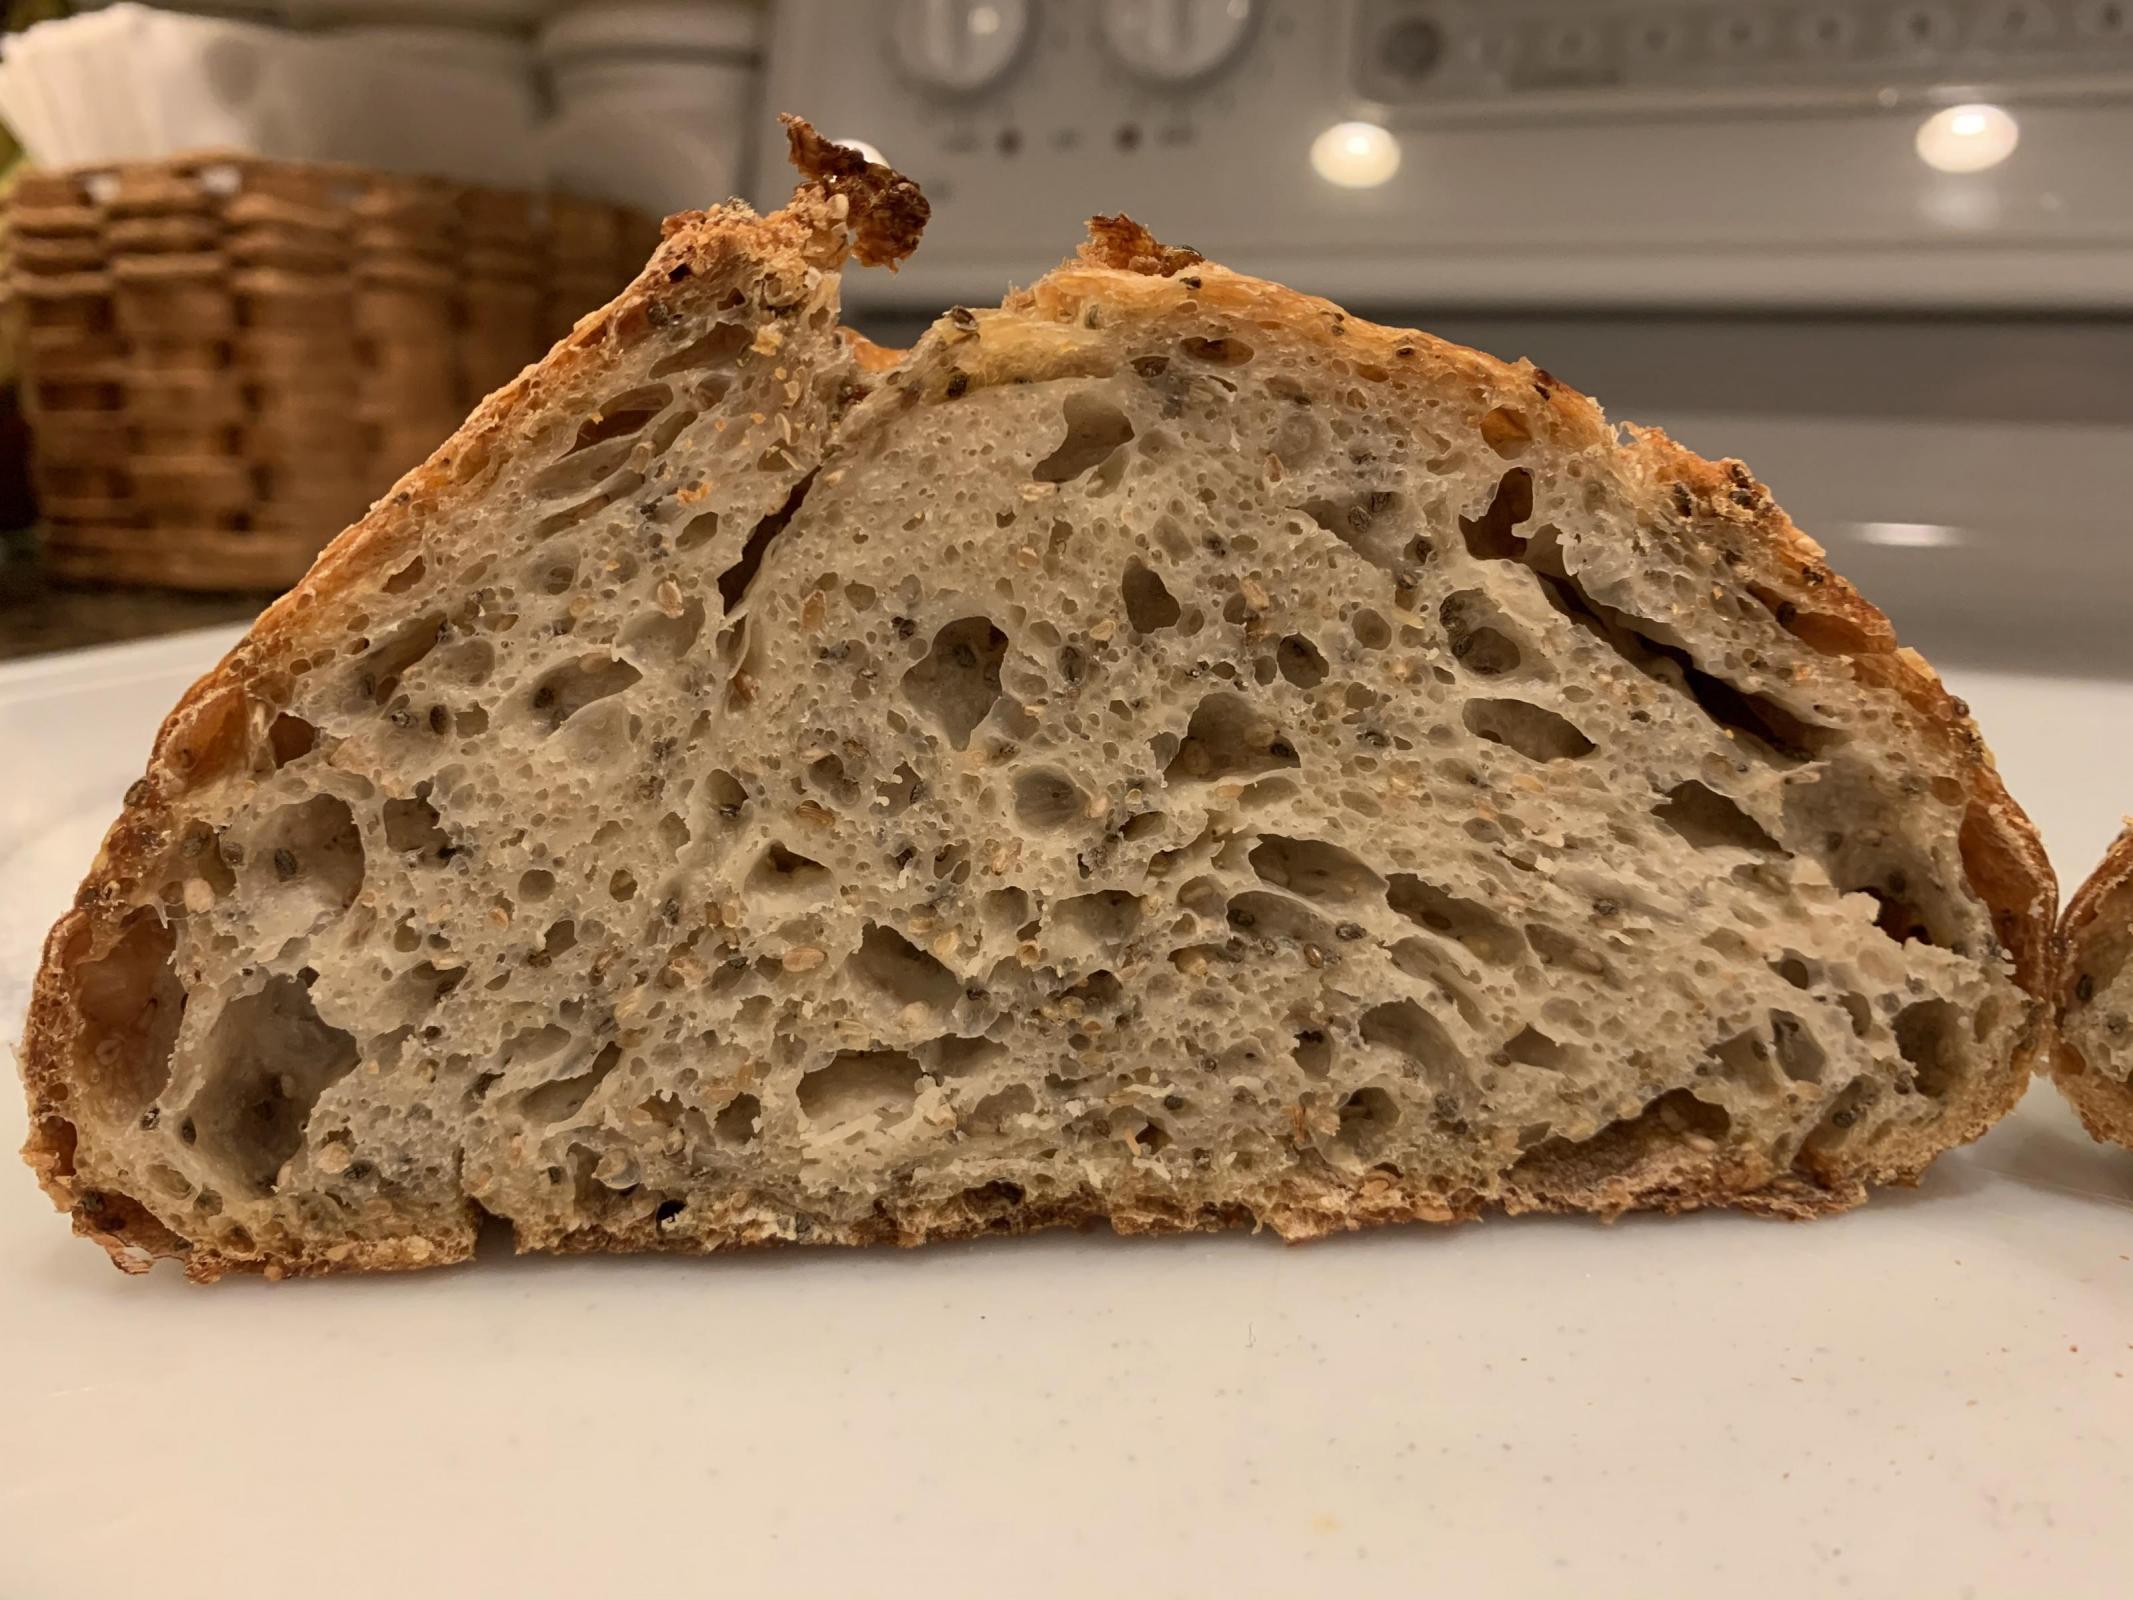
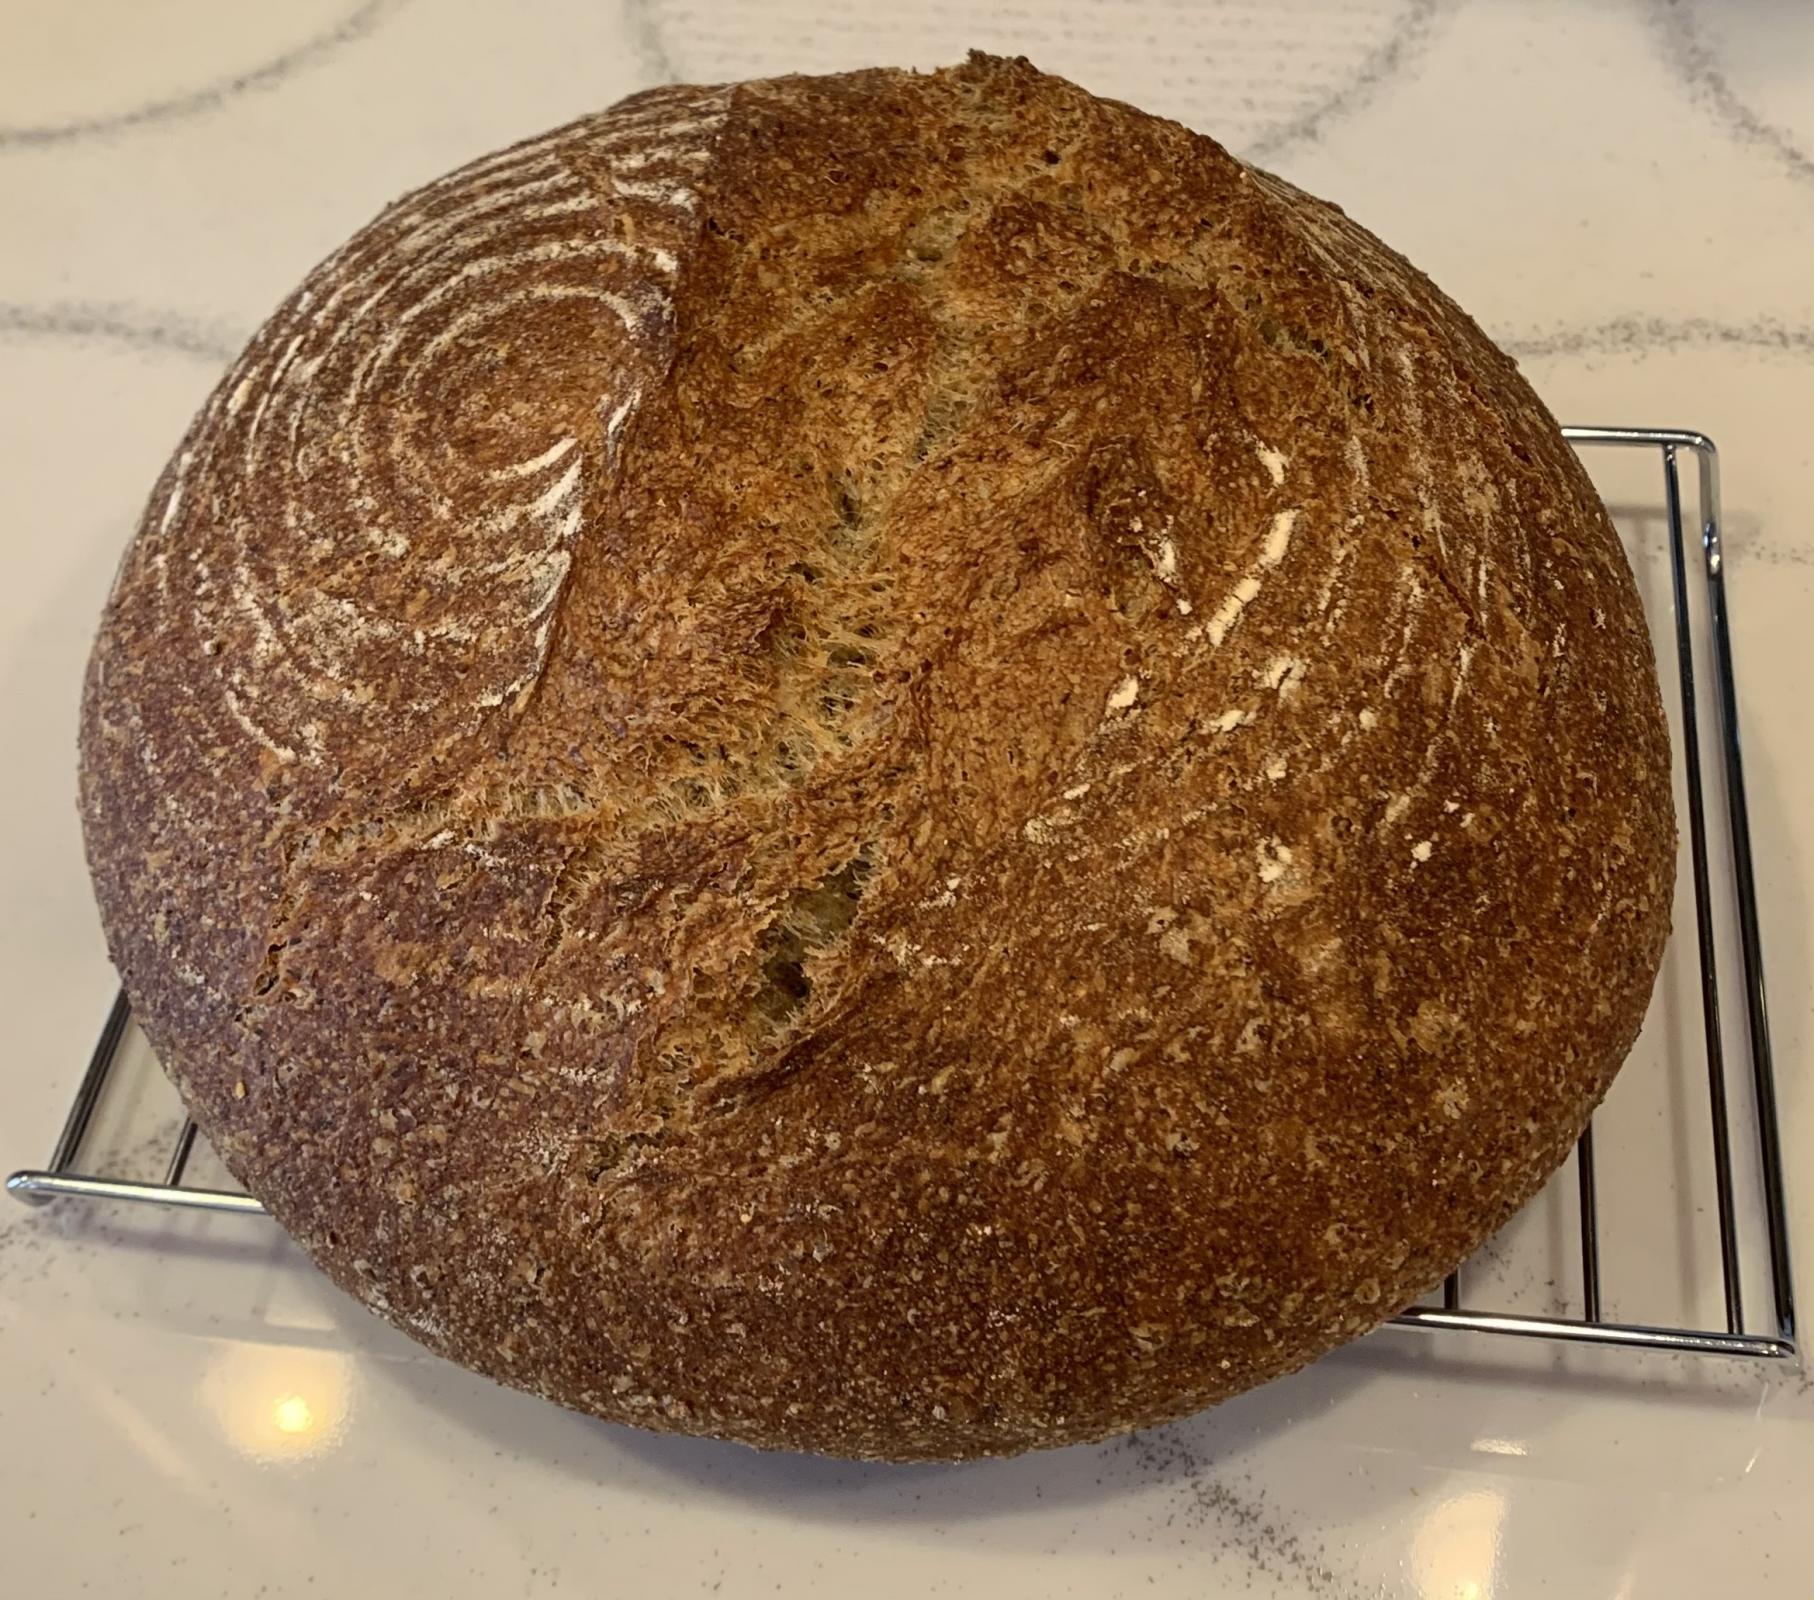
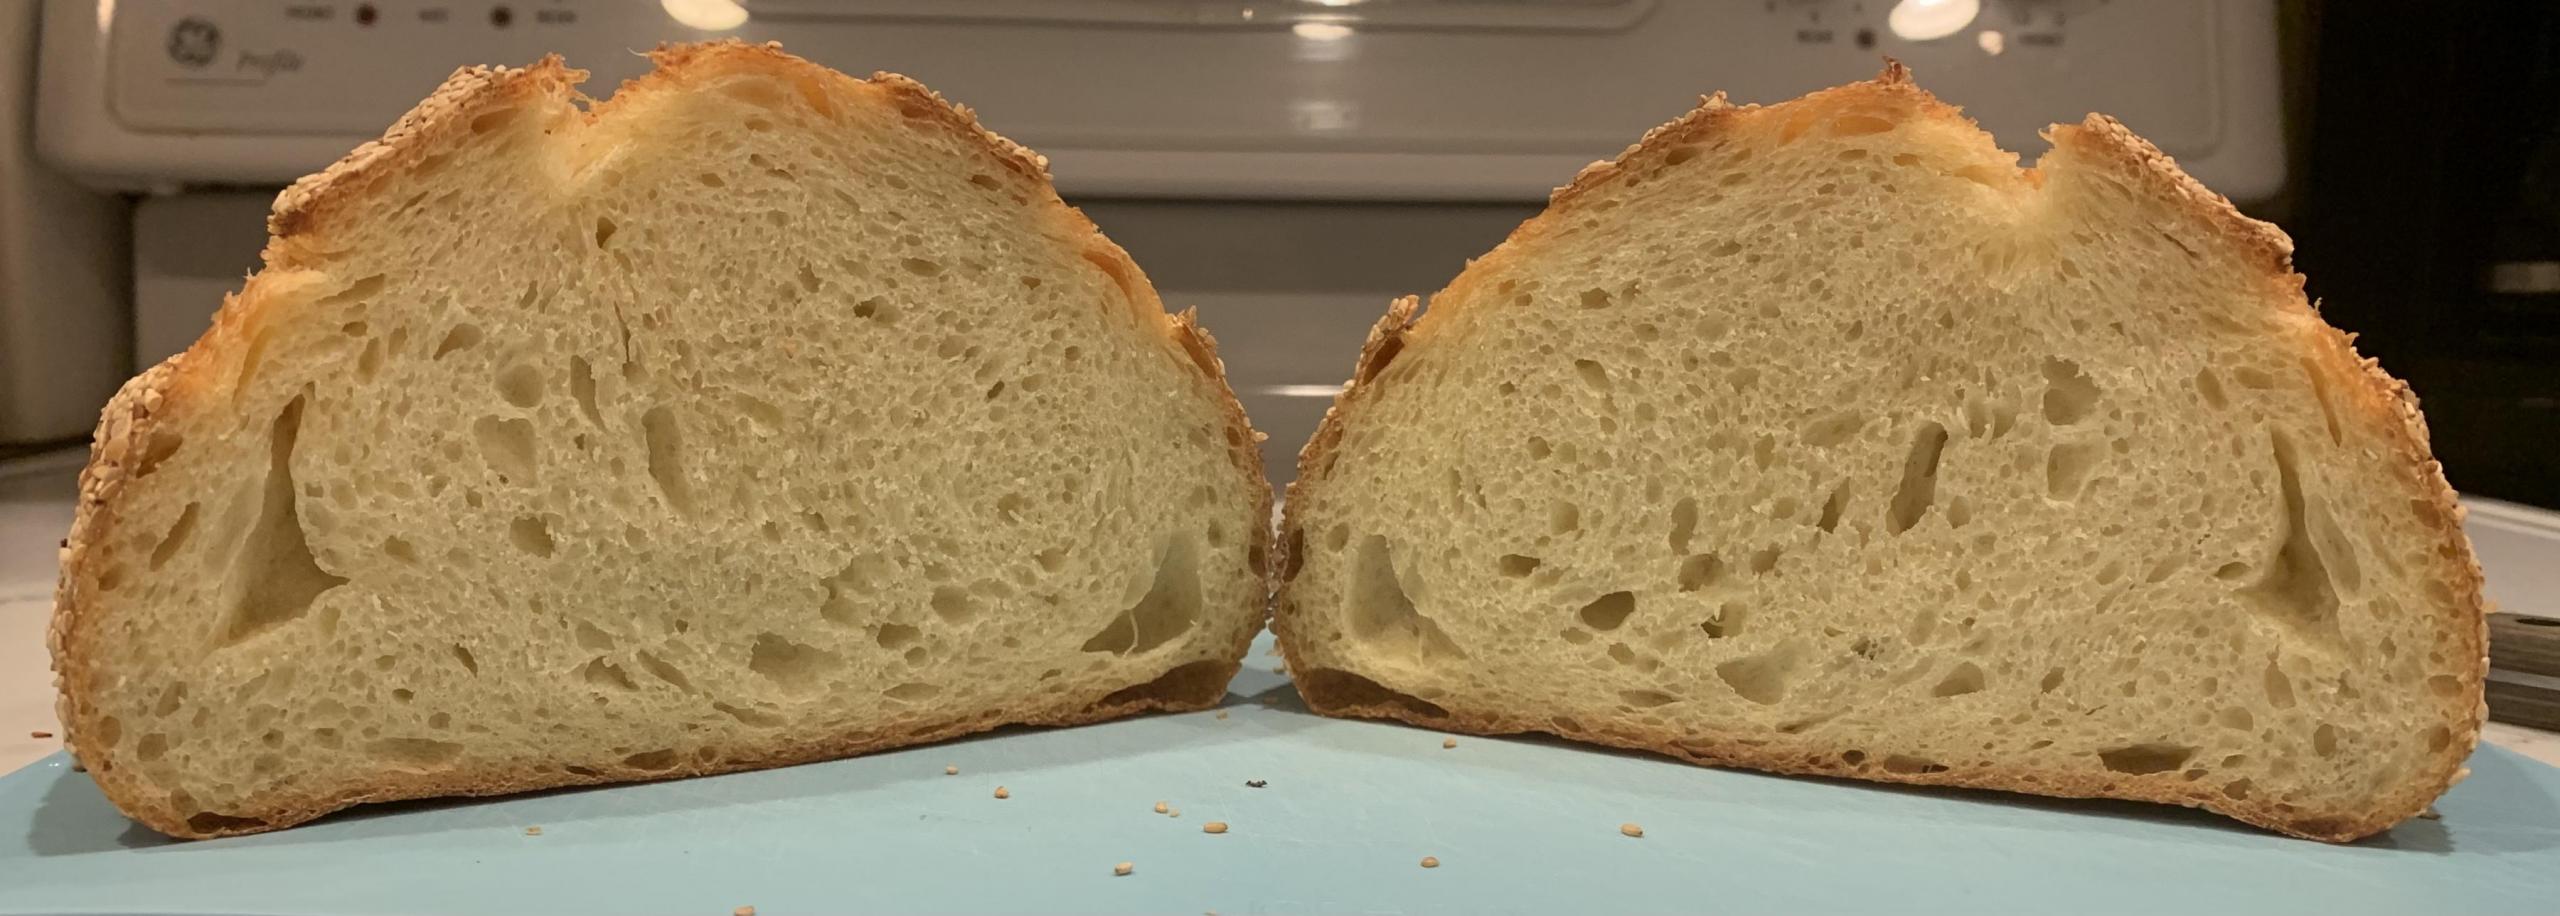
After the first 10 minutes out of the pan, internal temp was 173 deg (temp probe was not sticky at all when pulled from the loaf).  I put it back in for 8 more minutes at 375 deg, and it shot up to 209 deg!  I was worried about over-cooking it, so I stopped at that point.  After the cooling, the top of the loaf dimpled in a few spots and the bread feels moist.  Rheinhart said the mash gives it a moist, creamy texture, so I'm hoping that's what I'm feeling and that it's not completely undercooked.  I'll find out tomorrow morning.

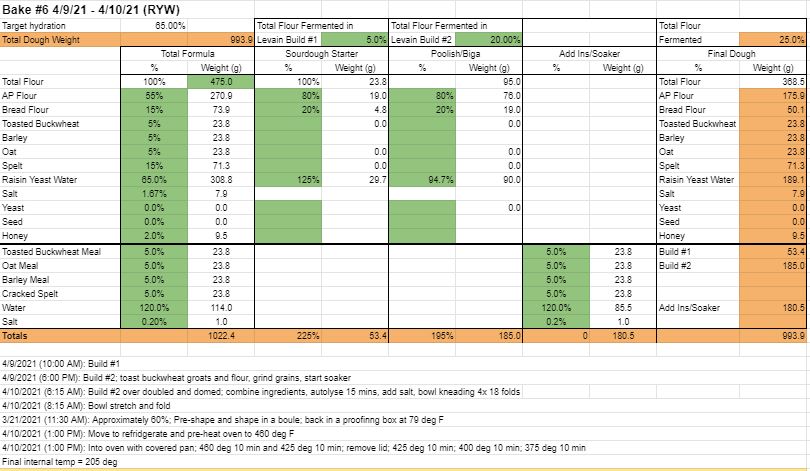
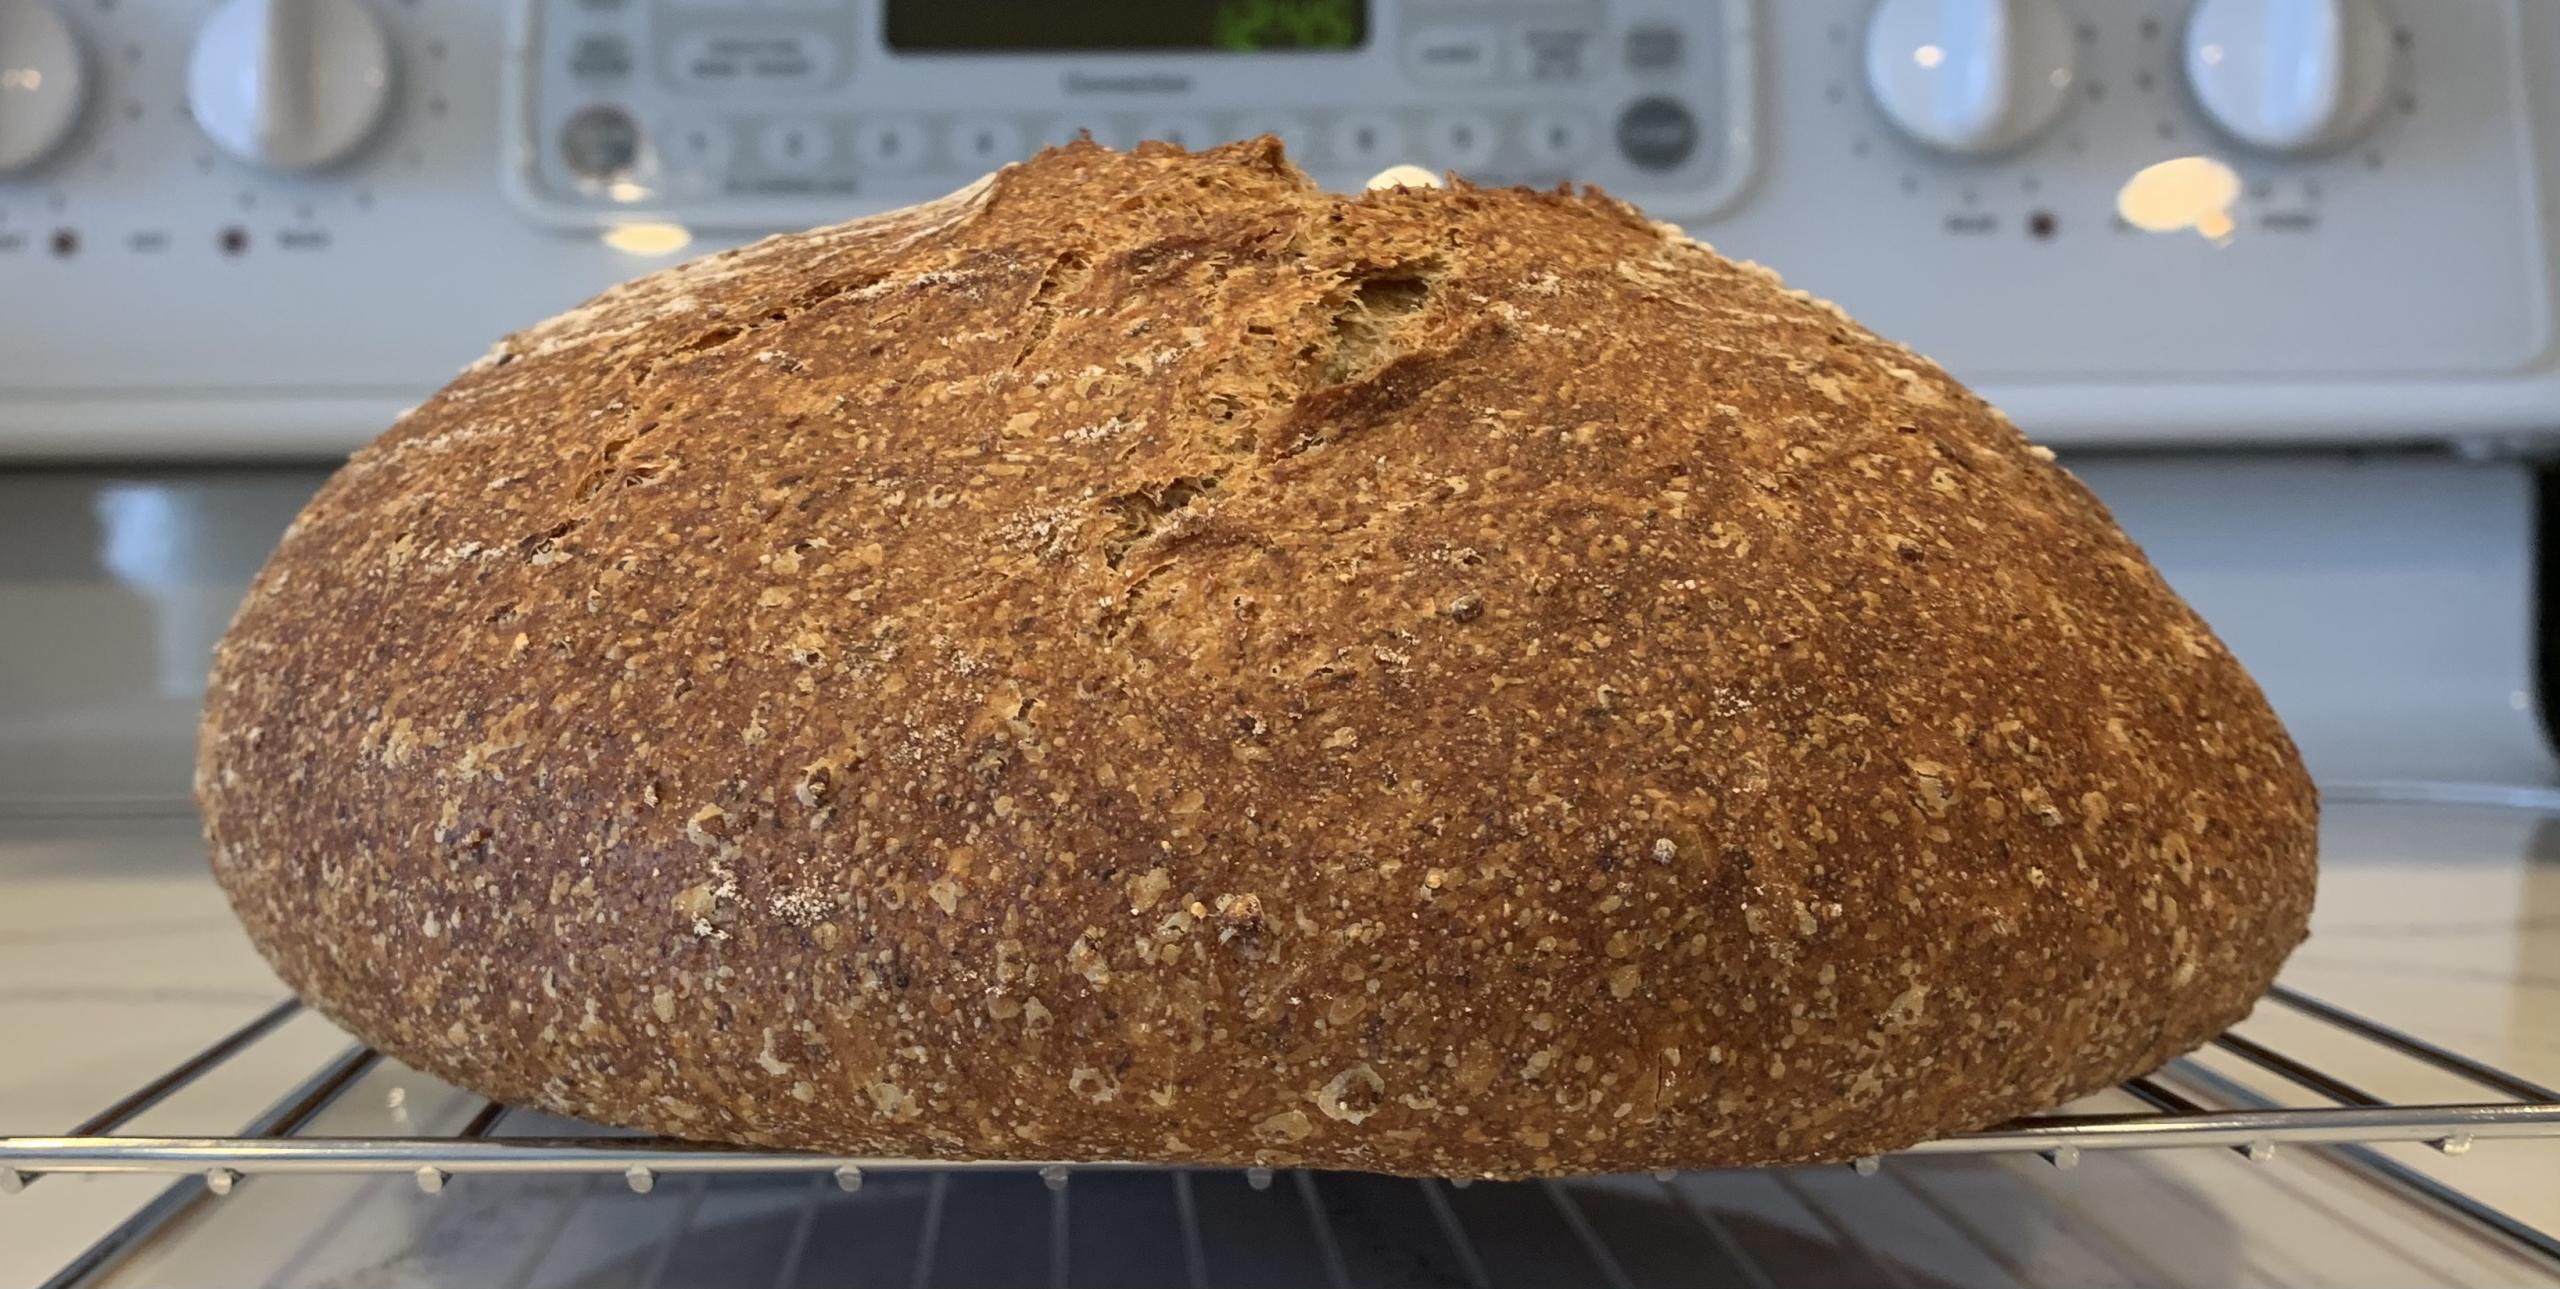
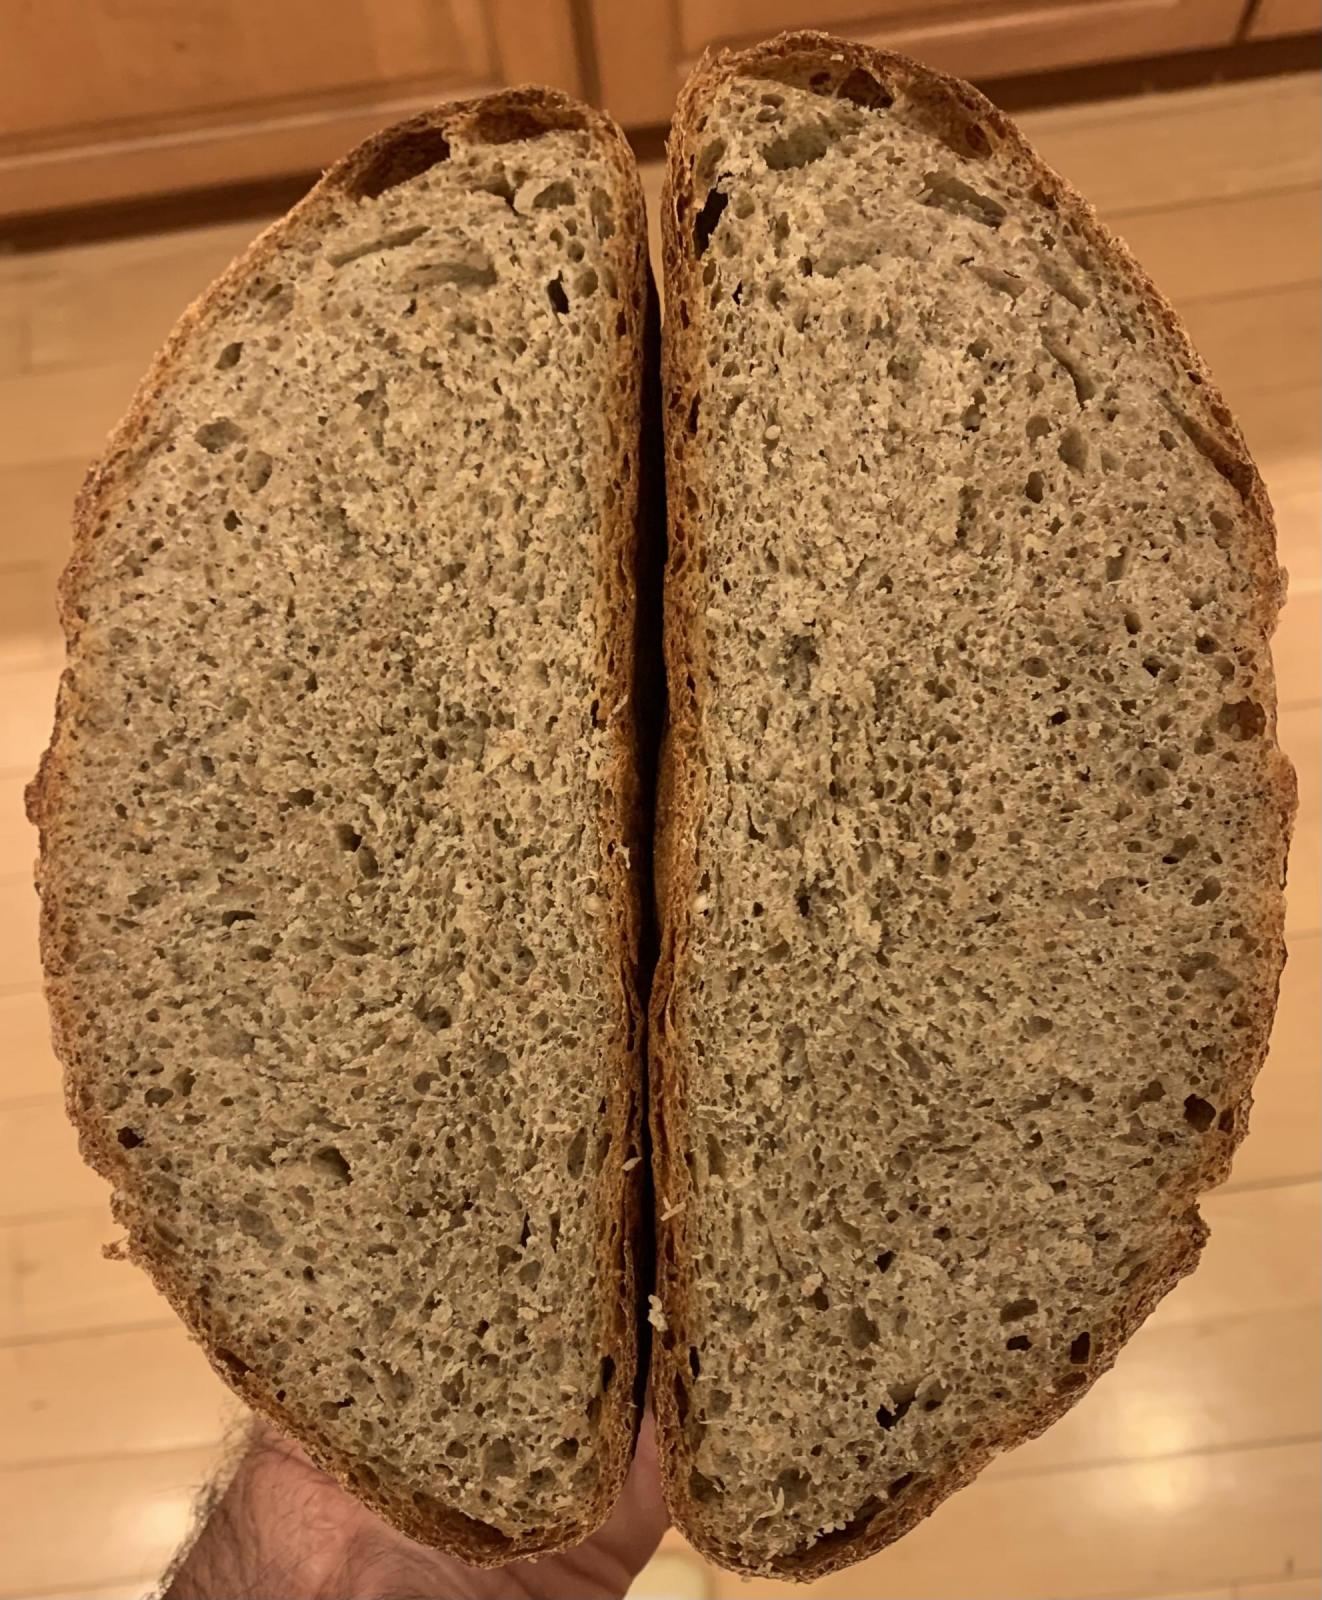
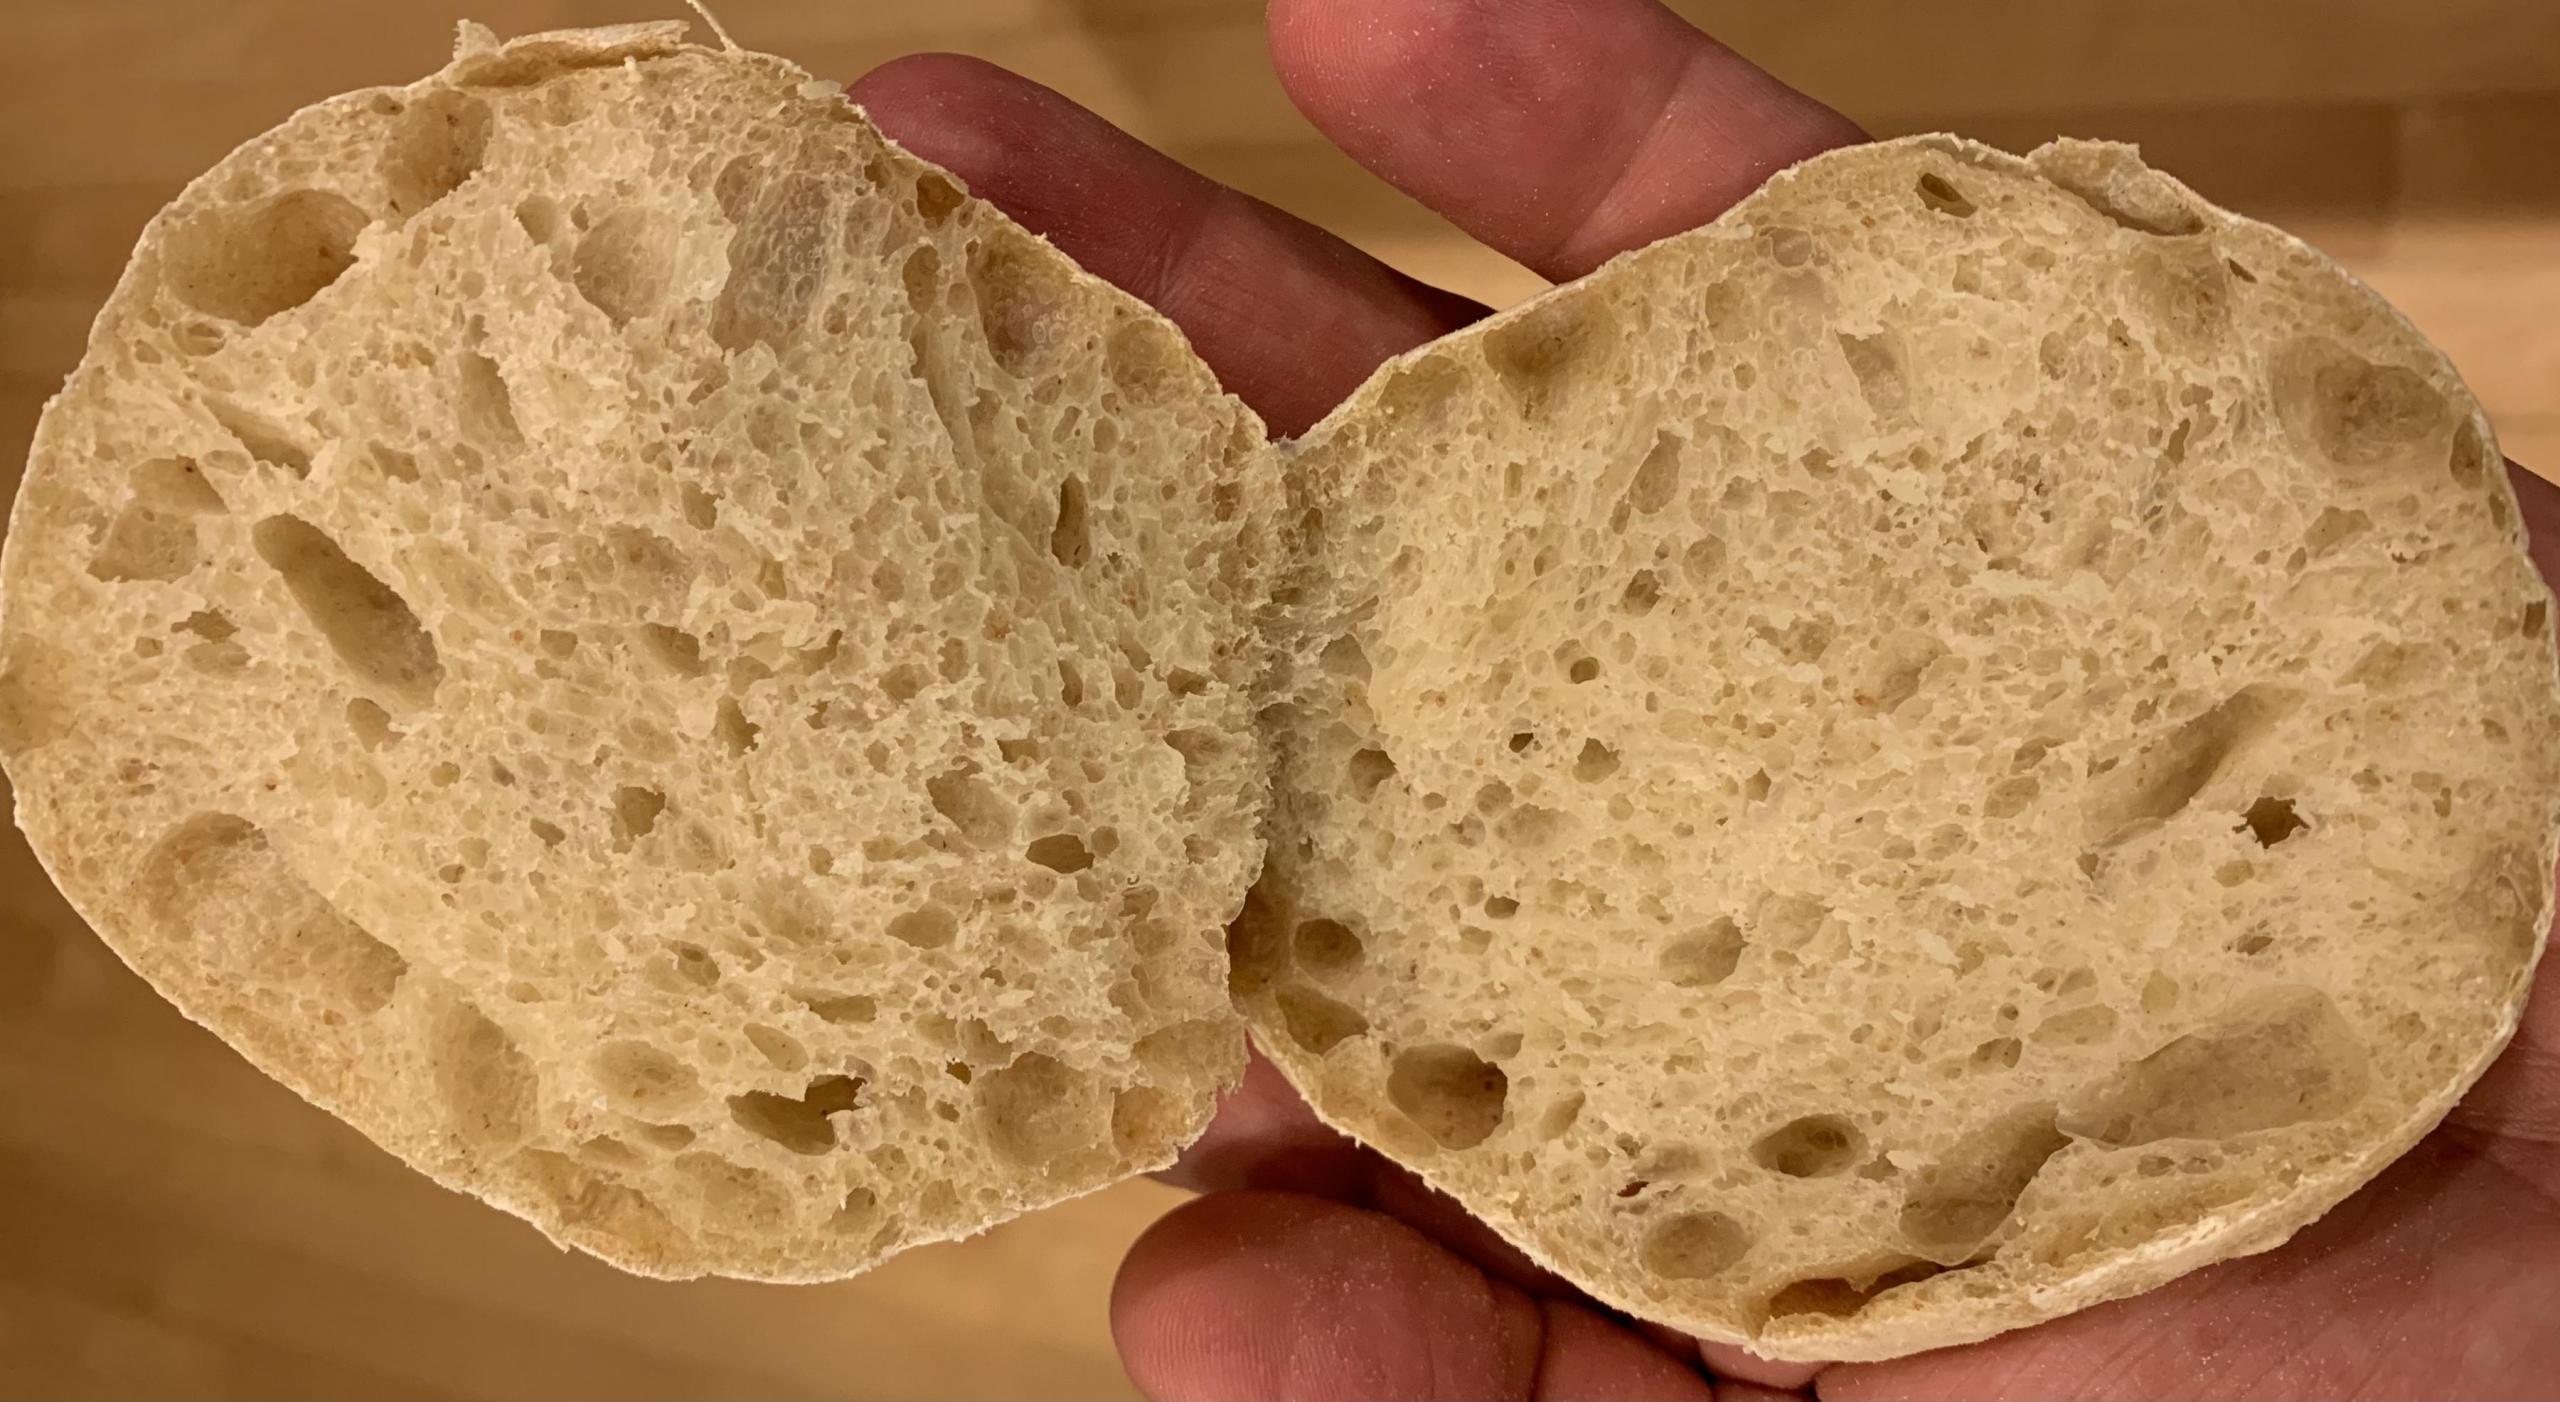
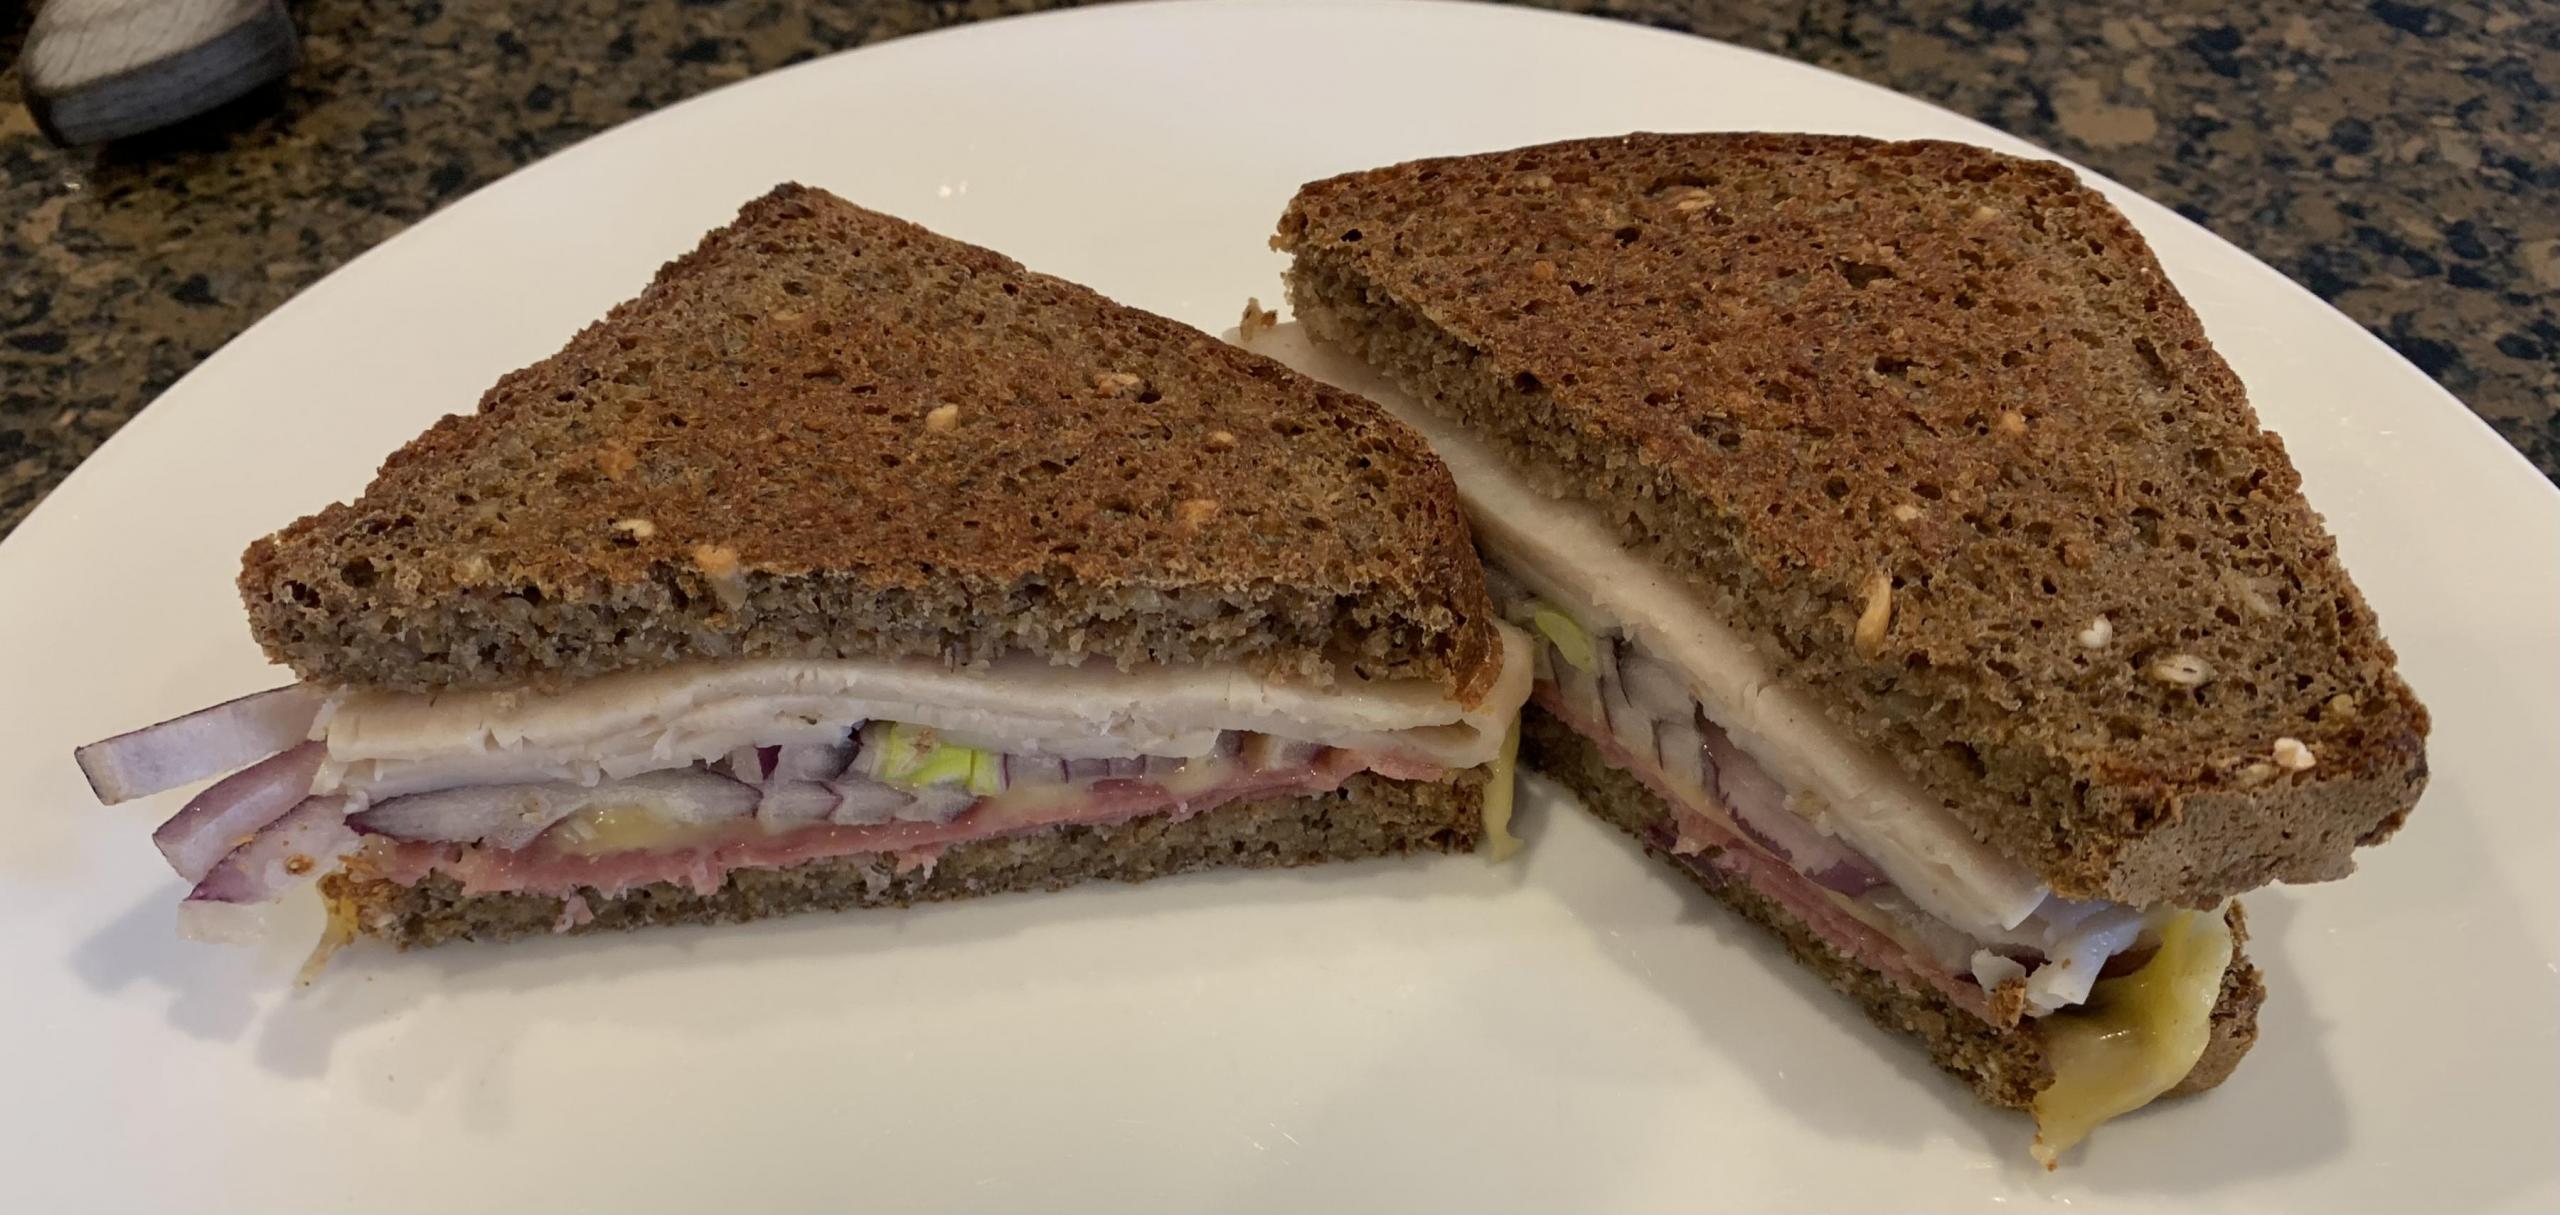
EDIT:  Crumb is creamy.  Seems moist, but nothing sticks to the knife blade when slicing.  Crust was just starting to burn before crumb started browning when making toast this morning.  Not sure if that's undercooked or the nature of the crumb with using a mash.  Also, here's how to make the mash...

1) Pre-heat oven to 170 deg F.  If you have an oven than can be set to Warm at 150 deg, even better.

2) Turn off oven, and then heat water in saucepan to 165 deg.  Add flour(s) to the water, stir to hydrate, cover, and immediately put in the oven.

3)  If you don't have the warm setting (I don't), start the oven for short periods and then shut off.  Ideally, you will have an oven thermometer next to the mash.  You need to keep the oven temp between 148 - 158 deg F.  You want to keep the temperature below 170 deg F to protect the alpha-amylase enzymes, but high enough to denature the beta-amylase enzymes.

4) Hold the temp in the 148-158 deg F range for at least 1 hour and up to 3 hours.  Allow to cool before use.  Can keep on the counter for up to 24 hours or can freeze for up to 3 months. 


HeiHei29er's picture
HeiHei29er

I wanted to push my learning curve a little bit on this bake and used Benny's recent bake as my template.  This one turned into a definite learning curve.

Everything started well.  I used Raisin Yeast Water for the hydration in the levain and my whole rye starter from the refrigerator.  After 9 hours, it was 2.5x in volume.  I stirred it down, and it doubled in less than 2 hours.  Figured it was ready for the mix.  Added the levain to the final dough water for mixing, and it passed the float test with flying colors. 

Dough was higher hydration than I usually work with but manageable.  After mix and autolyse, I developed gluten using this kneading technique.  I used it on both bakes this weekend, and I can say it works quite well for me so far.

Wanted to try lamination for inclusions this loaf as I usually add them at final mix.  That went well also.  Maybe could have stretched the dough a little more, but I was worried about tearing it.  After lamination, things went in the opposite direction.

Even though the levain seemed active and ready to go, bulk fermentation took forever.  I started with coil folds every 30 minutes.  I lost count and did my best to do them every 30-45 minutes.  After 7.5 hours, the dough was getting jiggly, but the aliquot was only at 25%.  It didn't look like it had grown much, and I was using a Pyrex dish to make coil folds easier instead of my normal bowl, so I didn't have a point of reference.  The "jiggliness" threw me off, and I almost shaped it way too early.  After 12 hours of bulk, the aliquot was just over the 50% mark, but it was getting late in the day.  The plan was to shape, give it an hour in the banneton, and then cold retard overnight.  Dough was extremely jiggly at that point (by my standards anyway), and I didn't degas it very much (it was rising so slow, and I didn't want to lose anything).  It was very slack and hard to get any tension in it, but I was surprised how much it filled the banneton.  After the hour of proofing, the dough had pretty much filled the banneton.  That, combined with the jiggle, had me rethinking that the aliquot was off and that I would overproof with the cold retard.  So, I preheated and had a late-night bake.  Should have trusted the aliquot...  :-)

Flavor is good with a definite but not overpowering sour note.  Very happy with the blistering and color in the crust!  Unfortunately, oven spring was so-so, and the dough was definitely underproofed.

HeiHei29er's picture
HeiHei29er

Did a variation on my regular recipe.  Swapped out all the WW for a mix of AP/Bread flour.  With all the non (low) gluten flours and the soaker, it's hard to keep this recipe from spreading flat when doing a free standing loaf.  This time I tried it with a round and seam side up.  I think it helped the loaf hold its shape with no score.  Spread just a bit on one side, but overall not too bad!

Combination of the spelt and buckwheat flours seems to give this loaf its reddish brown color.  Crumb turned out typical for this loaf.  It was still a little moist (should dry up a bit more over the next day or two), but it's perfect for sandwiches and toast.  The aroma from the toasted buckwheat really comes through.

EDIT: After having a couple slices, I think the white flour version might be a candidate for sourdough instead of the raisin yeast water.

HeiHei29er's picture
HeiHei29er

The request for a loaf to go with dinner tomorrow was "something Italian".  So...  Semolina Pain au Levain bake #2.

This one went well and was easier than the first one.  I didn't worry quite so much about degassing while rolling in the toasted sesame seeds, and I think I got them on better.

Starter pre-shaping at 75%.  Didn't degas as hard as yesterday's sandwich loaf, but patted it down enough to make sure I didn't have any big gas pockets.  The crust colored up nice.  Wish I would have made the side scores a little longer and deeper, but that's being finicky.

Will see if this one makes it till tomorrow before it gets sliced.  Those toasted sesame seeds smell good!


Bubbly poolish


Taking the lid off


EDIT: Crumb added...

HeiHei29er's picture
HeiHei29er

My wife asked if I could make a soft sandwich bread for this weekend, so I did another round of my Pullman pan test loaf.  Just increased the size of the loaf.

For the levain, I used a combination of Raisin Yeast Water and little bit of mother starter in the build.  So...  I guess we'll call it a sour poolish.  :-)

Overall, everything went well, but my dough seemed to be tearing during the FF.  Not sure if the dough hadn't developed yet or if my technique was poor, so I stopped after 200 and switched to some hand kneading.  I had a conference call so I stopped dough development and started bulk fermentation.  Made sure I did some folds to continue development.  

Stopped doing folds when aliquot was at 30%.  I decided to push deep into bulk this time and waited until aliquot was at 90% before pre-shaping.  Aliquot was over 100% when final shaping was complete, and was pushing 150% when it went in the oven.  Will be interesting to see if it is overproofed, but I did get good oven spring.  I degassed hard before final shaping, so I'm hoping to have a relatively tight but uniform crumb.  The feel of the loaf seems like it will be nice and soft.

Ended up being 30 minutes with the lid off and the last 5 minutes out of the pan and on the rack.  I removed the upper element shield when I removed the Pullman lid, but the top of the loaf never really browned much.  The rack was placed in the middle position.  Final internal temp was 205 deg F.

Crumb shot tomorrow!


EDIT: Crumb added...  Not great.  Not terrible.  I don't think I was overproofed, but don't think I could have gone much longer either.  Maybe seeing a little compression on the bottom of the loaf.  Hard to say though because I did degas hard before final shaping, and I was working the final shape pretty hard to get some tension in the dough.  This is one area where I really need to get some consistency.  My shaping techniques are kind of all over the map.  Loaf is still pretty soft though, so I'll take it!

HeiHei29er's picture
HeiHei29er

I've been thinking about learning to make ciabatta buns for pulled pork sandwiches this summer.  I've never made ciabatta or buns, so decided to try it for the No Comfort Zone Community Bake.  In addition to the new bread and shaping, it's the first time I've used a white flour at higher than 70% hydration, which was a whole new set of challenges too!

I referenced the prior CIabatta CB and picked the Craig Ponsford recipe.  Only deviation from it was hand mixing (got to try Rubaud mixing for the first time) and lowered the salt to 2% versus 2.5% (my calculation of 1-3/8 tsp in Baker's %).

I combined final dough ingredients without the yeast for a 30 minute saltolyse.  In hind sight, not the best idea.  I left a little bit of water back to activate the final dough yeast, but with that, I didn't have any water left to thin out the biga.  It took quite a bit of pinching and folding to get things reasonably mixed before Rubaud's.  I did two Rubaud's (5 minute each) with a 5 minute rest between.  I thought the gluten was reasonably developed, but was unsure with that high hydration.  Next time, I think I'd do a third Rubaud.  Dough remained very slack throughout bulk fermentation.

Did folds every 20 minutes per the method.  I used coil folds to minimize handling the sticky dough.  I do my bulk in a lightweight plastic bowl, and the bowl kept lifting with the dough.  After the third fumbling with the bowl while trying to fold, I transferred the dough to a Pyrex baking dish.  That worked much better.

Dough expanded 2x+ at the 2 hr 45 minute mark of bulk fermentation and dough was very jiggly.  Moved to shaping.  I had no idea how much oven spring I'd get, so I decided to divide the dough into 8 buns.  The dough pieces were small enough that there really wasn't any shaping to do.  I cut the bun pieces off the main dough with a bench scraper and weighed them.  Extra scrap pieces were taken off or added to hit the weight target (70-75g), and the dough was still so wet, that they easily molded into the doughs without pre-shaping.  

I have a round pizza stone to bake on, but I don't have a baker's linen or couche.  I put a piece of parchment on the stone and traced the perimeter of it on the paper.  This let me know where to place the doughs.  Both sides of the doughs were heavily floured and then they were covered with a tea towel for final proof.  Because I was pretty clumsy and trying to be really careful for the first 3-4 doughs, it took a good 15-20 minutes to get them divided and on the parchment.  After those first few, I got less finicky and figured a "rustic" look would be just fine.  Function before form...  Because of that lag, the first dough pieces had quite a bit more final proofing time than the last.  The method called for 45 minutes.  At that time, the first doughs were well risen and the last were a little bit flat.  Hopefully can divide quicker next time to keep the second proof a little more even.

I used a large cookie sheet upside down as a pseudo peel.  I put the parchment on the cookie bottom of the sheet and then held it next to the pre-heated stone in the oven.  I grabbed the edge of the parchment and slid it off the sheet and onto the stone.

Definitely learned a few things on this bake, but I'm a little less intimidated by high hydration doughs now.  :-)

Biga after mixing

Biga After 22 hours

Dough after Rubaud mixing

End of bulk

Divided and on parchment after second rise

In the oven after baking

HeiHei29er's picture
HeiHei29er

Long week at work and wanted to do a simple bake to start the weekend before trying my Go Out of Your Comfort Zone CB tomorrow.  I got this recipe from Abe, and it works really well.  Has room for flexibility on the flour selection.  I just got a bag of barley flour in, so I added some of that into the mix this time.  First time using barley flour with an AP/Bread flour base (have only used it with WW before this), and the aroma of the barley definitely comes through more on the finished bread.

Method is similar to a 1-2-3, but much lower inoculation and longer bulk ferment.  Mix and develop medium gluten at the most.  Despite the barley being low on gluten, this came together really fast.  Just a few turns of hand kneading is all it took.  Just stretch and folds after that to continue gluten development.  Woke up for a few minutes in the middle of the night, so gave it a quick bowl S&F then before it got too puffy.

Tried a new scoring pattern to get good bloom and expansion, but keep the gas flow uniform vs channeling it to a single score line.  Will see how it worked later today/tonight.  Hoping for a sandwich loaf type crumb with a few open spaces.


HeiHei29er's picture
HeiHei29er

I've been tweaking this recipe a little each bake and narrowing it down to a method that works for me.  Have tried it as sourdough, but I like it better with raisin yeast water.  The toasted buckwheat really comes through, and I've slowly reduced the amount so it doesn't overpower everything else.  Have tried it as both a hearth loaf and a pan loaf, but it's really working better for me as a pan so far.  It's hard to keep good strength with the non gluten flours and the inclusions, so the hearth loaves tend to flatten more than rise.  Today, I tried Dan's loaf pan method and it worked great!

https://www.thefreshloaf.com/node/62981/pan-breads-simplified

I do a two part levain build using the RYW from my refrigerator.  Normally I do nothing but RYW, but I ran out for this bake (have some fermenting), so I topped it off with regular water and added 0.5g ADY during final mix.

This bread is 70% WW, 20% spelt, 5% toasted buckwheat, and 5% oat flour with a barley, oat and buckwheat soaker.  It has a hearty flavor that I really enjoy as toast with my oatmeal in the morning and it makes delicious French toast.  Something about the combination of the toasted buckwheat in the bread and the cinnamon in the egg mixture...

Will post a crumb shot later tonight.  Will probably slice this one for dinner and see how it does as a turkey and cheddar panini.


EDIT:  Crumb photo added.  Didn’t get this one cooked all the way.  I hit 210 deg for final internal temp, but it’s just a little on the moist side.  I’m hoping it cures a little bit over the next day or two.  Texture and flavor are good though, and it made a great sandwich for dinner!


Pages

Subscribe to RSS - HeiHei29er's blog