The Fresh Loaf

A Community of Amateur Bakers and Artisan Bread Enthusiasts.

idaveindy's blog

idaveindy's picture
idaveindy

Sept. 21, 2020.  Goal 1240 g total dough, with bread spice. 

5:41 pm. Mixed 407 g home-milled Prairie Gold hard white spring wheat, 100 g home-milled Kamut, 118 g home-milled hard red winter wheat, (625 g total flour), 531 g water, (531/625=.85), 12.5 g salt (2%). Plan for a 1.5 hr soak/autolyse.

[ Autolyse: 1 hour 35 minutes.]

 7:16 pm. Folded in 44 grams of 100% hydration starter (generic AP flour), 8 grams water, 17 grams generic AP flour.   Overall hydration so far: (531+22+8) / (625+22+17) = 561 / 664 = 84.5%

625 / 664 = 94% whole grain.

7:46 pm - 7:51 pm. Stretch and fold, and fold in 1 tsp ground bread spice. (By pre-ground volume: 1/3rd coriander, 1/3rd caraway, 1/3rd fennel.) Spices were raw, not roasted.

7:57 pm. added 5 grams water. 566 / 664 = 85.2% total hydration.

Total weight, calculated: 1239 grams.

8:21 pm: Stretch and folds.

8:53 pm. Stretch and folds.

9:25 pm. Stretch and folds.

9:44 pm. Stretch and folds.

10:09 pm. Stretch and folds.

[ Bulk ferment, 4 hours, 7:16 - 11:16 pm ]

Weight, measured: 1227 grams.

11:16 pm. Fold and did a weak shape (no pre-shape/rest), put in banneton and into fridge.

Sept. 22, 2020.

6:14 am. Take out of fridge. Went back to bed.

9:08 am. It rose too much at room temp. Put back in fridge.

9:09 am. Start pre-heat of oven and Lodge cast iron combo-cooker, target 495/475* F.

Oiled heated pot with grape-seed oil, dusted with fine semolina. Forgot parchment paper again.

[ Final proof, 11:16 pm - 9:56 am, 10 hours + 40 minutes ]

9:56 am. Bake covered, 495/475 F, 10 minutes.

10:06 pm. Bake covered, 470/450 F, 10 minutes.

10:16 am. Bake covered. 450/430 F, 10 minutes.

10:26 am. Bake UNcovered, 420/400 F, 20 minutes.

10:46 am.  Bake uncovered, 400/380 F, 10 minutes.

10:56 am.  Internal temp 210.0 F.  Total bake 60 minutes.

Virtually no oven spring at score lines, they weren't deep enough. There was some oven spring over-all as evidenced by exapansion cracks throughout the top crust. Ergo, final shaping was too weak and didn't form a good gluten skin/cloak.

I should have left it in fridge, as the expansion during the room-temp final proof was too much.


I always let boules cool upside down. This was the first time the upper crust collapsed.

(to be updated with crumb photo.)

* First number is oven thermostat setting, second number is a store-bought oven thermometer.

idaveindy's picture
idaveindy

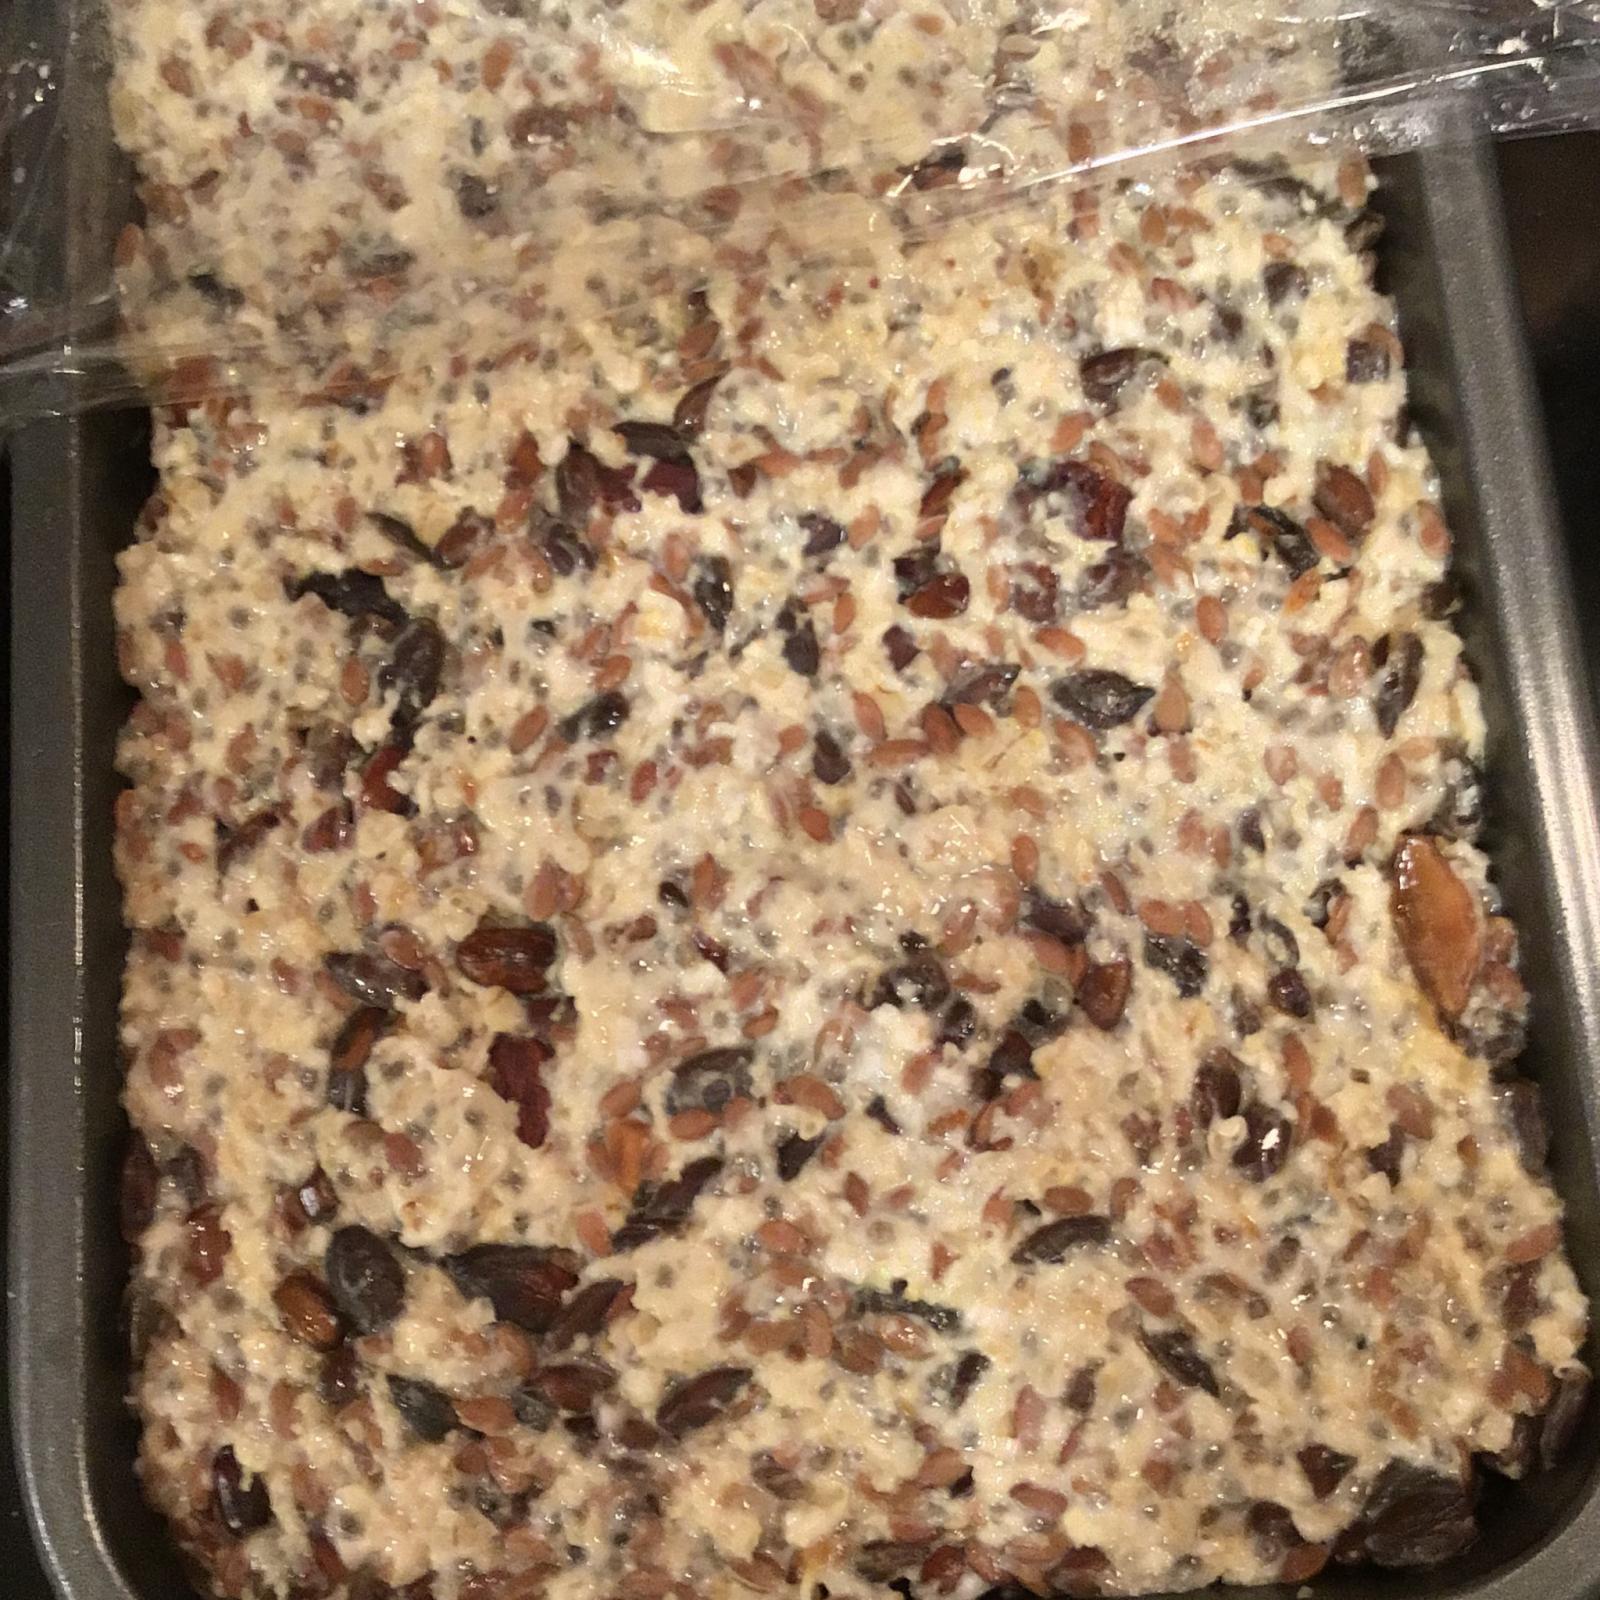
(Above image is pre-cooked, shortly after mixing.)

Sep 15, 2020.

This is the rolled oats and seed loaf, called "Adventure Bread", from "Josey Baker Bread."

http://www.amazon.com/Josey-Baker-Bread-Baking-Awesome-ebook/dp/B00GOJT6LU?tag=froglallabout-20

I needed to make at least one substitution: I don't like the effect that psyllium husk (aka Metamucil) has on my system, so I used some extra chia seed, and added some orange-flavored sugar-free "Citrucel" which is a competing product to Metamucil, and doesn't give me the side-effect that Metamucil does.  I figure the orange flavor won't be too far out of place.

I also used agave syrup instead of maple syrup.

I bought this book in Kindle format when it was recently on sale for US $2.99.

I lucked out and it fit perfectly in my loaf pan, which measures 8-7/8" x 4-7/8" inside measurements at the top, 2-3/8" deep inside. (And it has sloped sides.)  

In cm, it's 22.5 x 12.4 x 6 cm deep.

Ingredients: Uncooked rolled oats (old fashioned, thick, not quick oats) toasted whole sunflower seeds, toasted whole pumpkin seeds, toasted chopped almonds, whole raw chia seeds, whole raw flax seeds, agave syrup, grape seed oil, salt, water.

No leavening, no yeast, no sourdough.

I put it in an oiled  loaf pan, and it's waiting in the fridge for a few hours and will bake tonight, 1 hour at 400 F.

So... it ends up being gluten-free too. 


idaveindy's picture
idaveindy

This is my first loaf bake in six months. I have been making small flatbreads in the meantime.

I milled seven pounds of flour on Friday the 11th -- 3 pounds of Prairie Gold hard white spring wheat, 2 pounds of Kamut, and 2 pounds of hard red winter wheat.

The goal here was to re-do the previous bake, #19: http://www.thefreshloaf.com/node/62664/19th-bake-3202020-18-tsp-instant-yeast

with a longer autolyse, and a shorter ferment. 

Previous bake had 58 min autolyse, 12 hrs 11 min bulk ferment, and 1 hr 15 min final proof.  That was over-fermented. It also had 90.3% hydration.  I  checked my paper note sheet, and didn't see any mention of it being too wet. I should have re-read my blog entry, where I noted that 90% was too slack.

This had 2 hrs 2 min autolyse (no yeast/no salt), 9 hrs 14 min bulk ferment, 1 hr 22 min proof.   This was also over-fermented, but not as much as previously. Less yeast, or less bulk/final time, or doing part of bulk in fridge may have been the right move. 

For this bake, #20, after adding the salt, the dough mass was very stiff and tight.  But after the bulk ferment, it was too wet and slack.  Hence.... use less water next time too, and wait for it to slacken to do kneading or stretch and folds.  But it was late, after 11pm, and I did not follow my own advice (that I have already blogged about.)

9-13-2020.

9:09 pm. Mix 586 grams home-milled flour (400 g Prairie Gold, 120 g Kamut, 66 g HRWW) and 497 g bottled spring water. 84.8% hydration at this point. It felt just right for an autolyse of WW.

[ 2 hours 2 minutes autolyse.]

11:11 pm. Added 1/8 tsp instant dry yeast, folding it in. Added 32 g bottled spring water mixed with 11.7 g salt (mix of Himalayan pink salt and generic iodized salt.  It became very stiff, but did some gentle kneading and stretch and folds to get it well incorporated.

Total dough weight: 1127 g.

11:23 pm. Finish S&F.  Was very tight still. Should have waited for it to relax and do more S&F.

09/14/2020.

[ 9 hours 14 min bulk ferment. 11:11p - 8:25a ]

8:25 am. Fold and shape. (Forgot to pre-shape.) Put in lined and floured banneton, floured with 1/2 rice flour, 1/2 generic AP flour.

8:33 am. Finish above.

9:06 am. Start oven pre-heat, 495/475 F.*  With Lodge 3.2 qt combo cooker.

9:45 am. Oiled cast iron pot, sprinkle with corn meal.

[ 1 hr 22 min final proof.  8:25 - 9:47 ]

9:47 am. Bake covered, 495/475 F, 10 min.

9:57 am. Bake covered, 470/450 F, 10 min.

10:07 am. Bake covered, 450/430 F, 12 min.

10:19 am. Bake UNcovered, 420/400 F, 20 min.

10:39 am. Bake uncovered, 400/380 F, 2 min.

10:41 am.  Internal temp 209.7 F.

* First number is thermostat setting, second  number is actual.

--

Oven spring was not as good as my better sourdough loaves, but it was better than #19.  I couldn't resist, and cut into the loaf after 1.5 hrs.  It is a little too moist.

---

So next time I use IDY:

1) Bring total dough weight up to 1200 g.

2) Only 1 hr autolyse.

3) 87% final hydration.

4) Wait for dough to relax after adding salt, and do more S&Fs.

5) shorter bulk, or put in fridge.

6) WAIT before cutting open!

---

I cut it open way too early, as you can see at the top.

idaveindy's picture
idaveindy

How I lubed and adjusted my Chinese-made Shule (German) brand version of the Marcato Marga 3-roller hand-cranked grain mill.

No guarantees here. This blog is about my particular machine, my experience and observations.

I checked the Marcato Marga site, and externally it is identical to mine except for cosmetic differences. Be aware that the interior could be very different.

On this other person's  blog page: https://seedforsecurity.com/blog/79

in the first photo, the Shule is the pink box on the left. And it's the mill featured in the 4th photo.  Again, that page is not mine; I'm just using it as reference.

--

Here's the same mill at Amazon, where it goes by the name Norpro.  It shows the two screws (2 on each side) that you need to remove to get to the gears. There is a set of gears on both sides. And you can see the hex nut bushing in this photo.

https://www.amazon.com/Norpro-1056-Grain-Grinder/dp/B001FB59K4?tag=froglallabout-20

--

On mine, there was a rough spot, slight resistance of the gears, at a certain roller position, as if the gears were rubbing there. it happened every turn of the rollers,  about about every 2 turns of the crank since there is not a 1:1 gearing. 

You only need to remove the 4 screws, two from each side. Then gently pull on the big adjustment knob, and the _core rod only_ of that cylinder comes out with that side cover.  Do not attempt to remove the knob from the side cover or core rod. Knob, side cover, and core rod (axle) stay together.

After removing the two screws per side, the other side cover, the one with the crank socket and the hex nut, can be pried off.  Mine was held pretty tightly via friction after removing the two screws holding it to the inner side cover.

There are four stand-off rods with nuts holding the inner side covers together. Leave those alone.

There are four hex nuts holding the feet and the base to the two inner side covers. Leave those alone. I mistakenly removed them, thinking they held the outer side covers, but they are attached only to the inner side cover. 

(You may need to _loosen_ the 4 small hex nuts holding the feet and base on, in order to remove the outer side covers.  You may need to loosen those 4 hex nuts in order to re-install the outer side covers. Just remember to tighten them when finished.  I have disassembled this incorrectly once, but have not disassembled it "correctly" yet.)

That hex nut on the side with the crank socket, is not threaded. It is a _bushing_ with an offset - meaning the hole is not centered with the outer diameter.

The offset bushing is part of the system that allows the knob to adjust the distance of that roller to the other top roller and keep them parallel.

 The "clock position" of that hex nut matters!  On mine, the thin edge, I'll call it the index position, needs to be at about 1:30,  or 45 degrees clockwise from noon. Just for reference, I had the knob set to 1, but I don't know if that matters.

I mention this here because it is important:  If this hex nut bushing gets out of alignment, meaning it's not in the correct clock position, then the rollers might not stay parallel as you adjust the knob, but the gears will _definitely_ NOT mesh correctly.  I learned this by trial and error upon re-assembly.

In fact, upon reassembly, I turned the hand crank and "felt" for the smoothness of the gears, as I used a wrench to rotate the hex nut bushing.  Adjust - test - adjust - test, until you find the sweet spot for the clock position of the hex nut bushing.

I am not guaranteeing the correct clock position of your hex nut. So observe and record what clock position its  "thin side" is at before disassembly.  In fact, you do not need to remove it.   I thought it was threaded, and needed to be removed. But it is held in place in the outer cover by friction only. 

If your gears are not meshing properly, your hex nut bushing may already be out of adjustment.

Never force the crank. If very gentle pressure doesn't turn it (without grain, that is) then something is out of alignment.

This system of a cam shaft type of axle and the offset bushing allows the gears to be properly spaced regardless of which position the knob and roller are in.

--

Mine has been used for 4 years or so, and lots of flour was absorbed in some grease.  I read somewhere to use peteoleum jelly to lube it, so I added that to the gears with two toothpicks held together.

You are also supposed to add a little oil between the rollers and the inside cover. 

I got smudges of grease on the rollers, and wiped them off with a paper towel. I will also clean with isopropyl alcohol on a paper towel. And I will mill and discard some white rice and some wheat to further clean.

After the clean, lubricate, re-assembly, and adjusting the hex nut bushing, the rollers and gears turned smoothly, and the rough spot in the gearing (ie, resistance at a certain roller position) was no longer there.

On mine, the 4 side screws are phillips (cross), and the hex nut is 10 mm.

As you re-attach each side cover (two screws per side), only _loosely_ affix the first screw (that is, do not tighten it all the way) in order to allow wiggle room for getting the second screw aligned and started.  If you tighten the first screw all at once, the second screw most likely will not align.

The outer side covers have a tight, but imperfect, fit. So you may have to "finesse" them a bit before you insert and tighten the second screw.

Again, no guarantees. This is just my explanation of my perceived experience with my machine.

idaveindy's picture
idaveindy

In my experience, Fresh-Milled flour has 7 "things" I need to allow for:

This is based on using a sourdough starter/levain. Commercial yeast (dry or fresh) will be slightly different.

1. Fresh-milled flour is usually thirstier, takes more water, than store-bought WW. This is a general rule. You will eventually find exceptions, i.e., some grain will already be high in moisture, and therefore need less water.

2. Fresh-milled flour takes more time to soften, so use 30-90 minutes of soak/autolyse (without starter/levain, depending on granularity (particle size).

Sidenote: because of 1 and 2, if I make a combo fresh-milled WW and white flour loaf, I autolyse only the fresh-milled WW because the white flour would "steal" the water first.  So in that  case, I add the white flour (and some water) when I combine in the levain.  I'm sure there are other ways to do it.

3. Fresh-milled flour is Tricky, in that you think you over-wetted it, but then it absorbs and it feels underhydrated, but then it eventually slackens. So after you learn by trial and error (keep meticulous records of weights) and "dial it in", then you have to trust it to end up at the right spot of hydration.  You sort of have to learn three or four  different "feels", one at each stage, (depending if you add salt in a separate stage -- salt tightens dough, temporarily.)

3a. "Wet sand" feel. Home-milled flour can sometimes be gritty, especially extra hard wheat such as durum and Kamut/Khorasan.  I need at least a 1 hour autolyse (no starter/levain) for these.  And even then, the transformation from "wet sand" to dough doesn't happen, for me at least, until 30-60 minutes after incorporating the levain.

My procedure is usually: 1 hour autolyse, gently incorporate levain (no kneading, just gentle folds), let it rest 30 min, incorporate salt and hold-back water, let rest 30 minutes for it to slacken becasue salt tightens it up, then do stretch and folds.

3b. Important: Do not knead or do "stretch and folds" until the  "wet sand" becomes "dough" and the dough is extensible enough.  If the dough never slackens/loosens or becomes extensible ("stretch-able") enough say, 45 minutes, after adding salt (or after adding levain, if salt was already in it), then it likely needs more water.

4. Fresh-milled ferments FAST!  I use 3.5% prefermented flour for an overnight bulk ferment, or an overnight proof.  Fresh-milled, like most store-bought WW, maybe even more than store-bought WW,  keeps on fermenting in the fridge, more so than white flour does in the fridge.  The fridge won't "stop" WW from fermenting/aging/breaking down.

5. Fresh-milled flour has oil from the bran and germ  Store-bought WW has had some oil evaporated off, and might not even have had the germ in it, depends on brand. So I use little to no oil compared to store-bought WW.

6. If I over-hydrate a dough, and feel like I need to add flour to adjust, I add _white flour_ because it will absorb water quicker than fresh milled WW.  The late addition of WW and especially fresh-milled WW won't get as hydrated/soaked as well as what was in there from the beginning.  In other words, to "salvage" an over-wet dough at some point in the bulk ferment, I use white store-bought  flour.

7. Good oven spring on a boule or batard (ie, not a pan-loaf, like sandwich bread) generally requires under-fermenting. Do not let it rise (first or second rise) as much as you do with a loaf baked in a pan.  First rise (usually called bulk ferment) can be 30-50% increase.  2nd rise (usually called final proof) even less, depends on if you do it at room temp or in fridge.

Your mileage may vary.

-----

Suggested reading:

About home-milled, from user "agres": http://www.thefreshloaf.com/node/66636/better-bread

About home-milled from SeasideJess: http://www.thefreshloaf.com/node/64101/tips-100-freshmilled-whole-wheat-baking

Avoiding/removing bugs: http://www.thefreshloaf.com/node/64081/tip-bugs-whole-grains

Starch damage: http://www.thefreshloaf.com/node/62154/oven-spring-possible-miche

Sifting and multiple passes through your mill: www.thefreshloaf.com/node/62237/bolting-sifting-comparison-1-pass-vs-5-passes

Easy sandwich loaf formulas: http://www.thefreshloaf.com/node/62486/community-bake-approachable-loaf-bread-lab

Testing/comparing different varieties of home-milled wheat (just the comment, not the whole thread/post): http://www.thefreshloaf.com/node/56742/community-bake-maurizios-fiftyfifty-whole-wheat-sourdough-everyone-welcome#comment-412372 

---------

The home-millers you would do good to follow on here are: SheGar, SeasideJess, danni3ll3, ifs201, agres, barryvabeach, DanAyo, MTloaf, dabrownman, pmccool, deblacksmith, UpsideDan, TopBun, albacore, .. with apologies to any others I missed.

----

Video about using fresh-milled flour with Nick Giusto of Central Milling and Pablo Giet.  They speak of several things I mention above such as fast fermentation and the enzymes.
https://www.instagram.com/tv/CI6VsoZhTqK/

------

Notable comments. See more below, in the comment section:

From MTLoaf:

2. [...] I like to use around 15% bread flour for more consistent results. Extra kneading will make the loaf lighter.

3. Sifting is worth the effort. Even if you are going to bake with all the brown bits because it oxygenates the flour and allows it to absorb the water better. Separating them with a #40 will collect about 5>7% and a #50 will get around 15%. The bran can be presoaked, used in a levin, toasted or used for other things. My chickens love a bran dough ball.

4. My personal preference with whole wheat is to error on the side of over hydrate because the bran will absorb moisture even after it has baked. The Approachable Loaf from the recent Community Bake here at TFL (http://www.thefreshloaf.com/node/62486/community-bake-approachable-loaf-bread-lab) is 85 to 90% water and produces a Wonder Bread soft sandwich loaf. Say no to the brick.

5. Other grains like rye, spelt, white whole wheat, kamut are nice to have on hand. [...]

idaveindy's picture
idaveindy

I'm working on sourdough tortillas.  To reduce calories  I like the idea of sourdough to soften the tortilla instead of lots of oil.  

So far I'm experimenting, just measuring salt and baking soda, and eyeballing/guessing the rest.

l did remember to weigh the total resulting dough today, about 120 grams, and that was enough for 3 tortillas about 8 to 8.5" in diameter each.

So far I have... per 120 grams of total dough (3 tortillas):

- 1/8 tsp baking soda. (Previously tried 1/4 tsp, which was too much. will try 1/8 next time.)

- 1/8 tsp salt.

- 3/8 tsp regular olive oil.

---

My starter was only about 3 days old, and was kept in the fridge, taken out, not warmed up first. It's 100% hydration, in the past has always been fed with Bob's Red Mill All Purpose flour.   I did not plan on adding any water, but I added too much flour (same BRM AP), and so I had to add a few drops to get a soft dough.

I mixed the salt and baking soda in with the flour first, to ensure even distribution, before working the flour into the starter.

At 1/4 tsp baking soda (per 120 g total dough) I could taste the baking soda.  I'm using baking soda instead of baking powder because the sourdough starter is already acidic.

--

So... some of the "rise" or leavening action comes from the fermenting sourdough, as long as you leave it to ferment a bit, and some supposely comes from the heat/baking soda/acidic starter.

Today I cooked the tortillas soon after mixing the dough, and so the baking soda was enough to leaven it.  On a previous attempt, I gave the dough some time to ferment before cooking, and got a softer and more airy tortilla.  Sorry, I forgot the timing already.

I found that you do need at least some oil for a soft tortilla.  So far my oil-free tortillas are not flexible enough to use as wraps.

Also, don't cook the tortilla too long or it will stiffen and the skin gets too hard.

--

I cooked it on a fry pan/griddle at medium-low heat, 4 out of 10 on the electric burner, until there were brown spots on both sides.

 I let the tortillas sit covered a while after cooking so that the internal moisture would soften the outer skin.  A "tortilla keeper" would be good for that.  You do that with  oil/lard based tortillas anyway.  

The sitting/softening process is important, or else the tortillas are too stiff to fold.

idaveindy's picture
idaveindy

After at least two years of using sourdough, I'm finally starting my own starter.   I half-heartedly tried once before, but I used a firm-starter/biga method and gave up after about 3 days.  That was way before I found TFL.

So yesterday...

Thursday, PM, I started two would-be cultures:  one using home-milled Kamut, and one using home-milled Hard Red Winter Wheat that had been hermetically sealed for about 12 years.

The Kamut was purchased in Oct 2018, so I suppose it could have been 2017 or 2018 harvest.  The HRWW was 2008 harvest, if my notes on the mylar pouch are correct. 

The liquid used is bottled spring water, with a few drops of orange juice in each glass, maybe 150% hydration.

Friday PM, 24 hours in, was the first addition of more water/flour, feeding with the same wheat, to compare side-by-side.

Saturday, PM, 48 hours since first mix. Fed Red the red wheat flour. Fed Kamut the Kamut flour.  Red has a funky bacterial smell. Kamut barely has  a flour-y wheat-y smell.  No rise.  Maybe, _maybe_ some bubbles, but those could be artifacts of mixng.

Sunday, AM:  66 hours (2-3/4 days) since first mix. We have lift-off !  (Could have been earlier, as I was late getting out of bed.)  Both at least doubled.   Looked even between the two.  

So...., it was mixing flour/water/OJ, plus two feedings, and Voi-la!  Rise amount was identical between the two.  Red still smells more funky.  Kamut went from plain flour-y wheat-y smell to a more "microbial" smell, but not as "funky" as Red.

I'm going to keep this small, so I discarded all but about 11 grams each, and fed 1 : 1 : 1.  

idaveindy's picture
idaveindy

From: https://www.manataka.org/page180.html

American Indian fry bread.

Reproduced here in case the web site goes away.

--

Manataka American Indian Council

COOKIN' WITH THREE SISTERS

FRY BREAD RECIPES

Blackfeet  Navajo 
Cherokee   Old Fashioned  
Creek   Osage
Chickasaw  Seminole
  Traditional


Old Fashioned

4 cups flour

2 tbsp. baking powder

1 tsp. salt

1/2 cup shortening

1 cup warm water

Mix flour, baking powder and salt. Gradually add in the shortening and water. Add only enough water to make dough stick together. Knead dough until smooth, make into fist-sized balls. Cover them with a towel for 10 minutes then pat them out into circles about the size of a pancake. Fry in hot cooking oil in cast iron skillet until brown on both sides. Drain on paper towels, serve with jam. 

Traditional

1 pkg. dry yeast

3 cups warm water

1 tbsp. salt

1 tbsp. sugar

6 cups flour

2 tbsp. oil

1/2 cup cornmeal

Dissolve yeast in warm water then add salt and sugar. Let stand for 5 minutes covered with a towel.  Add flour and oil to liquid mixture.  Mix and put on floured bread board and knead until mixture is smooth.  Put dough in a greased bowl, cover with towel and let it rise for 1 1/2 hours. Remove from bowl and put on bread board, knead in the 1/2 cornmeal.  Make dough into 2 balls rolling each into 12 inch circles 1/2 inch thick.  Cut into 2 inch squares and drop into hot cooking oil.  (Works best with cast iron skillet.)  Fry 5 to 6 pieces at a time for only a few moments.  Drain on paper towel and sprinkle with white powdered sugar.  

Blackfeet

4 cups flour

1 Tbsp. powdered milk

1 Tbsp. baking powder

1 tsp. salt 

11/2 cups warm water

Oil for frying 

Mix all dry ingredients thoroughly. Add water. Knead until soft, then set aside for one hour. Shape into small balls. Flatten each ball into a circle with or rolling pin or by hand. Fry in a skillet half-full of oil until golden brown on both sides. 

Cherokee

1 cup flour

1/2 tsp. salt

2 tsp. baking powder

3/4 cup milk

Mix ingredients adding more flour if necessary to make a stiff dough. Roll out the dough on a floured board till very thin. Cut into strips 2 X 3 inches and drop in hot cooking oil. Brown on both sides. Serve hot with honey. 

Chickasaw

2 cups sifted flour

1/2 tsp. salt

4 tsp. baking powder

1 egg

1/2 cup warm milk

Stir first three ingredients then stir in the beaten egg. Add milk to make the dough soft. Roll it out on floured bread board, knead lightly. Roll dough out to 1/2 inch thick. Cut into strips 2 X 3 inches and slit the center. Drop into hot cooking oil and brown on both sides. Serve hot. 

Pumpkin Fry Bread

Add the following to the ingredients shown above to make Pumpkin Fry Bread

2 cups fresh pumpkin or 1-16oz. can pumpkin
1 tbsp. milk or water
3/4 cups brown sugar
1/4 tsp. cinnamon
1/4 tsp. nutmeg
1/4 tsp. vanilla

Drop into hot cooking oil and brown on both sides. Serve hot with butter or powdered sugar. 

Creek

2 cups flour

1 cup buttermilk

1 tbsp. baking powder

1/4 tsp. salt

Sift flour,salt and baking powder then add milk and more flour to make dough stiff. Roll out onto floured bread board and cut into 4 X 4 squares with a slit in the center. Fry in hot cooking oil until golden brown. Drain on plate with paper towels.

Navajo #1

1 C flour 

1 t baking powder 

1/4 C powdered milk 

1/4 t salt 

warm water 

Combine the ingredients and slowly add enough warm water to form dough. On a lightly floured surface, knead dough until it is smooth soft and not sticky. Cover and let rest 1 hour. Shape into small balls and pat into flat circles about 1/4-1/2 inch thick. Set aside.

In skillet, heat 1/2 inch vegetable oil. Brown dough circles on each side and drain on paper towels.

Serve with chile beans and your favorite taco toppings for "Navajo Tacos." 

Navajo #2

3 cups unbleached flour, sifted

1/2 cup dry powdered milk

1 Tbs. baking powder

1/2 tsp. salt

1/2 cup warm water or milk

2 quarts oil for deep frying

Combine the first 5 ingredients in a large mixing bowl and knead until smooth and soft, but not sticky. Depending on the altitude and humidity, you may need to adjust the liquid or the flour, so go slowly and balance accordingly.  Be careful not to overwork the dough, or it will become tough and chewy. Brush a tablespoon of oil over the finished dough and allow it to rest 20 minutes to 2 hours in a bowl covered with a damp cloth.  After the dough has rested, heat the oil in a broad, deep frying pan or kettle until it reaches a low boil (375º).  Pull off egg-sized balls of dough and quickly roll, pull, and path them out into large, plate-sized rounds.  They should be thin in the middle and about 1/4 inch thick at the edges.  Carefully ease each piece of flattened dough into the hot, boiling oil, one at a time.  Using a long-handled cooking fork or tongs, turn the dough one time.  Allow about 2 minutes cooking time per side.  When golden brown, lift from oil, shake gently to remove bulk of oil, and place on layered brown paper or paper towels to finish draining.

Serve hot with honey, jelly, fine powdered sugar, wojape, or various meat toppings.

Hint:
The magic is in frying the bread quickly!  The hotter the oil, the less time it takes to cook.  The less time it takes to cook, the lighter the texture and lower the fat content.  

Osage

4 cups all purpose flour

2 tsp salt

1 tbsp and a half baking powder

1 tablespoon melted shortening

2 cups warm milk

Shortening for deep frying 

Sift flour, salt and baking powder into bowl. Stir in shortening and milk. Knead the dough into a ball. Roll out dough on lightly floured board. Cut into diamond shapes and slice a slit in the center.

Heat shortening in deep fryer to 370 degrees. Fry 2 or 3 at a time until golden brown on both sides. Drain on paper towels. 

Seminole

2 cups flour

3 tsp. baking powder

1 tsp. salt

1 cup milk

Mix flour, baking powder and salt. Add milk gradually making sure the dough is stiff. Put on floured bread board and pat it out with your hands until it is 1/2 inch thick. Cut into strips with a slit in the center. Fry in hot oil until both sides are golden brown. 

Credits

Chickasaw, Creek, Cherokee, Old Fashioned, Osage, Seminole and Traditional recipes courtesy of Phil Konstantine, http://www.americanindian.net   

Blackfeet and Navajo recipes courtesy of http://www.aniwaya.org


idaveindy's picture
idaveindy

From: http://www.angelfire.com/art/skyhawkfireheart/recipe.html  

American Indian fry bread.

Reproduced here in case the original web site goes away.

---


Frybread recipe


!!!!!!!!!!!!! THE  GREATEST FRY BREAD MIX IN THE WORLD !!!!!!!!!!!!!!!!!

Courtsey of Mona Cliff--Nez Perce/Assiniboine

Makes fry bread for about 10 people. You can add or subtract cups depending on number in your company; adjust other ingredients as necessary.

4           cups of all purpose flour
1           teaspoon of baking powder per cup
1/2        teaspoon  sugar per cup
1/2        teaspoon  salt  per cup


*           powdered milk (easier to use)
             If you use regular milk, mix with water about 1/2 cup (so  you'll have 1/2 milk, 1 1/2cup water)


2           cups of water
             pan with a least 1 inch deep vegetable oil (or other oils). Enough to fry bread, enit?

Start with flour in large bowl. 

* Pour powdered milk in an even thin layer over all of flour.

Add other dry ingredients. Mix dry ingredients well.

Now push to side of the bowl, add 2 cups of water (or milk/water), stir until you have a good looking dough.

Cover and let rise for 1/2 of an hour or more. Dough should rise back if you touch it.


While dough is rising, heat oil between medium high and high. It takes a while so be patient. To test oil break off a a little ball of dough and drop into oil, dough should rise fairly quickly, then brown at a nice pace.

If oil is  ready, flour your hands, break of a golf ball size of dough, stretch to desired thickness, put a little  hole in the middle and fry till bread is golden brown.  

Tips my grandma taught me ( and a winkte from Nevada)

1.   Never add water while in the process of  mixing ( your bread will come out tough):  instead when you add your water  add a little  more water than you need ( so add 2 1/4 cups of water)  then while mixing ADD flour to get your dough just right.


2.   When mixing dough don't stir & stir & stir, instead stir until most  of dry ingredients look doughy then put spoon to the side and fold the bottom of bread to the top, if your dough is still too wet, sprinkle some flour over wet dough pat it in, and fold over again till your dough is uuuhhh nice and doughy (consistency of pizza dough or pre-baked bread).  I only make the stuff,  I' ve never explained it before.


3. When you are frying the bread don't use too much flour on your hands, the flour settles on the bottom of the pan. When you cook for long periods of time your flour could burn thus making your bread taste bad.


4. Don't turn bread in the pan too much it stirs up all the flour in the bottom, like the bottom of a lake.


5. When browning the bread, turn it over when the edges in the middle and the side are nice and brown.


6. You'll know your oil is too hot if you just put your dough in and it comes out dark brown in 3 seconds . Turn your stove down, wait for awhile and throw a tester in there again till the oil is right, if oil is too cold your dough will not rise to the top and if it takes longer than 10 seconds to brown turn it up, so on and so forth. These are not precise times, you'll have to wing it till you try a couple of times, get some feed back from some real fry bread eaters then get at it on your own. Enjoy.

idaveindy's picture
idaveindy

March 19/20, 2020.

Inspired by this conversation, http://www.thefreshloaf.com/node/62657/does-whole-wheat-need-long-fermentation  to do just a plain simple instant yeast formula, with overnight bulk ferment.

5:05 pm. Mix 469 g water, 586 g home-milled whole grain flour. 80.0% hydration. (In hindsight should have used 85%.)  1 tsp of caraway seeds.  Flour was a mix of Prairie Gold (Hard white spring),  Hard Red Winter (generic), and Kamut Khorasan.

6:00 pm. Added 25 g water.

[  58 minutes soak/autolyse ] 

 6:03 pm. Folded in 1/8 tsp instant dry yeast.  Static electricity picked up extra, which was included in the mix.  Weighed 1/8 tsp, with static extra, later. .5 grams. .0853 % (Scale is only accurate to +- .1 gram anyway.) 

6:05 pm. Folded in 23 g water.  ( 517 g water so far. 88.2% hydration.)

6:54 pm. added 11.7 g salt, and 12 g water.  ( 529 g water so far. 90.2% hydration.) 

Total dough weight = 586 + 529 + 11 = 1126 g (not counting caraway seeds.) = 2.47 pounds.

Did some stretch and folds.

6:05 am. preheat oven to *240/220 F.

   [ 12 hours, 11 minutes bulk ferment. ]   

6:14am to 6:19 am.  Shape and put in lined and floured banneton, 8.0" inner diameter at rim.

7:01 am.  Pre heat oven to 495/475 F.

   [ 75 minutes proof. ]    

7:29 am.  Bake in covered Lodge 3.2 combo cooker, in the deep part, 495/475, covered.  15 min.

7:44 am. continue bake, covered, 450/430 F. 15 min.

7:59 am. Uncover. Bake at 410/390 F. 15 min.

8:14 am. Take temp, 207.7 F.   Continue baking, uncovered, 410/390.  5 min.

8:19 am. Take temp, 208.4.  Call it done.

Virtually no oven rise.  Cut open after 4 hours.  Nice  crumb for commercial yeast.

* First number is thermostat setting, second number is actual.

--

Analysis: 

-- Needed more soak, less bulk ferment.  Could have proofed less too, just enough time to preheat oven.  2 hours more soak, 2 hours less ferment would have been good.  1/8 tsp yeast was too much for this 12 hour ferment of 100% WW home-milled.

-- 90% hydration was too slack. Next time, use 85% for soak.  And add 2.5 to 3 % water with the salt.  Maybe just add the salt right after the yeast.

-- Crumb was not too moist,

Pages

Subscribe to RSS - idaveindy's blog