The Fresh Loaf

A Community of Amateur Bakers and Artisan Bread Enthusiasts.

justkeepswimming's blog

justkeepswimming's picture
justkeepswimming

Things have cooled down just a bit the last few days, enough to make cooking more pleasant. This loaf is based on Trailrunner/Caroline's WW YW Pullman 13" bread. As Caroline mentions, this is a spin off of Danayo's 1-rise only bread. I scaled Caroline's recipe down a bit for use in my 9 in Pullman pan, and made just a few substitutions:

235 gm AP (Bob's Red Mill organic)

235 fresh milled Central Milling hard red spring wheat

50 gm KA Semolina that I ran through the Mockmill x2 to get it finer. No idea if that will work, but it was what I had on hand. 

20 gm fresh milled rye

280-325 gm water (100 gm of the water was yeast water)

34 gm each honey, EVOO, buttermilk (the real, cultured stuff) = 102 gm Trinity

9 gm salt

1 slightly rounded tsp of diastatic malt powder (none of these flours are malted, and the YW is pretty new. Not sure how strong it is and figured the wee beasties wouldn't mind a little extra help.)

126 gm active YW levain

Process: 

 Friday morning:

 - 7:20 a.m. Mixed 23 gm each of YW and flour (50:50 BRM AP and whole wheat) and put it out in the garage for 4 hours (temp 82 degrees). This is what it looked like at ~ 3:00. Probably not super strong yet, but it still smelled fresh and got there eventually. 


3:20 pm Mixed everything above. Mixed until everything was well incorporated, covered and rested 1 hour. Then mixed in a Bosch compact mixer for ~ 7 minutes. While the dough was mixing, I prepped the Pullman pan with some baking spray and previously used parchment paper. This spray has always served me well, nothing ever seems to stick when I use it. Still, parchment paper gives that extra layer of insurance. ;)


I had pondered holding back some of the water but my flour is always so thirsty in our dry climate that I decided to just go all in. Might not have been my best decision..... The dough was quite slack. Better than batter, but shaping wasn't going to happen. Good thing this is a loaf pan formula! I did about 50 slap and folds on the counter and that helped bring the dough together a little better. (It always amazes me how those help!) I schlorped the dough on to the parchment paper and used it as a sling to put it into the pan. DT was 78F. (Note to self - use a little less water!)


After 3.5 hours on the counter. The clips serve 2 purposes: they keep the parchment from flopping onto the dough, and also keep my trusty shower cap cover from touching the dough. Sorry for the blurry pic:


 - Saturday morning. We needed bread for lunch, and I was not willing to wait any longer. Preheated the oven to 375F and once it had been at temperature for about 15 minutes, I pulled the dough out of the fridge. This is after 13 hours in the fridge:


Baked at 375F for 30 min with the lid on, then 20 min with the lid off. The crust was still not quite our preferred color and the internal loaf temp was a bit cooler than usual so it got an additional 5 min in the oven. So total bake time was 55 min, right on par with how long most of my loaves take. 

After cooling for 2.5 hours, we needed lunch! It left a little gummy residue on the knife, but it was still just a little warm. No gumminess today, thankfully. 


The flavor is soooo good! Creamy, sort of yogurty but not quite. Definitely not the bland flavor I associate with a simple yeast based loaf. This one will definitely go into my regular rotation! It's an easy, no-muss-no-fuss loaf. Hubby liked it too - he doesn't often comment on the flavor 2 days in a row, and this loaf received that praise. I may increase the amount of whole grains next time.

Thanks again, Caroline and Abe, for all your help getting me to this point!!

Mary 

justkeepswimming's picture
justkeepswimming

I needed something to spruce up our leftover lentil stew that was planned for dinner. This is such a quick and easy recipe and has never failed me. I usually make 1/2 of the total recipe and cook it in an 8x8 (well greased AND lined) pan. There are multiple recipes available on the web, and most of them use identical formulas overall. I have always followed the KA recipe and use rye flour as they suggest, but others say you can use barley flour. I opted to try that for a change, and substituted fresh milled barley instead of the same amount of rye. I didn't add any inclusions this time, but have done so in the past. In the past I have added various things, like a little caraway, or some pine nuts, or hulled hemp seeds. All were really tasty!

Usually this comes out approximately 50-70% thicker than this. The rye (predictably) does a better job at capturing gases and rising. The crumb is very soft and tender, almost cake-like. Quite yummy fresh out of the oven with some butter on top! 


justkeepswimming's picture
justkeepswimming

First, a heart felt thanks to Abe, Caroline, Clazar123, as well as multiple previous TFL members for sharing your methods! Especially the reminder about using the microwave with the light on. I did a test run (empty) and left a thermometer in there with the door slightly open and the light on. After 3 hours, the temp was holding at 76F, so that should work. 

I decided to go ahead and make 2. I can decide later which one works best. The one on the left is half of an organic granny smith apple diced into roughly 1/2 in pieces. The jar on the right has the other half of the apple, with probably a little less than 1/4 cup of organic raisins. Half of them were chopped in half and smooshed a little bit before going in the jar. And since I was cutting into an orange for an afternoon snack, I squeezed a little juice into the one with raisins as Dabrowman suggested in an old post of his. Both jars got a gentle shake and after taking the picture below, the rings were removed. The lids are just resting on top of the jars, so things can vent as needed. 

We'll see which one is ready first, and which one lasts best in the fridge later. I'll update as things progress. 

Mary 


justkeepswimming's picture
justkeepswimming

Edit: Formatting fixed. That's better!!

It's funny how these things come up. I had purchased a Zojirushi Virtuoso about a year and a half ago and have struggled to get a reasonably decent loaf of bread out of it. My most consistent problems are drastic over proofing (to the point of complete collapse of the loaf), and a pale crust. Even with cutting yeast amounts in half and trying an assortment of recipes, results were never all that great. Edible, just far short of what I had hoped for. I had reached the point of relegating it to the basement vs just getting rid of it entirely. Nobody has counter space for appliances that aren't doing anything, me included.

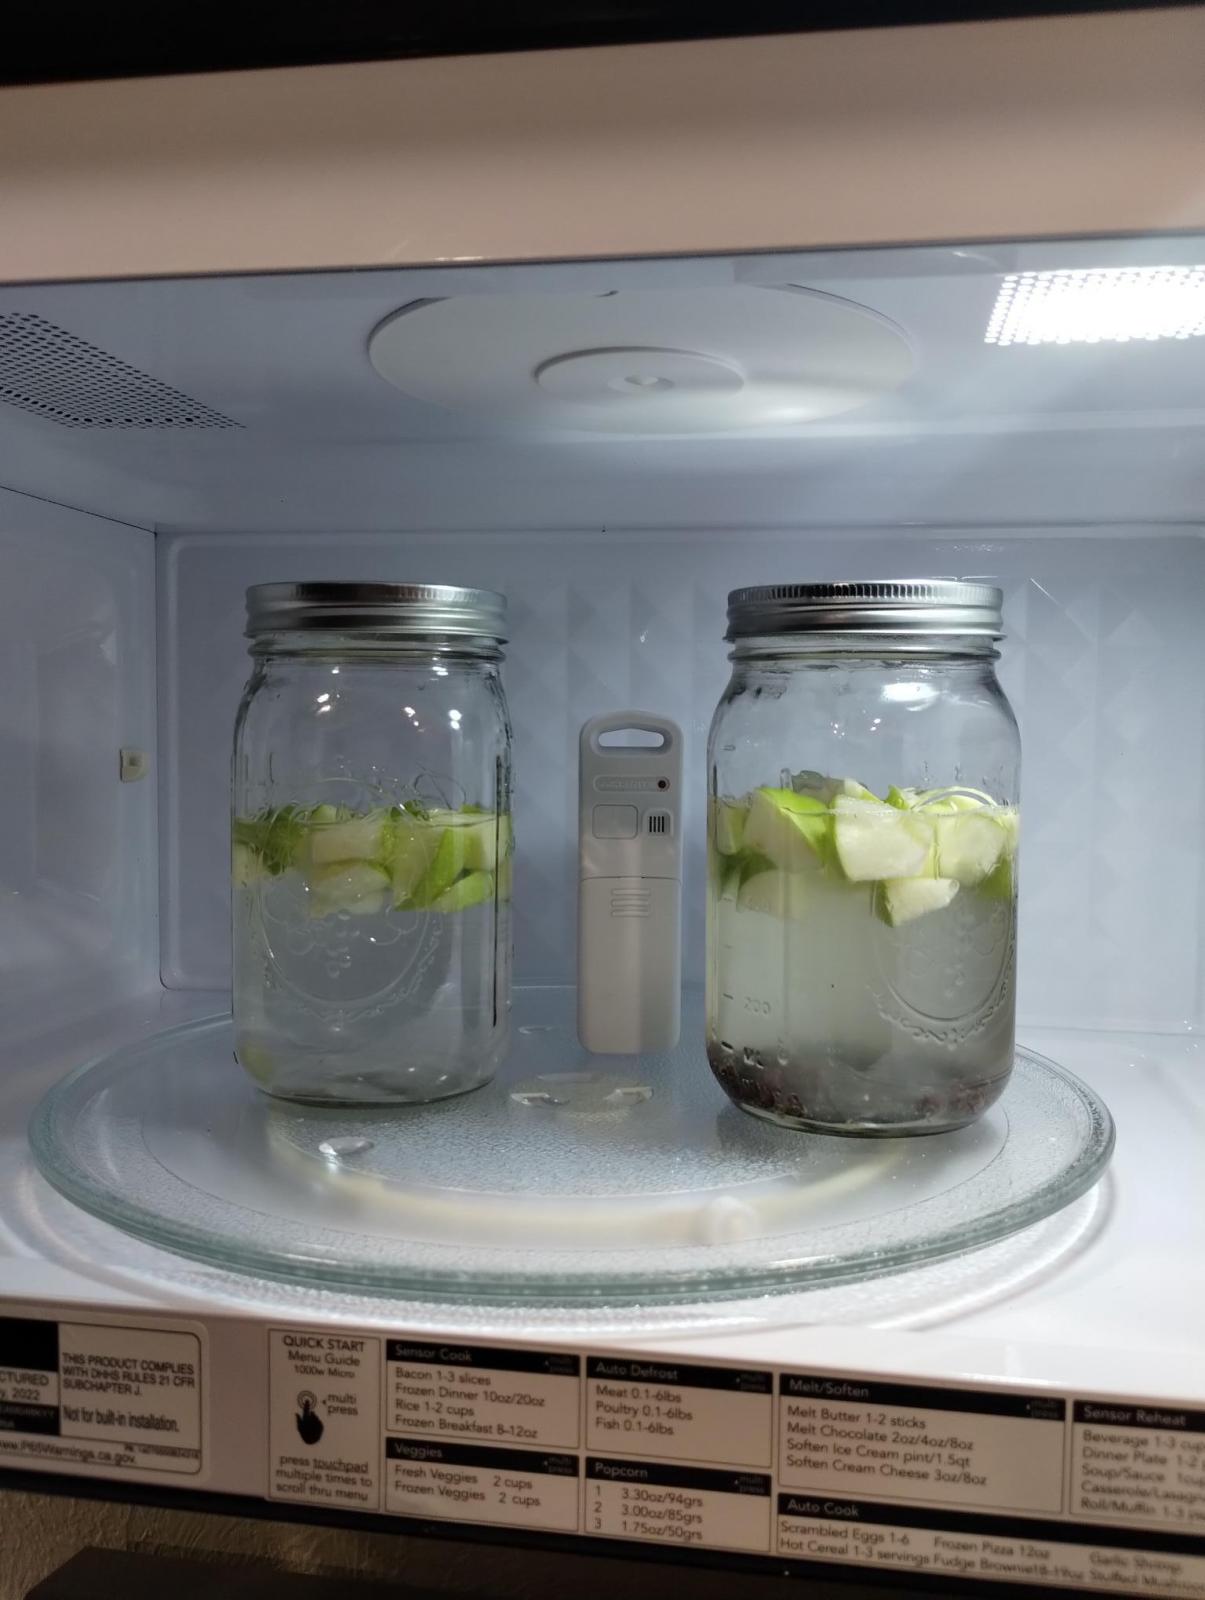
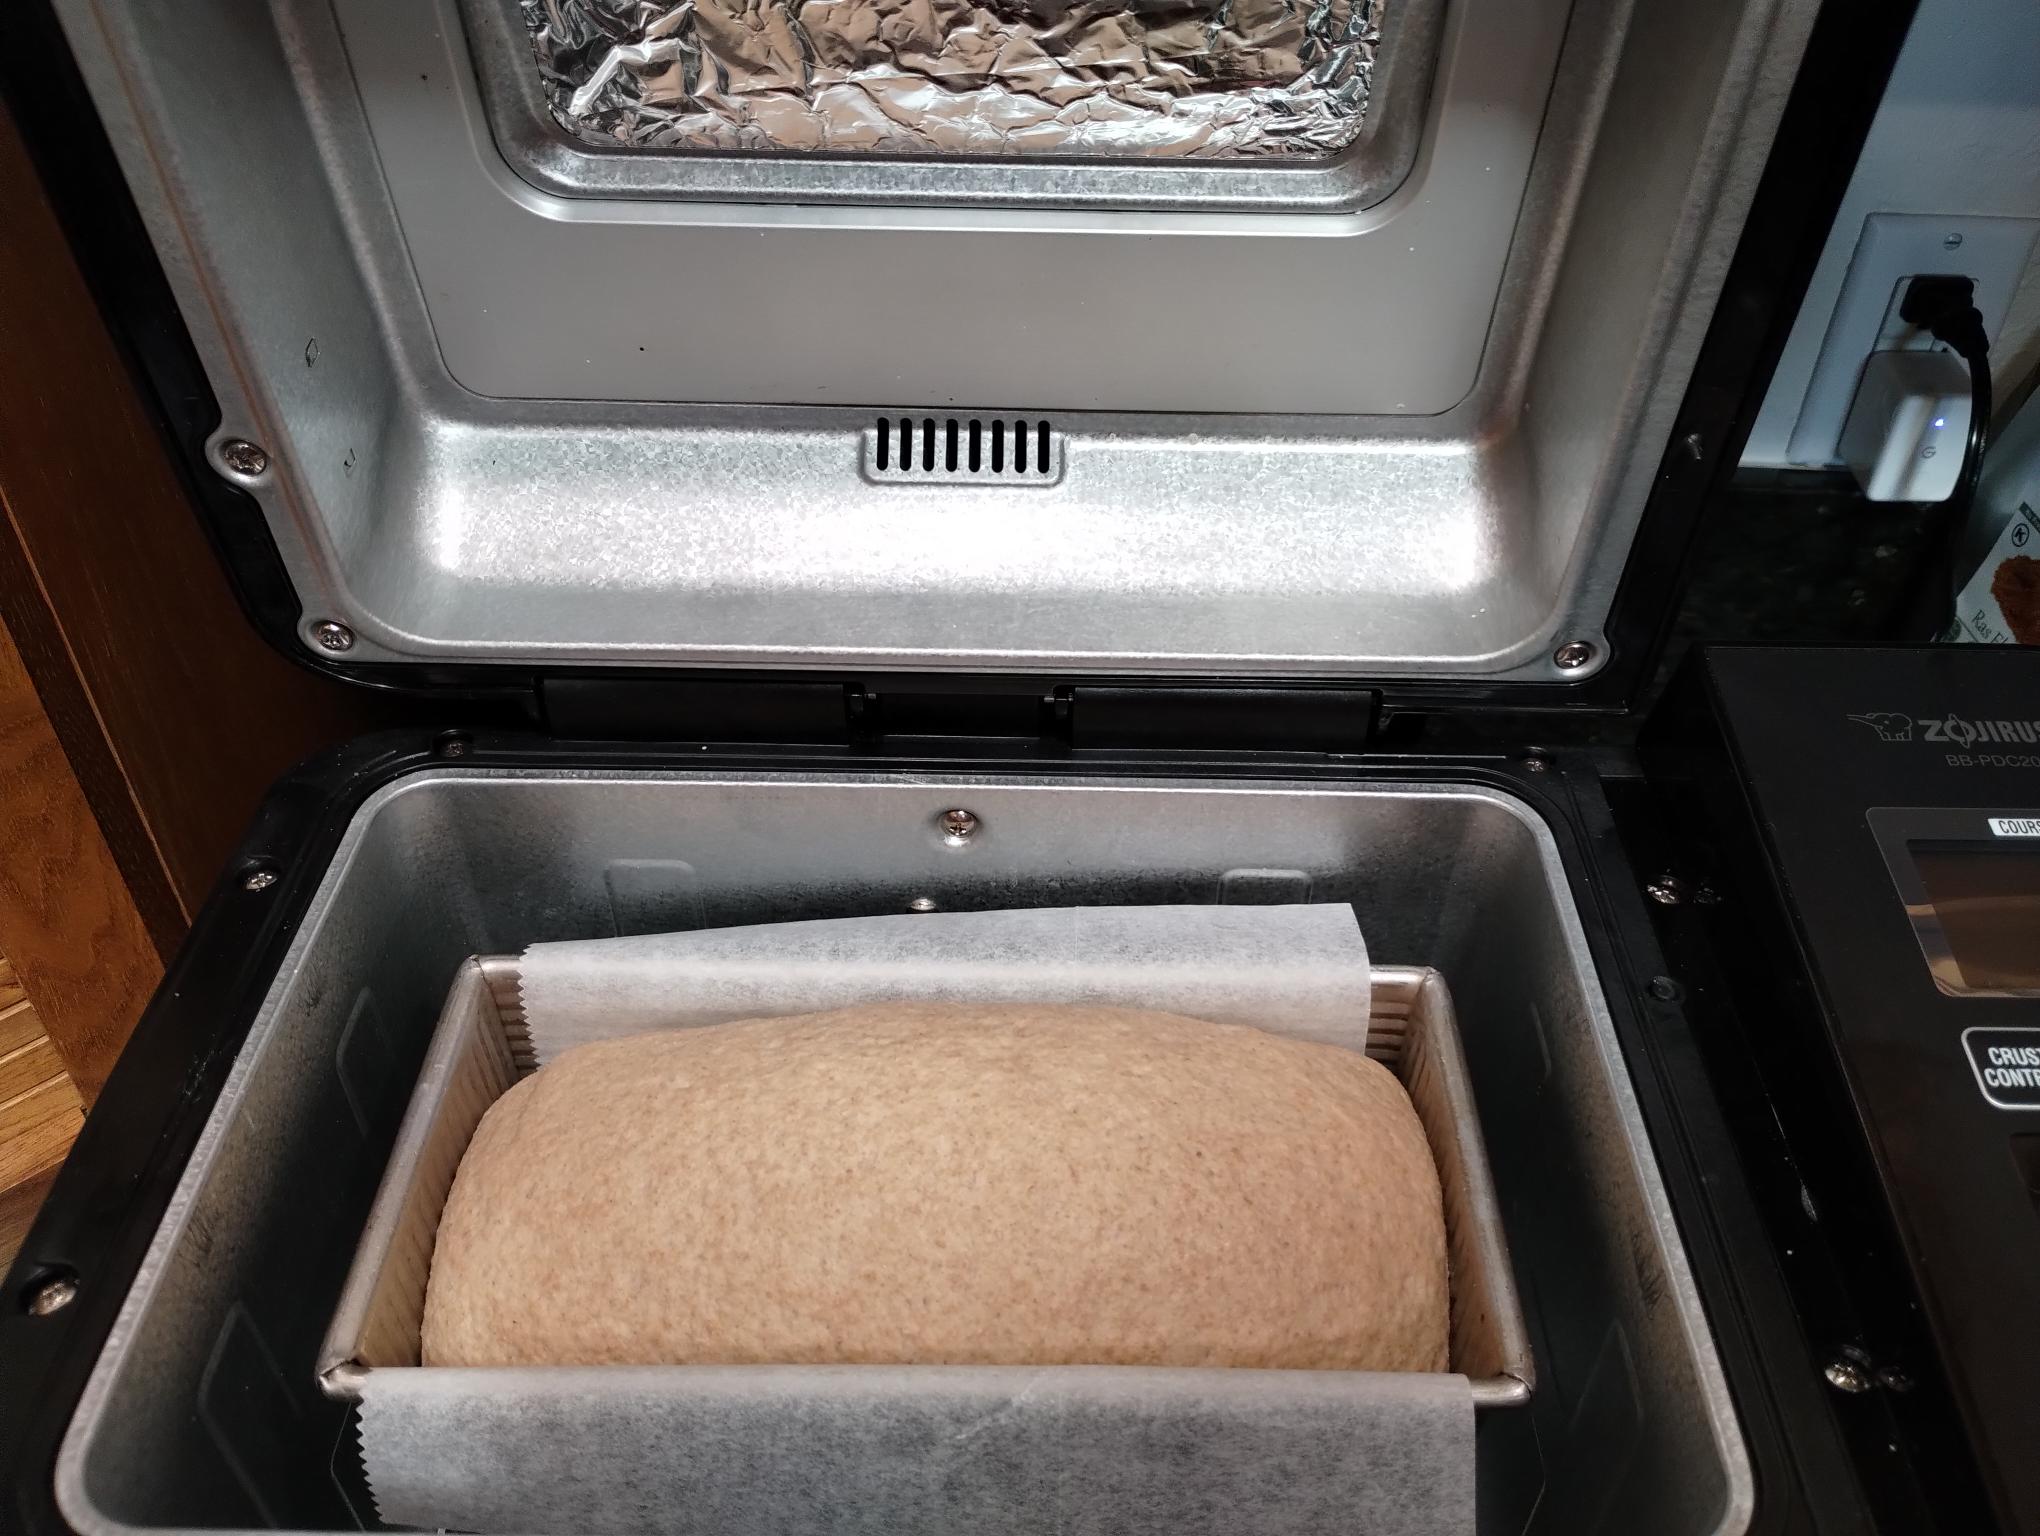
As I was wondering what to do with it, a discussion about a particular brand of bread machine popped up recently here.  Comments included suggestions about ways to improve the crust color as well as bake in the machine using a regular loaf pan. Several people (yipee and jo_en here) report improvement by putting a layer of aluminum foil between the glass viewing window and the interior of the machine, to reduce heat loss and improve reflectivity. Jo_en' trivet suggestion here was also helpful. I figured I didn't have much to lose at this point and went ahead with their suggestions. 

Putting the foil inside the lid was indeed easy. The Virtuoso has 5 screws: 4 Philips head and 1 torx screw, which required that specialty screwdriver. Hubby had one just the right size at the ready in his shop room - yeah!  And we had a trivet that was just the right size. It had come with an air fryer, but I had never used it. I figured if it was recommended for air fryer temps, it would be fine inside the Zo.

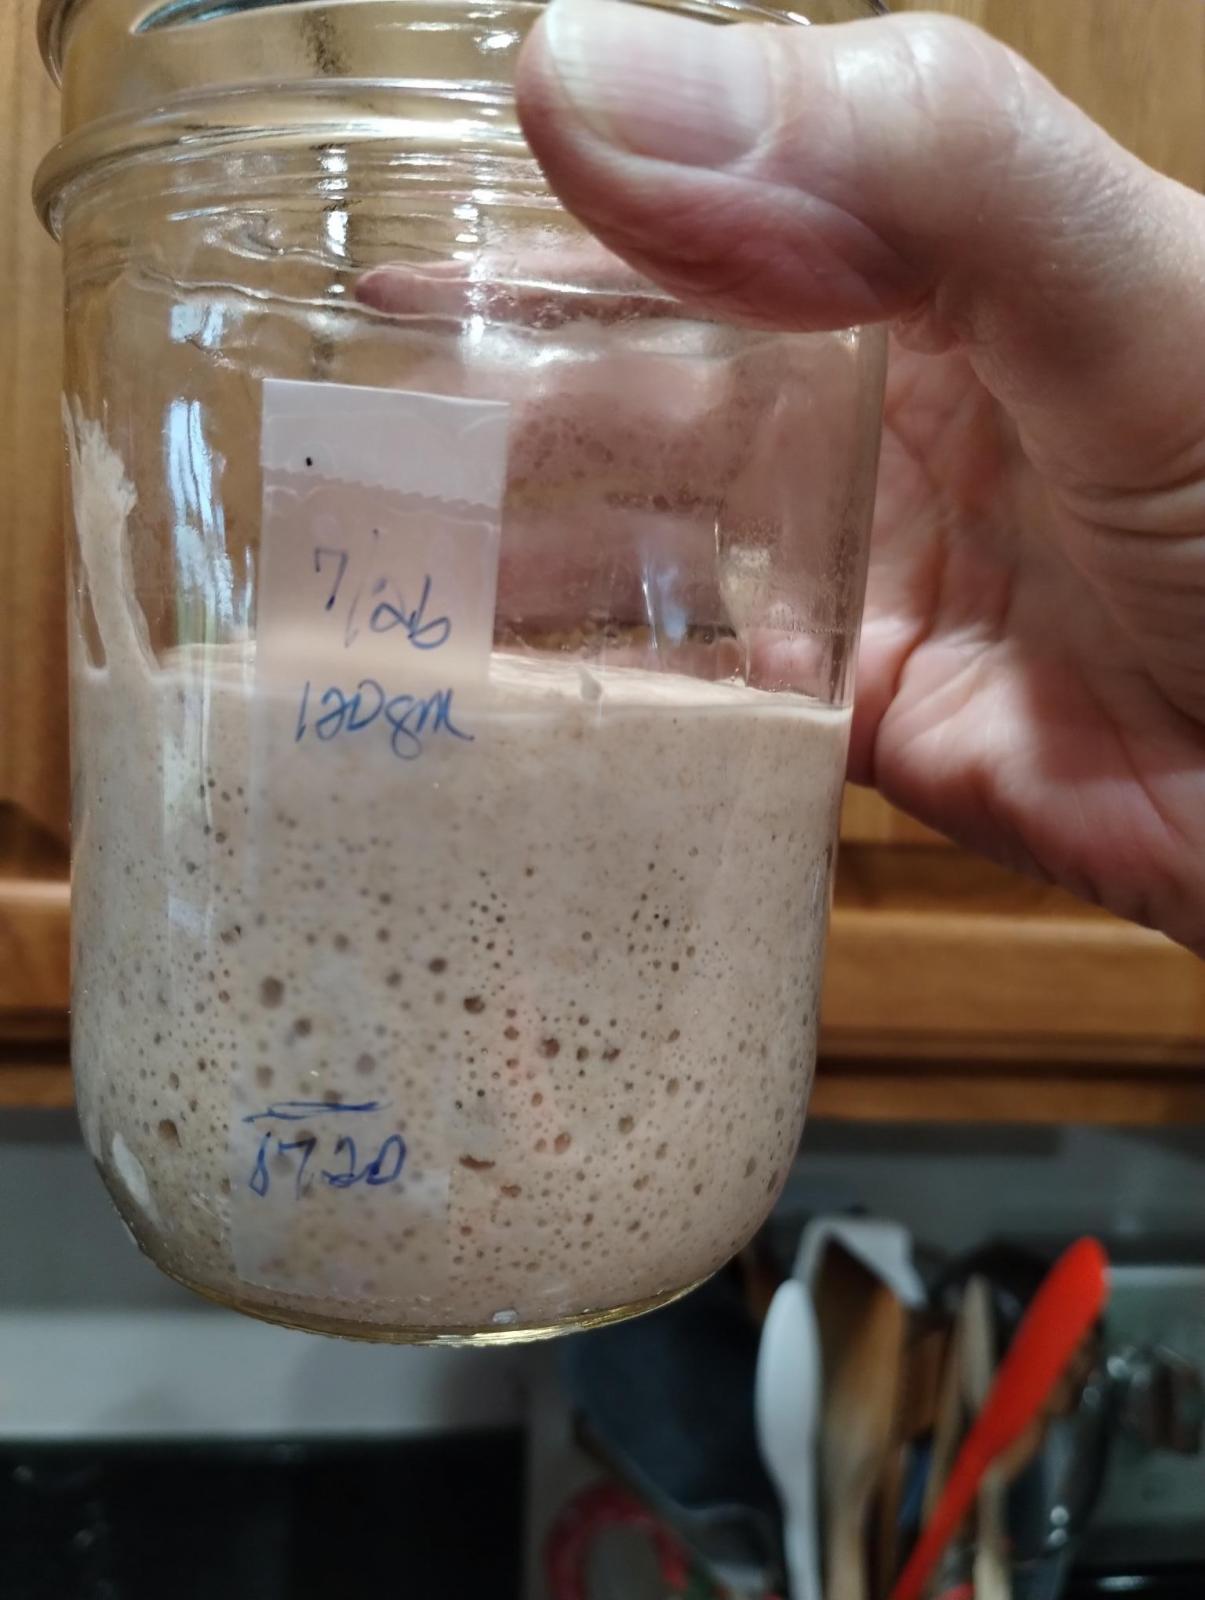
I haven't baked a yeasted loaf in nearly forever. My starter had been slumbering in the frig for the past week and I was itching to try out the suggestions. Rather than feed my starter and wait, I pulled up an old yeast based recipe for something similar to our usual SD sandwich bread:

375 gm fresh milled hard red spring wheat

125 gm King Arthur bread flour

350 gm water

2 tsp brown sugar

1 Tbsp safflower oil

9 gm salt

6 gm Instant Yeast

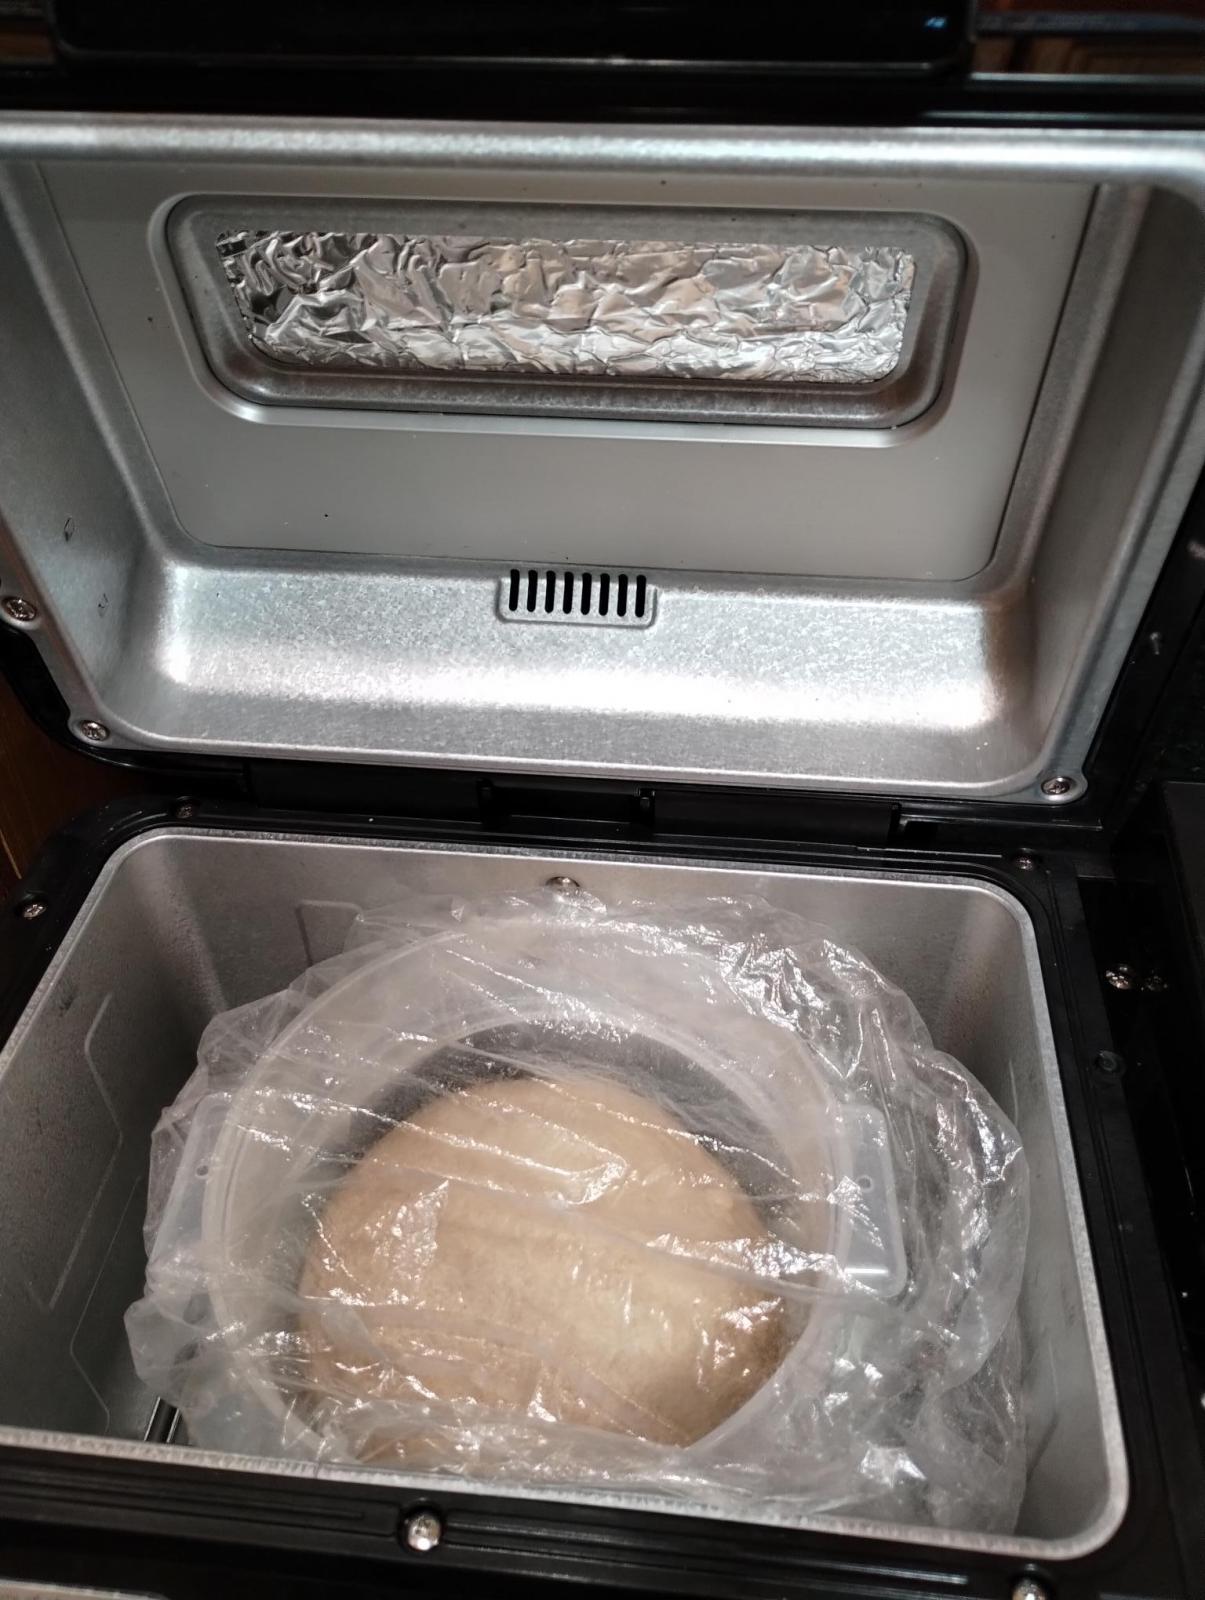
All mixed/kneaded in the Zo for 15 min, then the dough was put in a Cambro for bulk inside the Zo on the trivet. (Not sure I would do that again, it occurred to me if the dough overflows the container for some reason that would be quite a mess to clean up.) It felt nicely strong, not too elastic and not too extensible.... Just right. Dough Temp at the start of bulk: 86f. House temp 74f. The Zo was unplugged to avoid any troubles.

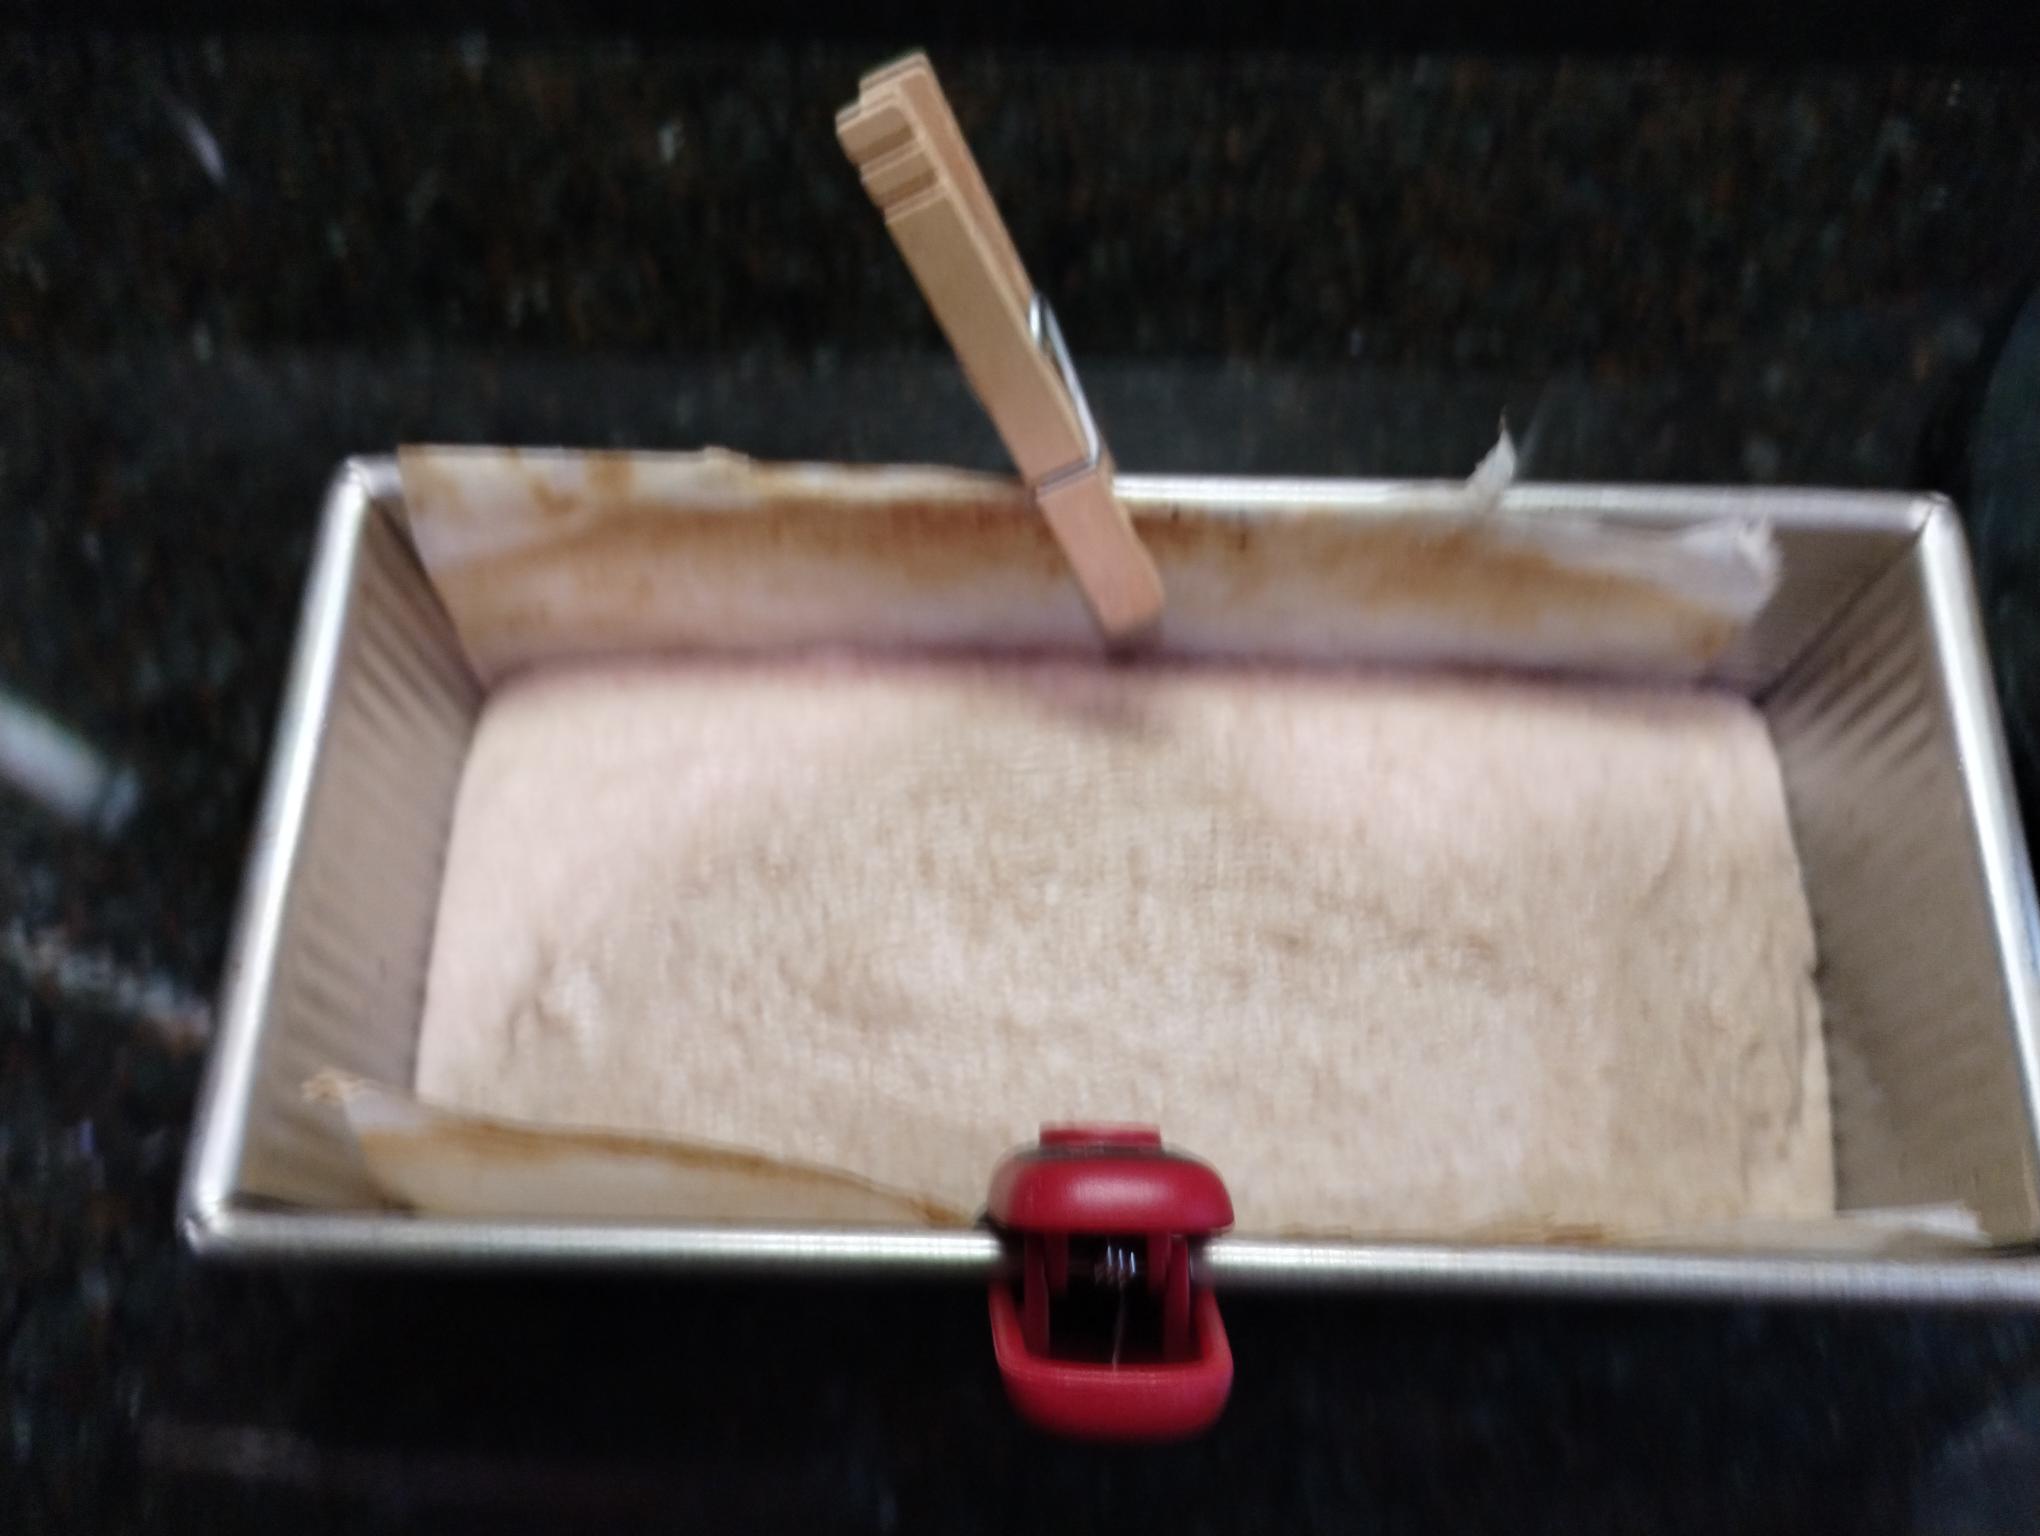
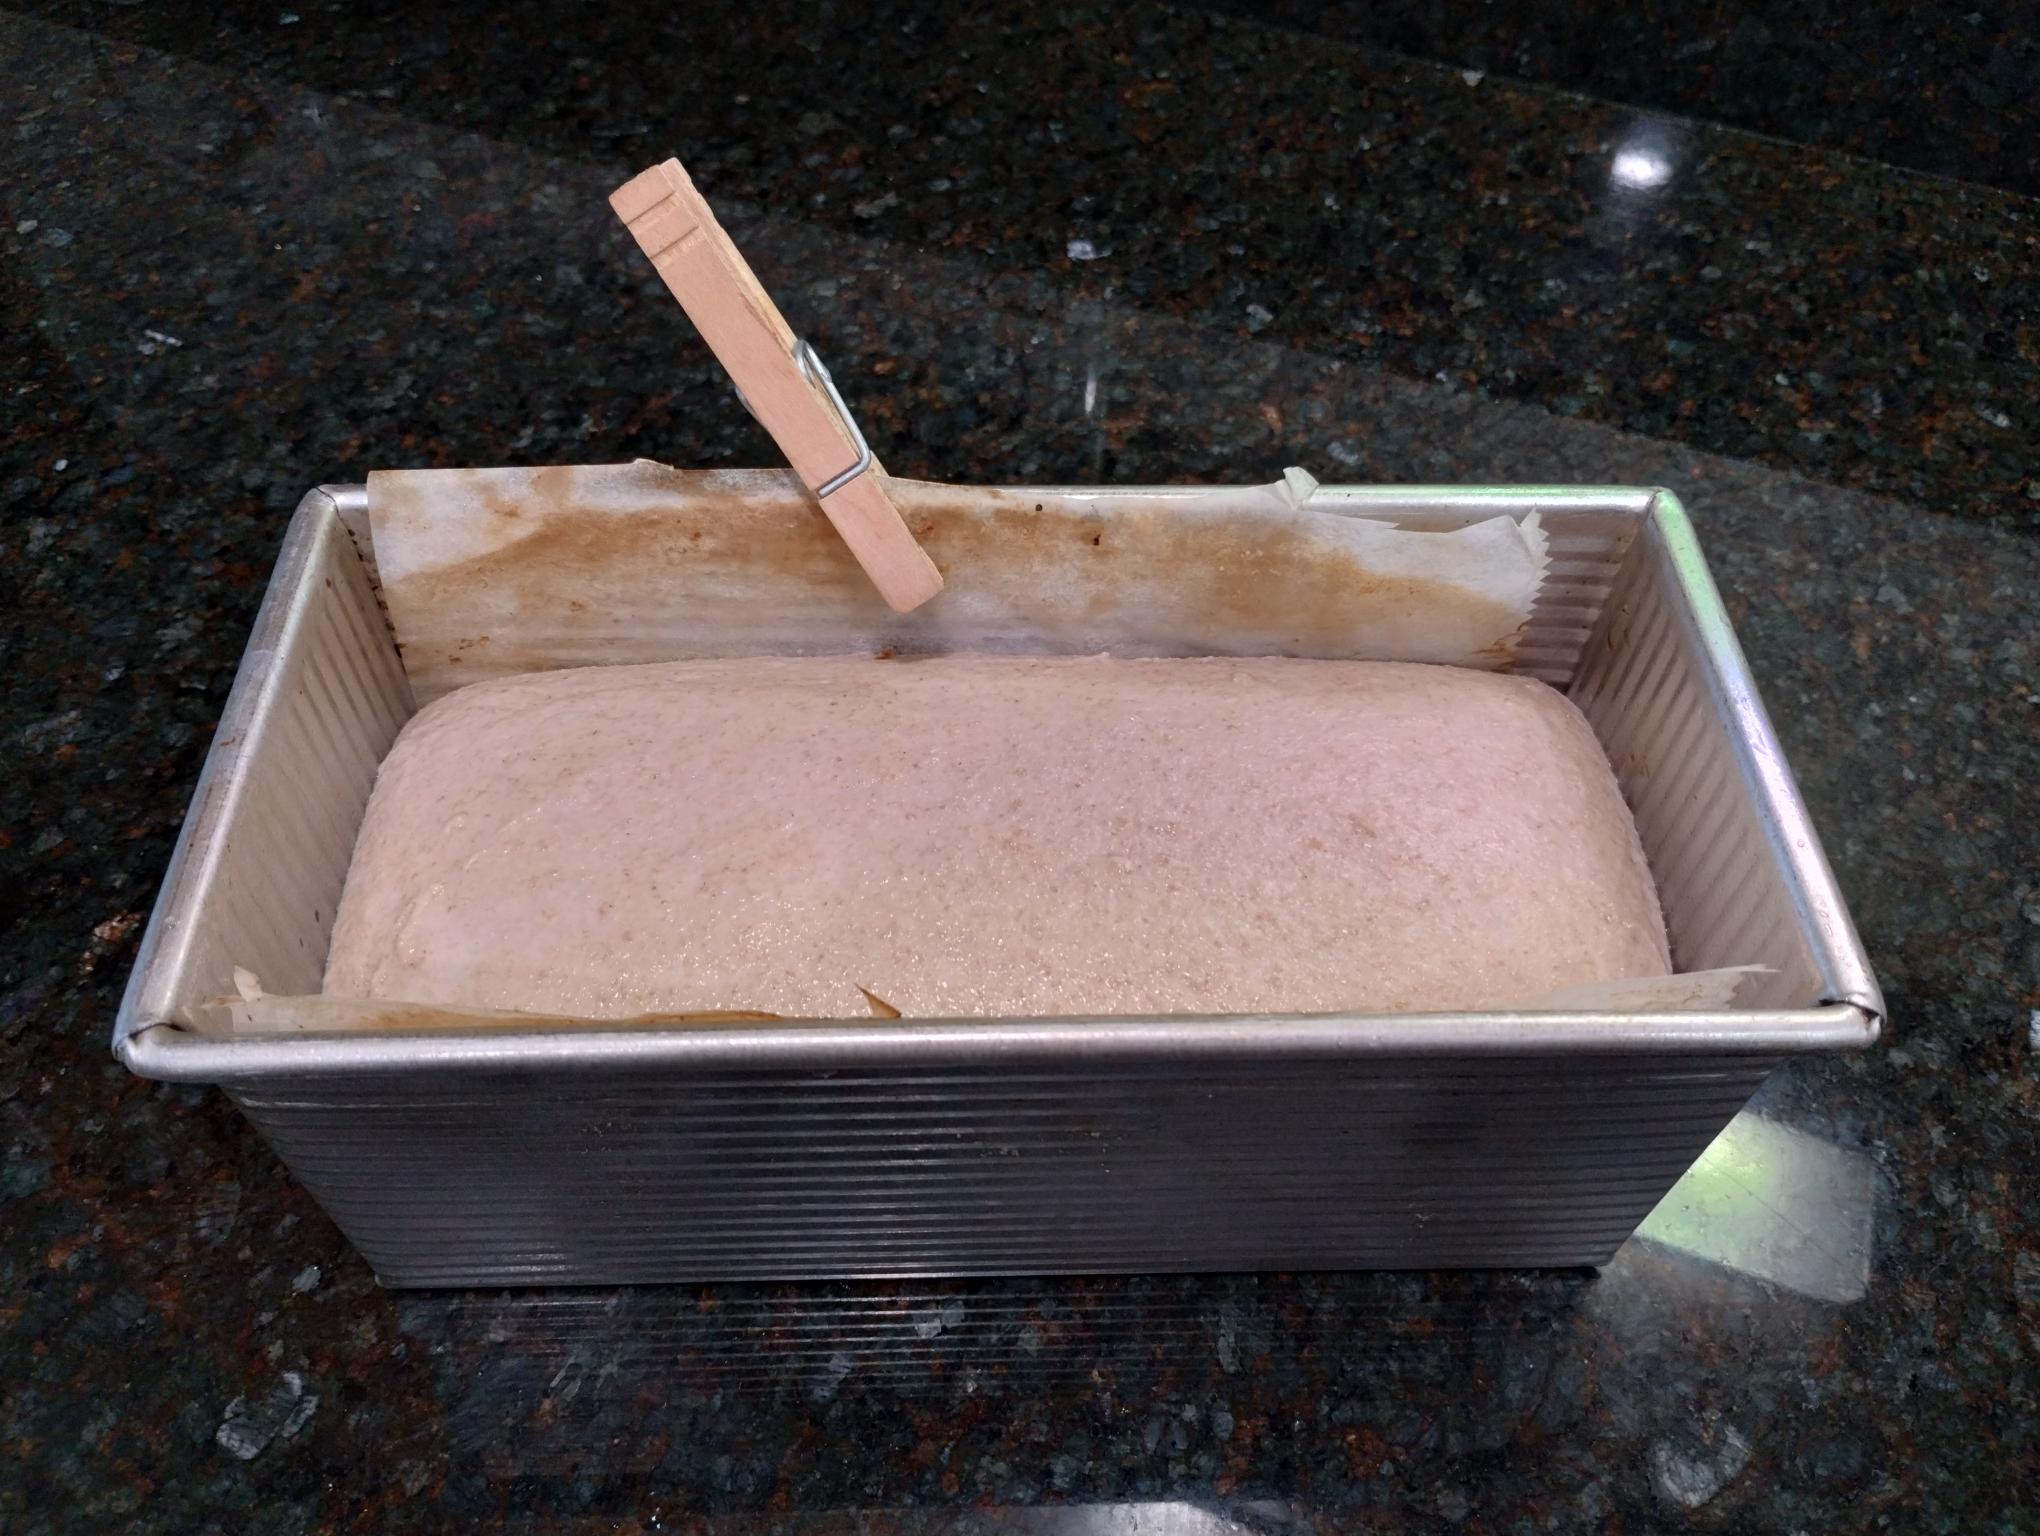
Fortunately, I checked the dough after 45 minutes - it had already doubled in size. I forgot that I usually use less of the SAF yeast than most recipes call for, because it tends to do this. Rationale: In part the yeast loves the freshly milled flour and really takes off fast with it, and in part because we live at 6,000 ft, and proofing can get away from me sometimes. The dough was shaped and put into a Pullman pan (9x4x4) with a parchment sling and covered for final proof inside the Zo, on top of the trivet. 

After only 30 minutes, the dough was roughly ½ in above the rim of the pan. I wasn't entirely certain how long I should bake for, so I set up a manual course to just bake for 90 minutes. (Side note for Zo users: the Virtuoso doesn't let you adjust the crust color in the manual programs, you can only do that in several of their pre-set programs... not all of the pre-set ones, just "some".) The dough got a quick brush with a mixture of 1 tsp milk and 1 tsp milk powder, and I pushed "start".

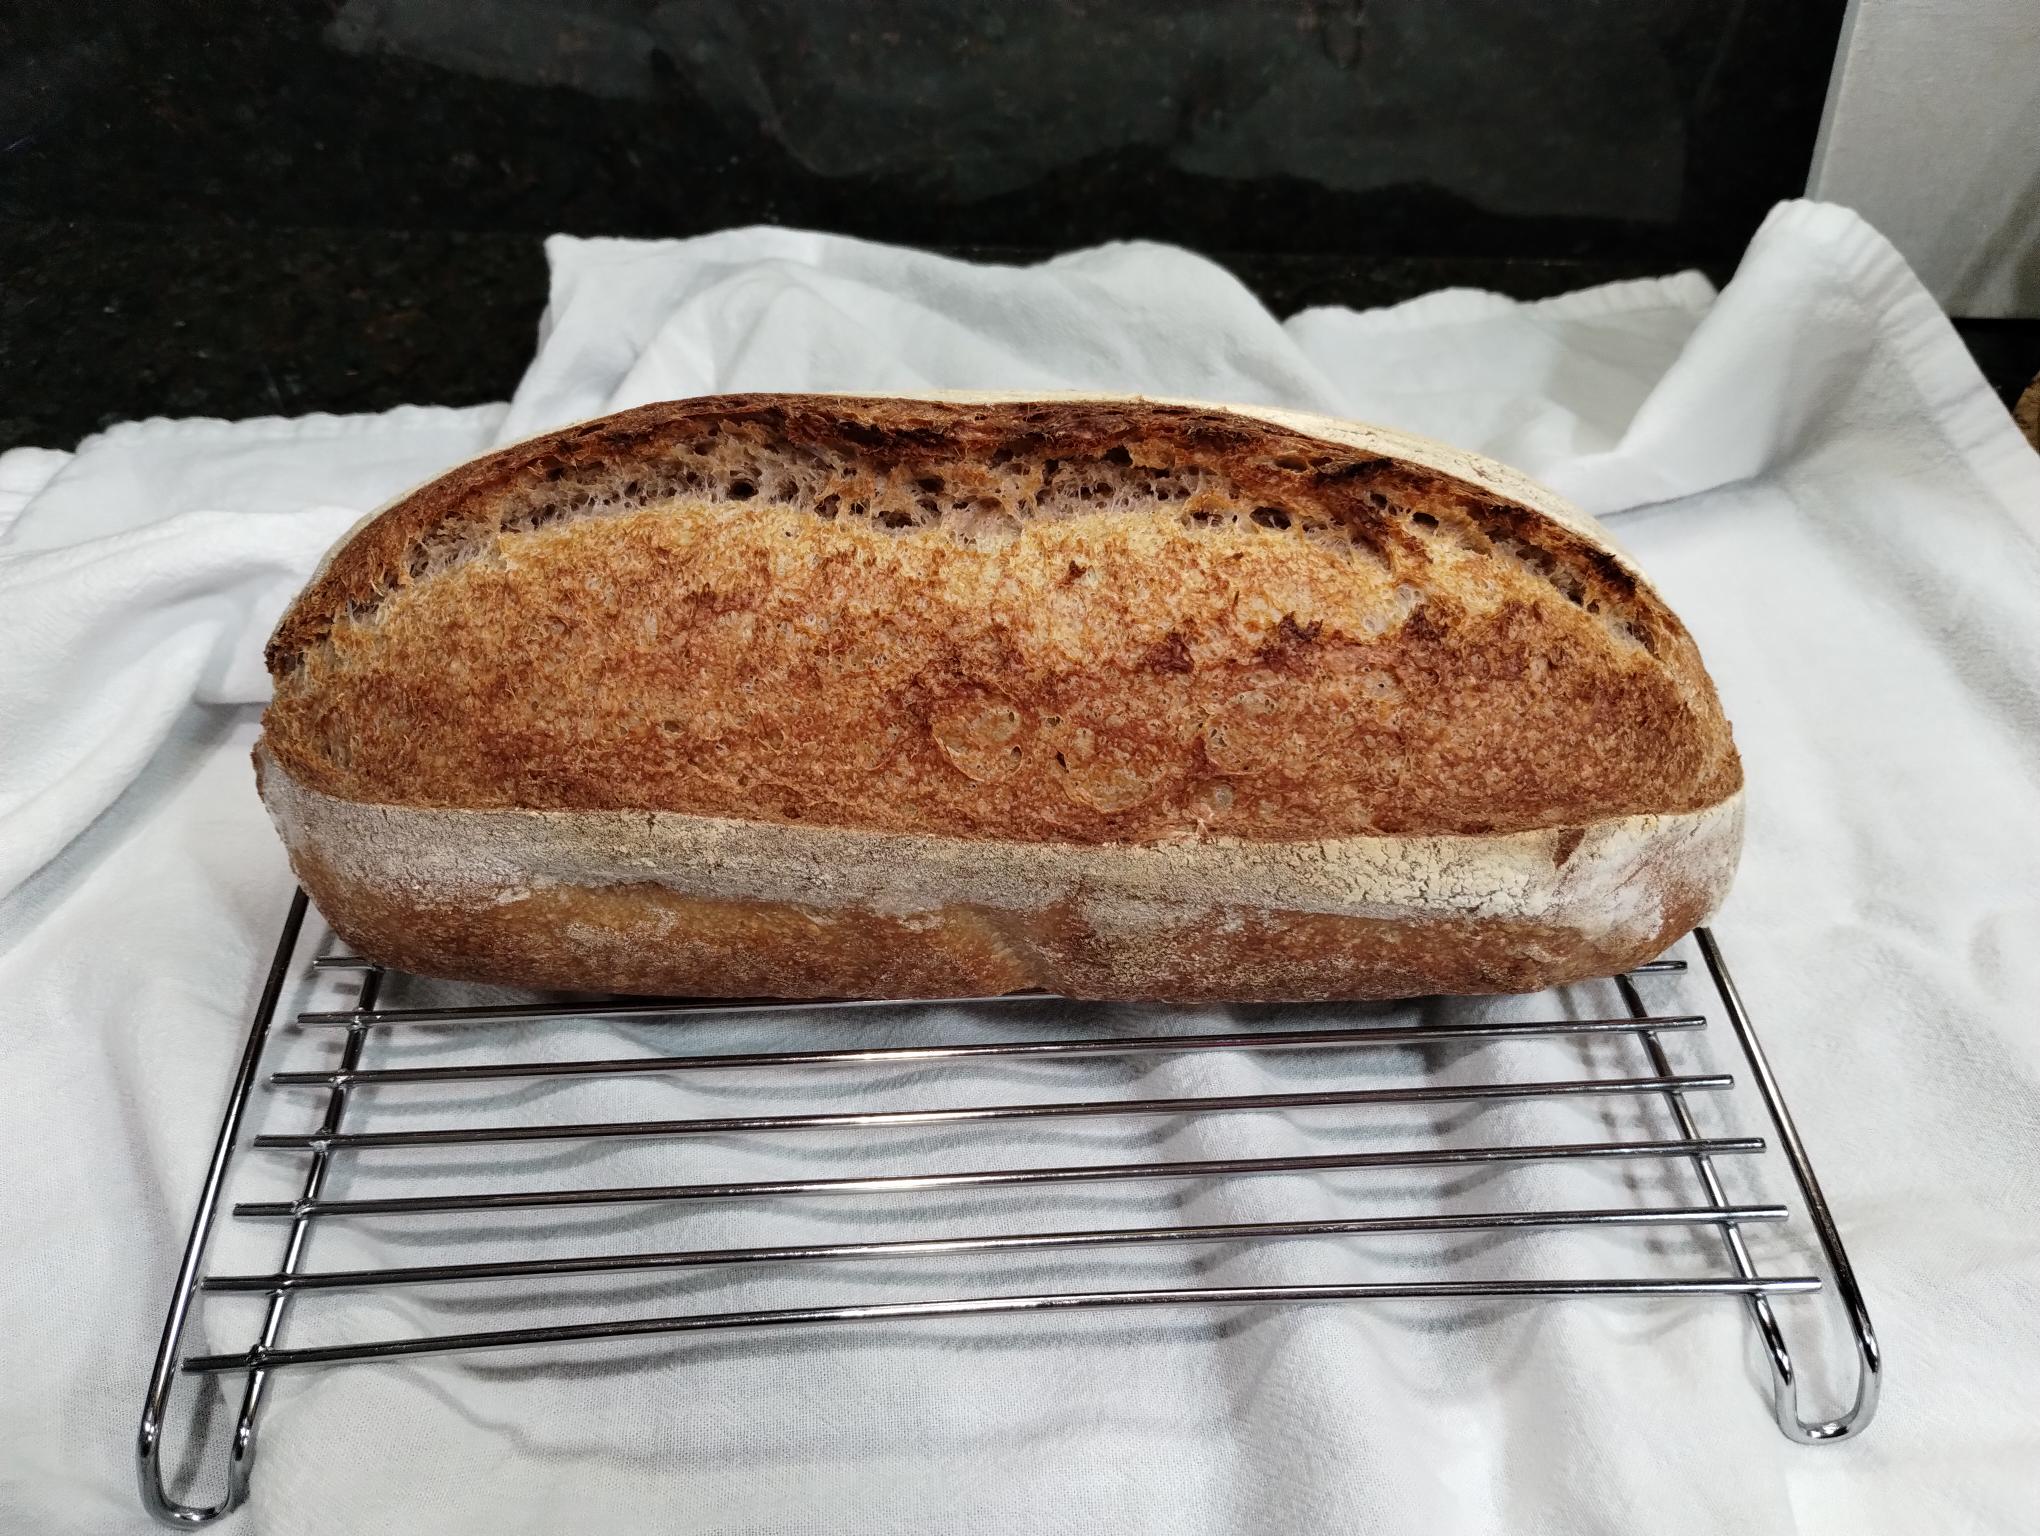
After 1 hour, I barely lifted the lid to give it a quick check.... The crust was a nice golden brown, and it smelled like it was either done or nearly so. Internal loaf temp was 197f (the best I can get here in the oven is 199f). The probe was not dry and not gummy at all.... 5 more minutes bake, then I took it out to cool. 

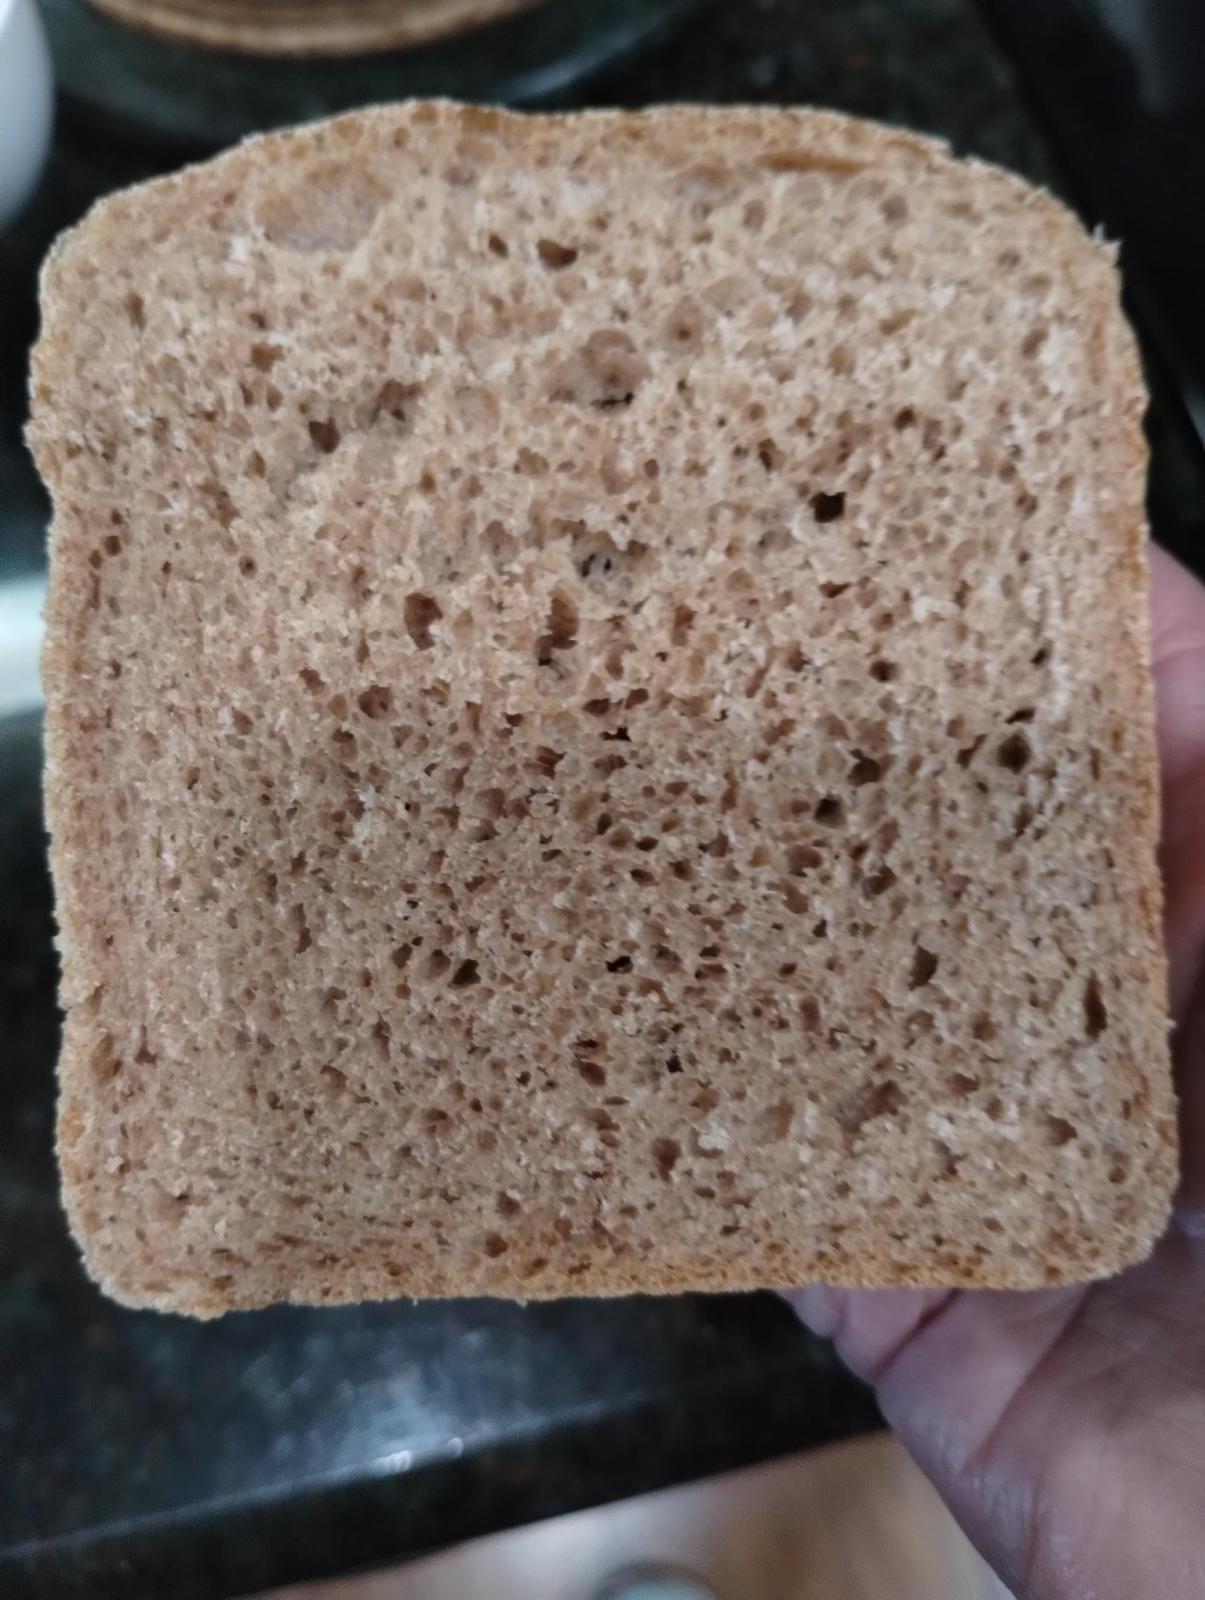
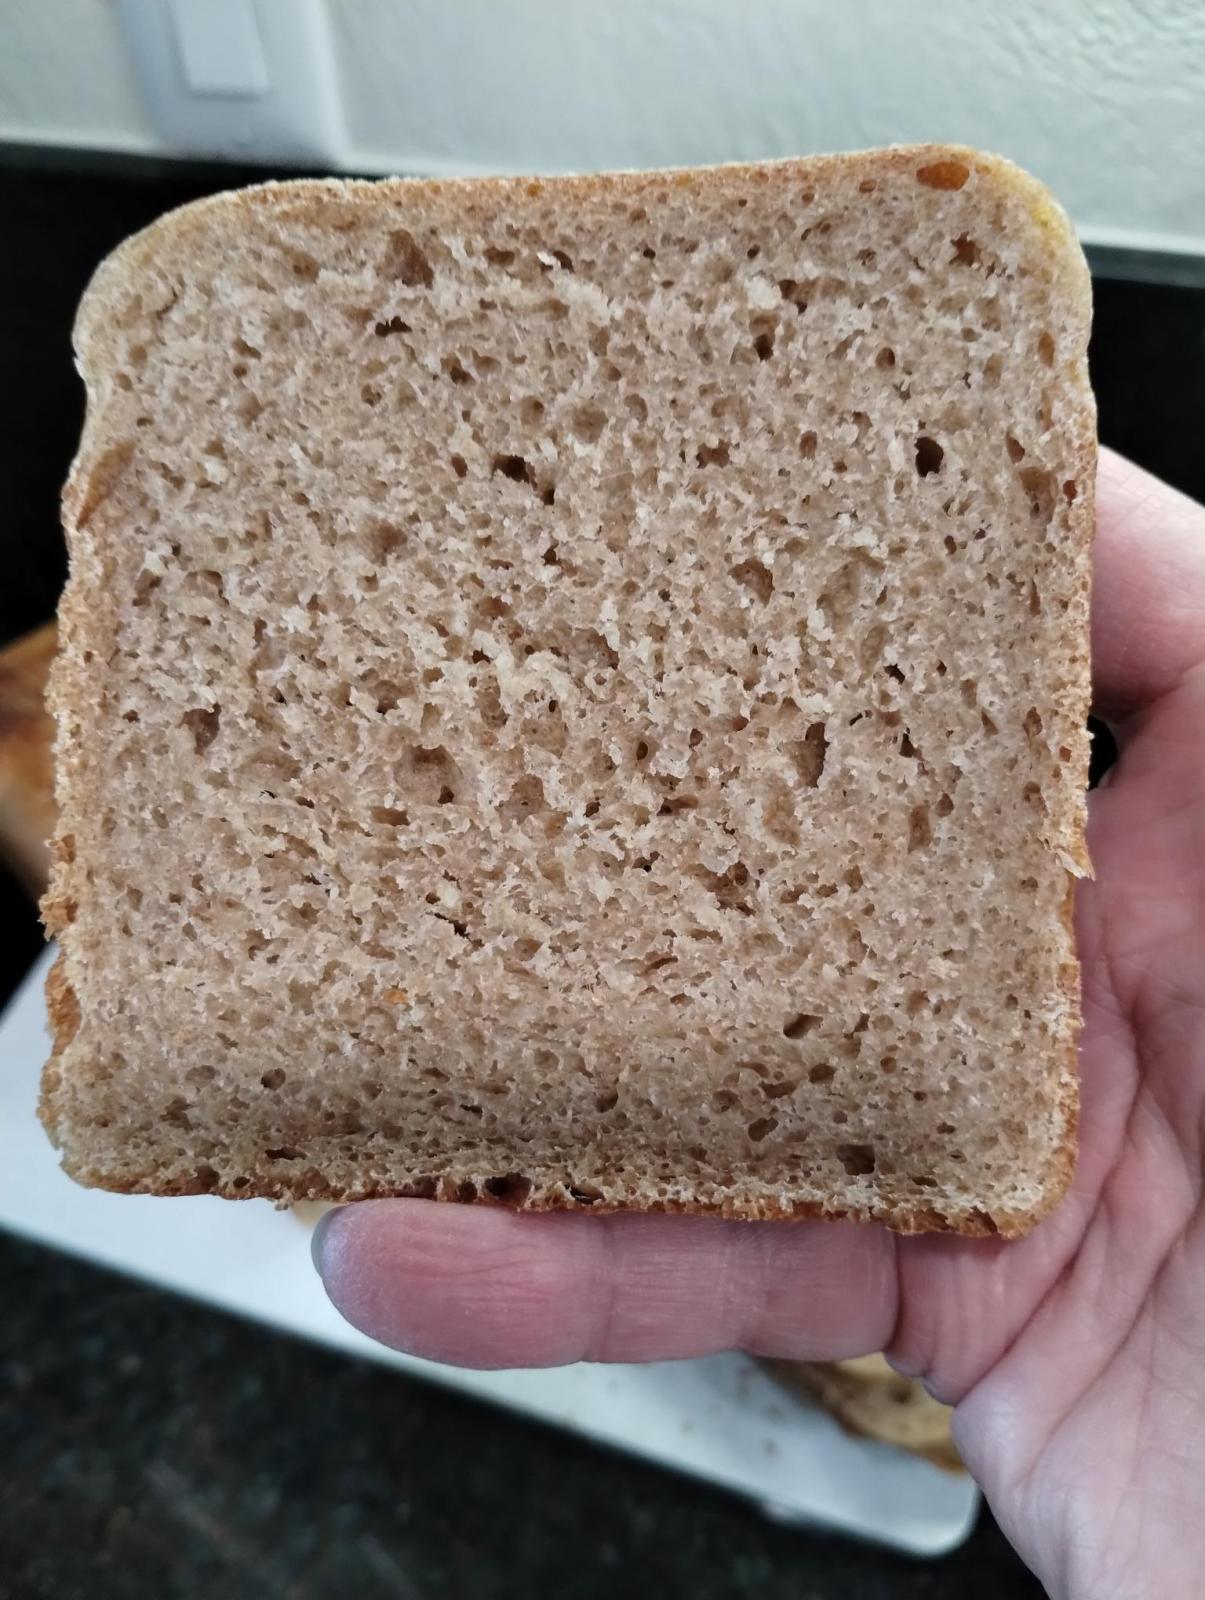
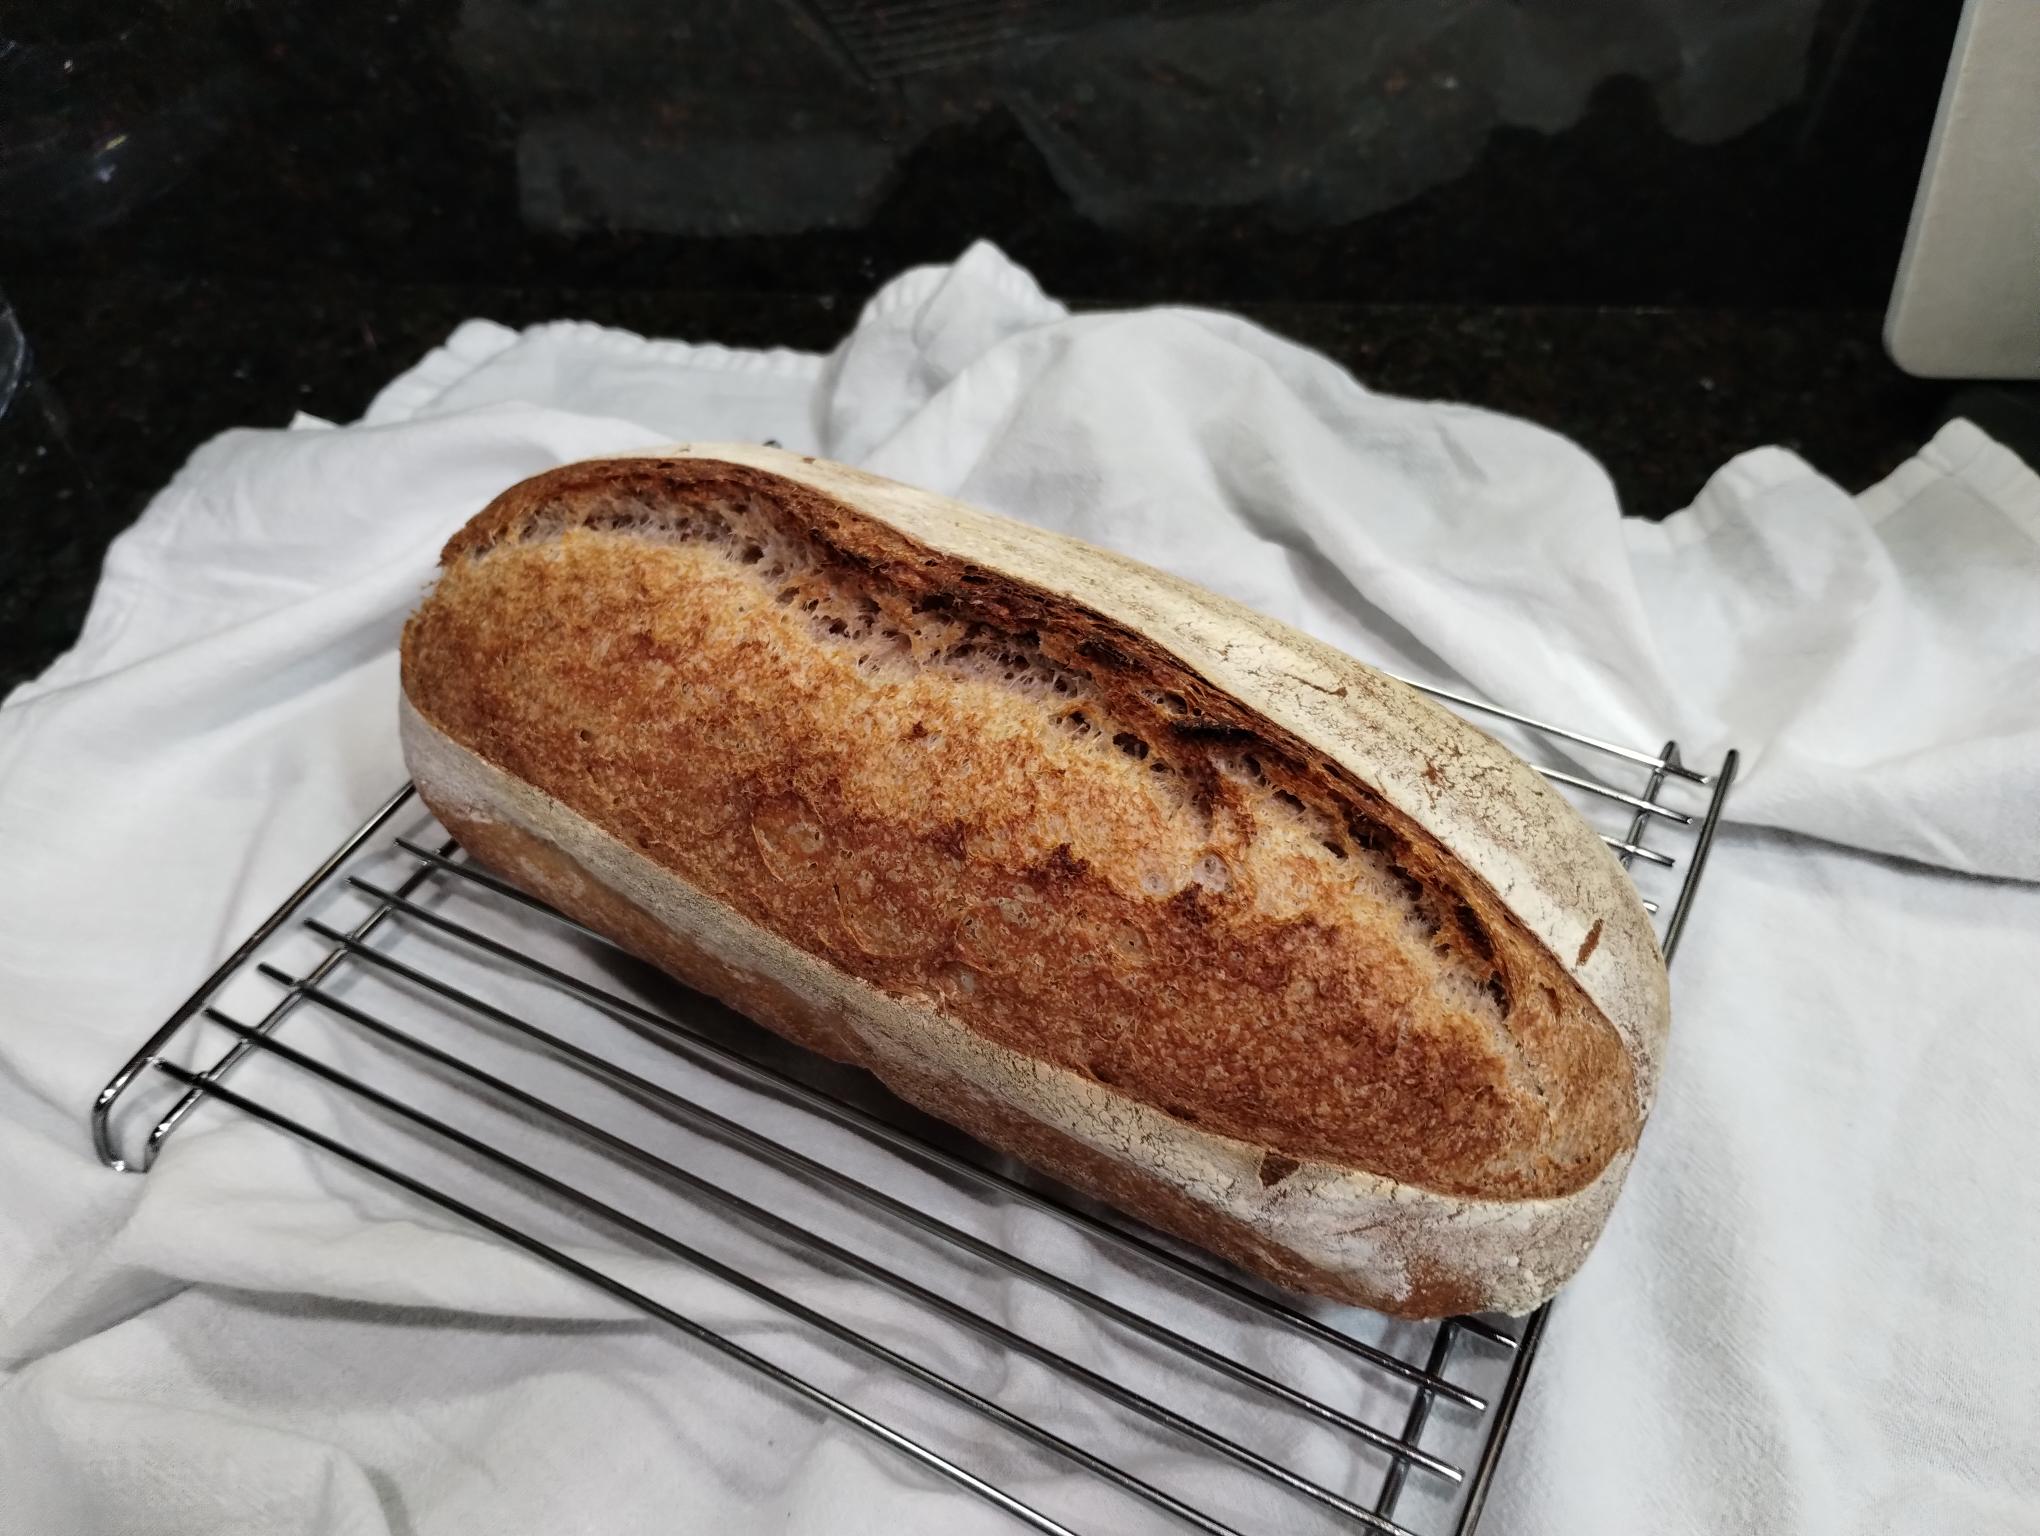
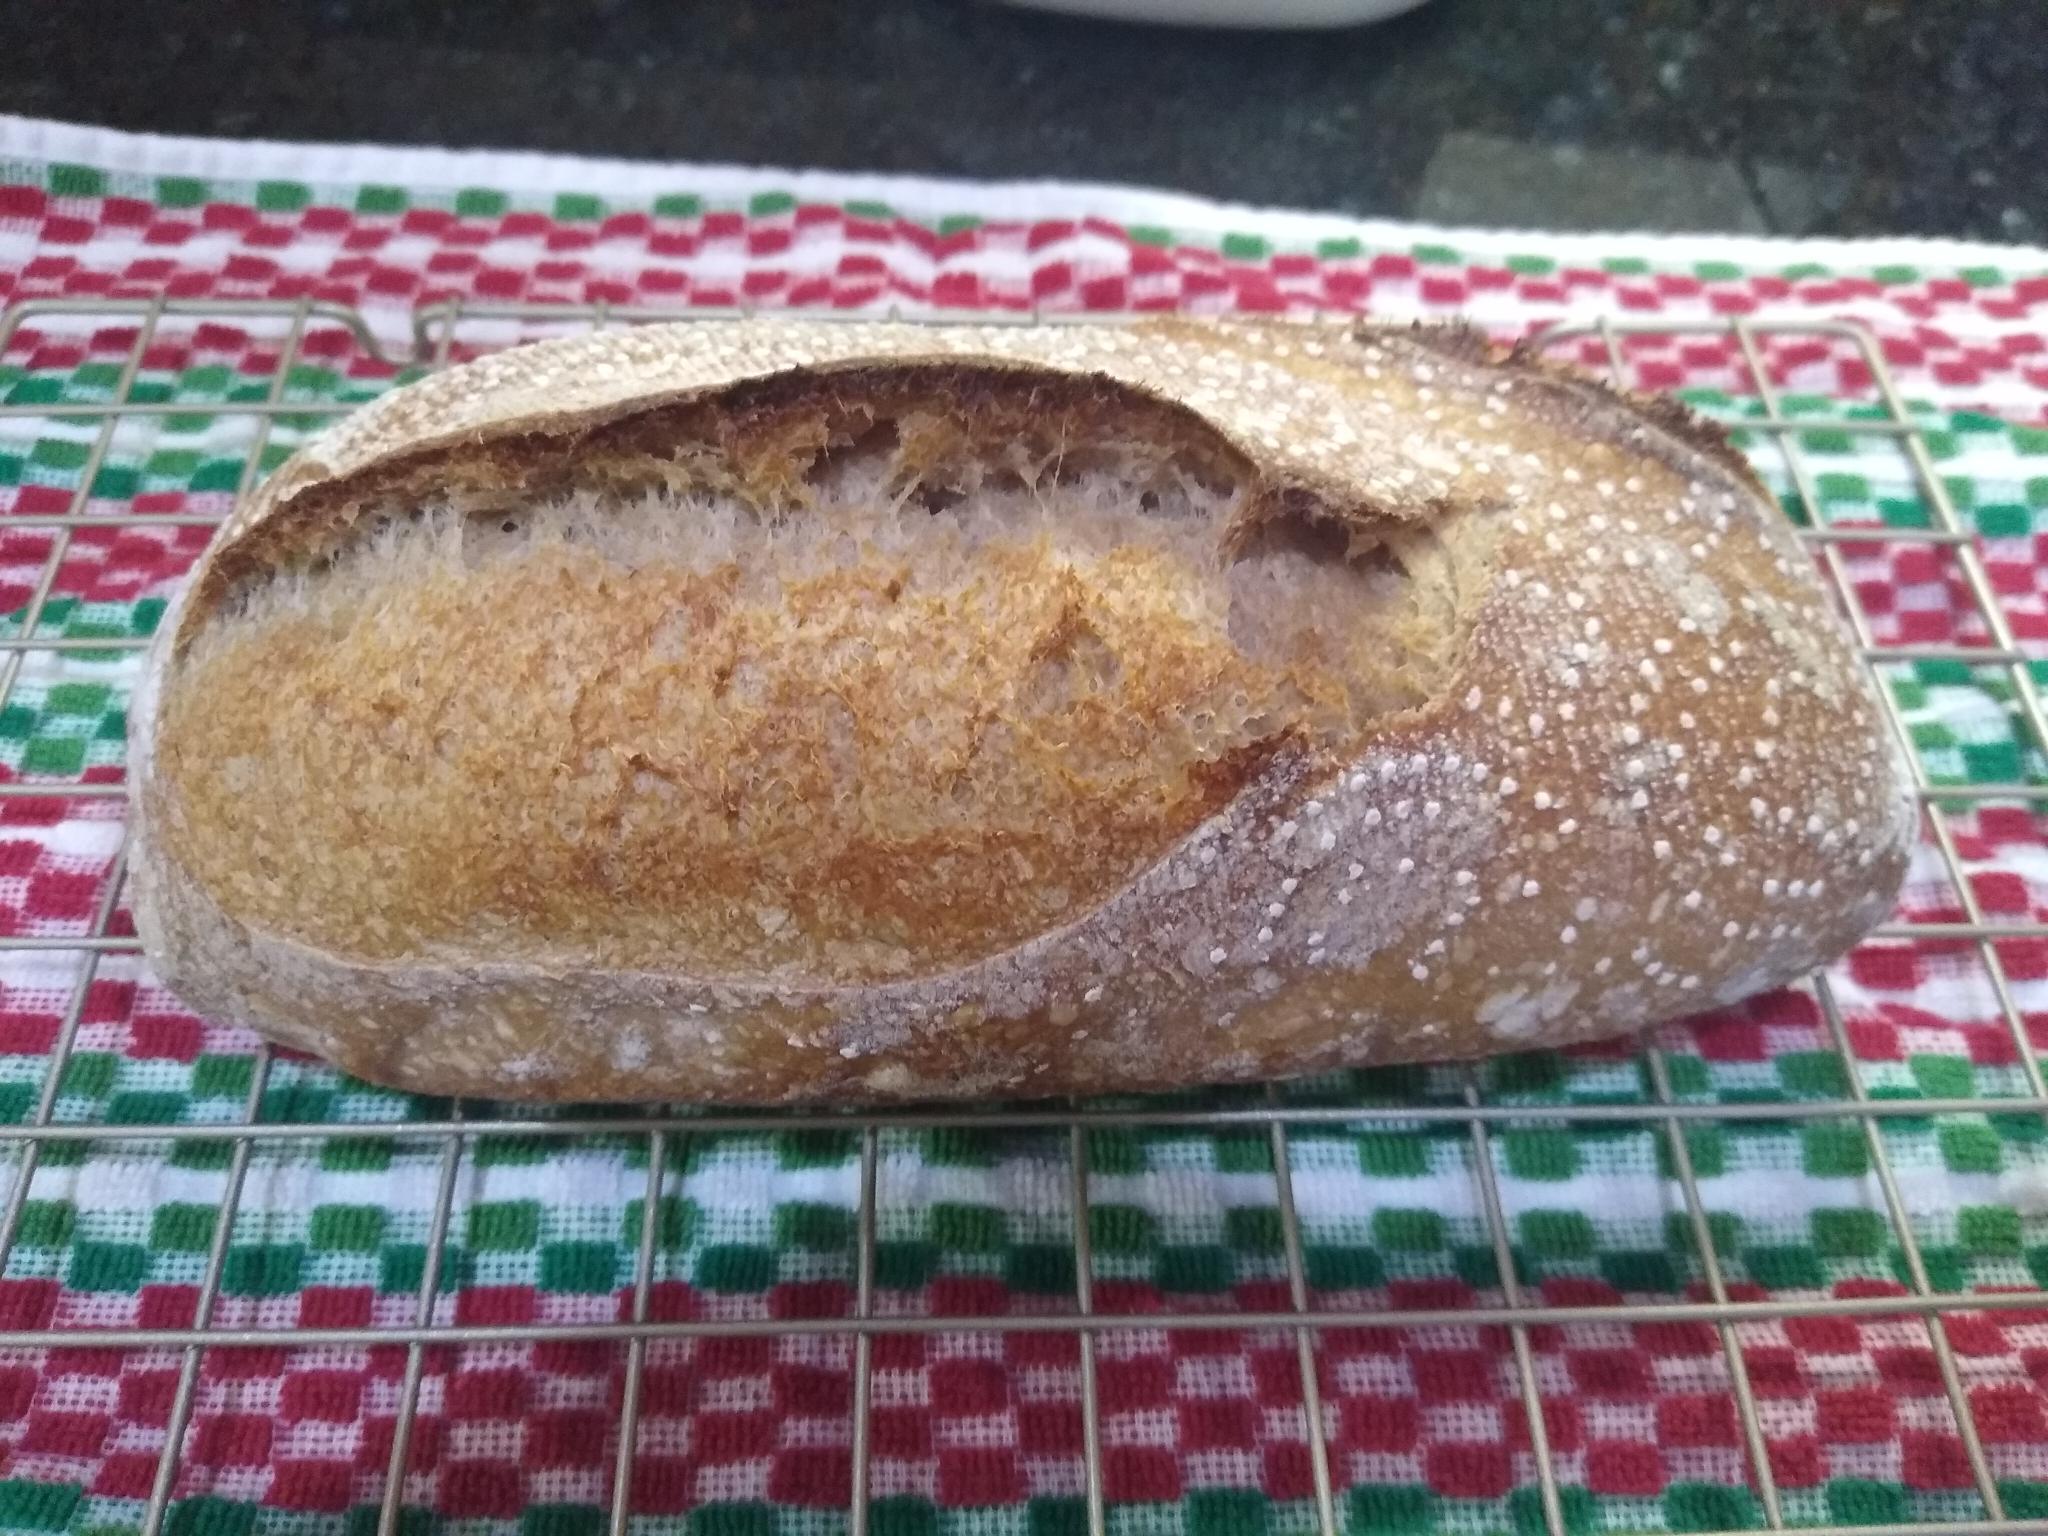
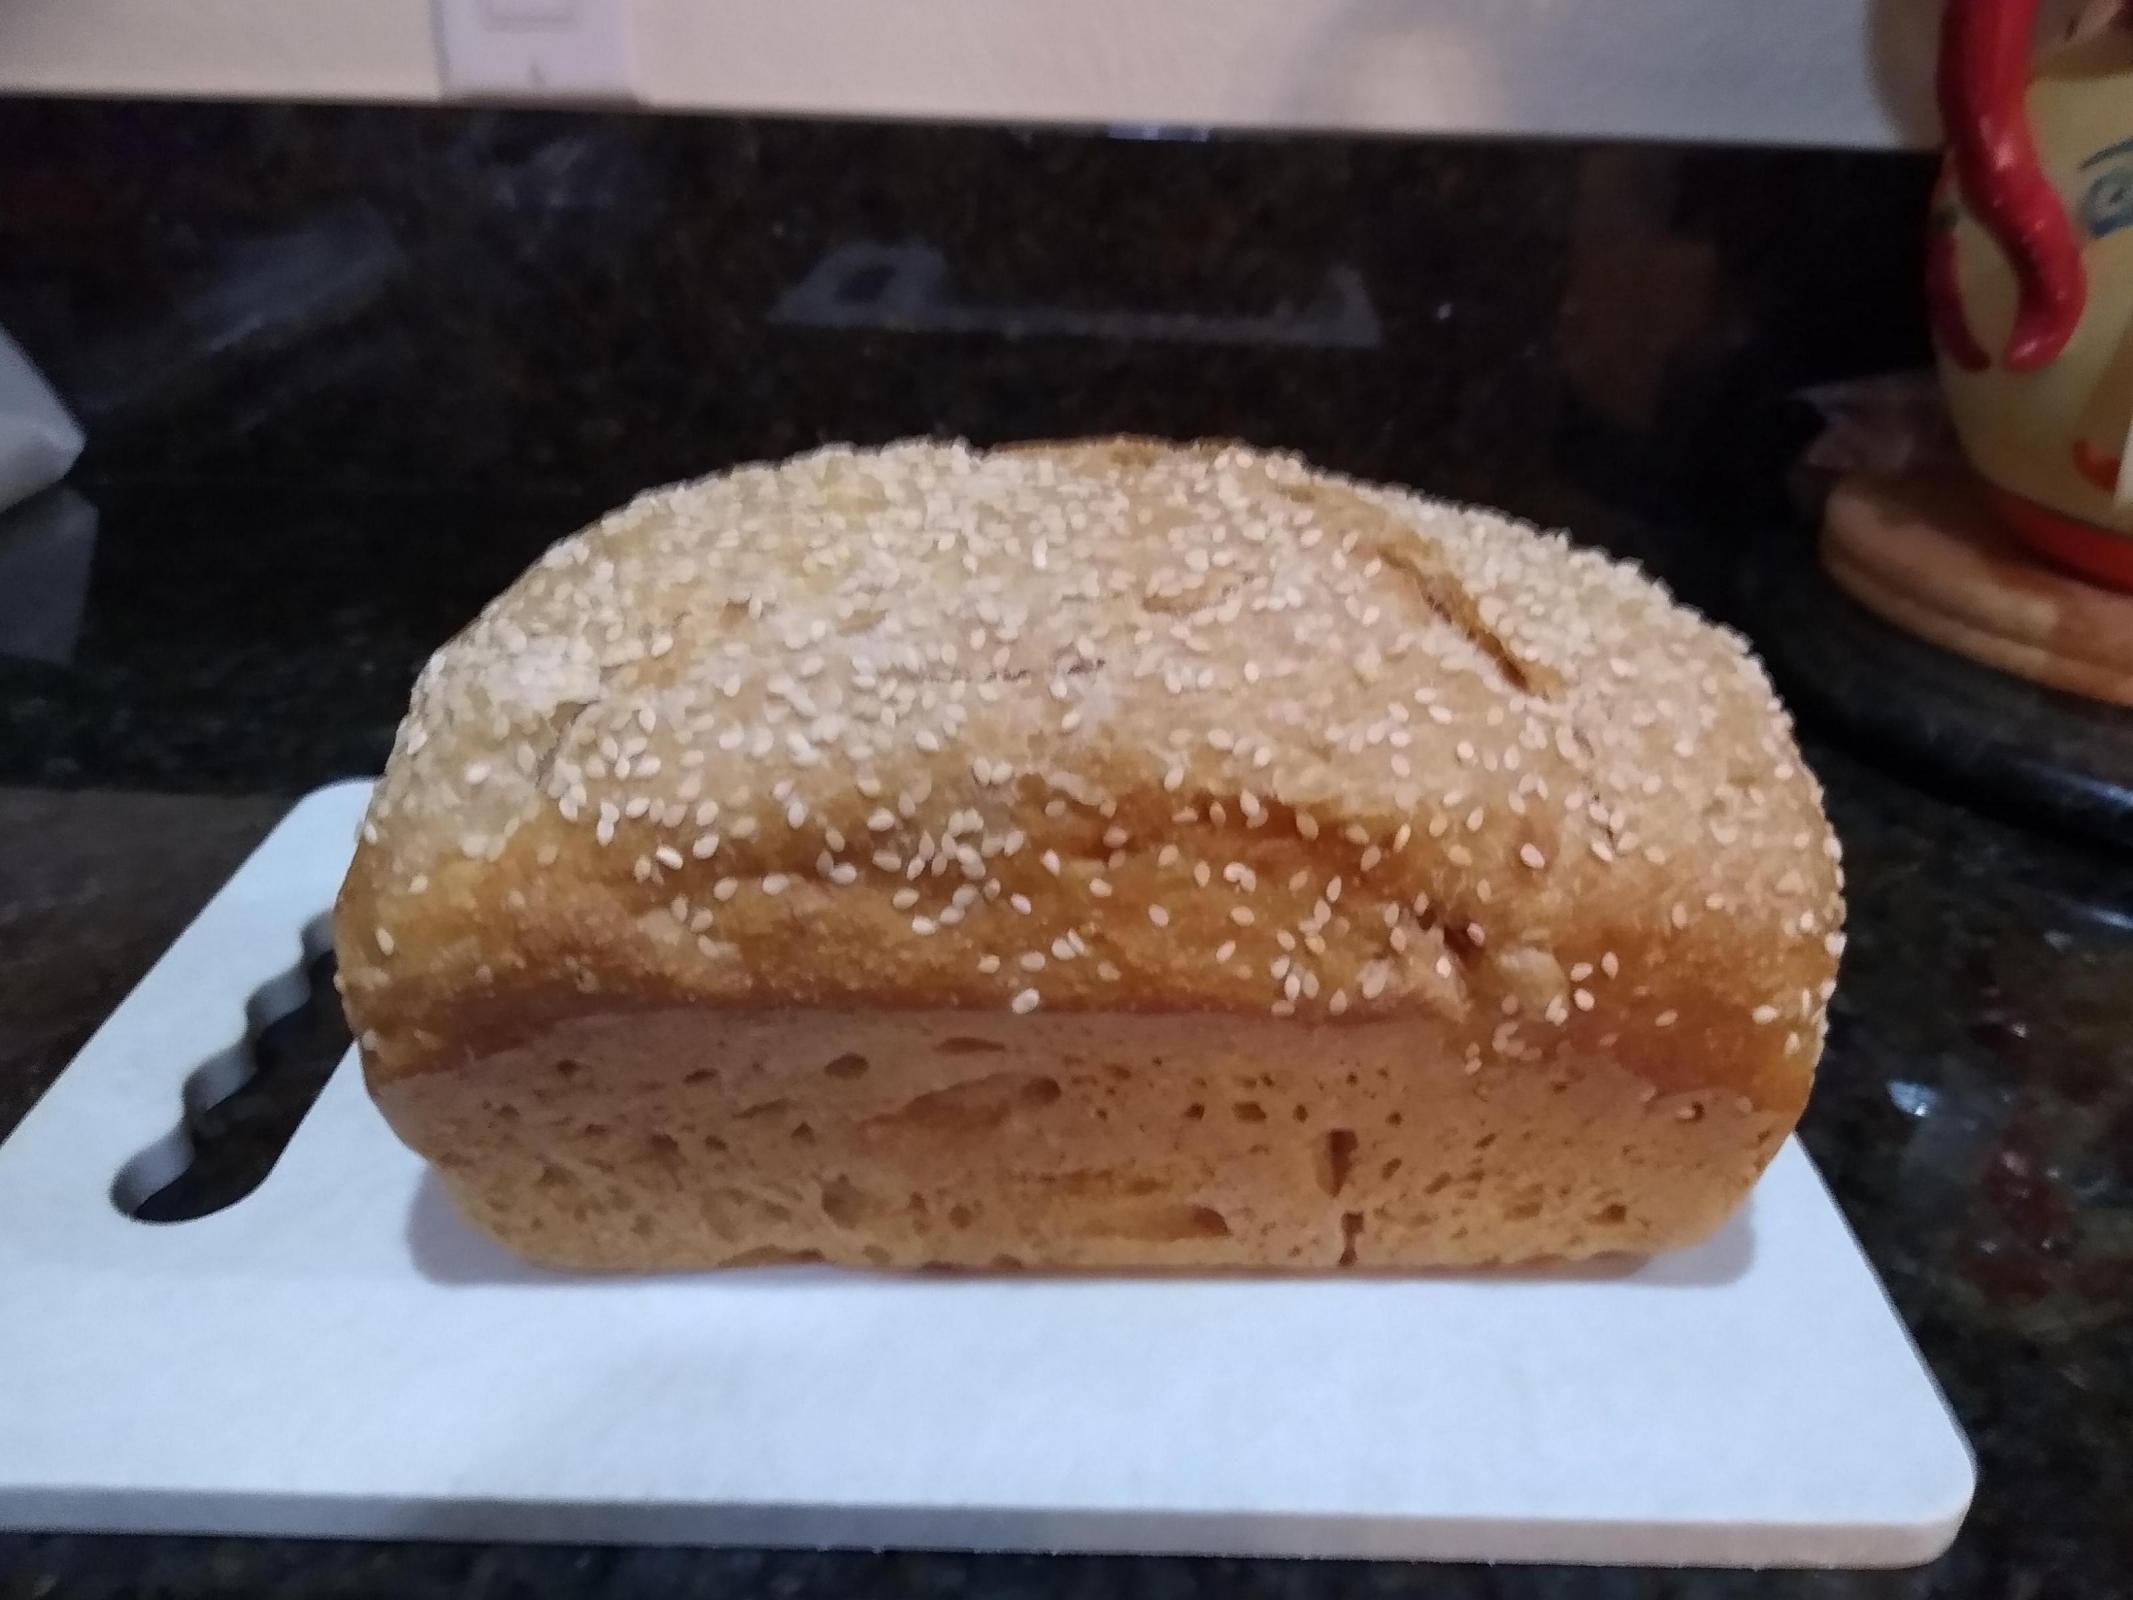
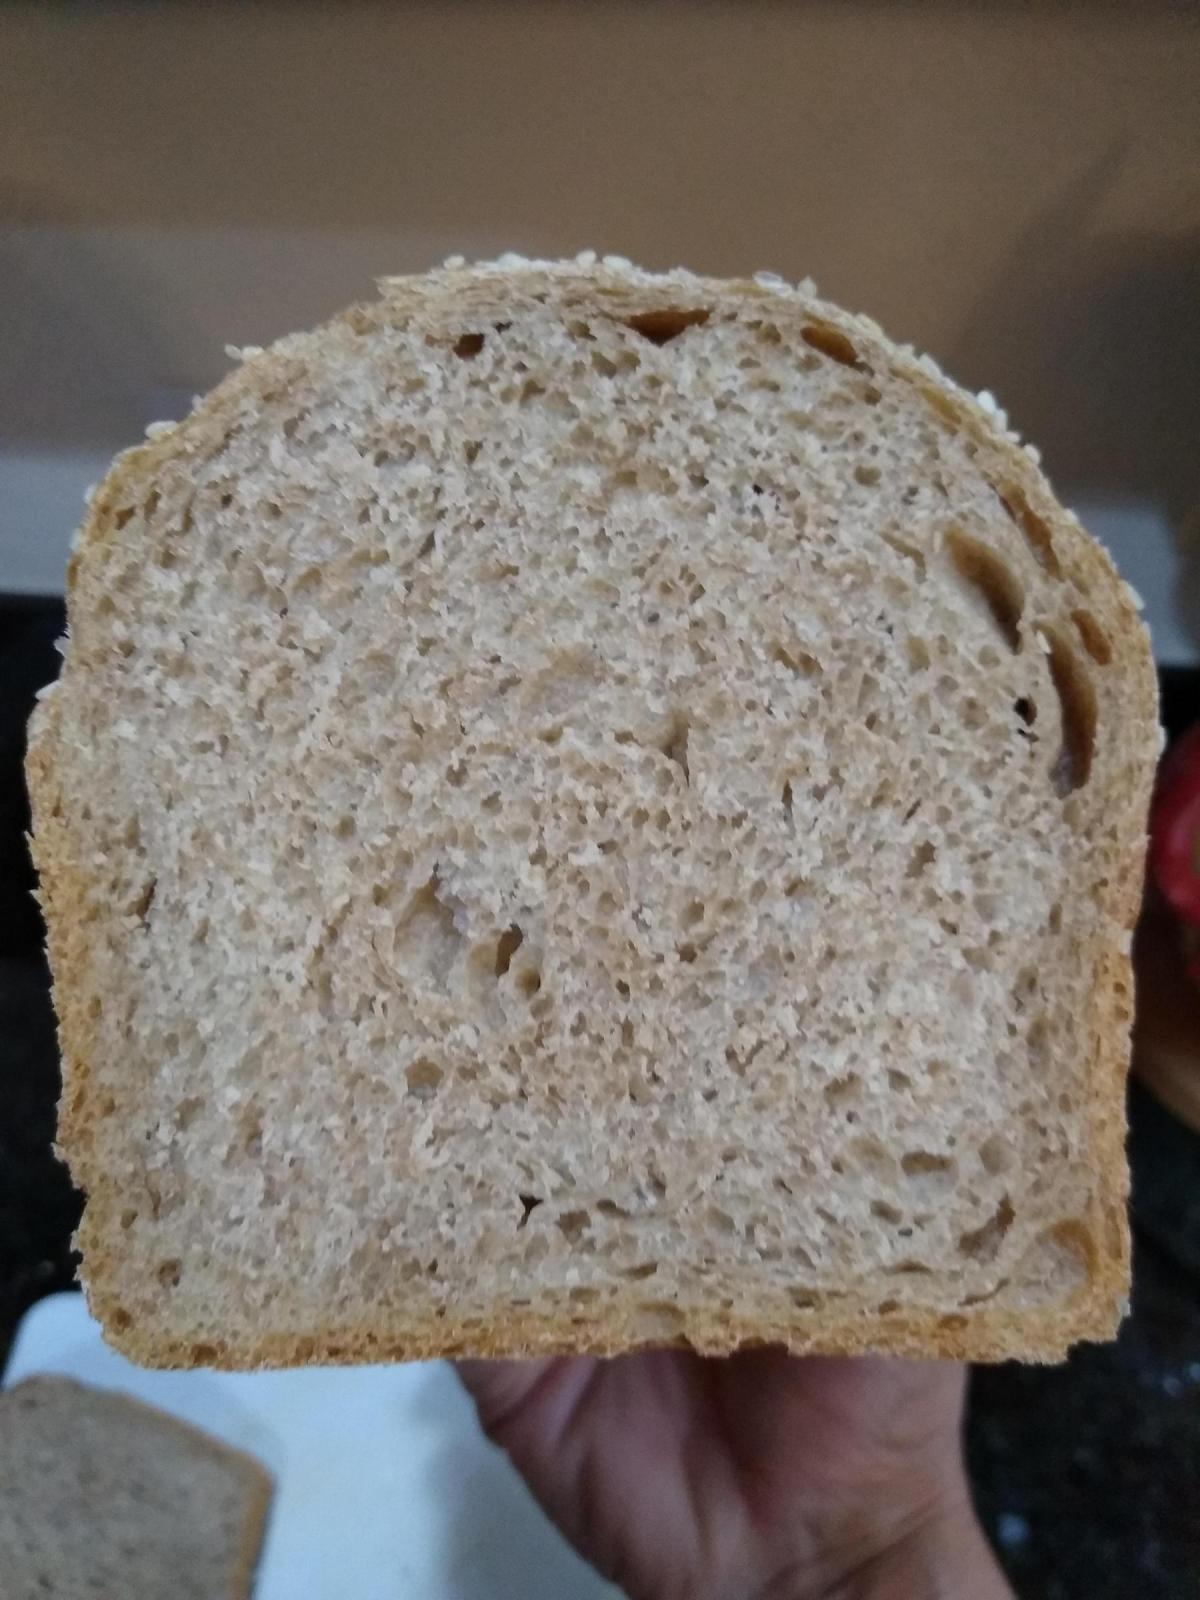
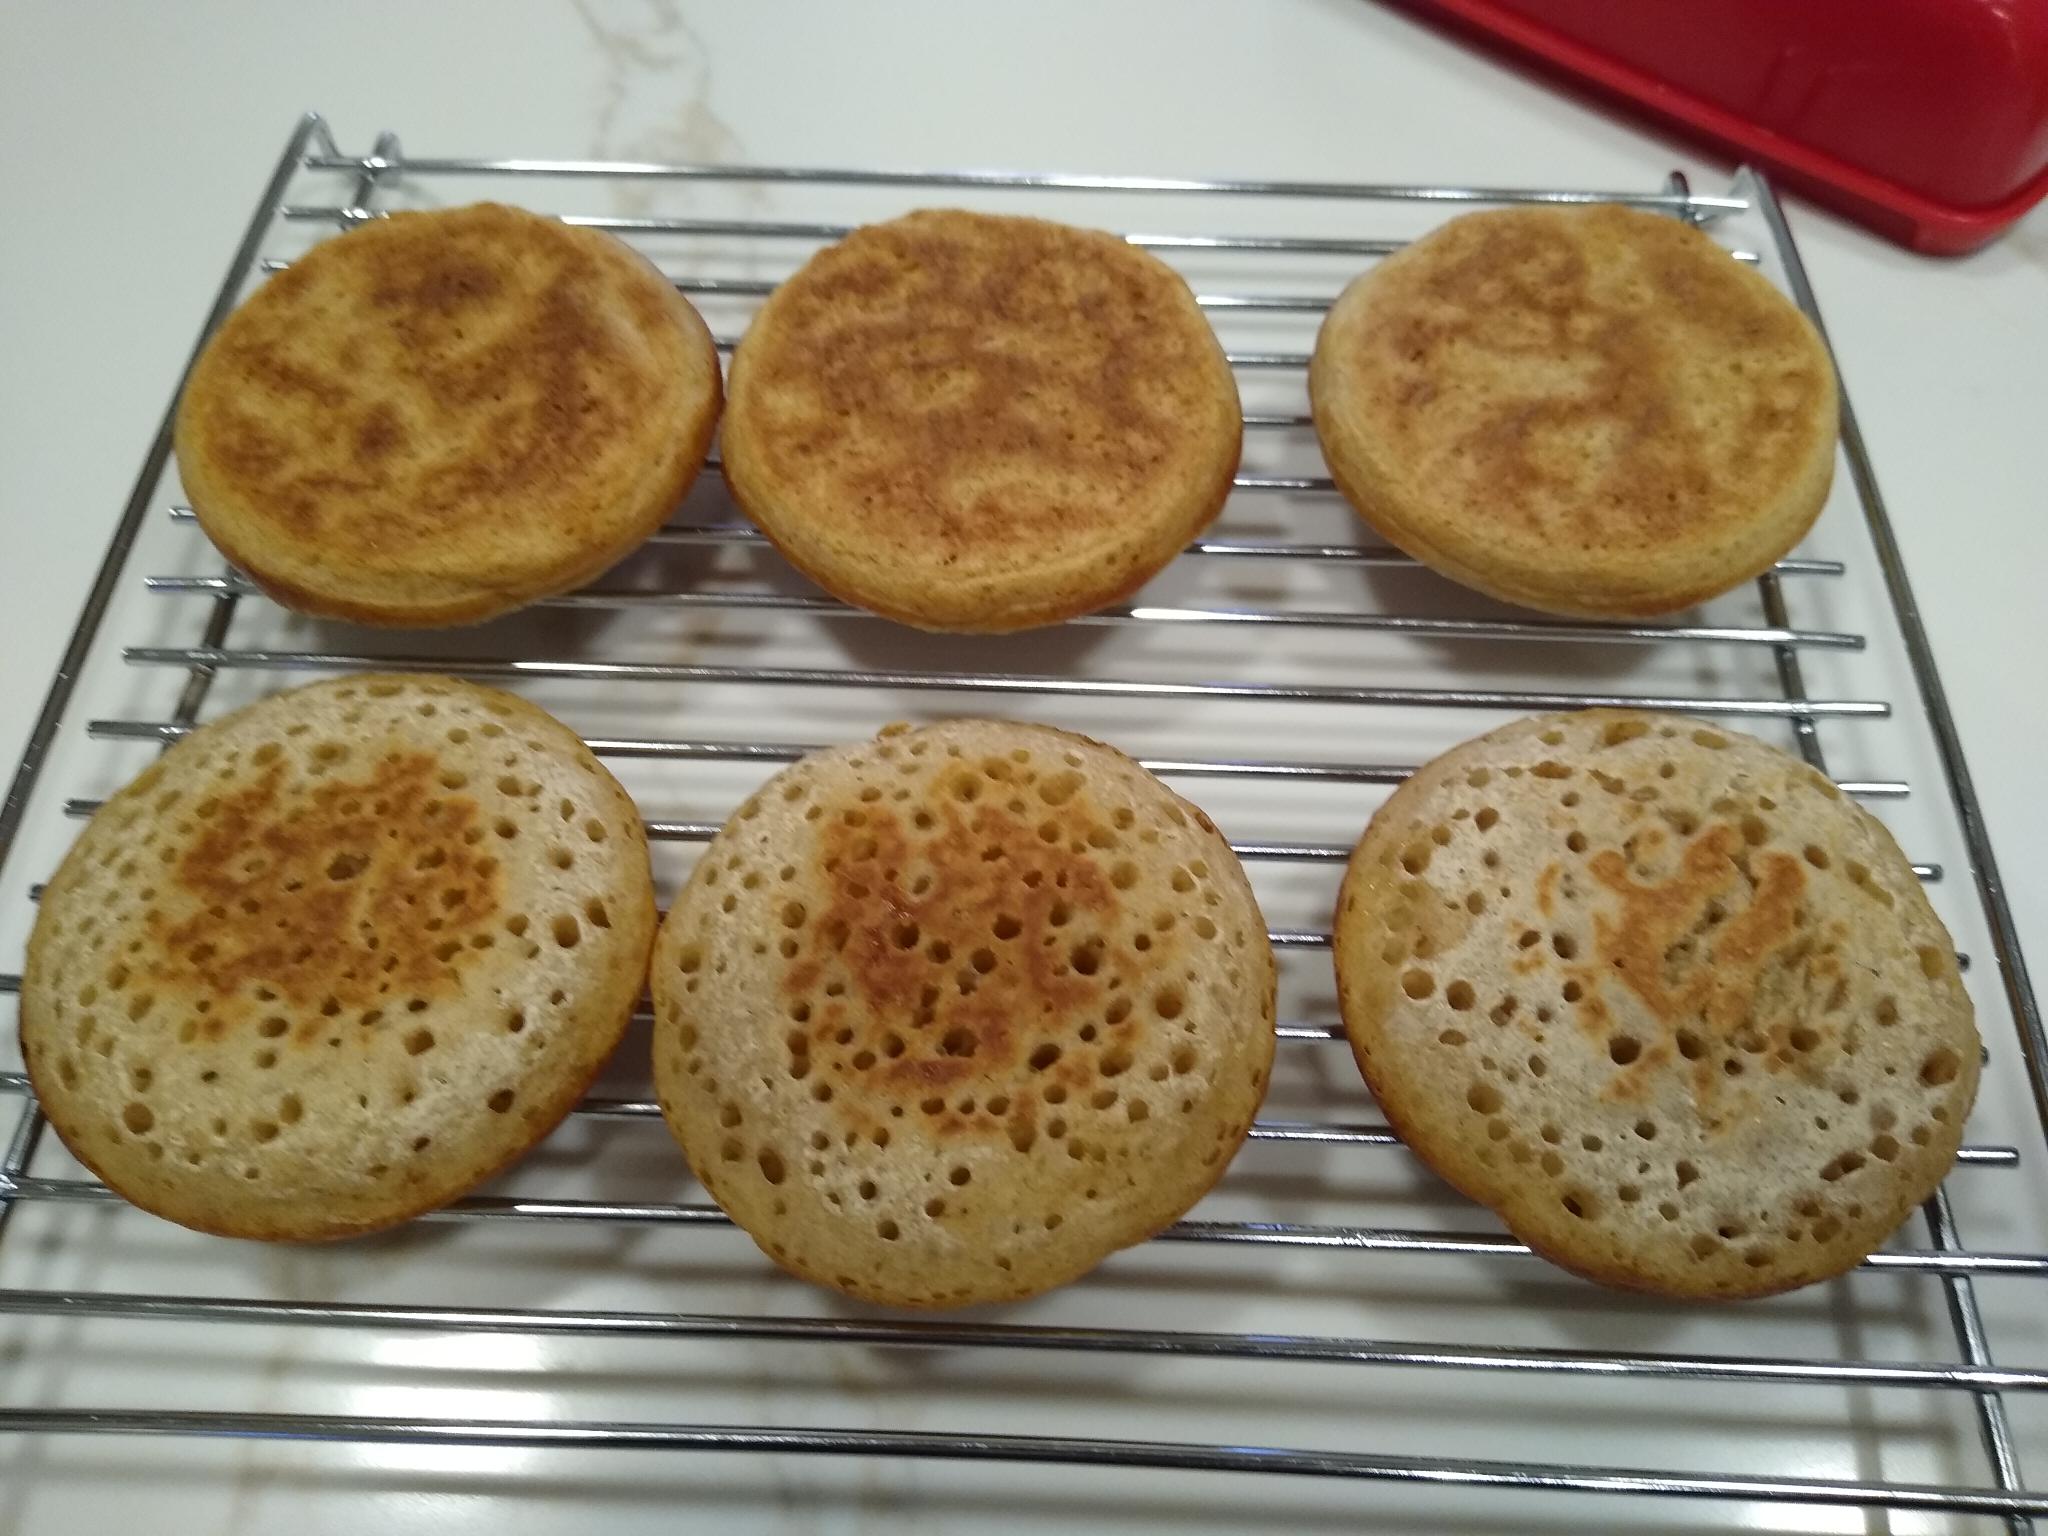
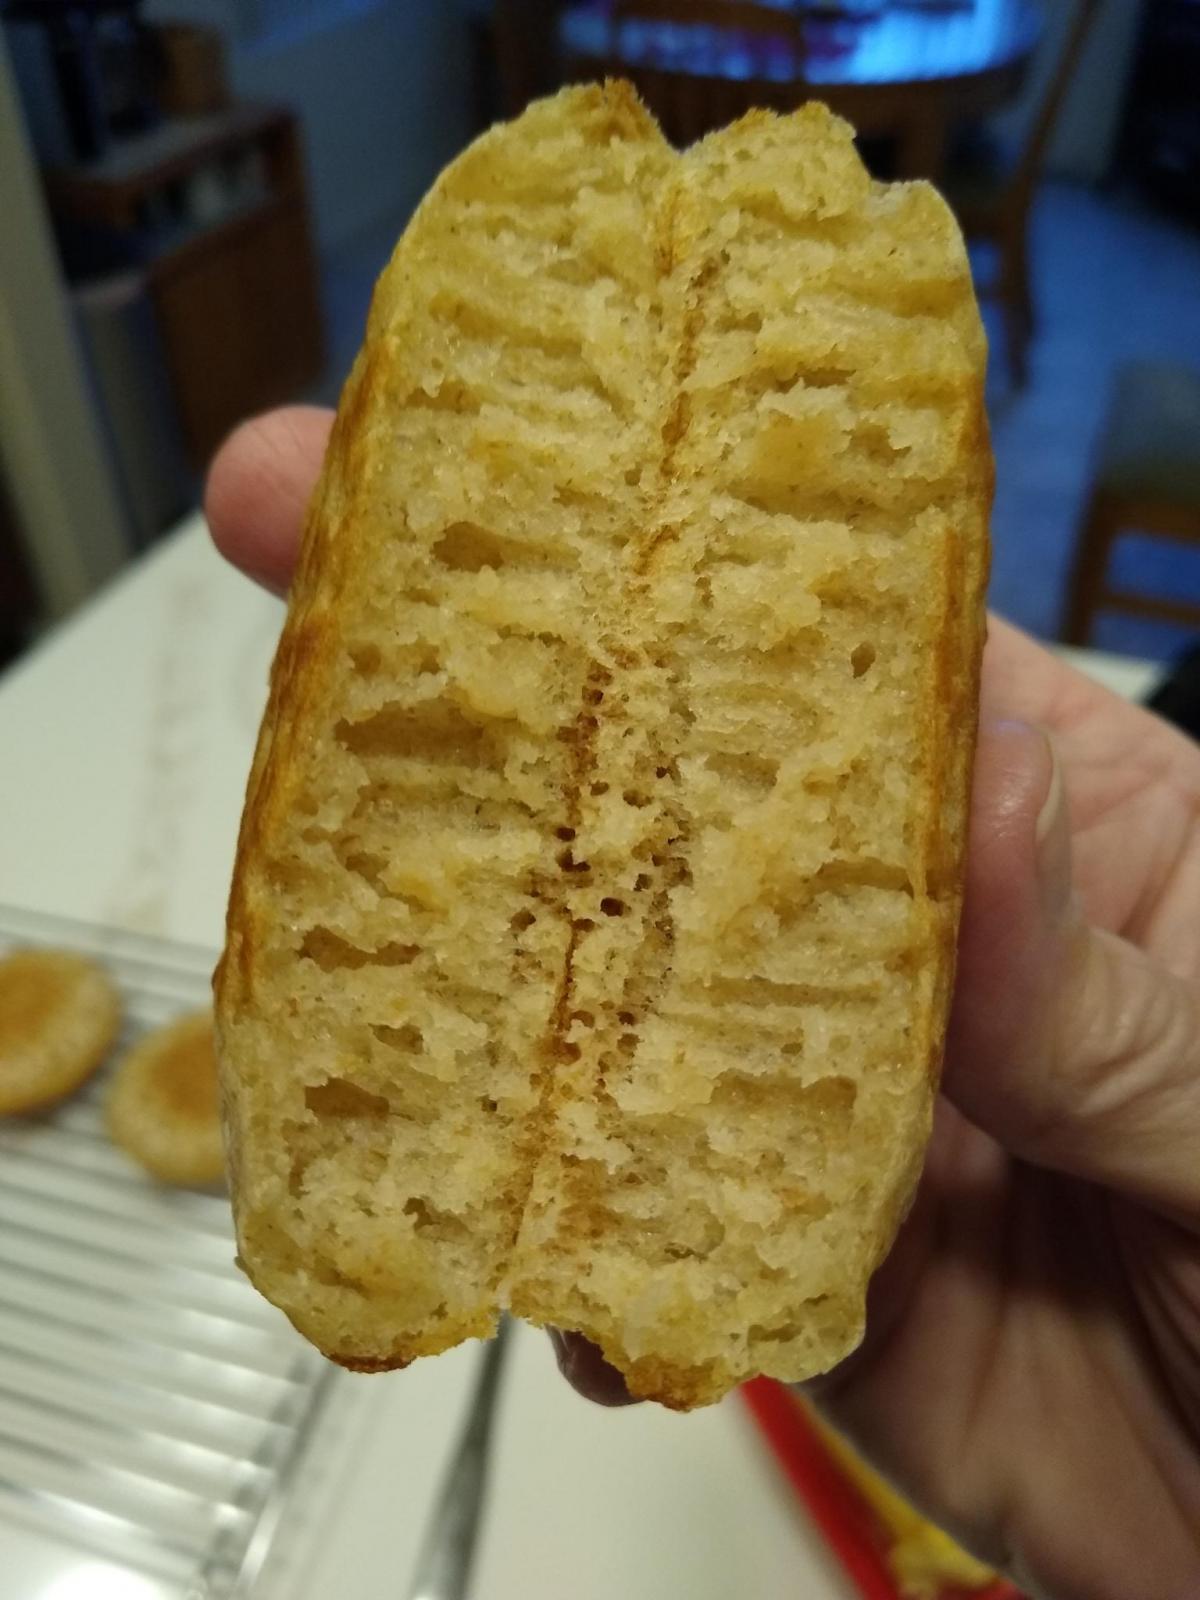
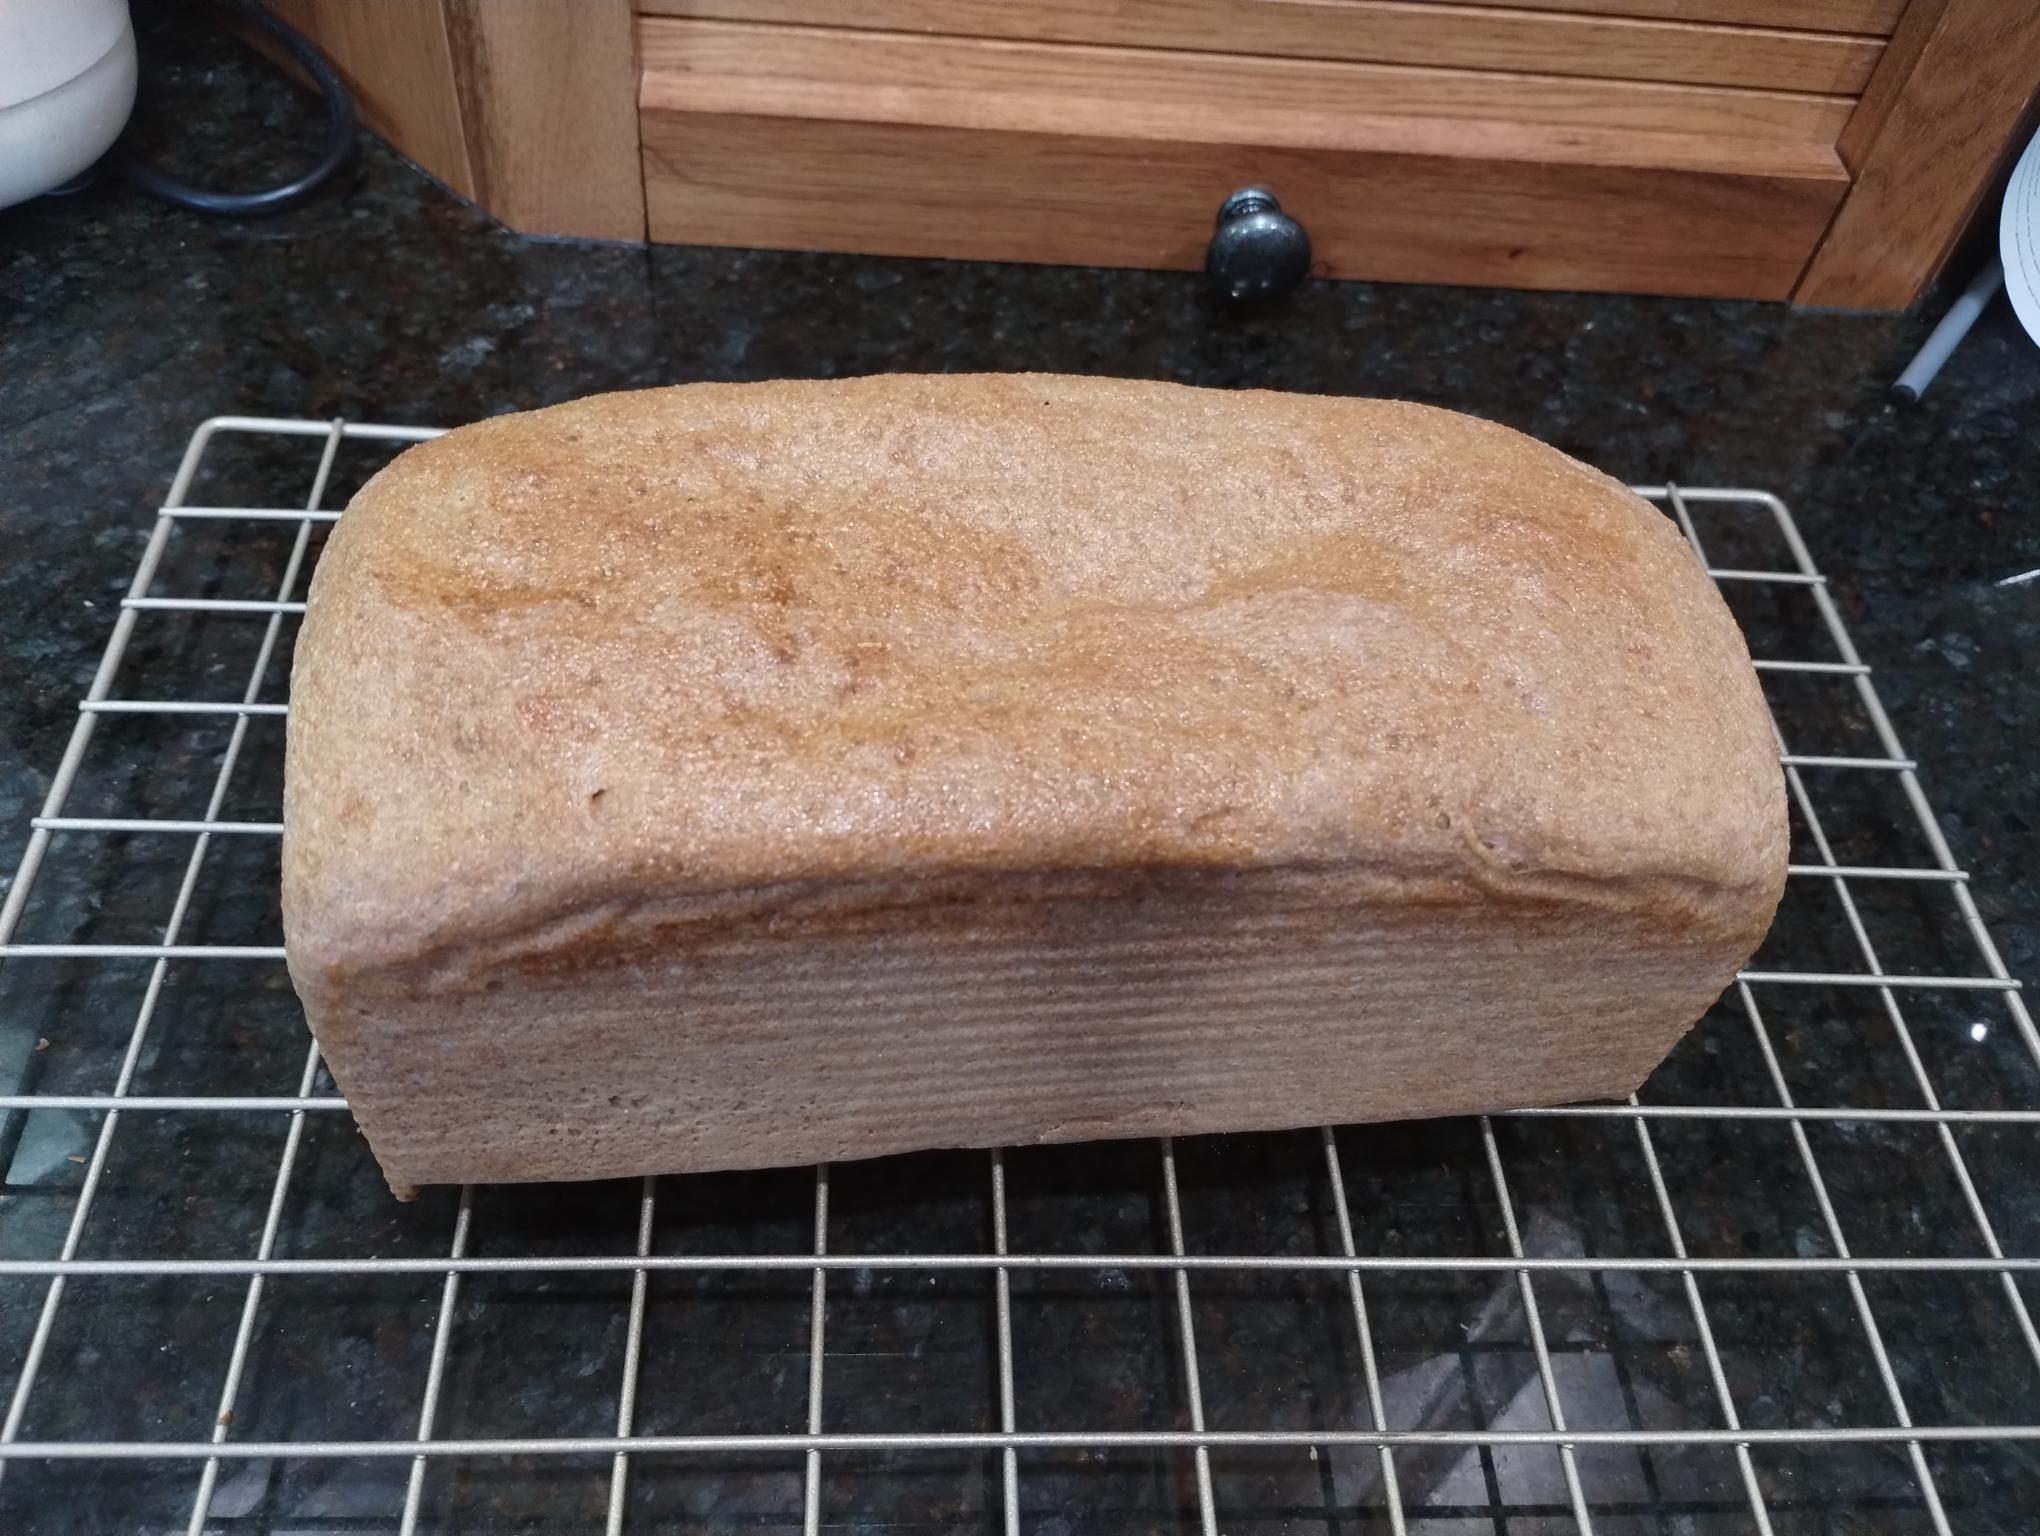
Result: Not too bad! The crumb shot is ~ 18 hours later. I think it is just a little bit over proofed. The top started to droop a bit during cooling, the crumb is fairly crumbly when cut, and the knife has a slight gummy residue which might either be from over proofing vs could have used a couple more minutes of bake time. Still - this is a bit improvement over anything I have made in it so far. The bread tastes fine, though a bit bland compared to our usual (not very tangy but more flavorful) sourdough version. 

My initial goal when I got the Zo was to have an alternative way to make bread during hot weather or when I don't have time to make sourdough for some reason (rare). It definitely worked well as far as not heating up the house was concerned. It might also be useful for times when the oven is being used for something else. I'll give it a try with a SD loaf and see how that works out and play with one or 2 other pans I often use. 

Pics:

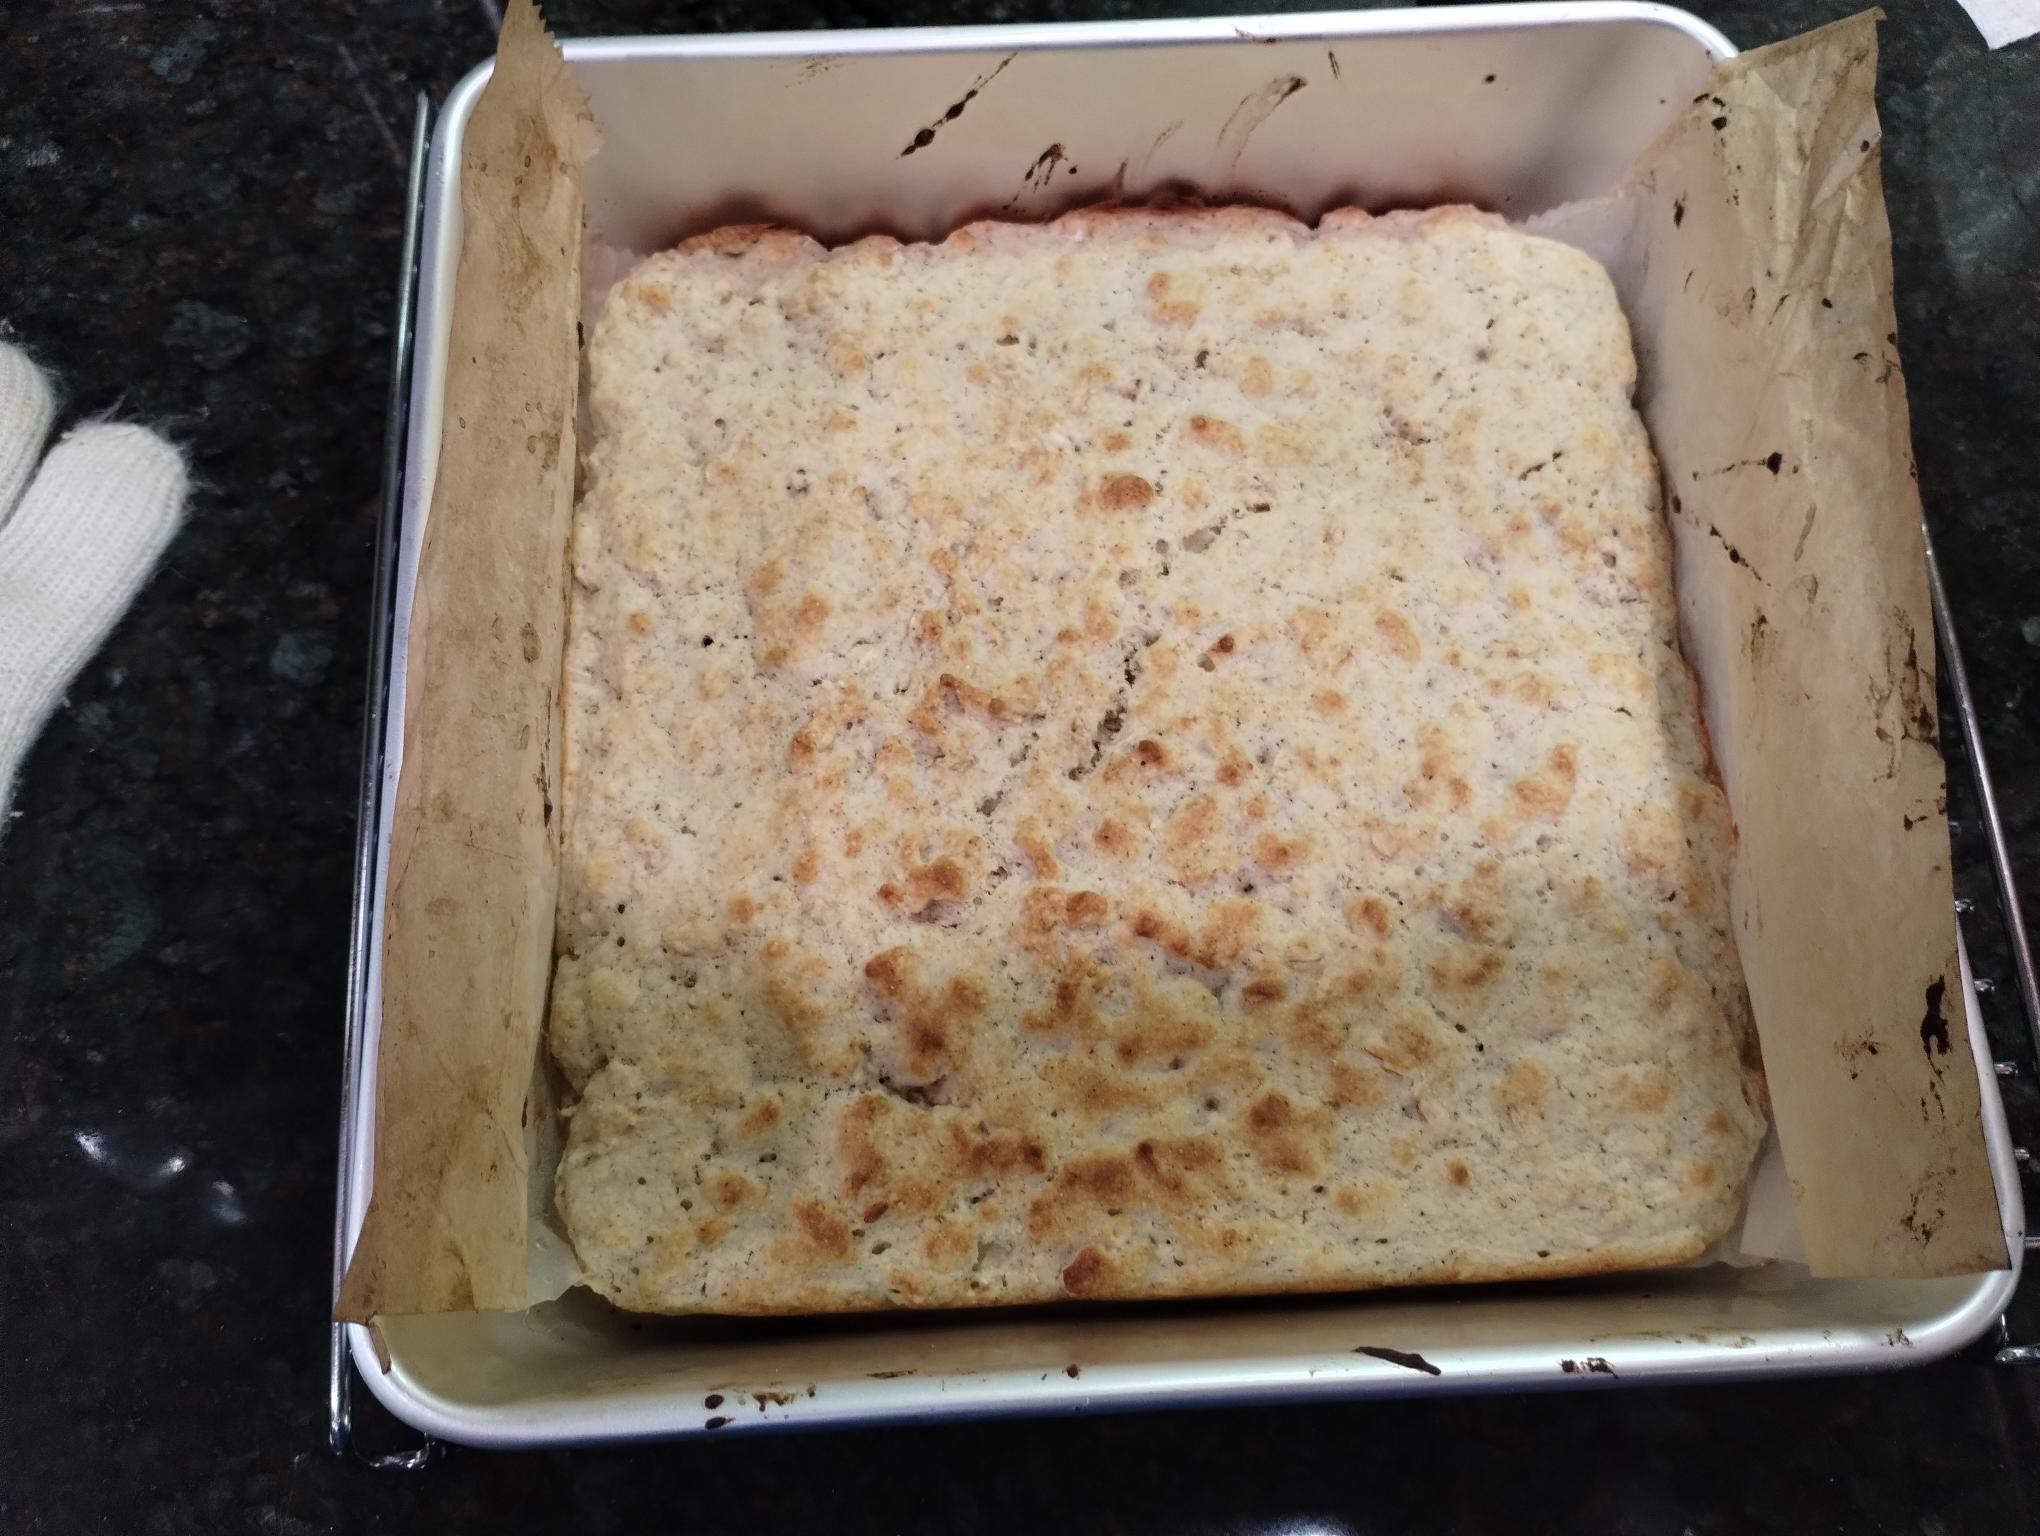
Foil inside window, bulk starting inside the Zo. (I won't do that again, the potential for a serious mess is real.) 


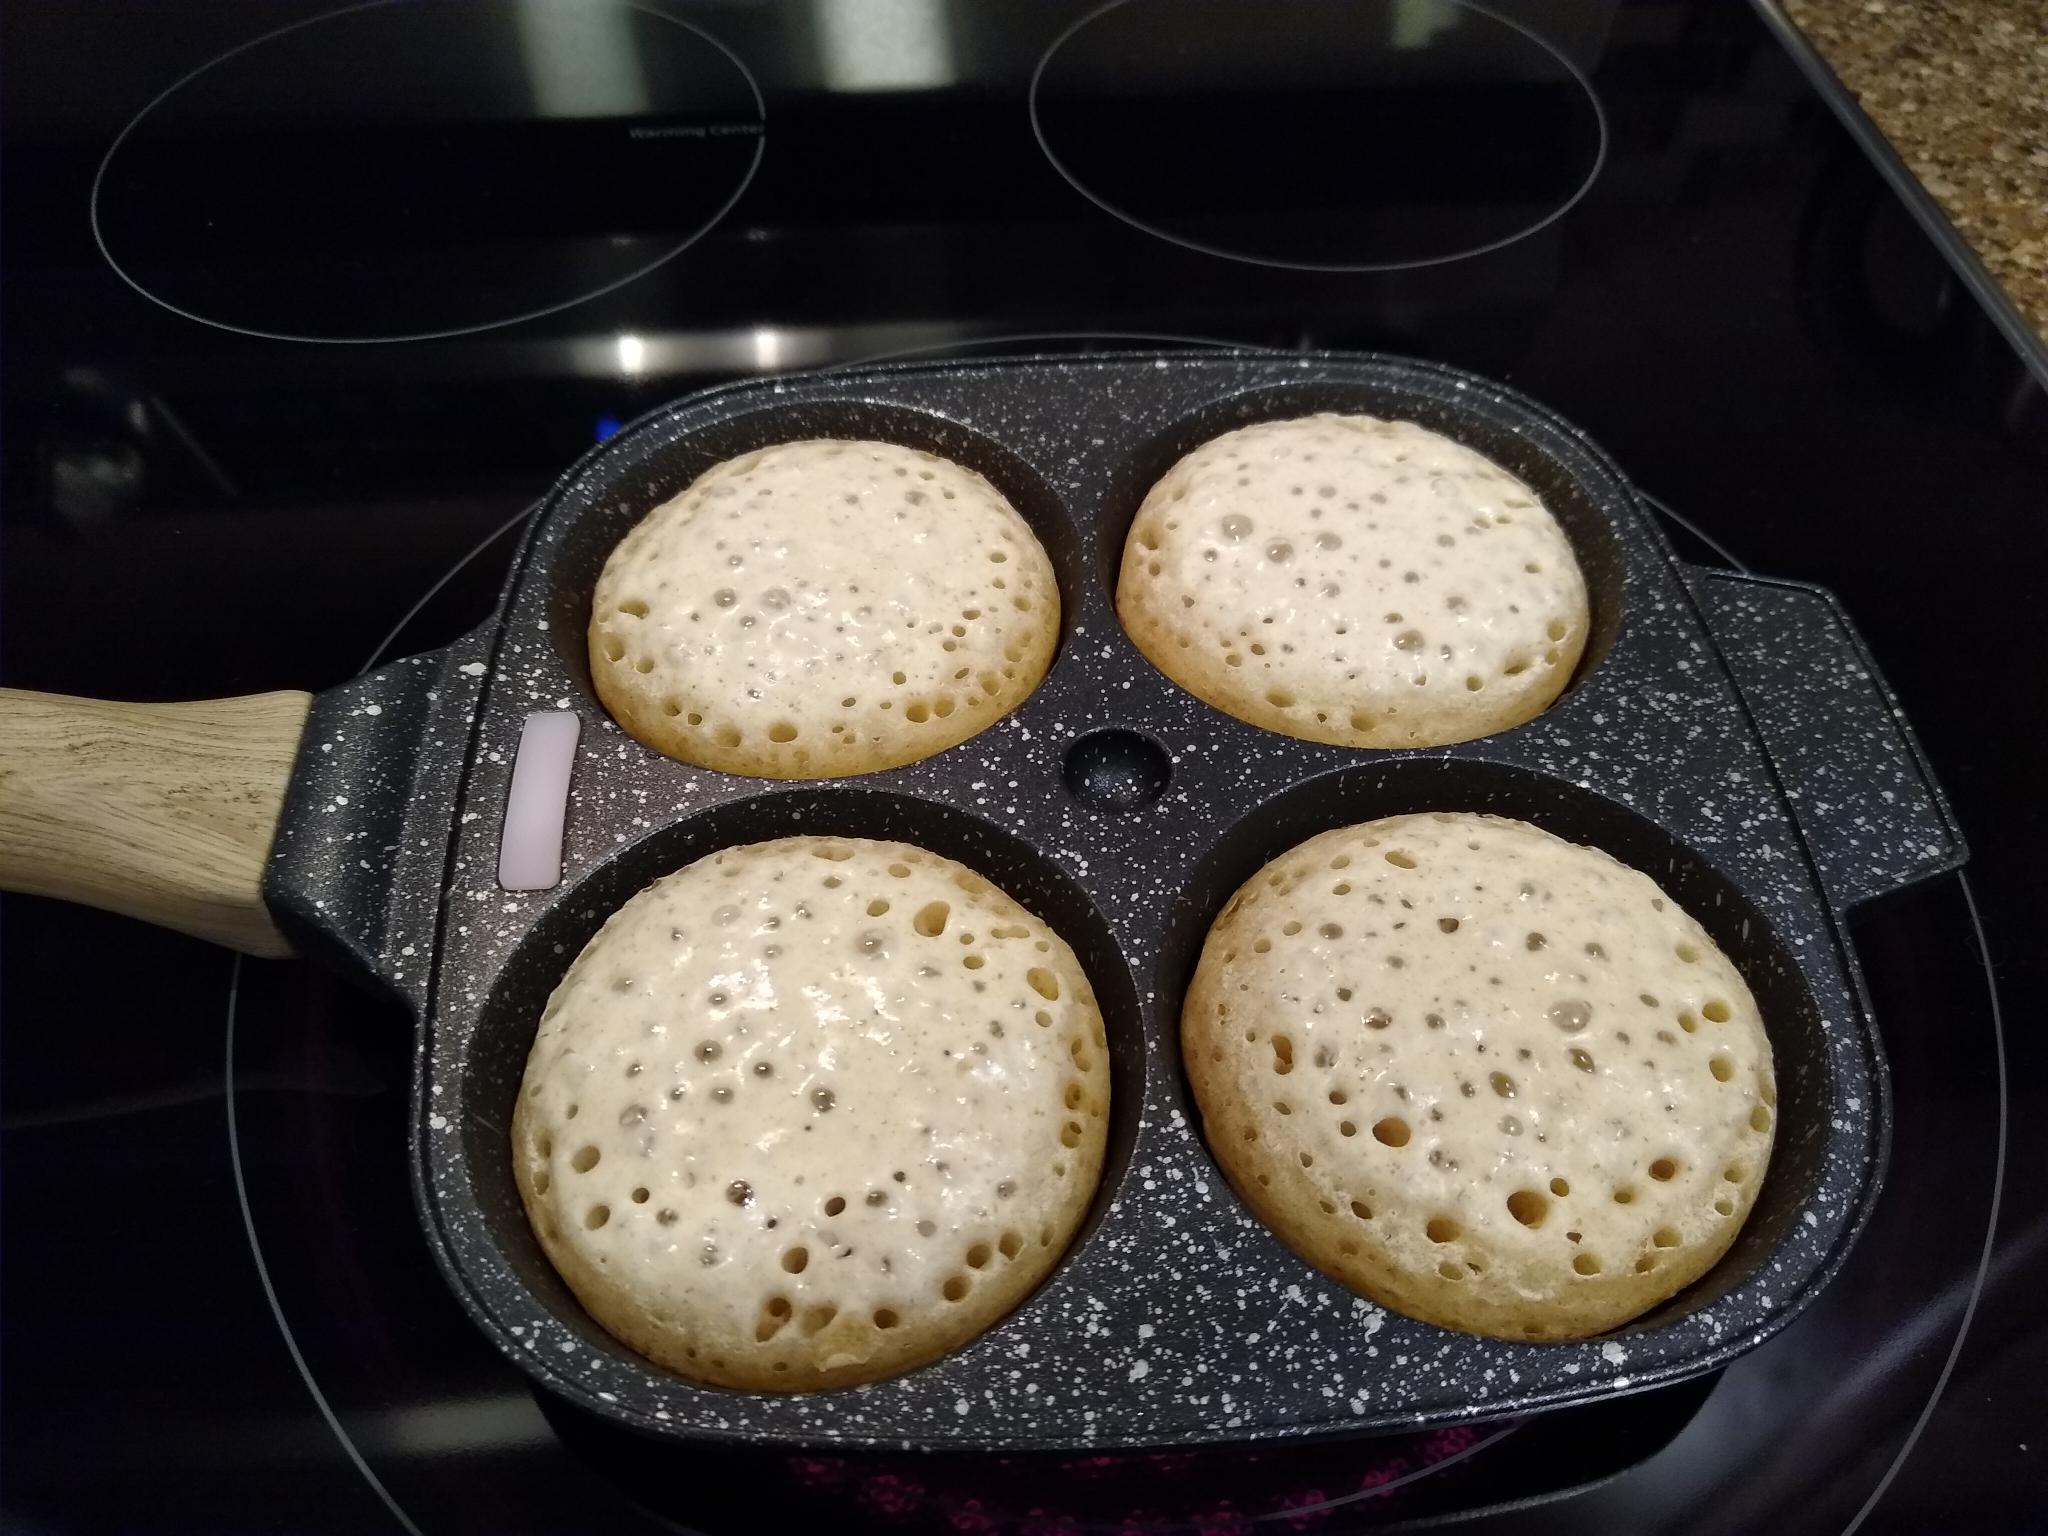
After 30 min final proof: 


Initial post-bake shot, just starting to cool: 


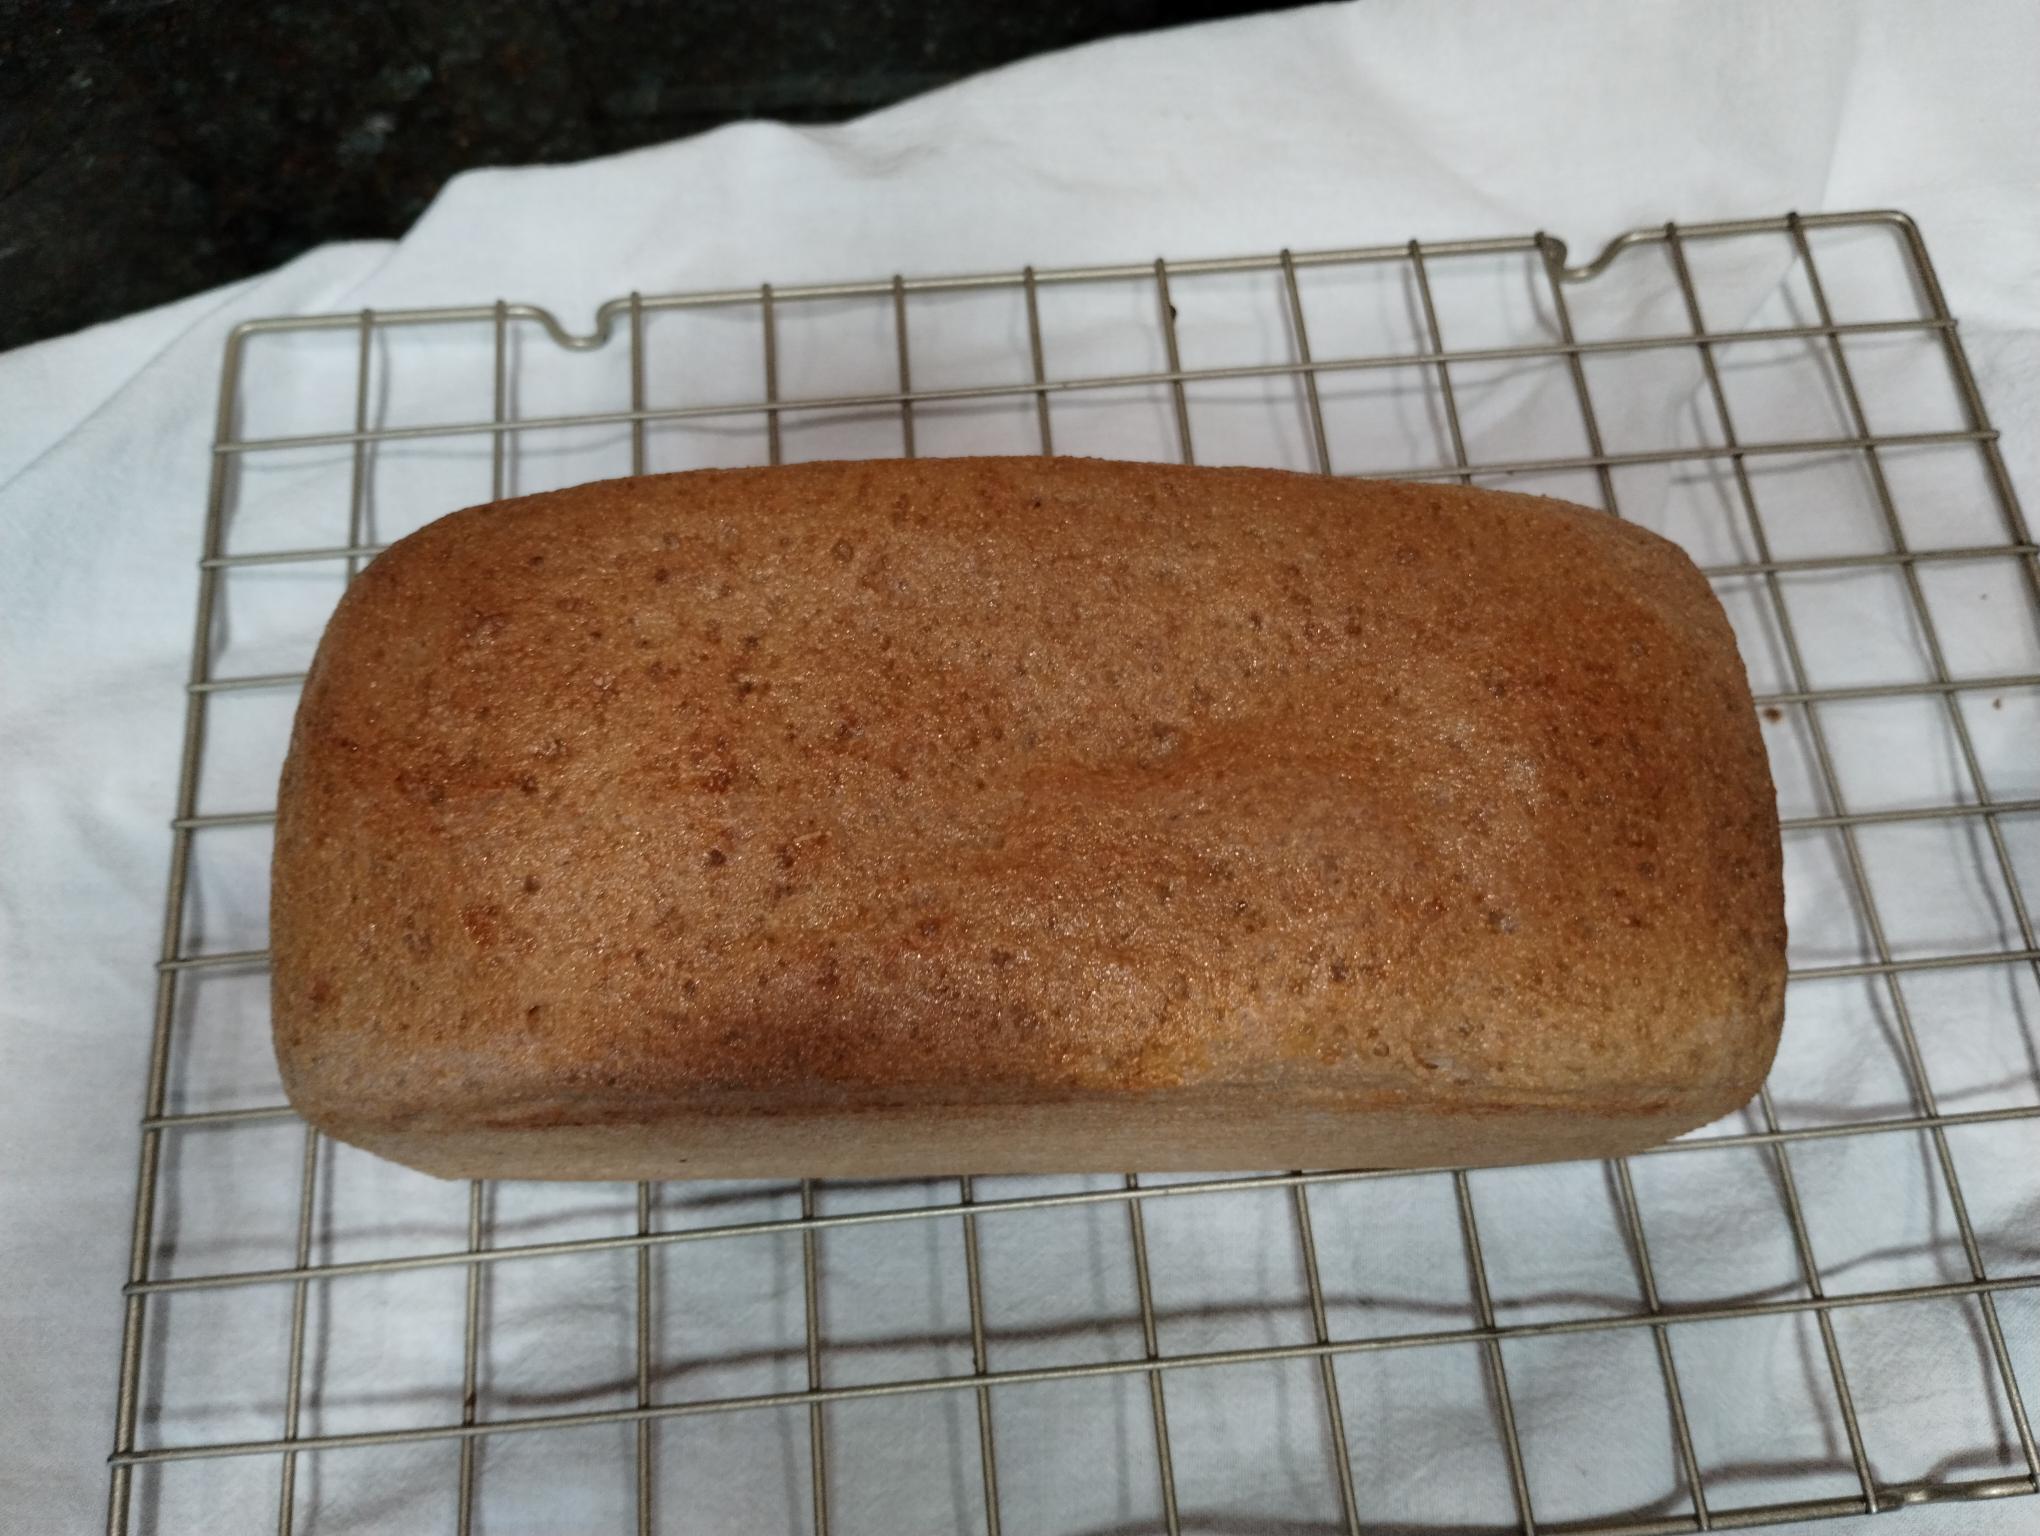
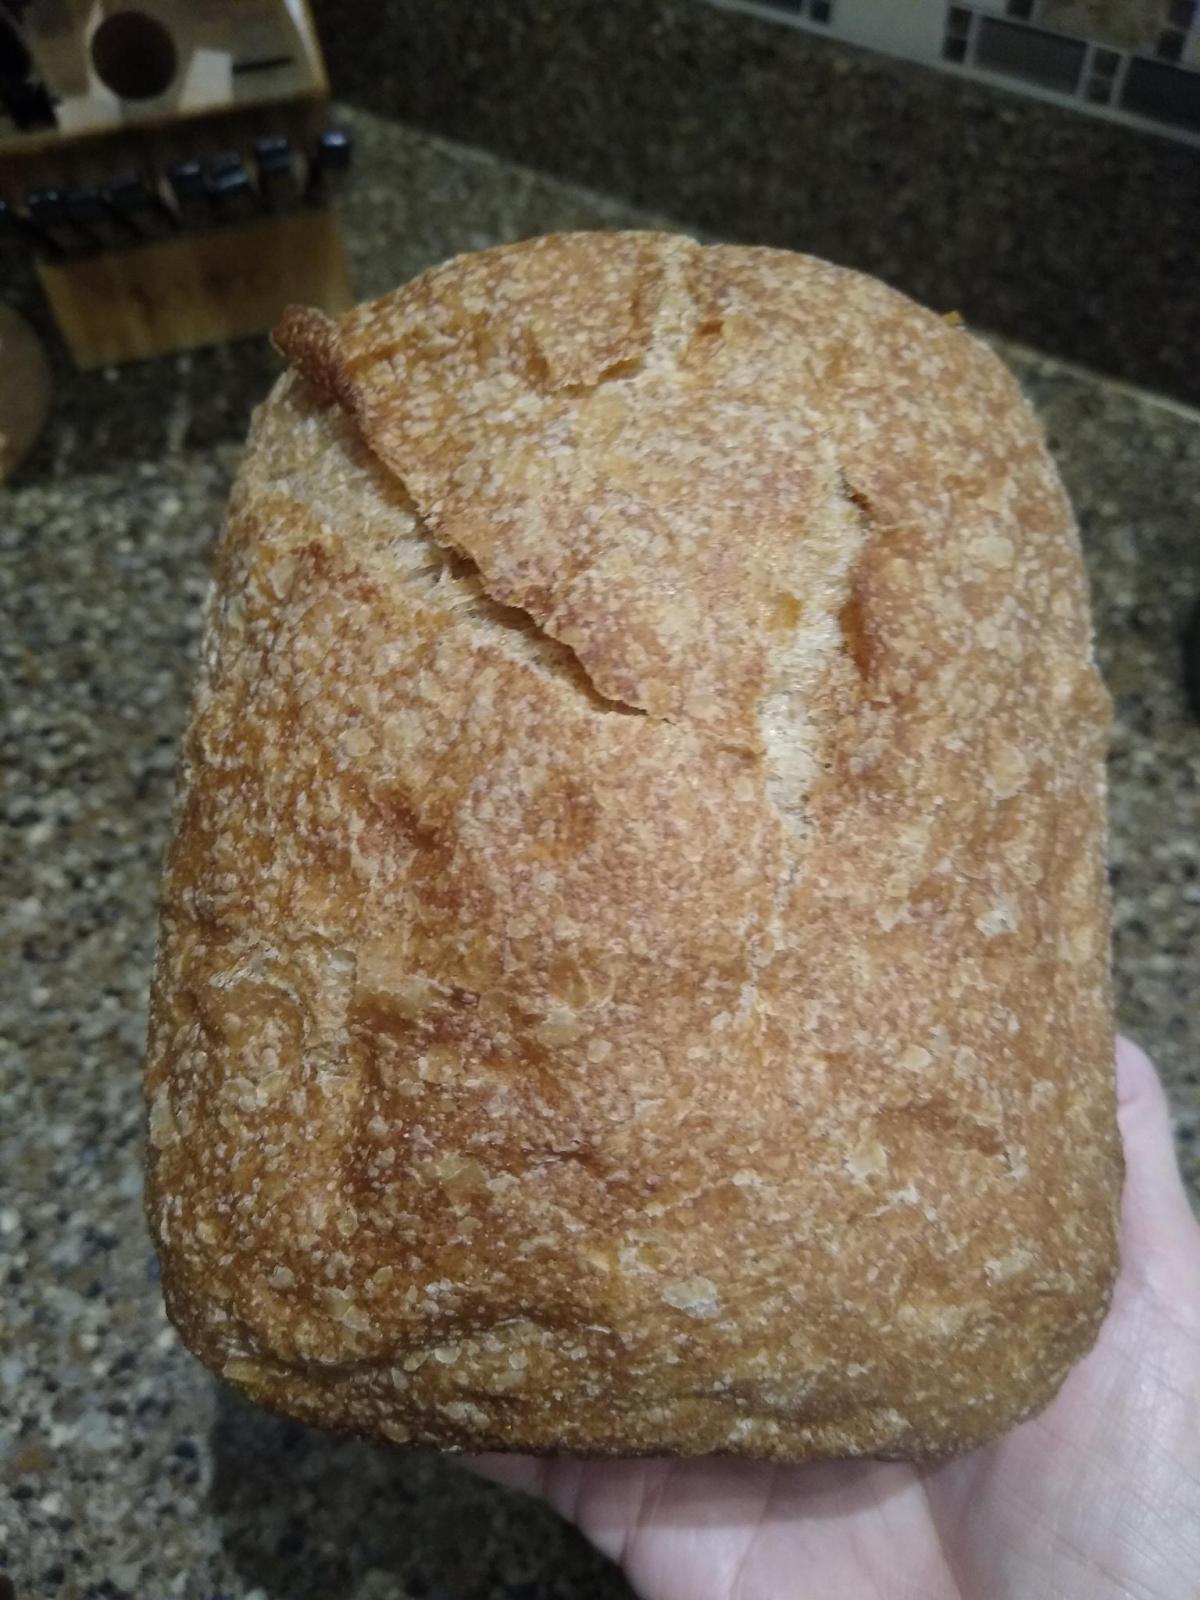
Next day: real life crust color is much better than the photo suggests. It’s the same as the initial post-bake pic: 
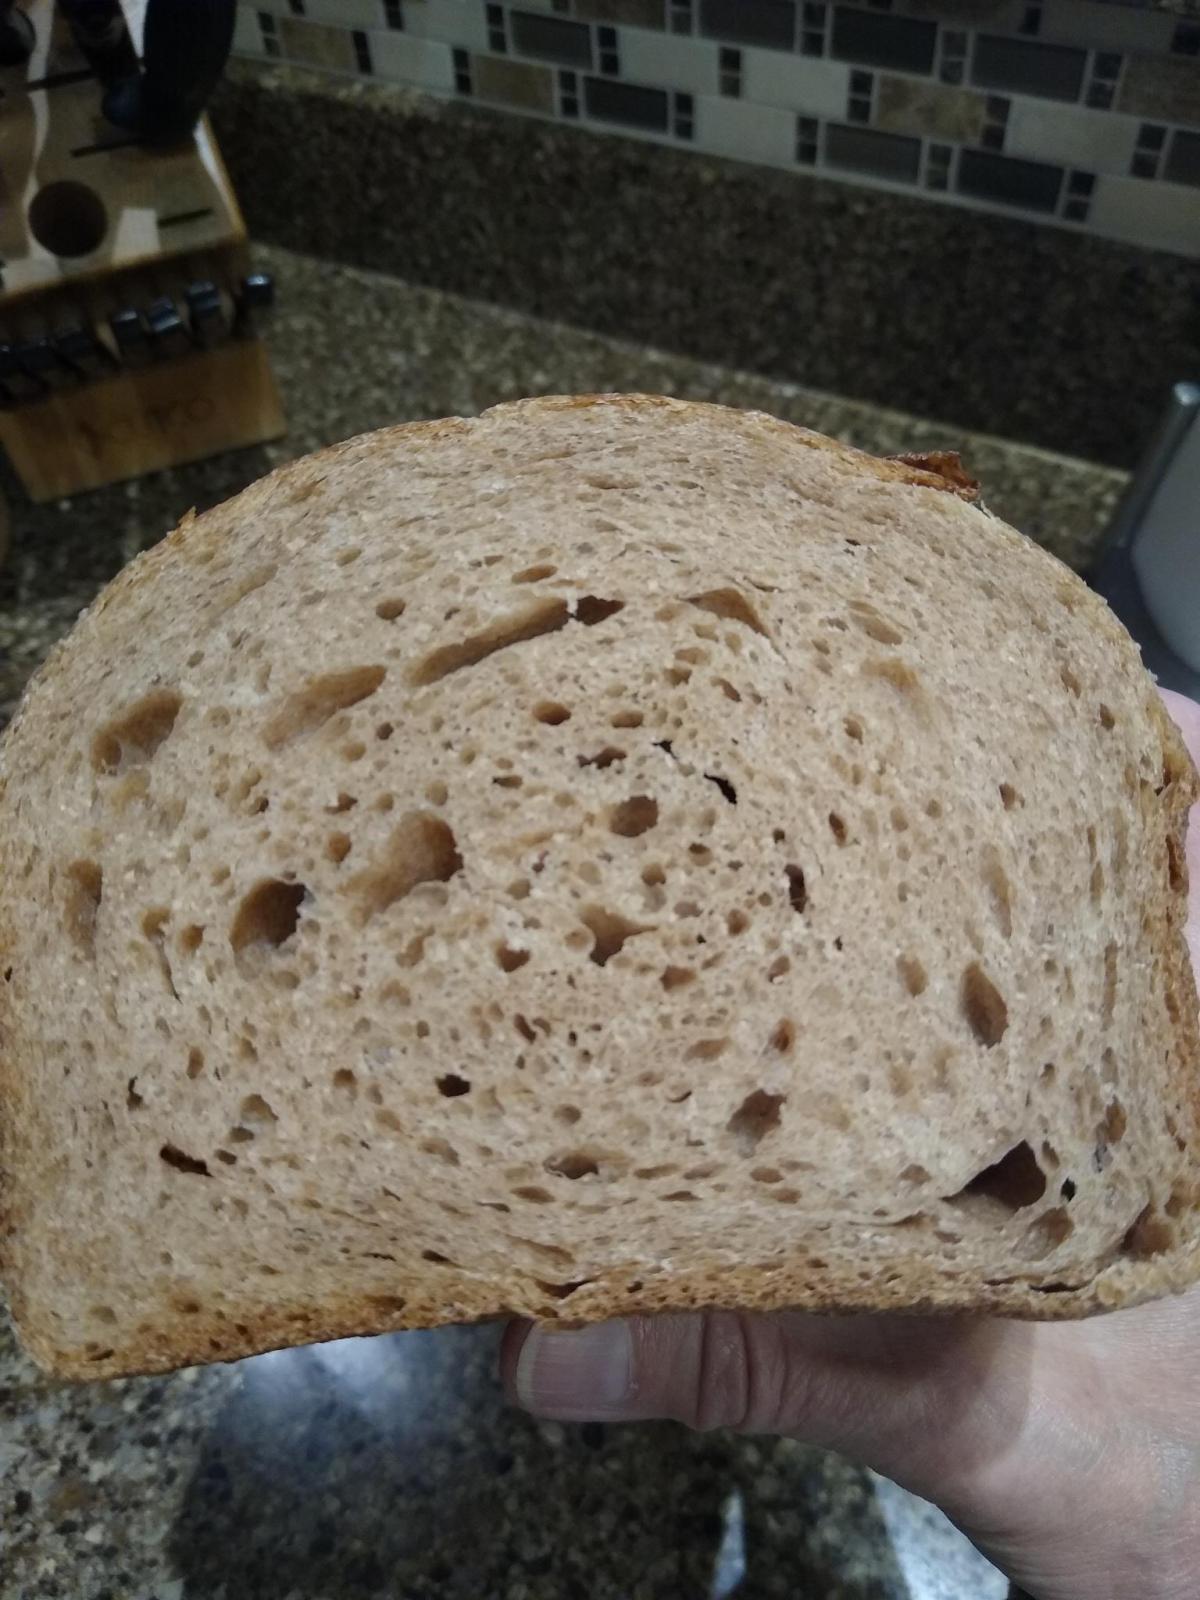
 

Crumb shot: 

 
justkeepswimming's picture
justkeepswimming

It has been a while since I did anything creative with my bread making. If there is such a thing as a "comfortable rut", our usual 75-100% whole grain sourdough sandwich bread has been just that. With the pending visit of a family member, I was inspired to dust off the clay baker and do something more creative for her. My scoring skills are rusty could use some work (they were never all that great really), but otherwise it looks pretty good so far. It's cooling at the moment; I'll edit and add a crumb shot later as time allows.

Total flour 550 gm (KA bread flour 138 gm, Central Milling High Protein bread flour 137 gm, Sprouted Spelt 100 gm, Hard Red Spring (freshly milled) 175 gm)

 Levain 120 gm

 Water 375 gm  

Salt 10 gm 

Safflower oil 1 Tbsp (we prefer a little softer crust and crumb) 

Water and levain combined, then flour added. Mixed by hand until no obvious dry flour, then covered and rested ~ 20 min.  

Salt and oil incorporated by hand a bit, then kneaded in my compact Bosch for 10 minutes. Dough temp 80f at the start of bulk.  

Bulk x 4 hours (~ 50 % rise) with a couple of S&F in the first hour. Then pre-shaped > 15 min rest > shaped > into an oblong banneton, covered and into the fridge overnight.  

Baked today (after 20 hours of cold retard) in an oblong clay baker at 500f x 20 min (lid on) then 450f (lid off). It's cooling at the moment.  

I had been having difficulty getting a reasonable crumb since moving here. The 6000 ft altitude combined with my preference for a high percent of fresh milled flour haven't been a winning combination, and  I don't like the idea of adding VWG. Using just a bit of the Central Milling high protein bread flour seems to have fixed the problem so far, though the final proof is pending. I'll add a crumb shot later.  

I will probably not bake this very often over the summer months, but might repeat it once cooler fall weather returns. 


justkeepswimming's picture
justkeepswimming

This video popped up on my computer several weeks ago and it looked intriguing to play with. It definitely isn't going to win any awards for appearance or presentation.  

I tweaked the flour a bit (she uses 100% AP) and added a few seeds. I didn't take time to weigh some of the ingredients, this loaf was "flying by the seat of my pants" in some respects, lol.  

Flour 280 gm  (48 gm AP, 48 gm KA bread flour, 185 gm sprouted spelt)

Instant Yeast - 1 tsp 

Salt - 1 tsp

Sugar 1 – tsp

Hulled hemp seeds - 1 rounded Tbsp 

Sunflower seeds - ~ 2 Tbsp 

Lukewarm water 250 gm 

Olive oil (or any really) for the pan. (Video says 1 Tbsp but that was a bit much for my pan.) 

Side note... my frying pan is a Ninja Foodi Neverstick 10.25 in frying pan. Finding a lid that would fit was a bit of a challenge, but thankfully Amazon came through. The lid needs to be domed just a little, and the multi-pan lid we have dips down into the pan enough for the bread to stick to the lid when cooking. 

Process: 

 1) Mix the dry ingredients and inclusions. 

 2) Add water and mix until no dry flour remains. (After the initial hand mix, I let things rest for about 15 minutes then gave it a few S&F for good measure. Probably not needed, but I do take pleasure in handling the dough just a bit....)

 3) Cover and let the dough rise for about an hour.

 4) Grease the (room temp) frying pan with olive oil. 

 5) Degas dough by rolling the dough with a spatula.

 6) Sprinkle with flour and roll a few more times.

 7) Put the dough in the (room temp) frying pan.

 8) Cover and let the dough rise for 30 minutes.

 9) Cover and cook over low heat (20-25 min). A little bit of moisture condensed and dripped onto the top of the bread, but it didn't seem to do any harm. 

10) Turn over and cook for another 15 minutes without the lid. I checked at the 10 minute mark and there were areas that were still a little "doughy". Your time may vary... 

This was mostly cooled and ready to eat about 45 min after cooking. 

I've made it several times now. It was quick and easy, with very little handling. Bonus, it didn't heat up the kitchen. It might be fun for making with kids, camping (RV or other), or a variety of other uses. My 95 y.o. mother-in-law (who made her first loaf of bread ever about 2 years ago) thought she would like to make this. It definitely came in handy after being gone for a couple weeks. After only a couple of hours after getting home, we had fresh bread ready to eat... another plus while my starter was getting back up to speed. I suspect it will come in handy again at some point.  

"Bottom", just after flipping. Continued to cook 15 min on low, lid off.

Crumb shot, about 1 hour after cooling.


justkeepswimming's picture
justkeepswimming

We're (finally) getting settled in our new home, and I have mostly figured out what needs doing for a successful bake at 6,000 ft. My starter had been on (to borrow a medical term) "comfort measures only" for about 4-5 months. It was fed just often enough to prevent death by neglect, but it wasn't exactly thriving. After series of feedings a few weeks ago, it was back to it's robust self. 

Lately I have been wanting to bake something other than loaf pan breads, so I invested in some new toys: an oblong banneton and oblong clay baker from Breadtopia. 

After baking mostly pan loaves for about a year, my shaping needs work.... I have a hard time getting dough to have the same thickness at the ends. One end is usually fatter than the other.  

Dough specs: 

Dough flour 460 gm. (50% bread flour, 50 % home milled flour {half hard red spring wheat, half spelt}). 

Water 330 gm

Starter 75 gm (1:1:1)

Salt 9 gm salt

Process:

Mixed everything together and kneaded it in a Bosch compact mixer for 10 min. I was busy and knew I wouldn't have an opportunity to do anything else for developing/organizing gluten. Bulk at 70F for 6 hours, about a 50-60% rise.

Preshaped/rest/shape and into banneton. The dough was pretty stretchy and on the verge of slack, I was glad I didn't push hydration any further. On a whim, I did that flour on a paper towel decoration thing that was popular for a while.... flip the dough out of the banneton onto a well floured paper towel. I used it as a sling to put it in the banneton. Rested on counter for about 15 min then into the fridge for 12 hours. Flipped onto parchment (seam down), scored, and placed into preheated clay baker. Baked at 490F for 20 min with the lid on, then at 450F lid off to internal temp 199F. That's the highest I can get at this altitude. It's cooling now, no crumb shot since it's a gift. 

This is only my second loaf using the baker, the first one came out just like this. The shape is more helpful for our usual bread uses (toast, sandwiches) than a boule. And the clay baker is much easier than a dutch oven for my arthritic joints to deal with. It's nice to have something different! This bread a gift for a brother visiting from out of town so no crumb shot. 

justkeepswimming's picture
justkeepswimming

We just moved from sunny AZ to Cheyenne, WY. My starter seems to have made the move just fine, bubbling up nicely when fed. Unpacking is progressing, and I am starting to find kitchen things bit by bit.

I threw together a sandwich loaf yesterday just so we could have something, and wasn't sure how things would turn out. This was a no recipe/no notes concoction, put together after discovering my loaf pans. 🎉

50/50 store bought whole wheat/bread flour, 80% hydration, about 40 gm of starter discard, 1/4 tsp of yeast, 9 gm salt, and a Tbsp of olive oil. Hand mixed, a couple of rounds of S&F and mostly ignored for 5 hours. "Shaped" (it was a bit wet for real shaping, so more like organized into a loaf pan configuration of sorts), sprinkled with sesame seeds, and proofed until it was about 3/4 in above the edge of the pan edge. Topped with another loaf pan as a lid and baked at 375 F. Lid off after 30 min, and watched it every 5 min or so. The crust looked good at 50 min. Other TFL members mentioned to bake to a lower internal temp than at sea level or risk having dried out bread, so I pulled it out at 197F internal temp. 

It turned out pretty well! Sliced it for breakfast and more for lunch. It doesn't taste like SD, more of a yeast bread flavor, but a big improvement over our recent random grocery store selections. 

 I'll be learning more later, but this was an encouraging first attempt. 

Mary


justkeepswimming's picture
justkeepswimming

I don't post very often anymore, but I'm still out here, still baking, still reading about everyone's beautiful bakes! Hats off to you all!!

I often do a same day bake. I mill my own whole wheat, and the starter/levain goes crazy with that. I have over proofed more often than I care to remember. Now that I have found the sweet spot for proofing time, I haven't wanted to try an overnight refrigerator proof. Maybe this summer ... I could also reduce the amount of starter vs levain and let it go longer, but this timeline works so I haven't fussed with it.

I do like to tinker with ingredients, so the percentage of whole grain varies. This is my current 60% whole wheat bread: 

Whole wheat flour 270 gm (freshly milled hard red winter wheat in this loaf)

AP flour (KAF this loaf) 90 gm

Bread flour (KAF this loaf) 90 gm

Starter/levain 105 gm (100% hydration)

Water 310 gm

Oil 20 gm (softer crust/crumb)

Salt 9 gm

For the starter, I usually build a levain the night before and use that. 

Mix everything and let it fermentolyse 30-45 min, with a round of S&F after 15+ min (timing as life dictates).

Knead in my mini Bosch mixer ~ 12 min. Dough temp at the end of mixing/kneading is usually 80F.

Bulk ferment at 75-78F (in my microwave out of drafts, temp varies slightly). 

Bulk to about 50% increase. Coil folds 2-4 times during bulk. Time from initial mix > fermentolyse > end bulk is usually 5.5 hours. 

Turn out on counter, preshape, rest 15-20 min, shape, pan, and proof. Proof is generally done in 2 to 2.5 hours at 75F.

Preheat oven to 400 F. Lightly spray the inside of my "lid", clip it on to the bread pan, and bake. 400 F for 20 min, reduce oven temp to 350F for 15 min, then remove "lid". Bake an additional 15 min to my preferred crust color and internal temp of 206F. 

We prefer a less crisp crust for sandwiches, so I wrap the loaf in a thin cotton tea towel while it cools on a rack. Photos of my most recent bread below, following the above. We had already cut into it when I took these photos, lol. 

Mary


justkeepswimming's picture
justkeepswimming

I have never had much luck making crumpets. I came across this recipe elsewhere,and decided to give it a try. Success at last!! There used to be 8 (I scaled the recipe down a tad), but two were eaten hot off the pan. The rest have cooled and are frozen.

A few notes of possible interest:

 - He appears to be in Australia, so when the recipe called for bread flour, I thought about it for a minute. I'm not always fond of the chew/texture US bread flour can give some things, but wasn't sure how US AP flour compares to AU bread flour. I decided to split the difference and used half of each (edit, half KAF bread flour, half KAF AP flour). That worked. I might try it with all AP flour next time, just to compare results.

 - He cooks them in egg rings, but we don't own any. While shopping on Amazon to see what my options are, they suggested this nifty little pan. I decided to give it a try. It was perfect, for this recipe and for our eggs this morning too. 

All successful experiment on all fronts. 


Pages

Subscribe to RSS - justkeepswimming's blog