The Fresh Loaf

A Community of Amateur Bakers and Artisan Bread Enthusiasts.

txfarmer's blog

txfarmer's picture
txfarmer

The recipe is from right here on this site: http://www.thefreshloaf.com/recipes/blueberrycreamcheesebraid , thanks, Floyd! I kept the dough a tad too wet at first, but easily corrected by adding a bit of flour.


This is not bread, it's cake!

Delicious.

txfarmer's picture
txfarmer


I have seen Schiacciata recipes from several books, as a big fan of savory focaccia, I've always wanted to try it. Recently we bought a lot of fresh blueberries on sale, so I combined several recipes, used blueberries instead of the usual concord grapes, added some rosemary flavor, and here's a beautiful schiacciata (i.e. sweet focaccia) that's delicious too. 


- The night before, make sponge:

instant yeast, 1/2tsp

bread flour, 125g

water, 160g


mix well, cover, and sit at room temperature (70F) for 12 to 24 hours. I used it after 14, it had reached its max volume then, was very bubbly.


- Baking day:

sugar, 3tbsp

instant yeast, 1.25tsp

water, 205g

bread flour, 345g

salt, 1.5tsp

olive oil, 5tbsp (3tbsp for the dough, the rest for brushing the top)

fresh rosemary, 1 bunch

blueberries, 1lb

sugar for spreading on top, 3tbsp

honey for spreading on top, to taste


1. Put rosemary in olive oil, heat, cool to room temperature and soak for about an hour, discard rosemary.

2. Mix 3tbsp of sugar, yeast, water, flour, salt, 3tbsp of oil, sponge, autolyse for 20 minutes. Knead well until gluten is strong. The dough is pretty wet.

3. Bulk fermentation for 90 to 120 minutes, until double. (If it's not very well kneaded at step 2, some stretch and fold would be necessary. I prefer my focaccia crumb to be fine and even, so I kneaded quite a bit.)

4. Divide into 2, round and rest for 10 minutes. Take one piece and roll it out to about 9X9 inch, put into a prepared 9inch square pan. (I like my focaccia thicker, so I used this pan to give it a square shape and limit its spread, of course you can use any other pan or just a large pizza pan to let the dough spread out more.)

5. Spread half of the blueberries and 2tbsp of sugar on top, use fingers to press the berries down into dough, ideally break up the berries a little

6. Roll out the other piece of dough and cover on top, pinch together the seams

7. Proof until double again, 30 to 60 minutes. Use fingers to dimple the dough again, make it spread to fill the pan. Spread the other half of blueberries and 1tbsp of sugar on top, press down to make sure the berries sit into the dough, wont' fall off during baking. Drizzle honey on top.

8. Bake at 400F for 45 minutes.


I love how the blueberries got baked "into" the dough, it's like making blueberry jam and the bread in one step! I like the crumb, soft, open with even holes, if you prefer your foccacia to have big irregular holes, you might want to knead less, fold more, and dimple a bit less in the end.

What elevates the bread from good to great is the rosemary! Combined with olive oil, it provides a savory background to the sour and sweet taste of blueberries, very Italian, very delicious.

With the amount of sugar and honey I put in, the bread is not that sweet, mostly from the natural taste of blueberries, you can certainly use more sugar/honey if you like it sweeter. I am so happy with the result I want to make the mroe traditional version too, using concord grapes and raisins.

txfarmer's picture
txfarmer


Got this idea from "Flavored Breads: Recipes from Mark Miller's Coyote Cafe", it reconstructs the classic pastrami on rye sandwich, and makes the ingredients (pastrami slices, onion, mustard, cream, milk, and rye) into a flavorful bread. However, the book only has volume measurements, and the ingredient ratios look rather "interesting" as the result. If I assume 120g of flour per cup, I end up with a 89% hydration level, without counting that 1/2cup of yellow mustard! So I basically changed up the ingredients ratio according to my preference, and turned the bread into a sourdough one too. 

100% starter, 200g

bread flour, 200g

rye flour, 180g

milk, 120g (I used nonfat)

heavy cream, 120g (it add some richness to the bread, just like Russian dressing does to a traditional pastrami rye sandwich)

butter, 28g

salt, 2tsp

mustard, 1/2 cup (I used yellow mustard I had on hand, but the book recommends half Dijon half whole grain mustard, I will try them next time, I image the flavor will be different)

brown sugar, 1tbsp, packed

pepper, 1tsp

onion, 2tbsp, diced (I used some caramelized onion I had on hand)

pastrami, 113g, cut into thin slices


- Mix together everything but onion and pastrami, autolyse for 20 minutes.

- Knead until gluten starts to develope, then knead/fold into onion and pastrami. It's a bery stick dough, and my hands were a nice shade of yellow.

- Bulk fermentation for 3.5 hours, S&F at 30, 60, 90 minutes.

- Shape into a batard (a big one, over 2lbs, I was too lazye to divide it), put into a brotform, cover and into the fridge it goes.

- 2nd day (15 hours later), take out and finish proofing (about 100 minutes)

- bake at 430F for an hour, steam for the first 15 minutes as usual.


Pretty decent ovenspring and bloom considering all that rye flour, and pastrami


Moist crumb, very flavorful. Mustard taste is very noticable, which I like, and I think a better quality/flavor mustard would enhance the bread even more. Pastrami and onion also play dominant roles in the taste.Not the most open crumb, but expect from a rye bread with so much fillings.


We all like this bread, tastes great, a meal in itself. The book has other intersting flavor combos that I want to try, but I probably won't use the exact formulas from it.

txfarmer's picture
txfarmer

2/14 is Chinese New Year this year, to celebrate the year of tiger, I baked the "tiger cake" above. Inside, it's a "tiger print cake", which is really a zebra cake in disguise. The Recipe is from: http://www.azcookbook.com/zebra-cake/

Then I made Burnt Orange Silk Meringue Buttercream from"Rose’s Heavenly Cakes", a complicated recipe but so worth it. I don't know why some people dislike her method, she's so detailed and precise, I've always gotten good results following her instructions. Not necessarily the most authentic results, but always the results she promised. Finally I drew the little tiger and tiger prints on the sides. Honestly that's the most time consuming part!


Now for the Valentine's Day, I made Apple Caramel Charlotte, also from "Rose’s Heavenly Cakes". Again, tastes and looks great, even though the instruction was 7 full pages, and it took me 3 days to complete.

The creme was silky smooth, matches perfectly with the slightly tart apple topping


Matches perfectly with the roses I got from my husband!

txfarmer's picture
txfarmer

Another formula from Dan Lepard's " The Art of Handmade Bread" (recipe can be found here: http://beginningwithbread.wordpress.com/2008/05/06/barley-and-rye-bread/ , but as always I encourage you to buy the book, well worth it.)


This is my first time using barley flour, it doesn't have any gluten, and this loaf also has a lot of rye, so it's not a light loaf to be sure, rather substantial. Straightforward to make, using Dan's "knead 5 to 10 seconds, rest 10 to 30 minutes" method. I did however halved the recipe and retarded the dough overnight in my fridge for proofing. Like always, my proof time is much shorter than Dan's, 90 minutes after taking out of the fridge. Judging from scoring marks, I'd say any longer would risk over proofing. (My house was 71F.)


I am happy with the crumb, it's not that open, since the loaf has 50%+ of rye and barley flour. However, it's definitely not dense or heavy.

Now the best part - the taste! I love how rye, barley, and wheat flavors all subtly mingled together, along with slight sourness from my starter. My idea of a good complex sourdough.


It's perfect for a grilled cheese sandwich, with some caramelized onion thrown in

txfarmer's picture
txfarmer

Ciabatta, like baguette, is one of those "basic" but "difficult" breads to get right. I make it every so often just to test out different recipes and see whether my techniques have improved. I've done Jason's ciabatta before, great open crumb, but tasted only OK since it was a stright dough. BBA's version proved to be flavorful but not hole-y, like a flat version of french bread. This recipe is from Maggie Glezer's wonderful book " Artisan Baking Across America", it uses a 24 hour biga, which lends great flavor to the final produt. It's a very wet dough, with relatively little mixing, 4 sets of folding, which results in a very open crumb.


The recipe can be found here:http://lindseysluscious.blogspot.com/2006/03/ciabatta.html, but I highly recommend to buy the book. I did use some of my own techniques:

1. for the first 2 of the 4 S&F, the dough was still very loose, so I did folding in the bowl, the last two I did french folds like she instructed

2. I did NOT use any flour while handling the dough, used oil instead on my hands and counter top. Oil combined with swift movement is more effective for handling such wet dough, AND this way I dont mix in any extra flour

3. I did the dough dividing, shaping (letter fold), proofing (seam side down), final flipping (baked seam side up) all on the same big piece of parchment paper. Well oiled of course. This way all the turning upside down, and moving around can be done by flipping of the parchment paper, without over handling the sticky dough.


She instructs to dimple the dough before baking, which is opposite to the "dont' touch the dough, don't even breath on it, must preserve all the bubbles" theory. I did obey and the result is fantansic. I think it's like how baguette dough is handled - iron hands to get rid of big unsightly bubbles floating on top, which will actually encourage more holes through out the crumb.


The holes are big enough to see through!

Of course all the holes are not just for show, it's there for a good reason - for all the sandwich filling to fill in! Here's a new sandwich idea I got from food network, b

rie and chocolate panini. Look at all the cheese and chocolate melting into the holes, yum!

However, DH is complaining that with so many holes, it doesn't fill him up, haha!

txfarmer's picture
txfarmer


Apparently I was in the mood of trying new things, with this bread I used: new recipe (Almond Milk Loaf from Dan Lepard's "A handmade loaf"), new yeast (a natural yeast from Japanese Shirakami-Sanchi region), as well as new bread pans from China, good thing everything turned out well!


First, the yeast - it is advertised as "natural yeast" collected from Shirakami-Sanchi, supposedly it's more active in cold environment than normal wild yeast, and it brings nicer flavors to the breads. It's in powder form, packaged in 10g envelopes like following. It looks very much like active dry yeast, and the way to use it is similar to fresh yeast - 2X of the weight of dry yeast in the recipe, needs to be activated by warm water (35C) for 10 to 15 minutes, fermentation speed is comparable to dry yeast also. Since it's not kept in a starter, it doesn't bring any sour flavors to the bread. It needs to be refridgerated after the package is opened. Honestly, while it's easy to use and my bread rose with no problem, I can't taste any special flavor from the yeast. No "subtle sweetness" as advertised, nor any complexity as from my normal starters. It's said that this yeast has special health benefits, which I can't verify either way. These were a gift from my friend in Japan, I don't think it's available in US.


Now the recipe - I LOVED it! It's a pretty straightforward lean dough with "quite a lot" of added almond paste. It's called almond milk, but there's no milk in it, just almond grounded with sugar and water. The bread has an even crumb, very frangrant and falvorful from almond. Perfect for both savory and sweet toppings. Highly recommended! Apprently the recipe is online here(http://ostwestwind.twoday.net/stories/5798892/), but you really should get that book, everything I made from it has been great.

Finally the pans. This bread was baked in pullman pans with lids on in the book, my pullman pan is way too big for trying a new recipe, so I used some mini cute pans from China (gifts from friends again). Had to try out different dough amount to get it right, as you can see I put too much in one, had to forget about putting the lid on:

Put too little in another one, which never rose to the lid, but the third one was just right:

As you can see, the shaping method for sandwich bread is a bit different here. It's a common way to shape Asian style sandwich bread. I don't know exactly why, but I suspect two reasons:

1. Asian style dough is usually very soft and enriched, and 2. Asian style loaf pans are long and narrow like the ones I used here. Both tratis mean if we roll the dough into one cylinder and put it in, it's not easy to get it even length-wise, by dividing the dough and roll seperately like following, it's more likely to get an even top. That's my theory anyway. I quite like the result.

Put the leftover dough in my 5X3 mini loaf pan, and it was a beautiful fit

Learned about the new yeast, the new pans, as well as a new favorite recipe, with delicious bread to boot, not a bad day!


txfarmer's picture
txfarmer

This bread is inspired by a Japanses baking book (translated into Chinese since I don't read Japanese at all):《日本人气面包店天然酵母的美味面包物语》.Japan has a very exciting and innovative artisan bread baking scene, which heavily influences Taiwan, Hongkong, and most recently China. I am originally from China (live in Texas now), still keep a baking blog in Chinese (http://blog.sina.com.cn/txfarmerying), and am pretty closely connected to the ever growing Chinese baking community, so I am lucky enough to have access to some Japanese/Chinese bread baking books/resources. 


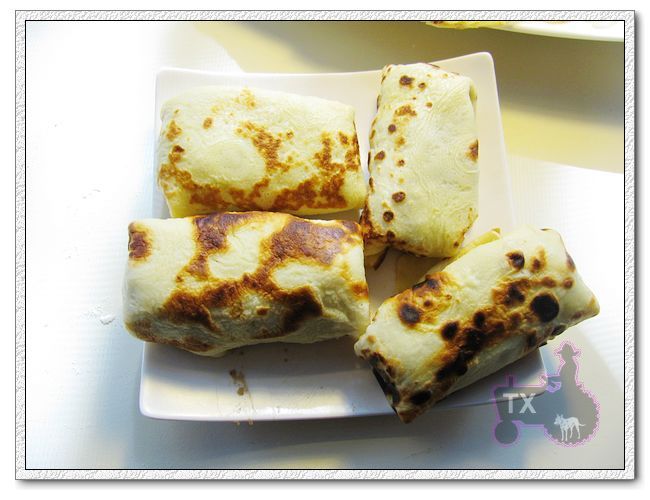
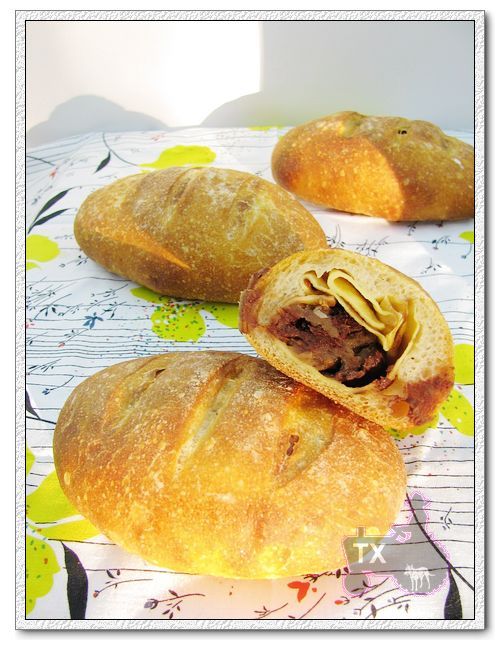
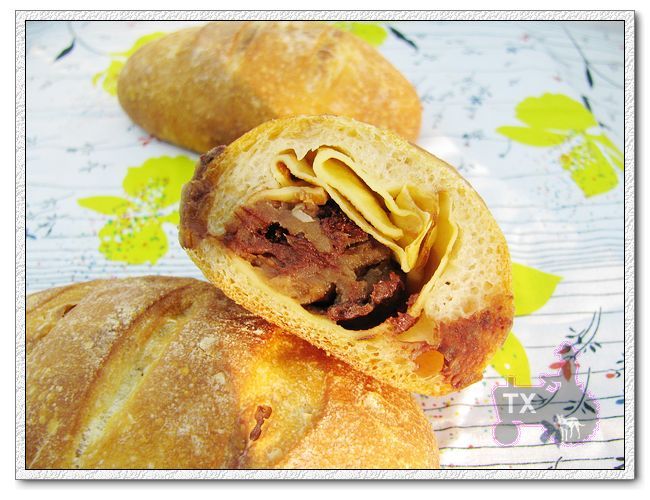
This bread is interesting in that it combines the classic lean sourdough bread and Asian style sweet buns in an unique way (typical of Japanese baking, which is very inventive and exciting). On the outside, it's a very typical sourdough baguette dough, on the inside, a sweet paste filling is first wrapped in a crepe, then wrapped in the dough, the bun is then baked on stone with steam just like a lean sourdough bread. In each bite, you get 3 different texture and flavor layered together: crusty and chewy baguette, soft crepe dough, then melt in your mouth sweet filling, unlike anything I've tried before! Since the recipes in the book are from a big-ish bakery in Japan, it's not practical to follow it in my US home kitchen, so I simply took the concept, and used my own formulas for the components, with satisfactory results.


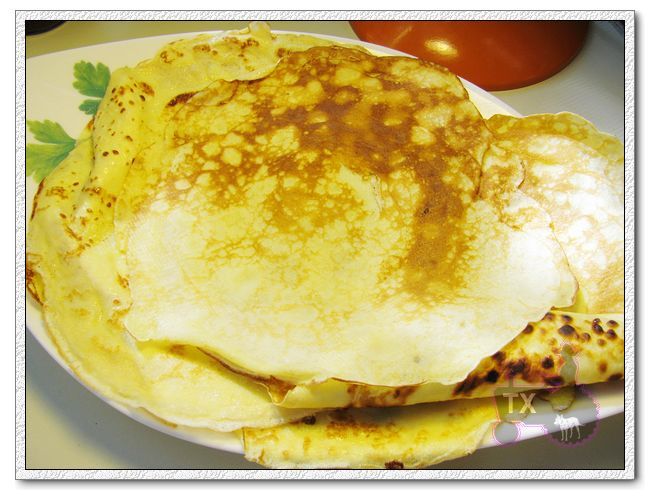
First, make the crepes, the following formula makes 6 to 7 crepes in my 10 inch pan, I only needed 2 for the buns, ate the rest with some nutella and bananas.

cake flour, 90g

eggs, 2

sugar, 10g

milk, 180ML

butter, 30g, melted

- mix everything together, cover and rest at room temperature for 1 hour or more, pour 1/4cup of mixture into a lightly oiled pan, fry on both sides until done.
Now the buns,  the dough is a typical baguette dough @ about 70% hydration, the following forumla makes only 4 buns (each around 140g), mostly because it's the last bit of my chestnut paste.


starter, 85g (100% hydration)

instant yeast, 1/4tsp

salt, 4.7g

bread flour, 190g

water, 120g


chestnut paste (lightly sweetened), 120g

bittersweet chocolate, 40g, chopped (I used baking chocolate pieces)

crepes, 2 (from recipe above)


- mix starter, flour, water, autolyse for 30min

- add salt and yeast, knead until gluten starts to develope. 3 minutes in my KA at medium speed.

- cover and fermentate at room temperature for 2.5 hours, with S&F at 30, 60, and 90 minutes. dough is very elastic and beautiful by the third fold, though still pretty wet.

- divide into 4 parts, each about 100g. round and rest for 20 minutes.

- take HALF of the crepe, wrap 30g of chestnut paste and 10g of chocolate inside
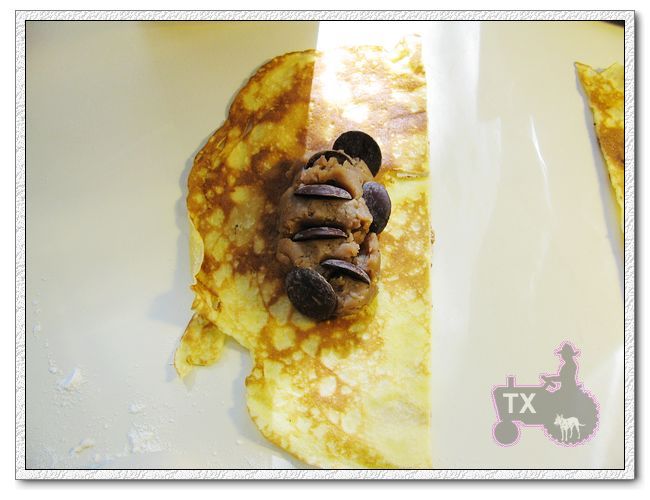
- take a piece of dough, press flat, and wrap the filled crepe inside, seal the seam, roll into a small batard
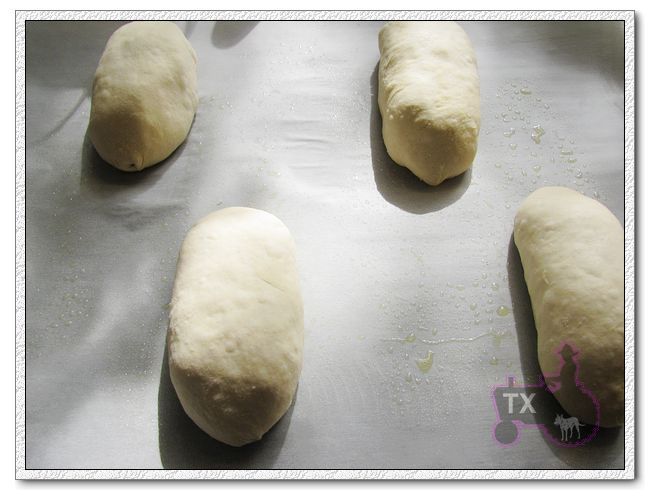
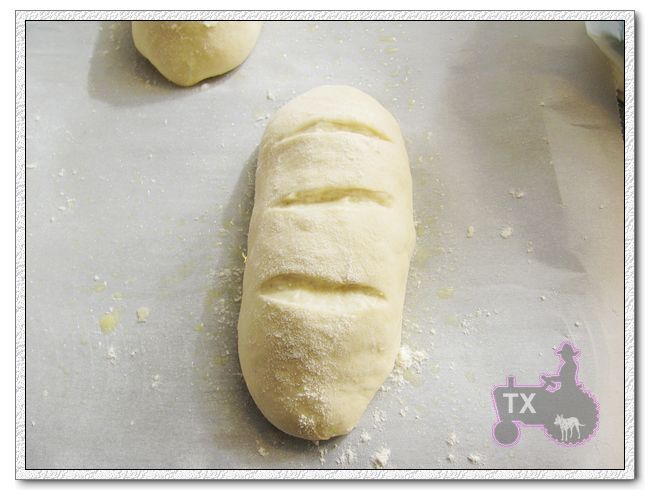
- slash on top, take care not of cut the crepe layer
- proof for 1.5 hour @ room temperature

- bake on stone with steam, 450F, 30 minutes. I preheated to 550F, decreased to 450F after steaming. At 10 minutes, I took out the steam pan.
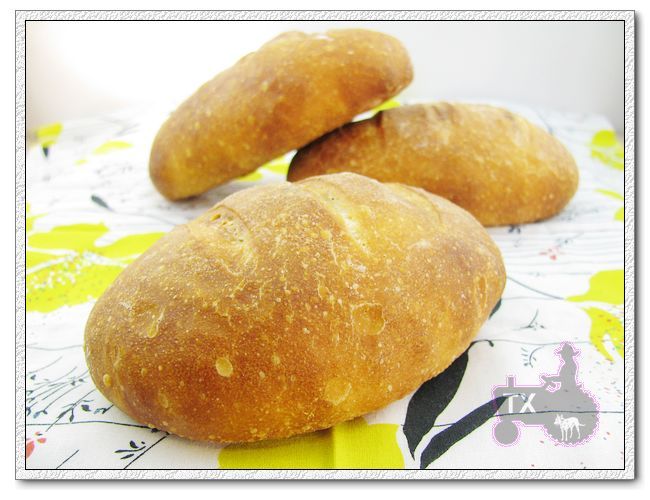
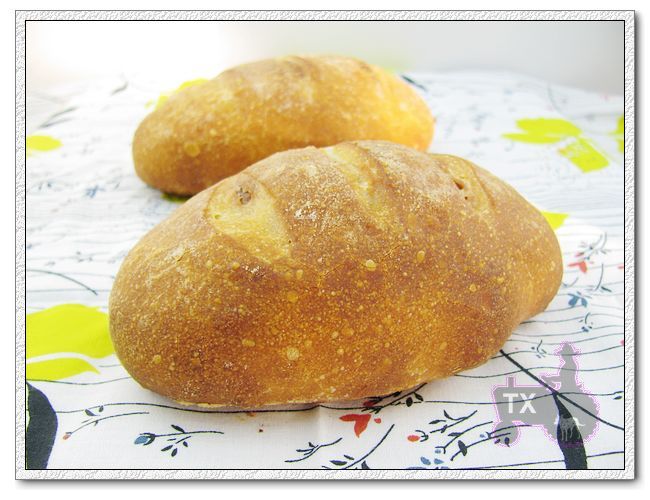
Makes a great snack or dessert. There are a lot more innovative recipes in that book, can't wait to try more. My last white wine chestnut sourdough also uses the same ingredients, yet it tastes vastly different from this bread, very interesting.


txfarmer's picture
txfarmer

It all started with that chestnut pie I made, amazing pie really, how can it not be? It had chestnut cream, chestnut puree, candied chestnut, creme fraiche, mascarpone, heavy cream all loaded in one flaky all butter crust!

But then I had these yummy chestnut puree and whole roasted chestnuts left over, as delicious as that pie was, it was also very rich and had a lot of added flavors, this time I want to make the chestnuts themselves shine. Of course I COULD eat the puree straight out of the jar, but I digress. ;) Here's what I came up with: a chestnut sourdough with loads of chestnut puree kneaded in; whole chestnuts boiled then soaked in fruity white wine overnight, then mixed into the dough; also used the soaking wine as part of the liquid, the result is a bread full of chestnut flavor. The wine brought out the subtle sweetness of chestnut, but the flavor of alcohol was minimal (a good thing since my husband doesn't drink). Chunks of chestnuts studded the soft and spongy crumb. I am pretty happy with the result, with the slight nutty sweetness, and almost "custardy" mouth feel, it's like eating a giagantic chestnut!

One thing I didn't expect is how sticky the chestnut puree made the dough to be. I had to decrease the liqud amount that I had planned to add in, even then, I still had to do quite a few S&F to build up the dough strength. I later found out that chestnuts have a lot of starch, double of what potatoes have, comparable to wheat flour, minuse the gluten of course. Even though it made kneading and fermentation a bit challenging, the final crumb was similar to those breads with potatoe puree mixed in, soft and songy, very moist.

Here's my formula for the bread:


The night before:

mixing 170g of roasted, peeled, and roughly chopped chestnuts with 140g of white wine (I used a fruity cheap one), bring to boil, remove from stove, cover and let sit overnight.


2nd day:

starter, 180g (100% hydration)

salt, 7.5g

bread flour, 300g (I used KA)

wine soaking liquid from above + water, 175g

chestnuts above, drained

chestnut puree, 240g (unsweetened, just chestnut and water)

honey, 22g


1. Mix together everything but chestnuts, autolyse 30minutes, knead until gluten starting to develope.

2. Add in chestnuts, knead them in evenly.

3. Cover and bulk fermentation for 4 hours, at 30, 60, 90, and 120 minutes, S&F.

4. Round and relax the dough for 15 minutes, shape into a boule, put into brotform, smooth side down, cover and put into fridge for overnight

5. About 15 hours later, take out the dough and leave in room temperature for 90 minutes, perhead the oven with stone to 550F

6. Slash and bake, steam as normal, reduce the oven temperature to 450F, bake for 45 minutes in total, at minute 15, take out the steam pan, and rotate bread for even baking.

The taste is pretty on target, the slashing effect was a bit lost due to all the chestnut pieces peaking out underneath

txfarmer's picture
txfarmer

Made miche for the first time for the BBA challenge, here's the "cover shot" ;)


I used Golden Buffalo high extraction flour, and followed BBA instruction pretty closely. The only change is kneading method - I don't have the stamina or arm strength to knead 2KG of dough until "passing windowpane", so I just kneaded some and did a couple of french folds during bulk fermentation. Turned out pretty well - dense chewy crumb (as expected with relatively low hydration) and great flavor. I will keep tweaking it though, changing up the hydration level (I usually prefer much wetter dough, but this bread is surprisingly good too) and flour combo.

Went with the siganature "P" scoring mark

Hmmm, "someone" REALLY wants a peice of this bread!

Pages

Subscribe to RSS - txfarmer's blog