The Fresh Loaf

A Community of Amateur Bakers and Artisan Bread Enthusiasts.

Blogs

Floydm's picture
Floydm

Here's the poolish in the AM:

According to Artisan Baking Across America, the puckering in the middle is a sign that it is ready to use.

The baked loaves:

They were acceptable, but not great, this weeknd. I think I made the dough a bit too dry. I'll try again soon.

Floydm's picture
Floydm

Today's batch of Pain Sur Poolish turned out pretty good. Not as good as last time, I don't think. We left the house during primary fermentation, so I threw it into the fridge for a couple of hours. I'm not sure I let the dough warm back up enough afterward. Also, the dough was definitely drier than last time. The wetness of the dough last time was part of what I think contributed to it being so good. So, more work to be done before I've got this one down.

So, I don't forget, the recipe I used was roughly the Village Baker recipe:

3/4 teaspoon instant yeast
1/2 cup water
the poolish that had sat out overnight (1 cup water, 1 cup flour, 1/4 teaspoon yeast)
2 cups flour (1 bread, 1 all-purpose)
1 1/2 teaspoons salt

Combine, let ferment 2 hours, punch down, let rise another 45, shape into logs, let rest 15 minutes, stretch, let rise another 1 to 1 1/2 hours, bake.

Floydm's picture
Floydm

I just started a poolish for pain poolish again tomorrow.

1 cup bread flour
1 cup cool water
1/4 teaspoon instant yeast

Overnight at room temperature seems to be about right. When I come down in the morning it is fairly foamy but doesn't appear to have totally run out of steam yet.

Oh yeah, I think I Terry Schiavo'ed my starter. I stopped feeding it two or three weekends ago, the weekend everyone in the house got sick. I probably could nurse it back to life, but I think I'm going to let it go. There are too many other breads I want to try baking right now: having to come up with something that involved my starter every weekend was getting to be a burden. Easy come, easy go.

crumbbum's picture
crumbbum

I'm trying to make a brownie that will turn out almost as soft and gooey as the cookie recipe below. Following the cookie recipe is an approximation of what I cobbled up from the cookie recipe and several brownie recipes.

These cookies are wonderful, by the way.

NavyDucks Peanut Butter Chip Chocolate Cookies

1-1/4 cups butter or margarine, softened
2 cups sugar
2 eggs
2 teaspoons vanilla
2 cups unsifted all-purpose flour
3/4 cup unsweetened cocoa
1 teaspoon baking soda
1/2 teaspoon salt
2 cups peanut butter chips

Cream butter (or margarine) and sugar in large bowl until light and fluffy. Add the eggs and vanilla and beat well. Whisk the dry ingredients (flour, cocoa, baking soda and salt) together and then blend into the creamed mixture. Stir in the peanut butter chips. If it's a warm day or your kitchen is warm, you'll get better baking results if you chill the dough for a couple of hours.

Drop by the spoonful onto ungreased cookie sheets and bake at 350F for 8 to 9 minutes only. DON'T OVERBAKE. The cookies will be soft; they will puff up during baking and flatten out upon cooling. EDIT: Cool about 5 minutes or until they are slightly set, then remove to wire racks to cool completely. Will make about 4 dozen 2-1/2 inch cookies. YUM.

~~~~~~~~
Peanut Butter Chip Brownies

3/4 cup butter or margarine (1/2 c marg. 1/4 c butter)
1-1/4 cup sugar
2 eggs
1 tsp. vanilla
1-1/4 cups all purpose flour
1/3 cup unsweetened cocoa
1/2 tsp. baking soda
small amount of half-and-half or cream (1/4 cup?)
1 cup peanut butter chips

Cream butter, sugar, eggs and vanilla until fluffy. Sift dry ingredients together, and blend in alternately with splash of cream. Stir in peanut butter chips.

Spread in greased 13x9 pan, bake at 350F 30-35 minutes.

recipe called for 3/4 cup chocolate syrup. I didn't have any, but increased the fat and sugar by 1/4 cup each, reflected in the amounts above, and splashed in a little half-and-half as I added the dry ingredients in.

freshly out of the oven, it looks like a giant pan cookie. I'm trying to let it cool before cutting and sampling, but my resolve isn't strong.

follow-up: it didn't come out gooey like I'd hoped. alternatives: smaller rectangular pan for a thicker brownie, shorten oven time to 25-30 minutes, actually have chocolate syrup on hand (ya think?).

crumbbum's picture
crumbbum

This is the white bread I settled on about 20 years ago, when I was baking all the bread for my family of four. We ate so much, I just worked it up for two loaves, so that's the first recipe here. It's followed by the single loaf approximations I used earlier this week for the loaf pictured below. It's a good, tasty white bread for toasting or making sandwiches, and if it gets stale, it makes fantastic french toast.
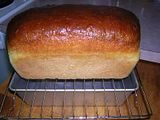
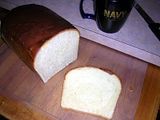
WHITE BREAD
(two 9x5 loaves)

7-1/2 cups bread flour
1/2 cup sugar
1 Tbsp. salt
1-1/2 Tbsp. instant yeast (or two 1/4-ounce packets)

mix 4 cups of the flour with the other dry ingredients.

heat to 120F:
2-1/4 cups milk
1/4 cup butter or margarine

add this, along with 1 egg, lightly beaten to your flour/yeast dry mixture and blend until evenly incorporated.

add the remaining 3-1/2 cups flour, a cup at a time, into the dough. it should begin to hold together after about two cups additional. if you're using a mixer, you can continue with that process, or turn the dough out to work the rest of the flour in by hand.

grease a large bowl, plop your dough ball into it, and turn it, cover with a kitchen towel, and set it to rise until doubled in bulk. depending on your ambient temperature, it could take 1-3 hours.

when it's doubled, punch it down in the bowl, and turn it out onto a floured work surface. knead it a few minutes to work out the bubbles, add a little flour if it sticks to your hands. flatten it out into a rectanglish-shape with your hands, and divide it evenly. flatten the pieces out a little more, then roll up tightly as you can, pinching the closing seams together, tucking the ends in if need be, and set them to rise (covered) in greased loaf pans. the second rise goes much faster, again, depending on ambient temperature, 30-60 minutes is typical.

preheat your oven to 375F, and bake for 10 minutes, then reduce to 350F for an additional 30 minutes. keep watch on it, I think my oven runs about 25 degrees hot, at least as compared to Floyd's temperatures. if all goes well, it should just roll out of the loaf pan when tipped on its side. cool it on a rack, resting on its bottom, and the rack will leave cutting guides for you.

Notes
If you coat the top crust with melted butter or margarine while it's hot, it will stay soft. The advantage to this is that slicing the bread won't crush the loaf. But you already know that a loaf like this should be sliced laying on its side anyway, right? It's another deterrent to crushing, and it exposes the cutting guides you made on the bottom of the loaf. And don't forget to use a serrated bread knife!

I skip the step of trying to heat milk without scalding it on the bottom of the saucepan by using powdered milk (1 cup) and the same amount (2-1/4 cups) of comfortably warm tap water in place of dairy milk.

This recipe can also be made into six mini-loaves if you want to have a special little dinner where everyone gets their own loaf of bread. Temperature is the same, adjust your own timing.

Single 9x5 Loaf:

about 4-1/2 cups bread flour
1 Tbsp. or one 1/4-ounce packet dry yeast
3 Tbsp. sugar
1-1/2 tsp. salt
1/3 cup powdered milk
1 cup warm water
2 Tbsp butter
1 egg

start your dry mix using 2 cups flour, add the remaining in after the liquids.
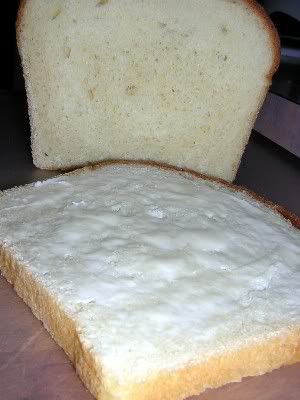
crumbbum's picture
crumbbum

ooooo, look! I figured out how to do thumbnails that link to the photobucket fullsize images! click the pictures.

Honey-Whole Wheat Bread
single 9x5 loaf

2 cups whole wheat bread flour
1/3 cup wheat germ
1-1/2 tsp. salt
2 tsp. instant yeast (or one 1/4-ounce packet)
1 Tbsp. vital wheat gluten (if you've got it)

mix these dry ingredients together.

heat to 120F:
1 cup milk
2 Tbsp. butter or margarine
1/4 cup honey

alternately, use 1 cup warm water and add 1/3 cup powdered milk to the dry ingredients.

add the liquids to your dry flour/yeast mixture and blend until evenly incorporated.

work 2 cups white bread flour, a cup at a time, into the dough. it should begin to hold together after this. if you're using a mixer, you can continue with that process, or turn the dough out on a floured surface and knead until the flour is incorporated and you have a smooth ball of dough. it will be slightly tacky, but shouldn't stick to the surface or your hands.

grease a bowl, plop the dough ball into it, and turn it so it gets 'buttered all over', cover it with a kitchen towel, and set it to rise until doubled in bulk. depending on your ambient temperature, it could take 1-3 hours.

when it's doubled, punch it down in the bowl, and turn it out onto a floured work surface. knead it a few minutes to work out the bubbles, add a little flour if it sticks to your hands, but this dough probably won't need it. flatten it out into a rectanglish-shape with your hands or a rolling pin, and roll it up tightly as you can, pinching the closing seams together, tucking the ends in if need be, and set to rise (covered) in a greased loaf pan. the second rise goes much faster, again, depending on ambient temperature, 30-60 minutes is typical.

preheat your oven to 375F, and bake for 10 minutes, then reduce to 350F for an additional 30 minutes. keep watch on it, I think my oven runs about 25 degrees hot. if everything goes well, it should just roll out of the loaf pan when tipped on its side. cool it on a rack, resting on its bottom, and the rack will leave cutting guides for you.

Notes
I used wheat germ this time because I had it on hand. I used to make it with cracked wheat, or wheat 'berries' that had been soaked in warm water to soften a bit. I'm guessing that was about 2 tablespoons in quantity.
Measures are approximations--nothing is to panic about as long as you're in the ballpark.
If you coat the top crust with melted butter or margarine while it's hot, it will stay soft. the advantage to this is that slicing the bread won't crush the loaf. Slice the loaf laying on one side--it's a deterrent to crushing, and it exposes the cutting guides you made on the bottom of the loaf.

Floydm's picture
Floydm

of the pain poolish was excellent too. It wasn't as pretty, but it still tasted great.

crumbbum's picture
crumbbum

Let's see if I can figure this out. Old dogs and new tricks don't always work.

here's the recipe I sorta followed.

the night before
1/2 cup starter
1-1/2 cups flour
1 cup water

in the morning
2 eggs, lightly beaten
1/4 cup sugar
1/2 tsp. salt

just before starting
1/4 tsp. baking soda

this recipe says it makes 18 very large hotcakes, so since there was just myself and a hungry shark teenage boy, I cut things down and we ended up with 8-9 hotcakes, about 6-7 inches across. I'm assuming everybody knows how to cook hotcakes.

my recipe for 2 hungry people, not for a ravenous horde goes like this:

1/2 cup starter
3/4 to 1 cup flour
1/2 to 3/4 cup water

1 egg, lightly beaten
2 to 3 Tbsp. sugar
1/4 tsp. salt
2 to 3 tsp. cinnamon

1/4 tsp. baking soda

they were good. we liked them so much we made them again the next day.

Floydm's picture
Floydm

This weekend I made bagels, pain au raisin, cream cheese snails, and pain poolish.

Bagels and snails were pretty easy. I'll post the snails recipe soon. The bagel recipe is here.

We ate one of the two pain poolish loaves last night. It was excellent. It'll be interesting to compare the other one to it tonight: I was pretty rough shaping the one we ate last night. It came out a beautiful dark brown. The other loaf I did not work as hard while shaping. It came out pretty pale. I suspect that that one may have been a little "over the hill" and would have benefited from being worked harder.

Once I get the pain poolish down I will post a recipe too.

Pages

Subscribe to RSS - blogs