
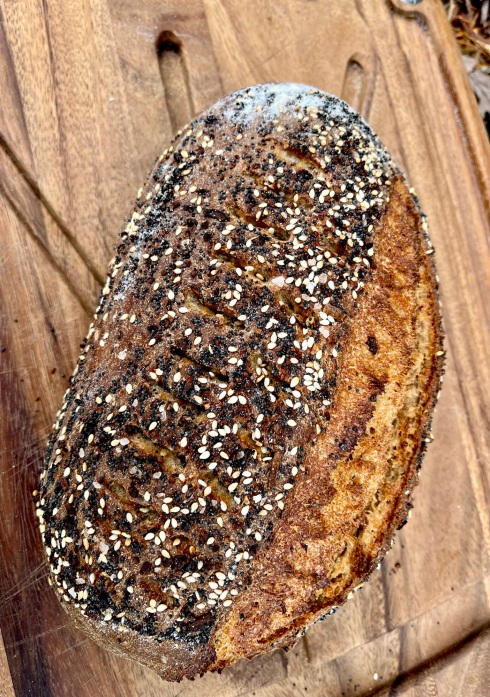
Durum-WW-Rye Baked Potato Buttermilk Sourdough

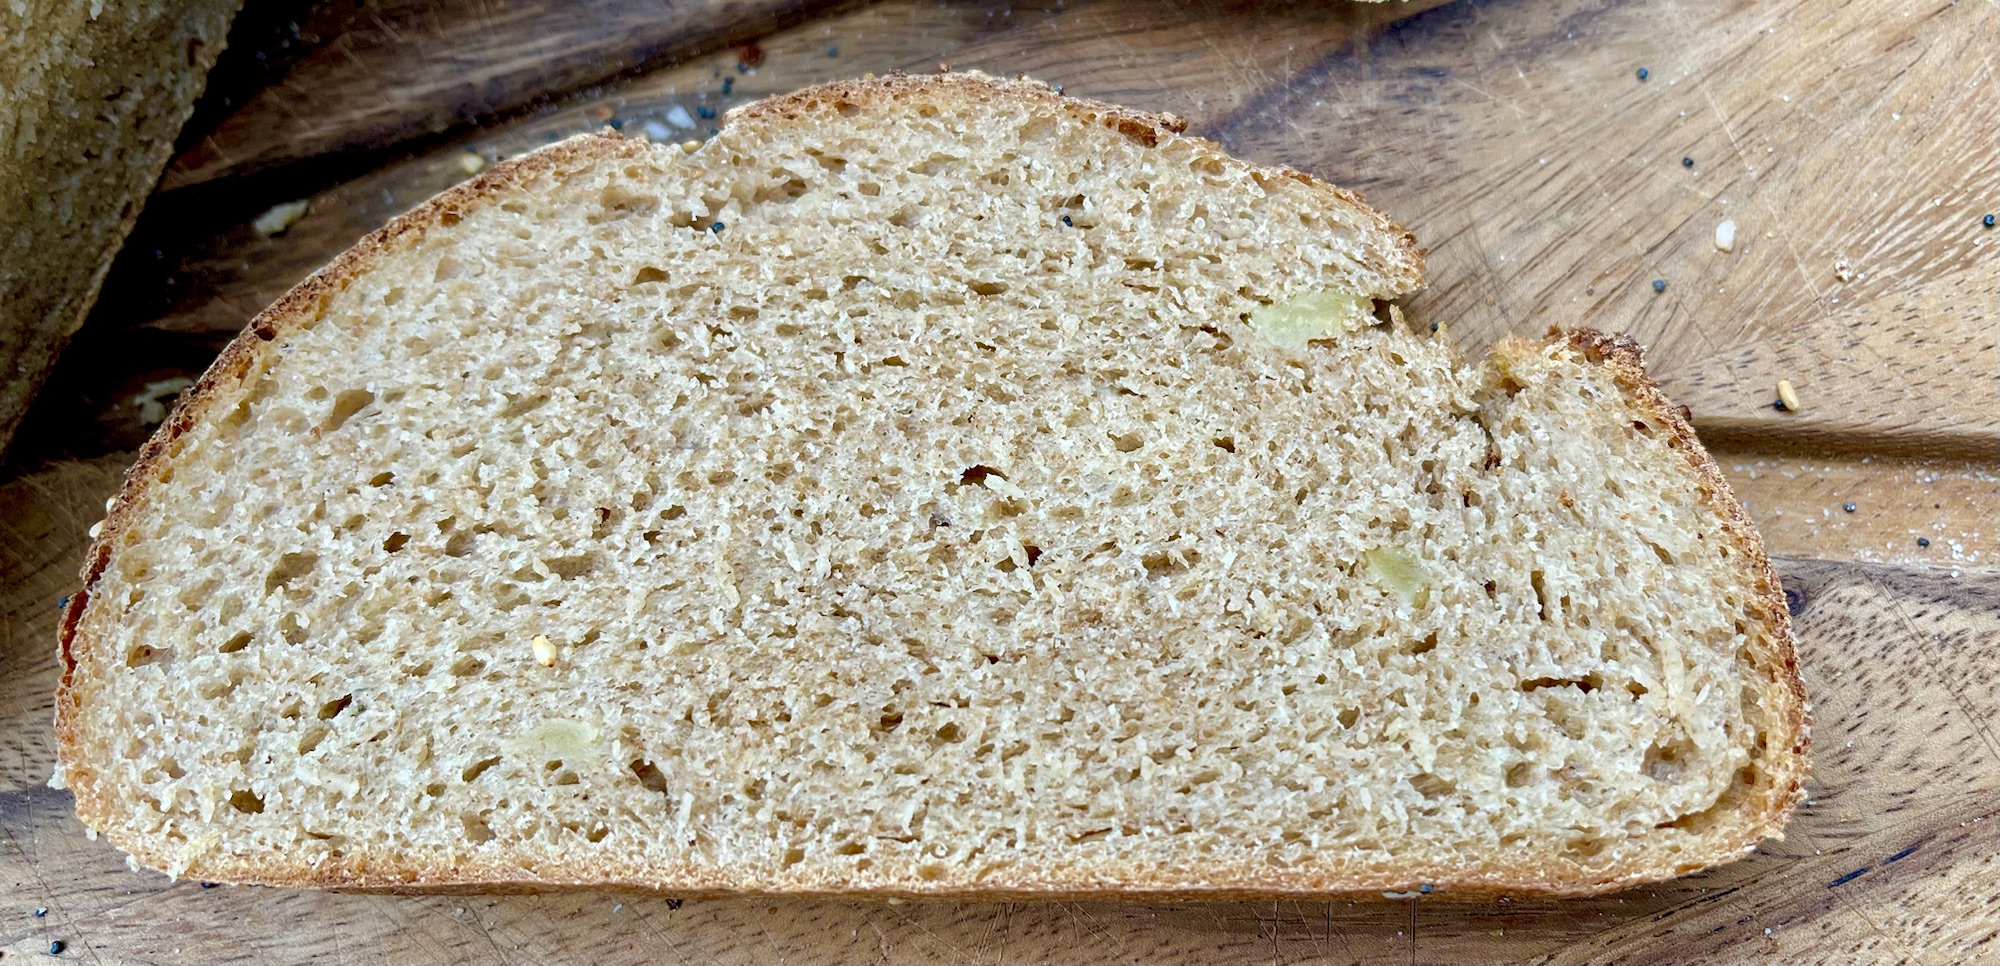
This was a nice flavorful bread made with fresh milled Durum, Rye and Rouge de Bordeaux whole wheat. I used some baked potatoes that were mashed up but still chunky so you end up with a rustic bread with pieces of potato throughout.
The buttermilk was originally going to be used in my English Muffins but I forgot so I pivoted and used it in this bake instead. It adds a little extra tang to the final bread.
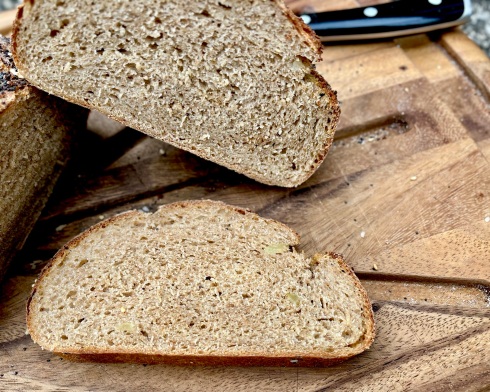
The crumb on this one was tighter than I wanted mainly because I should let the final proof go a little longer, plus with such a high percentage of whole grains I should have upped the hydration a bit more as well which would have helped. Either way, it still ended up a tasty loaf.
I milled the whole grains in my MockMill200, sifted with a #30 sieve, re-milled and then sifted with a #40. I save the bran to add to my levains which I find give them a nice boost.
Some everything bagel mix was added as a topping for some extra crunch and flavor.
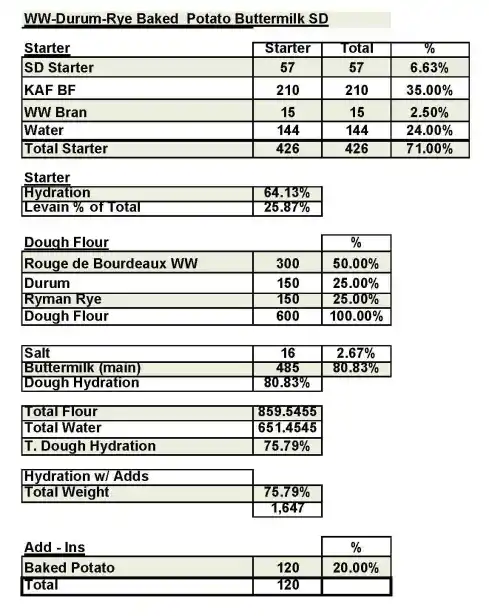
Formula
Levain Directions
Mix all the levain ingredients together for about 1 minute and cover with plastic wrap.
Let it sit at room temperature for around 6-7 hours or until the starter has almost doubled. I used my proofer set at 76 degrees so it took around 5 hours for me. Either use in the main dough immediately or refrigerate for up to 1 day before using.
Main Dough Procedure
Note: I use an Ankarsrum Mixer so my order of mixing is slightly different than if using a Kitchenaid or other mixer. Add all your liquid to your mixing bowl except 50-80 grams. Add the levain in pieces and mix for a few seconds to break it up. Next, add all your flour to the bowl and mix on low for a minute until it forms a shaggy mass. Cover the mixing bowl and let it rest for 30 minutes to an hour. Next add the salt, potatoes and remaining water as needed and mix on medium low (about speed 3) for 18 minutes. If you are using a more traditional mixer you would only mix around 7-10 minutes.
Remove the dough from your bowl and place it in a lightly oiled bowl or work surface and do several stretch and folds. Let it rest covered for 10-15 minutes and then do another stretch and fold. Let it rest another 10-15 minutes and do one additional stretch and fold. After a total of 1.5 hours place your covered bowl in the refrigerator and let it rest for 12 to 24 hours. I use my proofer set at 79-80 degrees. If you are leaving it at room temperature 72 degrees I would let it sit out for 2 -2.5 hours before refrigerating. Depending on how developed the dough is after the initial mix you may not need to do as many S&F’s.
When you are ready to bake remove the bowl from the refrigerator and let it set out at room temperature still covered for 1.5 to 2 hours or if using a proofer set at 80 degrees for 1 hour. Remove the dough and shape as desired and cover with a moist tea towel or plastic wrap Sprayed with cooking spray and let rise at room temperature for 1 1/2 – 2 hours. (I use my proofer set at 80 F and it takes about 1 hour to 1.5 hours but I should have let it go further on this bake). You will need to judge for yourself if you have a nice fermented dough before baking in the oven. I also added the topping mix directly to the bottom of my bannetons and rolled the dough side to side to make sure I had good coverage. You can also spray a a tea towel and then sprinkle the topping on the towel and roll the dough onto the towel.
Around 45 minutes before ready to bake, pre-heat your oven to 540 degrees F. and prepare it for steam. I have a heavy-duty baking pan on the bottom rack of my oven with 1 baking stone on above the pan and one on the top shelf. I pour 1 cup of boiling water in the pan right after I place the dough in the oven.
After 1 minute lower the temperature to 455 degrees. Bake for around 35 minutes or until the breads are nice and brown and have an internal temperature around 200-210 F.
Take the bread(s) out of the oven when done and let them cool on a bakers rack for as long as you can resist.


Comments
I've just started using a Mockmill 100. It is a great improvement over the Marga Mulino flaker I was using.
I wonder if you measured or can estimate the amount of bran you got with the #30 and then how much was left in the #40 after remilling?
I’m about to do some milling in a few minutes. I’ll measure after both passes and show you as soon as I’m done. FYI it does vary slightly based on the grain. I mill the first pass at the lowest setting before the stones start to click and then sift. I remill the second pass with the stones clicking and then sift with #40. Much less comes out with the second pass. Grains like spelt I only sift once and remill as I dint see any benefit sifting a second time.
Okay, here are the results below:
Durum Berries
Starting Weight: 345 Grams
First Mill and Sift: 339 Grams, 6 grams of bran removed, sifted with #30 Sieve
Second Mill with stones clicking and sifting with #40 Drum Sieve , 314 Grams, 25 additional bran removed
Butlers Gold Whole Wheat, Hard Red Winter Wheat
Starting Weight: 280 grams
First Mill and Sift: 271 Grams, 9 grams of bran removed, sifted with #30 Sieve
Second Mill with stones clicking and sifting with #40 Drum Sieve , 249 Grams, 22 additional bran removed
I have tried different variations and sometimes I will grind the finest setting with the stones clicking and go right to sifting with my #40 sieve. I find the above method works better and produces a lighter flour. There are many people I have seen on some of my Facebook groups who don't do any sifting at all but I like the results I achieve better. I also usually mix some commercial BF or AP flour in to add some gluten strength, but plenty of times I've made 100% Fresh Milled Flour loaves and they have come out great.
There is Mockmill FB group and several fresh milled flour groups on FB you can join for extra inspiration. Most of the breads I've been baking the last few years all have fresh flour in them.
Feel free to ask me any question here or send me a private message and I'm happy to help however I can.
I buy most of my grains from Barton Springs Mi,l https://bartonspringsmill.com/. All the grains are grown in Texas and they have some amazing varieties that I love. The pricing is not inexpensive but it's worth trying. The Durum berries are a pain to find close to me in New York on Long Island. I only get them from Amazon from one specific company because the Prime shipping is free. I've found them on other sites but the shipping ends up being almost as much as the berries themselves.
Good luck and happy Milling!
Ian
Did you know Azure Standard has a drop point right around the corner in Brookhaven, only 10 minutes away? They charge 8.5% for shipping. If that sounds good and you're interested in the durum offered through Azure Standard, contact CJ.
Yippee
Appreciate your comments as always. That Azure drop off must be fairly new. I had looked into this in the past and no drop off points were available. Thank you for pointing this out. This certainly could be helpful for some of my grains.
Best regards,
Ian
That gives me an idea of what to expect.
I haven't been sifting. I'll have to try it sometime and see if I notice the difference.
My regular loaf is about 25% bread flour and the rest freshly ground grains. I use Prairie Gold hard white, Bronze Chief hard red, spelt, rye and oats. I buy my grains from Yoder's Country Market up in Yanceyville. They sell 5 to 8 pound bags reasonably priced.
Sometime soon I'm going to experiment with CLAS.
Gary
It really makes a difference and if you can get some durum it’s a must.
Ian
Ian another beautiful creation, I love the seeded crust and the even crumb. I’m sure it tasted wonderful.
Benny
This was a real tasty one. I knew you would appreciate the seeds :).
Best regards,
Ian