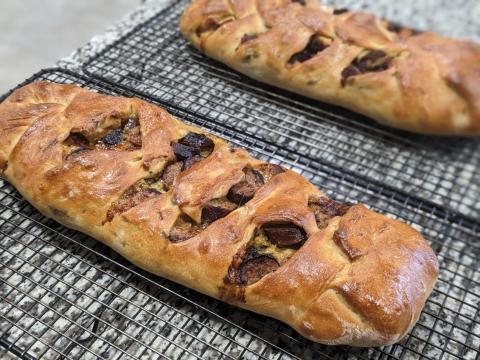
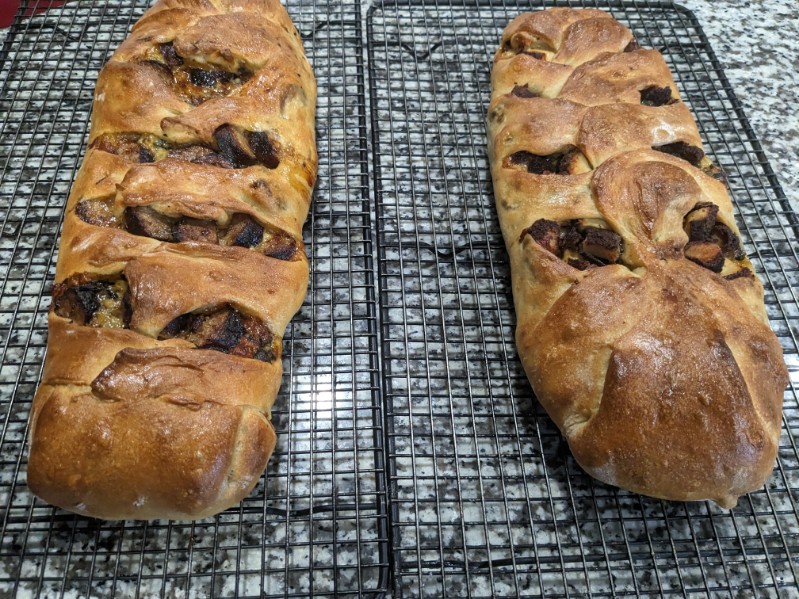
This is my take on what is apparently a traditional Venezuelan Christmas bread that turns out to be super yummy. As I said before, my various takes on Hokkaido SD milk bread prove to be so flexible. I used my 35% WW version for this bake. The dough gets rolled out and then ham, sliced green olives stuffed with pimentos and finally raisins and applied. It is all rolled up into a cylinder and then eventually baked. Did I say it is yummy, salty and a bit sweet from the raisins.
Filling:
2 tablespoons butter, melted, divided
1/2 pound thinly sliced deli ham, cut into strips
1/2 cup golden raisins, divided (spritz with water, cover and microwave in 10 sec increments until warmed and slightly hydrated/softened)
1/2 cup sliced green olives with pimentos, divided
Egg Wash:
1 large egg 1 tbsp milk pinch of salt and ¼ tsp sugar
Instructions
Levain
Mix the levain ingredients in a jar or pyrex container with space for at least 300% growth.
Press down with your knuckles or silicone spatula to create a uniform surface and to push out air.
At a temperature of 76-78ºF, it typically takes up to 10-12 hours for this sweet stiff levain to be at peak. For my starter I typically see 3-3.5 times increase in size at peak. The levain will smell sweet with only a mild tang.
Tangzhong
In a sauce pan set on medium heat, stir the milk and whole wheat flour until blended. Then cook for several minutes until well thickened, stirring regularly with a spoon or heat-resistant spatula. Let cool in the pan or, for faster results, in a new bowl. Theoretically it should reach 65ºC (149ºF) but I don’t find I need to measure the temperature as the tangzhong gelatinizes at this temperature. You can prepare this the night before and refrigerate it, ensure that it is covered to prevent it from drying out.
If you plan on using a stand mixer to mix this dough, set up a Bain Marie and use your stand mixer’s bowl to prepare the tangzhong.
Dough
In the bowl of a stand mixer, add the milk (consider holding back 10 g of milk and adding later if this is the first time you’re making this), egg, tangzhong, salt, sugar and levain. Mix and then break up the levain into many smaller pieces. Next add the flours. I like to use my spatula to mix until there aren’t many dry areas. Allow the flour to hydrate (fermentolyse) for 20-30 minutes. Mix on low speed and then medium speed until moderate gluten development this may take 5-10 mins. You may want to scrape the sides of the bowl during the first 5 minutes of mixing. Next add room temperature butter one pat at a time. The dough may come apart, be patient, continue to mix until it comes together before adding in more butter. Again, knead until well incorporated. You will want to check gluten development by windowpane during this time and stop mixing when you get a good windowpane. You should be able to pull a good windowpane, not quite as good as a white flour because the bran will interrupt the windowpane somewhat.
On the counter, shape the dough into a tight ball, cover in the bowl and ferment for 3 - 4 hours at 82ºF. There should be some rise visible at this stage.
You can next place the dough into the fridge to chill the dough for about 1.5 hours, this makes rolling the dough easier to shape. Remember, if you do so the final proof will take longer. Alternatively, you can do a cold retard in the fridge overnight, however, you may find that this increases the tang in your bread.
Roll out the dough
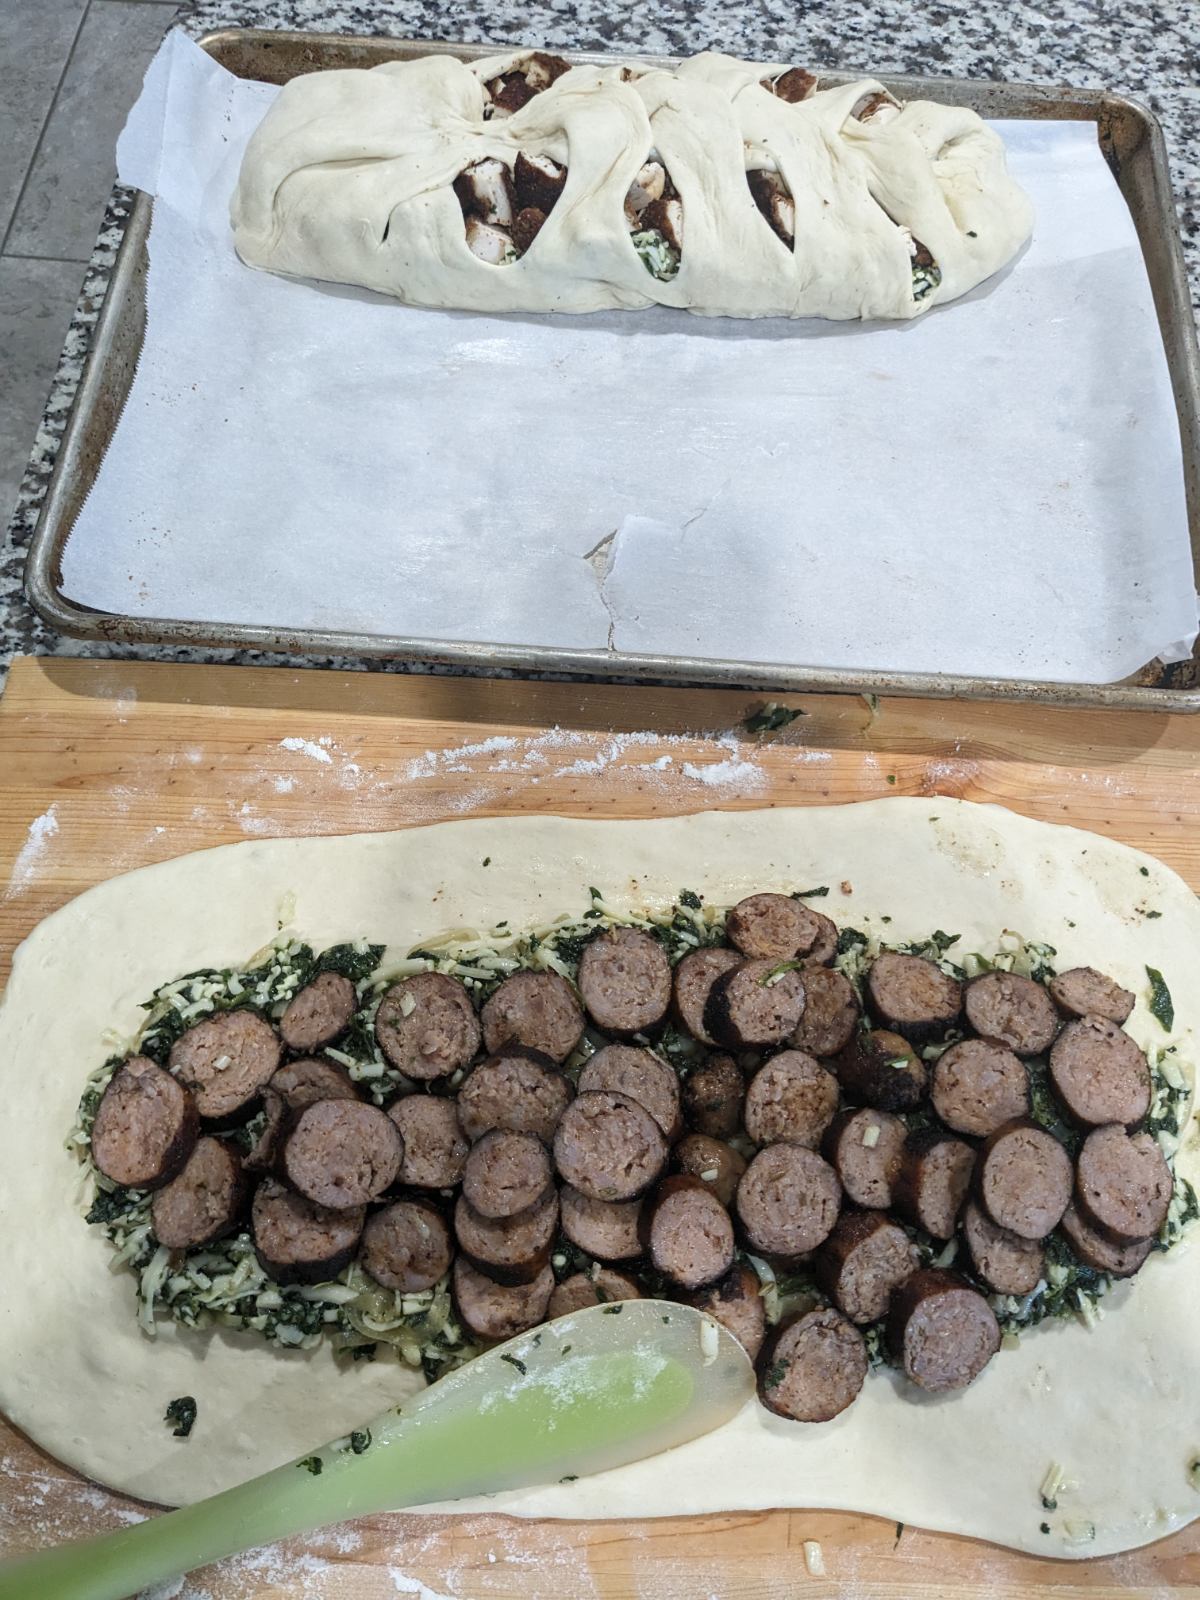
Punch down dough. Turn onto a lightly floured surface and divide in half. Roll each portion into a 10×12-in. rectangle. Brush dough with the melted butter.
Layer half of the ham over one piece of dough laying the strips parallel to the direction that you’ll be rolling the dough up in, leaving a 1 inch edge around the perimeter. Sprinkle half of the raisins and half of the olives over the ham. Starting from a long side, roll up jelly-roll style, and pinch the seam to seal. Transfer to a parchment-lined baking sheet, seam side down. Repeat with the remaining dough.
Cover dough rolls with a kitchen towel and let rise for about 4-6 hours until the dough passes the poke test. If using an aliquot jar, the dough will have risen in total from bulk fermentation about 130-140%. Preheat the oven to 350°F when the dough is about 30 mins from being ready (rise 120% or so)
Bake pan de jamon
In a small bowl, whisk the egg yolk and sugar. Brush over the tops and sides of the loaves. Bake until golden brown, about 30 to 35 minutes, rotating the pan halfway through.
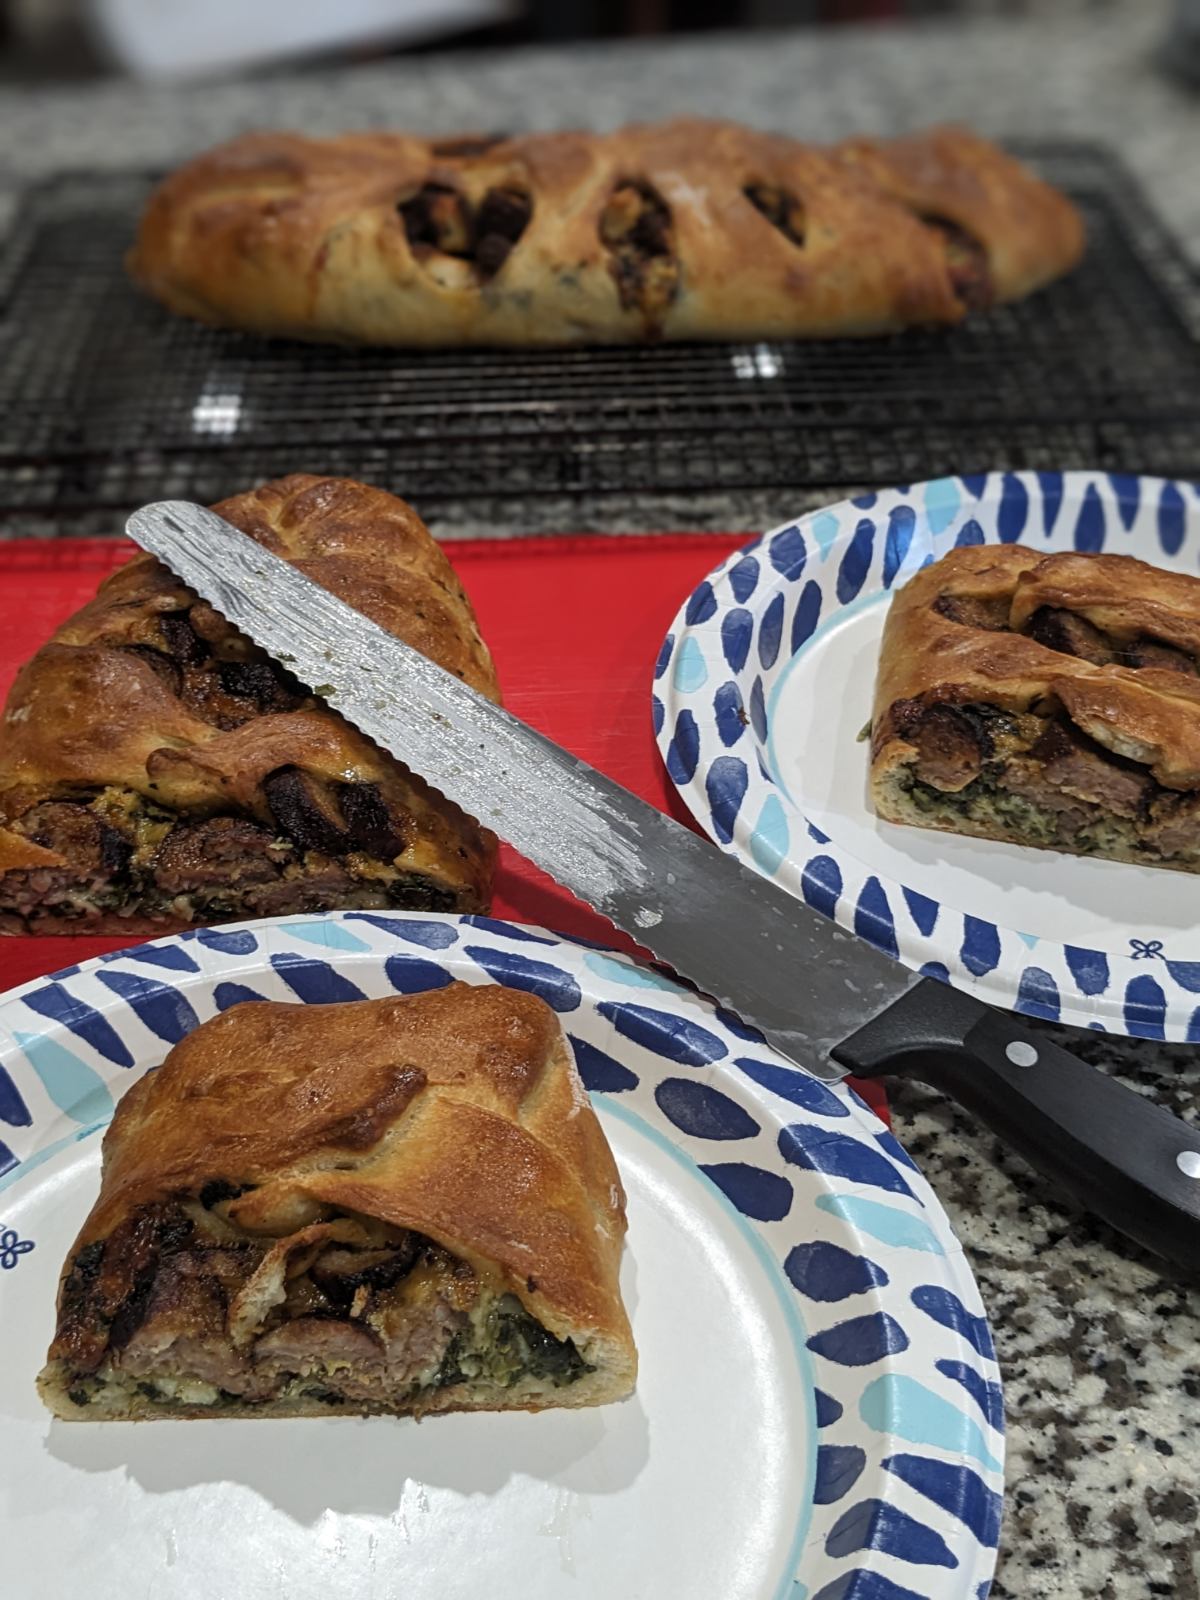
Allow the bread to cool so that the filling has time to set. Once it’s cooled, slice and serve.
I sliced the ham and placed them this way thinking that full slices of ham would prevent the dough from expanding during fermentation and during baking. The photos I’ve seen of this bread usually have large air cavities between the ham and bread, I wanted to avoid this if possible.
My index of bakes.