The Fresh Loaf

A Community of Amateur Bakers and Artisan Bread Enthusiasts.

SylviaH's blog

SylviaH's picture
SylviaH

I baked this pie early in October, because it's our very favorite pie anytime of the year...especially when the yams 'Garnet' perfered, are good and heavy with their rich fresh tasty yummieness.

Looking at txfarmers lovely custard pie has encouraged me to post this recipe to share for this 'pie season' and hope some of you might enjoy it for the coming holidays as much as we do. 

To say this is our favorite pie is a bit of an understatement...In the South this pie is often eaten along with the meat course, but obviously can be served as dessert.


An Old Southern Recipe - Matilda's Sweet Potato Pie - revised

4 medium- size Garnet Yams - About 2 lbs. -

'Baked' rather than boiled - to bring out the sweetness even more.  Cool and slip the peels off

1/2 Cup of Butter - softened

2 Cups of Sugar

4 Eggs - 

1 teaspoon cinnamon

1/2 teaspoon cloves -  You may wish to adjust the spices to your taste.. but remember..this is not pumpkin pie spices..extra clove is a good thing.

1 teaspoon vanilla

1 Cup of Buttermilk ---- yum, yum

1/2 teaspoon baking soda (added to the buttermilk)  

2 unbaked 9 inch- pastry shells or 12 three-inch tart shells

Whipping cream (optional)

Prepare your pie crust and place it into your  pie pan  'I prefer glass 'amber or clear' pie dish' for my pies.  Refrigerate until filling is completed.  

1.  Whirl your cooled, skinned, baked yams in a blender, food processor or mixer just until smooth.

2. Add remaing ingredients (not the pastry) mix until combined and pour into your pastry shell.

3. Baked in a pre-heated hot oven... I set mine for 425F..place my pie onto a parchment lined cookie sheet..on the bottom of the oven.  Cover my pie crust rim with foil or pie rim cover..put it in the oven..bake for 15 minutes..move to a lower shelf..reduce the oven to 350 and bake until center is nearly firm..test with a wooden skew for doneness.  Bake aproximately 40 minutes to an hour..depending upon how thick my filling is in my shell.  Removing the crust cover the last 10 minutes apx. of baking time.

Remember and 'watch and test' rather than clock your pie/crust for doneness.  The top should just begin to brown and feels firm to the touch.

Serve warm or cold with a dollop of sweetened whipped cream.

Serves 12 apx.

Note:  This pie freezes very successfully.

Happy Holiday Baking!

Sylvia


SylviaH's picture
SylviaH

I finally dug my starter out and brought it up to smelling good and looking strong.  So now, it was time to bake a few loaves...though I'd rather be making pizza's.  

It has been a while since I've turned my oven on.  Now the weather has cooled a little, it was nice to turn on the oven and not have the kitchen feeling to warm.  I would even make a pie today.    

Mike was happy to hear there would be some nice sourdough bread to eat and a few loaves to stock up in the freezer.  I also would make his favorite pie, Blueberry.  I had a nice bunch of fresh blueberries.  This time I would add a little extra lemon.  Last night I prepared my lemon wheels, as I refer to them, in a simple syrup.  It turned out it was an interesting and delicious addition to my BP.  I will definately do this again.   The added candied lemon wheels tasted wonderfully lemony, not bitter or to sweet, just a nice balance of pure lemon flavor added to the not to sweet blueberry filling.  I added 3 of the thinnest wheels on top of the bb filling, just enough I think.

I baked six loaves of bread.  They were very flavorful with a lovely just enough sour and wheat flavor notes.  The smell is wonderful.   It was just a few changes to my usual all white sourdough.   20% organic whole wheat flour, a little agave syrup, a little grape seed oil and scaled to make enough loaves to fill 6 of my banneton baskets.  Mixed by hand and a long overnight ferment.  

I also mixed up a batch of pizza dough with Caputo Tipo 00 Italian Flour and placed it into the freezer...just in case I decide to fire up the wfo this week and a gentle breeze comes to the neighborhood.

Not the most attractive pie I've made but it timed perfectly with the last loaf of bread coming out of the oven.  So Mike could enjoy a slice, heading off to work, it was sliced a bit warm before setting up properly cooled.  The texture was just right..not runny, wet,  resulting with a nice crispy tender bottom crust.  To much sugar in your filling is one of those things that will make for a very runny pie and soggy undercrust!  The crust was a combination of butter and crisco, salt, sugar, water.  My old standby, favorite, flakey, tender, flavorful crust.   We also enjoyed a cuban style pork shoulder roast and fresh roasted brussel sprouts for dinner.  

This was earlier prep for dinner's pork shoulder....


Overnight soak of organic lemons in sugar syrup


Sylvia


SylviaH's picture
SylviaH

I just love those crunchy, flaky, best for coating fried things Panko bread crumbs :)

Making homemade Panko Bread Crumbs.  Fun easy and fast.

Recipes are posted all over the web.  But I've never actually seen one here.  So here goes.

Pre-heat your oven to 300F

The secret weapon.......The Food Processor Shredder Disk : )  little did I know :/

Assemble your food processor with the largest sized shredder blade

Panko is usually made with a very shreddable, soft fluffy type plain white bread.  I like my sourdough stale leftover bread of coarse

Simply remove all the crust

Process the bread in your food processor with your largest shredder disk

Place the crumbs onto a cookie sheet.  

Bake in a pre-heated 300F oven for aproximately 6 minutes..till dry and crispy.   Do not brown

Done, just about..........unless of coarse you want some of those delicious seasoned bread crumbs.  My favorite are Italian.  Add whatever seasoning you like..toss.   

Place into storage bags and freeze for later if you like.


Store bought or homemade breading???  Answer at the bottom on the photo.

storebought Italian Panko...made this eggplant parmesan yesterday with the last of my Italian style panko.  Now I'm a day older and wiser...where have I been.  

Sylvia


SylviaH's picture
SylviaH

Yesterday I picked up some nice pickling cucumbers.  Since mine were a total flop trying to grow them in my tiny garden space...it's just gotten to shady with my pepper tree.  I'd rather have the shade and stick to the farmer's markets..we have so many.  I don't know why I even attempt to grow anything with all the locally available produce.  Well, I really do know why..it's fun to grow things.  Even my tomatoes were a flop this year...but not the tomato worms..yikes..I cringe at those things and will pick them off sqirmming more than they do.  

I also picked up some other nice organic veggies.  Among them were a nice butternut squash for the fresh ravioli.  I have been wanting to make it with my fresh supply of Caputo Italian 00 flour.

This recipe makes a lot of pasta.  Just for the fresh Ravioli for two.  I use 2 Organic Eggs, 200g C Tipo 00 flour, about a teaspoon of E.V.O.O and a pinch of salt.  

I mix it all in my food processor, until I get a nice texture that comes together in a ball and is not sticky..comes away from my fingers nicely.  I use extra flour while kneading the dough and making the pasta on my Artisan King Arthur (oops edit) thats a Kitchen Aide Mixer using, my pasta roller attachment.

Fresh Pasta Made With Italian Caputo Tipo 00 Flour

6 Organic Eggs

600 G Caputo Tipo 00 Flour

pinch of salt to taste

1 TBsp. Extra Virgin Olive Oil

For the Butternut Squash Filling and Cream Sauce.  

I used Fabio Vivani.com recipe.  He has a video making it.  He is so fun and entertaining to watch with many wonderful recipes.  I only changed the cookies that were added and made 1/2 a recipe.  I used some wonderful Italian Lady Fingers from Italy I picked up a Sprouts.  They are dry crispy with a slight sweetness...just delicious.

Dinner was delicious.   Light, Butternut Squash Raviolies, perfect for a hot summer day.


It's hard to get a photo before things get eaten


Easy Dill Pickles-  Great for just making a few jars at a time as your pickling cucumbers ripen.

I like Cold Packed pickles and peppers.  They are the firmest

Wash, slice, pack pickling cucumbers into Sterilized jars.  Use approved canning jars and rims with new seals for safe processing.

In a pot add 3 cups water, 2 cups 5% white vinegar/ or you can use apple cider vinegar, 1/8 cup pickling salt more or less to taste.  More is your making a lot of jars.  Bring to boil..turn down heat and keep hot until ready to ladle into jars.

I added a couple peeled garlics, lots of  fresh dill..I didn't have it so used dried.  Some pepper corns, a small amount of dried red pepper, pinch or two,  mustard seeds to each jar according to your taste...about a teaspoon per jar.  Fill to 1/2 head space with vinegar mixture. 

Remove bands and lids from hot water and skew into place.

Process in a hot water bath for 15 minutes.  

Remove and let sit several hours until cooled and you'll hear a 'pop' they've sealed..or press cooled top and if it pops..it didn't seal..just refrigerate and eat after allowing at least 2 weeks to full flavor.  Store 'sealed' jars in a cool place for at least 2 weeks for full flavor to develope.  Refrigerate before eating..they always taste better that way.


Sylvia


SylviaH's picture
SylviaH

I've been back from a week's vacation in lovely cool Aspen and just getting things caught up.

The day before I left.  I got a sudden urge to bake in my wfo.  I don't know what brings on these urges, I'm sure there is some disfunctional reason, maybe fear of not being able to bake for a whole long week.

I did manage some soda bread, upon request.  First baking I've done at such a high altitude.  A few minor adjustments and other than not turning the heat up a little higher on the oven, which I found out later about, it turned out wonderful and everyone was pleased.  Sylvia's 'mom's' Irish Soda Bread is one of my most family requested breakfast breads.

I order my Italian Antimo Caputo Tipo '00' flour from 'Taylor's Market' on Amazon.com.  I just love it..the flour and the Market.  They ship me 10 small bags for $37.95 plus $7.25 shp.   The price is market fair and the shipping is well worth my time and gas money and it's delivered to my door...I love it.


I baked and roasted chicken.  

As the oven fired up, good and hot I roasted a chicken, one of my favorite things to do.  A lovely little organic chicken flavored with organic lemon, lemon juice,  fresh rosemary, garlic, O.Oil, salt and pepper.

Mike say's this is my very tastiest pizza crust and his favorite.  It's very thin, super crispy, flavor like no other flour and does bake up best in a very hot wfo...I like about 750+F and 500+F floor, seems to work best in my wfo.

I made 4 pizza balls and stretched them out to make nice sized Margherita pizza's.

This flour is very extensible and makes stretching the dough thinly a pleasure.

This is a pretty standard recipe for the Pizza Margherita Dough comes from the 'Forno Bravo.com'. you can add a little more hydration depending on your on personal preference.

500g Tipo '00' Italian Flour

325g Water   65% hydration

10g salt

3g ADY   I used IADY and reduced a little for overnight fermentation

Stand Mixer, add all ingredients, mix slowly for 2 minutes, faster 5 minutes, slow 2 minutes.  

I use my own judgement hand or machine mixing to get a good gluten formation to shape the dough balls.

Form into 3 dough balls - I made 4 and stretched the dough thinly to make 10 to 12 inch pizza's.

Refrigerated overnight and warmed up the 4 dough balls 2 hours before shaping and baking.


Organic Lemon Rosemary Chicken and Pizza Margherita with EVOO and garden basil


Pizza Margherita


This is my Sourdough Semolina Country Bread I posted on my blog earlier and also made some rolls with same formula.  Sorry no crumb shot.  This was bread to leave home in the freezer.


Only single shot..sorry not very good!


Aspen site seeing at over 11,000ft.

Bottoms up!

OMG I almost forgot..our traveling companion and new addition to the family.. A mini Pom her name is 'Lolly Pop' and the adored little hamster 'Fluff'.

Fluff and Lolly.  Lolly is nearly 3 mos. 


Sylvia


SylviaH's picture
SylviaH

Happy 4th to all you fresh loafer's.

Our family enjoyed and celebrated yesterday with food and the fireworks tonight. 

Just a couple of breads and treats baked to bring from my house : ) 

Good Ol' delicious Scali...but this time I've added 40% Durum flour.  The recipe is for both the Scali and dog treats are at http://www.kingarthurflours.com 

        A Scala to go


                                   I used a chopstick end to make the little indentations for a more bonie look

                the pet's love these..the bird, doggies, horses even fluff the hamster..also fit for human consumption..not bad :)

                and very easy to make.  

                                      What a Treat of Day!


                              There were all kinds of pizza combinations.


                       I enjoyed very much watching and picking up some pointers on pizza's and WFO baking :)                   


                              Salmon Dinner was the highlight of the meal.  Beautifully prepared by the chef.


Sylvia


SylviaH's picture
SylviaH

I have converted a favorite sourdough recipe to make some loaves made with durum flour.  I decided to just call them my Sourdough Semonlina Country Bread.

I made a large batch of dough.  I was planning on baking them in my WFO.  Plans were changed when Mike told me my car needed to be taken in for a service and we would be going out after it was done.  I just pulled them out of the frig early and baked them up in my EO.

Makes 5 loaves - I have various sizes - I  adjusted the sizes to fit my  proofing baskets.


Ingredients                                     Bakers Percentage

1088 gm Bread Flour                     60%

726 gm Durum Flour                      40%

1020 gm Spring Water                    56%   -  Overall Hydation will be 65%

28 gm Olive Oil                                 1.2%

28 gm Avacado Honey                     1.2%

44 gm Sea Salt                                   1.5 - 2%


Active Sourdough Starter @ 100% hydration 

906 gm                                             

1st Build - The night before mix

34 gm Active starter 

226 gm water

226 gm flour

2nd Build - next morning

486gms ripe starter

226 gms water

226 gms flour

 906 gms Starter will be ready in about 3 hours in a warm enviroment - remove excess for next seed -

I do all my mixing by hand.  Mix all ingredients holding back the sea salt until after the dough has been mixed to a shaggy mass, rested, mixed by hand adding in the salt moistened on my hands.  Do apx. 2 to 3 S&F hourly.  Apx. 3 to 4 hours dough should be ready divided, rested, shaped and placed into covered bannetons and refrigerated overnight.  

Warm up loaves and test for final proof..When ready.  Bake on stones in a pre-heated,  pre-steamed oven.  I pre-heat my oven 485F and bake with steam at 485F for 10 to 15 min.  Remove steaming towels, Set oven on convection heat and finish baking adjusting my oven temperature till my loaves are nicely browned and done.  Turn off oven, crack door open and leave my loaves in for apx. 5 to 10 min.  Remove, preheat my oven for the next loaves.


The flavor was very pleasing without being overly sour.  The chew was also pleasing.  It makes a delicious toast, sandwich bread, bruschetta or Garlic toast for enjoying with pasta.  

Next time I will up the hydration for the thirsty durum flour and also add more durum flour.  I also enjoy this type of bread made using an dry yeast Biga.


                This locally San Diego harvested Avocado Honey is very dark..looks just like molasses and even taste a bit like it.

                 I didn't notice the flavor in the loaves..so little of it was used.


I've been saving on using parchment paper lately and really enjoying loading my loaves without it..I just sprinkel regular flour on my wooden paddles and a little on top of the loaves before, turning them onto the paddle.  I managed all 5 loaves with none sticking.  First using my larger paddle, placing a loaf and then the smalled paddle to place the next one side by side.  Making pizza's has really helped me practice getting my loaves off a floured peel.  I suppose you could use cornmeal, semolina to do this also..but I don't care for the way they burn and are a bit messy on my stones on in my wfo.


             I should have let the steam out my oven before snapping this photo : ) I've been placing my microwaved hot 

             towels in those saved pans from purchased pies.  They work great and I don't have to worry about messing up

             any of my loaf pans or pre-heating them..they go in once for pre-steaming and come out after final steaming still

             steaming like crazy.


Not a very good slash.  But I loved the color of these Durum loaves.


                              Sylvia


SylviaH's picture
SylviaH

A sequel to my previous WFO bake of my Greek Pide.  This time it was baked in my electric oven 'EO' just because...I had nothing better to do and wanted to use the dough I had frozen from last weeks previous bake and I was curious to see how the GP would turn out versus the heat of the WFO.  Well, the results were pleasing.  Flavor wise...well very pleasing from the EO..excellent from the WFO.  No doubt there are certain types of breads that benefit from the smokey hot flames, coals and intense heat of a WFO.  I pre-heated my oven and stones, 550 convection setting, for an hour..this gets the stones much hotter versus a 45 min. pre-heat.  The pizza and pide both had crisp crusts that were nicely browned without to much browning of the cheeses.  Both were done in 8 minutes.

First the same favorite for Mike..the pepperoni pizza.  One large thin crusted from previous frozen pizza dough.  Very tasty with mixed italian cheeses.


                                        Without the charred crust the pizza would be lacking in flavor.


Greek Pide ..... This time with Goat Cheese.  It was tastier last bake with the creamy Feta.  I forgot the Greek Olives, remembering to add them just as I had loaded the pide onto the stone.  I did remember to add some black sesame seeds :) how pretty and tasty.  I brushed the rim with a little egg wash to help them stick.  I had to trasfer this pide to the paddle with my 'Super Peel' as it was to heavy to pull onto the paddle.  Last time I was able to pull the pide onto the peel.  I wasn't fast enough making this one and the dough was slacker after being frozen.  It would have only stretched and not moved if would have tried to pull it or lift it onto the peel.  I love my 'Super Peel'.  I might use it only once or twice a year...but when I do, it's WIW in flour.  

                                             Added the Kalamata Olives I forgot earlier.  Baked at 550F convection for 8 minutes


                                     Teeter Tottering Greek Pide  -  Lovely crisp crust - I preheated the oven a few minutes longer after

                                     removing the pizza.


                                             Sliced for crumb shot.


                             One of the 3          My Bella, relaxing after dinner : )


                                                  Joey just took her spot!  


            Sylvia


SylviaH's picture
SylviaH

Yesterday, with warmed weather and some time to fire up my oven.  I made several pizza's for us and the neighbors.  

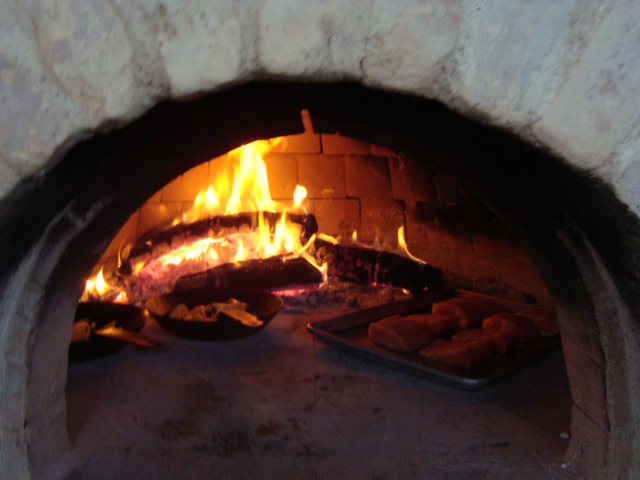
The oven was a little cold.  So a slow buildup from smaller fires to larger hotter ones where done through the day.  I made use of the smaller firing for my favorite roasted peppers and Italian sausages.

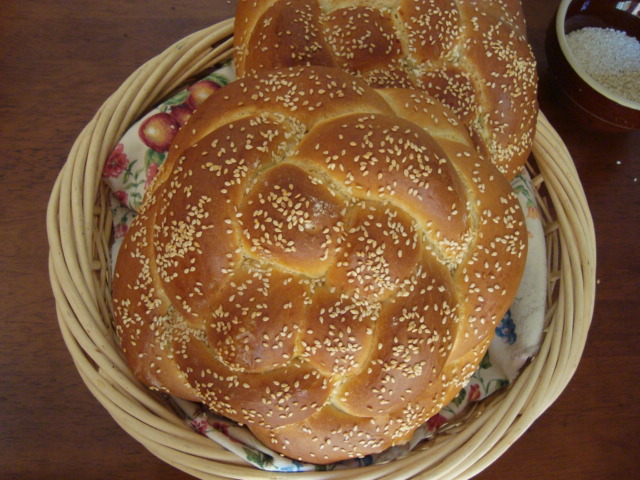
I was so inspired to make a version of the Turkish Pide bread after viewing a site called 'The Pizza Goon.com'  and even more inspired to after seeing breadsongs last post on 'Pide'.  'I apologize to breadsong'.  I'm having trouble with my links.

'thepizzagoon.com' what a fun site to visit.  I used his shaping and much inspiration for my Greek Pide.  How fun and easy these are to make.

I choose one of my favorite pizza recipes from P.R. 'American Pie' and also posted on TFL by Floyd with included recipe.  The only changes I made was to add a little more hydration.  I thought the dough was well suited for the Greek Pide and it turned out I was very happy with the results.


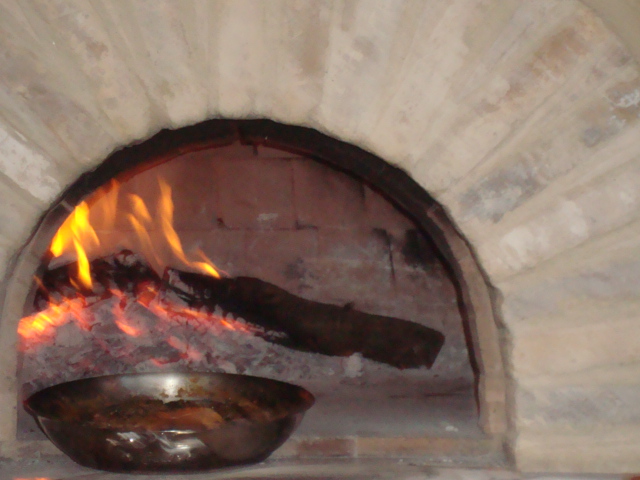
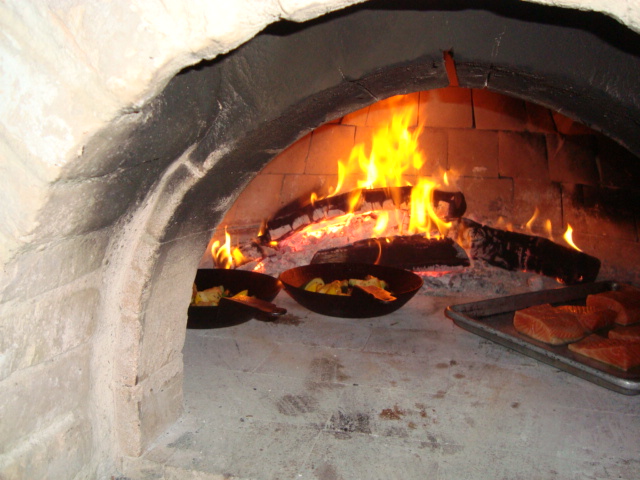
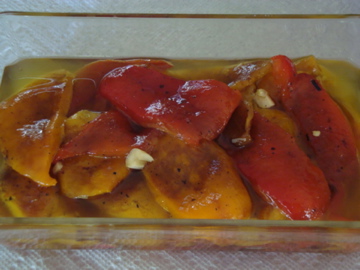
Roasted Peppers in the WFO directly on top of the burning coals, makes for a very fast char that ends with a perfectly, not overcooked inside and a char that removes easily and leaves a lovely sweet smokey flavor...this works much better than setting them in a pan to roast in the WFO.  


                                  Roasted peppers and sausages in the beginning smaller firing to warm up my cold WFO.


                    Peppers in EVOO, garlic and sea salt ......  


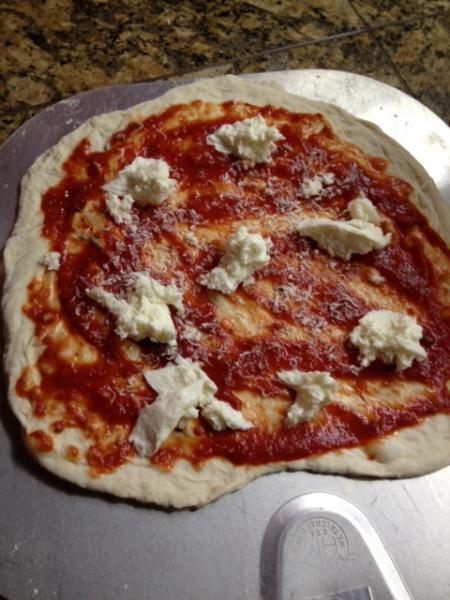
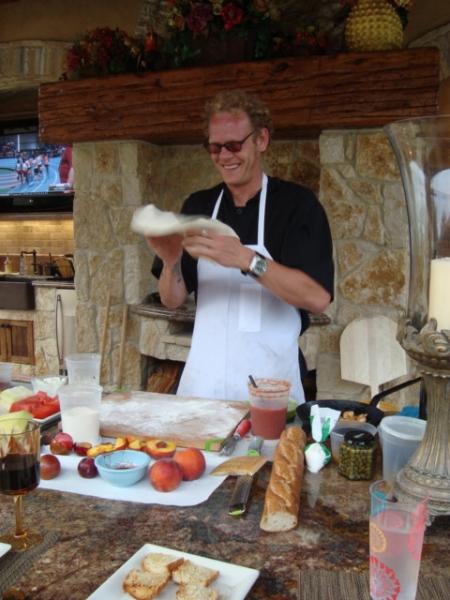
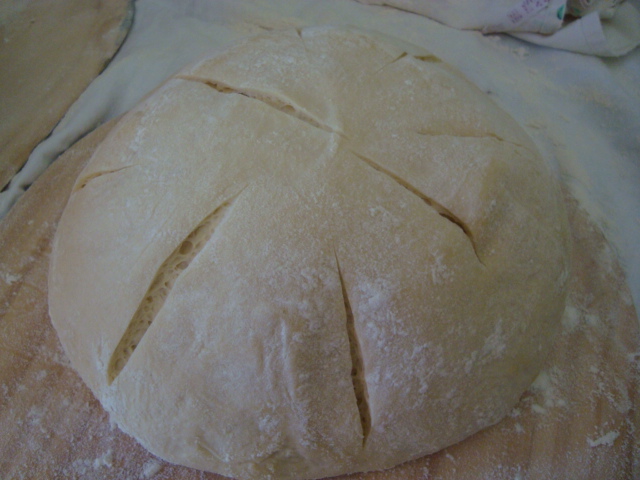
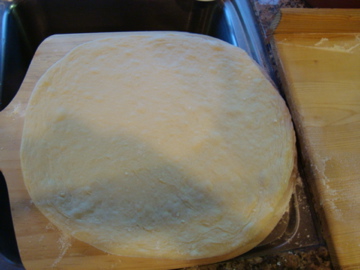
                   I shaped my pizza's large today.  This one has been pulled onto my lightly flour 14" paddle.  I will top it and into the wfo

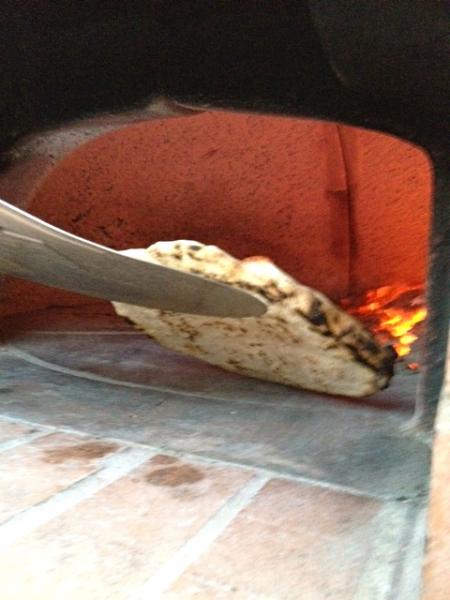
                   that's now very hot and ready for pizza's.

                           My photo's are small.  The best I could get to download today.


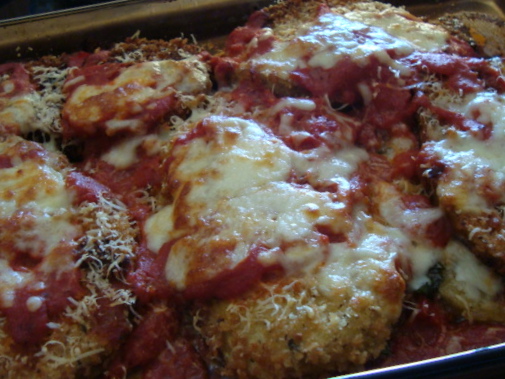
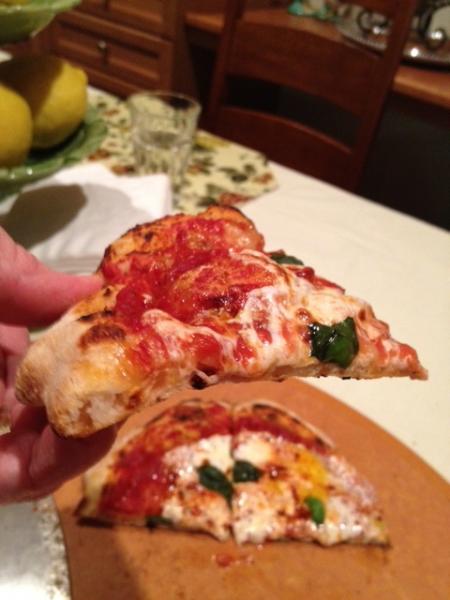
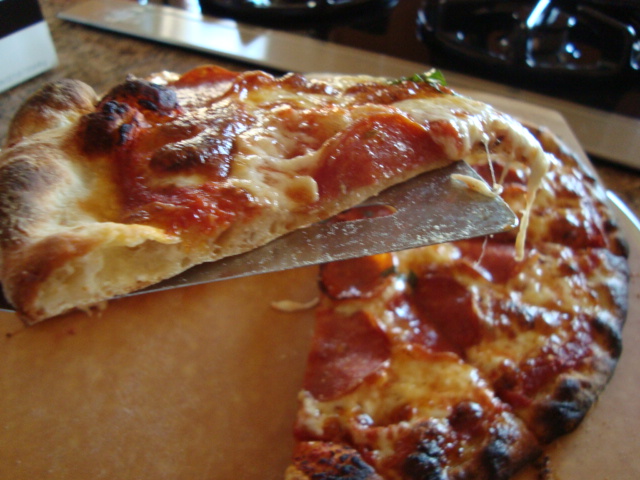
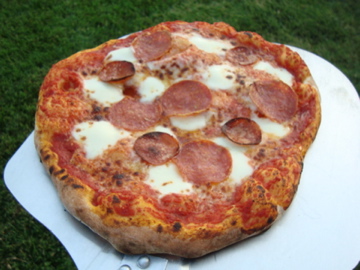
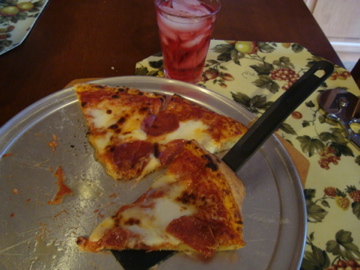
               Pepperoni's just out of the oven


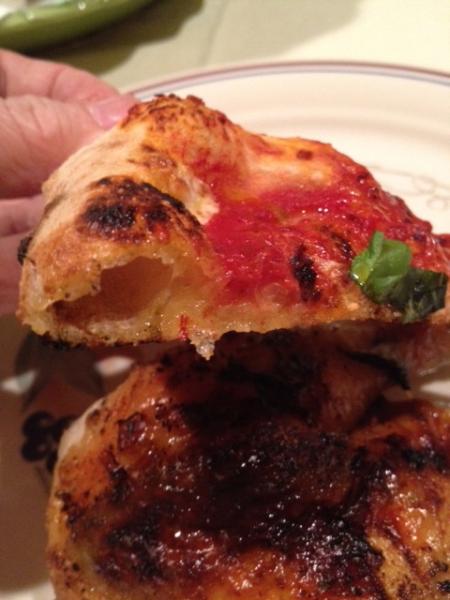
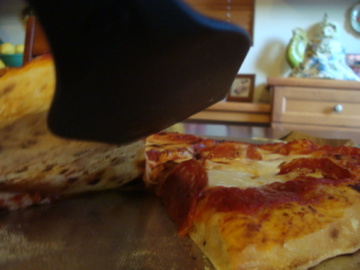
                               Underside of crust....... best I could get.  Remember this is a one man bake, photo shoot..hubbies watching tv :)


                                 This ones for 'thebrownman'  Love, the Roobios Sangria!


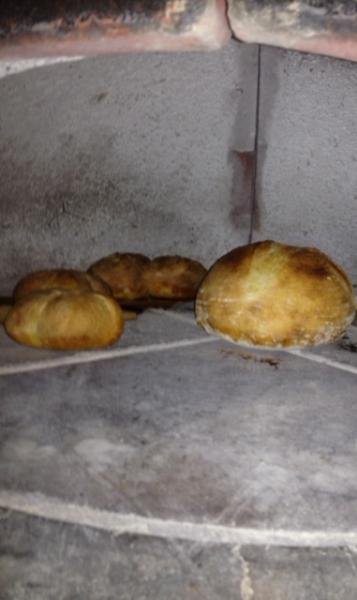
                   About now the oven had cooled, a little, and I made a Greek style Pide.  Quick and easy to make and oh so delicious..I had put my last two dough balls into the freezer and wish now I would have made some more.  They keep nicely for enjoying later with a little warm up.  These are great!

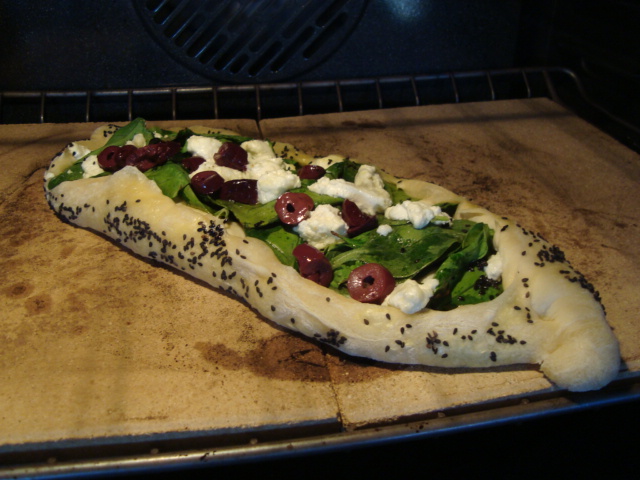
                                   Piled on some spinach first, topped with feta, sliced kalamata olives and drizzled with EVOO.  Forgot to add some seeds on the crust....next time!  Though these are traditionally done in a WFO.  They should bake up beautifully in a regular oven on a stone.  What a wonderful replacement for a salad or appetizer or anytime.


               Just shape your dough into a long oval, place ingredients, fold up sides, take ends, slice, twist together and roll.  Place onto a lightly floured pizza paddle and into a hot oven.  Also, you can form you Pide on parchment paper and bake for easier handling.


                                                The fire was cooling down and baked the Greek Pide nicely.
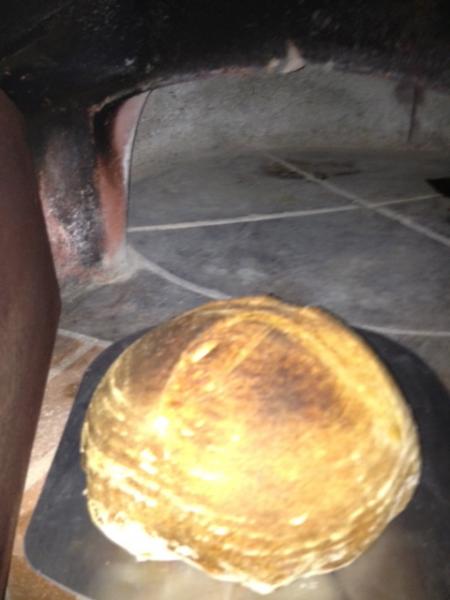
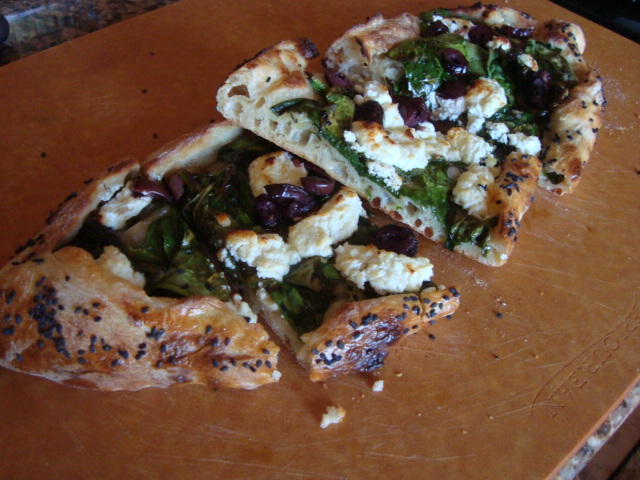


                      Out of the WFO         


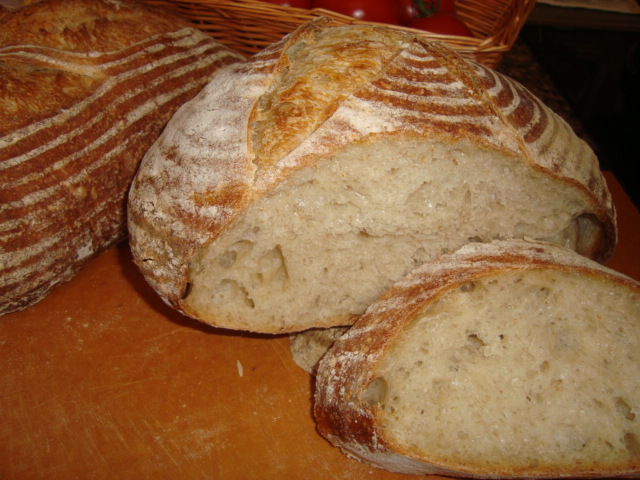
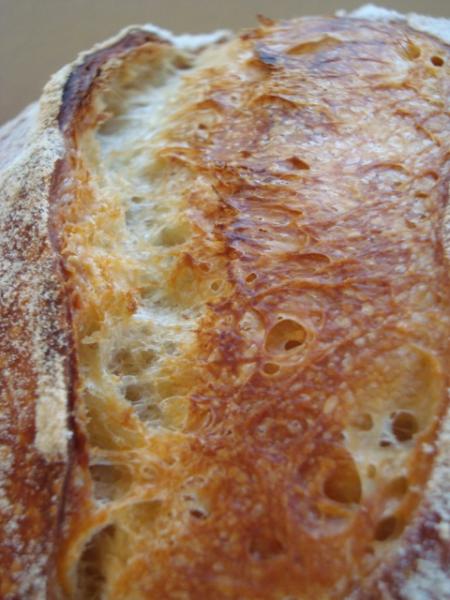
                                          Crumb turned out just as I hoped with a nice crisp crust on the bottom


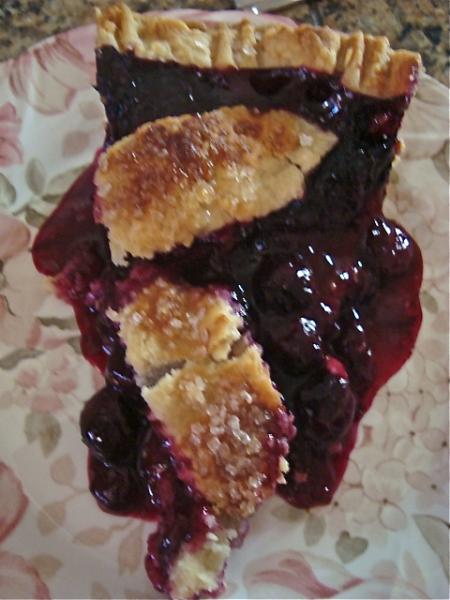
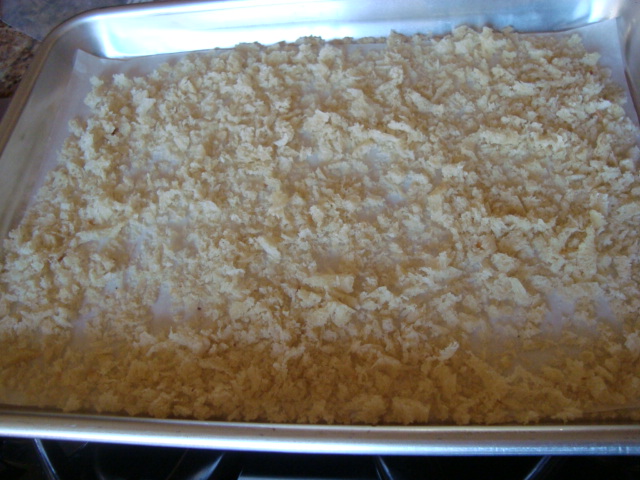
                Another thank you to thebrownman.  I had thawed out some lovely frozen pie ready peaches, the last from last summer.  I wanted dessert and by the end of the day was to tired to prepare a pie crust for the cooling oven...  What a great idea, I saw thebrownman's post with his 'Crumble' Perfect and fast.  Into the oven...I didn't make near enough crumble..to tired again..it was made with chopped pecans, cinnamon, brownsugar, rolled oats, canola oil...fast and easy..we enjoyed dessert :)

                 So much better for the waistline, too!


Sylvia


SylviaH's picture
SylviaH

My new 'Wellness Mat' I ordered it from Amazon.com.   OMG...why didn't I get one of these earlier.  I'm loving it.  They are expensive but sooo worth it...check out all the pluses on this mat.   I sometimes stand all day long in the kitchen.  What relief this mat provides.  I couldn't be more pleased.  I ordered the 2x6 and it lays across my sink and L shaped baking area perfect.  No more tired legs.

I imagine some of you already have these mats....but I just wanted to mention how great they are for bakers who tend to stand long hours on hard floors...what a relief!

What I baked today...standing barefooted on my new floor mat.

Basic Sourdough w/green garlic olives

not many olives in this crumb shot .. tasty little buggers though..nice for dipping bread in EVOO and balsalmic glaze,  one of my favorite ways to enjoy this bread.

It seems lately when I plan a WFO bake it rains! :/  

So yesterday I made my 'indoor' favorite burgers.  Lean organic beef extra thin patties, cheese, shredded lettuce, tomato, red onion, dill pickles, thousand island dressing...that's it..the way I like my burger's.

I needed fresh buns...same day!  So I baked my old stand by 'Sandwich Buns' with added black sesame seeds... yummy!


Pages

Subscribe to RSS - SylviaH's blog