The Fresh Loaf

A Community of Amateur Bakers and Artisan Bread Enthusiasts.

Recent Blog Entries

Benito's picture
Benito

So with the success of my first vinegar a rose wine vinegar I decided I’d try making a fruit vinegar.  Raspberries were on sale recently and raspberry vinaigrettes are delicious so that made my decision easy.  Because I recently refreshed my 1.5 year old grape yeast water I decided I’d speed the first fermentation up by inoculating the raspberries with some about 2 tbsp of the grape yeast water.  So into a jar went the two containers of raspberries.  In a ratio of 500 g of fruit to 66 g of sugar, added sugar and enough water to cover the fruit.  You want to use a jar that will allow the fruit to rise quite a bit as they ferment.  I didn’t do this and lost a fair amount of the raspberry water initially until I transferred half of the raspberries and water into a new jar.

Within a day or two you will have vigorous fermentation of the sugars into ethanol by the wild yeast.

Next, swirl this daily until the fruit is no longer floating and bubbling, this indicates that the first fermentation is complete.  Another indication that this first stage is complete is that the water is clear.  Apparently for apple vinegar the water will never be clear so you cannot use that indicator as a sign of the completion of this stage.

The fruit solids are strained out and now the jar of raspberry wine is left to spontaneously start the second fermentation of ethanol to acetic acid.  This is an aerobic fermentation so you must allow the water to be exposed to air for this to occur.  I covered the jar with gauze kept in place by a rubber band.  The Acetobacter needed to ferment is naturally in the fruit so it is already there in the raspberry wine so this should start on its own.  If I had enough vinegar mother I could speed this up by placing the mother into this jar, however, I don’t have a mature vinegar mother yet so I’ll have to wait and see if this second fermentation will start on its own.

The pH today is 3.5 and the target is 2.8.

My index of bakes

The Roadside Pie King's picture
The Roadside Pi...

launchpad pre-bake-off systems (ingredient) check off.


Faiccos Italian specialties (Bleecker street Greenwich Village) homemade sweet & hot Sopresatta

Imported sharp Provolone

Imported Sicilian Caciocavallo

No name low moisture mozzarella, I saw some sandwich-ready slices of the mozzarella on the counter. I asked, Boars head? He replied, no. I asked for a pound. He came out with an unmarked loaf about 2/3 the size of a Grande loaf of whole milk. Don't you know, with my big mouth was embarrassed to ask the brand! Grrr.

The dough is 19 hours into the cold ferment. even with a well-oiled top, the plastic moved and the dough got cold burn. Grrr. I flipped it on the oiled 16X16 well covered to continue the cold ferment/retard.


The main ingredient check, all systems go!


Bake-off at "T" minus sometime this afternoon. Smile...


I Like to have fun with my baking. (I am easily amused)


Mini Oven's picture
Mini Oven

Saw the making of this bread on a tv culture special. Had never seen this technique before.  The dough is very wet and turned out onto a heavily floured bench after a rest from final mixer mixing.  (Any mixer can handle this white rye goo.) With heavily floured hands, the dough is portioned, pulled from the mass and shapped into balls or floured globs and rested on a floured tray with plenty of spacing.  Then after a rest, dough is geschüttelt or shaken until it flattens out into a large, for want of word, cracker resembling a pizza slipping and sliding across the peel.  Then into the oven!  

I will see if I can find a video in English. The recipe looks large for my oven so I might reduce it. 6 min. in mixer to start off.  

This looks like fun!  :)    Crackers anyone?

https://www.suedtirol.info/en/experience/eating-drinking/recipes/schuttelbrot-chrunchy-flat-bread_recipe_51876

suminandi's picture
suminandi

Was inspired by Martadella's recent rye breads, and the somewhat recent community bake to make bread similar to the Danish rugbrod. I was short on rye, so I did include some whole wheat. Must try this again when I replenish my stock of rye.

Ingredients:

300 gr whole rye flour

150 gr whole wheat flour

150 gr last night's belgian beer (completely flat and most of the alcohol had evaporated)

200 gr water

80 gr 100% hydration rye starter (recently refreshed)

70 gr old ww bread, soaked with an unknown amount of water and then wrung out

150 gr combo or sunflower and pumpkin seeds

8 gr salt

Process: mix rye starter, liquids, flours. Let rest 2 hrs. In a separate bowl, combine some boiling water, torn up old bread and seeds. At the 2 hr mark, wring out and add in bread seed mix and salt. Combine well. Cover and let rest about 4 hrs until there are signs of fermentation. My kitchen was 'cold' ~68 degrees. Scoop into pan after gently folding the dough to distribute bubble. (I don't think that folding was actually necessary. Just a habit from making wheat hearth bread). Smooth top, pushing sides down slightly to create a arched top. Refridgerate overnight (wasn't planning that, but I was tired and wanted to turn in). In morning, dock and bake at 375 for 55 min. Cooled for about an hour before cutting. 

As expected, it's a bit on the sour side from the overnight in the fridge, but it is quite soft, nutty and delicious. The flavor should continue to develop tomorrow. 


Benito's picture
Benito

I’ve had orange poppyseed in the back of my mind for quite some time and finally got around to trying it in this 100% whole stoneground spelt sourdough bread.

Whole stoneground spelt 453 g sifted yielding
47 g of bran scalded with 94 g of boiling water and left overnight in the fridge.
VWG 23.55 g
Water 341 g water and 15 g for bassinage
Salt 10.47 g
50 g of poppyseeds
Zest of 1 small-med orange

Overnight levain
16 g starter + 16 g brown sugar + 25 g water + 47 g whole spelt

In the morning breakdown the levain in the water. Add salt and dissolve. Add all the sifted spelt and VWG and mix until there is no dry flour. Rest for 10-15 mins. Do French Folds until good gluten development. Add bassinage water and incorporate. Add poppyseeds and orange zest. Stretch and fold until well incorporated. Do a bench letterfold and place dough in a bowl in the proofing box at 82°F.

Do coil folds every 30 mins stopping when the dough is strong and doesn’t really spread. Four coil folds were done. Allow to rest until 40% growth.
Shape and place in a banneton and allow to rise to 60% growth.

Preheat the oven to 500°F and place the dough in the freezer to firm it up for scoring. Place cast iron skillet in the oven. 30 mins later fill a metal loaf pan with a towel with boiling water and place in the oven to pre steam the oven.

When the oven reached 500°F flip the dough onto a sheet of parchment paper. Brush off rice flour and score. Brush water onto the dough. Transfer the dough to the peel and load into the oven onto the baking steel. Drop the temperature to 450°F and pour 1 cup of boiling water into the cast iron skillet. Bake with steam for 25 mins. After 25 mins vent the oven removing the pan and the skillet. Drop the temperature to 420°F and baking for 20-25 mins turning as needed.

image image


image


image


image


imageIndex of my bakes 
Another Girl's picture
Another Girl

BACKGROUND

My husband is not a fan of sourdough, although everyone else in my family loves the stuff. He won’t eat any bread if he detects the merest hint of sourdough flavor. When I happened upon Swiss Farmhouse Bread in Jeffrey Hamelman’s Bread, which in Mr Hamelman’s words is characterized by “a complete absence of acidity,” I was curious. The bread was leavened by water in which yeasty raisins had been soaking and that was my entree into the world of yeast water. Working with YW made me wonder if it could be used in conventional sourdough breads and what its effects might be. Wouldn’t it be nice if a flavor profile emerged that could be a favorite (if not the favorite) of all the people I bake for? Hey, a girl can dream, can’t she?

YW is interesting to me as a potential means to that end, but two things about it concern me: 

1) The Swiss Farmhouse crumb was a little bland without the flavor enhancement provided by fruit and nuts. I’m searching for something other than the familiar sourdough flavor profiles, but I would still like a flavorful bread. 

2) I’ve found the rise times of YW to be wildly unpredictable, which makes me hesitant to use it except when I happen to have a few days when nothing else is planned. Once my YW matures and I get in the habit of keeping YW levains under refrigeration for later use, I hope this will change. 

It seemed reasonable to start this project with my basic SD bake, Vermont Sourdough (also a Hamelman formula). After again checking with the YW gurus here on TFL, it was pretty clear that every baker has their own way of incorporating YW into conventional SD loaves and that pretty much any of them could be expected to work. 

PROCESS 

Yeast Water

The first order of business was to give the YW some TLC. It was removed from the refrigerator the day before the bake and the liquid poured off into a clean jar. I was careful to pour off as little of the bottom sludge as possible, which I understood might contain a fair percentage of dead yeasts that could add glutathione to the dough, an eventuality I wished to avoid. There seems to be some anecdotal evidence contradicting that outcome, but I didn’t see any point in taking the risk, so I declared the new jar a Sludge-Free Zone. Diced organic apple was added to the jar and the pH was measured. It tested at 3.73 despite the fact that it had been holding steady at 3.43 – 3.46 for its first three weeks of life. The jump to 3.73 seemed like a large-ish decrease in acidity that I was unable to account for. As long as the pH was below 4.0, I believed it was safe to use, but it seemed to be headed in the wrong direction, so I dropped in the teeny-tiniest pinch of Ascorbic acid (probably about a tenth or two of a gram) and left those little yeasties alone to do their overnight thing. Since the YW was increasingly sluggish the last couple bakes, I hoped these measures would yield a yeastier, more active YW.

Preferments

Based on input from several TFL members and my own wish to use the same amount of prefermented flour called for in the original formula, I decided to make two half-size levains, the first half a standard SD and the second half made from YW. The SD levain for this bread is a liquid levain of 120% hydration. My preference was not to change the hydration, but I remembered reading an assertion that YW levains are better on the stiff side, so at the last second I decided to make the YW levain at 70% hydration to match the final dough. The final dough water was adjusted to accommodate this change. For the record, bottled mineral water was used in the final dough. I usually use filtered tap water.

I decided to build both levains just before bedtime and hope that the SD levain didn't mature first. Fortunately they seemed to track reasonably well and both levains were ready for use around the same time. The SD had receded only very slightly from its peak when it was mixed into the dough. 

Final Dough

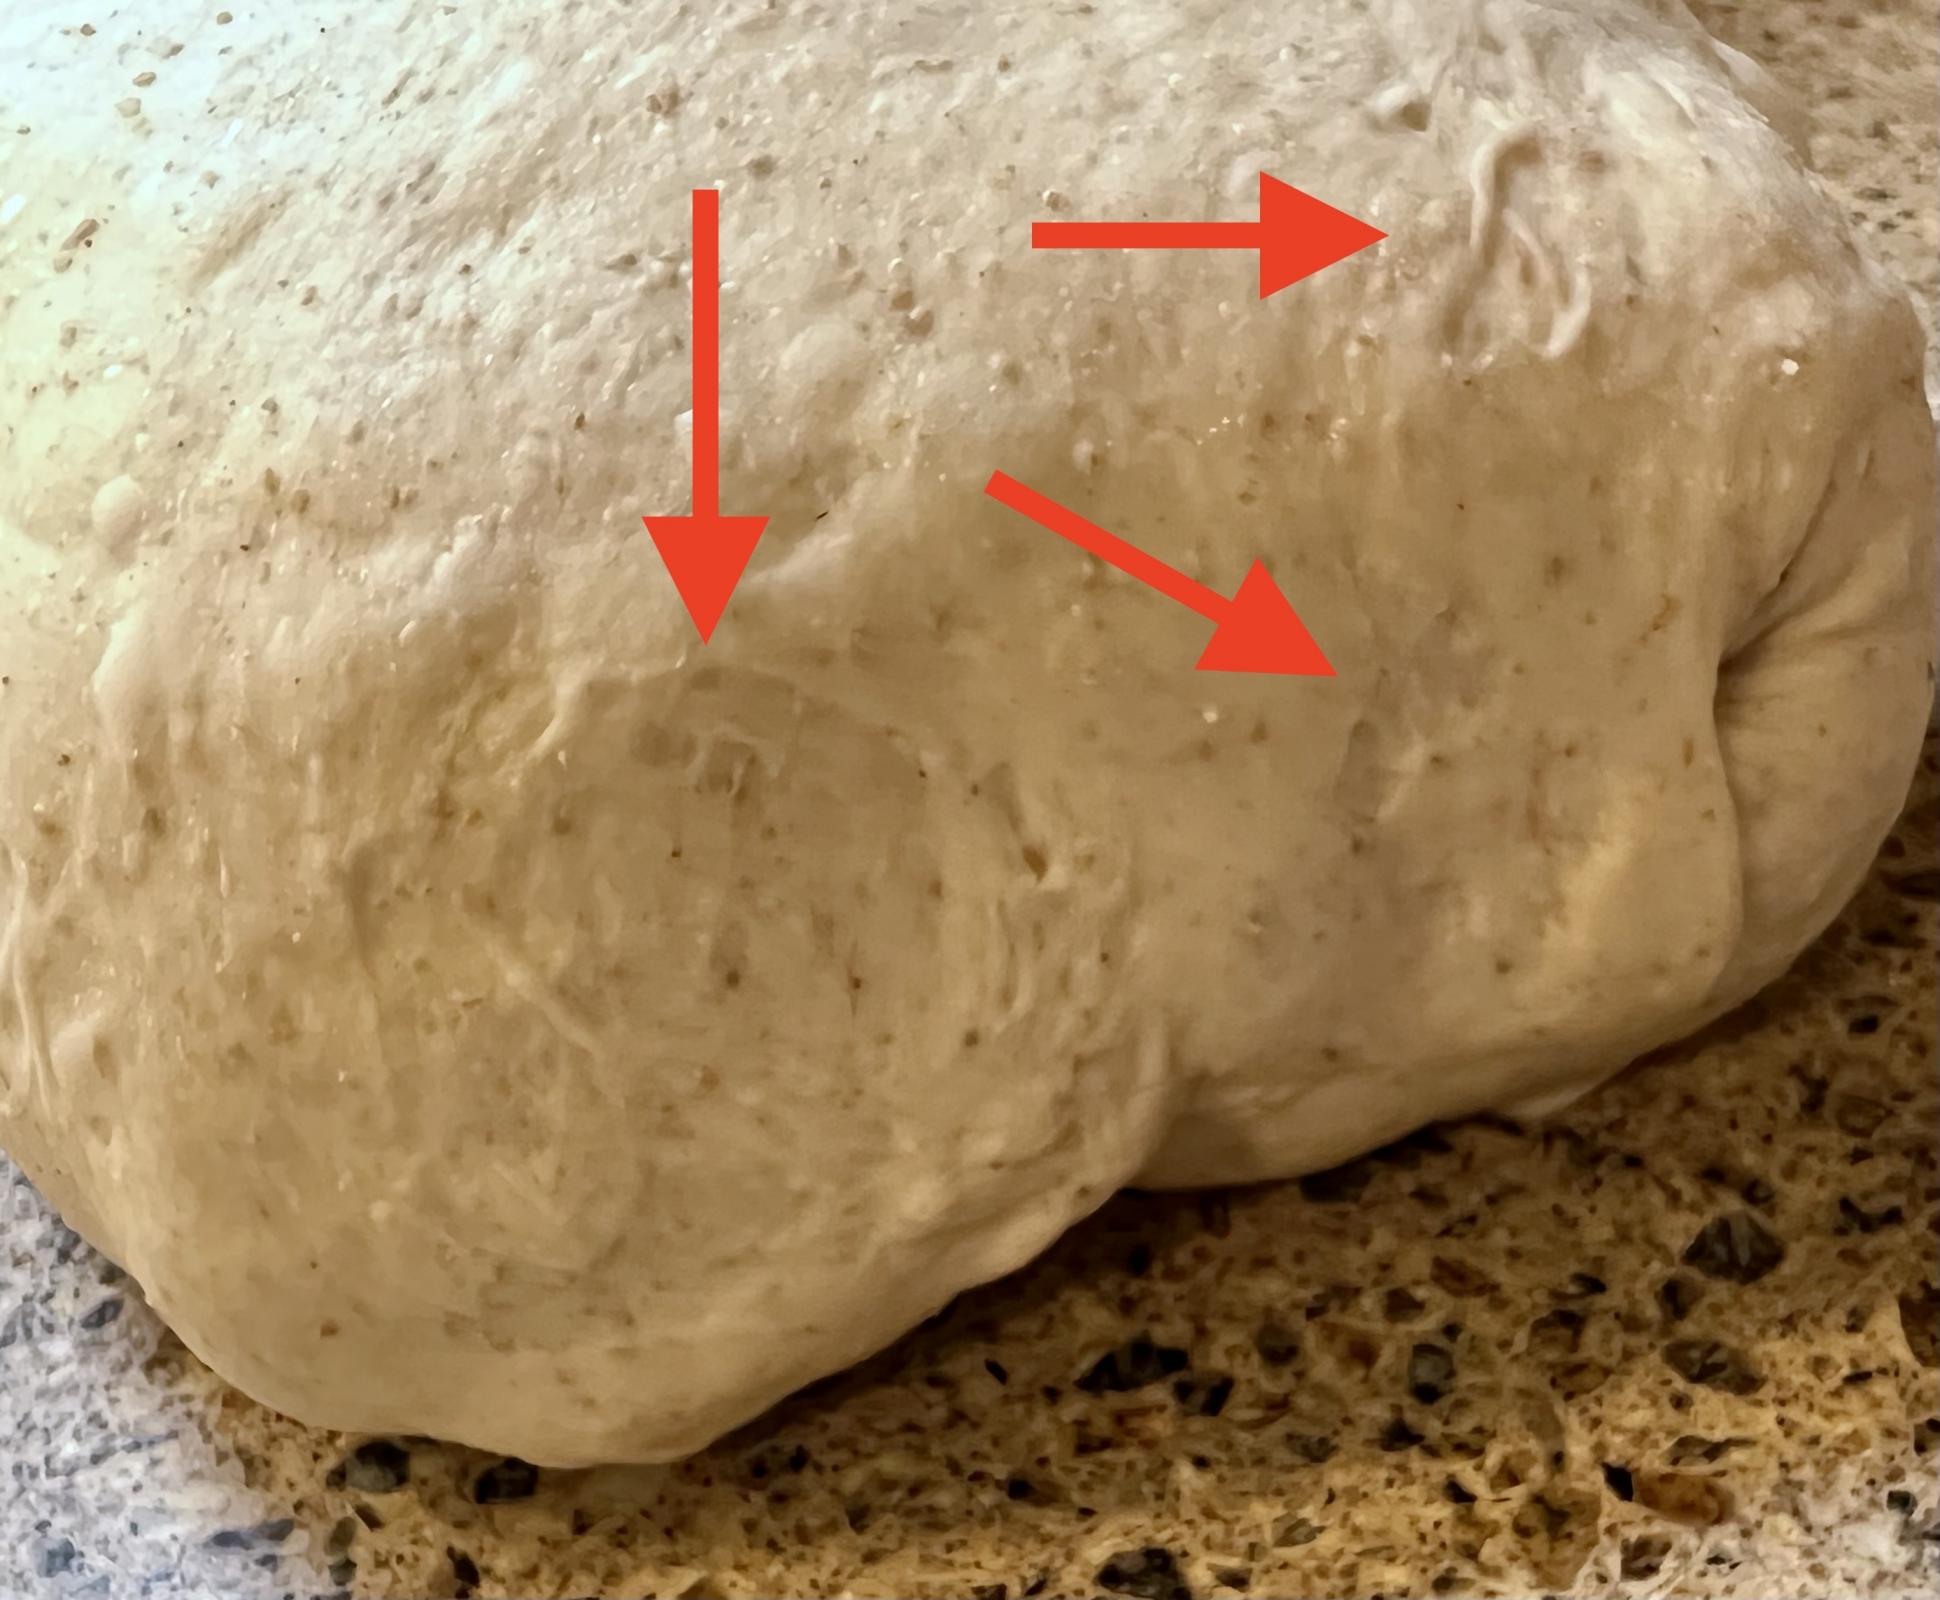
The autolyse was mixed in my Ankarsrum on the lowest speed because I intended to do the final mix that way, so why not. The Ank is very gentle on low settings. The dough was still surprisingly ragged 30 minutes into the autolyse, but had improved by the 45 minute mark. It had an unusual feel to it, but I proceeded with the mix and that’s when things got really weird. I’m hard-pressed to describe the dough’s texture. It felt soft but… I don’t know… dry? tight? Those aren’t the right descriptors, but they’re the best ones I can come up with. I added 10-15g water in small increments in the hope of improving the texture. The additional water helped the dough feel somewhat better, but it did not feel like the gluten was developing well at all. The surface of the dough was beginning to appear pock-marked and after 7 minutes of mixing about 3/4 of the way up the Ankarsrum dial (the sixth “box”), the surface of the dough started pulling and breaking. I have not encountered this before and wondered if it might be the affect of glutathione. I have no familiarity with it and don’t know.  

The Jiffy Pop Moment

Instinctively, I pulled the dough from the mixer bowl. It was quite sticky but not unmanageable with wet hands. I folded the dough but that just made it tear. I don’t know why I thought to try French folds when regular folds didn’t work, but for some reason they did seem to have a positive effect – until they didn't. Just when I was about to stop, the top surface of the dough split open like Jiffy Pop revealing layers of folded dough inside. I wish I’d thought to photograph it but in the moment my only thoughts were geared toward salvaging the dough if possible. I quickly folded the hole closed and did another FF. It seemed alright, so I did another and then another until the dough was largely smoothed out. Not wanting to bring on the Jiffy Pop Effect again, I stopped the moment most of dough’s surface looked smooth. I’d guesstimate there were about 40 or 50 FFs in total. 
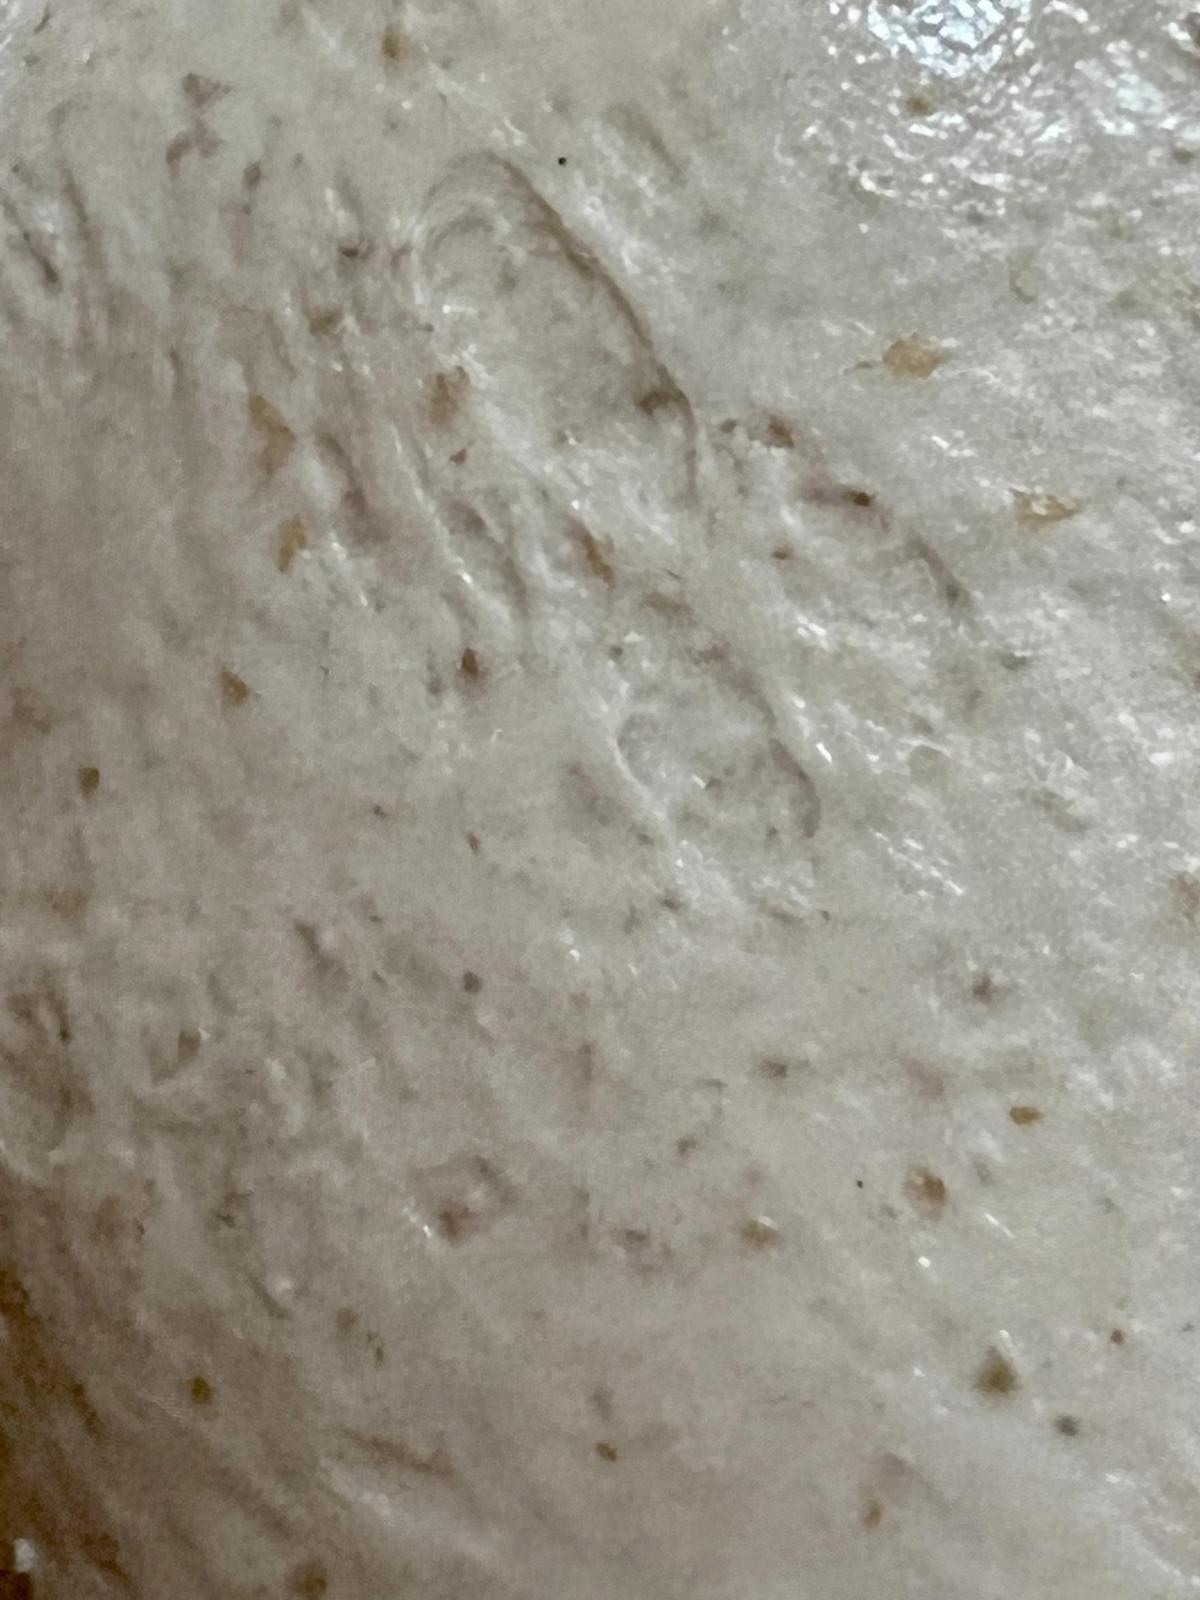
 

Mostly smooth, but there are still pock marks along the edges. I do wish I had photographed the dough at its worst, but honestly, there was work to be done.

At the end of the mix, the dough temp was 76.3°F so at least that was on target, even if nothing else was.

Bulk Fermentation

The dough was slightly risen after 90 minutes. It was more extensible after resting but still prone to tearing so there was no stretching, only folding. Pock marks like the ones in the photos above were apparent where the dough folded. Afterwards, the dough continued to rise but felt dense and heavy. Even when it had doubled in volume, it looked and felt leaden. I don’t typically let my doughs double during bulk and, under the circumstances, I was afraid of degradation so I shaped the loaves. Maybe I should have done so sooner. Too many mixed signals to be sure of anything. 

Shape & Bake

After a preshape and 15 minute bench rest, the dough was molded more so than folded into shape to avoid tearing. The final proof progressed quickly and looked sufficiently risen after about 60 minutes. On feeling the dough, it still lacked that certain lightness that tells you it’s ready, so I let it go another 20 minutes until one of the loaves felt acceptably aerated. I was still concerned about gluten degradation, so that loaf was sprayed with water and, since it seemed sturdy despite its propensity for pulling and tearing, I scored it but only very shallowly. It stood up well to the slash. The dough was loaded into the preheated Fourneau Grande and the hatch closed. Silent prayers were said.

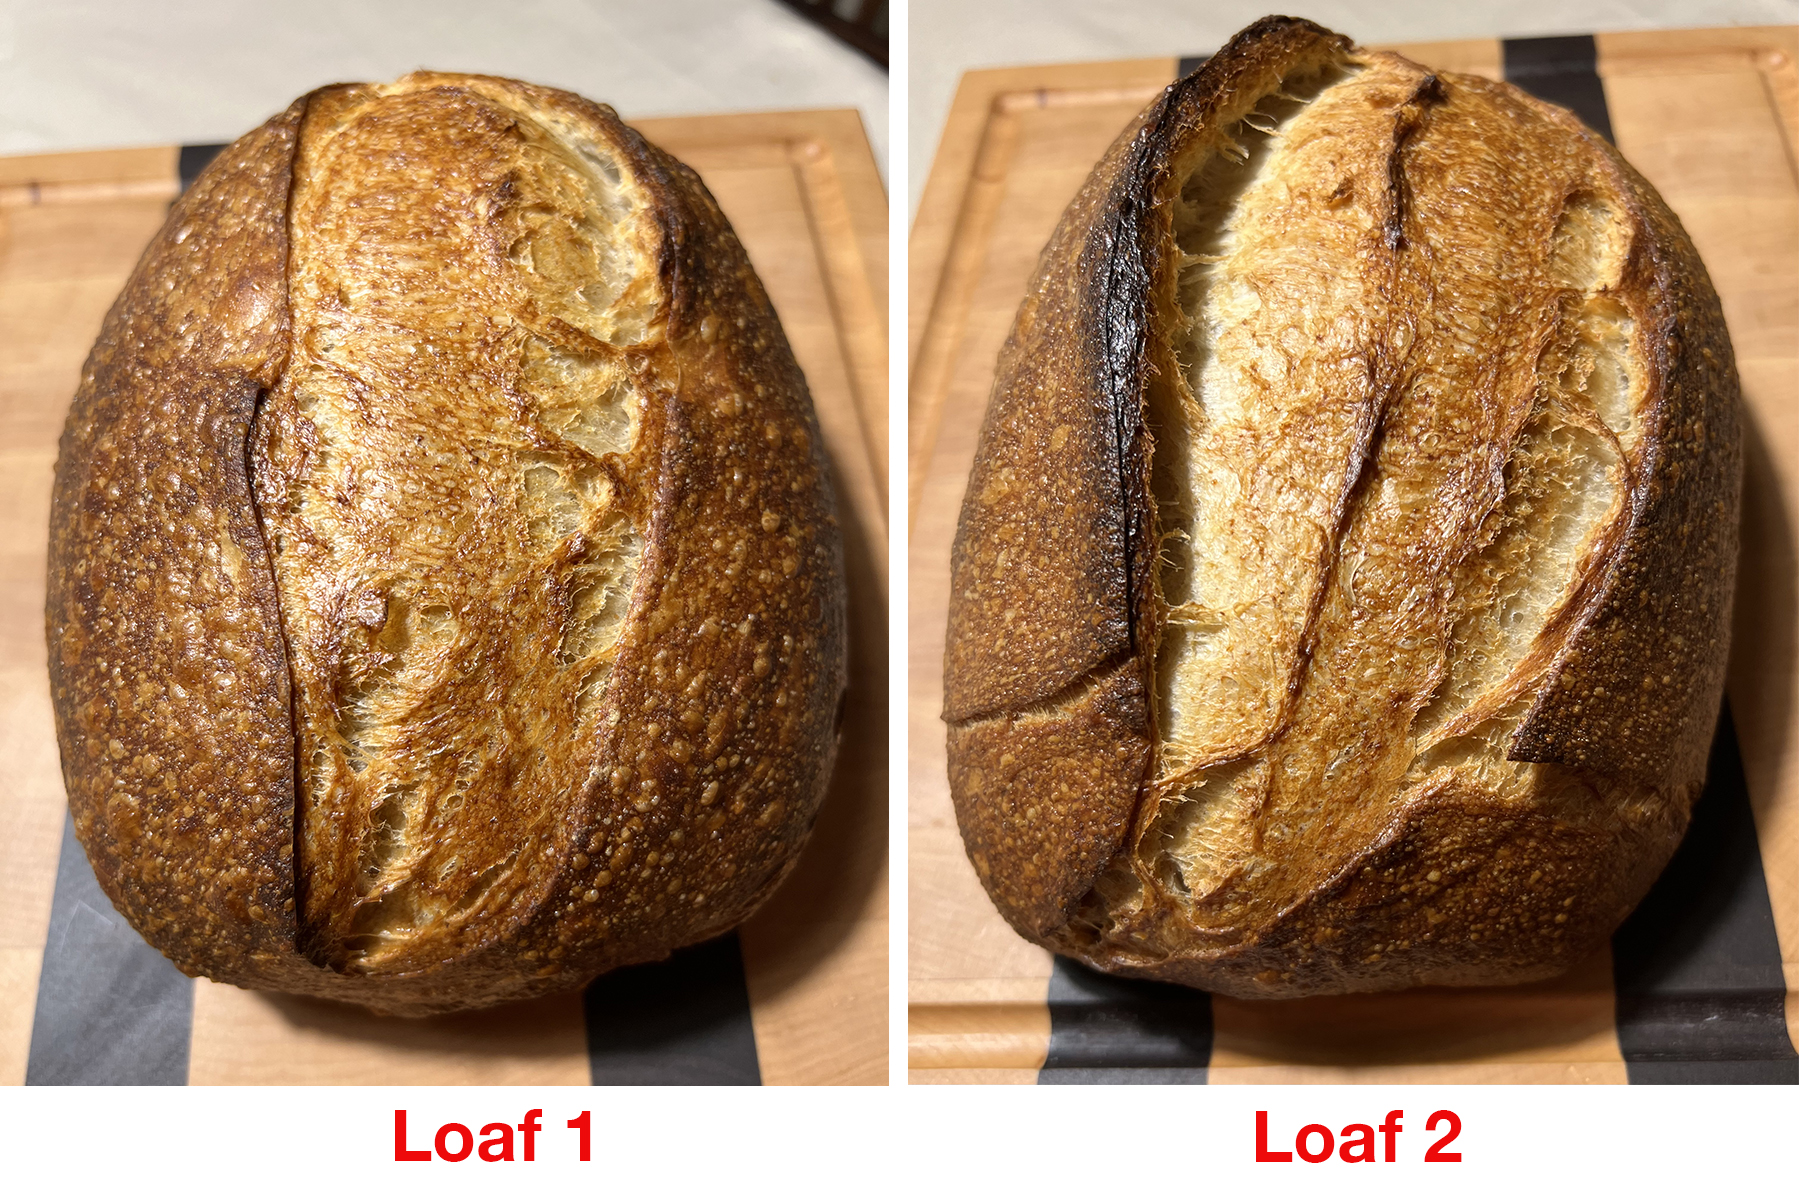
When Loaf #1 emerged from the oven, it exhibited great oven spring and a nice blistered crust. There was no ear; the dough filled in the bloom area and leveled out. I thought this was most likely due to the shallow scoring, so I focused on making a deeper cut into the second loaf. Unfortunately, I didn’t angle the blade very much. Who in that situation can resist the urge to commit the cardinal sin of re-scoring even though you know its impossible to hit the exact same spot? Not me. The result is the second loaf has a somewhat better ear and bloom but bears the scars of botched surgery.  

Grand Opening

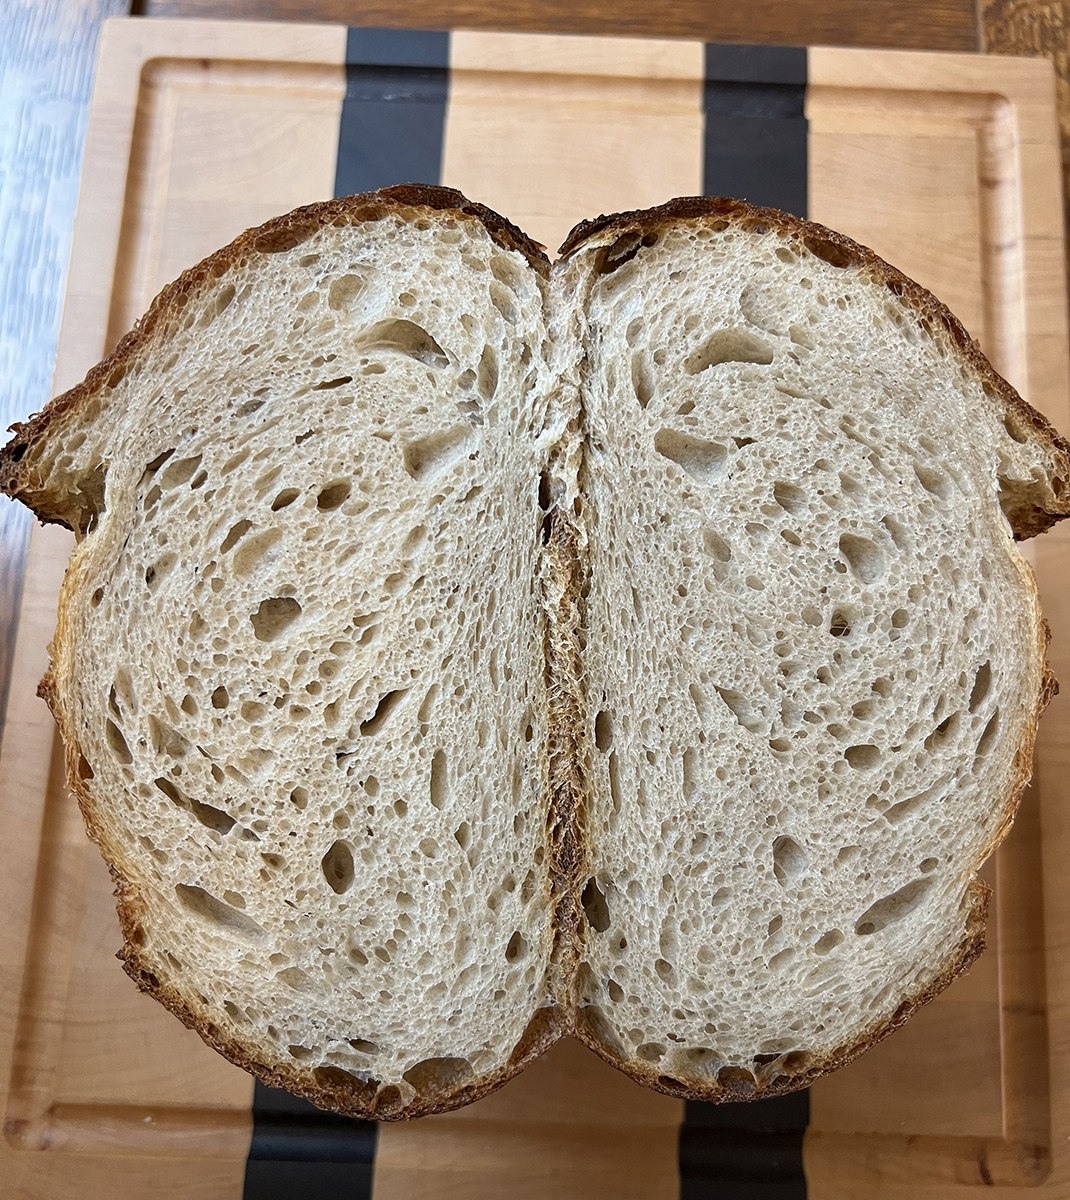
I'm going to bury the lede here and begin by saying the flavor was good, and the best part was that my husband enjoyed it. That was a win right there. Unfortunately, the crumb was a different story. Despite the good oven spring, the loaf was verrry heavy  – not unexpected given the dough quality. You know that old trick question about which weighs more, a ton a feathers or a ton of bricks? The correct answer is a pound of this bread.

The bread looks better in the photos below than it turned out to be in real life. At the same, it wasn’t terrible. Given the bizarre dough quality, I was not expecting an edible bread. And, truthfully, the eating quality is not great… but it’s not bad either and makes, like many substandard loaves, decent toast. 
ANALYSIS – NO ANSWERS, ONLY QUESTIONS

So what happened with this dough? I assume the fault was floating in my jar of YW, so I made a fresh batch inoculated by a spoonful drawn from the old jar. This is the first time in the 4 weeks since it was first made that the water was completely changed. I feared doing so might dilute the yeast population in a young culture, but in light of the poor dough development, it seemed the prudent thing to do. The new YW spent the night in the proofer at the low setting of 75°F (the overnight temp inside the box was probably closer to 70°F). Once it looks active and the pH dips below 4.0, it will be refrigerated and given a few more days to develop.

Meanwhile, another YW levain (second build) rests in the refrigerator. I mixed extra to have on hand for SD-YW Test Bake #2, but now I think I will toss it and make a new levain when the new YW is ready. 

TO BE CONTINUED

StevenSensei's picture
StevenSensei

Oh how I wanted these to be good. The ingredient list was simple. The process looked simple. I even found Graham Flour at a specialty baking shop. However, the fact that the book didn't include a picture of the finished product should have been my very first clue. 

INGREDIENTS AND CALCULATION HERE


Mixing the dough was odd. The directions said that it should feel like modeling clay and be "silky", not be sticky, and not be crumbly. However when mixing this by hand it was sticky or crumbly. The roughness of the Graham Flour was partly to blame for this. After trying to add more flour...and trying to add more milk I eventually got what was kind of a wet mass. The book said that it develops more flavor overnight so I figured I'd let it sit overnight and come back in the morning. 

In the morning I had a dense clay like dough once all the flour had properly hydrated. I was feeling confident. I rolled it out...baked it...it smelled good. I waited for it to cool on the tray. 

Could it be? Do I have graham crackers?


Why yes! These appear to be whole grain Graham Crackers! But the celebration was not to last. Once cooled I snapped them apart. They smell good. However they are inedible. Ok, I exaggerate...they can be eaten...but they would need to be soaked in coffee or milk or something. They are so dense and hard I am afraid of cracking or chipping a tooth. I gnawed on a corner gently with my molars after fighting to break a piece off. The term hardtack is the only one that comes to mind. 

Sensei's Report Card


Tasting Notes: The honey and molasses are there. The whole grain is prominent. The flavor profile seems right. Although I can't detect the cinnamon I added at all. Had this been a light and crispy instead of dense and crunchy cracker it could have been a winner. 

Time/Effort: 2 days (kinda). The mixing on day one at night after dinner takes maybe 5 minutes and that's it for day one. The second day is just rolling out the dough and baking. Total time is probably an hour to an hour and a half total. 

Would I make it again: No. Nor will I be returning to this version. There are many other recipes out there including this one I found posted by Mini Oven here on the forums that seem to be a lighter and more reasonable version of the Graham Cracker I remember from my youth. 

https://www.joyofbaking.com/cookierecipes/HomemadeGrahamCrackersRecipe.html


So it looks like these are destined for the bin. I'm not sure I can think of a way to save them. Maybe blend them up (at risk to my blender or food processor blades) and use it somehow? Oh well, it’s all part of the adventure!

cfraenkel's picture
cfraenkel

I am running very low on safe AP flour, so I did this one kinda? whole grain.  I probably could have used less AP, but I was afraid it would be too dense. In hindsight I could have used more freshly milled grains.

Levain build: (4 hours before mixing)

10g NMNF rye starter

40g fresh milled hard red wheat

40g water

Second build: (after the 4 hours and at the same time as the soaker) - I was NOT sure this was going to work, (I never add this much all at once) but it was bubbly and ready in about 2 hours. Go figure.

192g fresh milled hard red wheat

192g water

Soaker:

80g Cracked rye

80g Whole Flaxseeds

70g Sunflower seeds

70g old fashioned oats

370g boiling water

6g salt


Final Mix

450g AP Flour

228g Einkorn

228g Water

Soaker

Levain

Mixed about 4 minutes in my Kitchenaid Mixer on speed 4, divided in two, shaped and put to bed in bannetons in the fridge overnight.  Baked at 465df in dutch ovens for about 40 minutes in the morning. 

Really tasty! (and low sodium - next time I'd like more salt - I'll add it in the final mix)


Martadella's picture
Martadella

This is the same as in previous post but I tortured myself with using devices, like scale and even the thermometer 😀 Oh, dear .... 

It can be done without any commercial yeast,  but I prefer it this way. More practical  and richer taste (yup, that's true) 

There we go:

Day one, stiff starter:

240g dark rye flour

20g rye starter, unrefrehed

Enough water to make rather dense, but not to dry dough (140g)

Fermentation at 26-28°C for a few hours, then at rt for a total of 16-24 hours (I did 22 total, rt was 18°C)

Day one, altus soaker:

70g of oldish bread (a good slice) torn into pieces

Enough water to cover it completely 

Optionally,  especially if you want to skip yeast,  add a good pinch of rye starter. Soak at rt until ready to make dough, then drain reserving water and break into a pulp with your fingers 

Day two, dough:

All preferment (or save a piece as a starter for a new bread )

All altus

+/- 400 g water (including the one from soaker)

4g  dry yeast 

20g salt

80g dense date paste or plum butter (powidla)

260g wholegrain rye flour 

260g whole wheat flour 

First break starter into pieces and whisk with some liquid to destroy the clumps.  Then add altus and the rest of ingredients.  Mix patiently with your fists, adding tiny amounts of water,  if necessary. The dough should be relatively dense, but soft. It will try to stick to everything it touches.  At some point it will become kind of slick and almost slimy on the surface, will also make specific sound when kneaded,  that means it's ready. Smooth it out and let ferment at 26-28°C for 60min (I did it in the oven with a light on)

Forming the loaf is frustrating,  I always try to do it in the air, but can be done on silicon mat with wet hands

Place the dough in the pan, press it down and smooth with silicone spatula.  Cover and let proof at 26-28°C, 45 min, then, if necessary, another 15 or so, at rt, while you preheat the oven 

Dock and glaze the surface (I used rye flour and water slurry)

Bake 10 minutes at 475°F, 30 minutes at 400 and final 20 minutes at 350. 10 minutes before taking out of the oven glaze the crust again 

This bread is very tasty. The acidity is pronounced,  but at the same time countered and balanced with sweetness of fruit preserves.  The aroma is very rich, typical of hybrid fermentation. The long incubation of preferment assures that there is no chance of enzymatic destruction of crumb. Without any problems this can be baked as a 100% rye


Pages

Subscribe to Recent Blog Entries