The Fresh Loaf

A Community of Amateur Bakers and Artisan Bread Enthusiasts.

Most bookmarked

JMonkey's picture
JMonkey

Whole wheat sourdough bagels


The best bagels I've ever had were not from New York or New Jersey, or even Philadelphia. They came from a tiny bagel shop in Winston-Salem, NC. I'm not even sure what it's name was; we just called it, "The Bagel Place."

There's no doubt, though, they made the "real thing". Beautifully chewy water bagels with the traditional toppings: plain, poppy seed, garlic, onion, sesame -- and, of course, all the newfangled kinds as well: cinnamon raisin, asiago cheese, chocolate chip, tobacco.

Just kidding about tobacco, of course, though when you live in the hometown of RJ Reynolds Tobacco Corp., the aroma of tobacco tends to permeate the air, especially if a storm is coming in, because the wind changes direction and blows directly over the cigarette factories outside of town.

Tobacco winds or no, the bagels were delicious, and have formed my ideal for what a bagel ought to be. Of course, I may have been a bit biased. I met the baker contra dancing, and he became a good friend: Joe Bagel, we called him. He taught me that bagels should be boiled and then baked good and hot.

I've never had any luck, however, finding a 100% whole wheat bagel that tasted ... good. All the whole wheat bagels I bought had a strong bitter aftertaste, a taste that I now know comes from using whole wheat flour that's less than fresh. And more often than not, they were even more dense than a bagel ought to be.

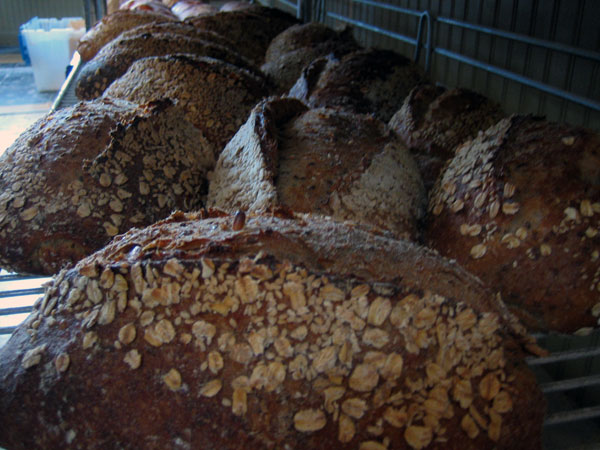
I've tasted some better whole-wheat bagels recently, but they're not 100% whole wheat. So I decided to see if I could make a decent bagel from fresh whole wheat flour. For inspiration and instruction, I looked to both Reinhart's Bread Baker's Apprentice and Hammelman's Bread. I also thought that sourdough might help - it always seems to do so with everything else. The end result is up above. I'm happy to say tha they were, indeed tasty. In fact, my wife didn't know they were whole wheat until I mentioned it to her after she'd eaten breakfast!

As I'd feared, they were not as chewy as I'd like -- need high-gluten flour for that. I think, perhaps, I'll try adding some vital wheat gluten the next time around to see if I can increase the chew factor. Anyway, here's how I made them:

Overall formula

  • Whole wheat flour: 100%
  • Water: 60%
  • Salt: 2%
  • Diastatic malt powder: 0.9%
  • Pre-fermented flour: 30%


Ingredients
  • Whole wheat starter: 220 grams at 60% hydration
  • Water: 195 grams
  • Whole wheat flour: 320 grams
  • Diastatic malt powder: 4 grams
  • Salt: 9 grams
  • Optional: 1 Tbs baking soda or enough Malt Syrup to turn the Boiling Water the color of tea.


Start the night before you want to bake. Combine the ripe starter with the water and knead them together until the starter is very soft and the water is milky. Add the flour, salt and malt powder. Mix until it turns into a dough. The dough will be dry -- like any dough, if you poke it enough, it'll feel a little tacky, but you don't want any more tackiness than that. It'll be tough to knead, but nonetheless, give it a good 300 strokes. Stiff as it is, a small piece of the dough will form a translucent windowpane when it's fully developed, just make sure you turn the piece of dough in a circle as you stretch it.

Once the dough is developed, form it into a ball, cover it, and let it ferment for about an hour at room temperature. It will not rise much in that time.

Divide the dough into six pieces and shape each piece into bagels. I chose to use the old-style shaping described in Bread. Flatten each into a rough rectangle and then roll them up tightly, after which they need to be rolled out (by hand) into 6 to 8 inch ropes. Wrap the rope around your hand and then seal with your palm.

Once they are shaped, cover them and let them proof at room temperature for another hour. To see if they're ready to proof, use what Reinhart calls "The Float Test": just drop one bagel gently into a bowl of water. If it floats after 3 seconds or so, it's ready! Dry the test bagel off gently and put them all on a cookie sheet that's wither lined with parchment paper or lightly dusted with cornmeal or semolina flour. Cover with plastic and pop them in the fridge.

The next morning, preheat the oven and a stone, if you've got on, to 500 degrees F and put a big pot of water on to boil. Once the water is good and boiling, add the optional ingredients to the water, if desired. The baking soda acts as a sort of low-grade food-safe lye, and gives the bagels a nice shiny sheen. The malt syrup adds color and flavor. You can add both if you wish, but the water will foam as the acid in the syrup and the baking soda react. What's most important is the boil itself.

The bagels will float. Boil them for about 1 minute on either side. When boiled, you may then top them with seeds, salt, garlic, whatever suits your fancy. I like poppy seed, myself. My wife prefers garlic.
Once they've been boiled and topped, they're ready to bake. I baked mine right on my stone for about 18 minutes, and then let them cool for 10. Have cream cheese and lox ready at hand.
subfuscpersona's picture
subfuscpersona

should milk be scalded before using in bread dough?

Many recipes for loaf bread that use milk advise that the milk must first be scalded (brought just to the boil). (Then, of course, you have to wait for the milk to cool.) I remember reading an explanation that something in the milk can inhibit yeast growth and the heat somehow corrects this.

Tell me, gurus, is it really necessary to scald the milk? If yes, why? If no, why not (can it just be a holdover from earlier times that has been mindlessly perpetuated)?

PS - I love long, involved scientific explanations, so please feel free to elaborate

Thanks in advance... 


danmerk's picture
danmerk

100% Whole Wheat Sourdough - Need help

Can someone help me with formulating a recipe for making a 100% whole wheat sourdough? I do not want to make a bread with white flour, and prefer not to use milk, eggs etc. I made a few loaves using a starter, flour, salt and water. Can I do the same with whole wheat?

I bought a box of vital gluten, should I use that to get better results in my wheats? 

tigressbakes's picture
tigressbakes

QUESTION: How to use SD starter in commercial yeast recipes?

Hi,

OK this is probably a total newbie question but here goes...

It seems like many of you bake mostly or exclusively with sourdough. I am wondering, is there some kind of basic 'general rule' about using wild yeast instead of commercial yeast in non SD recipes? Or if not, I would love to get some experienced opinions on the best way to do this.

I do know that the fermentaton times in commerical yeast are pretty standard - and I am learning, at least with what little experience I've had with my sourdough starter so far that the fermenation times are a lot longer.

I was thinking that a good start would be to replace the 'sponge' or 'poolish' that is called for in a lot of commerical year recipes with the same amount of starter - (and of course omit any yeast that is called for anywhere else in the recipe).

Will this work?


I would love comments, suggestions, thoughts, and any input anyone has on this subject.


thanks!

bwraith's picture
bwraith

Sourdough Raisin Focaccia

Sourdough Raisin Focaccia

Sourdough FocacciaSourdough Focaccia

Sourdough Raisin Focaccia (a)Sourdough Raisin Focaccia (a)

Sourdough Focaccia CrumbSourdough Focaccia Crumb 

My wife's favorite bread is without a doubt sourdough raisin focaccia. The recipe is loosely based on the BBA (Reinhart) "Poolish Focaccia", including his mention of raisin focaccia and a tradition in certain parts of Italy for "breakfast focaccias".

Many thanks to various contributors to this site as always. Photos of the process have been posted for this sourdough raisin focaccia and the sourdough ciabatta I made at the same time and mentioned recently in a previous blog entry. A spreadsheet is also posted showing weights in ounces or grams.

Starter:

  • 14 oz BBA style barm fed w/KA organic AP flour (1:1 by weight flour:water)

The day before this bread was baked, I took my "BBA style barm", a 100% hydration starter fed with KA Bread Flour, out of the refrigerator. I fed it 1:2:2 (starter:flour:water) three times over the course of the day at room temperature, which refreshed the starter and built enough starter for this recipe, the sourdough ciabatta I also made the next day, as well as some left over to return to storage in the refrigerator. The larger amounts were made by feeding with KA organic AP flour, to convert to KA organic AP flour, a choice of a slightly lower protein flour that should be good for irregular, large holes and artisan style bread.

Dough:

  • 14 oz 100% hydration starter using KA organic AP Flour
  • 13 oz KA organic AP Flour
  • 2 oz KA Rye Blend Flour
  • 2.5 oz olive oil
  • 10.5 oz water
  • 0.5 oz salt (14 grams)
  • A box of golden raisins (about 2.5 cups)

Autolyse:

Mix the flours and water together in a bowl (I used a dough hook for this). Let sit for about 30 minutes.

Mix:

Mix flours and water above with the 14 oz of starter, 0.5 oz salt, 2.5 oz olive oil, and mix for a couple of minutes - just long enough to thoroughly mix the starter and salt with the flour and water from the autolyse step. Add a box of golden raisins (about 2.5 cups). The dough should be quite "wet", meaning it will not clean the bottom or even much of the sides of the mixer bowl. It should be fairly sticky and already have a fair amount of gluten development. I realize I needed a little more water than I actually used (10 oz), so the recipe says 10.5 oz and is what I will use next time. As a result, the dough was a little too stiff and the crumb wasn't quite as open as I think it would be with the extra ounce of water.

Bulk Fermentation and Folding:

Make a fairly thick bed of flour on the counter about 12 inches square. Using a dough scraper, pour the dough out into the middle of the bed of flour. Allow it to rest for a few minutes. Then, fold the dough by flouring or wetting your hands, then grabbing one side of the dough and lifting and stretching it, folding it over itself like a letter. Do this for all 4 sides. Brush flour off the dough as you fold over the sides that were in contact with the bed of flour. You don't want to incorporate much flour into the dough as you fold. After folding, shape it gently back into a rectangle or square, spray it with a light coating of olive oil or some other oil spray, and dust very lightly with flour. Then cover it with plastic wrap, and drop a towel over it. If the dough seems a little stiff at this point, it unfortunately probably already doesn't have enough water in it. You can put it back in the mixer and add 1 oz of water and try again. Or, soldier on and adjust your water next time. Repeat the folds approximately every 45 minutes two more times. If the dough seems very resistant to stretching, only fold it from two directions instead of four. You don't want the dough to get really stiff from too much folding. The amount of folding you will need will be more if you have more water and less if you have less water. Note that even an ounce can make a very big difference in the consistency of the dough. After three folds, let the dough rise for another 1.5 to 2 hours, at which point, the dough should have doubled roughly in volume. Use the "poke test" to get a feel for how long to continue the bulk fermentation.

Shaping:

Line a standard (the ones that are about 17 inches long and 13 inches wide) baking sheet with parchment paper and spread about 1/4 cup of olive oil over the parchment paper. Transfer the dough to the sheet. Spread the dough out by dimpling it systematically with your finger tips, pressing down firmly into the dough with all ten fingertips, and slowly getting the dough to spread out in the pan. Don't stretch the dough, just dimple it by pressing into the dough vertically with your fingers. If necessary, wait 10 minutes for the gluten to relax, if it won't spread out enough to fill the pan at first. As you do the dimpling with your fingers, work about another 1/3 cup of olive oil into the top of the dough by spreading it over the top of the dough as you dimple away. Once the dough has  spread all the way out and nearly fills the corners, you can cover it with saran wrap.

Final Proof:

Let the dough rise for about 2.5 hours, until it is puffy and has increased significantly in volume. With this sourdough version it may not rise above the lip of the pan, but it should come close. If it rises unevenly, you can dimple the high sections again periodically to even out the height of the dough across the whole pan. I actually let this one rise almost 3 hours. It finally seemed to relax and rise around 2.5 hours, so I went ahead and tried baking it. As I mentioned before, the result wasn't quite as open of a crumb as I hoped, but it was fine - next time a little more water, and it will be better.

Prepare to Bake:

Preheat oven to 500F. Remove plastic wrap, and use your fingers to spread about 3/4 teaspoon of kosher salt evenly over the dough. Don't use more than 3/4 tsp of salt, or it will come out too salty. Spread the salt with your fingers by holding the 3/4 tsp of salt in your palm and picking up pinches of salt and slowly spreading it over the dough. Again, it's important to get it spread evenly in just the right amount, and that is very difficult to do unless you measure out 3/4 tsp of kosher salt and then spread it in small pinches very evenly over the whole surface.

Bake:

Place pan in the oven and lower temperature to 450F. Bake for about 12 minutes, until the internal temperature is around 207F (I'm near sea level), rotating it after about 9 minutes. You can bake longer to get a darker, harder crust. Actually, I think this KA organic artisan AP flour may benefit from a little bit of added diastatic malted barley flour, as the breads I baked with this flour today were more pale than previous results with KA AP or KA Bread Flour combinations. I don't think I overproofed them, but maybe that's a factor. The focaccia should spring up from their "flattening" with your fingertips, such that not much evidence is left of the dimples you made with your fingers.

Cool:

Let bread completely cool, if you can stand to wait.

This bread is especially good for breakfast lightly toasted or heated with a little butter and/or honey. The mixture of salt, sourdough flavor, and the sweetness of the raisins is delicious.

tigressbakes's picture
tigressbakes

HELP: what do I do with the 'hooch'!

Hi all,

Well, I finally arrived back in my kitchen and I am ready to go (unfortuantely I have a bunch of work I have to get done before I can even think about baking). But of course I was very excited to see the condition of my starter - and I want to refresh it so that hopefully I can work with it tomorrow.

It smells fresh, but it looks like potato soup with about 1/4 or so of clear liquid on top - I think it is called the 'hooch'?

According to Peter Reinhart, I am going to keep a cup of the starter and get rid of the rest. He doesn't say anything about the liquid - what should I do shoud I pour it off first - or mix it in before I take out the discarded starter? Or don't do either and just take out the required amount of discarded starter?


Help - i am raring to go but I don't want to make a mistake!

The last few times I've visited my parents' house, they've served some incredible breads from a local bakery. One time we had a roasted garlic-parmesan loaf that was to die for. This time we had an organic white sourdough with the most beautiful gringe and crust on it. The next morning for breakfast we had an organic cranberry-walnut sourdough that knocked my socks off. After finishing off an entire loaf of cranberry-walnut bread in one sitting, I thought to myself "I gotta go check this place out."

Pane D'Amore is in a teeny little storefront in uptown Port Townsend. Going by mid-day on the day before Easter was probably not the smartest idea of mine because the place was packed, so I didn't get a chance to talk to the bakery owners Frank D'Amore and Linda Yakush. But I was lucky enough to catch one of the bakers there, Ilon Silverman, as he was wrapping up for the day. He gave me a tour of the place and told me about his baking background.

Ilon told me he's been baking for close to 20 years. He got into bread baking, he said, when he first heard about baking sourdough loaves without yeast while in high school. "My initial tries came out like bricks", he told me, but he stuck with it and was eventually able to get the hang of it.


Slideshow

Inside the village bakery

Ilon was able to get his foot in the door as a professional baker at The Berkshire Mountain Bakery in Massachusetts, getting to apprentice under the master baker Richard Bourdon. Later he landed a gig at the renowned Metropolitan Bakery in Philadelphia.

When I asked what brought him to Washington he told me a funny story. "I was out here checking out the Olympic Peninsula," he said, "when one morning I smelled bread. And not just any old bakery, but, you know, real bread." He went into Pane D'Amore and chatted with the guys for a bit, then asked if could come in and help bake the next day. So for the next two days (on his vacation, I remind you), he got up at 3 in the morning and put in a full (unpaid) shift at Pane D'Amore.

After returning to Colorado, Ilon heard that Pane D'Amore owner and head baker Frank D'Amore had been seriously injured in an accident and that the bakery needed help covering for him. Ilon called up the bakery, saying "Hey, you might have forgotten me, but I'm the guy who came in and baked with you on my vacation." He ended up coming back out to Washington to help cover for Frank while he was out of commission.

Frank D'Amore, who has been baking in Port Townsend for over 25 years, is back baking again and the bakery, which is about four years old, is going strong. The under 900 square foot joint (including the retail space) does about a thousand pounds of bread a day, with anywhere from ten to twenty different types of bread each day. All of the bread is made with organic ingredients, not just the flour but the nuts, seeds, and fruits as well. In the summertime, when the farmers' market is going on out front, the line will be out the door and they'll sell over 400 loaves of bread from the storefont alone. Pane D'Amore's breads are served at a number of local restaurants and has recently been picked up by the Safeway in town, which is the largest bread seller in the area by far.

The breads they make there are killer: aside from the ones I mentioned, they make a Fig-Anise Bread, Ciabatta, Swedish Limpa, a Flax, Oat, and Sunflower Multi-grain Bread, a 7 Grain, Panini, rolls, Ficelle and many others. About half of the breads they bake are sourdoughs, the other half yeasted. They also bake pastries, rolls, sticky buns, cinnamon rolls, cookies, focaccia, and pretty much anything else you can bake in a hot oven every day.


Pane D'Amore is located at 617 Tyler St., Port Townsend, Washington and is open 7 days a week.

Bakery Profile: Pane D'Amore

soupcxan's picture
soupcxan

Impact of accelerating fermentation/proofing?

I'm relatively new to baking and I wonder what the conventional wisdom is on acceerating fermentation or proofing by using a warmed space (usually an oven that has been briefly warmed or an oven with a pot of steaming water beneath the fermentation vessel). Now, there is no doubt that this speeds up the rise, but I wonder what am I really losing by speeding this process up? So far, my bread recipies have used instant yeast and a fermentation time of 2-3 hours (no poolish or overnight refridgerator rising, I don't have the patience) - by adding some hot water to my oven, I can cut that down to about an hour. Most of the articles I've found so far state that a longer rise will result in more flavorful bread - but could accelerated rising cause other problems as well? Such as the texture, crumb, or ovenspring? Whether I speed up the fermentation/proofing or not, my biggest problem is getting enough ovenspring so that the loaf comes out light and fluffy. I don't get bricks, but the results are sometimes more dense than I think sandwich bread shoud be.

I'm still learning how all this works so I appreciate your comments. Here's a basic recipe that I've been using for a sandwich loaf, courtesy of Mark Bittman's "How to Cook Everything". Usually after combining the ingredients, kneading, there's a 2-3 hour rise, then a punch down, 15 minute rest, then another 1-2 hour rise, then baking at 350 for 45 minutes.

16 oz. bread flour

2 tbsp butter, room temperature

2 tsp kosher salt

1 1/2 tsp instant yeast

1 1/3 c. 2% milk, room temperature

1 tbsp honey


bluezebra's picture
bluezebra

poolish or preferment math.

hi everyone. i'm new to this site and new to baking and have what is probably a very stupid question. although i'm pretty good in art, my math is very crummy. (and that's not a good kind of crumb!)

so i'm making a preferment today and trying to use my scale. as i understand it, a preferment is 1:1 water to flour and 1/4tsp yeast. the question arises when i try to figure baker's percentages. in baker's percents a preferment would be 100% flour and 100% water  by weight and 1/4 tsp yeast.

obviously flour and water are not the same weight. and if you figure the weight of the flour as the 100% measure and the water as a percentage of that...then you have the baker's percentages. well here's what happened today when measuring:

1 cup of flour (houston, humid, sea level) weighed .29 lbs or 4.64 oz. (sorry don't know how to change my scale to grams).

1 cup water by measure weighed .52lbs or 9.88oz.

so if i'm making a 100% to 100% preferment that is 1:1 by weight. then it's about 1/2 as much water to the flour by measure. right? it means that i weigh out .29lb or 4.64 oz of water and add to the poolish, right?

my technique for measuring the flour is to spoon in flour to my measure scoop. then leveled with a knife, and measure.

if this is the case then adding 1 cup of flour and 1cup of water by measure is waaaaayyyyyyyyyy wrong! because it means that the water is too much volume for the amount of flour, right?


tia!

tigressbakes's picture
tigressbakes

tech support?

Hi,

I have been traveling for the past 2 1/2 weeks for work and I can't wait to get back to my kitchen! Whenever I could spare a moment I have jumped on and you all have made me jealous with your baking!

I want to post a a couple of photos of my very first sourdough that I baked just before I left but I am having trouble getting the images up.

Can someone direct me to any info on the site that explains how to do it?


thx

Pages