The Fresh Loaf

A Community of Amateur Bakers and Artisan Bread Enthusiasts.

Most bookmarked

Crank that oven up!

The next three tips all share the same goal. They all have to do with how to get the most oven spring. By "oven spring" I mean the final, extra rise that happens in the first few minutes that a loaf is in the oven. Good oven spring can make the difference between mediocre and great bread.

When preheating my oven to bake French bread, I turn it up to the maximum temperature. On my oven, that is 550 degrees fahrenheit. Once all of my loaves are loaded into the oven I give them a minute or two and than turn it down, typically between 450 and 475 degrees fahrenheit. The additional temperature during the first few minutes helps compensate for the heat lost while loading the oven and creates a nice, hot environment that will maximize yeast activity.

I guess I should add here, ALWAYS preheat your oven while baking bread. Many other types of recipes tell you to preheat the oven solely so they can give you accurate directions on how long to bake for. But bread actually requires a hot oven to rise completely.

Continue on to Number 2: Use a Baking Stone.

Lesson Five, Number 3: Bake with High Heat

Some call it a sponge, others a preferment, a poolish, a bigas, or a pate fermentee. Whatever you call it, the concept is the same: by taking a portion of the flour and water and fermenting it longer than the rest of the dough the baker can evoke better flavor from the ingredients.

If you are going to be baking two days in a row, one of the simplest preferments is to save a handful of the dough from the first batch for the next batch. I typically do not bake two days in a row, so instead I create a poolish the night before I am going to bake. My approach is to use between 1/8th and 1/4th a teaspoon of instant yeast (more if it is cold or I want to bake sooner, less if it is a warm night or I want it to develop slower) and an equal weight or volume of flour and water. Yes, I am aware that an equal weight of the two ingredients (8 oz. water and 8 oz. flour) is not the same as an equal volume of the two (1 cup of water, which weighs 8 ounces, and 1 cup of flour, which typically weighs around 5 or 6 ounces but depends on the type of flour and how tightly the cup is packed). Truthfully, it doesn't make a big difference as long as you adjust the final amount of flour and water by an equivalent amount in your final dough: either one will improve the flavor.

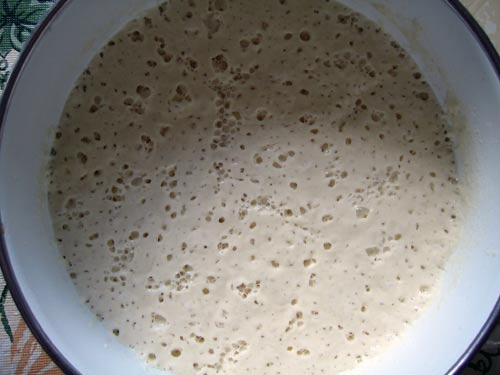
Assuming you combine the ingredients in the evening, cover the bowl with plastic, and leave it out at room temperature overnight, here is what should greet you in the morning:

poolish in the morning

Mix this in with your final ingredients (reducing the flour, yeast, and water the amount you used in your preferment) and your loaf should develop more interesting flavors and have a longer shelf life than a loaf created without this step.

Preferments can vary from as dry as bagel dough to as thin as a frothy liquid, and can be allowed to develop for minutes, hours, or days. I find that the poolish approach I describe above results in a nuttier, sweeter flavor that I quite enjoy. My impression is that harder preferments give you more of a sourdough-like flavor without having to go through the work of supporting a starter. But your experience and taste may vary from mine, so spend some time experimenting to figure out what you like most.

Next up, Number 8: Autolyse.

Lesson Five, Number 9: Use a Preferment

10. Use Good Ingredients
French bread is just flour, water, salt, and yeast. Since that is all you have to work with, you ought to use decent quality ingredients.

Just as I did in Lesson One I still insist that you can make really good bread with standard grocery store all-purpose unbleached flour. But for the cost of a cup of coffee, you can get a bag of high protein bread flour that will make even better bread. It isn't hard to come by: just about every grocery store carries at least one brand of fancy flour, whether it be Bob's Red Mill or on the West Coast, King Arthur in the East, or another brand that is available in your region or country.

The tap water in my area is excellent, so I have no problems baking with it. But if your water is high in minerals that could throw off the flavor, consider spending a buck or two on a bottle of distilled water. Folks here have also reported considerably better yeast activity when using distilled water.

Some folks swear by sea salt. I use kosher salt that is about a dollar more expensive than standard table salt. I can't say for certain that it makes a difference, but it is a small investment to make.

When it comes to yeast, there are a lot of different varieties out there. I've heard great things about SAF Instant Yeast. I'll admit, I've never tried it. But if your yeast is old and about to expire or not really seeming to do the job, seriously, toss it out and buy fresh yeast. And if you are going to bake more than a couple of times a month, buy yeast in bulk or by the jar or bag, not in the little pouches. You'll save a great deal of money.

Buying all of these costs less than going out and buying a new CD or DVD. If you going to be baking regularly, it is a worthwhile investment.

On to Number 9: Use a Preferment.

Lesson Five, Number 10: Use Good Ingredients

Floydm's picture
Floydm

Sourdough Switcharoo

As I mentioned in my previous post, last night I placed my new sourdough starter in the oven with just the light on to see if staying 80 degrees overnight would give it some pep. It did, having slightly over doubled in size by this morning.

I also started a poolish last night so I could do a standard French bread if my starter wasn't looking lively. It too was ready to go this morning.

"Hey," I thought, "Since I have both, why don't I try making a yeasted and a sourdough version of the same recipe and compare how they come out? That's a good idea, innit?"

It is if you can remember which is which, but I, alas, could not.

My head was just not together this morning and I mixed up the two. What I knew was that I had two batches of my simple rustic bread: 14 oz. bread flour, 1 oz. rye flour, 1 oz. whole wheat flour, 1 tablespoon salt, 12 ounces water. One of the two had a teaspoon of instant yeast and a cup or so of poolish in it, the other had half a cup of sourdough starter.

For the life of me, I could tell them apart: I was certain the one that was rising fast was the sourdough. It smelled like sourdough. Or maybe that was just the rye flour?

In the end I figured out which was which, but by then I botched the shaping of one of the sourdough loaves. Against all odds, the other one came out well.

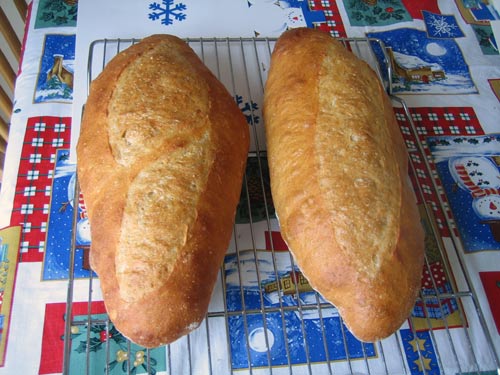
The poolish bread:
poolish batards

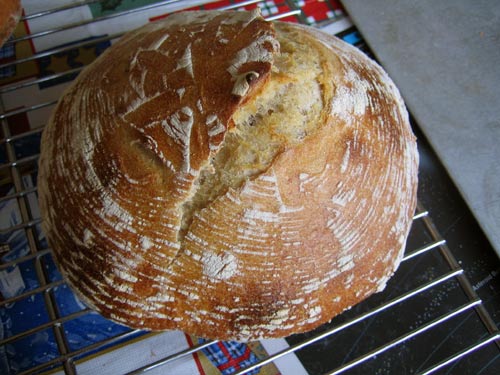
The sourdough round:
sourdough round

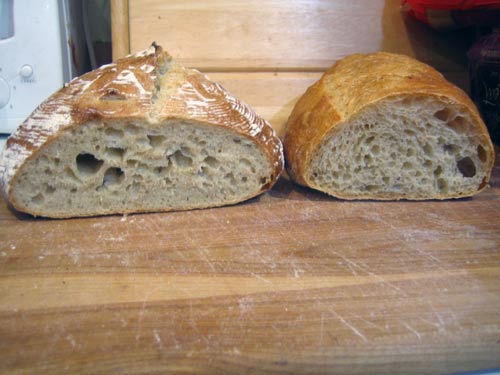
The two side-by-side (sourdough on left):
crumb

A close up of the sourdough:
sourdough crumb

The poolish bread was much lighter and had a much more evenly open crumb. The sourdough was somewhat dense and should have been allowed to rise another half hour or hour (and would have, if I'd remembered which one it was), but it still developed a beautifully irregular crumb and tasted marvelous. That it came out not only edible but excellent proves my assertion that even a dunderhead can bake a naturally leavened bread if they are willing to keep trying.

Next weekend I bake ONLY sourdoughs, or a sourdough and something that I couldn't possibly confuse it with, like a brioche or a challah.

BeckyBaker730's picture
BeckyBaker730

Honey-Wheat Potato Bread

I was in a baking mood today (well, on what day am I not?) so I decided to surf the net for an interesting recipe. I found this potato bread recipe on a website for a company that sells potatoes (convenient!). I adapted it to my tastes and the ingredients I had on hand. The recipe is as follows:

Honey-Wheat Potato Bread Makes 2 loaves (using 8x4x2" pans) 1 large potato, peeled and chopped into chunks 1 1/2 cups water 1/2 cup whole milk (approx.) 2 packages (1/4 oz each) active dry yeast 1 cup whole wheat flour 5 cups all-purpose white flour 3 TBS pure honey 2 TBS butter 2 tsp salt

Cook potato chunks in the water until they are tender. Do not drain! Reserve 1/2 cup of the potato water, and mash the potatoes with the rest of the water. Using measuring cup, add enough whole milk to potato mixture to make 2 cups of potato mixture (I needed about 1/2 cup of milk). Make sure reserved potato water is around 110 degrees F (if it has cooled too much, nuke it in the microwave for a few seconds until it warms up...if it is still too hot, wait till it cools). In a large mixing bowl, sprinkle the yeast onto the reserved potato water. Add mashed potato mixture, the cup of whole wheat flour, 1 cup of the white flour, the honey, the butter, and the salt. Beat on LOW speed for 30 seconds or until ingredients are combined. Scrape sides of bowl. Beat on HIGH speed for 3 minutes (set a timer!). Then, on low speed or with a wooden spoon, stir in as much of the remaining white flour as possible. Turn dough out onto floured surface and continue to knead in the remaining flour until a semi-stiff dough is formed. Knead dough, without adding extra flour, about 8 minutes. Place in oiled bowl and cover with plastic wrap. Let rise until doubled, about 1 hour. Gently deflate dough, divide in half, cover and let rest for 10 minutes. Shape dough into loaves or other desired shape, place in oiled pans, cover with plastic and let rise again till almost double, about 40 minutes. While loaves are rising, preheat oven to 375 degrees F. Bake loaves about 40 minutes. If crust starts to brown too much, cover with foil.

My husband gave me a mini digital camera for Christmas, just so that I can post photos of my baked goods. :-) Here are a couple pictures of my finished loaves...
Honey-Wheat Potato Bread

As you can see, the loaf on the left rose significantly higher than the loaf on the right during the 2nd rise. I was not expecting this. The only thing I can attribute it to is that I had quite a time shaping the left loaf, and thus ended up having to knead the dough a little as I shaped it. The right loaf did not get the extra kneading after punching the dough down after the first rise.

We couldn't wait till these loaves cooled, they smelled so good! We each had a slice to sample from the smaller loaf, and the flavor is amazing. Pleasantly nutty (probably from the whole wheat flour) with a wonderful crunchy crust, but soft and tender inside. I'll be baking this weekly from now on, I think!

bottleny's picture
bottleny

No-waste method of making starter from scratch

I really like Samartha's way of making a starter: no throwing out
anything.

The "usual" way of making a starter is throw out the half of previous one and then add flour and water.

Repeat several times and then you have your own active starter.

Just as mention here, you may toss out about 83% of flour to make a starter. Even though flour is cheap, you don't need to throw anything out and you can make a ~500g starter ready for making a sourdough bread by following Samartha's method.(step by step with photos)


This website also contains many useful information (with scientific spirit). I think it's good for the beginner. When your starter is ready, you can try to make a SF-style sourdough bread as shown.

Floydm's picture
Floydm

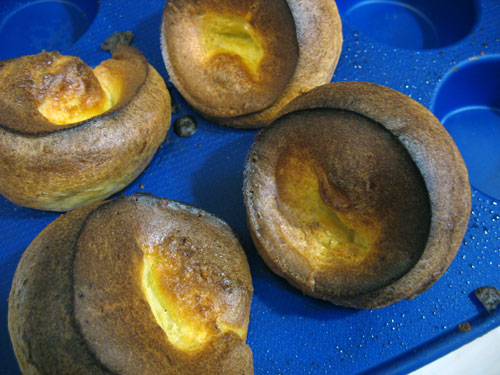
Popovers

popovers

I dig popovers. No leavening at all, just steam.

Popovers Make 1 dozen popovers 1 cup all-purpose flour 1/4 teaspoon salt 1 tablespoon sugar 1 tablespoon melted butter or vegetable oil 1 cup milk 2 eggs
Preheat oven to 375 degrees. Combine the dry ingredients and mix well. Combine the wet ingredients and mix into the dry ingredients until you have a very smooth batter. You can use an electric mixer or eggbeater to do this, do it by hand, or even mix it in a blender.

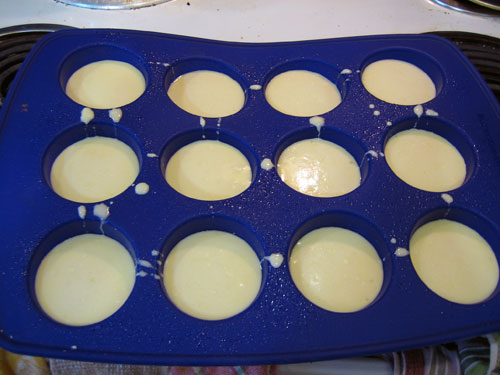
Pour the batter into greased muffin tins. The tins should only be about half full.
popovers

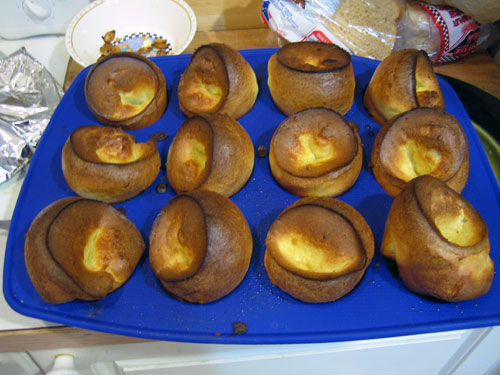
For a light-colored, drier popover, bake at 375 for 50 to 55 minutes. For a darker, crustier but moister in the inside popover, bake at 400 degrees for 40 minutes (as I did in this batch).
popovers

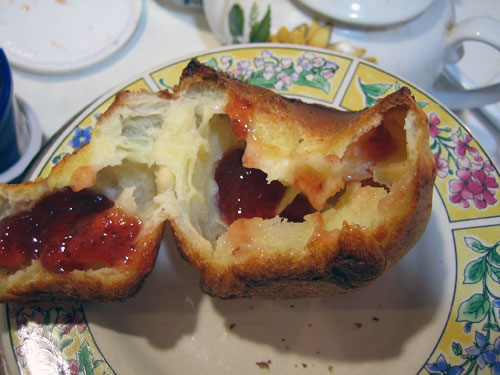
Remove from the oven and eat while hot with jam or butter.

popovers

Floydm's picture
Floydm

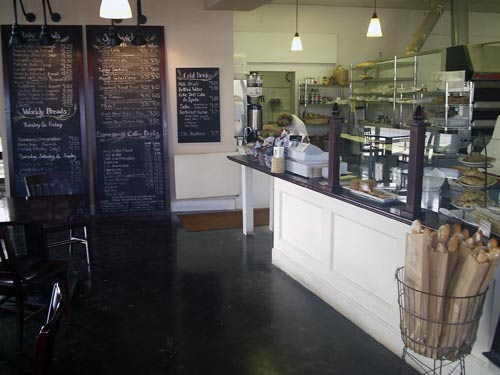
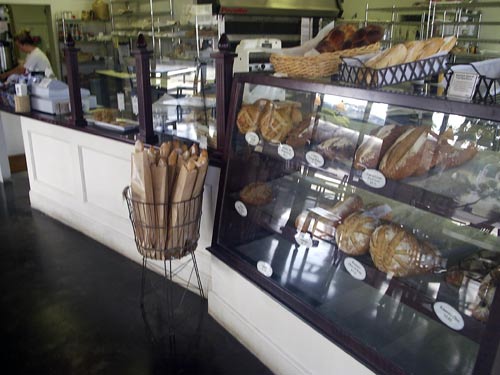
Con Pane Rustic Breads & Cafe

Con Pane Rustic Breads & Cafe 2750 Dewey Road, Suite 105, San Diego, California 92106

Hours:
Closed Wednesdays
M-F: 7:00am - 6:00pm
Sat: 8:00am - 6:00pm
Sun: 8:00am - 4:00pm

24 varieties of Artisan breads including Traditional French Baguettes, Pain au Levain, Artisan Multi-Grain, Raisin and Hazelnut Batard, Gruyere & Chive Boule, and Pane Cioccolata.

Also, brioche cinnamon rolls and chocolate twists, scones and cookies as well as hugh innovative sandwiches and coffee and espresso drinks.

Find it on the bakery finder.

Floydm's picture
Floydm

Apple Butter

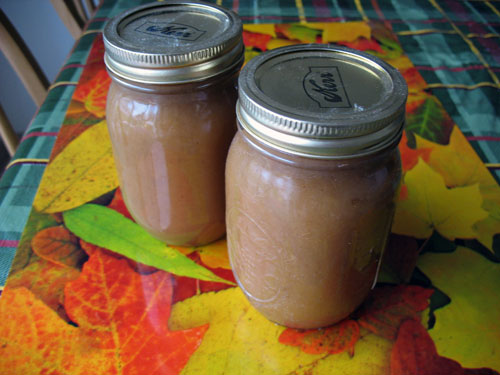
apple butter

Spiced Apple Butter 6 lbs. Golden Delicious or other variety apples (about 2 doz. medium-sized apples) 1 and 1/4 cups water 1/4 cup lemon juice 1/2 tsp salt 1 and 1/2 tsp cinnamon 1/4 tsp ground cloves 3 and 1/2 cups brown sugar 1/2 cup orange-flavored liqueur or orange juice
Core apples and cut in quarters; not necessary to peel them. Cook until soft, with the water and lemon juice. Remove from heat and put contents through sieve or food mill (i.e., make applesauce). Return to kettle and add all other ingredients except liqueur. Simmer, uncovered, stirring frequently to avoid burning on bottom. Be sure to stir more frequently as mixture thickens. It takes about 1-1/2 hrs. to thicken enough. Remove from heat and add liqueur. Seal in sterilized jars. Makes approximately 4 pints.
Floydm's picture
Floydm

Beware...

!!! BREAD IS DANGEROUS !!!

!!! BREAD IS DANGEROUS !!!

Research on bread indicates that:
1. More than 98 percent of convicted felons are bread users.
2. Fully HALF of all children who grow up in bread-consuming households score below average on standardized tests.
3. In the 18th century, when virtually all bread was baked in the home, the average life expectancy was less than 50 years; infant mortality rates were unacceptably high; many women died in childbirth; and diseases such as typhoid, yellow fever, and influenza ravaged whole nations.
4. More than 90 percent of violent crimes are committed within 24 hours of eating bread.
5. Bread is made from a substance called "dough." It has been proven that as little as one pound of dough can be used to suffocate a mouse. The average American eats more bread than that in one month!
6. Primitive tribal societies that have no bread exhibit a low incidence of cancer, Alzheimer's, Parkinson's disease, and osteoporosis.
7. Bread has been proven to be addictive. Subjects deprived of bread and given only water to eat begged for bread after as little as two days.
8. Bread is often a "gateway" food item, leading the user to "harder" items such as butter, jelly, peanut butter, and even cold cuts.
9. Bread has been proven to absorb water. Since the human body is more than 90 percent water, it follows that eating bread could lead to your body being taken over by this absorptive food product, turning you into a soggy, gooey bread-pudding person.
10. Newborn babies can choke on bread.
11. Bread is baked at temperatures as high as 400 degrees Fahrenheit! That kind of heat can kill an adult in less than one minute.
12. Most American bread eaters are utterly unable to distinguish between significant scientific fact and meaningless statistical babbling.

In light of these frightening statistics, it has been proposed that the following bread restrictions be made:
1. No sale of bread to minors.
2. A nationwide "Just Say No To Toast" campaign, complete celebrity TV spots and bumper stickers.
3. A 300 percent federal tax on all bread to pay for all the societal ills we might associate with bread.
4. No animal or human images, nor any primary colors (which may appeal to children) may be used to promote bread usage.
5. The establishment of "Bread-free" zones around schools.

This article was written by B.S. Wheatberry in a desert after consuming mass quantities of yeast bread then realizing his canteen was empty. (seriously :P )

Pages