The Fresh Loaf

A Community of Amateur Bakers and Artisan Bread Enthusiasts.

Most bookmarked

dmsnyder's picture
dmsnyder

My San Francisco Sourdough Quest
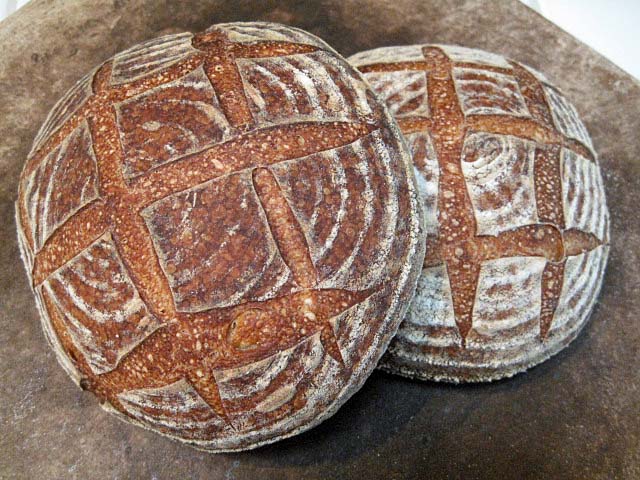
Progress is being made!

After my disappointment with the Kline, et al San Francisco Sourdough method, I re-read and re-digested what I know about time, temperature, ingredients and the care and feeding of sourdough flora. I suppose the principal new concept to sink in was that the fermentation temperature matters a whole lot, and what's best for yeast growth is not best for lactobacillus growth, and what's best for lactobacillus multiplication is not what's best for acid production. In a way, I rediscovered something I found out several years ago but neglected to pursue. (Reading old blogs was interesting.) Those very smart fellows at Detmolder were on to something: You can have it all, if you do it in stages. I'm pretty sure that what I did was not the only way to achieve pretty much the same result. It may not be the best way, but it worked for me. Note that I achieved the necessary temperature control with a Brød & Taylor Folding Proofer, but you can achieve this with a home-made proofing box as well.

My goal has been to make a moderately sour, mostly white “San Francisco style” sourdough bread that has a crunchy crust, an open crumb and a nice, sweet, complex flavor, not just sourness. Today's bake achieved all of these characteristics, and I'm a very happy baker (and bread eater)!

I started with the “San Francisco Sourdough” formula in Michel Suas' Advanced Bread and Pastry, but modified the method, as described below:

My stock starter is 50% hydration. My sourdough starter is fed with a mix of 70% AP, 20% WW and 10% whole rye.

I started by refreshing my stock starter with 40 g starter, 100 g water and 100 g flour mix and fermenting it at room temperature for 12 hours. I used this to build the stiff levain. (Note: This is a liquid starter - 100% hydration.)


Stiff levain

Bakers' %

Wt (oz)

Bread flour

95

2.5

Medium rye flour

5

0.15

Water

50

1.25

Liquid starter

80

2.15

Total

230

6.05

  1. Dissolve the starter in the water. Add the flour and mix thoroughly until the flour has been completely incorporated and moistened.

  2. Ferment at room temperature for 6 hours.

  3. Cold retard overnight.

  4. The next day, take the levain out of the refrigerator and ferment at room temperature for another 2-4 hours. The levain is ready when it has expanded about 3 times, and the surface is wrinkled (starting to collapse). 

Final dough

Bakers' %

Wt (oz)

AP flour

100

14.85

Water

72.8

10.85

Salt

2.53

0.35

Stiff levain

40

6.05

Total

215.33

32.1

Method

  1. In a stand mixer, mix the flour and water at low speed until it forms a shaggy mass.

  2. Cover and autolyse for 1-2 hours. (Yup. I autolysed for 2 hours.)

  3. Add the salt and levain and mix at low speed for 1-2 minutes, then increase the speed to medium (Speed 2 in a KitchenAid) and mix for 5 minutes. Add flour and water as needed. The dough should be rather slack. It should clean the sides of the bowl but not the bottom.

  4. Transfer to a lightly floured board and do a stretch and fold and form a ball.

  5. Place the dough in a lightly oiled bowl and cover tightly.

  6. Ferment at 78º F for 3 hours with a stretch and fold at 1 hour.

  7. Divide the dough into two equal pieces.

  8. Pre-shape as rounds and rest, covered, for 10 minutes.

  9. Shape as boules or bâtards and place in bannetons. Place bannetons in plastic bags.

  10. Proof at room temperature (68-70º F) for 1-2 hours.

  11. Cold retard the loaves overnight.

  12. The next morning, proof the loaves at 85º F for 2-3 hours.

  13. 45-60 minutes before baking, pre-heat the oven to 480º F with a baking stone and steaming apparatus in place.

  14. Transfer the loaves to a peel. Score the loaves as desired, turn down the oven to 450º F, and transfer the loaves to the baking stone.

  15. Steam the oven.

  16. After 15 minutes, remove the steaming apparatus, and turn down the oven to 425º F/Convection. (If you don't have a convection oven, leave the temperature at 450º F.)

  17. Bake for another 25 minutes.

  18. Turn off the oven, and leave the loaves on the stone, with the oven door ajar, for another 10 minutes.

  19. Transfer the loaves to a cooling rack, and cool thoroughly before slicing.
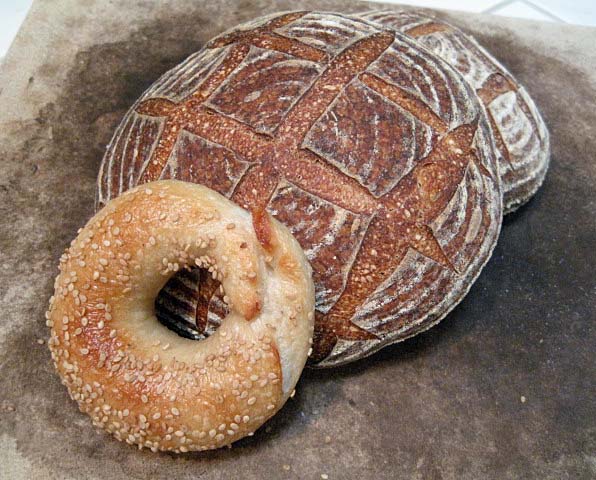
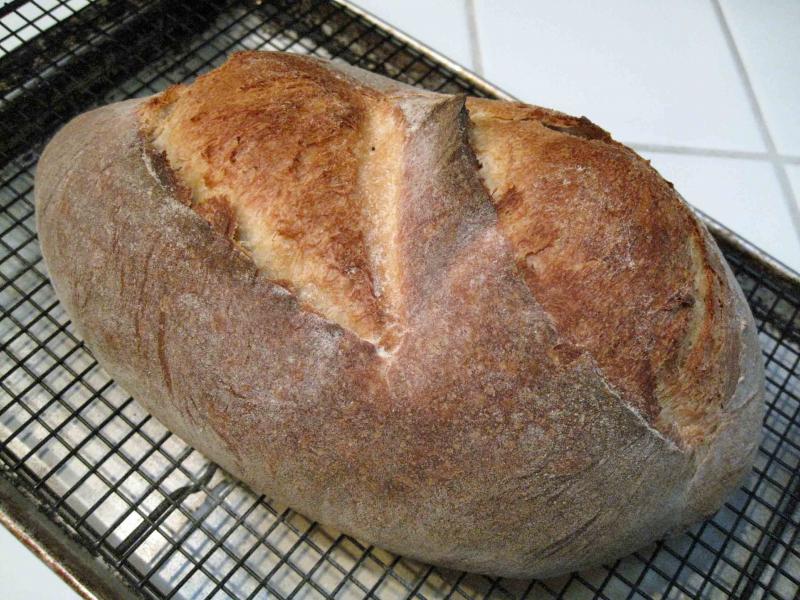
San Francisco Sourdough (and New York Bagel from ITJB. This weekend's "Coast to Coast" baking.) 
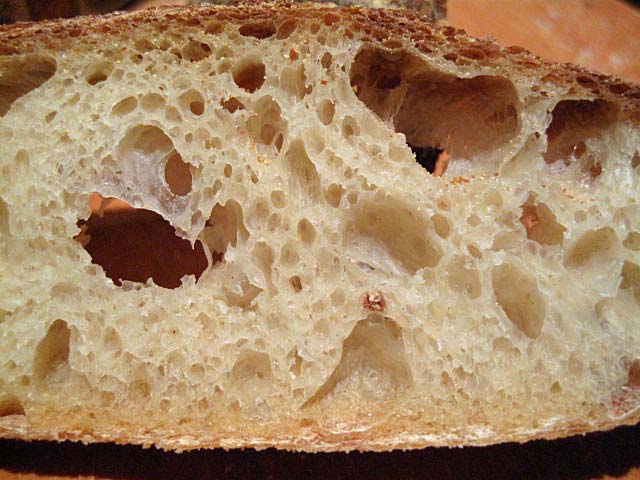
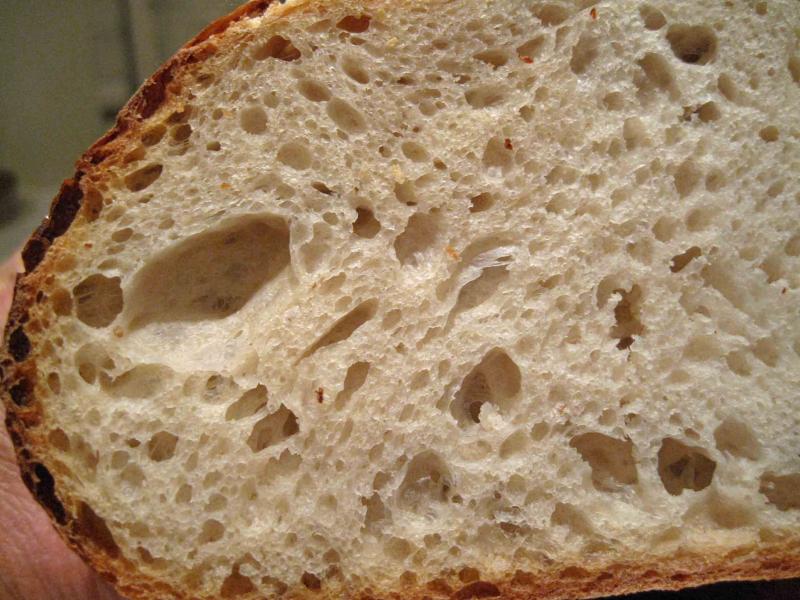
San Francisco Sourdough Crumb

These loaves had a rather flat profile but did have fair oven spring and bloom. When sliced after cooling for 4 hours, the crust was crunchy. The crumb was open. The aroma was decidedly sour. The crumb was tender-chewy and cool in the mouth. The flavor of the crumb was a bit sweet and wheaty with a moderately sour after taste. The crust was nutty, but I would have personally enjoyed it more had it been darker, even though that would not have been strictly in the the “San Francisco Style” of old.

This method is spread over 3 days, so it requires some advance planning. Since it requires little time, except on the second day, it should be easy to fit into almost anyone's schedule. It this is the kind of bread you're after, it's definitely worth the effort.

Future plans

  1. Substitute 5-10% whole wheat for some of the AP flour in the final dough.

  2. Make some larger loaves.

 David

Submitted to YeastSpotting

Addendum added 2/4/2012: Please see My San Francisco Sourdough Quest, Take 2 for my next bake. The modifications resulted in improvements in the crumb and a more assertively sour bread.

dmsnyder's picture
dmsnyder

San Francisco Sourdough Bread using Larraburu Bros. formula

Back in May, 2010, bnom posted a reminiscence of the San Francisco Sourdough bread baked by Larraburu Brothers Bakery, which went out of business about 30 years ago after a fire in their plant. (See Divine inspiration--for me it way Larraburu Brother's SF SD. What was it for you?) For many who grew up eating it, the Larraburu bread was the quintessential San Francisco Sourdough. Although the bakery is long-gone (and much lamented), Doc.Dough found a journal article from 1978 describing their formula and process, so we might attempt to reproduce this famous bread.
Doc.Dough's citation is quoted below, as follows:

Title: Lactic and volatile (C2-C5) organic acids of San Francisco sourdough French bread

Cereal Chemistry 55(4): 461-468; Copyright 1978 The American Association of Cereal Chemists

Authors: A. M. Galal, J. A. Johnson, and E. Varriano-Marston

The Larraburu Company produces San Francisco sourdough French bread by the sponge and dough process.  Each day a piece of straight dough or starter sponge known as the "Mother" is saved and refrigerated to be used as a starter sponge the following day.  This starter sponge is used to make more starter sponge as well as sponges for bread production.  The starter sponge consists of 100 parts of clear flour (14% protein), approximately 50 parts of water, and 50 parts of the starter sponge.  The ingredients are mixed and fermented for 9-10 hr at 80°F.  The bread dough is made by mixing 100 parts flour 12% protein, 60 parts of water, 15 parts of sponge, and 1.5-2% salt.  The dough rests 1 hr and then is divided, molded, and deposited on canvas dusted with corn meal or rice flour.  The dough is proofed for 4 hr at 105°F (41°C) and 96% relative humidity and baked at 420°F (216°C) for 40-50 min in a Perkins oven with direct injection of low pressure steam (5 psi).  Oven shelves were covered with Carborundum.

Specific instructions for mixing are not provided, but I would surmise that, because of the very short bulk fermentation and long proofing times, Larraburu Brothers used an intensive mix. This would result in a bread with high volume but a relatively dense, even crumb. I altered the procedure to use an autolyse, a less intensive mix, a longer bulk fermentation with a stretch and fold and a shorter proof. My intention was to bake a bread with a more open crumb structure and better flavor.

The autolyse allows the flour to absorb the water and for gluten to start developing. This head start on gluten development allows for a shorter mixing time to get to the desired stage of gluten development. Less mixing has two principal effects: 1) The gluten strands are less organized, resulting in a more open crumb with a random distribution of holes of varying size. 2) Less oxidation of the carotenoid pigments in the flour, resulting in a more yellow crumb color and better bread flavor.

Note that the fermentation and proofing temperature control was made possible by using a Brod & Taylor Proofing Box.

To make one 1 kg loaf:

Sponge (Stiff Levain)

Baker's %

Wt (g)

High-gluten flour

100

45

Water

50

22

Stiff starter

50

22

Total

200

89

Mix thoroughly and ferment for 9-10 hours at 80º F in a lightly oiled bowl, covered tightly.

Final dough

Baker's %

Wt (g)

AP flour

100

565

Water

60

339

Salt

2

11

Sponge (stiff levain)

15

85

Total

177

1000


Procedure

  1. Mix the flour and water in a stand mixer with the paddle for 1-2 minutes at Speed 1.

  2. Cover the mixer bowl tightly and autolyse for 20-60 minutes. (I autolysed for 60 minutes.)

  3. Sprinkle the salt on the dough and add the sponge in chunks.

  4. Mix for 1-2 minutes with the paddle at Speed 1, then switch to the dough hook and mix for 5 minutes at Speed 2. Adjust the dough consistency by adding small amounts of water or flour, if needed. (I did not add either.) The dough should be tacky but not sticky. It should clean both the sides and bottom of the mixing bowl.

  5. Transfer the dough to a clean, lightly oiled bowl. Cover tightly.

  6. Ferment at 105º F for 2 1/2 to 3 hours in a humid environment. Stretch and fold once at 1 1/4 hours.

  7. Pre-shape the dough round and cover with a towel or plasti-crap.

  8. Let the dough relax for 15-20 minutes.

  9. Shape as a boule or bâtard.

  10. Proof at 105º F in a floured banneton or en couche, covered, until the dough slowly fills a hole poked in it with a finger. (This was in 30 minutes, for me!)

  11. About 45 minutes before baking, pre-heat the oven to 480º F with a baking stone and steaming apparatus in place.

  12. Transfer the loaf to a peel and score it as desired.

  13. Transfer the loaf to the baking stone. Turn down the oven to 450º F.

  14. Bake with steam for 15 minutes. Remove your steaming apparatus, and bake for another 25 to 35 minutes until the crust is nicely colored and the internal temperature is at least 205º F.

  15. Turn off the oven, but leave the loaf on the baking stone with the oven door ajar for another 10-15 minutes.

  16. Transfer the loaf to a cooling rack, and cool completely (at least 2 hours) before slicing. 

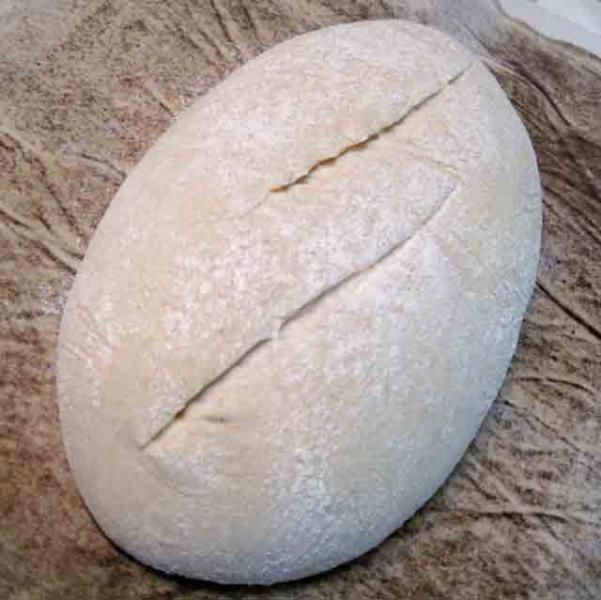
Proofed, slashed and ready to bake

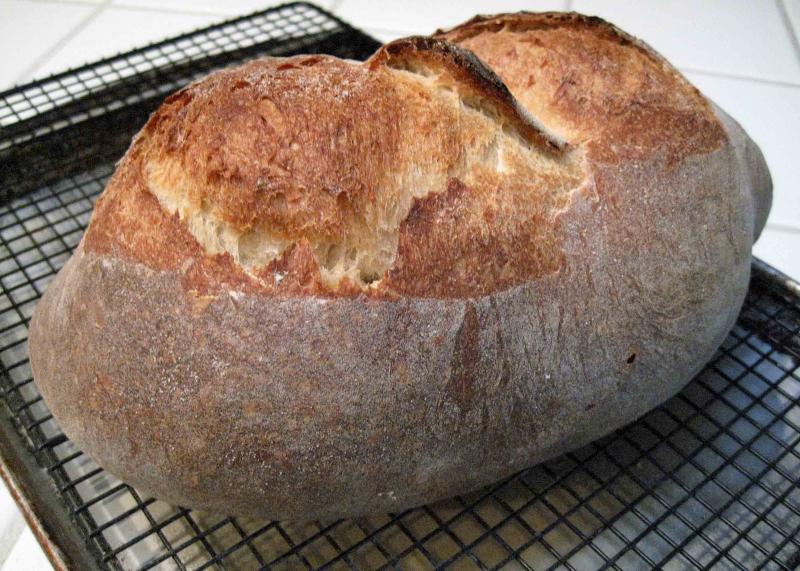
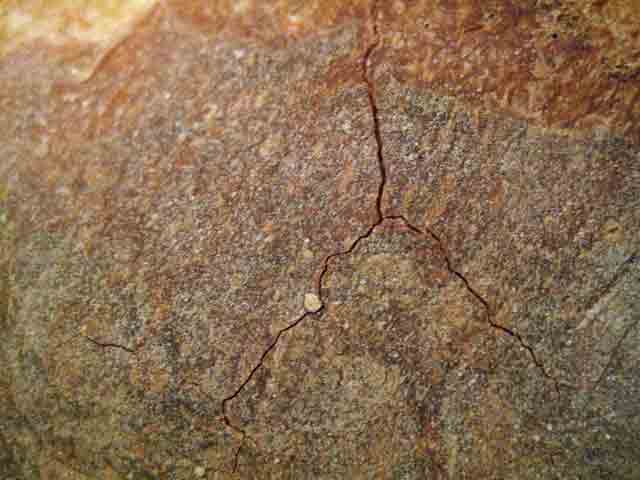
The bread had exuberant oven spring and bloom. In hindsight, it could have proofed for another 15 minutes or so without harm. I baked it for a total of 40 minutes. The crust was very firm, and the loaf sang nicely while cooling. The aroma was that of fresh-baked bread without any yeasty overtones. 

Crackley Crust

Classic SF SD crumb

I sliced and tasted the bread about 3 hours after it came out of the oven. The aroma of the bread was sweet and wheaty. The crust was very crunchy with a wonderful flavor I have had from the crusts of excellent bakery loaves but not before from my oven. The crumb was quite tender and cool-feeling. The flavor was sweet with only a hint of lactic acid, creamy-type sourness. I could discern no acetic acid presence at all, much to my surprise.

Now, that's not "bad!" I'd say this may be the best flavored French-style pain au levain I've ever made. But it does certainly not have the assertive, vinegary tang usually associated with San Francisco Sourdough. In fact, my wife, who is not at all fond of super-sour sourdoughs, said, "This is better than San Francisco Sourdough!" I try not to argue with her, but it's clearly a matter of taste. 

I'm going to give this recipe some thought and may tweak it to get more sourness, but, you know, I may make it just like this again too. It's really outstanding!

David

Submitted to YeastSpotting 

txfarmer's picture
txfarmer

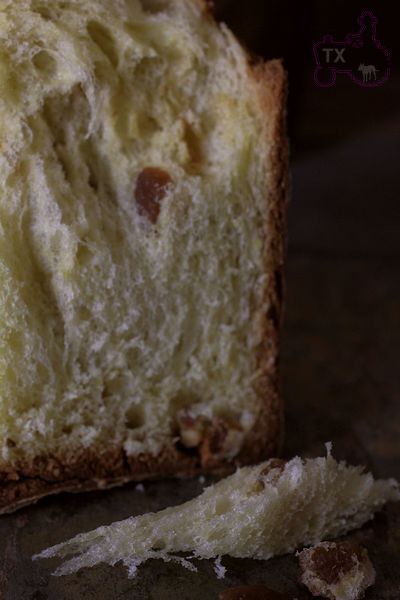
Francesco Elmi Traditional Sourdough Panettone - 2 loaves, 16 yolks, many many hours

Sending this to Yeastspotting.

Click here for my blog index.

It's that time of the year again -- when I sacrafice sleep in honor of holiday spirit. Starting early this year since I am moving soon, and sourdough panettone makes a great goodbye gift. This recipe is from here: 53% butter, 36% sugar, and 50% egg yolks (that's 16 yolks for 2 loaves my friends, as I was seperating them, I was praying the breads would work out, I really would like NOT waste a whole case of eggs for nothing!)! It's rich, it's light as air, it's melt in your mouth, I am pretty sure my friends will remember me for a looooong time! I follow the recipe closely with the following notes:

- Yes, the link is in Italian, this is where we put Google Translate in good use.
- Instead of sultanas and candied fruits, I got inspired and add candied chestnuts. Recipe can be found here. Yes, it takes 4+ days to make, but hey, with this sourdough panettone thing, one should just ignore time spent, money spent, or fat/cholesterol content. :P I didn't make quite enough, so my add-in ingredients was 87.5% of what the formula specified for both sultanas and candied fruits, making the final loaves slightly lighter (but definitely not smaller, see below).
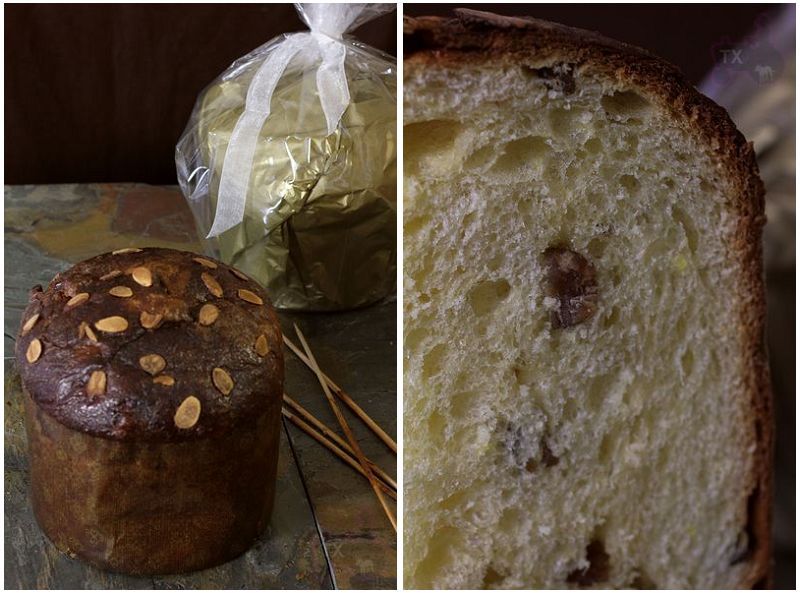
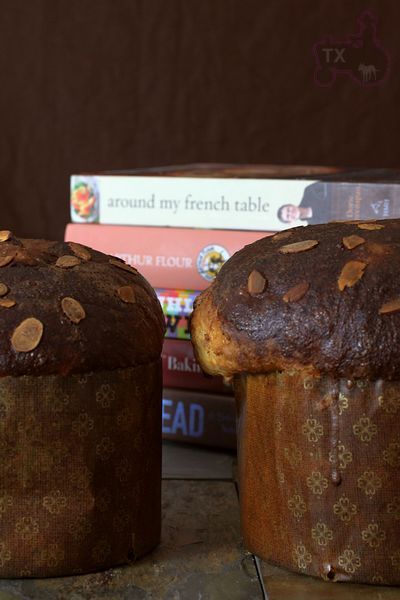
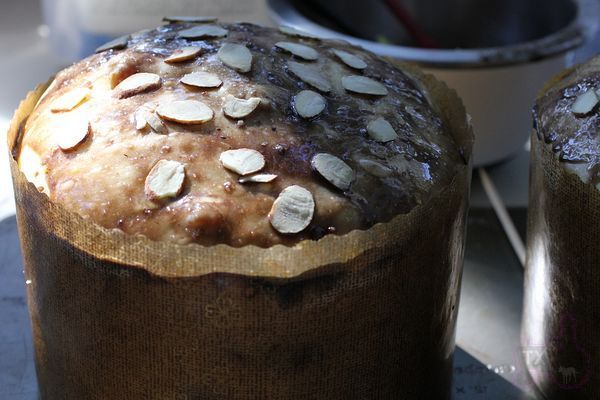
- I made 2/5 of the formla, which means I got 2 big loaves. If I had divided the dough evenly, each should be 1040g, perfect for the paper case. However, one loaf was a gift, the other was for ourselves, so I put 1100g in the gift case, only 980g in the other. From last years experience, I thought 1100g would fit, but OMG, this formula is much richer, which means the dough rose much higher. As you can see below, the 980g looks perfect, the 1100g one was threatening to spill over! Oh well, my friend had no objection with some extra yummy bread.
-Key #1 for a successful sourdough panettone, especially such a rich one, is an active Italian mother starter. I first kept my 100% liquid starter at room temp for 2 days (feeding everything 12 hours), then converted to 50% firm starter (20g 100% starter +20g Bread Flour+5g water), then keep it at 85F and feed it every 4 hours with following ratio: (starter: flour: water = 1:1:0.5). Did this for 48 hours, the starter more than tripled between each feeding.
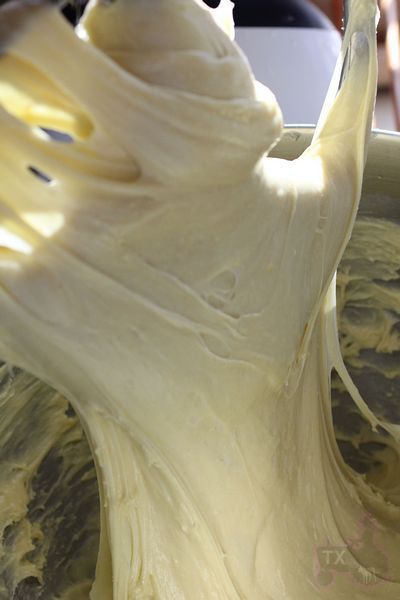
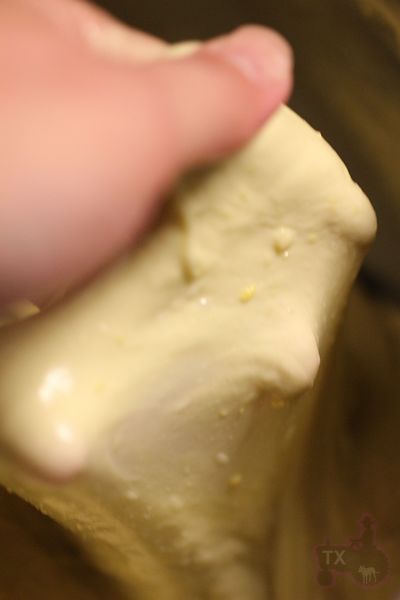
-Key #2 for a successful sourdough panettone is a thorogh kneading. For the first dough, butter must be added little by little after the dough as come together, then I kneaded until the dough came together again and cleared most of the mixing bowl (no need for windowpane). Be careful not to overknead, with so much yolks and butter, it's easy to overknead. However, be sure not to underknead, otherwise, the 2nd dough would be much harder to knead. The following is first dough after kneading:

For 2nd dough, butter must be added little by little AFTER the dough has come together and clear the bowl. After butter is added, the dough must be kneaded until you can get a thin but strong windowpane. The dough literally felt like liquid silk, draping down from my hands.

-Unlike last year, the dough rose right on schedule this time, indicating an active starter and good kneading. After 5 hours at 30C, the dough came to the rim of the case. The chocolate glaze recipe I used was from AB&P.

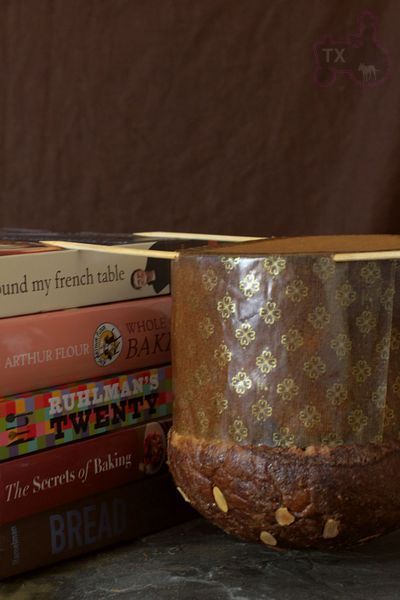
- I hung the loaves upside down between stacks of books for 5 hours after baking.

- For my last years panettone post please click here, it also includes info on the paper case.

Definitely richer and lighter than last year's version

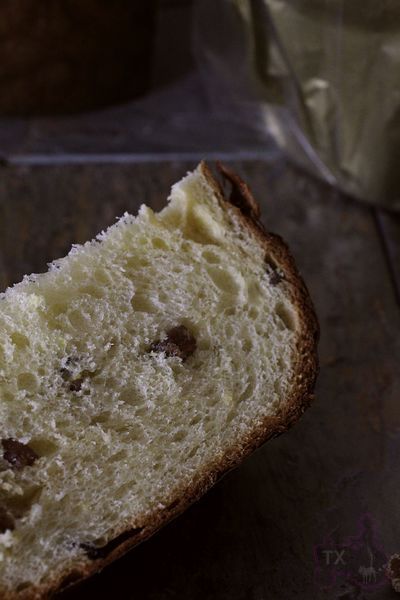
Shredding...the texture is literally like air, the flavor on the other hand, hits like a rock! If I can get my new kitchen in order before Christmas, I am sure I will make more of these.

txfarmer's picture
txfarmer

Light Sourdough Rye with Spinach and Feta Cheese - without burning my finger this time

Sending this to Yeastspotting.

Index for my blog entries

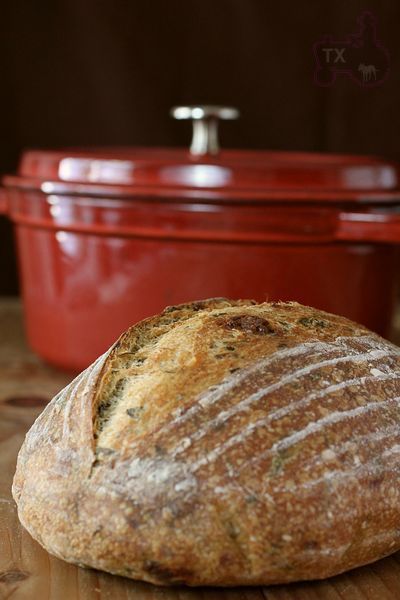
The first time I attempted to bake bread in a cast iron pot (here), I burned my fingers so bad that some finger prints were lost for good. Since then I have tried a few more time, like anything, it's about figuring out a good process and stick with it. I can now do "cast iron pot bakeing" quite safely.

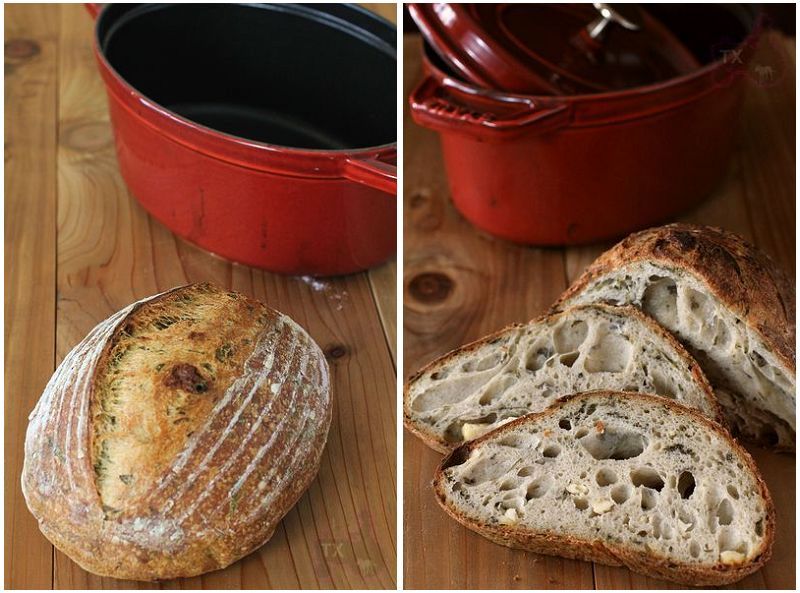
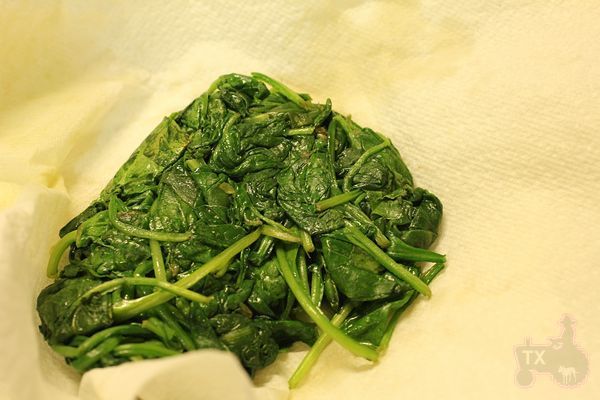
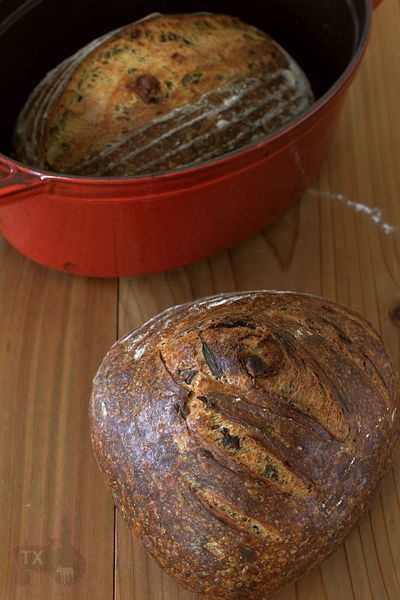
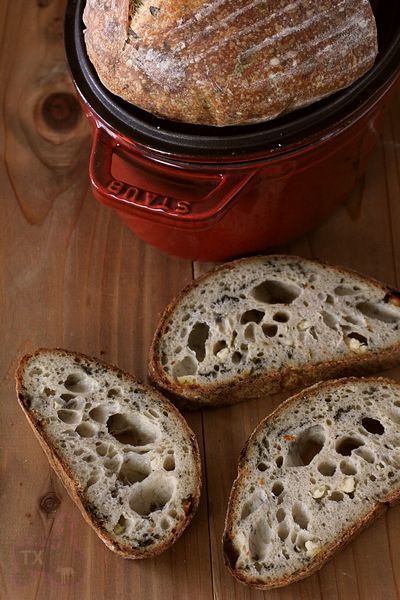
This particular formula has two of my favorite salad ingredients: spinach and feta. To control moisture, I stired fried spinach until soft, squeezed out liquids before putting them in the dough. The slighter larger batard was baked in a covered cast iron pot, while the smaller trangle one was baked on the stone alongside, both turned out well with good ovenspring.

Light Rye With Granola

- levain
whole rye, 81g
water, 65g
rye starter (100%), 9g

1. Mix and let rise 12-16hours.

- final dough
bread flour, 485g
salt, 11g
raw spinach, 114g, stir fried in a little oil until soft, pat dry on a paper towel

feta cheese, 143g, crumbled
water, 316g
all levain

2. Mix levain, flour, and water, autolyse for 20 to 60min, add salt, mix @ medium speed for 3-4 min until gluten starts to develope. Add spinach and feta, mix @ slow speed until evenly distributed.
3. Bulk rise at room temp (~75F) for about 2.5hrs. S&F at 30, 60, 90min.
4. Divide dough into two portions: 650g and 550g, shape into batard and boule, put in basketes smooth side down, put in fridge over night.
5. Next morning take the dough out to finish proofing, about 100min for me. Score.
6. Bake at 450F with steam(either put in preheated cast iron pot and cover with lid, or put dough on preheated baking stone and pour water in another cast iron pan to create steam) for the first 20min, take away cast iron pot lid or take out the pan with water, keep baking for another 25min. Turn off oven and crack the door open a bit, and leave the breads inside for 10min before taking out.

Good volume with nice score and ear.

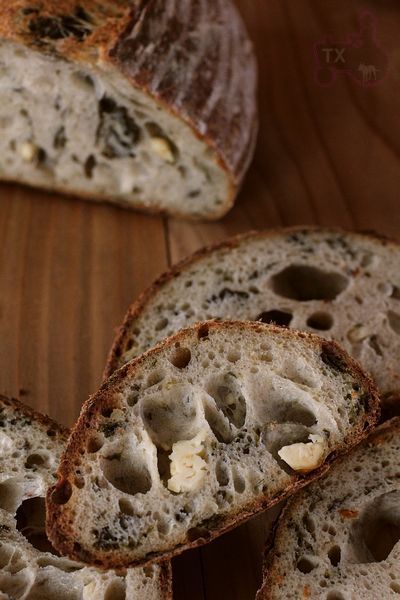
Crumb is surprisingly open for a 68% hydrated dough

Love those big chunks of cheese, great flavor from the combo of feta, spinach, and rye. A full meal right there.

ehanner's picture
ehanner

Hand Made Bagels-Really-Recipe update

Those of you who have been following the forum have noticed the frequent posts on Bagels of all kinds. I have been experimenting with toppings and flavoring myself. Lumos has her beautiful WW bagels displayed on the front page. There has been much written about how firm/dense bagel dough is and warnings about not over heating our mixers by too large of loads or repeated batches. I decided to try Mike Avery's Sourdough Bagel recipe as written in his book "Back to Bagels" but instead of using a Kitchen Aid or my DLX mixers, I would do the entire mixing and kneading development process by hand. Mikes basic recipe includes a small amount of olive oil which makes the crumb softer and easier to chew. Of all the bread theme books I own, Back to Bagels is the very best value at $5 for the PDF form and I would say the most comprehensive book on the subject. I highly recommend the book for new and old timers alike. Mike details 8 different bagel flavors and how to prepare them. If you like blueberry bagels, spring for the $5. book and try the sourdough version. Utterly delicious!

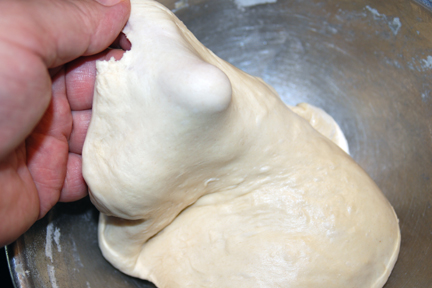
Let me say I didn't expect to be able to easily develop the dough to a nice window pane condition, using only my hands. With all we have all learned about how time will do what we used to beat into the dough, I doubted a 56% hydration dough would stretch and fold well enough to do the job.--I was wrong.  Here are the photos in evidence.

I apologize for the lengthy number of images. The idea of hand mixing and kneading bagel dough is so novel I thought some of you might like to try it. Since it is almost entirely a matter of technique, I thought the photos would answer most questions and encourage people to try this simple and gratifying process.

I'll post the recipe for these as soon as I hear back from Mike. Enjoy! Recipe now added courtesy of Mike Avery. This is just the recipe. The mixing and shaping techniques are described in detail in the book. There is a selection of other bagel recipes, each one delicious. Here is a link to the entire Bagel section which goes into much more detail about the process. It's a good read for anyone just learning about sourdough and bagels.

Eric

Sourdough Plain Bagels

These are a simple bagel, the same bagel that I featured in section 4, but with a larger batch size. This bagel is the basis for all of our bagel recipes.

Ingredients:

6 bagels                        12 bagels            Ingredient

230 grams                   460 grams          Water

8 grams                        16 grams             Light Olive Oil

45 grams                      90 grams            Sourdough Starter

450 grams                    900 grams          High Protein Bread Flour

10 grams                      20 grams             Salt

15 grams                      30 grams             Malt Powder

 Mix the ingredients, and allow to rise about 2 hours, or until they are ready. Cut into 6 or 12, 120 gram pieces, round or roll into cigars, cover and let rest 30 minutes. Do final bagel shaping, put them on a baking sheet covered with parchment or Silpat, oil, cover, give them an hour of

floor time, and then refrigerate them for 12 to 24 hours. Boil in malted water, seed if desired, and then bake at 500F for about 15 minutes.


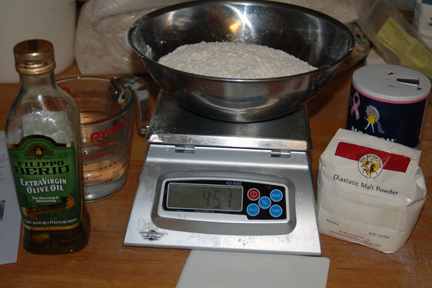
Mise en Place


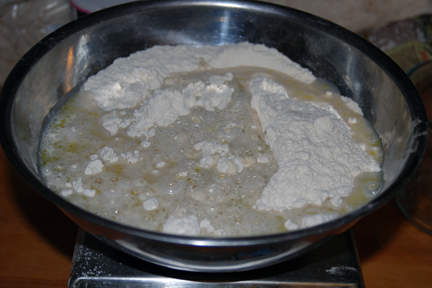
All in the bowl, ready for the spoon.


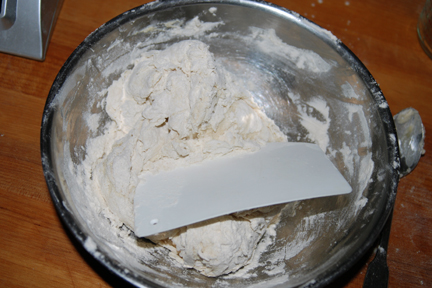
Started with a spoon and switched to the plastic spatula to incorporate this dry dough.


After a minute of scraping and turning , still some dry flour at the bottom.
This is where you could be tempted to add additional water. Fear NOT. It will eventually be fine.


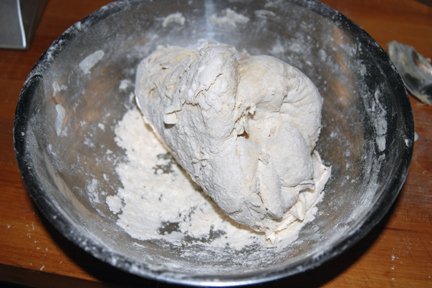
It took a mere 2 minutes to get to this point. All flour is incorporated and the dough is one mass.


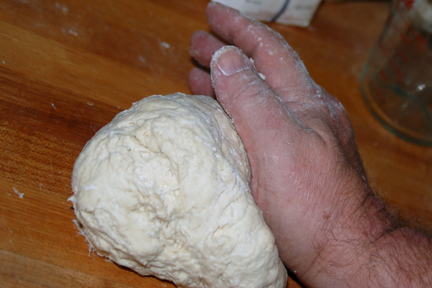
I hand kneaded just long enough to be sure there were no lumps of dry dough. You can see the mass is lumpy and not smooth at all.


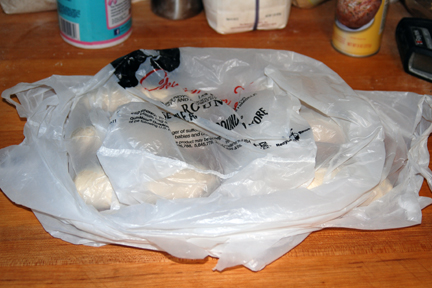
Dough is now resting for 20 minutes covered with an expensive shopping bag.


Now rested, on to the first stretch and fold. There were 3 S&F's in 20 minute increments.


The second stretch. It teases out easily and letter folds nicely. Now getting smooth.


This is after the 3rd S&F. Dough is smooth and silky if firm. Quite impressive for a firm hand mixed dough.


I was able to tease out a nice window pane. It doesn't show well in this photo but I could see my finger through the membrane. The time since first mixing the dough is now 1 hour and 20 minutes.


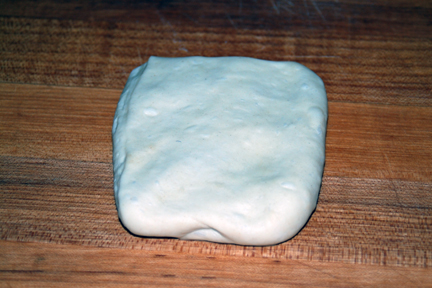
All the dough is spread out on the counter ready to be divided into squares this size and shape.


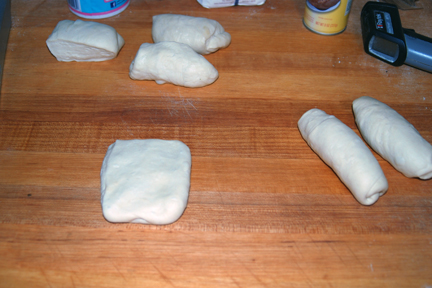
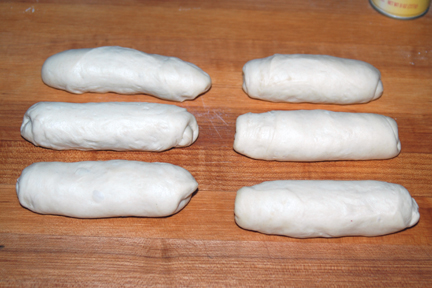
Each 125g piece is flattened into a square/rectangle and tightly rolled into a log as a pre shape.


Ready to rest and roll.


Resting under plastic.


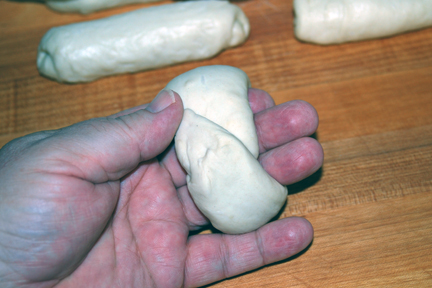
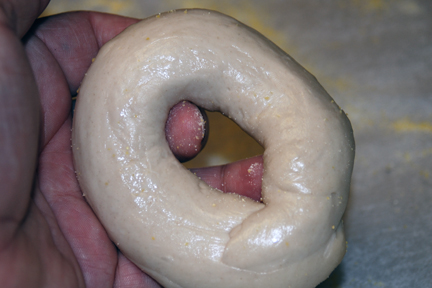
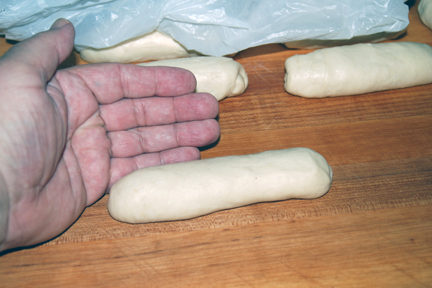
Rolled log, about to be wrapped around 3 of my fingers. Hand for scale.


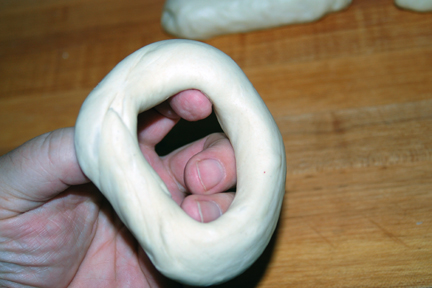
Notice blunt ends are overlapped. When you roll the joint on the counter, it spreads out and becomes even or the same thickness all around the ring. (at least that's the idea)


Stretch the inside out gently or it will close up later. I usually go back and open the ring again before the fridge.


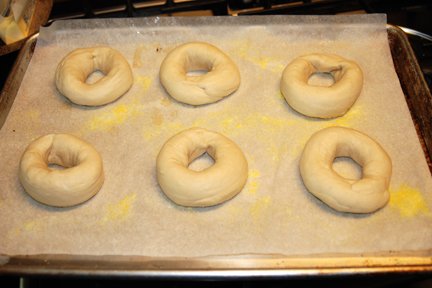
This is a half batch. Just the right amount for a small family for a couple days.
The recipe calls for  1 hour bench time after shaping and before refrigerating. The one hour is allowing the dough to warm to room temp and begin to wake the yeast. Depending on your starter, the room temp and how much gas was produced during the ferment yesterday, your bagels may or may not float test at this point. Try floating one in cool water. If it floats go ahead to the next step of boiling. If not wait another 15 to 30 minutes and try again.


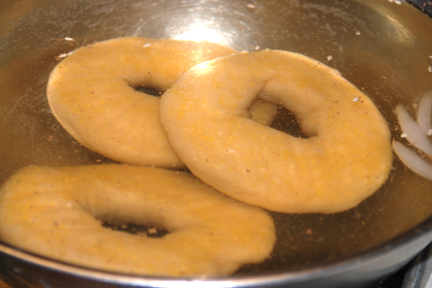
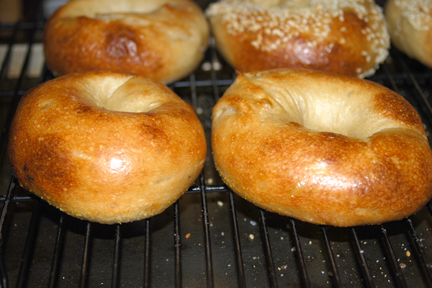
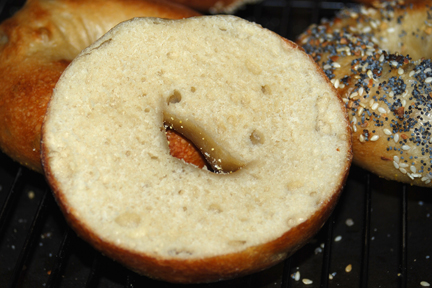
Here are my first 3 bagels sitting on the bottom. They had not proofed long enough. The next 3 did float. You can see in the crumb photo that the crumb is dense and not as open as I would like. The float test will prevent this happening.


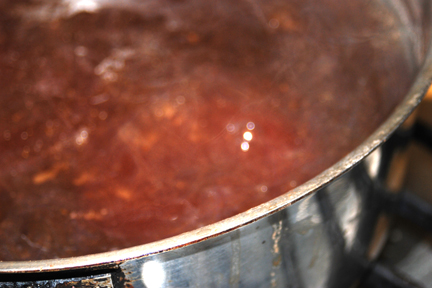
This image is out of order. I am holding a cold dough ring about to drop it into the boiling malted water.


Out of the hot and into the ice water. Still not floaters.


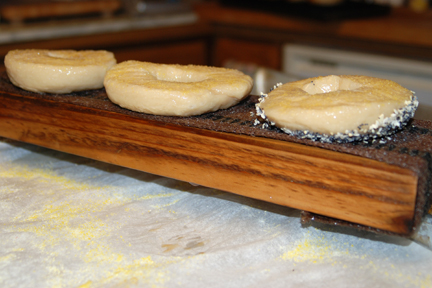
One seeded and two plain on the board, ready for baking.


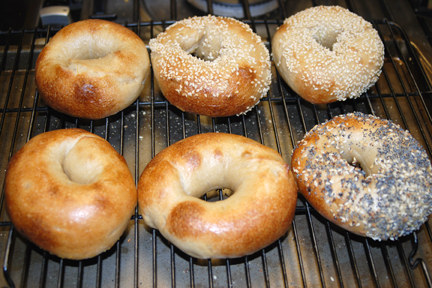
Done baking. They are a little blotchy to my eye. i was trying to cook them more blond this time.


A better close up I think.


The crumb is just barely done and slightly dense. Never the less quite delicious. Next time I'll add 1 minute to the 15 minute baking time.


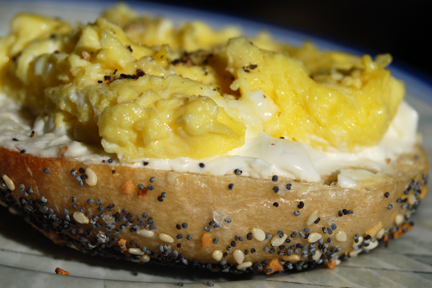
My breakfast this morning, plus a cup of strong, black coffee.


hanseata's picture
hanseata

LÜBECKER - LUEBECK RYE

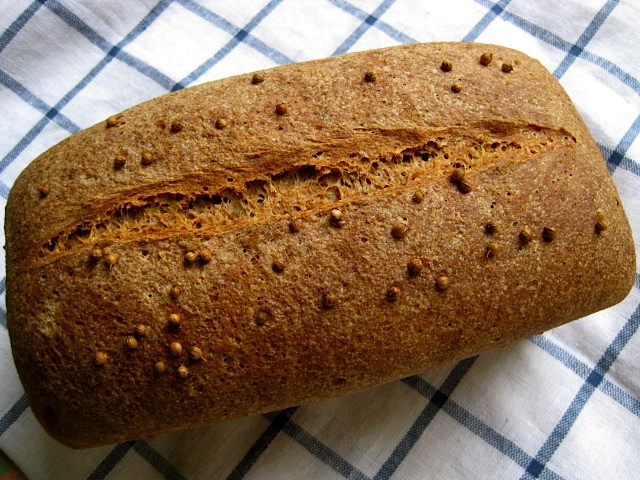
This is a milder, less tangy version of a typical German rye/wheat everyday bread, made without sourdough. I called it "Lübecker", because this was one of my first successful adaptions of an old German recipe to American ingredients, and the medieval Hanse town Lübeck is one of my favorite cities. 

I changed the technique from a 1- to a 2-day process, working with pre-doughs to achieve a much better taste (with less hands-on work).

(Of course, this bread can be also made with sourdough).

LÜBECKER - LUEBECK RYE

SOAKER
80 g rye flour
136 g whole wheat flour
3 g salt
92 g buttermilk
83 g water
 
BIGA
216 g whole wheat flour
1 g instant yeast
160 g water
 
FINAL DOUGH
all soaker and biga
48 g whole wheat flour
9 g salt
5 g instant yeast
15 g honey
45 g sunflower seed oil (or other vegetable oil)
1 tsp. caraway seeds, ground
¾ tsp. fennel seeds, ground
1 tsp. coriander, ground
1 tsp. coriander, whole, for topping

DAY 1 morning:

In a small bowl, stir together all soaker ingredients. In a second bowl, mix all biga ingredients at low speed (or with a big spoon) for 1-2 minutes, until they come together. Knead at medium-low speed (or by hand) for 2 minutes, let rest for 5 minutes, then resume kneading for another 1 minute. Place in oiled bowl, cover, and refrigerate.

Remove biga from refrigerator 2 hours before using to de-chill. (Cutting biga into small pieces helps to distibute preferment more evenly in final dough).

In the evening: prepare final dough. Mix all ingredients at low speed (or by hand) for 1-2 minutes, until coarse ball forms, and all flour is hydrated. Knead at medium-low speed for 4 minutes. Let dough rest for 5 minutes, then knead for another 1 minute. Place in oiled container, cover, and refrigerate overnight.


DAY 2:

Remove dough from refrigerate 2 hours before using to de-chill.

Preheat oven to 425 F/220 C, including steam pan.

Shape dough into sandwich loaf, place in greased loaf pan, mist with water and sprinkle with coriander. Press seeds gently into dough. Slash. Cover, and let rise at room temperature for 45 - 60 min., or until dough has grown to 1  1/2 times its original size.

Place bread into oven, and pour 1 cup of boiling water into steam pan. Reduce heat to 400 F/200 C, and bake for 20 minutes. Remove steam pan, rotate bread 180 degrees, and continue baking for another 20 - 30 minutes. (Internal temperature: at least 195 F, bread should sound hollow when thumped on bottom).

Remove bread from loaf pan, and let cool on wire rack.

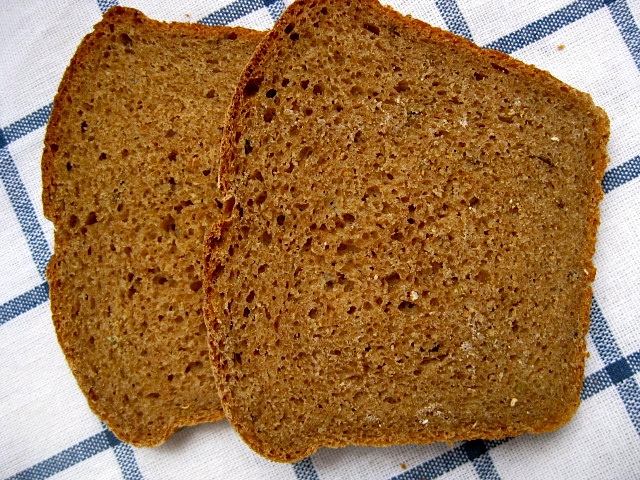
Lübecker Crumb

lumos's picture
lumos

V - Better Than Poilane!!..........?????????

In my second blog entry,  I wrote that I baked three varieties of bread for my friend;  WW bread (with right amount of salt!), cocoa-flavoured bread with cranberry & walnuts, and the other one. For the first two bread,  I’ve already shared the formulae in my earlier blogs.  So, today I’d like to share the recipe for the last one,  which is actually the favourite of this friend I baked those breads for. 

She’s my best and most trusted foodie friend for many years and my regular companion to Borough Market where we pay absurd price our  pilgrimage occasionally to enjoy getting ripped off their wonderful (no editing here. They are really wonderful….most of the times) produce, not only from the British Isles but also from Continental Europe and more exotic places far afield.  And every time we go there, we first bee-line to Neal’s Yard Dairy  first to buy our favourite cheeses (their Colston Basset Stilton  is to die for and this relatively new Scottish blue  is to kill for!) and a few loaves of bread from the selection which they sourced from several highly-regarded artisan bakeries in and around London.  One of the breads we ALWAYS used to buy was, of course, THE famous(ly-overpriced) Poilane……until one day I conjured up the recipe of this ‘the other bread' (...Starting to sound like Harry Potter's 6th book...).

 This formula came about quite accidentally during my still on-going project to re-creating a wonderful Pain de Campagne we had in Dijon, France, some years ago on holiday. The result was not quite what I was trying to achieve but nevertheless, it was quite good.

 So, one day I baked it and took it to her house to see how she’d like it. We didn’t eat it then (we went out for a lunch) but I received email from her later that night, which said (in the gist...-ish) ; “The flavour!  It’s so complex!  And the crumb!  Oh, the crumb!!  Every time you bite into it, the flavour and aroma explode in your mouth and it lingers on for such a long time...I think you exceeded Poilane!”    

  Well…..I think she’s a bit over-enthusiastic (and too kind).  I really don’t think I did exceed Poilane with that bread. Of course not.  Nor will I ever do, for that matter.  I don’t own their famous ‘a few hundred years old’ heritage levain to make my bread nor do I have absolutely ANY intention of living that long just to add extra value to my starter.  And to be entirely honest, I’d rather pay for their expertise and hard work and buy the real McCoy than labouring in my humble kitchen to emulate their highly-priced prized bread. The depth of flavour and that uniquely distinctive and complex acidity Poilane is famous for is, I think, something very difficult to re-create at home, which this new bread of mine certainly did not have those to their extent. 
 But still, it is true it was quite good and I was rather chaffed about the result and, also, was very happy she really liked it so much. And precisely because it’s not as ‘assertive’ nor does it have that strong acidity as Poilane’s, it is a gentler and more accommodating company to your meals, and also very good as breakfast bread, either as it is or toasted.

 So, since that day, she stopped buying Poilane’s or any bread from Borough Market entirely and started buying various breads from me whenever we get to meet each other. And we named this bread   ‘faux-Poilane,’ which is always included in her order of breads.  And since that day, it also joined my team of regular breads. 


And here’s the formula. Hope you’ll like it as much as we do, too.

 *  *  *  *  *  *  *  *  *  *  *  *  *  *  *  *  *  *  *  *  *  *  *  *  *  *  *  *  *  *  *  *  *  *  *  *  *  *  *

‘Faux’ Poilane : My Dear Friend ‘YM’ ‘s Favourite

     (To make a loaf = dough size about 650g)

INGREDIENTS

  S/D (75% hydration)  125g 

  White 180g

  WW 60g

  Spelt 30g

  Rye 30g

  Wheatgerm 1 tbls

  Good quality sea salt 6g

  Non-diastic malt powder 1 tsp, if you have

  Water 220-230g

  A tiny amount of instant dry yeast, less than 1/8 tsp (optional)


 METHOD

1.   Feed S/D twice during 8-12 hr period before you start making the bread.
2.   Mix all the flours, wheatgerm and malt powder (plus instant dry yeast, if using) in a large bowl.

3.   In a separate small bowl, mix S/D and water to loosen S/D a little.

4.   Pour S/D+water to the bowl of flours and mix briefly into shaggy mess. Cover and leave for 40 minutes to autolyse.

5.    Sprinkle salt on the surface of the dough and S & F in the bowl for 20 times or so until salt is (probably) evenly distributed. Cover and Leave another 40-45 minutes.
6.   Two more sets of S & F in the bowl (just 8-10 S&F this time, enough to circulate the bowl once) every 40-45 minutes.

7.   Cover and cold retard for 12-18 hours.

8.   Make sure there’re a few large bubbles on the surface of the dough after cold retard. Take it out from the fridge and leave at room temperature for 1/2-1 hr.

9.   Pre-shape and shape. Put in a bannetton and proof (Either at room temperature, which produces milder flavour, or in a fridge again for increased acidity)….until your trusted finger-poking test assures you the dough is ready.

10.   Bake in a pre-heated covered pot (I use a lidded Pyrex casserole, upturned, which’s been very reliable…and you can enjoy watching the dough grows in volume!!) at 240 C for 20 minutes.

11.  After 20 minutes, remove the lid and bake for another 20-25 minutes.

  Note : As with many sourdough bread, it tastes good on the day it’s baked, but the flavour develops over next few days. My favourite is it’s on the third day.

 *  *  *  *  *  *  *  *  *  *  *  *  *  *  *  *  *  *  *  *  *  *  *  *  *  *  *  *  *  *  *  *  *  *  *  *  *  *  *  *


The pics above are of the loaf I bake for her, so obviously I don’t have the crumb shot. But I baked another one at the same time, and these are how it looked.


BW

lumos @ no-camera-at-the-mo (My dauther took mine to Paris!!! Gahhhhh)


Syd's picture
Syd

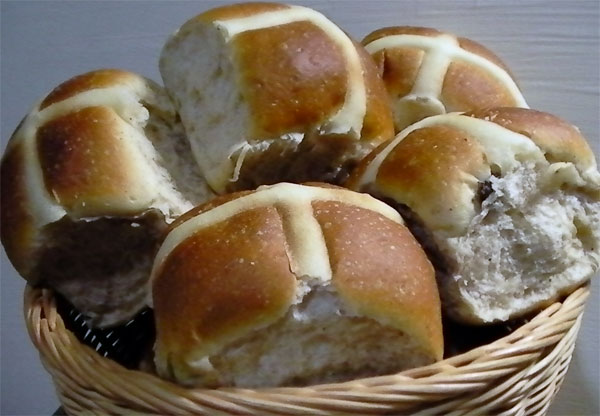
Hot Cross Buns

This made some of the nicest hot cross buns I have ever tasted.  I used the same dough as for the Asian Style Pain de Mie but added:

  • two very generously heaped teaspoons of mixed spice (I made my own and used these ratios which I found on the internet)

16 parts cinnamon
8 parts coriander
4 parts allspice
2 parts ginger
2 parts nutmeg
1 part ground clove

I used whole spices and ground them up in a coffee grinder. I think using my own freshly ground spices made all the difference to this dough.  The aroma was intoxicating.  Nothing I have ever bought from a shop smells even remotely as fresh and as pungent as that.  Omit this step at your own peril!


  • 230g of raisins

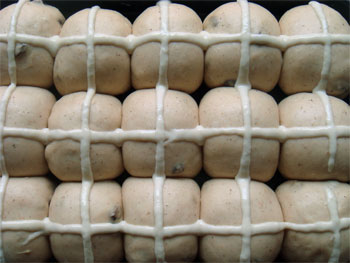
I scaled them at about 90g a piece and arranged them close to (but not touching) one another on a baking tray.  This amount of dough made 24 buns.  For the cross on top I made a paste of flour and water which I sweetened with some sugar and then piped it on with a piping bag.

They took about 2 and a half hours to rise.  I baked at 180C (with convection on) for 18 mins.  I allowed them to cool slightly for five minutes before removing from the pan and placing on a wire rack to cool.

They are pillow soft and delightfully fragrant.

I expect them to keep well, too seeing that I used the water roux method.  They took three and a half days to make from start to finsih but they were well worth the effort.

Syd

LindyD's picture
LindyD

Video lessons with Master Baker Jeffrey Hamelman

King Arthur Flour has created a wonderful video series called Techniques for the Professional Baker which are awesome.

While labeled for the "pros," serious home bakers can learn a lot from these videos.  I sure did.

Total running time is 30 minutes and includes info on mixing and folding, gluten development, shaping baugettes, rounds, and bâtards, scoring baguettes, and evaluation.   There's also a great shot of what a ripe poolish should look like.

Thank you so much, KAF and Messrs. Hamelman and Philips!

breadsong's picture
breadsong

Trying for Flaky Scones, with flavor variations

Hello, I have some sharp cheddar to use - scones sounded good - I've been trying this way to make them.

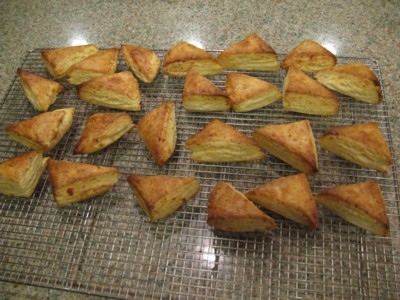
These are a Cheddar variation - makes 12. Note I actually made 24 in this batch, which are pictured.

Ingredients:
2 cups (10 ounces) unbleached all-purpose flour
1 Tbsp baking powder 
1/2 tsp kosher salt
5 Tbsp cold unsalted butter, cut into 1/2-inch cubes 
1 cup heavy cream (I started with 208 grams which is a little less than 1 cup)
Half-and-half cream as needed
30 grams grated sharp cheddar

Method:
Place the flour, baking powder, and salt in the workbowl of a food processor fitted with the metal blade. Pulse a few times to combine.

Remove the cover of the food processor and distribute the butter evenly over the dry ingredients.
Cover and pulse 10 times. Mixture should be crumbly. Pulse a couple of more times if needed. Transfer mixture to a large mixing bowl.

Add the grated cheddar to the bowl, and mix in with your hands so all of the cheese is coated with flour.
Stir in the heavy cream and mix until clumps of dough form. I used a dough whisk for this:


I turned the clumpy part of the mixture out onto the counter. There's usually some dry bits underneath that haven't mixed in:


I stirred in a bit more half-and-half cream until more clumps formed then turned this out onto the counter too:


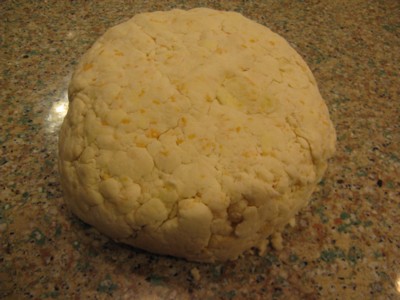
Using a bench scraper, I get underneath some of the dough and lift and press on top, to get the dough to come together. I do this from all sides, until it comes together into a dough ball. I try not to directly touch the dough, and press with the bench scraper, so I don't warm the dough up with my hands:


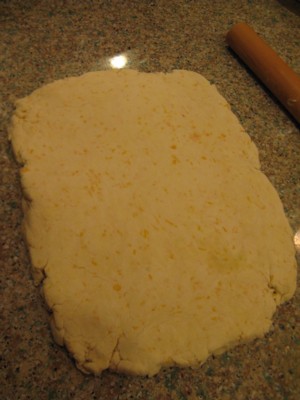
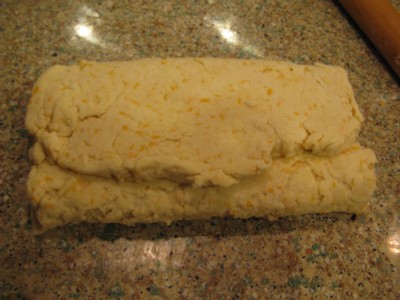
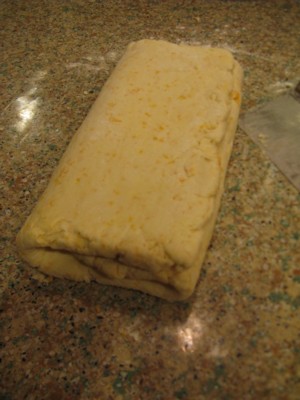
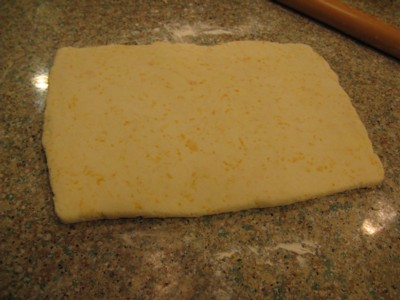
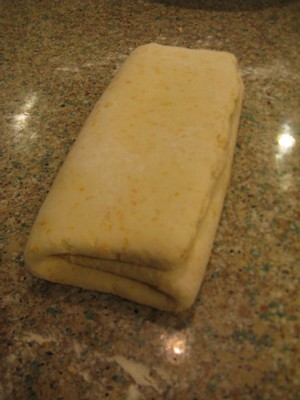
As I am making 24, I rolled the dough ball into a 10"x14" rectangle (using the bench scraper to push on the edges to even up the sides as needed); if you are making 12, roll to approximately 10"x7". I then did a business-letter turn with the dough:


And a second time (dough is getting smoother):


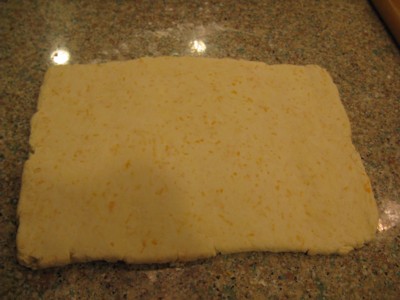
And a third:


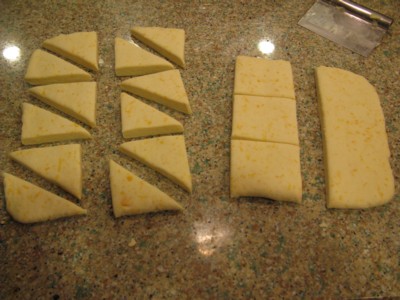
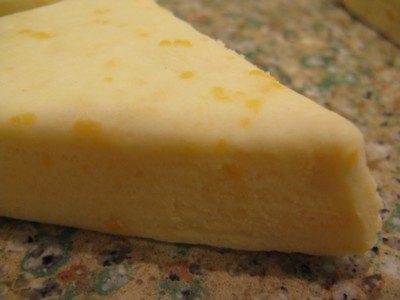
A final roll to 10"x14", (10"x7" if only making 12), then divide into triangles (24 or 12 depending on how many you're making)(I don't do rounds because I prefer to not deal with scraps). I divide using the bench scraper, and am careful to keep the bench scraper vertical, that is, perpendicular to the counter, and to cut cleanly, straight down, and to not drag the bench scraper sideways. (I read somewhere this helps the scone to rise straight up):


I placed the shaped scones on a parchment-lined baking sheet (13"x18" because that's what will fit in my fridge), covered in plastic wrap, and chilled for 1-1/2 hours before baking.
One half hour before baking, (if making 24, consider whether you are baking on one big sheet or two smaller ones). Position oven rack(s) near the center of the oven. Heat oven to 425F.

Remove scones from fridge, remove plastic wrap.
If making 24 like I did in these pictures, transfer scones to one 15"x21" parchment-lined baking sheet or two 13"x18" parchment-lined baking sheets, to spread them out more/increase airflow around the scones so they bake properly, when baking all 24 at once.
Brush tops of scones with half-and-half. Place scones in oven.
Bake for 12-15 minutes (I baked these for the full 15 as they were well-chilled). Depending on how evenly your oven heats, you may want to rotate your baking sheets or move your scones around on the baking sheet partway through the bake, so they bake/brown evenly.

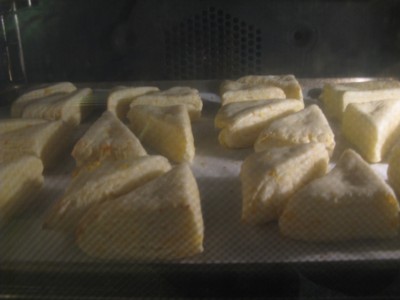
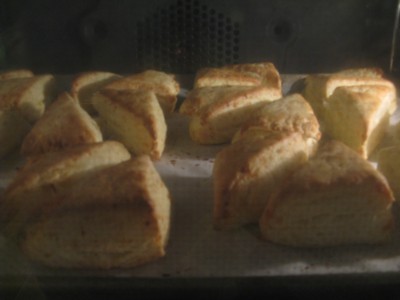
After 5 minutes in oven, after 10 minutes in oven, and the finished bake:


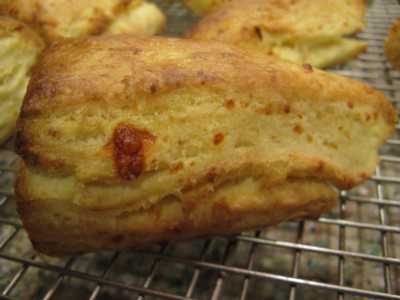
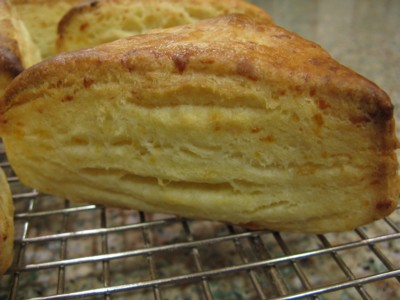
Somewhat flaky layers (some cheese melting out!) and a crumb shot:

These are an Irish Cream with Chocolate variation, with thanks to Neo-Homesteading's post! for a great idea!
This is what I tried for ingredients (makes 12):

Ingredients:
2 cups (10 ounces) unbleached all-purpose flour
1 Tbsp baking powder 
1/2 tsp kosher salt
1/3 cup golden brown sugar
5 Tbsp cold unsalted butter, cut into 1/2-inch cubes 
1/2 cup chocolate chips, pulsed in food processor until chopped up a bit (or you could use mini-chocolate chips)
1 cup heavy cream (I used a little more than 1 cup, 240 grams, as this is what I had left in my carton)
Half-and-half cream as needed
1-1/2 Tablespoons Whiskey (Irish if you've got it!) or Bailey's Irish Cream Liqueur
1/2 teaspoon pure vanilla extract
Turbinado sugar (for sprinkling)

I followed the same method as for the Cheddar variation above, except:
- added the brown sugar to the dry ingredients in the food processor at the start of mixing
- added the chocolate chips (not cheddar!) to the dry ingredients in the mixing bowl
- added the whiskey and vanilla extract along with the heavy cream to the dry ingredients in the mixing bowl
- after brushing the scones with half-and-half, I sprinkled them with Turbinado sugar, then baked.

I found this dough wetter due to the higher amount of heavy cream and Whiskey addition; I didn't have to add hardly any half-and-half to get all the dry ingredients to bind together.
The scones were browned at 12 minutes but I baked until 14 minutes as this dough was wetter. Depending on how your oven heats, you may want to turn some of the scones around partway through baking so they bake and brown evenly and don't get too dark in any one spot - this dough has a higher sugar content and it browns well. The aroma coming out of the oven was amazing while these were baking! :^)

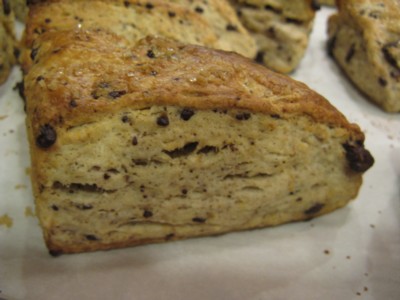
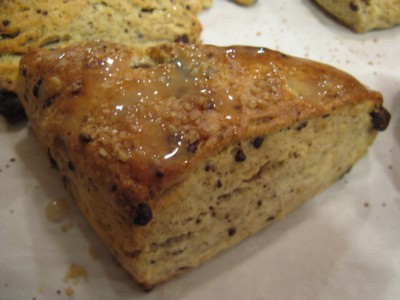
Here's a couple of pictures of the finished scones (the picture on the right with a small bit of glaze applied, made by mixing some icing sugar, 1 Tablespoon whiskey, 1 Tablespoon Bailey's Irish Cream Liqueur, a bit of half-and-half, and a tiny pinch of salt). The increased liquid did make these less flaky, so next time I will reduce the amount of heavy cream to that used for the cheddar scones, 208 grams, and see how it goes:


Happy baking everyone! from breadsong


Pages