The Fresh Loaf

A Community of Amateur Bakers and Artisan Bread Enthusiasts.

Recent Blog Entries

Isand66's picture
Isand66

9JUL

I asked my good friend Mike for some of his homebrewed Ale so I could use it in a bake and I have to say the results were quite good.

I thought some fresh milled rye and spelt would go perfectly with the ale and I wasn’t mistaken. I added a nice healthy handful of shredded cheese mix which included Asiaggo, Parmesan and Cheddar which paired perfectly with the other ingredients.

The bread tasted fantastic and the Ale flavor came though just enough to make this a tasty bread, perfect for a hot pastrami sandwhich or smeared with some cream cheese for breakfast.

Formula

Levain

  • AP Starter 56 grams
  • AP Flour 200 grams
  • WW Bran 27 grams

Final Mix

  • AP Flour 275 grams
  • Fresh Milled Rye 150 grams
  • Fresh Milled Spelt 147 grams
  • Beer/Ale 400 grams
  • Shredded Cheese 90 grams
  • Olive Oil 30 grams
  • Salt 16 grams

Note: I sift the flour using a #30 Drum Sieve, remill at the finest setting and sift with a #40 Drum Sieve which gives me a pretty high extraction flour.

Levain Directions

Mix all the levain ingredients together  for about 1 minute and cover with plastic wrap.  Let it sit at room temperature for around 7-8 hours or until the starter has doubled.   You can use it immediately in the final dough or let it sit in your refrigerator overnight.

 Main Dough Procedure

Since I now use a Ankarsum I add the levain to the water first and then add the flour. If you are using a KA or Bosch you can add the levain after you do your autolyse.

I added the starter to the water and broke it up and then added the flour and and mixed to a shaggy rough dough formed. Cover the dough and let it sit at room temperature for 30-60 minutes. Next add the rest of the ingredients and mix on low for 10 minutes (if using a different mixer I would suggest mixing for around 4-5 minutes). I added the cheese just before done mixing and let it mix until incorporated.

Remove the dough from your bowl and place it in a lightly oiled bowl or work surface and do several stretch and folds.  Let it rest covered for 10-15 minutes and then do another stretch and fold.  Let it rest another 10-15 minutes and do one additional stretch and fold.  After a total of 2 hours place your covered bowl in the refrigerator and let it rest for 12 to 24 hours.  (Since I used my proofer set to 80 degrees F. I only let the dough sit out for 1.5 hours before refrigerating).

When you are ready to bake remove the bowl from the refrigerator and let it set out at room temperature still covered for 1.5 to 2 hours.  Remove the dough and shape as desired.

The dough will take 1.5 to 2 hours depending on your room temperature and will only rise about 1/3 it’s size at most.  Let the dough dictate when it is read to bake not the clock.

Around 45 minutes before ready to bake, pre-heat your oven to 540 degrees F. and prepare it for steam.  I have a heavy-duty baking pan on the bottom rack of my oven with 1 baking stone on above the pan and one on the top shelf.  I pour 1 cup of boiling water in the pan right after I place the dough in the oven.

Right before you are ready to it in the oven, score as desired and then add 1 cup of boiling water to your steam pan or follow your own steam procedure.

Lower the temperature to 450 degrees.  Bake for 35-50 minutes until the crust is nice and brown and the internal temperature of the bread is 205 degrees.

Take the bread out of the oven when done and let it cool on a bakers rack before for at least 2 hours before eating.


Here’s some summer garden photos for those who are interested. Enjoy!


thepocketcrumb's picture
thepocketcrumb

New week, new loaf!

This one is a medley of 3 things:
- Buckwheat (Bobs Red Mill)
- Shio Kombu (thin sheets of kelp boiled in soy sauce, mirin, and sugar, then dried and cut into small pieces)
- Aonori (dried and powdered green seaweed)

A few things i did:
- Scalded the buckwheat flour, as I have read that this makes it easier to incorporate
- Added in the shio kombu and aonori before BF
- Did not add salt as the shio kombu is pretty salty. But wasn't sure if this was going to affect the taste of the loaf.

Other ingredients:
- 80% Bread flour
- 20% whole wheat
- 20% levain (1:2:2)
- 70% hydration
- 50g buckwheat, scalded with 130g water (did not include this in final weight tabulation)

Baked in dutch oven at 220C for 20mins (lid on), and another 10mins (lid off). These are smaller loaves as I'd split the dough into 2.

Didn't get much oven spring, but the crumb seems to be okay! Happy to have tried out buckwheat flour for the first time!

MTloaf's picture
MTloaf


This just happens to be the softest, lightest, tallest, least sour WW pan loaf I have ever made. Something I wasn’t sure was possible with my home milled grains. I am not sure I can technically say it’s 100% WW because I sifted out 10% of the bran with a 40# screen but only out of the flour used in the final mix. I left the bran in for lthe two stage levain. This was my first attempt to use yeast water for whole grain after reading something Dabrownman wrote here years ago about how it would lighten up whole grain loaves. Indeed it does!

Crumb
In my weekly rotation of breads I always make a WW pan loaf partly for nutrition but also because I have an abundance of Wheat Montana organic berries from a miscommunication last year when I picked it up at the mill they brought out 50 pound sacks instead of 25. In lieu of today’s grains prices and the cost of shipping I don’t mind having a few extra buckets of grain in the basement. I was using The Approachable IDY version for a while but wanted a naturally fermented recipe to try. I tried Benny’s sweet levain and got good results but more often than not it would start to break down before it was fully risen. I scalded the bran which helped but I didn’t go the Tangzhong route because it is more involved and included dairy. Frankly I am not a fan of the soft tight cotton crumb that reminds me of supermarket sliced bread. I like a roux for rolls and such but I prefer a bread crumb that is less opaque and has a story to tell.
A few months ago I started a raisin YW that I had been using for fruit and nut breads and started using it for country bread when my starter went into a funk. It has gotten better with age and adding a few apple pieces and a citrus peel kicked it into high gear.(Thanks Trailrunner,Caroline) I am not a complete convert and certainly claim no YW expertise but the bread rising ability is pretty incredible. I know that YW responds well to higher temperatures so my back porch which is 90F degrees in the shade has become my latest proofing box. 

When the levain looks like this I have high hopes 

Levain


Pullman
I made a long Pullman yesterday to confirm my results. TDW 1150 grams The  spreadsheet is for the 9x4 Pullman. It was Wheat Montana organic Bronze Chief which is a hard red spring wheat that was milled in a Mockmill 100


Spreadsheet


Egg salad

 Egg salad is one of those sandwiches that are better on soft bread especially when they are farm fresh eggs!


 Happy Baking

Don

CrustyJohn's picture
CrustyJohn

Maybe one (well two) of my best loaves ever, I think.  I was really happy with these, especially because I made them for a family gathering, and I'm always afraid of making loaves to share that don't end up turning out to be up to my personal standards.


While searching for injera bread last week, I happened upon some roasted barley at an Ethiopian grocery and bought it thinking it might make a richer variation on my experimentation with barley porridge loaves.


Roasted barley- 250g

water (with a little yogurt mixed in)- 500g + extra 

soaked for 3 days


---------------------

Bread Flour- 700g (70%)

Red Fife Whole Wheat (home milled by friend)- 150g (15%)

Dark Rye Flour- 100g (10%)

White Spelt Flour- 50g (5%)

Leaven- 100g (10%)

Water- 750g (75%) *plus water contributed by prooidge addition

Salt- ~6 tsps

------------------------

Process:

-Mix leaven and water, add flours, mix until incorporated, autolyse for ~1 hr (room temp. ~mid 80s probably)

-After atolyse, add salt, pinch in

-stretch and folds every 30ish min for 3hrs.  Incorporated soaked barley after 2nd set of folds (stretched out dough, spread barley across surface, fold, repeat)

-move dough to refrigerator for about 1 hr cool down dough and slow fermentation

-move dough to "root storage" walk-in (~60 degrees) to continue bulk fermentation overnight (~6.5 more hrs)

-divide dough, pre-shape, wait 15min or so, shape, wait, 10 min or so, stitch up, let sit at room temp (~mid70s) for another 30 min

-move to refrigerator for cold proof (~8 hrs)

-Bake: 500 covered, for 20 min, 500 uncovered, 10min, 450 uncovered for 20 min.  Take out batard, continue to bake miche further ~20 min (I might have further lowered temp. t0 425 or 400 for this part)

------------------------

I think reducing the Tartine formula from 50% porridge to 25% porridge made for loaves that were much easier to shape and get an airy crumb. (And 25% still feel like a lot of add-ins).  The roasted barley smelled nice and added a rich flavor, but it was a bit acrid.  I think cooking it would have been a better approach flavor-wise, but I don't know if the crumb would have been as airy.

It had a nice crunchy, crusty outside and a good soft, airy inside- pretty close to ideal, especially working with the barley add-ins.  Still, the mythical flavor of my first barley porridge loaf eludes me, but this was closer and structurally much better.  

---------------------------

Sitting, watching the sun rise over the marsh, fresh bread, peaches, and hot coffee- that's damn near heaven.
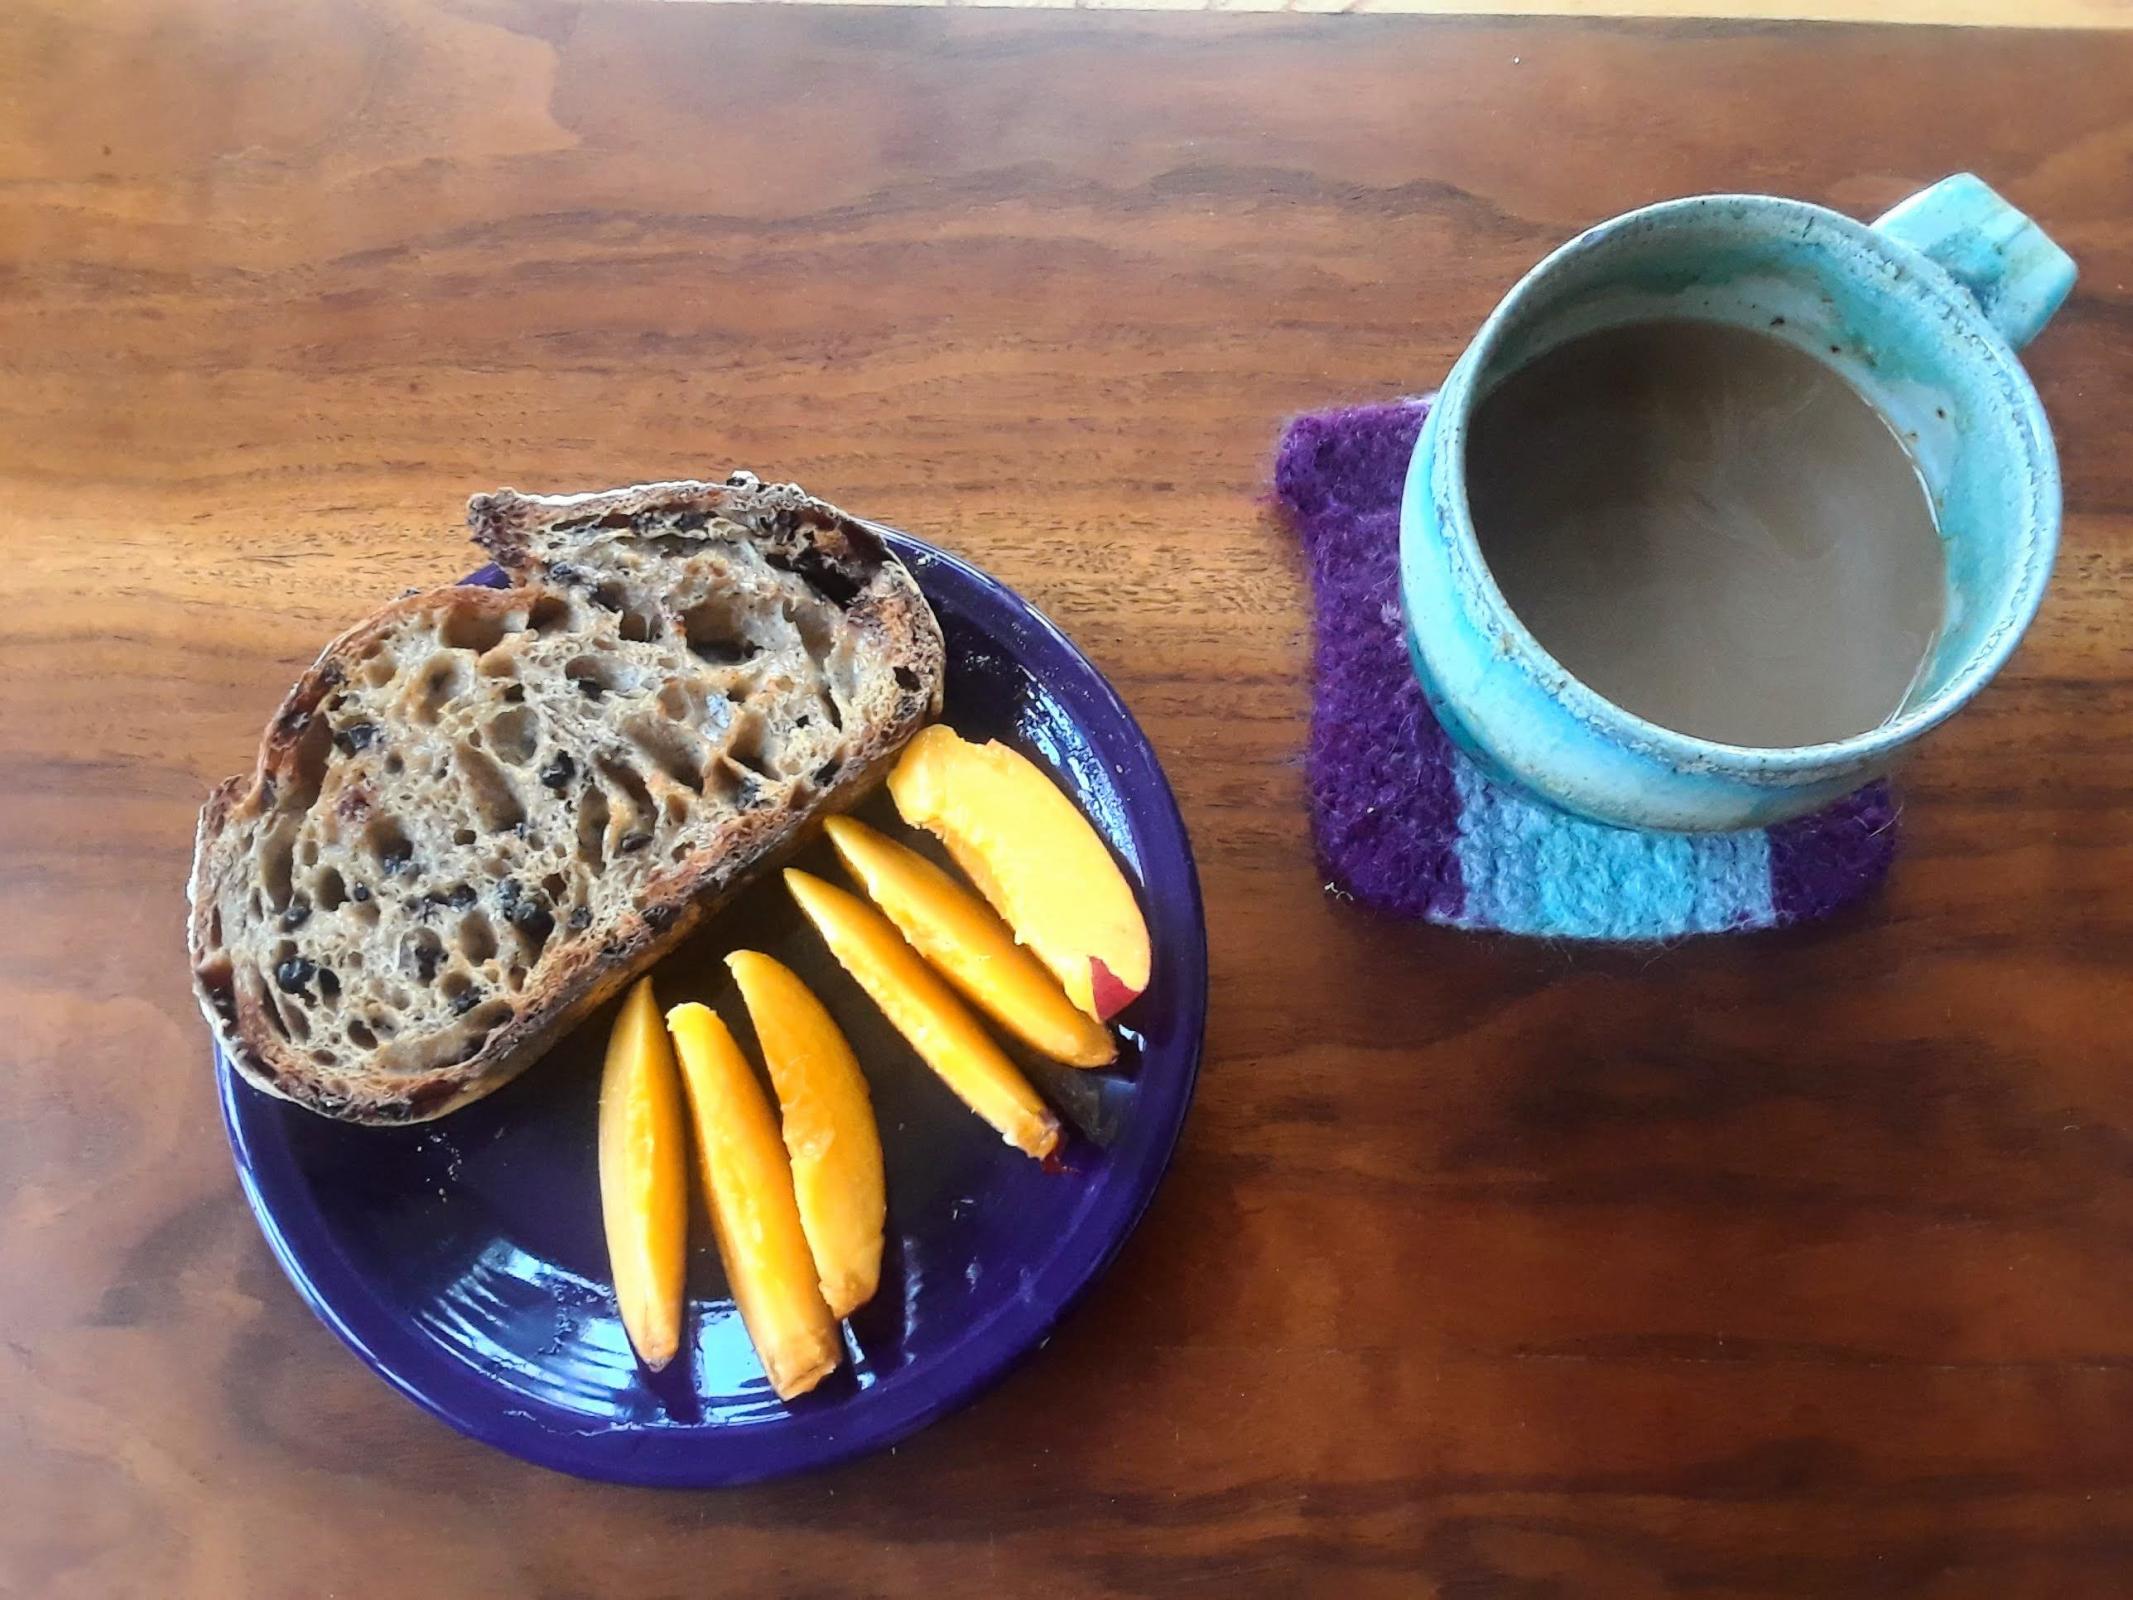
 

Round 2:  Cooked Porridge

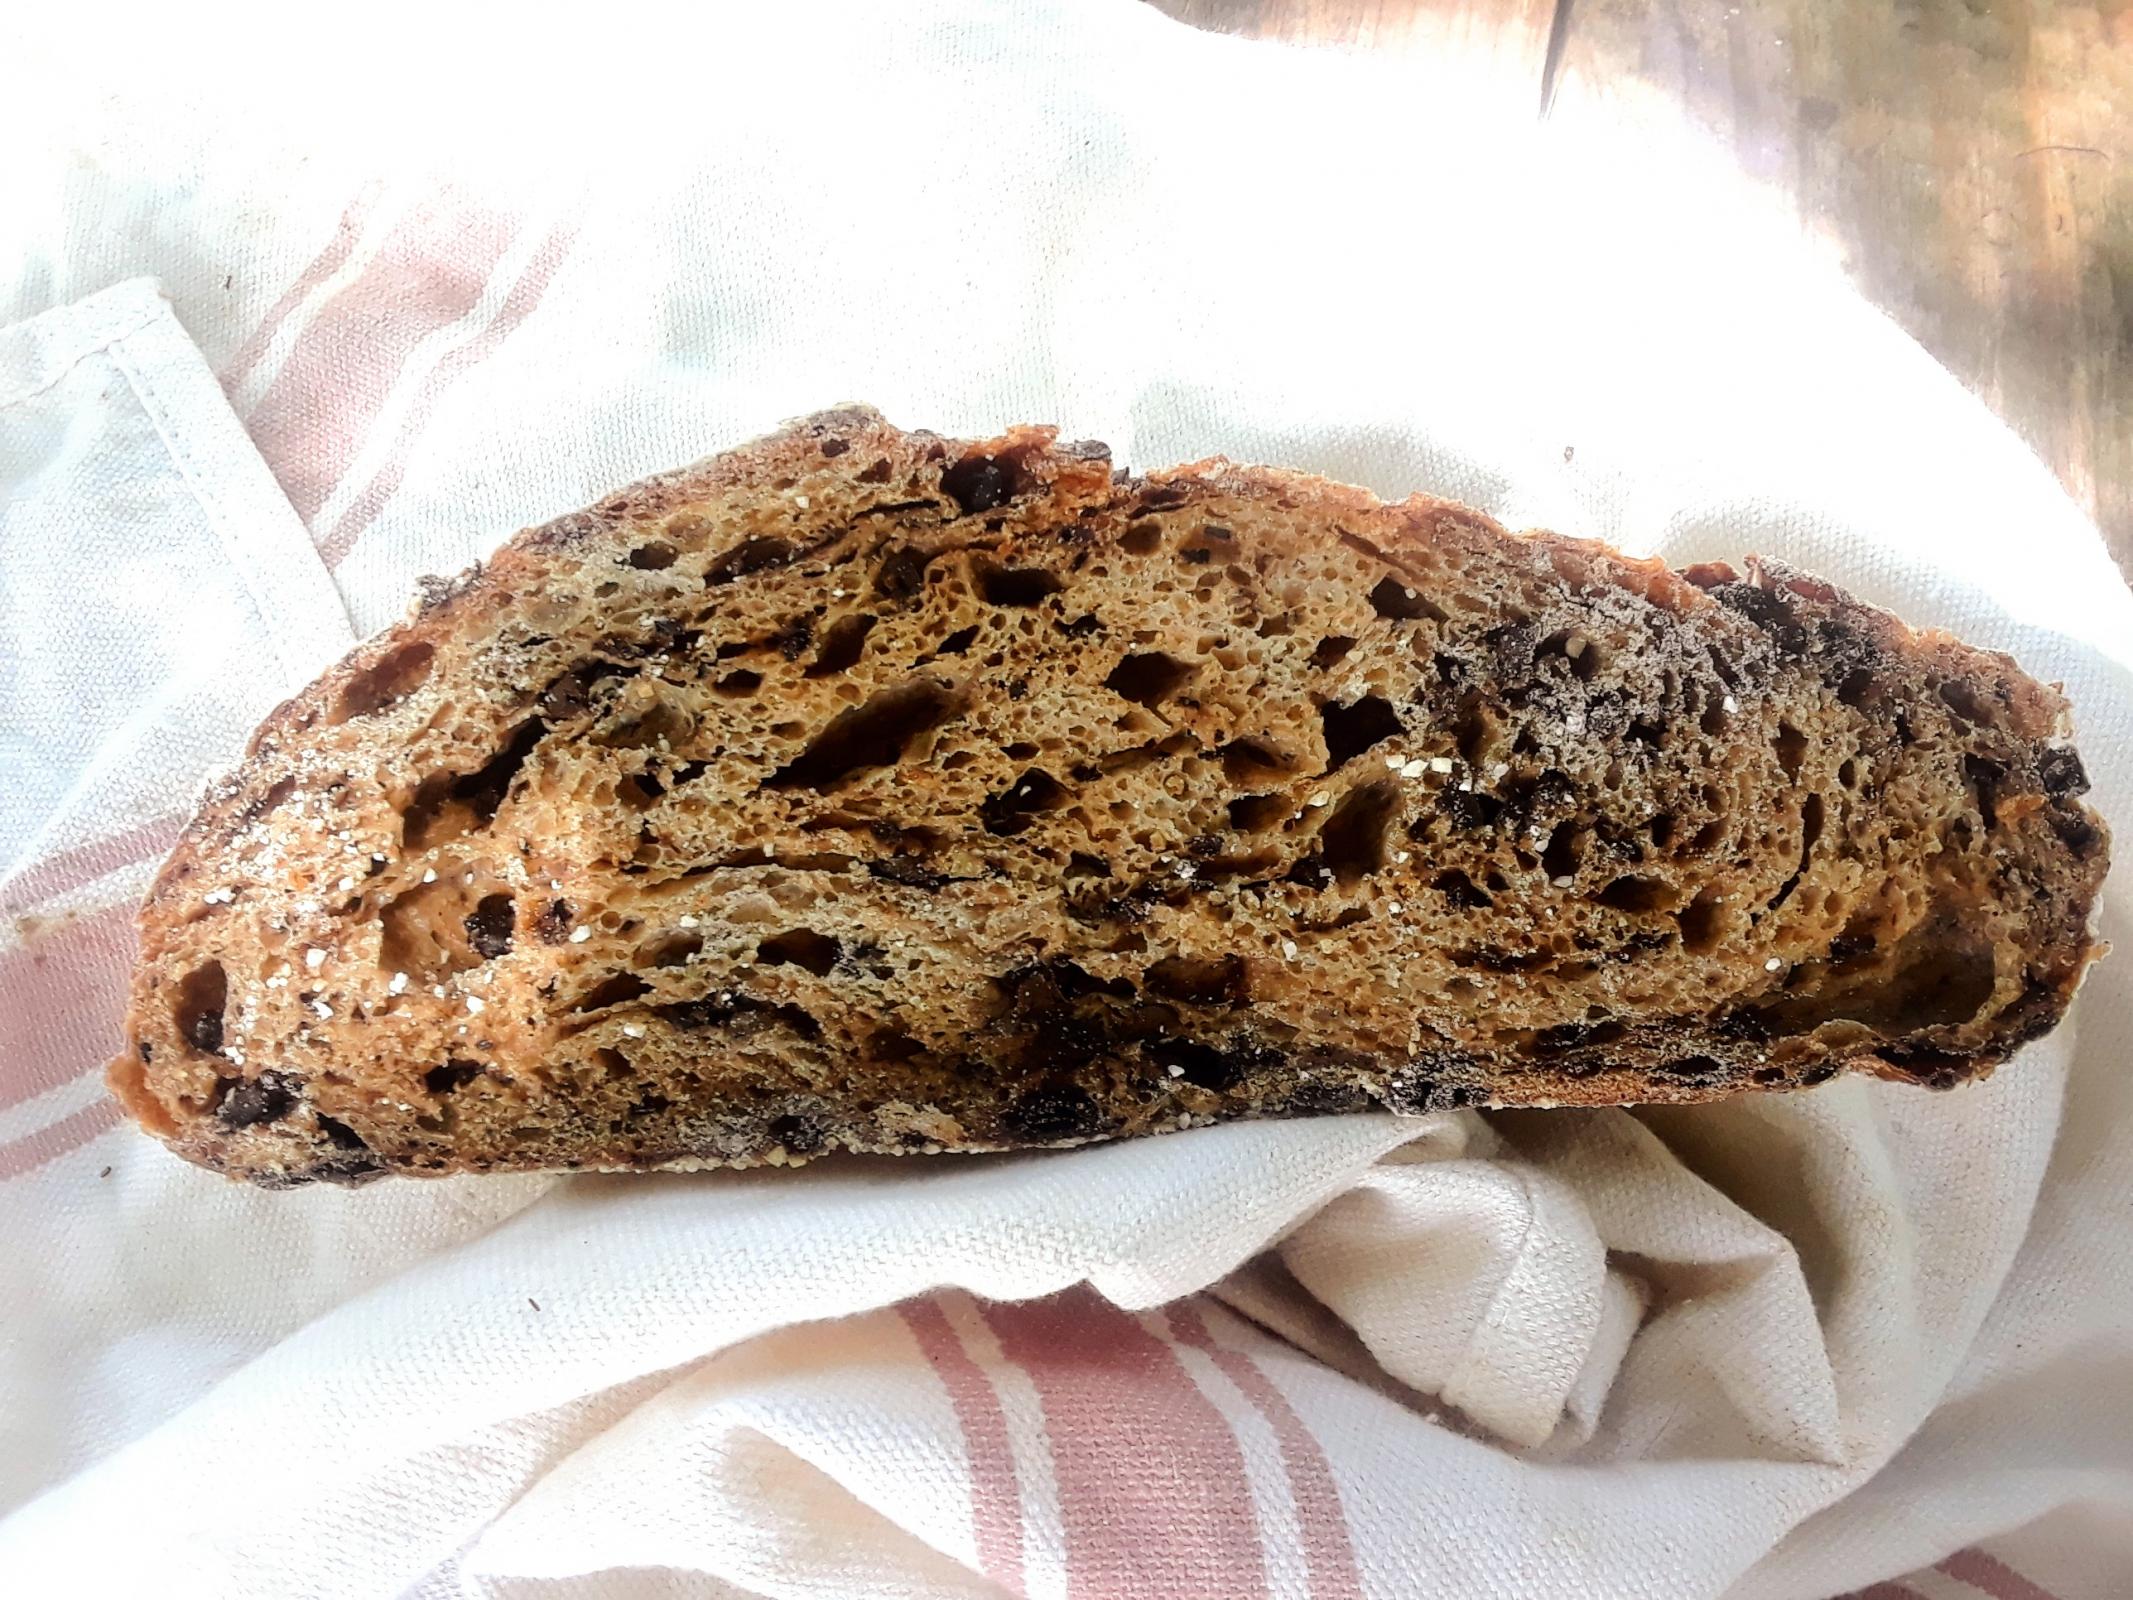
I wanted to try the above idea again but cook the barley instead of soaking/fermenting.  The cooked porridge looked fairly similar to the soaked grain, but the resulting loaf had a much creamier crumb. 

Pretty much same approach, temperatures, and timing.

Dough make-up: 10% white spelt, 30% red fife ww, 60% bread flour.  Also 5% wheat germ.  Otherwise same as above.

Structure was a bit saggier than first loaf, probably due to cooked porridge contributing more water, though the non-white bread flour percentage was also slightly higher.  This loaf isn't quite as exciting, but the creamy porrige-y crumb is very enjoyable. 
 

3rd Iteration

The goal with this one was to take a 100% bread flour dough and add the porridge to that to see if the greater dough strength would take the porridge and still yield a nicely structured loaf.  Answer: yes, but I don't think the flavor or texture was as good, though it did look quite nice.

spec.'s:

450g bread flour

20g wheat germ

333g water (~75% hydration)

3 tsp salt

-----------

~280g roasted barley porridge with ~tbsp each of fennel and flax seed  (I'm not 100% sure on this weight- I started around 60g or dry barley I believe, and then I cooked it into a porridge adding water as needed and seeds in the process, and then I arrived at the final weight by weighing it in the pot and then subtracting the weight at the pot, which should work but 280g was a bit higher than I expected).

pretty standard routine as detailed above.

result: very nice structure, elegant ear.  The flavor was nice, but not as rich as I expected with all the strong flavors of the porridge.  Also, I think the roasted barley is just too bitter tasting; regular barley is a much better choice

StevenSensei's picture
StevenSensei

Early on in my baking adventures when looking for a 100% rye sourdough I stumbled across Patrick Ryan and his videos on the ilovecookingireland youtube channel. I was pleasantly surprised when when this more recent video came across my feed and though this would be a perfect way to use some of the fresh basil from the back garden. 


After watching this I decided I would tweak it a little bit. Instead of cheese I would add roasted garlic and would for sure use pine nuts. I'm sure the cheese is amazing and would be well worth doing, but some family members can't eat cheese so it had to go. 

FULL RECIPE AND CALCULATIONS HERE

A few small notes. While I remembered to roast the garlic the night before...I actually forgot to include it in the bread! However, I think this was the right choice. The bread with just the basil, roasted pine nuts, and sun-dried tomatoes is amazing! For dinner we decided to make pizza toast and I used the forgotten garlic as a spread on the toast instead. Sublime!

Tasting Notes: Wow! The pine nuts, basil, and sunderied tomatoes all shine. the bread all by itself was super tasty. so much so that my first thought was that I would bake a loaf of this...cut it up...and then take it on a long plane flight. Doesn't need any toppings, spreads, or anything else. I could easily cut up the whole thing and eat it in one sitting with no regrets.  

Time/Effort: 3 days (Growing Levain, Mixing Dough, Baking) Normal for sourdough for my process. Maybe an hour or so of extra time spent the night before to roast the garlic and pine nuts, but honestly, worth the time. 

Would I make it again: Yes, and especially for use for making pizza in the summer. The pizza toast above was probably the most delicious pizza I have had in recent years, literally. I've made pizza and have a pretty good recipe and results but this was spectacular. The crust has a nice crunch and the crumb is soft and chewy. I would omit the the garlic from the bread itself as I accidentally did this time (a happy accident) but still roast it to use as a spread later. The great thing about using this bread for making pizza in summer is a quick blast under the broiler and its done, no need to run the oven for hours and pump more heat into the house. 

SueVT's picture
SueVT

Red, White and almost Blue!

Really a delicious combination, and a pretty satisfying bake. The white chocolate chips mostly melt into the crumb, give an overall cocoa-buttery richness that goes well with the cherries. I guessed at amounts, next time will double the add-ins.


MTloaf's picture
MTloaf

July 4th is also known as Independence Day here in the good ol’ US of A. The day we declared our freedom from tyranny of a different sort rather than today’s nut jobs that rule by decree  It’s celebrated with flags, parades, and picnics which must include hot dogs 🌭. Most grocery store buns are perfectly adequate for holding the tubular mystery meat and mustard but this version of a New England bun is a definite upgrade so much so that it is traditionally used for lobster rolls. I also use them for things like chicken salad and the same recipe can be used for hamburger buns. What makes these buns supreme is after they are separated they are buttered on the pull apart sides and browned in a pan. These buns require a unique but simple shaping technique but is well worth the effort. The recipe below has a video from the somewhat goofy but always excellent Chef John that shows the process. 

 Hot dog bun recipe https://www.allrecipes.com/recipe/237824/chef-johns-hot-dog-buns/ 


Buns 

Happy Fireworks Day

Don


The Roadside Pie King's picture
The Roadside Pi...

Today's bake consists of two separate and distinct phases.


Phase #1 - The Mozzarella

Phase #2 The bake

Phase one is fresh mozzarella. This formula is 80% the ingredients going in. The other 20% boils down to (pun unintended) experience pulling/shaping the balls. My end game needs practice. Very pleased with my first crack at this!


Benito's picture
Benito

We’re finally getting to visit our closest friends who we haven’t seen since last summer.  So we’re bringing pie and bread, of course!  I decided on trying my recipe for 50% WW 25% butter SD brioche again because it is a little bit sinful with the butter and yet has a good amount of whole wheat.  My friends prefer a soft bread so this should be perfect. 

Levain

Mix the levain ingredients in a jar or pyrex container with space for at least 300% growth. 

Press down with your knuckles to create a uniform surface and to push out air.

At a temperature of 78ºF, it typically takes up to 10-12 hours for this sweet stiff levain to be at peak.


Dough

In the bowl of a stand mixer, add the milk, eggs, salt, sugar and levain.  Mix and then break up the levain into smaller pieces.  Next add the flours.  Mix on low speed until there is no dry flour remaining.  Once incorporated increase the speed gradually to medium.  Mix at medium until the gluten is moderately developed.  With the mixer running add the room temperature butter one pat at a time until it is fully incorporated, waiting until each pat is well incorporated before adding the next.  Continue to mix until you can  pull a good windowpane, not quite as good as a white flour because the bran will interrupt the windowpane somewhat.


Shape the dough into a tight ball, cover in the bowl and ferment for 3-4 hours at 82ºF.  There should be some rise visible at this stage.

You can next place the dough into the fridge to chill the dough for about 1.5 hours, this makes rolling the dough easier, remember if you do so the final proof will take longer.  Alternatively, you can do a cold retard in the fridge overnight.


Prepare your pans by greasing them with butter or line with parchment paper.
Scrape the dough out onto a clean counter top. Lightly flour the bench. Transfer the dough onto the bench and divide it into four. Shape each into a roll, allow to rest 5 mins.  Next like a baguette, shape each roll into a long log with tapered ends.  Next do a 4 strand plait.  Tuck the ends underneath and transfer into the prepared pan.


Cover and let proof for 6-8 hours, longer time if you chilled your dough for shaping. I proof until the top of the dough comes to within 1 cm of the top edge of the pan.


Preheat the oven to 350F and brush the dough with the egg-milk wash (1 egg with 1 tsp of milk and pinch of salt).  Just prior to baking brush with the egg-milk wash again.


Bake the loaves for 35-40 minutes or until the internal temperature is at least 190ºF, rotating as needed to get even browning. Shield your loaf if it gets brown early in the baking process. After 35-40 mins remove the bread from the pan and bake a further 10 mins by placing the loaf directly in the oven on the rack with the oven turned down to 325ºF. You can brush the top of the loaf with butter if you wish at this point while the bread is still hot to keep the top crust soft.

My index of bakes.

leslieruf's picture
leslieruf

I had almost enough T65 flour for one last try.  

Starter was refreshed on Tuesday. I meant to feed it before going to bed but forgot! Wednesday morning I gave it 1:3:3 feed hoping to mix mid afternoon. It was cold that day and things slowed.  As I had to go out about 5 pm I put it in the fridge until yesterday morning. Pulled it out first thing and left it to warm up.   Baguettes were the 2nd dough to be mixed so it was late morning before I was ready.

10:45 am Autolyse - Mixed flour and water and left for 45 mins. I had to add a small amount of bread flour as I was short of T65 flour by. 20 g

11:30 am Added starter and yeast and mixed on low for 4 minutes, added salt and mixed for about another 2 minutes.  I tipped dough out onto bench and gave it 20 SLAFs - this just seems to line the gluten up. annd dough. looks much smoother and shinier.

12:20 pm  coil folds

13:10 pm coil folds then into fridge.

19:45 pm remove dough from fridge and allow to warm up, targeting 16°C dough temperature.

21:15 pm divide and pre shape

21:30 pm final shaping and left to proof. after an hour or so I popped bagguettes in fridge to hold whilst other bread finished baking and I could heat the lava stones up.  Final bake 21 minutes at 255°C - never baked at that temperature before! although I reduced temperature to 235°C about 3/4 way through as I thought it might burn.

I am reasonably happy with the  bake - the baguettes rose beautifully - by far my best effort with shaping and volume.  Still haven’t managed to get that lovely open crumb and scoring still needs work. 

Not sure when I will be able to source T65 flour again but will try again if I do.

Leslie

Pages

Subscribe to Recent Blog Entries