
manosha(arabic pizza)
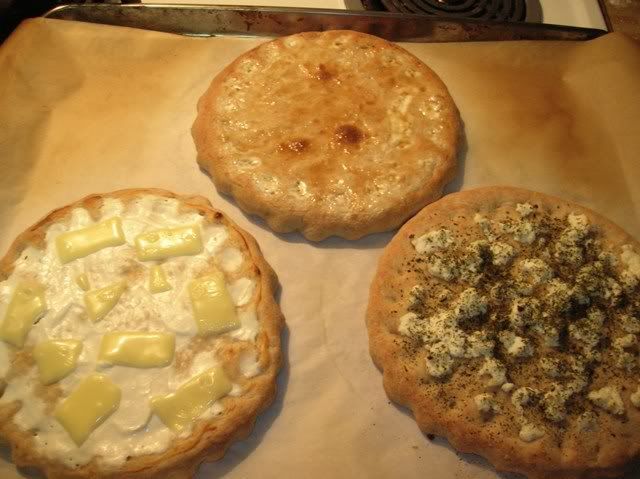
Fresh Labneh +zaatar
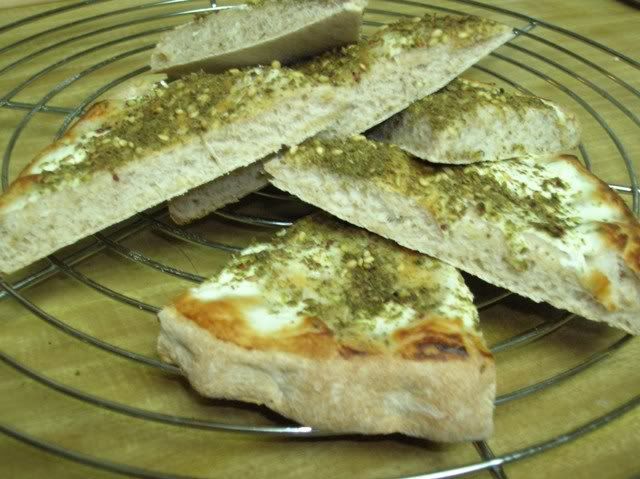
Fresh Labneh+Cheddar Cheese
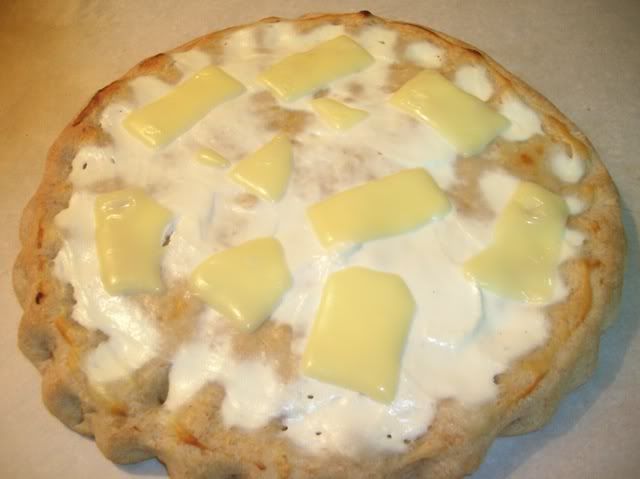
Qashta"fresh cream" +honey
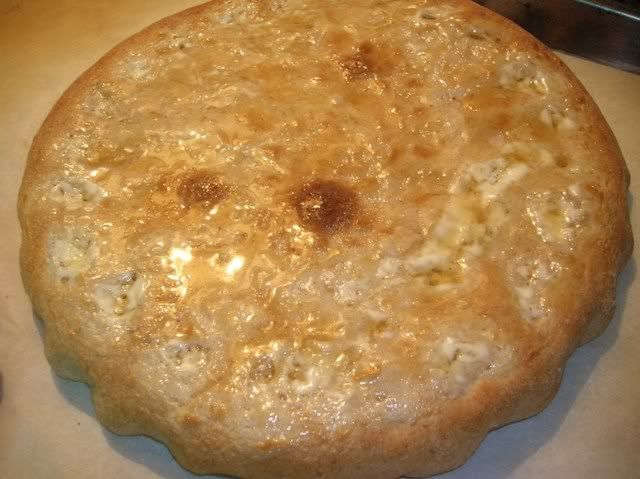
Feta Cheese+dried mint
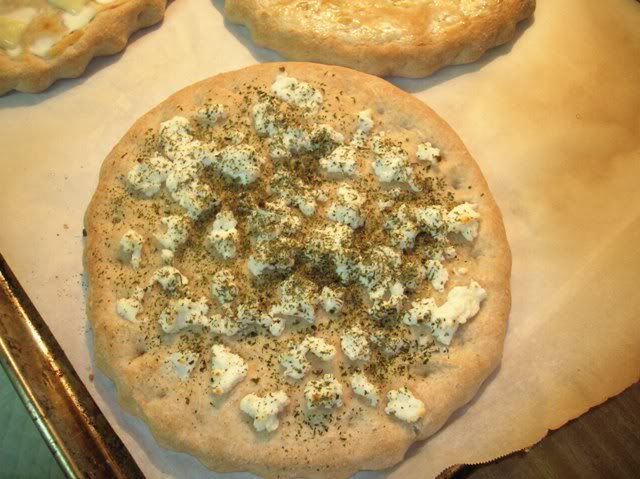
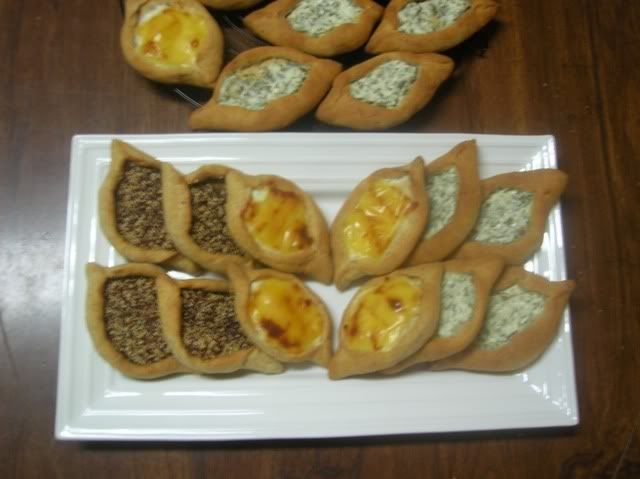


Fresh Labneh +zaatar

Fresh Labneh+Cheddar Cheese

Qashta"fresh cream" +honey

Feta Cheese+dried mint


I spent a few months looking for a good grilled pizza recipe awhile back. I eventually stumbled upon a version by Americas Test Kitchen, which actually turned out pretty darn good. It took me awhile to convince my wife and kids that I could make a pizza on my gas grill, but that didn't stop them from eating it. :) Actually, everybody I've mentioned it to is skeptical about it. Not sure if they doubt my skills or the concept in general. It's a fairly straight forward recipe, but there are a couple things that can easily be modified for your tastes. I really enjoyed the spicy garlic sauce, but everybody else in my home limits there spicy foods to ketchup.
I have done some whole wheat in it as well, and it wasn't bad. Once I get a chance to get a working starter, I plan to play with a sourdough version of it and see what happens.
And after tonight, I have to test out the Neo-Neopolitin dough from the Pizza Primer of Floyd's. That dough was so much better tasting than anything I've managed to make with this recipe. I think it has to do with the overnight retard in the fridge, which the below doesn't do. But like I said, the Neo-Neapolitan dough tasted much better, and has much the same texture as this recipe. It should work just fine on the grill if you prefer that one.
I changed the topping to be a more standard sauce with the traditional toppings my family or guests anticipate, but the toppings below are also quite enjoyable when your looking for something a little different than pepperoni or sausage.
Oh, one more thing, the below is only a gas grill. I removed the charcoal parts, and I only have a gas grill. The steps were much the same other than cooking times and controlling the heat. Hope you all enjoy this one.
Grilled Pizza
Dough
2 tbsp olive oil
1 cup water, room temp
2 cups flour, plus more for work surface
1 tbsp whole wheat flour (optional)
2 tsp sugar
1¼ tsp salt
1 tsp instant yeast
Topping
1½ pounds plum tomatoes (5-6 medium) cored, seeded and cut into ½-inch dice
¾ tsp salt
6 ounces Fontaine cheese, shredded
1½ ounces Parmesan cheese, finely grated (about ¾ cup)
1 recipe Spicy Garlic Oil
½ cup chopped fresh basil
course salt
FOR THE CRUST: Combine oil and water in liquid measuring cup. In food processor fitted with plastic dough blade or metal blade, process bread flour, whole wheat flour, sugar, salt, and yeast until combined, about 5 seconds. With machine running, slowly add liquid through feeding tube; continue to process until dough forms tacky, elastic ball that clears sides of workbowl, about 1½ minutes. If dough ball does not form, add more flour 1 tbsp at a time and process until dough ball forms. Spray medium bowl lightly with nonstick cooking spray or rub lightly with oil. Transfer dough to bowl and press down to flatten surface; cover tightly with plastic wrap and set in draft-free spot until doubled volume, 1½ to 2 hours.
When dough has doubled, press down gently to deflate; turn dough out onto work surface and divide into 4 equal-sized pieces. With cupped palm, form each piece into smooth, tight ball. Set dough balls on well-floured work surface. Press dough rounds with hand to flatten; cover loosely with plastic wrap and let rest about 15 minutes.
FOR THE TOPPING: Meanwhile, toss tomatoes and table salt in medium bowl; transfer to colander and drain 30 minutes (wipe out and reserve bowl). Shae colander to drain off excess liquid; transfer tomatoes to now-empty bowl and set aside. Combine cheeses in second medium bowl and set aside.
Gently stretch dough rounds into disks about ½ inch thick and 5 to 6 inches in diameter. Working one piece at a time and keeping the rest covered, roll out each disk to 1/8-inch thickness, 9 to 10 inch diameter, on well floured sheet of parchment paper, dusting with additional flour as needed to prevent sticking. (If dough shrinks when rolled out, cover with plastic wrap and let rest until relaxed, 10-15 minutes.) Dust surface of rolled dough with flour and set aside. Repeat with remaining dough on top of each other (with parchment in between) and covering stack with plastic wrap; set aside until grill is ready.
TO GRILL: Light all burners and turn grill to high heat, cover grill, and heat until hot, about 15 minutes; scrape cooking grate clean with grill brush.
Lightly flour pizza peel; invert 1 dough round onto peel, gently stretching it as needed to retain shape (do not stretch dough too thin; thin spots will burn quickly). Peel off and discard parchment; carefully slide round onto hot side of grill. Immediately repeat with another dough round. Cook until tops are covered with bubbles (pierce larger bubbles with paring knife) and bottoms are grill marked and charred in spots, 1 to 2 minutes; while rounds cook, check undersides and slide to cool area of grill if browning too quickly. Transfer crusts to cutting board browned sides up. Repeat with 2 remaining dough rounds.
Brush 2 crusts generously with Spicy Garlic Oil, top each with one-quarter of cheese mixture and one-quarter of tomatoes. Return pizzas to grill and cover grill with lid; cook until bottoms are well browned and cheese is melted, 2 to 4 minutes, checking bottoms frequently to prevent burning. Transfer pizzas to cutting board; repeat with remaining 2 crusts. Sprinkle pizzas with basil and course salt to taste; cut into wedges and serve immediately.
Spicy Garlic Oil
4 medium garlic cloves, minced or pressed (4 tsp)
½ tsp red pepper flakes
1/3 cup olive oil
Cook all ingredients in small saucepan over medium heat, stirring occasionally, until garlic begins to sizzle, 2-3 minutes. Transfer to small bowl.

Hi folks,
I am in the process of trying out Jeffrey Hamelman's recipe for Vollkornbrot, prompted by a German friend's whining about the lack of real rye bread in this country. In the process, I came across a mistake in the recipe for preparing the sourdough starter. The starter recipe as printed (Hamelman, 2004; p. 217) calls for 3 5/8 cups of rye meal, 5/8 cups water, and 2T + 1stp mature sourdough culture. However, if you prepare this you will end up with dry crumbles of rye flour, definitely not a viable starter.
The correct recipe should read 1 5/8 cups of water, which works out to 13oz. The recipe does list the correct measurement in ounces, but being naive, I still work with volume measurements. I guess that will show me.
Kind regards,
-Uberkermit
Hamelman, J. 2004. Bread: A baker's book of techniques and recipes.

I wanted to make dill bread so used Floyd’s wonderful recipe for Potato Rosemary Rolls yesterday but replaced the rosemary and sage for a huge pile of fresh baby dill. Then I added another huge pile of freshly ground black Tellicherry pepper. We really like things spicy but I was afraid the amount of pepper I used would overpower the dill. Not having made dill bread before (Tingull's looks so good) I also wanted to try using fresh dill to get a feel for the amount desired. I ended up using 2 1/2 teaspoons of freshly ground pepper and roughly 4 packed tablespoons of chopped fresh baby dill. The flavor was outstanding. My husband loved them!

I really love the way these taste not only because of the potato and potato water, which also helps them keep longer, but just the richness of the dough and texture when you bite into it. It has a kind of chewiness to the crust but still moist and the crumb is great for juicy hamburgers. We did have grilled ground sirloin burgers with fresh chopped garlic mixed into the meat and grilled sliced Vidalia onions. It made a fabulous hamburger.

Besides adding quite a bit of extra pepper and substituting fresh dill instead of rosemary and sage I didn't make any other change to Floyd's recipe. I did brush the top of the buns with unsalted butter when they were hot from the oven.

Inspired by Floyd's, Potato Rosemary Rolls:
http://www.thefreshloaf.com/recipes/potatorosemaryrolls
And Tingull's, Country Dill Bread:

Please don't ask me for the recipe...I was interupted and that threw every thing out of wack..
I had 2 cups warm milk,
2 cups water
1 rounded table spoon of sugar
1 good ounce fresh yeast crumpled
4 cups flour
Then after this was mixed I added 3 heaping tablespoons dry butter milk, about 1/2 cup soft butter, mixed that well and added 1 1/2 teaspoons salt, and enough flour togive me a nice dough.. It's the amount of flour that I put in I am not sure of... ;-))) qahtan


I dont really know if these photos will help anyone. I wanted to post them so some folks who may be having problems with shaping batards and baguettes and transferring to peel could see how I do it (I'm not a pro, I'm just using this as the way that works for me). And on with the show....
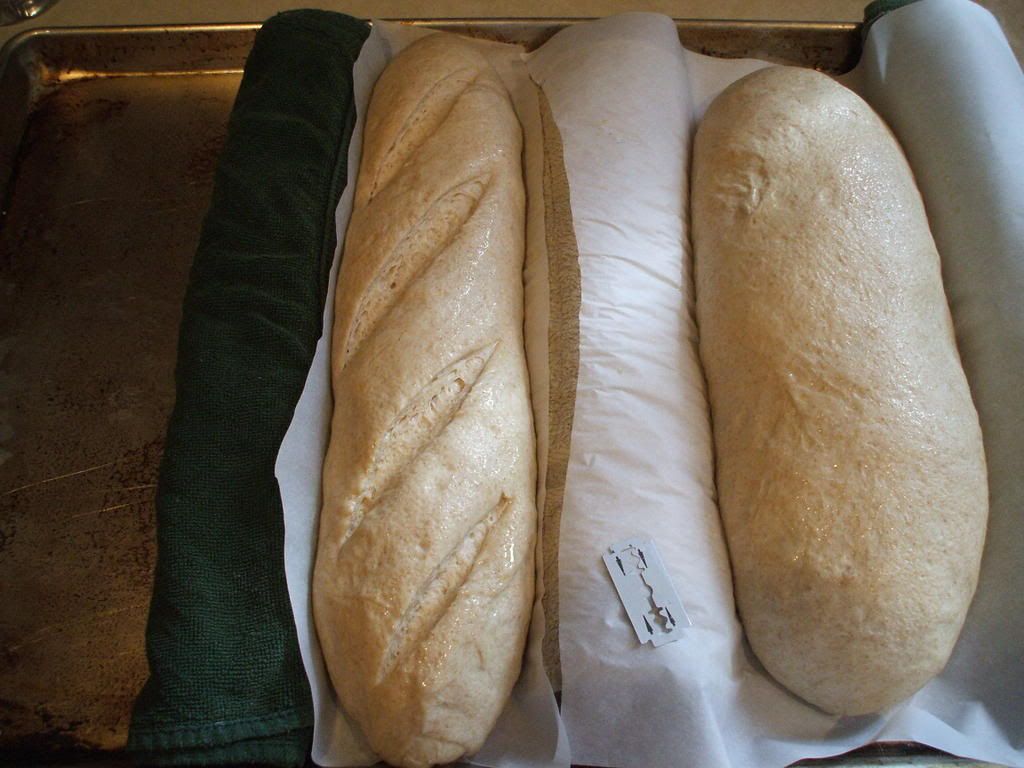
I start with a 3/4 sheet pan and take a dish towel and roll it up into a cylinder laying it against one side. Then I take a sheet of parchment paper and lay across the top of the rolled towel. I then take another towel and roll it up and place it under the paper against the first loaf. Then repaeat first step in placing next loaf, followed by another towel.
After the loaves are done with their final rise I use a razor to cut the paper around the edges of the loaf.
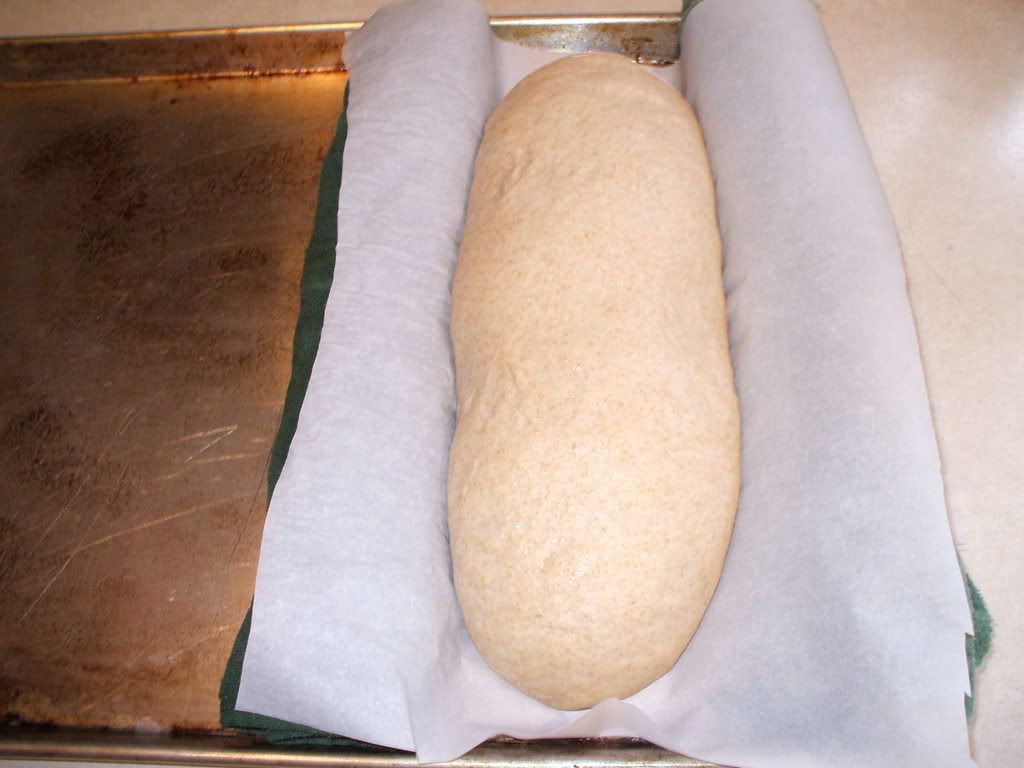
Second loaf is done the same way.
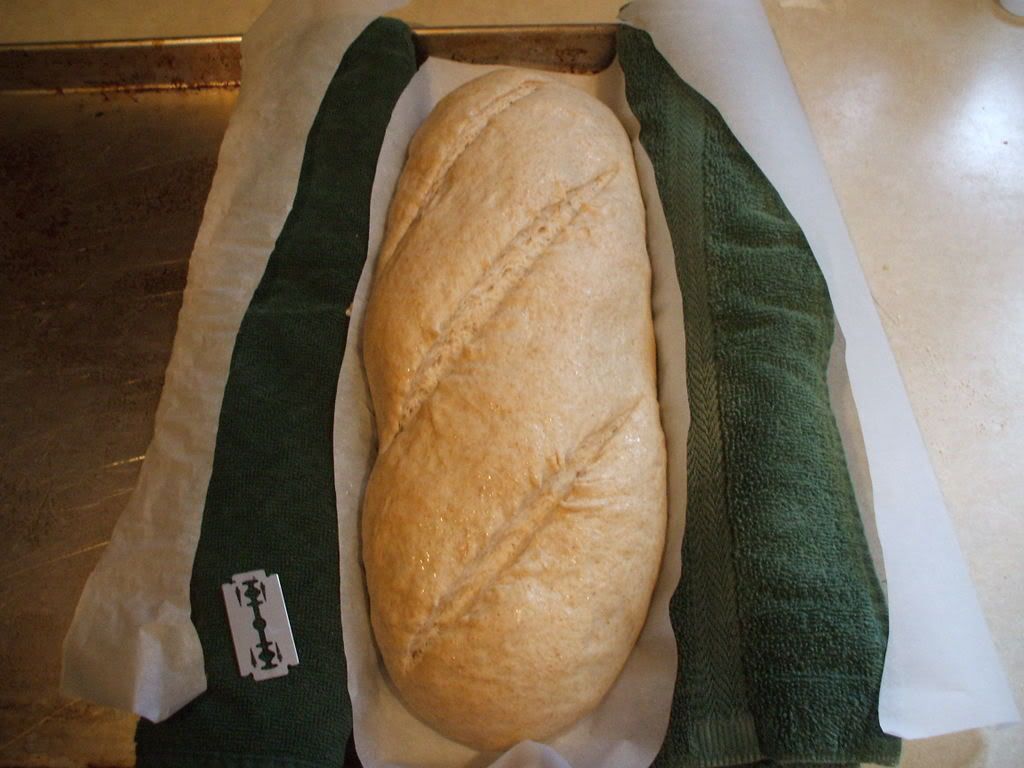
After the paper is trimmed I transfer loaf, paper and all onto peel.
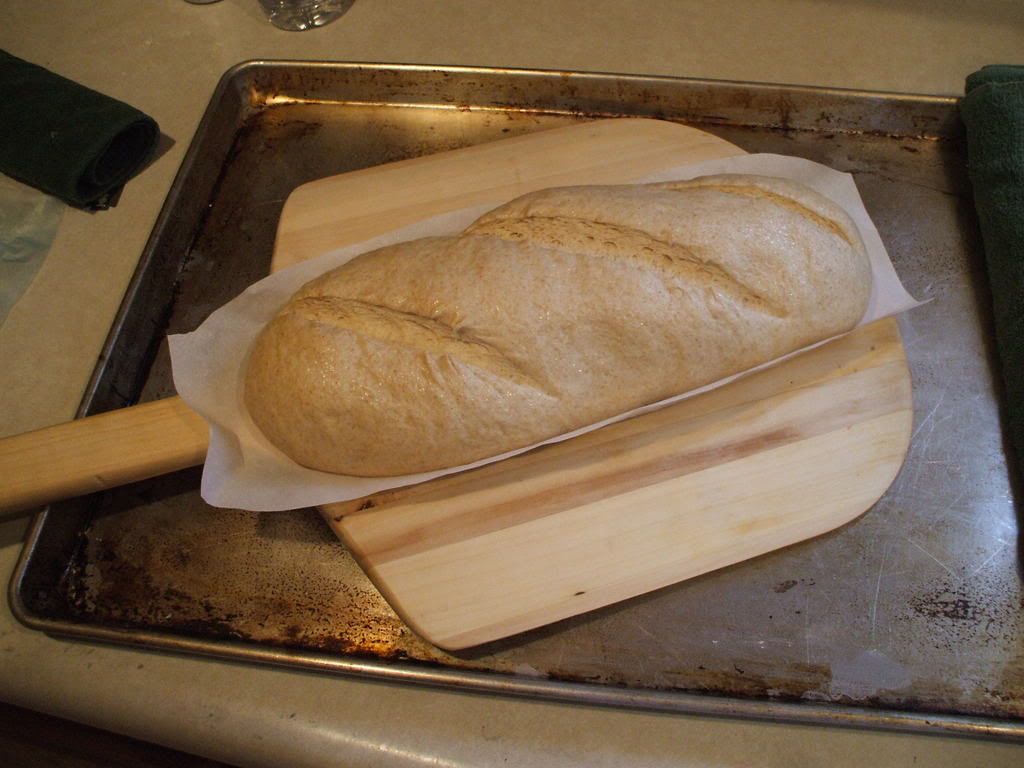
Half way thru bake I turn the loaf 180 degrees on the stone pulling the paper out during the process.
And here is the sourdough baguette coming out of oven.
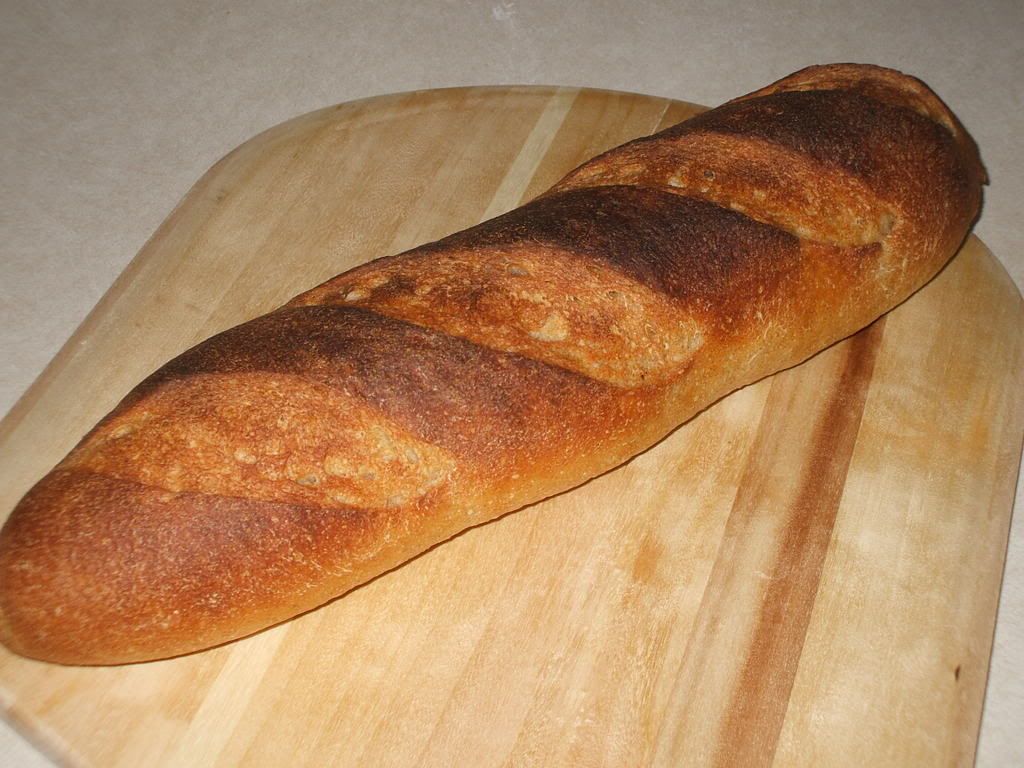
Here is the sourdough batard after bake.
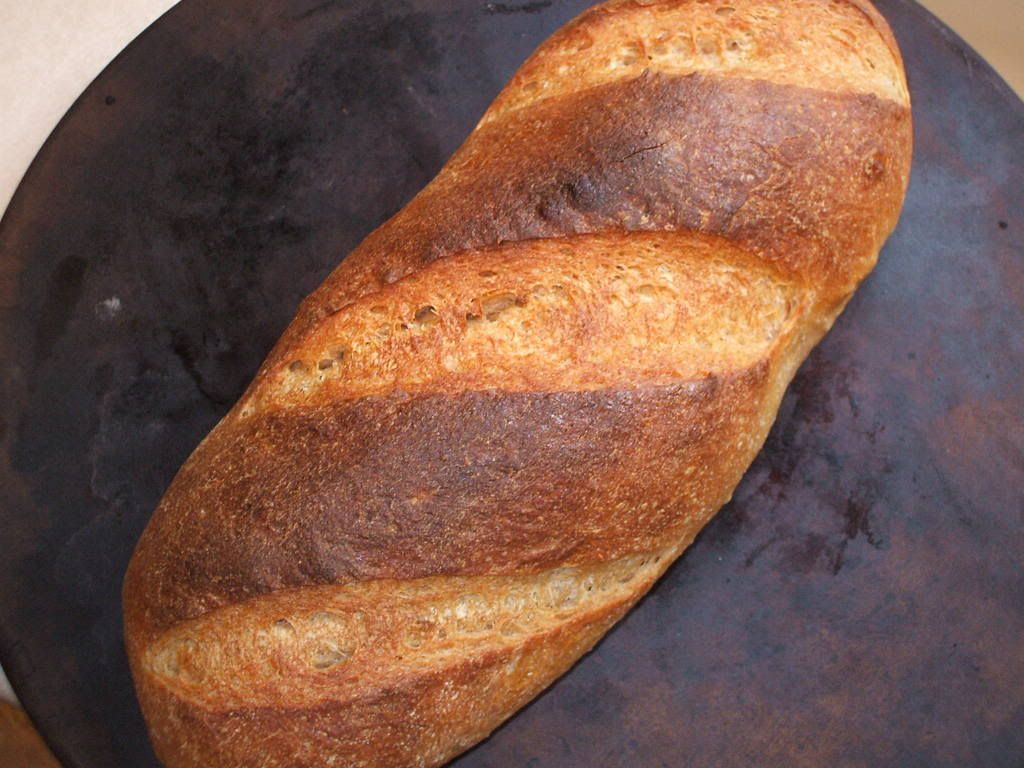
And another photo of baguette after bake.
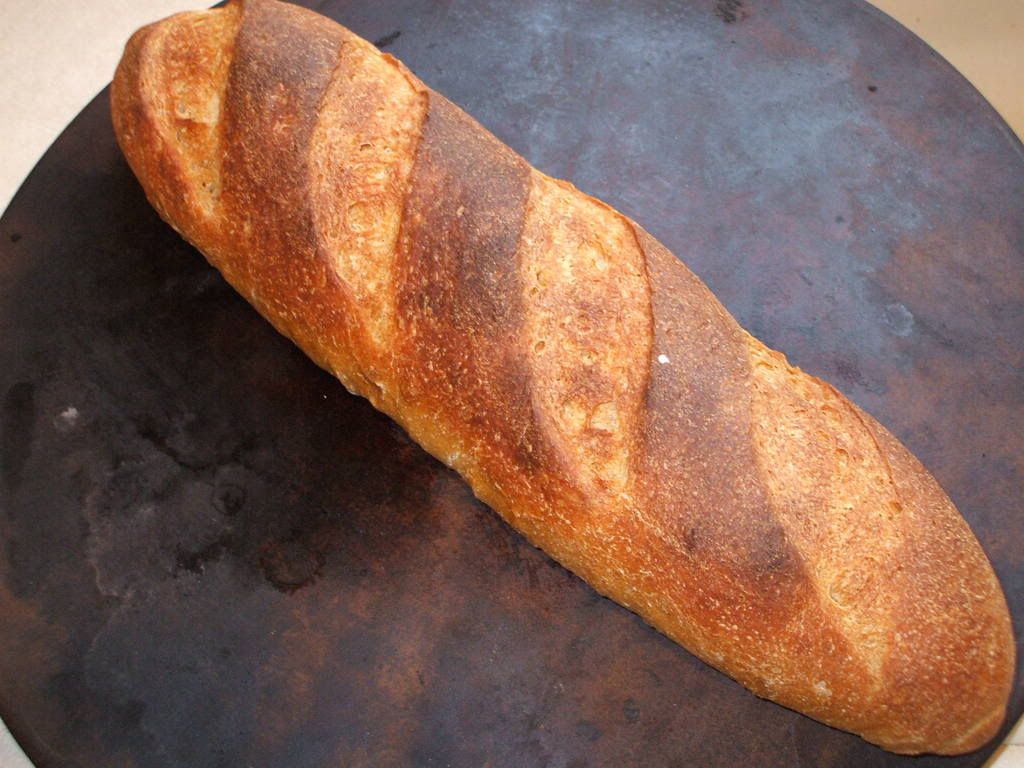
Here is a hodge-podge of this weekends bake. Whats left of my daughters two white loaves. Whats left of my Sourdough boulle, a SD batard and baguette. And a dozen bagels getting ready to go into the boil.
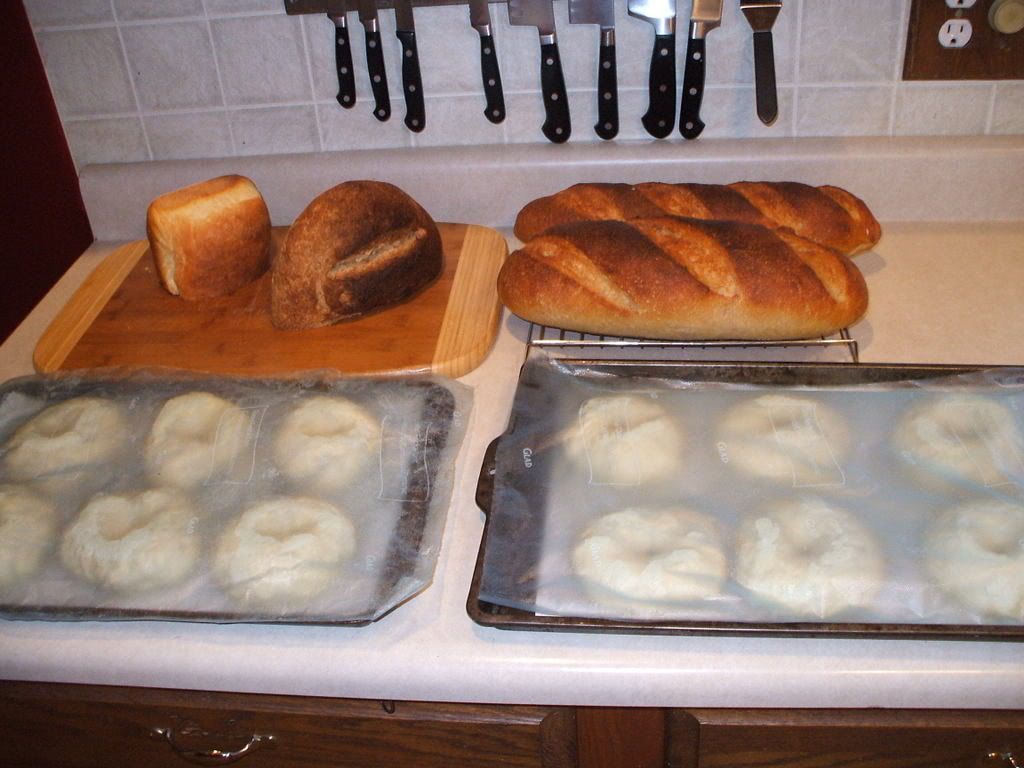
And I still have another boulle of sourdough in the fridge waiting to be baked after chillin for another 24hrs. I think I need to start thinking about wearing a kilt. Its getting awfully warm by mid day in my kitchen. And from what I understand, I can even get one of those cool little hanging pockets for the front to keep my measuring spoons in...... :-)
TT

Brotkunst, I am so jealous! I made my second batch of this bread yesterday and it didn't look anything like yours! I used durum flour both times but didn't know about altering the percentage of bread flour. The pate fermentee was softer this time, and the crumb was very yellow and had only small holes. I'm beginning to think I don't proof doughs long enough, but the risen "Ss" were very puffy and when I poked one the dent remained, which is what I think PR says. I charred the first batch I made and really wanted to get it right this time - and then I saw your picture and went into deep depression. Not really, I'm a stubborn old woman and will try again, but I would appreciate any suggestions you could make. I love this site and feel as though I am learning a lot, thanks to all for sharing, A

So I have baked a lot of bread this weekend, if you count Friday. Friday saw the BBA pugliese.


I liked it, but it didn't turn out the way I expected it to. It wasn't as soft as it looked like it would be in the book photo. The book photo bread is all squooshed down on top, as if it has a ciabatta-like, softer crust. Also, my crumb wasn't near as open. But, it was still nice, sort of like a generic Italian bread.
Yesterday I started to bake some sandwich bread (just my usual recipe), but then the day got short on me and I ended up putting the shaped loaves in the fridge for overnight. I baked them this morning before church, and they seem different. I haven't sliced them yet, but it does seem like the crust might be a little chewier. There are lots of little blisters all over the crust, too, which they usually don't have. It will be interesting to see what the crumb texture (and flavor) are like.
I also baked Bill's sourdough pagnotta today with my new starter. Now this is a bread I can get behind!!! With a big, wide open mouth!


It's gorgeous, albeit a bit flat. It's such a wet dough that I just don't think it can do much. But my starter performed wonderfully, doubling the dough in 4 hours and doubling the shaped boules in 3 hours. Fantastic. I did a few things differently than the recipe--I made up a sponge last night, using the starter, water, and just the AP flour. Let it sit overnight on the counter. It was super sour and foamy this morning, which worried me, bc I don't like really sour bread. But I kept going. I used KAF AP, KAF bread, and then for that last 100 g of flour, I substituted organic whole wheat graham flour from Hodgson Mill. It made a beautiful dough. I also used gray sea salt from France. And, I mixed the dough in my mixer rather than doing all of the folds. It took about 10 minutes at med-high speed to get a windowpane.
I proofed the shaped boules in improvised bannetons, namely wood salad bowls lined with smooth kitchen towels and dusted with flour. Baked them at 500 for 20 minutes and did the steam thing (I baked the first loaf without the steam, and it got less oven spring than the other two).
The crust is thin, crisp but chewy, and nice and brown. The crumb is open, holey, smooth and moist (almost tastes buttery). And most importantly, it isn't too sour...it's just right. And so, count me as another "Bill's Sourdough Pagnotta" convert!

Hi everyone,
I have a question about challah. I have not made it before today and I decided to give Hamelman's recipe a try. I'm wondering just how stiff this dough is supposed to be? I mixed it according to Hamelman's instructions, even adding a bit more water, but the dough was almost as stiff as bagel dough--and I make my bagels pretty darn stiff. The flour was a combination of regular and high gluten flour, for which I used KAF's Sir Lancelot. What should I have been looking for here in terms of dough consistency? The dough is fermenting now. I guess one good thing is that with such a stiff dough, I know the braiding will be easy!
Thanks,
Susanfnp

I apologize in advance if this is a stupid question. But when I've been building a dough with a poolish and with yeast here are my steps:
1. Build the poolish.
2. Let the poolish sit overnight of for hours - UNDISTURBED
3. Add poolish to rest of flour and water etc
4. Stretch and fold dough multiple times to get the gluten developed
5. Do a bulk fermentation to x 2 in dough volume
6. Cut and shape
7. Final Rise
8. Bake
It occurs to me I don't have a step-by-step process worked out in my mind of how sourdough dough development works. Could you tell me if I'm messing up my steps please?
1. Build the starter up to active state. (Takes as many days and feedings as necessary)
2. Add starter to rest of flour and water. Mix it up and let it autolyse for an hour or so.
3. Add salt and other ingredients into the dough mixture.
4. Stretch and fold dough multiple times to get the gluten developed
5. Do a bulk fermentation to x 2 in dough volume
6. Cut and shape
7. Final Rise
8. Bake
Are these the right steps or did I miss the part where the newly mixed dough with starter needs to ferment undisturbed? Can anyone give me a step by step guide for a basic sourdough bread or is each recipe different in it's methodology?