Essential's Columbia

I've been prodded by a certain TFL friend (username starts with "Z") to do this recipe, and I finally got around to it. I have to say it's too bad this didn't happen sooner. The recipe is just excellent. I've included some photos of the process and a spreadsheet of the recipe I used.
The recipe I followed is almost exactly as specified in Artisan Baking by Maggie Glezer on pages 82-83 except I doubled the recipe and made 4 loaves. I used Wheat Montana AP in place of the bread flour and KA Organic AP in place of the AP flour in the recipe. I made the firm levain using 36g of my 90% hydration starter in 321g of Wheat Montana AP and 197g of water. The inoculation is slightly lower, and I'm starting with a somewhat higher hydration storage starter, since that's what I had on hand. I made the inoculation lower than what is specified to gain a few hours in my overnight levain fermentation, since I knew the dough would not be mixed for about a full 12 hours after the levain was mixed.
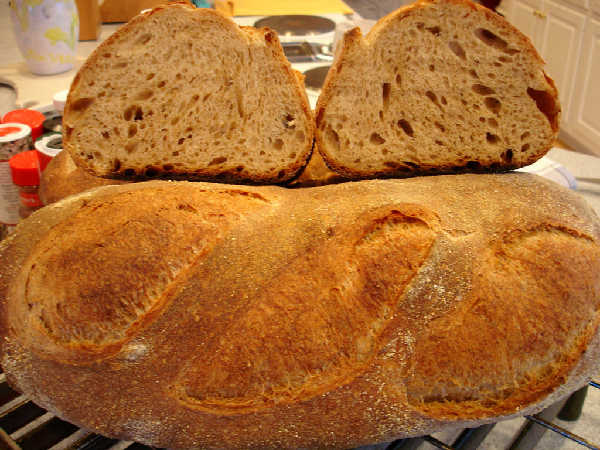
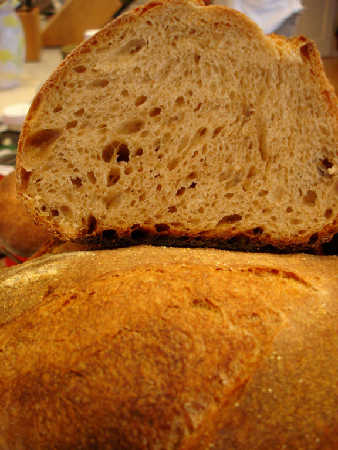
I kneaded the dough by hand using the suggested Glezer technique of working up and down the dough squeezing it and extruding it through my fingers. I also did some of her folding motions The slashing was easy, since this bread is only at about 65% hydration or so. I had to add a little more water because the Wheat Montana AP seems to absorb a little more water, but it is a firm, fairly dry dough. The flavor with the toasted wheat germ, whole wheat (I used Wheat Montana Bronze Chief), and whole rye was outstanding. The firm levain was just peaked when I used it, and the smells coming out of it were very pleasant when I added it to the dough.
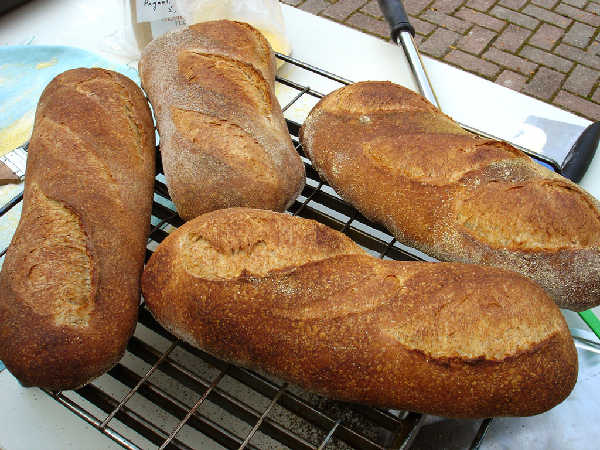
I had a little trouble with the shaping stage. The dough was very gassy, even though I stopped the bulk fermentation after 3 hours, before it had doubled, as specified. As I shaped the first one, it just seemed like the dough needed to be deflated or I would have gigantic holes in it, so I did aggressively pat down the loaves, form them into rough ovals and let them relax a few minutes before forming batards.
I've been experimenting with my newly installed outdoor brick oven, which has been a bit tricky to figure out. I scorched the bottoms of these loaves a little, so a couple of extra moppings of the oven floor may help to cool down the hearth just enough. The temperature of the dome and air seemed good, as all but the bottoms seemed to come out nicely baked with the firing I gave it this time, which gets the hearth up to about 530F, the air temperature to about 450F, and the dome up around 600F. Those are just the temperatures right after firing. Then, I turn off the fire, let the oven cool with the metal door in place, and mop the hearth floor before starting to bake. I have been especially pleased with the ability to steam the oven with a garden spray mister and seal it with a wet, towel covered wooden door. The crusts are coming out great this way, and the freedom to do larger amounts all at once adds some fun to the whole process. Being outdoors while baking is pleasant too, but I'm not sure what will happen in the winter.
The other bonus of the brick oven has been that the retained heat can be used to cook an entire very delicious roasted dinner. For example, after baking I've done lobsters, corn-on-the-cob, and asparagus, and roast leg-of-lamb, candied yams, and roast cabbage, and roast chickens, roasted halved potatoes, and garlic heads. So, you can enjoy a whole afternoon of baking and cooking from firing the oven one time before baking.


 Leader's Pain au levain
 Leader's Auvergne Rye Baguette with pancetta
  Leader's Pain au levain: crumb
 Leader's Auvergne Rye Baguette with pancetta: crumb