The Fresh Loaf

A Community of Amateur Bakers and Artisan Bread Enthusiasts.

Most bookmarked

CountryBoy's picture
CountryBoy

Rose L. Beranbaum Rye Bread

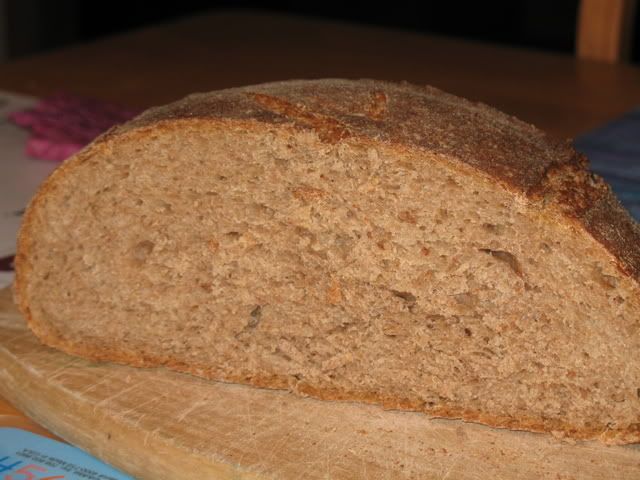
I have a problem and would like advice that anyone could provide.  My rye bread is waxy rather than light and chewy.  Do you know what I mean?  I have tried this recipe 4 times and I am not improving.  Could you advise?  Please note that she expressly suggests Bread flour for this recipe.

The following is the recipe I am following.  I quote it in full so you will know my process for this.


Basic Rye Bread-This Yields 3 Loaves…

The Sponge
6…Cups of wrist-temp water
2  tsp … active dry yeast
3 .…Cups Bread flour
3 Tbs .. of Honey 
3 ….Cups of rye

Additional Flour: mix the below items altogether
9….cups unbleached bread flour
1 … Pkg of active dry yeast
4….. Tbs. of Vegatable oil or 4 Ts of butter
Optional: 6 Tbs of Caraway seeds to soak in evening before..
2 ½ ….. Tbs.  sea salt before kneading

DAY I: Sponge
o Place 3 Cups water in large bowl; sprinkle in yeast; wait 10-20 mins. 
o Beat in The Sponge Ingredients; should be thick batter consistancy.
o Cover the bowl, wait for 1-2 hours.
o Put in fridge overnight 8-24 hrs.
o Next day take out and allow 1-2 hours to warm.

DAY II: Mix, etc.
? Add the Addt'l flour 1 cup at a time, graduating from wooden spoon. 
? When all the flour is added then allow to set for 1-4 hours.
o Levy says autolyse not necessary.
? Do Bulk Ferment:Kneade on 2 different occasions
o As needed at 1 hour + intervals; w/2 foldings at Each interval.
?  Divide Wait ½ hour and then form loaves.  .
? Put in oiled pans and then wait 1-2 hours to rise.
?  Meanwhile preheat oven to 450 degrees.
?  Brush top with water for crust.
?  S L A S H….. ½ ''. 

Baking
?  Put in oven at 400 degrees;  Bake for 20 mins.  And then tent appropriately.
? Open door to release the steam w / spoon.
? Then bring down heat to 375 for 40 mins. 
? Per Levy, with Rye necessary to bake 60  mins. !!!!!!
? Note:
o Allow to cool in oven
o Allow 6-12 hours to realign before cutting and eating.

subfuscpersona's picture
subfuscpersona

major wheat growing regions in the US - reference maps

Maps of the US showing the major wheat growing regions. For those of us who must mail order, at least it can explain those shipping costs.

Every map has a link immediately below if you need to see it in a larger size.

As I am geographically challenged, I start with a basic US map that shows the states with their names.

US Reference Map

click here for large size version

Major US Regions for All Wheat

click here for large size version

Major US Regions for Spring Wheat

click here for large size version

Major US Regions for Winter Wheat

click here for large size version

Major US Regions for Durum Wheat

click here for large size version

dolfs's picture
dolfs

Thom Leonard's Country French

My first attempt failed, but this second one was much better.

Thom Leonard's Country FrenchThom Leonard's Country French

The first time I was baking six loaves (3 different recipes, 2 loaves each) on one day, and I wasn't quite with it (tired). I did not take care of the dough well enough, I suppose. It took way to long to ferment and rise, and as a result was over proofed. When I slashed it, it collapsed, and never quite recovered in the oven. It was still quite edible with some soup though! 


So, back to the drawing board. Second time around I made sure I had a good gluten window. This time around I also did a longer autolyse, and waited to add the salt until much later. I did three folds along the way during the bulk ferment. Finally, I made sure I shaped a good really tight boule. The effort paid off. I had a minor collapse during slashing, but probably more due to me trying to slash "assertively". It came back just fine in the oven!

Thom Leonard's Country French CrumbThom Leonard's Country French Crumb

The crumb was nice, and the crust incredible. The taste was very complex and very sweet. Only a hint of sour. I baked this as an almost 3 pound loaf, so I did use only about 55 minutes of baking time, rather than the 70 minutes suggested for the 4 pound version. Internal temperature was 210F. I did not have high-extraction flour. Last time I did an approximation by sifting coarse whole wheat flour, but the bread came out a lot darker than it should. This time I used a fine whole wheat mixed with regular bread flour (Giusto's Ultra Performance). To keep the color down I used 50% whole wheat and 50% white whole wheat (both KA). 


--dolf


See my My Bread Adventures in pictures 

DavidAplin's picture
DavidAplin

Vollkornbrot

Hi Bread Bakers, I have been 'sper-i-menting with Vollkornbrot forms from Hamelmans book. Some have turned out well, others not so well. The final proof seems to be key here. Paying attn to the final proof time is very important, if it rises a little too high...kerplunk! Also, the baking time in the book seems to be rather short, I have increased it to around 4 hours in total.

Happy Baking, David Aplin  Finished mix @ 20 degrees C
Vollkornbrot Final Dough: Finished mix @ 20 degrees C
 Water on table, dough is tres sticky
2 kg. and 1 kg. pieces: Water on table, dough is tres sticky
 Beginning of 1 1/2 hr. final proof
Vollkronbrot in tins: Beginning of 1 1/2 hr. final proof
 End of proof with cracks very visible, time to slam the heat
Vollkornbrot Proof: End of proof with cracks very visible, time to slam the heat
 After a lengthy bake; almost 4 hours.
Vollkornbrot baked: After a lengthy bake; almost 4 hours.
 Another view, quite pleased with myself, (FOR NOW)
Vollkronbrot Baked 2: Another view, quite pleased with myself, (FOR NOW)
jmos's picture
jmos

Durham wheat for making bread

Can one make bread with Durham wheat. Have any of you tried it? I think it may make for chewy crumb.

Thanks

dmsnyder's picture
dmsnyder

Leader's Pain au Levain Complet (a la Poilane)

I have made Peter Reinhart's Poilane-style miche many times, but this was my first attempt at Daniel Leader's version. The formulas are different in a number of ways. Leader uses autolyse, which Reinhart does not, and does not use cold retardation of either the starter or the formed miche, which Reinhart does. Leader uses a higher hydration dough and folding an hour into bulk fermentation.

Leader's instructions for this formula contain at least one error, in the secion on making the whole wheat starter. His instructions for adding the starter to the dough are confusion in this formula as in others. 

Rather than using a mixture of bread flour and whole wheat in the final dough, I used 400 grams of first clear flour and 100 grams of whole wheat. (I used to prefer all first clear flour for Reinhart's miche, but KA's first clear flour seems to be somewhat lower extraction recently.) The miche was proofed in a linen-lined wicker banneton, which I am loving.

Two hours out of the oven, the flavor was lovely. I like the flour mix I used - just enough whole wheat flavor. It was somewhat  less sour than Reinhart's version in my hands, presumably due to the lack of cold fermentation, I assume.

Photos to follow ... 

David

JMonkey's picture
JMonkey

Baking this week

Working from home has its disadvantages: it's all too easy to blur work into home-life, you're somewhat isolated from co-workers, and it's tempting to try to do chores when work is slow.

But bread baking poses no problems at all. Most of bread baking, especially when you use the stretch and fold method to develop dough instead of traditional kneading, consists of 2-3 minute bursts of activity separated by long periods of waiting. The trouble, of course, is that the timing of those little bursts of activity is really, really important. Working from home, the kitchen is always just a few steps away from my computer, and doing the work of making bread takes about as much time as going to fetch a fresh cup of coffee.

Lately, I've been doing a lot of sourdough baking, even when the bread itself isn't truly a sourdough bread. For instance, here's my results from baking Peter Reinhart's Mash Bread, from his new (and fabulous) book, Peter Reinhart's Whole Grain Breads.


The sweetness of the bread was really surprising, and I was astonished by how much oven spring I got. It's easily the best I've ever gotten from a 100% whole grain bread. Unfortunately, I was in a hurry and didn't let the sourdough mature fully, so the flavor was less than I'd expected. In short, sweet, but bland. I'm eager to try it again, though, and next time I'll let the sourdough fully ripen, which is especially important, since the sourdough is used almost exclusively for flavoring rather than leavening. If you want to make this bread, I'd suggest heading over to Bill Wraith's excellent write-up.

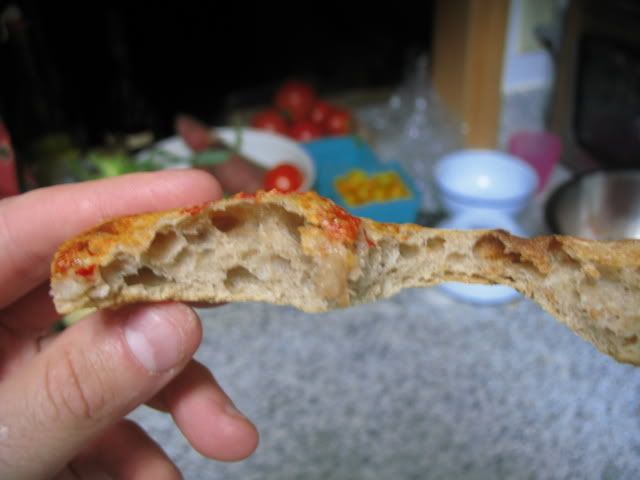
I had some starter left over, so I made up some sourdough pizza dough -- two of the doughballs went in the freezer, while the others went into the fridge so that I could make them up for dinner the next night. Probably two of the best pizzas I've made. A woman at the Corvallis Farmer's Market was selling wild chantrelle mushrooms, so I got some, sauteed them in a bit of butter, and plopped them on the pizza. They were great, along with some black olives and turkey-chicken sausage:


The crust was nice and holey!


Here's how I made it:

Formula

  • Whole wheat flour: 50%
  • AP flour: 50%
  • Water: 80%
  • Salt: 2%
  • Olive oil: 5%
  • 15% of the flour is pre-fermented as starter
Recipe (2 crusts):
  • Whole wheat starter (75% hydration): 100 grams
  • Whole wheat flour: 130 grams
  • AP flour: 180 grams
  • Water: 250 grams
  • Olive oil: 18 grams
  • Salt: 7 grams

Mix the water and the starter, and mush it all up with your fingers until it's a soupy mess. Add the salt and the oil, mix again, and then add the flour. Let it sit, covered, for 1 hour and then give it a stretch and fold. Do two more folds spaced 30 minutes to an hour apart. Let it ferment a total of 4-5 hours at room temperature (about 68-70 degrees F), and then divide into two. Shape each lump of dough into a tight ball, pop them into plastic bags, and put them in the fridge if you plan to use within the next 3 days. Otherwise, put them in the freezer, where they'll keep for at least one month. When you're ready to make the pizza, let the dough sit out for about 2 hours if it was in the fridge, 4 hours if in the freezer. Shape, top and bake on a stone preheated for about an hour in an oven at the highest setting possible. Bake for 8-10 minutes.

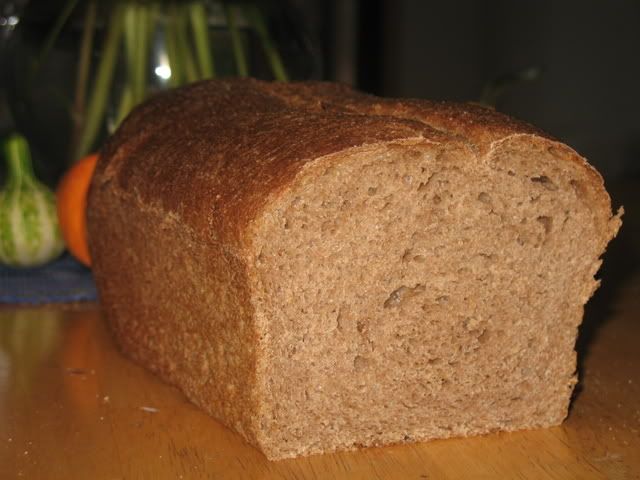
Last, my standby: whole wheat sourdough sandwich bread.


Always tasty, always reliable.

Next on my agenda: some of those potato-onion-rye rolls from Peter's book!
JMonkey's picture
JMonkey

Kenneth's Poilane-style Miche

This is a recipe that Kenneth, a long-time poster to rec.food.sourdough, has posted a few times in response to requests. I made it this weekend and can safely say it's delicious. Tangy, but not overpoweringly so, with a smooth crumb that, though not full of big holes, is nevertheless a moderately light bread. It sprung well in the oven. In fact, it reminded me of some of the better Desem breads I've made. The hydration of this loaf is 68%, so one could go higher, I'm sure, and the salt is higher than usual at 2.5%, but the bread did not taste overly salty.

On a side note, I'm beginning to think my quest for holey, super hydrated whole wheat is misguided. The breads are no more tasty, in my experience, and though the crumb is more open, the high hydration has made the loaf flatten out considerably in the oven.

Back on topic. Kenneth, I believe, uses an authentic Poilane starter in his bread (I used Carl's) and emulates the high-extraction flour that Poilane uses through a combination of AP flour and freshly ground whole wheat (the loaf is about 40% white flour). He also uses 30% whole spelt flour, based on this page on Poilane's Web site.

How well does it imitate a true loaf from Poilane? I have no idea. The last time I was in France was 17 years ago when I was a not-so-well-heeled student, and today ... well, I'm not willing to part with the kind of cash it would take to have a loaf delivered to me from across the Atlantic.

All I can say is, it makes a nice loaf of bread. Here's my result:


And here's Kenneth's recipe, or at least, the version of it that I used:

Day 1, 9:30pm 474g Water + 120g starter + 236g coarse whole wheat, ferment at 69F.

Day 2, 7:30am add 65g coarse rye, 254g KA AP flour, 170g wholespelt flour, 20g salt.

Knead fully, then refrigerate 24 hours. Then, form boule, ferment at 69F for 5 hours.

Slash, then bake at 490F for 35 minutes, the first 15 minutes with steam...
Of course, I fiddled with the recipe. First, I didn't knead on Day 2. Instead, I mixed it up and then let it ferment for 2.5 hours. I gave it a fold at 1 hour, 45 minutes and then another 45 minutes. Then, I popped it in the fridge. When I baked it, I did use a preheated oven, stone and steam, but I feel certain that a cold start would do fine as well. I baked at 460.

I'll be making this again ....
bwraith's picture
bwraith

Pane Casareccio e Lariano di Genzano

Pane Casareccio e Lariano di Genzano

Daniel Leader's Local Breads has a fascinating story of his visit to Genzano, where he saw them make large, almost charred looking, bran dusted breads raised with a biga naturale, an Italian firm sourdough levain. I enjoyed hearing about his visit with Sergio, while they mixed, raised, and loaded 64 very large loaves into a wood-fired oven. Now that I have a brick oven in my back yard, I thought I'd give a try at making these loaves in the size he says he observed at the bakery he visited. He says they created approximately 8 pound loaves that were loaded eight at a time into an eight foot long by one foot wide by about 4 inches tall box with divisions in it for eight loaves. Thanks to Zolablue for doing this recipe as shown in Leader's book and writing about it in her blog, which provided inspiration as well as lots of information and photos.

I've included some photos of the process and spreadsheets for the high extraction flour loaf in html and xls format and for the white flour loaf in html and xls format.

I only did two loaves of 8 pounds each, which I proofed in a 26 inch by 17 inch by 4 inch roasting pan, and then baked in my brick oven, which is a dome 37 inches in diameter - enough room for two of these loaves. The dough is very wet and is kneaded in a mixer at increasing speed for over 20 minutes or more to fully develop the gluten. The dough is hard to handle, as it is very soft, sticky, and puffy.

There are two styles of this bread, one with a high protein white flour and one with a high extraction flour. I used Heartland Mills Strong Bread Flour for the white flour loaf and Heartland Mills Golden Buffalo for the high extraction flour.  

Levain

  • 15g of 90% hydration white flour starter (12g for the high extraction loaf, as it rises a little faster)
  • 392g flour (use the appropriate flour for each loaf, as described above)
  • 273g water

The levain was mixed the night before and allowed to rise overnight at room temperature. The amounts are such that by mixing the white flour levain at about 10PM and the high extraction flour levain at 11:30PM, the white flour levain would be ready at 9:00AM the next day and the high extraction levain would be ready at 10:00PM the next day, allowing me to mix them successively in the morning with my DLX mixer such that both loaves would be ready to bake at the same time later on the next day. The high extraction flour rises more quickly than the white flour, so it is being mixed later to account for that difference.

Dough

  • All the levain
  • 1.6 Kg flour (use the appropriate flour for each loaf as described above)
  • 1240 g water with the white flour loaf, 1420g flour with the high extraction flour loaf
  • 5 g instant yeast
  • 40 g salt

According to Leader, the dough is mixed for a long time at high speed. I used a DLX mixer, first at a low speed to mix the ingredients for about 10 minutes, then at medium speed for about 8 minutes, then at high speed for another 4 minutes.

The dough is supposed to be very soft and wet. I had to add a little flour to the white flour loaf, as it was so wet, it wouldn't come together, even after 20 minutes of kneading. I had to add some water early in the mixing of the high extraction flour loaf, as it was clearly too stiff to begin with. Eventually, they were both fairly wet and gloppy, but with reasonable gluten development. I ended up folding the white flour dough a couple of times and the high extraction flour once. It seemed necessary to get some additional gluten development later on.

The inoculation for this recipe is 20% fermented flour to total flour weight, which is a little lower than the recipe in Local Breads (30% fermented flour). The idea was to let it rise a little longer to get more sourdough flavor in the dough. I've had better results starting at inoculations below about 25% with my starter in any event. For the same reasons, the amount of instant yeast was reduced to only 5 grams in 2Kg of total flour. My plan was to let the dough rise for about 3.5 hours in bulk fermentation and about another 2.5 hours in final proof. However, it went faster, as I forgot how warm the dough would be and how long it would stay warm due to the long machine kneading and the large volume of the dough. The dough rose almost too quickly, even with the lower inoculation and amount of instant yeast. I would consider reducing the yeast even further in a subsequent attempt, to match the timing I wanted for the sourdough fermentation with less need to punch down the dough.

Bulk Fermentation

Each dough was placed in a rising bucket. The white flour dough was folded twice, at one hour intervals. The high extraction flour dough was folded once two hours after mixing.

Final Proof

The loaves were placed seam side up in a large roasting pan measuring 26x17x4 inches. A piece of wooden board was placed between the loaves and separate couches were placed on each side of the board to facilitate lifting each large piece of dough out onto the peel. The couches were dusted with KA white wheat bran, which worked beautifully as a "teflon" dusting. After about 2 hours and 15 minutes, the loaves seemed ready. To place them on the peel they were lifted in the couche and basically "dumped" onto the parchment lined and bran dusted peel unceremoniously. They spread out beyond the edges of my 16 inch peel, so I had to quickly but gently fold the edges underneath to get the loaves to fit on the peel, which didn't sound completely inconsistent with the description Leader gave of the process followed in the Italian bakery he visited. He said the loaves were very soft and gloppy, were handled minimally, and quickly moved from one spot to another. I'm sure it was far more graceful than what I ended up doing on my first shot, but it did seem to work. The basic advice here is plow ahead, don't look back, don't waste time worrying about the shape or the tightness of it. This is a rustic loaf, after all.

Bake

The oven hearth floor was raised to about 525F and then the flame was put out, the oven door sealed, so the temperature inside could equilibrate and drop over the course of the last hour of the final proof. The loaves were dumped on the peel, adjusted minimally in shape as needed, and transferred into the oven in quick succession. The oven and loaves were sprayed with a fine mist to generate steam, and the oven door was sealed with a wooden door covered with damp towels.

The kitchen oven equivalent would be to preheat to about 450F with baking stone, and use a skillet with water or other steaming method, and drop temperature to 400F immediately shortly after putting the loaves in the oven.

The loaves were rotated after about 20 minutes, and the steam was removed from the oven by replacing the towel covered door with a metal door positioned to allow some air flow out the chimney.

The total bake time was 1 hour and 20 minutes, but the oven door was open and the outside air was fairly cold today, so the hearth temperature was only about 400F and the air temperature about 350F for the last 20 minutes. The idea was to make sure the loaf was fully baked inside, since they are large, wet loaves. The internal temperature was about 207F at the end. In retrospect the oven could have been a little hotter, as they didn't get quite as charred as was intended.

Results

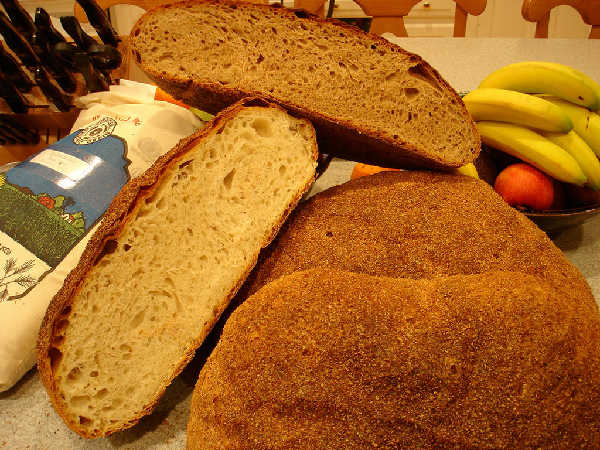
The loaves have a nice color but aren't quite as dark as Zolablue's loaves. My sense of the right temperature for different situations with the new brick oven is still developing. The crumb is just what I like for both loaves, moist with irregular hole structure and a mild but distinct sourdough flavor. The white flour loaf, which may have been made a little too wet, had fewer large pockets and less crust separation than expected, given the excess hydration. As a high extraction flour miche, the high extraction flour Genzano loaf may become a standard, although the Thom Leonard Country French made with Golden Buffalo is similar and also a wonderful miche.

susanfnp's picture
susanfnp

Tortas de aceite

I found the recipe for these Spanish olive oil wafers in Penelope Casas' La Cocina de Mama: The Great Home Cooking of Spain.

These are a great way to use up a little bit of extra pizza or bread dough and they are really delicious. Thin and flaky and spiced with anise and sesame seeds. There is sugar on top (which could be omitted for a less sweet wafer); no sugar in the dough.

Click here for the recipe.

Tortas de aceite (olive oil wafers)


Pages