The Fresh Loaf

A Community of Amateur Bakers and Artisan Bread Enthusiasts.

Recent Blog Entries

Teeny's picture
Teeny

I have a 5 quart cast iron Dutch oven with lid and I am interested in baking some no-knead artesian bread.  Could anyone tell me the minimum and maximum amounts of flour that works with a 5 qt Dutch oven?  Most of the recipes I find just say to use a Dutch oven without indicating what is the best size for the amount of flour the recipe calls for.

HeiHei29er's picture
HeiHei29er

I originally tried this bread with the 90% biga version.  I struggled with lumpy dough like others did and couldn't get them all out.  Even with the lumps, my sister-in-law really liked the bread, and she asked for it again this week.

I decided to give it another go but approach it a little less extreme.  The flours and hydration are the same as the original, but I reduced the biga to 50% of the flour and increased the biga hydration from 47% to 55%.  In addition, this time instead of adding final dough water and starting to mix right away, I added the final dough water to the biga and let it soak for a 5-10 minutes to hydrate the flour a little more.  Then, I gently worked it to start loosening it up.  The Final Dough flour was added a bit at a time and worked into the loosened biga.

This method worked MUCH better.  No clumps and a nice smooth dough formed after a few rounds of bowl kneading with 10 minute rests.  My next attempt at this will be to keep the PFF at 50% but work the biga hydration back down towards 50%.  My understanding is that there's a unique aroma and fermentation that occurs when the biga is sub 50%.  But...  that was from reading other threads and I may have misinterpreted the statement.  Anyone with experience using low hydration bigas and if it's a noticeable difference from the 55% hydration version I used with this bread?  

My sister-in-law hadn't arrived before I left for my work trip, so this loaf hasn't been sliced yet either.  Will get some crumb shots when I get back home.

Biga after mixing

After Final Dough mix

After 4 sets of bowl kneading

HeiHei29er's picture
HeiHei29er

Let's get the obvious out of the way...  My first attempt at decorative scoring is, well, let's say rudimentary at best.  Still a lot to learn on that!  :-)

Just before Labor Day weekend, I had a bunch of windshield time and was thinking about random stuff.  Thought I remembered reading somewhere that the Gold Rush cooks would keep a ball of their starter in a bag of flour and break it out when they needed to bake.  Then, refresh it and put it back in the flour bag.  I tend to like the traditional and historic side of things, especially this hobby, so I decided to give it a whirl.

I have a blend of wheat varieties from Janie's Mill that I've been grinding as my whole wheat: Glenn, Red Fife, Turkey Red, and Warthog.  Before we left for a 3-day camping weekend, I mixed up 40g of flour (50% WW blend and 50% Bread flour) at 45% hydration and formed a dough ball.  That went into a jar, was covered with bread flour, and put in my proofing box at 76 deg F.  3 days later I came home and found a nice mound in the top of the flour and the dough ball had definitely grown.  It also had a hard shell with an active starter center.  I did multiple refreshes.  A few at 24 hours.  Then a few at 12 hours.  Since then, I have been refreshing it at 1: 0.9: 2 with about an 8 hour ferment.  After 8 hours, it goes into the fridge.  This is my first bake with it.

I've also been done a few bakes recently with a 2-stage build on the levain.  The first is at 100% hydration to promote yeast and the second down at 60% to promote acetic LABs.  This is based on comments from one of the recipes on The Rye Baker website.

This bread is a country loaf with 15% whole wheat at 68% hydration and 15% PFF.  The whole wheat uses the blend of grains mentioned above.  My first build was 11g of stiff starter, 20g of water, and 18g of bread flour (haven't done the math on the hydration but should be close to 100%).  This was fermented for 6.5 hours at 76 deg F.  It was more than doubled, but hadn't fully peaked yet.  A young levain...  The second build was all of the first build combined with 20g of water and 49.5g of bread flour.  This fermented for 10.5 hours at 70 deg F.  The levain was fully matured and maybe just starting to show signs of deflating.  Wish I would have grabbed photos at both stages...

The resulting loaf had great spring and was maybe the thinnest, crispiest crust I've ever achieved.  This isn't full of cracks like others have attained, but it's the first one I've ever had.  My baking setup, times, and temps were standard for me so no changes there.

The loaf hasn't been sliced yet and I had to travel for a day.  It smelled great though!  Will try to post a crumb shot when I get back home and slice it.

loaflove's picture
loaflove

Hi all

When my starter peaks but I'm not ready to mix my dough yet, can I put the starter in the fridge for about 8-10 hrs then mix my dough? Will I have to bring it back to room temp before I mix? 

thanks

LL

dmsnyder's picture
dmsnyder

Hansjoakim was a regular contributor to thefreshloaf for a long time, He was a physics graduate student at the time, as I recall, and an amazingly adventurous and talented chef and baker. In September, 2009 he posted what he called his "favorite 70% rye." I asked him for the formula and baked it myself a week later. It was easy to see why it was a favorite. It was an easy dough to handle for a 70% rye, and it was delicious to eat.

Over the intervening years, I have made this bread a few times. Every time I make it, I wonder why I have let so much time pass since the last bake. This week, I baked it again, and it is as wonderful as ever. I baked it yesterday. Let it rest wrapped in baker's linen overnight and had some with butter and smoked salmon for breakfast. Seriously yummy stuff!

Looking at my write-up from 2009, I found it could stand re-formatting  and editing. So, here it is ...


Total Dough

Wt (g)

Baker’s %

Medium rye flour

441.5

70

AP flour

187

30

Water

472.5

75

Salt

11

1.8

Total

1112

176.8

55% of flour is pre-fermented.


Rye sour final build

Wt (g)

Baker’s %

Medium rye flour

218

100

Water

218

100

Ripe rye sour

11

5

Total

447

205

Mix the rye sour final build the day before you plan to bake. Mix all the ingredients in a medium bowl and cover tightly. Ferment for 14-16 hours at room temperature. For example, if you plan on making the bread in the morning, you can mix the rye sour the night before.


Final dough

Wt (g)

Medium rye flour

218

AP flour

187

Water

249

Salt

11

Rye sour (all of above)

447

Total

1112


Procedure

  1. Dissolve the rye sour in the water in a large bowl or the bowl of a stand mixer.
  2. In a medium bowl, whisk together the flours and the salt.
  3. Add the flours and salt to the large bowl and mix thoroughly.  If mixing in a stand mixer, mix with the paddle at Speed 1 for 3 minutes. Switch to the dough hook, and mix at Speed 2 for 3-5 minutes. You may need to scrape down the bowl once or twice during mixing. The dough should form a loose ball but remain a thick paste with little dough strength.
  4. Transfer the dough to an oiled bowl and cover it tightly. Ferment for 1 hour at 78-80ºF. It won't expand much if at all.
  5. Transfer the dough to a floured board and pre-shape into a round. Cover and let rest for 5-10 minutes.
  6. Shape into a round and place in a floured banneton/brotform. Note: If you want to dock the loaf (make lots of holes in the top to release steam), put it in the basket seam side up. If you want the folds to open chaotically, place it in the basket seam side down.
  7. Cover the loaf with a towel or place the banneton/brotform in a food-safe plastic bag and seal it.
  8. Proof for about 2 hours. (Mine usually proofs in about 1 hour, 45 minutes). The loaf will expand by 50% or so.
  9. One hour before baking, pre-heat the oven to 480ºF with a baking stone and steaming apparatus of choice in place.
  10. Dust the bottom of the loaf with corn meal or semolina. Transfer it to a peel. Steam the oven and transfer the loaf to the baking stone. Turn the oven down to 460ºF.
  11. Bake at 460ºF with steam for 15 minutes. Then, remove the steaming apparatus and turn the oven down to 440ºF.
  12. Bake at 440ºF for 20 minutes, then turn the oven down to 400ºF. Bake for another 15-20 minutes. Note: If the crust is getting too dark, you can turn the oven down further for the last 5-10 minutes.
  13. The loaf is fully baked when the crust is firm, the bottom of the loaf sounds hollow when thumped and the internal temperature of the loaf is at least 205ºF.
  14. When the loaf is fully baked, remove it to a cooling rack. Let it cool completely (2-3 hours), then wrap it well in baker’s linen or a tea towel, and let it rest for 18-24 hours before slicing.

Happy baking!

David

Nadia's picture
Nadia

Hi,

I find that most sandwich bread recipes include, butter or oil.  I would like to find a good basic recipe for sandwich bread that does not include butter or oil.  I need to  bake a lot of sandwich bread and I am looking to minimize ingredients.  Any suggestions?

Isand66's picture
Isand66

I wanted a nice bread for sandwiches and/or toast so I threw together some Durum flour, fresh milled high extraction rye flour, AP flour and a little Potato flour I had recently bought at KAF.  The Potato flour helps keep the bread from going stale.

I also added some fresh honey I picked up during our recent trip to Vermont to add a touch of sweetness.

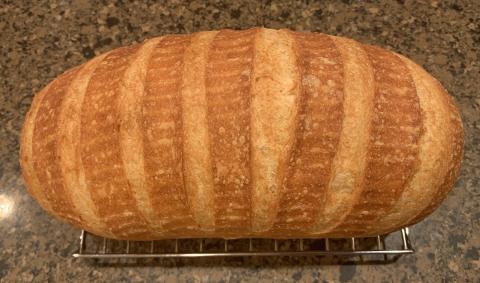
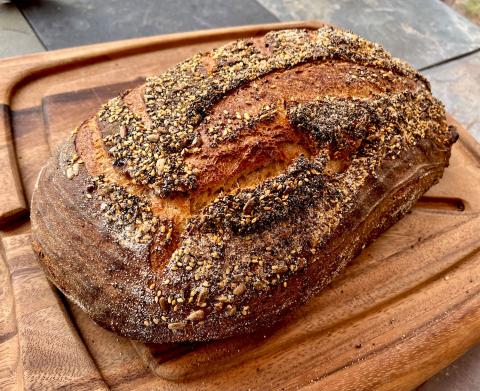
For the topping I used some “The Works” Bread Topping from KAF which to be honest is a bit strong.  It has a bunch of different seeds, garlic, onion, paprika, tumeric and sea salt and spices.

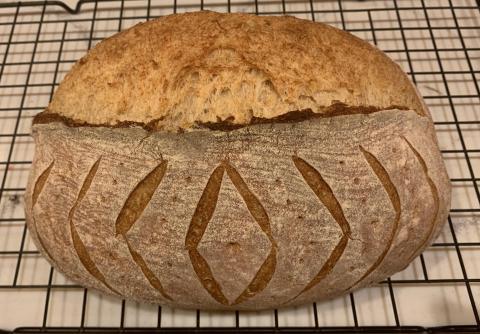
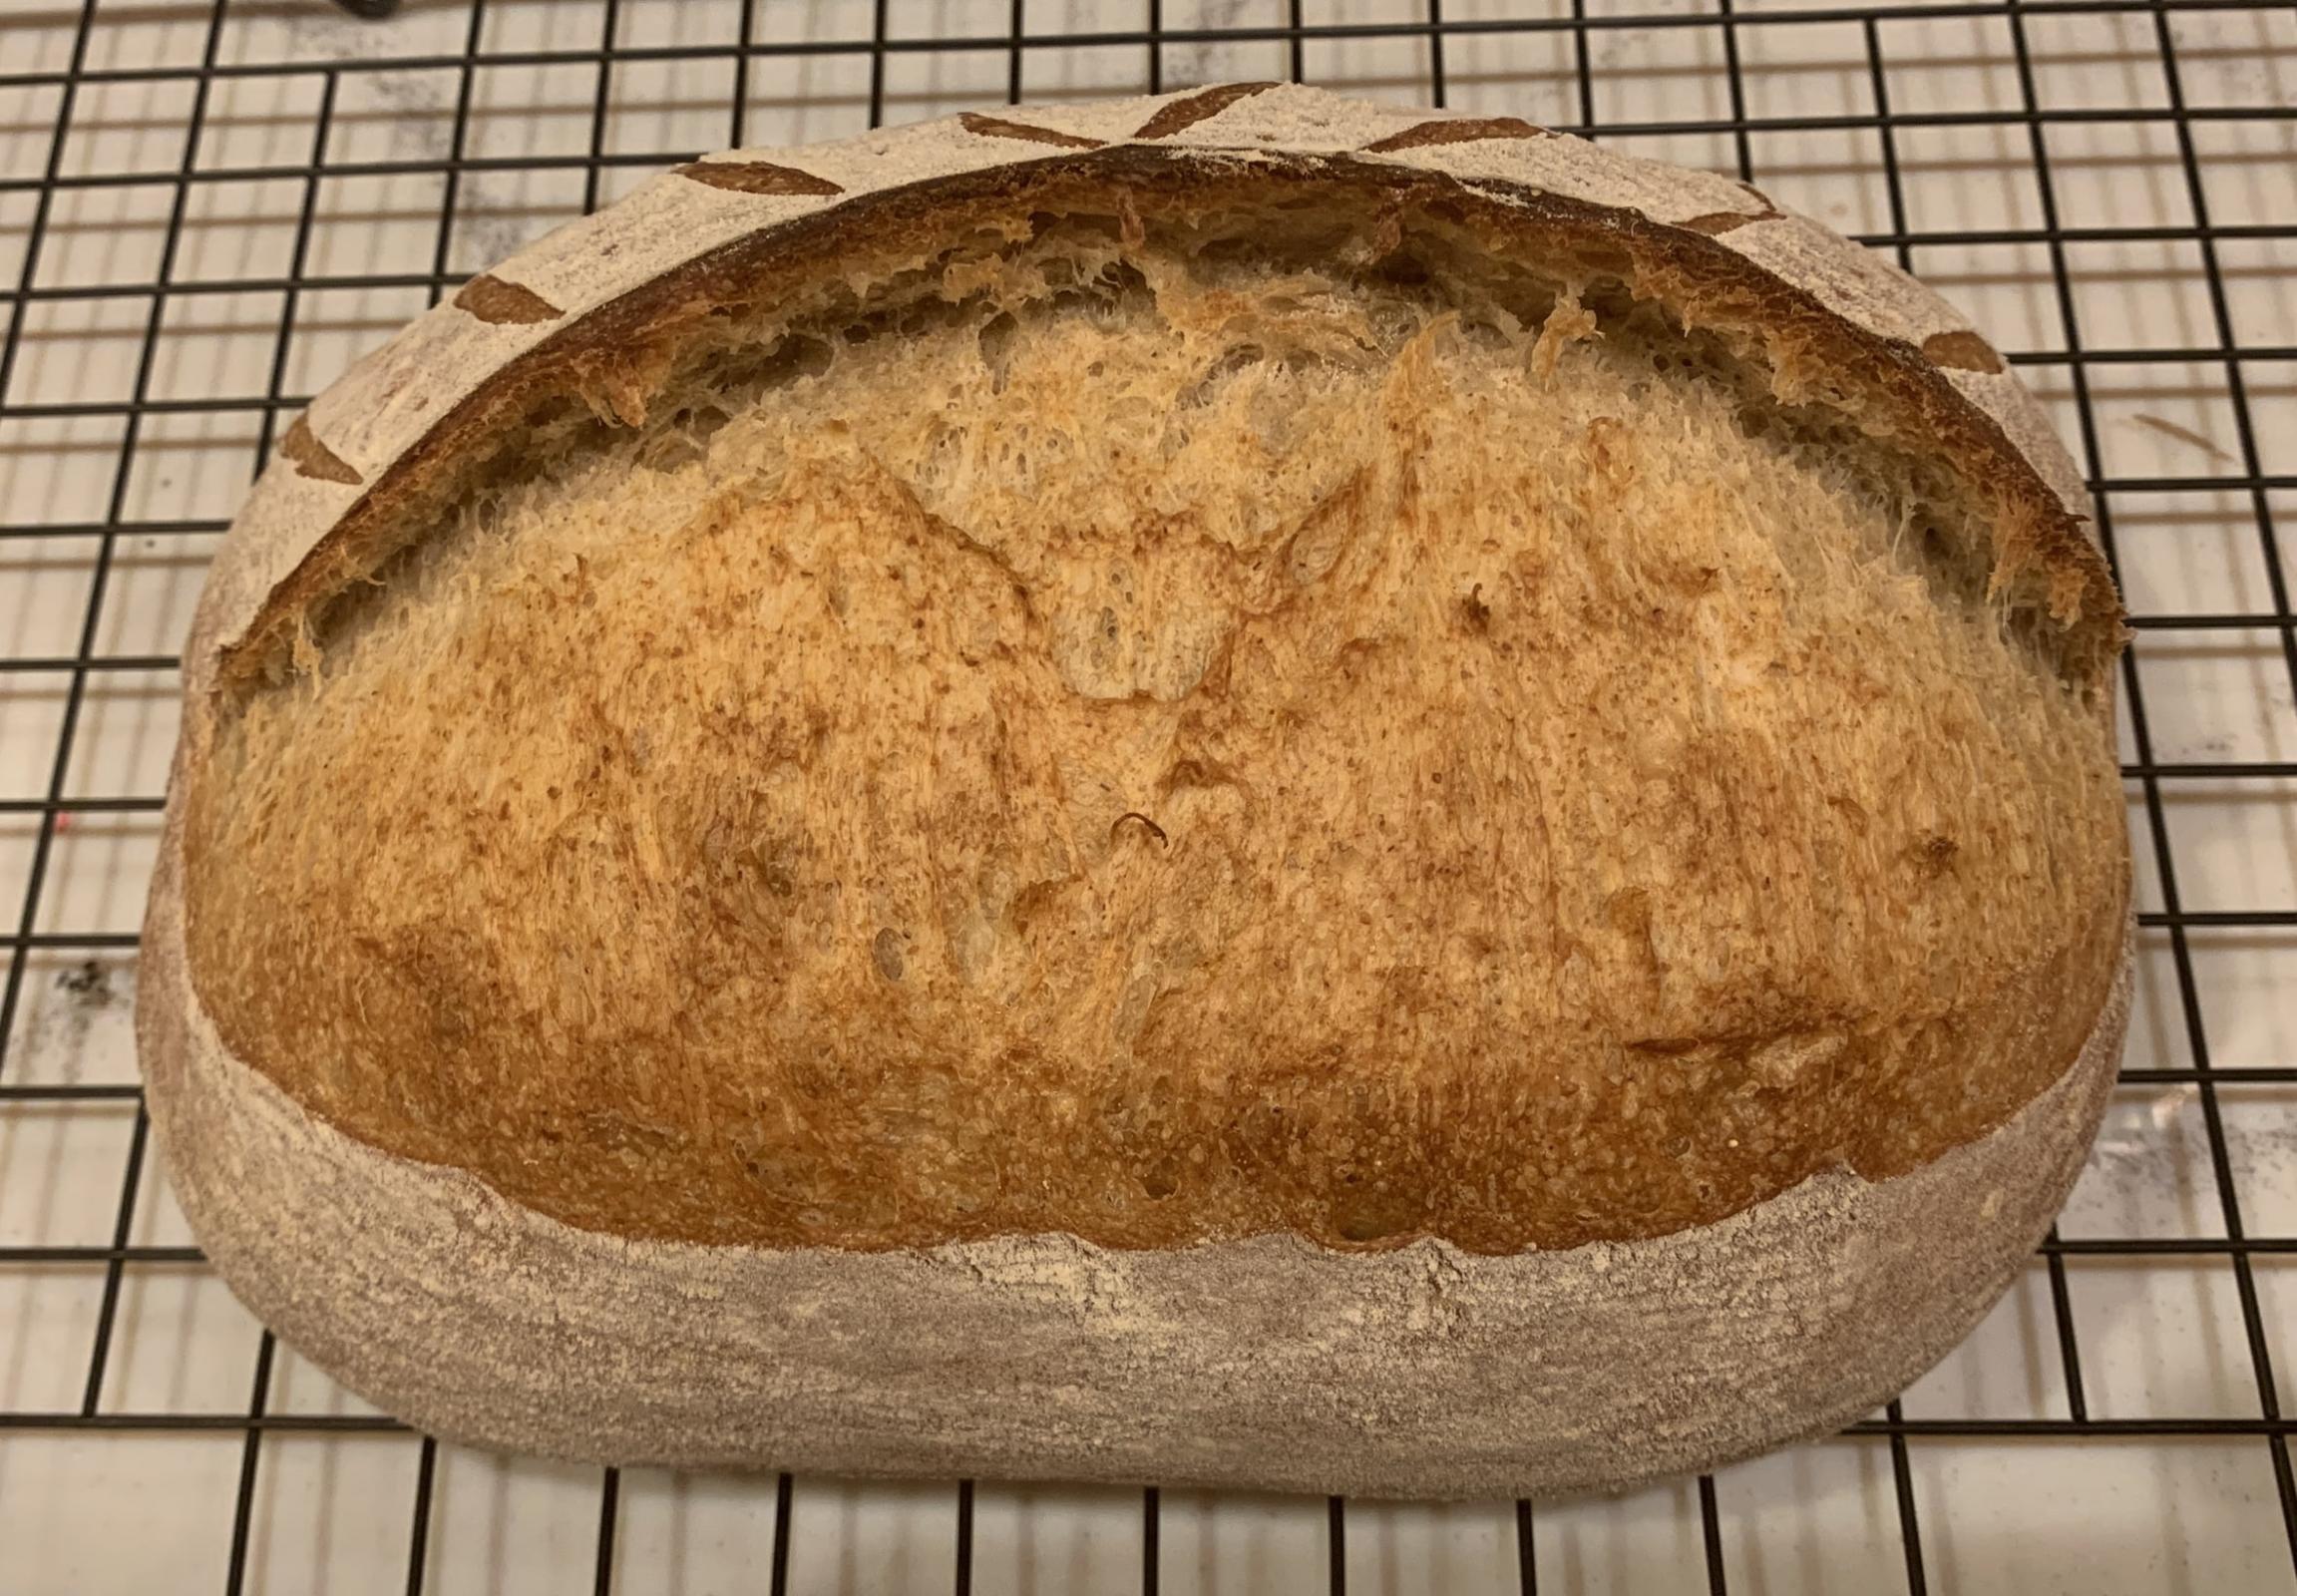
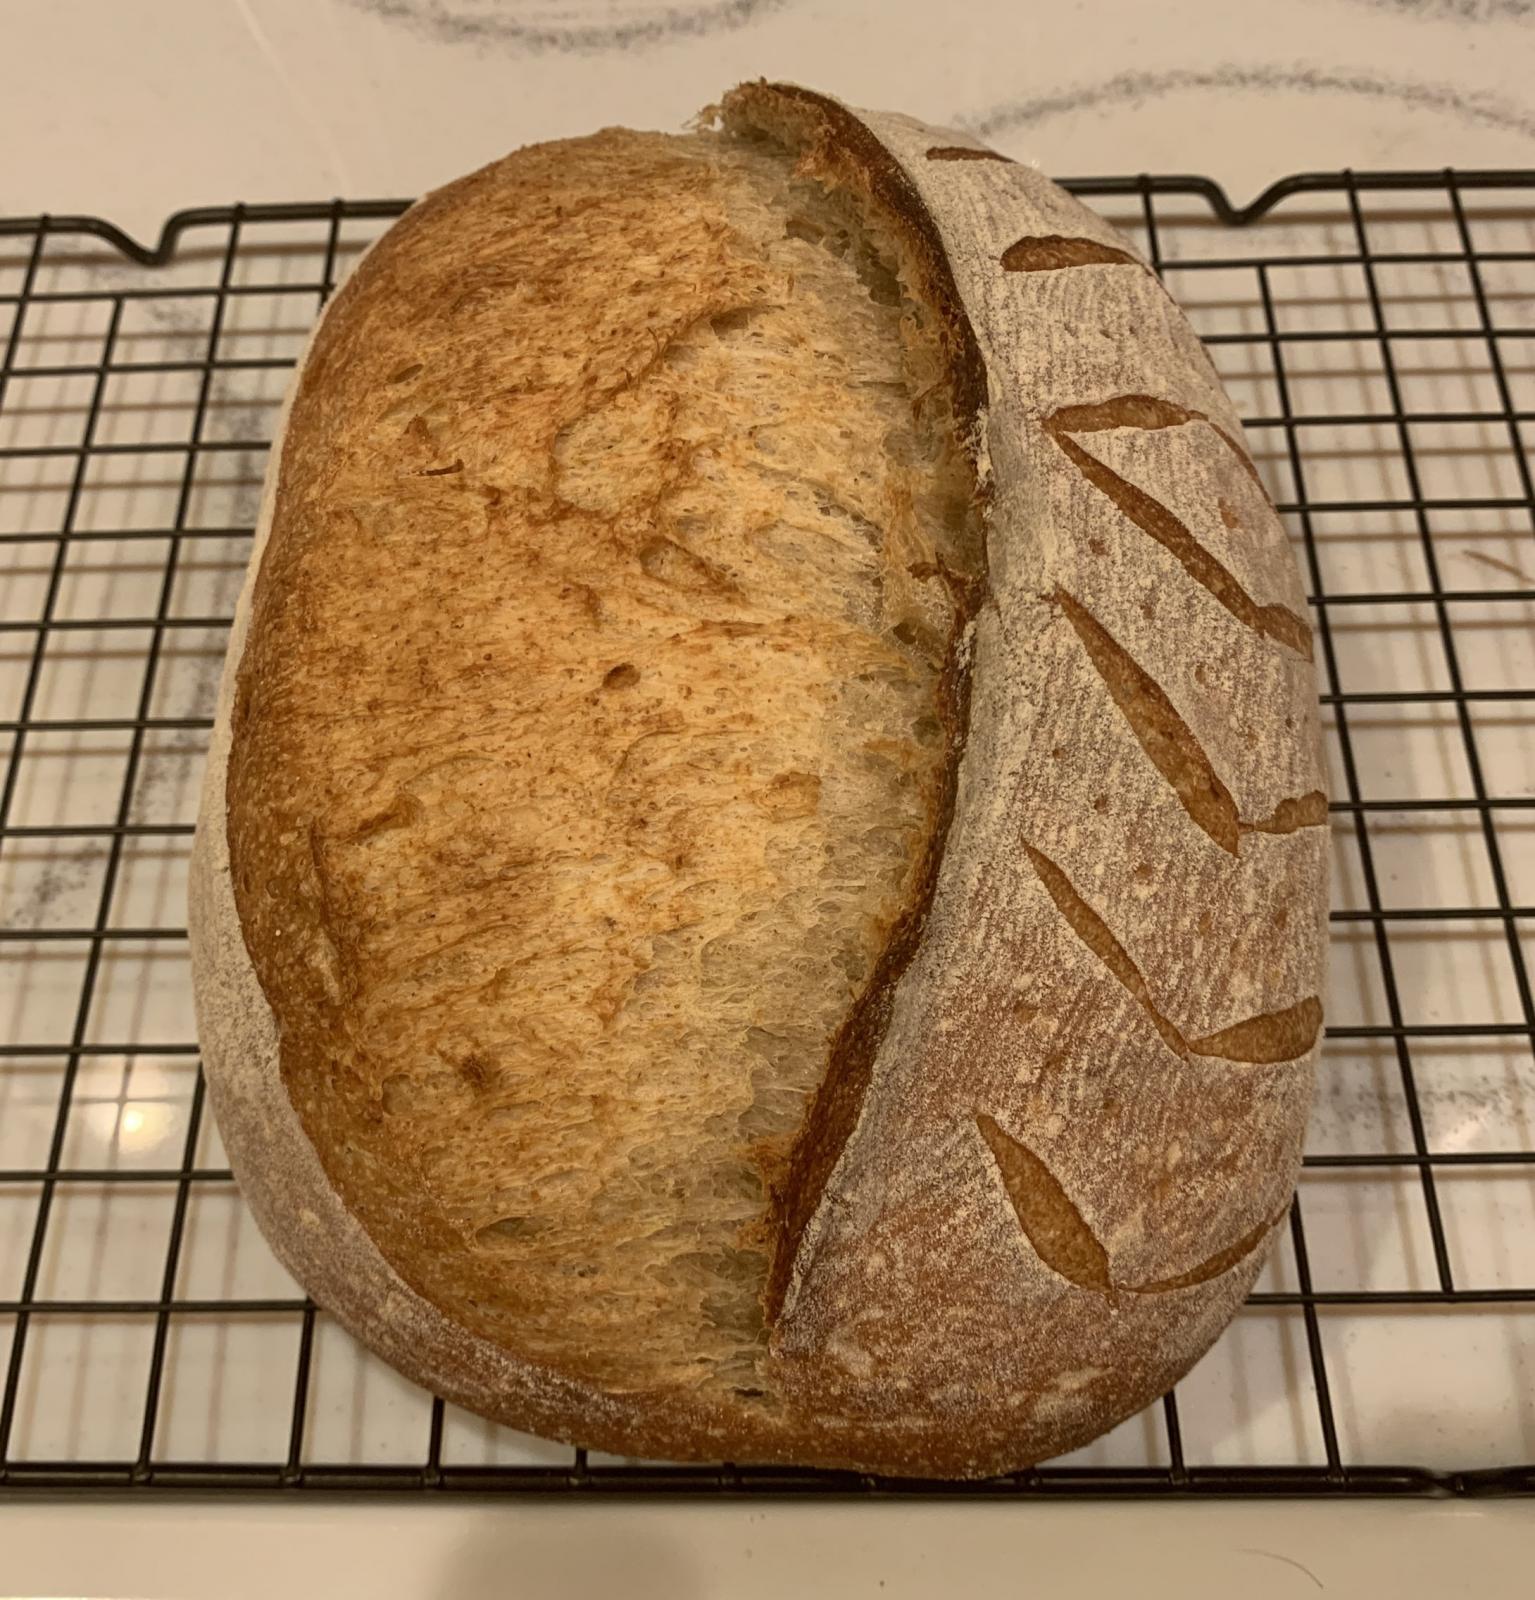
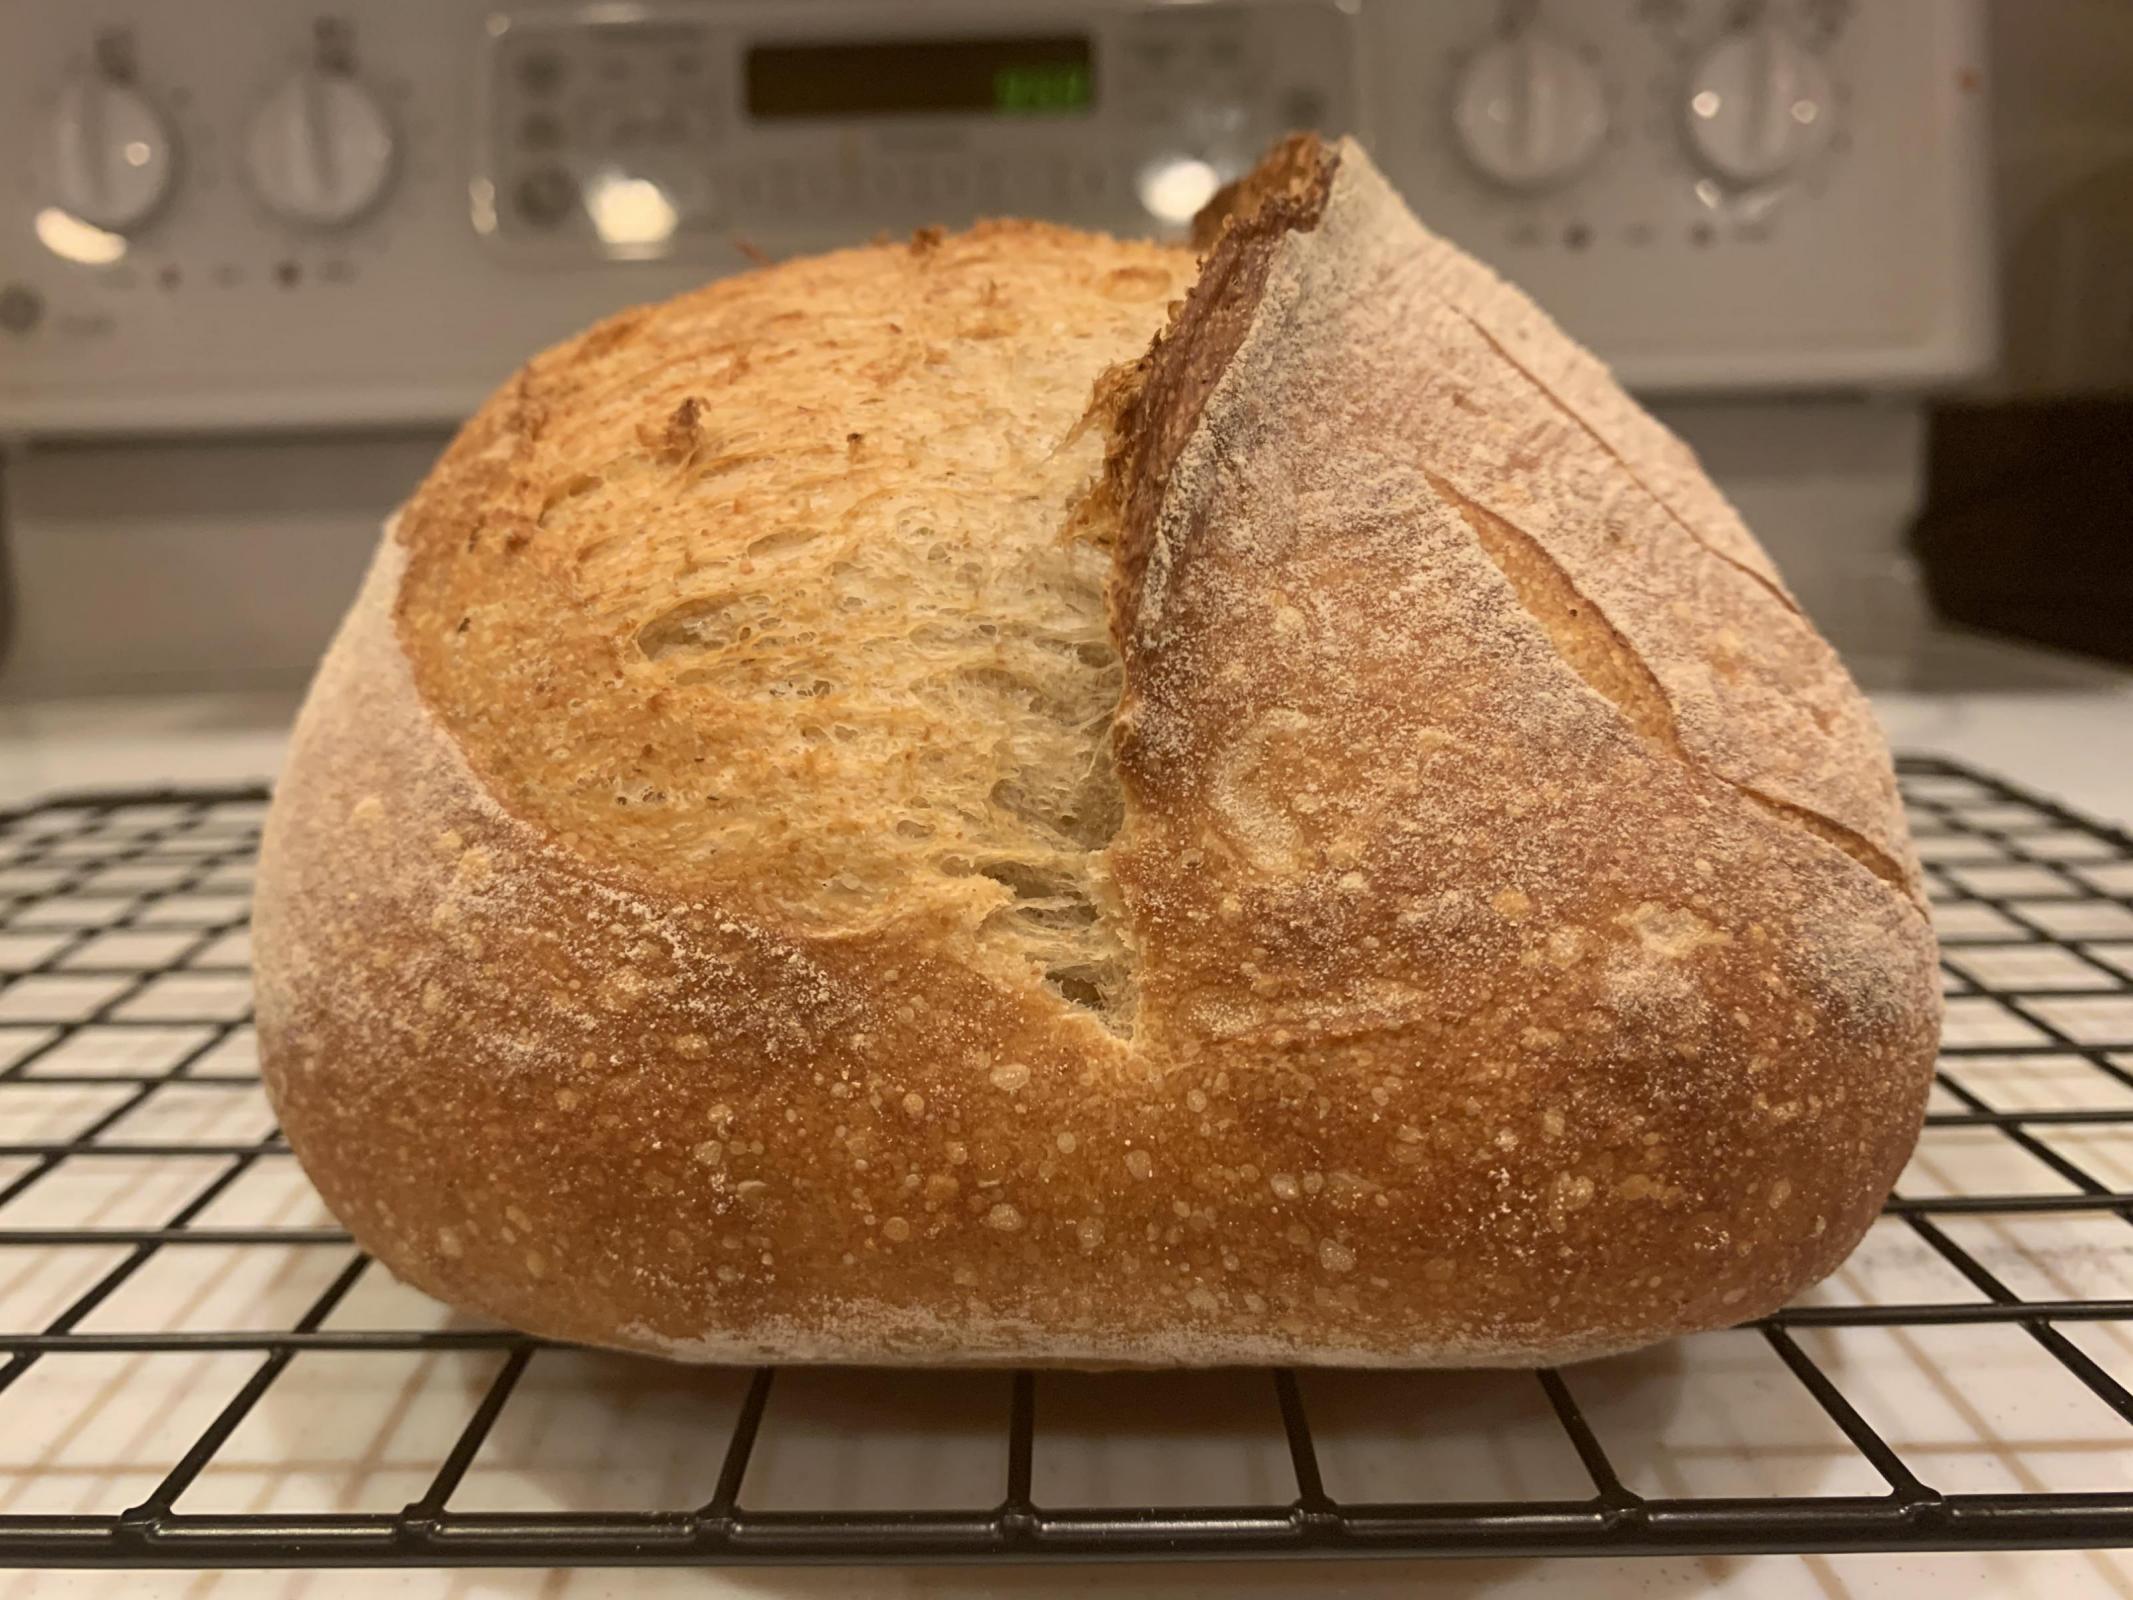
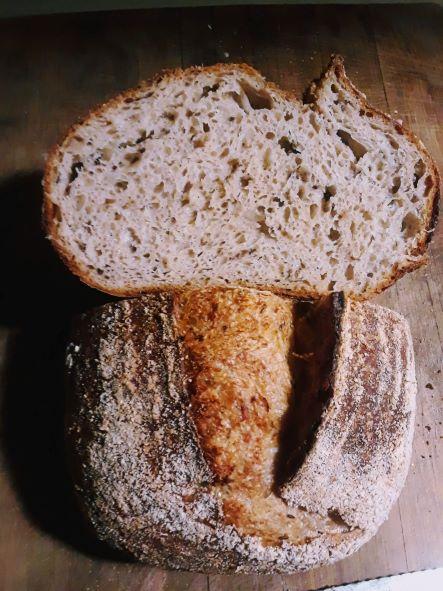
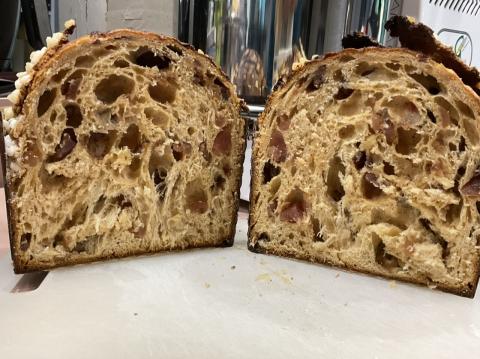
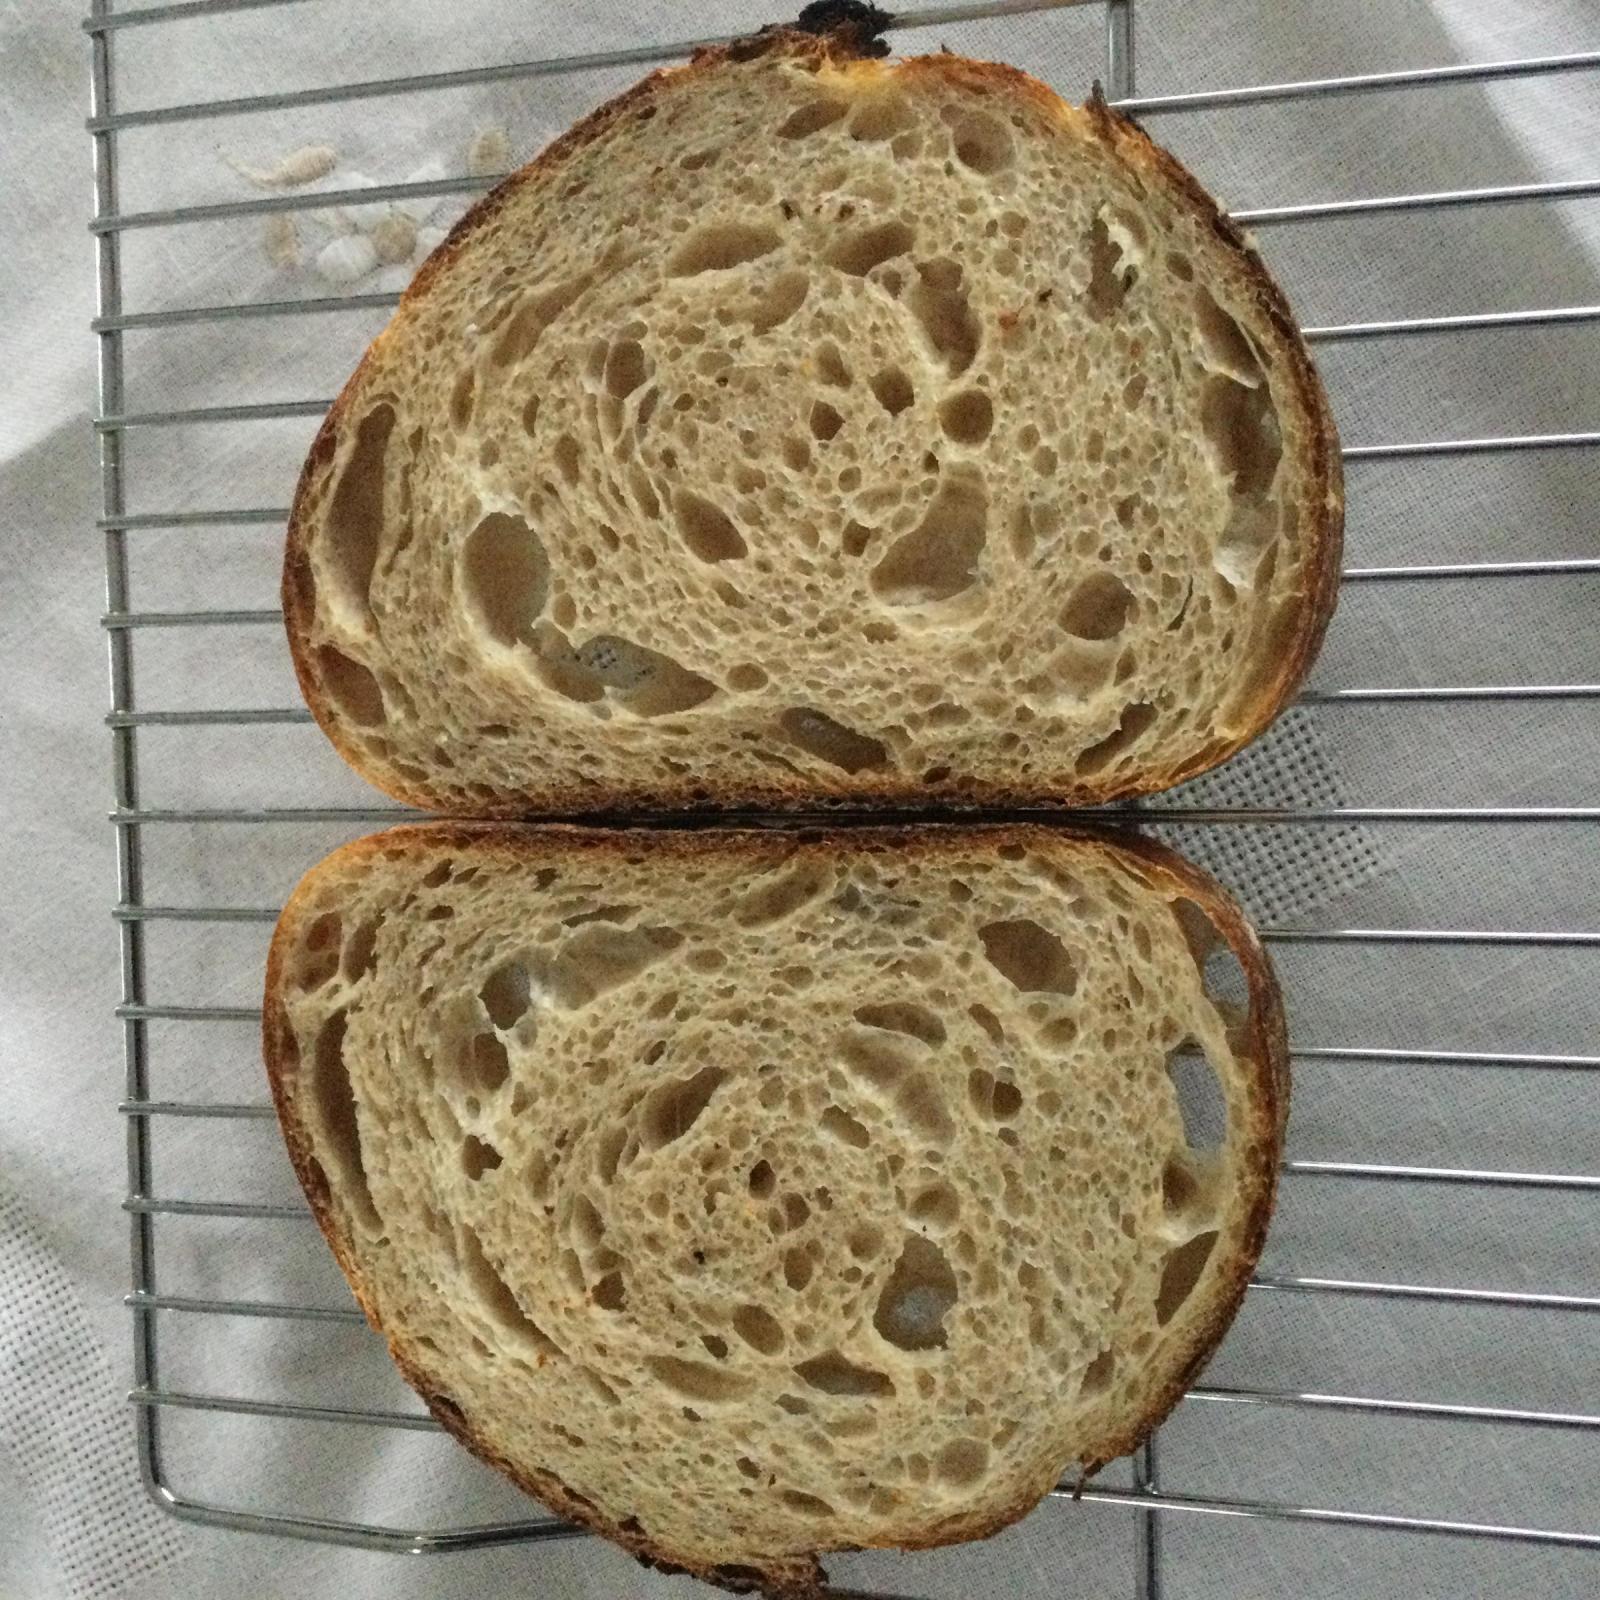
The bake turned out excellent.  The crust was crisp but not too thick and the crumb was open enough and perfect for sandwiches or toast.

Meet Gracie, the newest member to our family.  She’s another rescue who was used for breeding and then was surrendered to a shelter before being rescued.  Her doggie brothers and sister all adore her and her kitty sisters Luna and Sasha and brother Mookie are still deciding :).

Formula

Levain Directions Build 1

Mix all the levain ingredients for build one (including the seed starter) together for about 1 minute and cover with plastic wrap.  Let it sit at room temperature for around 6-7 hours or until the starter has almost doubled.  I used my proofer set at 78 degrees so it took around 4 hours for me.

Levain Directions Build 2

Add in the flour and water as indicated and mix until incorporated by hand.  Cover and let sit another 3-5 hours until doubled and you should see plenty of activity.

Either use in the main dough immediately or refrigerate for up to 1 day before using.

 Main Dough Procedure

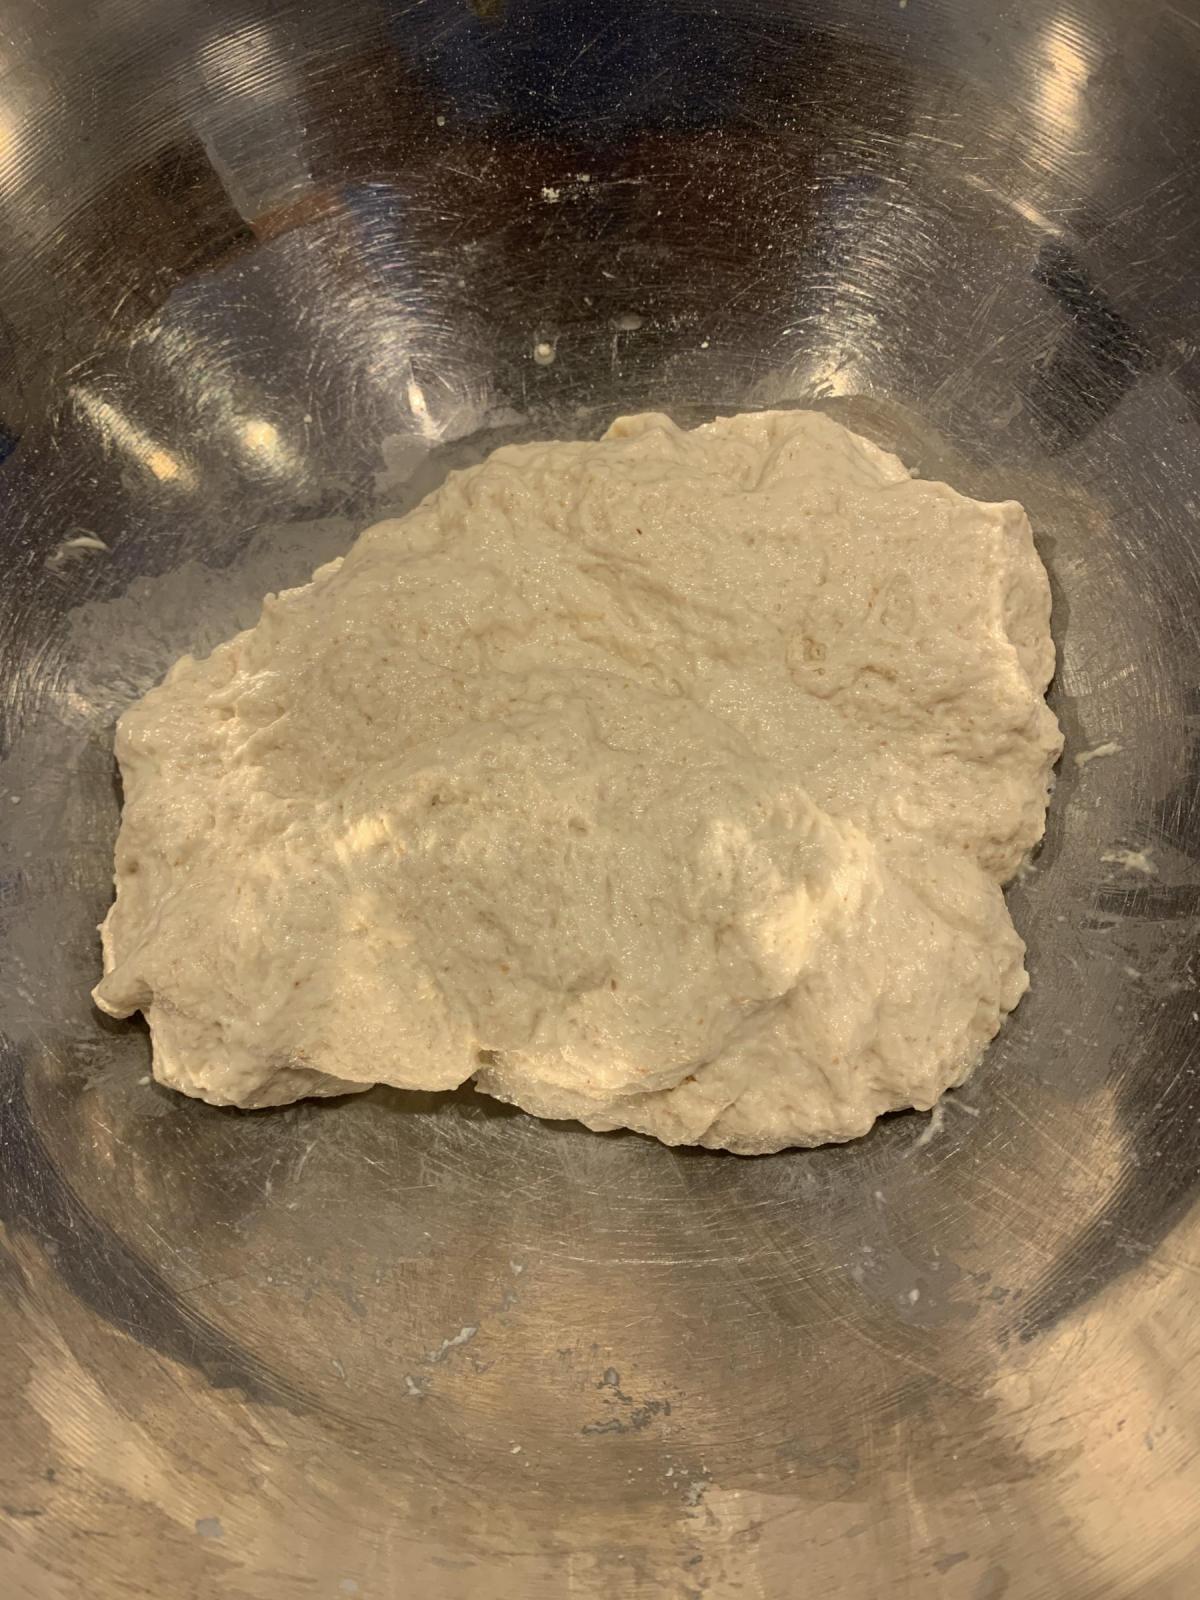
Mix the flour and water together in your mixer or by hand until it just starts to come together, maybe about 1 minute.  Let it rest in your work bowl covered for 20-30 minutes.  After 30 minutes or so  add the salt, starter (cut into about 7-8 pieces),  olive oil and honey and mix on low for 5 minutes.   Note: If you are using the Ankarsrum mixer like I do, add your water to the bowl first then add in the flour.  After your autolyse add in the starter, salt, honey  and olive oil and mix on low to medium low for 15-20 minutes.

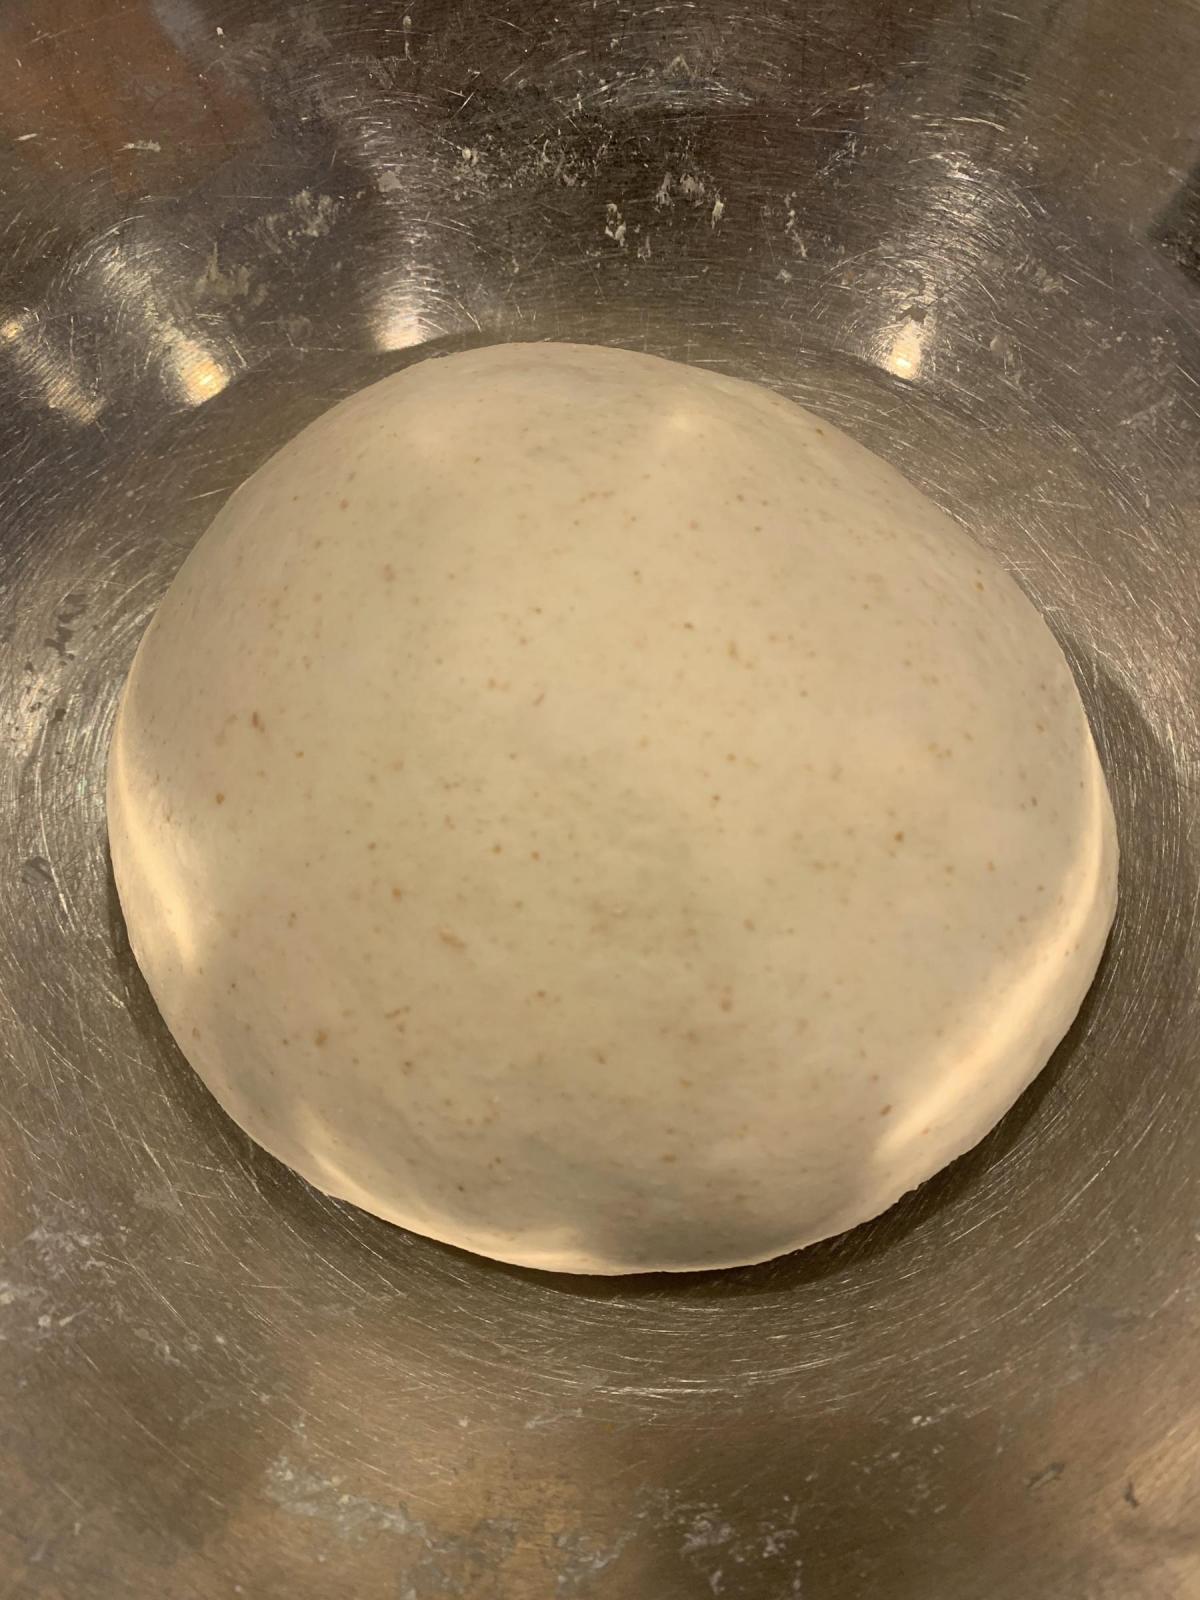
Remove the dough from your bowl and place it in a lightly oiled bowl or work surface and do several stretch and folds.  Let it rest covered for 10-15 minutes and then do another stretch and fold.  Let it rest another 10-15 minutes and do one additional stretch and fold.  After a total of 1.5 hours place your covered bowl in the refrigerator and let it rest for 12 to 24 hours.

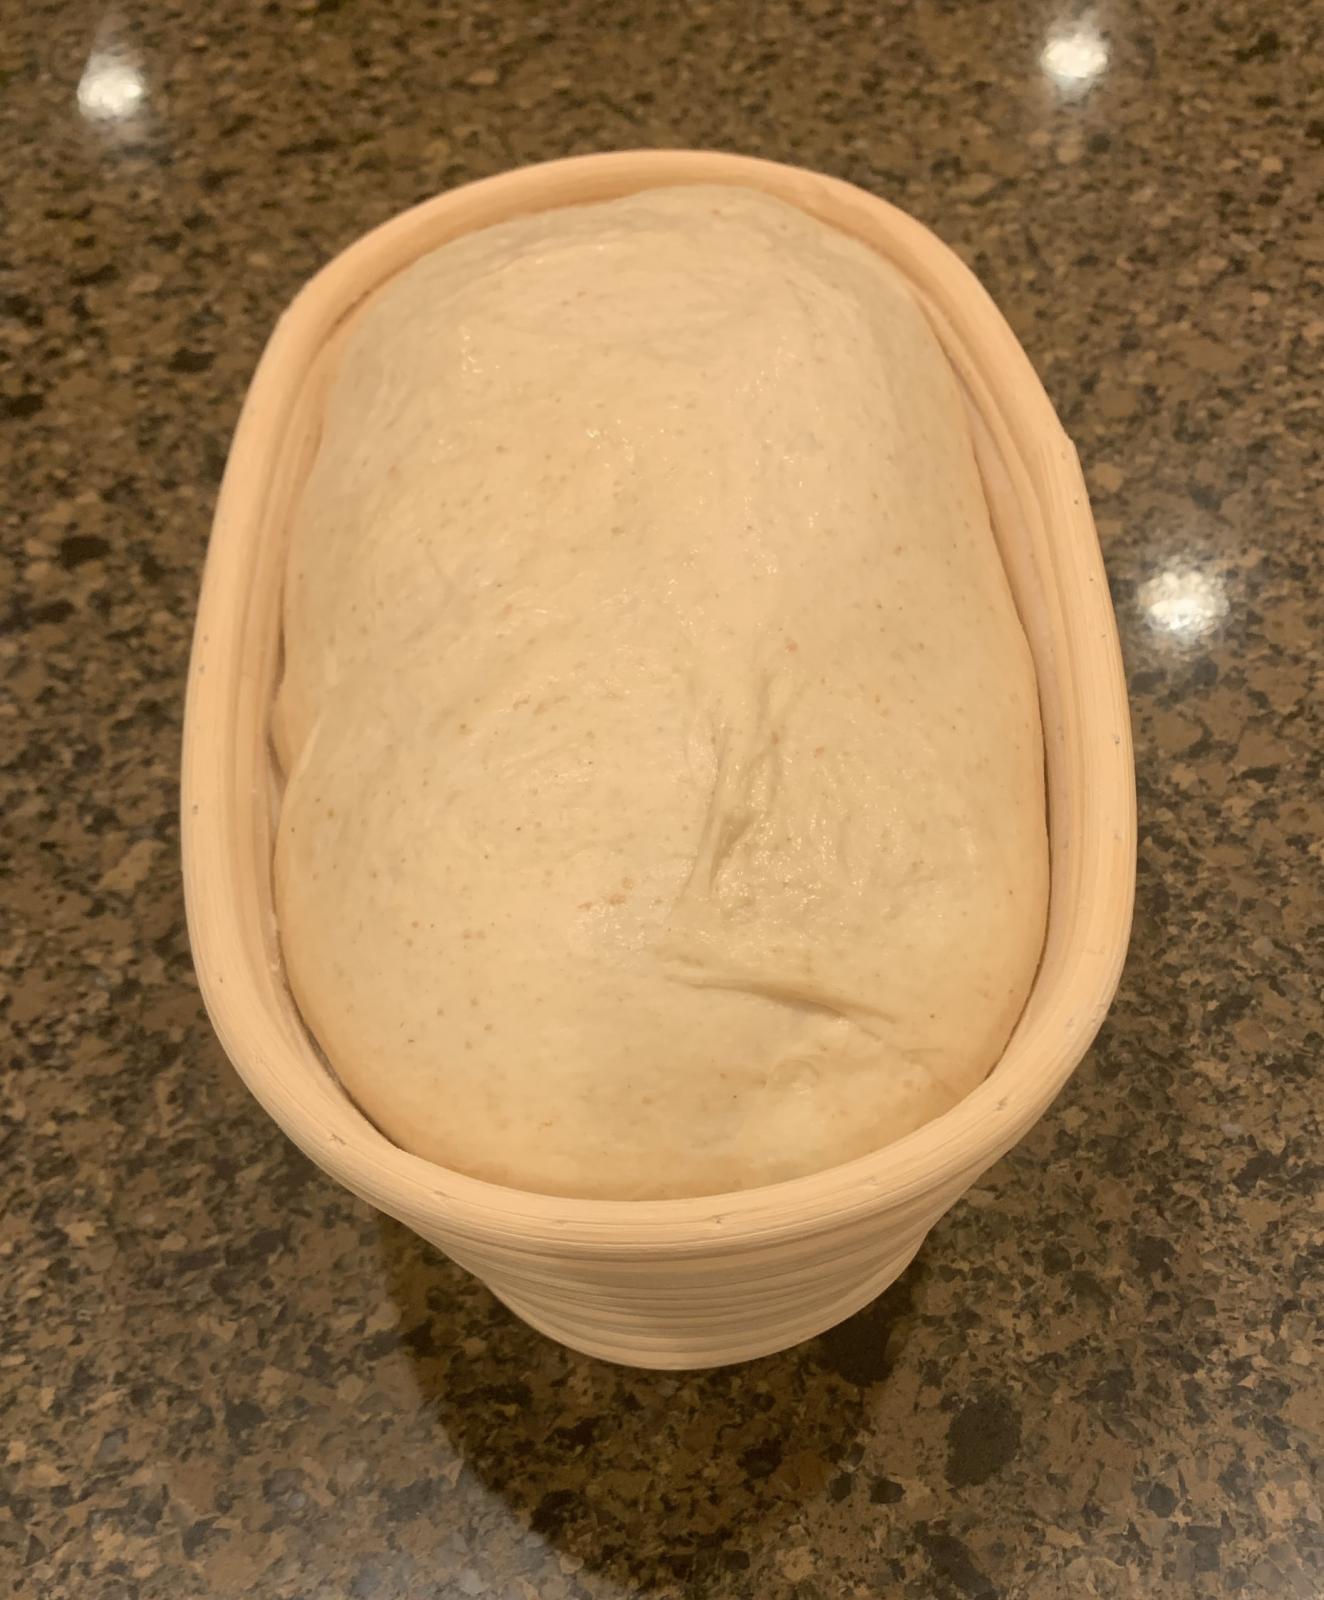
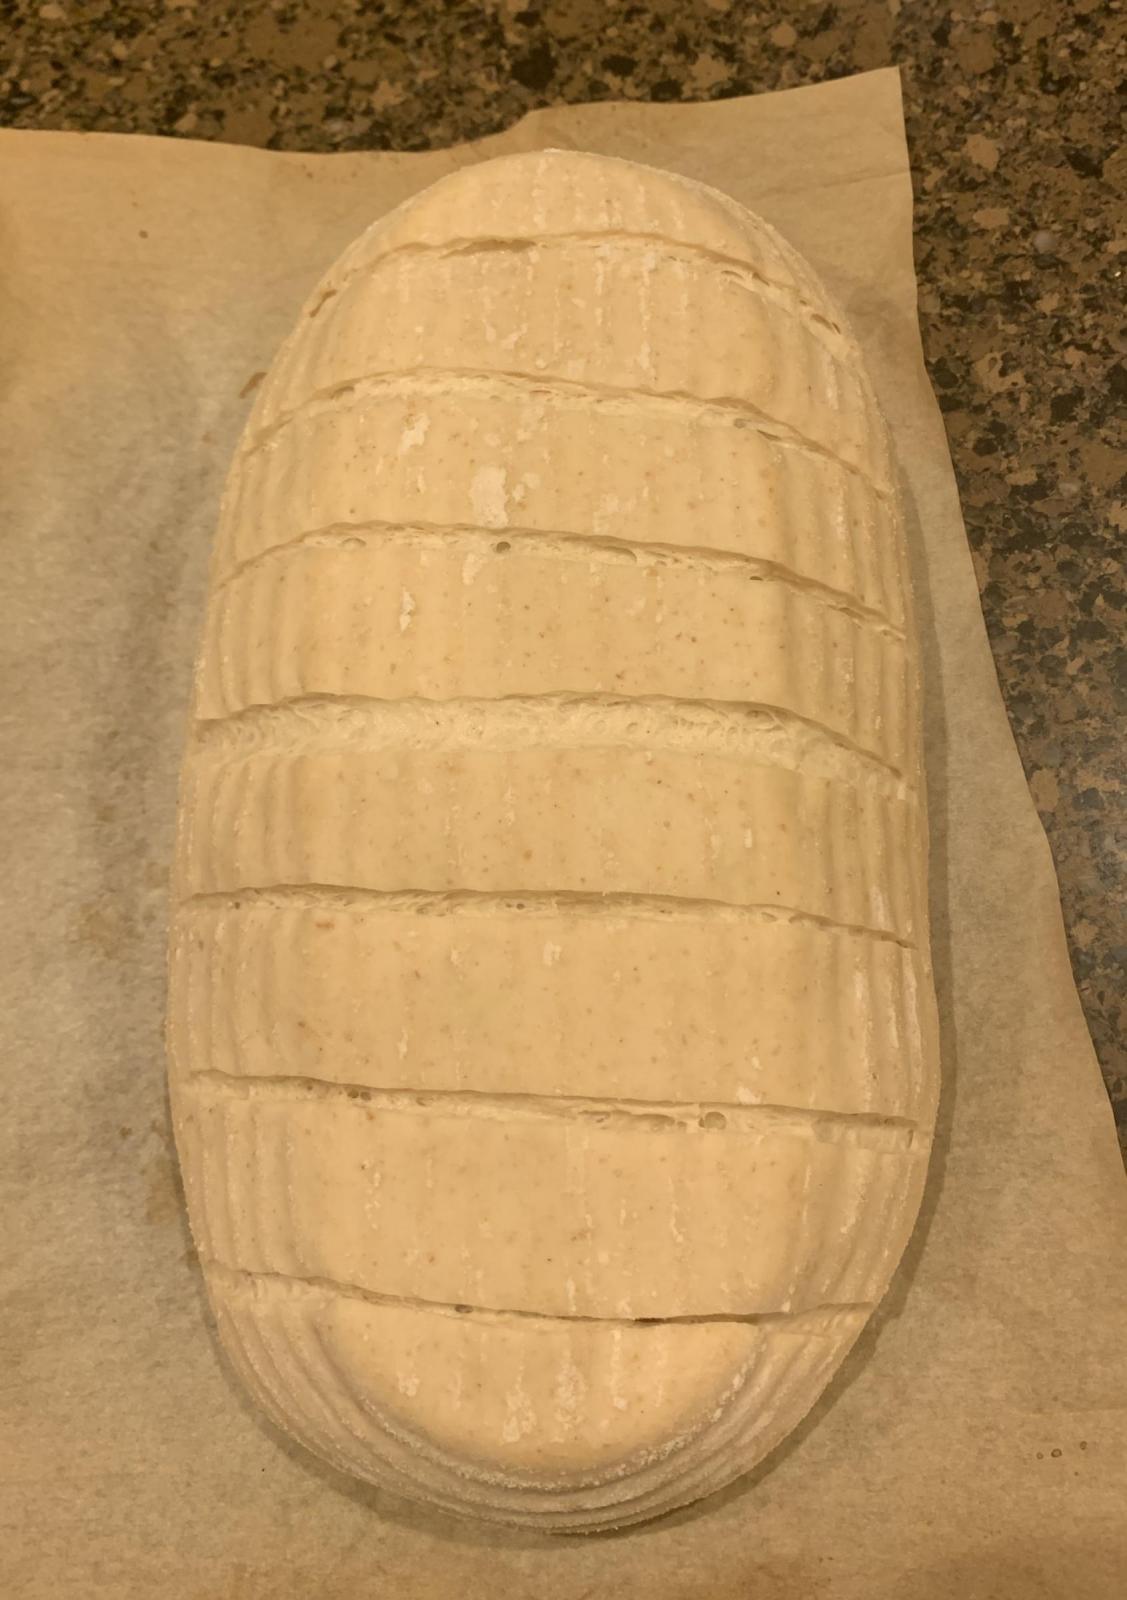
When you are ready to bake remove the bowl from the refrigerator and let it set out at room temperature still covered for 1.5 to 2 hours or if using a proofer set at 80 degrees for one hour.  Remove the dough and shape as desired and cover with a moist tea towel or plastic wrap Sprayed with cooking spray and let rise at room temperature for 1 1/2 – 2 hours.  (I use my proofer set at 80 F and it takes about 1 hour to 1.5 hours).

Around 45 minutes before ready to bake, pre-heat your oven to 500 degrees F. and prepare it for steam.  I have a heavy-duty baking pan on the bottom rack of my oven with 1 baking stone on above the pan and one on the top shelf.  I pour 1 cup of boiling water in the pan right after I place the dough in the oven.

After 1 minute lower the temperature to 450 degrees.  Bake for around 35 minutes or until the breads are nice and brown and have an internal temperature around 200-210 F.

Take the breads out of the oven when done and let them cool on a bakers rack for as long as you can resist.

CrustyJohn's picture
CrustyJohn

Further explorations in porridge loaves.  I'm currently out of interesting flours, so it seemed a good time to try something new in the porridge category.  Oats are pretty much always at hand.


Spec.'s: (I think)

350g bread flour

75g white spelt

25g peanut flour

338g water (~75% hydration)

~1tbsp salt

---------------

180g quick oat porridge with ~tbsp lavender a dash of salt and a glug of cane syrup


Standard procedure.  It's been getting cooler here at night recently, so I left the dough out at room temperature (rather than putting it in the 60 degree root storage room).  I though that at around 70 degrees for about 7 hours (+3 hrs of stretching and folding) it would be fine, but when I came back to it in the morning to shape it, it was quite sticky and hard to handle even though it had been quite smooth and easy to handle in the evening.  I'm not sure if this is over-fermentation breaking down the gluten or if it is the porridge slowly hydrating the dough and the effects setting in after I finish with the stretch and folds.  The only reason I might consider the latter is that I've had this experience before with porridge loaves.  

Result:  It definitely was a bit of a loose loaf, but it baked up alright thanks to my batard-shaped dutch oven preventing it from spreading too much.  It was also a very moist loaf; I baked it for a total of, I think, 45 or 50 minutes, and it probably could have benefitted from another 15 or more.  


SueVT's picture
SueVT

Still working away at my panettone here in the VT wilderness. I've adopted a consistent twice-daily feeding process for my Lievito Madre, and have made other adjustments in dough handling, pH measurements, proofing temperature, and baking process.

I am now seeing significantly more alveolation in the loaves, so apparently all of these things are contributing factors. 

This is the Candied Strawberry Chocolate Caramel panettone.  Here is a side-by-side with my bake of two weeks ago, the new bake is the top row:

leslieruf's picture
leslieruf

This has been a long time coming but a couple of weeks ago I finally got around to making a 50% Emmer loaf (thanks to Ted’s prompting 😊).  It’s been a crazy few weeks getting everything sorted for a much awaited trip back to Europe to visit family. so to bread…

Bread flour 210 g (49.5%)

Malted four 2 g (0.5%)

Emmer 212 g (50%)

water 305 g (72%)

salt 8 g (1.8%)

Levain refreshed and left over night to ripen - I used 133 g 100% hydration starter (part of total dough weights above)

13:30 pm mixed dough for 5 minutes added salt then mixed for a further 5 minutes. Turned out onto bench and then did 30 SLAFs just to finish dough. It was a firm dough and could probably taken more water but I decided to stick with the 72% hydration.  

14:25 pm turned dough out onto bench and gently stretched and laminated dough

15:15 pm coil folds ( repeated twice more at 45 minute intervals) then left to bulk ferment.

20:00 pm dough looked ready so preshaped and left to rest for 30 minutes

20:30 pm dough shaped and placed in banneton and left on bench for 45 minutes before being placed in fridge overnight.

Next morning

08:15 am dough removed from fridge to warm up on bench, oven turned on

09:00 am dough removed from banneton, scored, sprayed with water and placed in preheated DO.  Baked for 16 minutes at 240°C then 20 minutes with lid off.


I am really happy with the crumb on this bake, I thought it may have been a bit more dense than it turned out to be.  The only thing was a little bitterness in the crust when it was fresh.  After freezing I haven’t noticed this.  The flavour of the emmer is much more obvious than it was with the last bake which was about 30% Emmer flour. Maybe next time a slightly lighter bake on the crust .

Leslie


Pages

Subscribe to Recent Blog Entries