The Fresh Loaf

A Community of Amateur Bakers and Artisan Bread Enthusiasts.

Most bookmarked

SulaBlue's picture
SulaBlue

Sub for Molasses in Israel?

I'm trying to share my recipe with a friend in Israel - and got to the molasses and went &*^!@. She doesn't even know what molasses is. What's a substitute for that part of the world? If she were in the UK I might think treacle. What about honey? Am I correct that it's in there as a sweetener for both flavor and a sugar-boost for the yeast as well as to help with the caramelization of the crust?

Anonymous baker's picture
Anonymous baker (not verified)

chocolate almond danish ring

Finally got myself an inexpensive digital camera and would like to show off one of my "creations" which is far from original.  I'm sure many of you have made this danish ring.  I got this recipe from www.cookscountry.com/recipe.asp?recipeids=3846&bcd=46152.  Cooks Country is a great web site, by the way, and would like to know how many of you are members and whether or not you use your membership.  They seem to have a gold mine of knowledge with truckloads of practical advice.  I'm thinking of signing up.

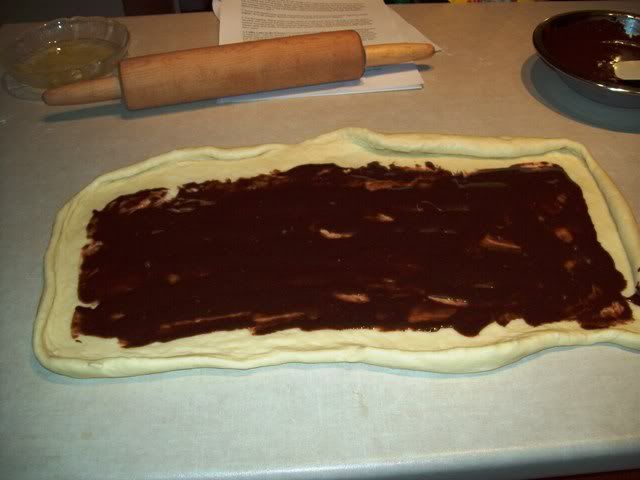
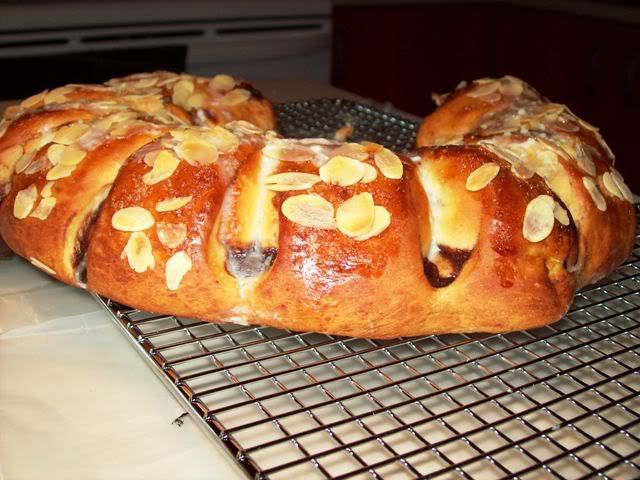
Anyway, I'm showing pictures of the (1) preparation for the dough where I slather it with the filling, (2) the finished product and (3) the product partially gobbled up.  I halved the recipe, and didn't quite succeed with the cutting and the turning upside of each slice, but the recipe gives a step-by-step.  I'll try it again one day, and hopefully, get the technique right!

Picture 1:  Prepping the dough.

 prepping the dough


2.  Danish ring fresh out of the oven:

danish ring as it came out of the oven

3.  And now, as it was partially eaten (closer look of slices - as you can see I did not quite do the slices with flying colors!)

partially eaten ring


vincent's picture
vincent

pandesal pilipino buns and ensaimada


INGREDIENTS ·         2 cups evaporated milk

  • 3/4 cup white sugar
  • 1/2 cup butter
  • 4 teaspoon instant dry yeast1 1/2 teaspoons salt
  • 1/2 teaspoon baking soda
  • 1 teaspoon baking powder
  • 6 cups all-purpose flour
  • 4 tablespoon vegetable oil
  • 4 tablespoons or more dry bread crumbs for topping
  • Note no water added
DIRECTIONS
  1. Heat the milk in a small saucepan until it bubbles; remove from heat. Add the butter and sugar and the salt; stir until melted. Let cool until lukewarm. And dissolve the baking powder and the baking soda
  2. Pour the cooled milk mixture into a large mixing bowl.. and 6 cups of the flour and the instant dry  yeast (note: be sure you mix well the flour and the instant dry yeast ; stir well to combine. Add the remaining flour, 1/2 cup at a time, stirring well after each addition. When the dough has pulled together, turn it out onto a lightly floured surface and knead until smooth  . And it should a little bit sticky not so wet…if it is to dry add milk just enough to make sticky and when you kneading just  greased the surface with vegetable oil  no flour.
  3. Lightly oil a large mixing bowl, place the dough in the bowl and turn to coat with oil. Cover with a damp cloth and let rise in a warm place until doubled in volume, about 1 hour.
  4. Preheat oven to 375 degrees F (190 degrees C).
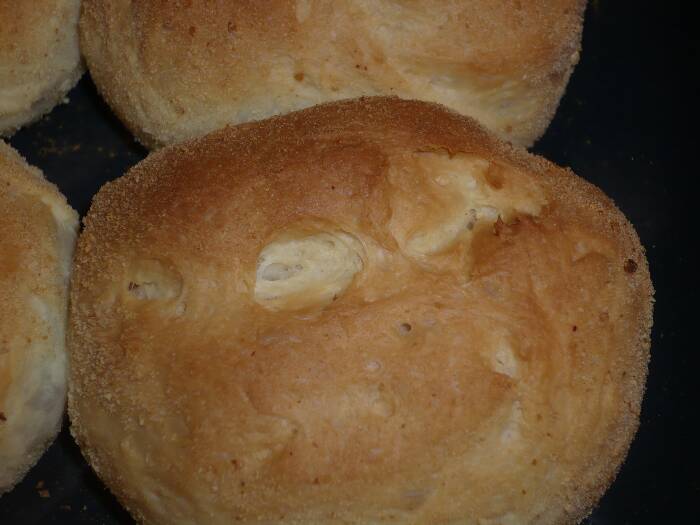
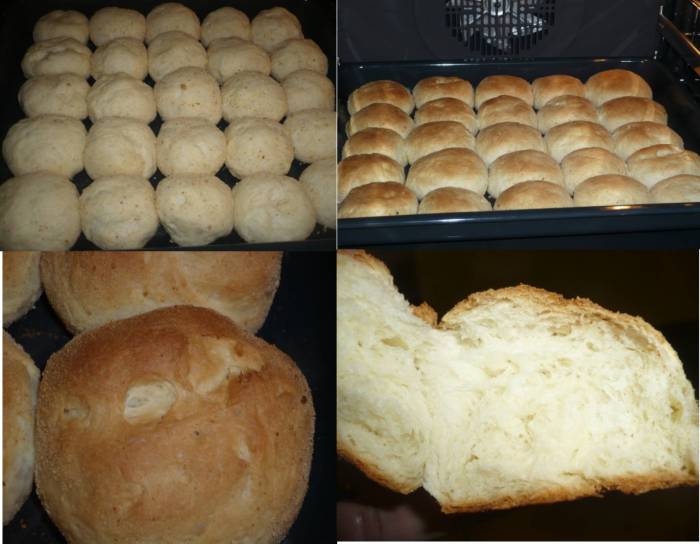
  5. Deflate the dough and turn it out onto a lightly floured surface. Divide the dough into 25 pieces (depending how many you cut) as long it will be equal parts and form into rounds. Then dip into the bread crumbs and roll it all over.  Place the rolls on a lightly greased baking tray. Cover with a damp cloth and let rise until doubled in volume, about 1 hour
  6. bake at 375 degrees F (190 degrees C) for about 15 to 20 minutes or until the tops are golden brown.

  7. i cut remeaning dough about a quart in the pandeasl dough is for the ensaimada  for my trial to make ensaimada it's  the same recipe in the pandesal....


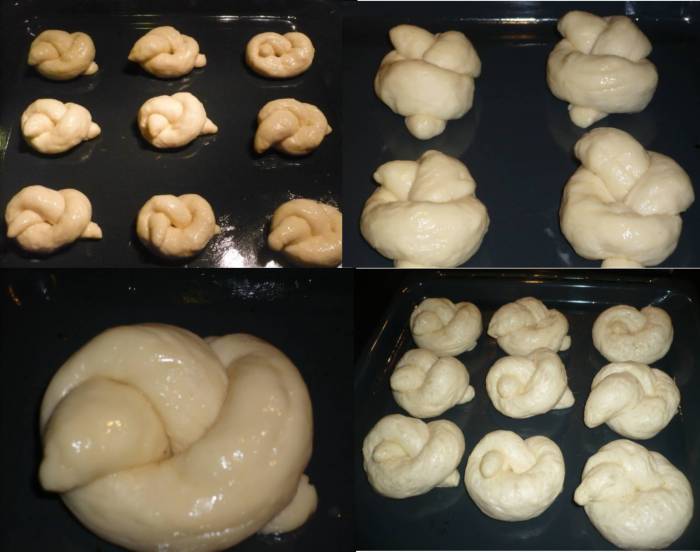
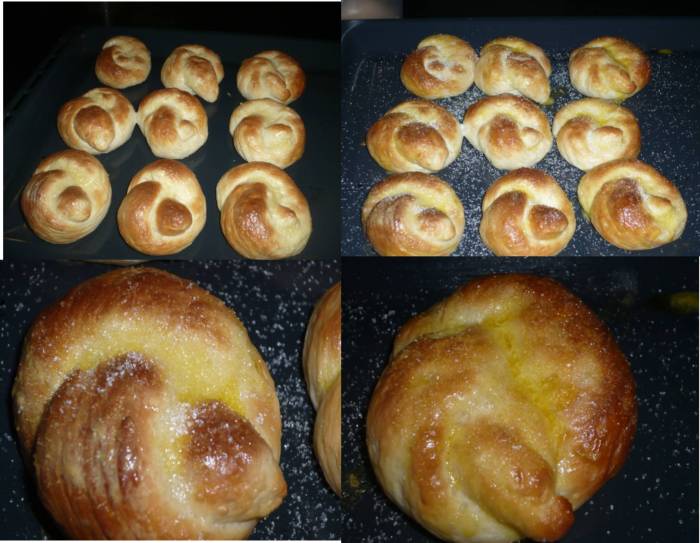
MY TRIAL ENSAIMADA ( PRETZEL LOOK)


 when you finish the 1st rising of the dough fold it just like pretzel fold and when you finish folding brush with scramble egg the outer surface then cover again with cloth let it rise for 1 hour then bake

Note: i baked them together 1st layer is the pandesal 2nd layer ensaimada after 10 minutes i switch the position  puting the ensaimada 1st layer and the pandesal 2nd layer... until golden brown

bake at 375 degrees F (190 degrees C) for about 15 to 20 minutes or until the tops are golden brown. then get the baking tray spread with margarine by brush and dip in into the sugar i prepared it is hot when done by margarine and sugar....  same reicpe of the pandesal ....  my trial taste good and the pandeasal ....enjoy

vincent

Anonymous baker's picture
Anonymous baker (not verified)

My New Baking Stone

I bought a new baking stone at Sur La Table last week. It is a lot heavier and thicker than your ordinary baking stone (14 x 16 x 5/8). I'm really impressed with how it is performing. My oven is definitely getting and staying hotter and my breads are cooking more quickly and getting browner. My new stone, made by Best Manufacturers in Portland, OR, is lighter in color than ordinary stones and seems to be made of a different type of material. Anyway, I highly recommend it. It was worth the $42.

Baking Stone

--Pamela

teddybakes's picture
teddybakes

Hydration % question

I'm new with sourdough and awful at math, it makes a wonderful combination for it.  I have a question for converting a wet starter to a firm starter.  If my starter is at 100% hydration, that means I am feeding it equal parts flour and water....got that.  However, I am getting confused as to how to change it to firmer hydration %.   For example, if I want to change it to 70%, do I just feed it 100% flour and 70% water?   Do I need to adjust those amounts to take in account for the 100% my starter is?  I've searched around on the forums and I'm still pretty confused.  Sorry if this has been asked a million times before.   I appreciate any help....and I hope that I've worded this without being too confusing. 

amazonium's picture
amazonium

"Whey" to go!!

I recently made my first foray into the world of cheesemaking (with the end result being a beautiful and tasty mozzarella!) and had almost 3 quarts of whey with which to deal. Being the non-waster that I am I googled uses for it and read here that it is good for making bread. Oh baby, is it ever! I used my basic no-brainer recipe, substituted the whey for the water, and yowzers, it rose like crazy and  tastes wonderful! I have a quart of cream being 'cultured' at the moment and tonight I should have freshly made European-style butter to spread on bread. Mmmmmmmm. Plugra be damned! I think we breadmakers are an adventurous lot, so I highly recommend trying your hands at mozzarella and bread with whey!

Amaz

rolls's picture
rolls

anis baguettes - most beautiful bread but stuffed up scoring-

hi all i made anis's baguetttes today. i found it to be the best ever baguette recipe. the dough was beautiful and the baked bread was delicious. my only problem was with the scoring. it dragged. i may not be using the right tools. but still, even though it deflated i still got beautiful holes in my crumb, albeit, not like anis's!

i made up the dough as directed on previous posts by jane and david. slap and fold till comes together but still rough, then the three stretch and folds (which i did in the wide shallow bowl i used to mix the dough), during first hour. this is where the dough came together beautifully (very satiny). i just forgot to autolyse after mixing.shaping was simple, easy and fun. i shaped the same way he demonstrated in the youtube video.

this recipe is definately worth repeating over and over. i'd also like to try it as a boule or batard. has anyone tried this?

my scoring is still not working out for me. does anyone have any tips? i bought a packe of razor blades but maybe they are not sharp enough? i also have a bread knife and tomato knife. the bread knife works alrigh if i flour the loaf first (this is what i noticed).

thanks. would love to hear about everyone else's experience with this recipe.

JIP's picture
JIP

Seasoning Bannetons

I recently ordered a couple of 1.5 puond oval brotforms and was wondering something.  I have seen somewhere a description on how to properly season them in preparaion for the first bake. From what remember it involved oil and baking them at a very low temp.  If anyone remembers or knows where something like this is I would appreciate a link.  These are the first I have been able to afford and I don't want to trash them right out of the box. 

Floydm's picture
Floydm

m.thefreshloaf.com

I recently set up m.thefreshloaf.com so that I could monitor the site while away from the computer.  It isn't perfect, but it works fairly well on cell phones or other portable devices like the Kindle

I'll be surprised if there is a huge audience for this but, then again, it could be handy if you want to pull up a recipe or a photo of one of your recent bakes when you are over at someone else's house.

rolls's picture
rolls

anis bouabsa video on youtube

hi maybe this has already been previously mentioned but i just found a video on youtube about anis bouabsa (won best baguettes). it's long, over 6 mins, but seems very informative and show's him demonstrating his technique, flour, dough consistency, etc inside his bakery . im not describing this properly only because it was in french. so i don't really know what everyone's saying but just seeing it helps so much.

it would be really great though if someone could translate, subtitles etc. does anyone know anything about this? i was really excited it showed a mum making it in her home with her two kids and showed her at the bakery with anis while he demonstrated how to make the baguettes. worth seeing. let me know what you all think.

(i did a google search and came across it. the title of the video though is e=m6 - pains maison (search youtube.com)

(sorry im not sure how im supposed to create a link)

thanks

Pages