The Fresh Loaf

A Community of Amateur Bakers and Artisan Bread Enthusiasts.

Most bookmarked

pjaj's picture
pjaj

How to achieve a soft crust.

I am trying to duplicate a commercial loaf that is virtually crustless. It is a malt fruit loaf. I have tried baking it at a lower temperature for longer and with a pan of boiling water in the bottom of the oven. This is better, but it still comes out with a light, crisp crust. Any ideas how I could keep / make the crust softer? The recipe I'm using can be found in the discussion on this site here.

gijose's picture
gijose

Working Wet Doughs by Hand... kneading vs folding?

I know it's a topic that has been talked about quite often, and I have seen the tutorial on folding.


I have been working quite successfully with 80% hydration dough.  I'm using the Pain a L'Ancienne recipe in the BBA, and I now have a scale, so I can more accurately recreate my bread effectively :)  What I have been doing is... mixing the ingredients together for a minute or so, then put the dough in the refrigerator for an autolyse period (the recipe calls for cold fermentation, so I figured this made sense).  When I take the dough out it's much smoother, and I give it a few folds, and toss it back in the fridge to hang out.


I get bread that looks and tastes delicious, so I'm not really looking to change too much.  The recipe itself uses a kitchenaid mixer, and works the dough a lot harder than I do.  In the recipe the dough is basically kneaded for several minutes.  All I do is autolyse and fold for a minute or two.  What would working the dough more accomplish?  Would I have to knead the dough to effectively develop gluten?  Or does folding do the trick?  Next time I make the dough I'm going to try taking the bowl out and folding a few times every hour or so, just to see what happens.  Just wondering if I could expect any changes in the bread.


Thanks!

chahira daoud's picture
chahira daoud

HELP!!! These little creatures are envading my kitchen !!!!

Hello dear friends , I really missed you all, but I did not want to show you my face untill I fulfill my promise to Minioven and other fellows, i promised that I will share my recipes for "Falafel & Egyptian beans dish" but till now I did not make it, I was so busy and I do not have any space in my freezer but I am thinking seriously to buy a deep freezer because my freezer is complaining. And I am used to prepare large batch and freeze it to be ready anytime, sorry guys and I will hurry up and make it as soon as possible.

Concerning the title of my blog entry, mmmmmm!!

That was my daughter birthday, I chose a savory dish beside the cake I made for her and her classmates, I baked these little hedgehogs, from 7 cups of flour, I got 69 cute hedgehogs.

I really liked it, I used it as sandwiches or canapes.

and as soon as they are out of my oven , they invaded my kitchen, there was a hedgehogs every where!!!!


There was even a battle.

But there was also a love story !!!

What do you think he is telling her????

My kids and the girls even all the adults like them from the first look.

Are'nt they cuuuute???

Thank you all and missed you all, and i'll be ready sooooon with my Falafel or "Taameea" & egyptian beans blog post.

Ah !! forgot to tell you about the birthday cake ,,, it was a hit!!

To watch it, please visit me on my blog

http://chahirakitchen.blogspot.com/

Bye Bye !! Love you all !!

pmccool's picture
pmccool

Whole Wheat Genzano Country Bread

Today's bake was Daniel Leader's Whole Wheat Genzano Country Bread, from his Local Breads book.  This bread combines a biga naturale for flavor with yeast for shorter, more predictable fermentation times.

The formula is straight-forward: the biga, water, equal parts whole wheat and bread flours, salt and yeast.  Final hydration works out to about 77%.  Based on Leader's description of the dough, I was expecting something almost in the ciabatta realm.  It turned out to be less gloppy than a ciabatta dough, perhaps because of the extra absorbency of the whole wheat flour.  Still, it was definitely better handled by the mixer than by hand.  I'm a little leery of his mixing directions, though.  First, he recommends an 10-minute run at speed 8 on a Kitchen Aid, followed by an 8-10 minute run at speed 10.  I didn't run it quite that long, or quite that fast, since I was seeing good gluten development.  Plus, the dough was clearing the sides of the bowl, even though it was very sticky.  The directions indicated that it probably cause the mixer to walk.  Hah!  I had to hold it down, what with the ball of dough slapping and releasing from the sides of the bowl.

After the mixing/kneading stage, the dough is dumped into an oiled container for 1-1.5 hours until it doubles.  It is then treated to a series of stretch and folds in the container (I used a plastic bowl scraper for this exercise), then allowed to double again.  Having finished bulk fermentation, the dough is scraped out onto a floured counter, divided in two, and (very gently) shaped into rough, rectangular loaves that are placed on bran-strewn pieces of parchment paper for their final rise.  The risen loaves go onto stone in a preheated oven, with steam.  The initial temperature is 450 F, which is dropped to 400 F for the second part of the bake.  Oven-spring was good.  The crust color is a deep brown, but not the near-black color promised in the formula.

The finished bread looks like this:
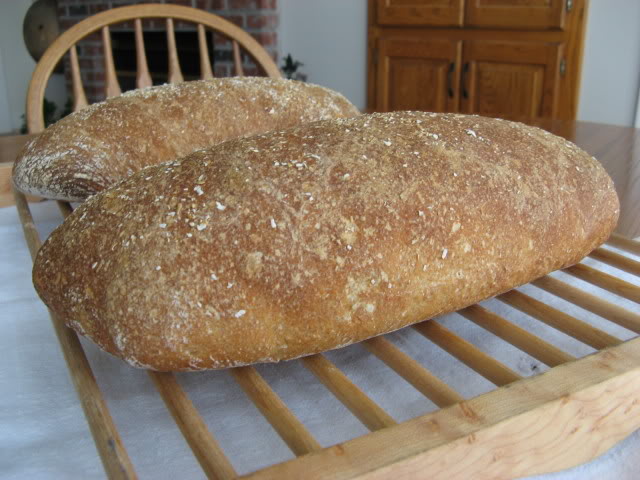
Whole Wheat Genzano Country Bread

The crust is thin and crackly, although I expect it will soften because of the internal moisture.  The flavor is very good; closer to that of a yeasted bread than to a sourdough but with some complexity that isn't usually present in a straight dough.  There doesn't seem to be the bitterness that sometimes shows up in whole wheat breads.  The crumb is moderately open, though nothing like the big holes of a ciabatta.  That's not bad, since this will be used primarily for sandwiches.  The breads are relatively light in weight for their size, another indicator of an open crumb.  I'll have to get a crumb shot, later.

I will definitely make this again, although I may experiment with leaving out the yeast.  That should swing the flavor profile in a whole 'nother direction.  Before getting to that, though, I have my eye on a couple of different rye recipes from Local Breads.

Paul

ehanner's picture
ehanner

Wood fired Oven

I just saw a PBS show on the tube and now that I think about it I think it may of been a Gourmet Magazine show on PBS, about Tuscan cooking. A fellow was making a point of explaining why he used small brush twigs and small diameter wood for firing his oven. He filled the oven with this small wood. He explained that if you start the fire with what we would call kindling and then add larger wood, you end up with a very hot floor and not so hot roof in the oven. This makes perfect sense and reminds me of another show where a baker in England was saying how he fills the oven with what they call "Faggotts" which are again, small diameter brush like wood. It flashes quickly and burns down to ash in a short time leaving the roof hot and the floor appropriately evenly heated.

I thought I would mention this since quite a few Fresh Loafians are escaping to the outdoor oven recently. Using small hardwood brush would make it easier to find burnable materials I would think also.

Eric

foolishpoolish's picture
foolishpoolish

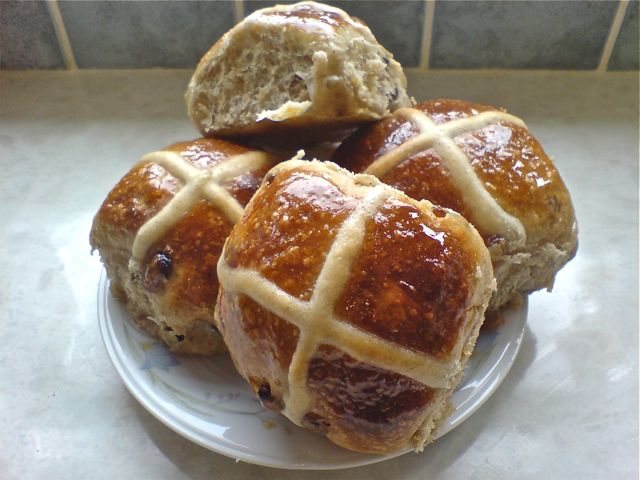
Hot Cross Buns

In the run up to easter, I've been working on a naturally leavened recipe for hot cross buns.

Results are up on my blog, for all who are interested: http://foolishpoolishbakes.wordpress.com/2009/03/30/hot-cross-buns/

Enjoy!

FP

althetrainer's picture
althetrainer

Sourdough Dill Bread

My Aero Garden yields quite a bit of dill and I was looking for ways to use them up.  I found a Cottage cheese dill bread recipe online an I modified it to make a small sourdough loaf.  It turned out surprisingly nice.  My husband and our 7 year-old son loved it.  Guess next time I will make a full load. 


gosiam's picture
gosiam

Creating and Refreshing a Starter for a Specific Recipe

I am getting ready to bake Paul Merry's French country bread from Country Breads of the World by L. Collister & A. Blake and I can see that the baker builds the starter from the scratch for three days, refreshes it twice, over the following two days and then creates the dough after the time lapse of anywhere from 4 to 12 hours after last refreshment.  The built starter and the dough are 66% hydration.

My question is, since I have a healthy white starter in my fridge, 100% and ready to go, will it suffice to convert it to 66% hydration and then proceed with making the dough after the suggested time.  In essence, I would go strait to the second refreshment.  Will it matter that I did not keep the starter at 66% from the beginning of the process? And if so, what will this fact affect - rise, crumb, taste?

The second question has to do with the converter I am using.  I have this tiny Excel spreadsheet that enables me to calculate starter conversions from any higher hydration to any desired lower starter hydration.  It does it in such a way that I don't waste any starter, but build to exact quantity required by the recipe, by taking the minimum required quantity of the mother starter.  In other words, I only add flour (the amount calculated by the worksheet) for the firmer starter.  However, I am so used to adding both flour and water that it seems sacrilegious that I don't do this anymore.  Would "The French Baker" frown if he knew?

By the way, I will gladly share the converter tool if you are interested.

Gosia

Anonymous baker's picture
Anonymous baker (not verified)

Rye Chops: Making My Own

I want to try some of Hamelman's recipes that call for rye chops. I found one web site that said you could make your own by putting whole rye through a corona-type grinder. Any thoughts on if this would work?

http://www.sourdoughhome.com/ryetypes.html

--Pamela

JoeV's picture
JoeV

Parchment Paper Tutorial - No-Knead Bread

I posted this tutorail on another food site before they banned me from the site (no sense of humor...their loss. LOL), so rather than give the link to that site I figured some of the newer artisan bakers could benefit from this tutorial, especially if they are having difficulty working with wet dough. Hopefully many will benefit from the dialog and the pictures.


No Knead Bread & Parchment Paper
By: Joe Valencic, Mentor, Ohio

I see this topic come up frequently, especially when someone is being challenged by handling this very loose dough. Some folks can understand a verbal description of using parchment paper, but some need to SEE what is being explained in order to fully understand. I’m a person who likes lots of pictures to make sure I’m doing things as described, and for those of you who are like me, here’s a short tutorial on working with parchment paper and no-knead bread dough.

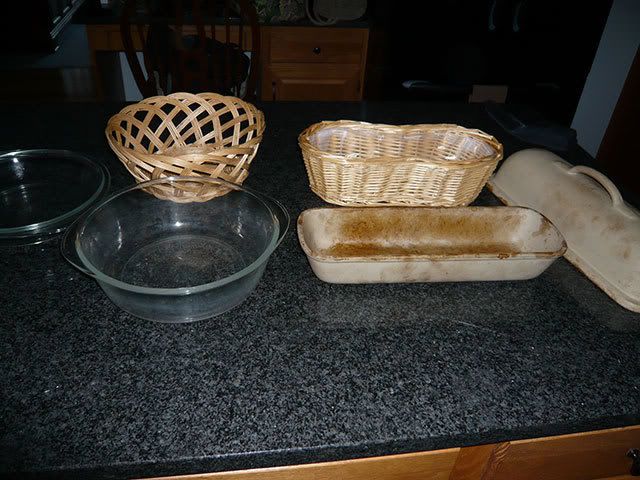
I mainly work with round baking vessels for this bread, but I do own one La Cloche Oblong Clay Baker. Here are two of my many choices for baking vessels, and the proofing baskets I use for them. Notice how the baskets are similar in size to the baking dishes. This is important so that the proofed dough is not larger than its baking vessel.


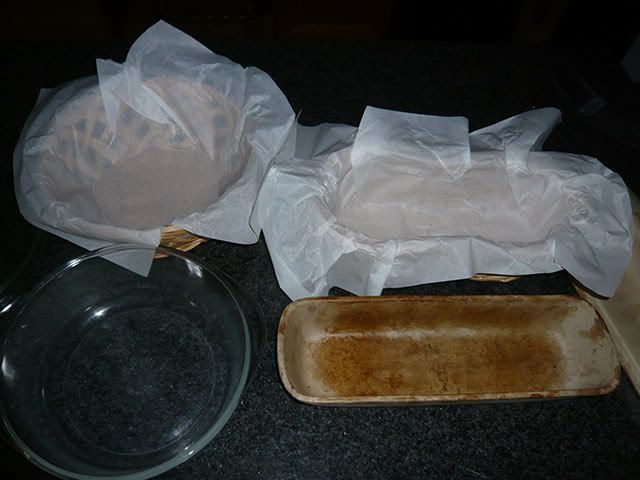
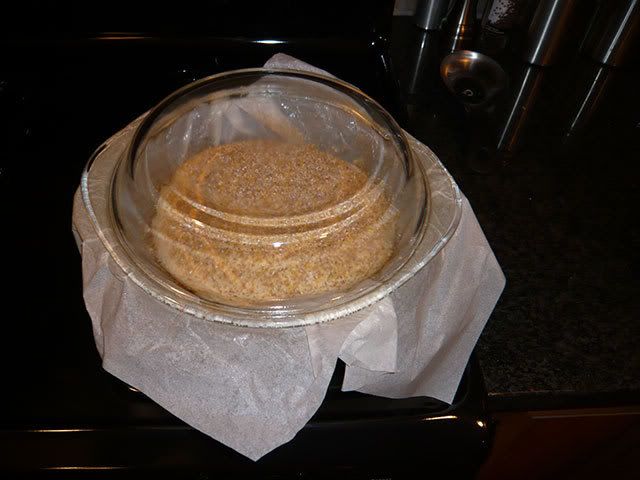
I take a sheet of parchment paper and work it into the basket, being careful to fit it closely to the inside of the basket. Once I’m happy with the paper placement, I trim off the excess so that there is about 2” of paper left over the basket edge for lifting the proofed dough. I then spray a liberal coating of cooking spray on the parchment paper to prevent the dough from sticking to the paper. Shape the dough and then drop it in the basket and cover with plastic to rise for about 60 minutes.


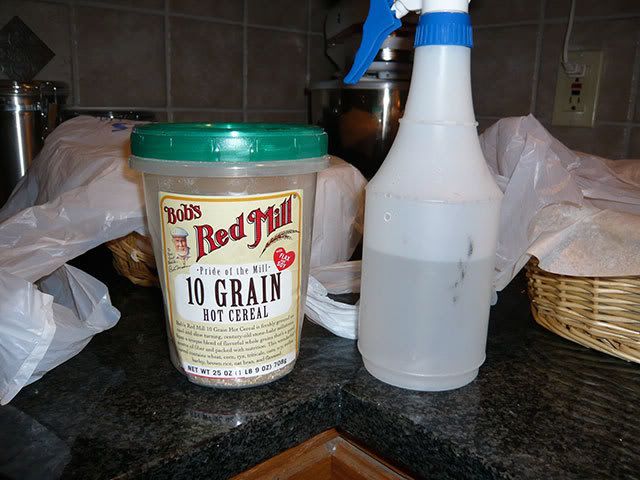
Once the dough has risen and is ready for the oven, I like to ‘dress up’ my No-Knead bread with a good topping of 10-grain cereal. I take a spray bottle of water and wet the top of the dough so the grain will stick, then sprinkle a liberal amount of cereal on top of the loaf. You could also use wheat bran, oatmeal or other toppings that you enjoy.


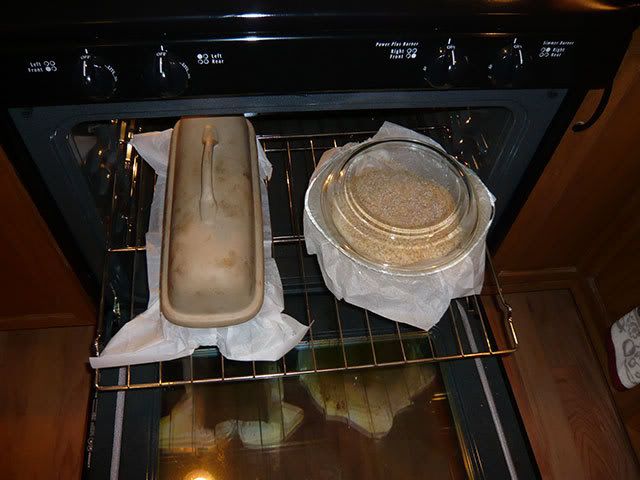
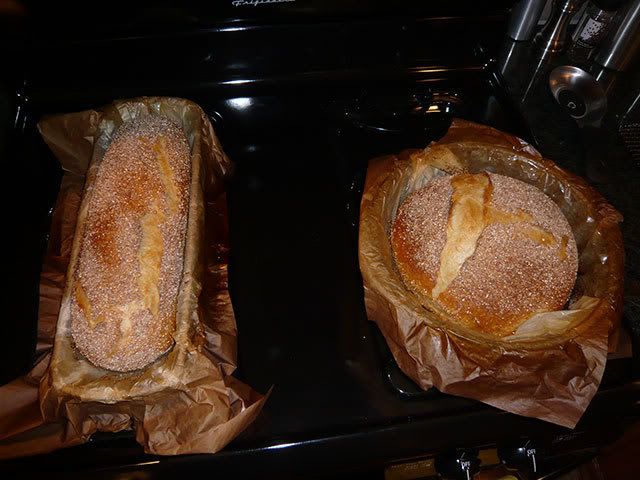
You’re now ready to put the dough in the cooking vessel. Just lift the dough by the parchment paper edges and place the whole thing into your pot. Put on the cover and bake as usual. To save energy I like to bake two loaves at a time. The dissimilar shapes work very well for this, but I can also fit two round baking dishes in my oven. If doing this, make sure there is at least 1” between vessels and away from walls so the air can circulate around the pots in the oven.


When the bread is done remove the pan from the oven using long oven mitts. Don’t try to lift the bread by the parchment paper, because it will just fall apart in your hands.


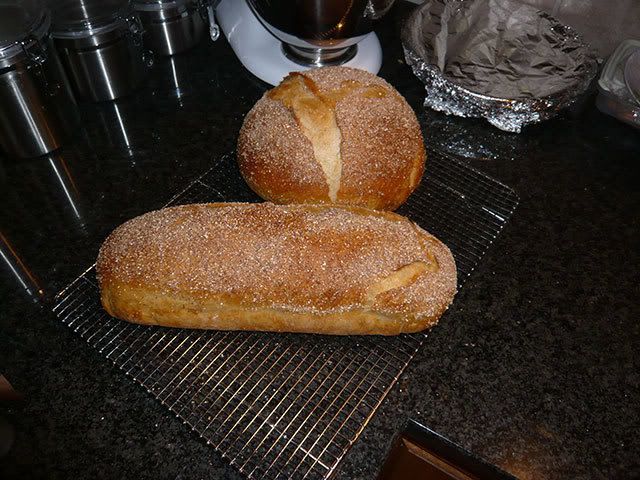
Tip the bread out of the pan using the oven mitts and place on a wire rack to cool. For best results, allow bread to cool for at least two hours before cutting.
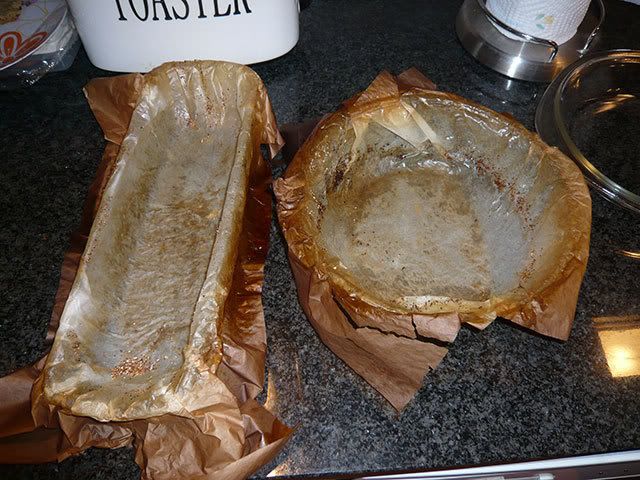
If you did it all correctly, you will be left with beautiful, delicious bread and a shell of parchment paper to throw away.


I hope this makes your No-Knead baking experience more enjoyable.

Pages