The Fresh Loaf

A Community of Amateur Bakers and Artisan Bread Enthusiasts.

Most bookmarked

San Francisco Style Sourdough

San Francisco Style Sourdough
JMonkey

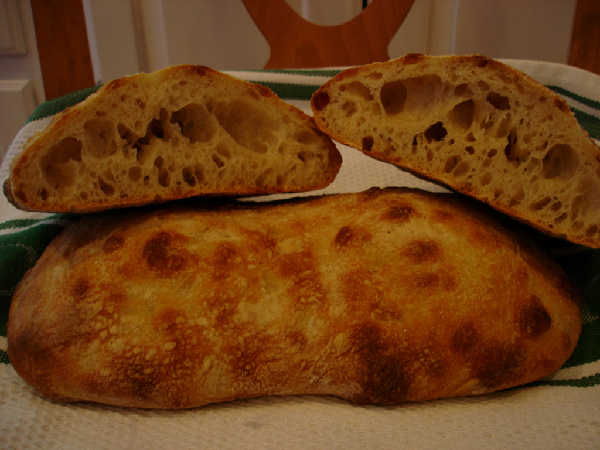
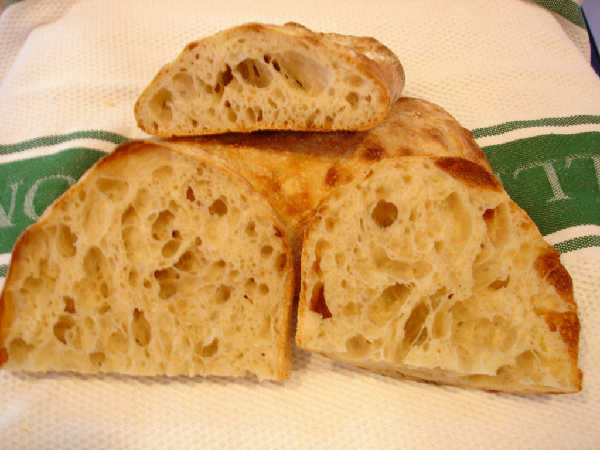
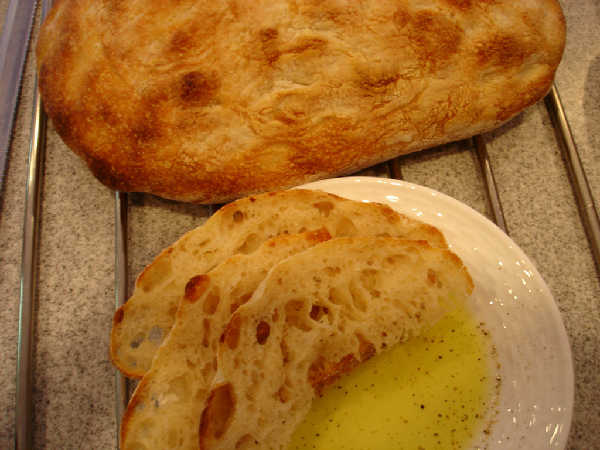
I don’t make white breads very often, but I make this one every so often to satisfy the occasional, overpowering hankering. If you like, you can substitute whole wheat flour for up to half of the white flour, or you can simply use a whole wheat starter. You’ll probably want to increase the water, though by 1 to 3 Tbs.

Formula:
White flour: 100%
Salt: 2%
Water: 72%
30% of the flour is in the starter. (I’ll give two recipes, one for starter at 100% hydration and another at 60% hydration)

Ingredients
White flour: 350 grams or about 3 cups
Salt: 10 grams or 1.25 tsp
Water:

  • Using a wet starter: 210 grams or 1 cup MINUS 1 Tbs
  • Using a stiff starter: 270 grams or 1 cup +3 Tbs

Starter: Two options

  • Wet starter (100% hydration) 300 grams or 1 ¼ cup
  • Stiff starter (60% hydration) 240 grams or 1 cup

Mixing
Dissolve the starter into the water, and then add the salt. Finally add the flour and mix until all is hydrated.

Dough development and the first rise
However you develop the dough, from the time you mix until the time you shape the dough, it’ll take about 3 to 4 hours for the first rise at room temperature.

Shaping
Be gentle. You want to retain as many of those air bubbles as possible. Rounds and batards are the traditional shapes for San Francisco-style sourdoughs.

Second rise and retarding
Sourdoughs benefit quite a bit from retarding – many people think loaves that have been retarded taste better. You can simply cover the shaped dough and place it in the fridge or, if you’re lucky and the overnight temperature will be between 45 and 55, you can simply place it outside, in which case the bread will probably be ready to bake when you wake up.

If you put it in the fridge, it’ll need to warm up for 3-4 hours to complete its rise.

If you don’t want to bother with retarding, you can let it rise for another 2 to 3 hours at room temperature. You can also speed things up (and increase sourness) by placing the dough on an upturned bowl in the bottom of a picnic cooler, throwing a cup of boiling water in the bottom and covering it quickly. After an hour, throw another cup of hot water in. The rise should only take a couple of hours this way.

Baking
Score the bread as you like. Hash marks are traditional for rounds, and batards usually take a single, bold stroke down the center or a couple of baguette-style slashes.

While you can certainly bake this bread on a cookie sheet, it benefits from a stone and some steam, or a covered baker. However you do it, bake at 450 degrees for about 35-40 minutes.

Section I: Introduction

There are few things that smell quite as good as a loaf of bread baking in the oven. But there are other benefits beyond just that lovely smell of baking your own bread. It’s cheaper, tastier, and, more often than not, healthier than buying it from the store.

Our goal with this e-book is to help amateur bakers produce the kind of bread that they would most like to pull from their ovens. We hope that it helps you.

idaveindy's picture
idaveindy

7 things about fresh-milled flour

In my experience, Fresh-Milled flour has 7 "things" I need to allow for:

This is based on using a sourdough starter/levain. Commercial yeast (dry or fresh) will be slightly different.

1. Fresh-milled flour is usually thirstier, takes more water, than store-bought WW. This is a general rule. You will eventually find exceptions, i.e., some grain will already be high in moisture, and therefore need less water.

2. Fresh-milled flour takes more time to soften, so use 30-90 minutes of soak/autolyse (without starter/levain, depending on granularity (particle size).

Sidenote: because of 1 and 2, if I make a combo fresh-milled WW and white flour loaf, I autolyse only the fresh-milled WW because the white flour would "steal" the water first.  So in that  case, I add the white flour (and some water) when I combine in the levain.  I'm sure there are other ways to do it.

3. Fresh-milled flour is Tricky, in that you think you over-wetted it, but then it absorbs and it feels underhydrated, but then it eventually slackens. So after you learn by trial and error (keep meticulous records of weights) and "dial it in", then you have to trust it to end up at the right spot of hydration.  You sort of have to learn three or four  different "feels", one at each stage, (depending if you add salt in a separate stage -- salt tightens dough, temporarily.)

3a. "Wet sand" feel. Home-milled flour can sometimes be gritty, especially extra hard wheat such as durum and Kamut/Khorasan.  I need at least a 1 hour autolyse (no starter/levain) for these.  And even then, the transformation from "wet sand" to dough doesn't happen, for me at least, until 30-60 minutes after incorporating the levain.

My procedure is usually: 1 hour autolyse, gently incorporate levain (no kneading, just gentle folds), let it rest 30 min, incorporate salt and hold-back water, let rest 30 minutes for it to slacken becasue salt tightens it up, then do stretch and folds.

3b. Important: Do not knead or do "stretch and folds" until the  "wet sand" becomes "dough" and the dough is extensible enough.  If the dough never slackens/loosens or becomes extensible ("stretch-able") enough say, 45 minutes, after adding salt (or after adding levain, if salt was already in it), then it likely needs more water.

4. Fresh-milled ferments FAST!  I use 3.5% prefermented flour for an overnight bulk ferment, or an overnight proof.  Fresh-milled, like most store-bought WW, maybe even more than store-bought WW,  keeps on fermenting in the fridge, more so than white flour does in the fridge.  The fridge won't "stop" WW from fermenting/aging/breaking down.

5. Fresh-milled flour has oil from the bran and germ  Store-bought WW has had some oil evaporated off, and might not even have had the germ in it, depends on brand. So I use little to no oil compared to store-bought WW.

6. If I over-hydrate a dough, and feel like I need to add flour to adjust, I add _white flour_ because it will absorb water quicker than fresh milled WW.  The late addition of WW and especially fresh-milled WW won't get as hydrated/soaked as well as what was in there from the beginning.  In other words, to "salvage" an over-wet dough at some point in the bulk ferment, I use white store-bought  flour.

7. Good oven spring on a boule or batard (ie, not a pan-loaf, like sandwich bread) generally requires under-fermenting. Do not let it rise (first or second rise) as much as you do with a loaf baked in a pan.  First rise (usually called bulk ferment) can be 30-50% increase.  2nd rise (usually called final proof) even less, depends on if you do it at room temp or in fridge.

Your mileage may vary.

-----

Suggested reading:

About home-milled, from user "agres": http://www.thefreshloaf.com/node/66636/better-bread

About home-milled from SeasideJess: http://www.thefreshloaf.com/node/64101/tips-100-freshmilled-whole-wheat-baking

Avoiding/removing bugs: http://www.thefreshloaf.com/node/64081/tip-bugs-whole-grains

Starch damage: http://www.thefreshloaf.com/node/62154/oven-spring-possible-miche

Sifting and multiple passes through your mill: www.thefreshloaf.com/node/62237/bolting-sifting-comparison-1-pass-vs-5-passes

Easy sandwich loaf formulas: http://www.thefreshloaf.com/node/62486/community-bake-approachable-loaf-bread-lab

Testing/comparing different varieties of home-milled wheat (just the comment, not the whole thread/post): http://www.thefreshloaf.com/node/56742/community-bake-maurizios-fiftyfifty-whole-wheat-sourdough-everyone-welcome#comment-412372 

---------

The home-millers you would do good to follow on here are: SheGar, SeasideJess, danni3ll3, ifs201, agres, barryvabeach, DanAyo, MTloaf, dabrownman, pmccool, deblacksmith, UpsideDan, TopBun, albacore, .. with apologies to any others I missed.

----

Video about using fresh-milled flour with Nick Giusto of Central Milling and Pablo Giet.  They speak of several things I mention above such as fast fermentation and the enzymes.
https://www.instagram.com/tv/CI6VsoZhTqK/

------

Notable comments. See more below, in the comment section:

From MTLoaf:

2. [...] I like to use around 15% bread flour for more consistent results. Extra kneading will make the loaf lighter.

3. Sifting is worth the effort. Even if you are going to bake with all the brown bits because it oxygenates the flour and allows it to absorb the water better. Separating them with a #40 will collect about 5>7% and a #50 will get around 15%. The bran can be presoaked, used in a levin, toasted or used for other things. My chickens love a bran dough ball.

4. My personal preference with whole wheat is to error on the side of over hydrate because the bran will absorb moisture even after it has baked. The Approachable Loaf from the recent Community Bake here at TFL (http://www.thefreshloaf.com/node/62486/community-bake-approachable-loaf-bread-lab) is 85 to 90% water and produces a Wonder Bread soft sandwich loaf. Say no to the brick.

5. Other grains like rye, spelt, white whole wheat, kamut are nice to have on hand. [...]

BobS's picture
BobS

Life with Fred: maintaining a starter in pictures

There's lots of discussion and great information about starters on TFL. Everyone does things a little differently, and what works for you is best. Here's what works for me.

I typically make two sourdough loaves a week. Sometimes more, and sometimes I miss a week, sometimes two. Sometimes I make more than two loaves.


When I started baking sourdough I had a lot of questions and two constraints. First, I traveled a fair bit for work, often on short notice, so I needed a process that was not too fussy  - no twice-daily feedings, no big mason jar of goo on the kitchen counter.  Second, I hate waste; the idea of discarding half of anything bothers me. I addressed the first constraint by having Fred live in the fridge nearly all the time; and addressed the second by keeping him fairly small. Here's Fred:


That's a half-cup container, and it contains 2.5 ounces of Fred. He's a little guy. Fred is a 100% hydration starter, so he's 50/50 flour/water by weight.  Fred's hydration is not so important, but one reason 100% is nice because it makes the math simpler. Fred is too small to make bread by himself, I use him to innoculate a levain that typically ferments 12-14 hours.

I made the original Fred about 3-4 years ago using the great instructions on this site from Debra Wink. Pineapple juice rocks.

The evening before (or two evenings before if I am retarding the final proofing) I take Fred out of the fridge and build a levain. Sometimes, when I have presence of mind, I take him out an hour or two before I start to let him warm up a bit, but often I just take him right out of the fridge. This is what he looks like after being in the fridge for about 10 days:


Sometimes, after a week or so, Fred will blow his top in the fridge. Not a big deal, and if no one notices for a day or two Fred will create a dry crust on top to keep his innards moisty. Fred's a bit of a teetotaler: I very seldom see hooch, perhaps only after a couple of weeks in the fridge. If Fred looks all watery and hoochy, I might feed him once or twice, but usually I will let him warm up and he comes back to life.

I feed Fred in a 1:2:2 ratio: 1 part starter, 2 parts flour, 2 parts water. My experience  (YMMV) is that this ratio provides adequate food so that he will be in good shape to innoculate a levain in a week, and can tolerate cooling his heels for longer if necessary . I always (well, almost always) remove 2 oz (of the 2.5 total) to start the levain build:


There's just a little bit of Fred left (0.5 oz):


The 1:2:2 ratio means we need to add 1 oz of water and 1 oz of flour in order to make Fred the man he was.  So we add 1 oz  water (that's a chopstick, which works really well for mixing the remaining starter and water) and then 1 oz flour. I feed Fred with AP or Bread flour, but I always give him a little treat of rye:


The 2 oz of starter is built into the levain - in this case a stiffer levain for Pain au Levain. There's no waste; I haven't discarded any starter.


If the formula for the levain called for less than 2 oz of starter,  I decrease the amount of flour and water in the levain by the excess amount of starter. For example, if the formula called for 1 oz of starter, I would use 2 oz of Fred, but then reduce the amount of flour and water I add by 0.5 oz each (that's what I meant about the 100% making the math easier). (It could be that innoculating the levain with more than the amount of starter called for in the formula changes the flavor profile of the bread. That's okay; I'vehad no complaints yet, and I have other details of technique to work out before addressing that one. If I found that it did make a difference, I would simply scale Fred down.)

The levain I'm building often has a different hydration than Fred. Sometimes it uses a different type of flour, e.g. rye. No matter.

The chopstick doesn't work for a lot of stiff starter, so I switch to the handle of a wooden spoon.

The levain goes in the proofing box overnight. Fred goes in for an hour or so just to help get his juices flowing. (I'm writing this in New Hampshire in February - the proofing box is required equipment). Then Fred goes in the fridge and does not reappear for a week or so. It seems to take about 4-5 days for Fred to develop sufficient strength in the fridge. If I want to use him sooner I will take him out and place him on the counter or in the proofing box until he's bubbly.


The next morning the kitchen is at 63F, but the levain looks good:


Fred, flour, water, salt:


dmsnyder's picture
dmsnyder

Sourdough baguettes: My version of Gosselin's "baguettes tradition"

I have made baguettes following many different formulas. Some of the most interesting have been various versions of “pain à l'anciènne,” including those of Reinhart in The Bread Baker's Apprentice and of Leader in Local Breads. Sometime back in 2008, I found an e-mail that Peter Reinhart had sent to a bread bakers' Usenet mailing list in 2003 which described the formula for pain à l'anciènne as he got it directly from Philippe Gosselin. The version that ended up in BBA was simplified somewhat by Reinhart, adding all the ingredients before the mixing, omitting the double hydration and delayed addition of the salt.

When I first made baguettes from Gosselin's original method, they were the best-tasting ones I had ever made. I finally got to taste Gosselin's baguettes tradition (from the rue Caumartin shop) last year. To my taste, they had a bit of a tang suggesting they might have been made with levain, so I modified the formula to use a liquid levain and found I preferred the result to that leavened with commercial yeast. In fact, I preferred what I had baked to Gosselin's own.

This is the version I used for today's bake:

Ingredients

Wt.

Baker's %

Organic AP Flour

400 g

100

Ice Water

275 g

69

Salt

8.75 g

2

Liquid Levain

200 g

50

Instant yeast (optional)

¼ tsp


Total

883.75 g

221

Notes: Accounting for the flour and water in the levain, the total flour is 500 g and the total water is 375 g, making the actual dough hydration 75%. The actual salt percentage is 1.75%.

For today's bake, I made 3/4 of the dough amount in the table above.

I mixed the levain the night before starting on these and retarded it in the fridge overnight. 

Method

  1. The night before baking, mix the flour and levain with 225 g of ice water and immediately refrigerate.

  2. The next morning, add the salt and 50 g of ice water to the dough and mix thoroughly. (I did this by hand by squishing the dough between my fingers until the water was fully incorporated.)

  3. Place the dough in a lightly greased bowl with a tight cover.

  4. Ferment at room temperature until the dough has about doubled in volume. (3 hours for me) Do stretch and folds in the bowl every 30 minutes for the first two hours.

  5. An hour before baking, pre-heat the oven to 500ºF, with baking stone and steaming apparatus in place.

  6. Divide the dough into 4 more or less equal pieces and stretch each into a 12-14 inch long “baguette.”

  7. Score and bake immediately at 460ºF, with steam for 10 minutes, and for about 20 minutes total.

  8. Cool on a rack before eating.

Notes: In Step 7., I specify shaping the loaves by simply stretching the dough pieces into a rough baguette shape. This is a very slack dough and a challenge to handle as one might a lower-hydration baguette dough. If you are very comfortable handling slack dough, have a firm grasp of the “iron hand in a velvet glove” principal and are feeling up to the challenge, you can shape the pieces as you would shape a baguette ordinarily. That is, in fact, what I did for this bake.

You will also note that I scored these baguettes with a single, longitudinal slash. I find the results more satisfactory than the traditional 5 or 7 cuts when scoring a very sticky dough like this. However, the difference is merely cosmetic.


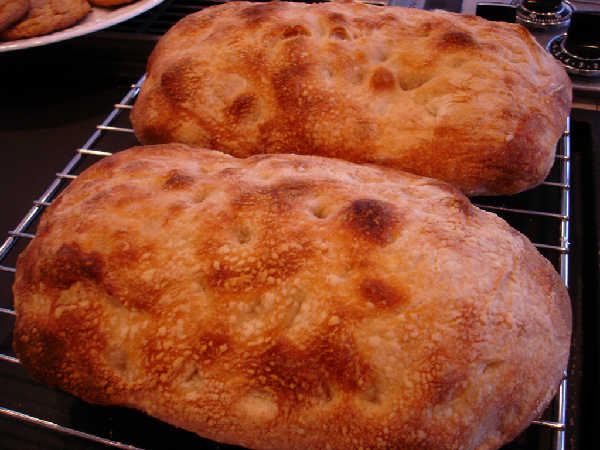
These baguettes had a chewy crust, except for the ears, which were crunchy. I think they could have baked 5 minutes longer, or I could have left them in the turned off oven for another 5-7 minutes to dry the crust. The crumb was nice and open. The flavor was sweet, complex and moderately tangy. I attribute this to a combination of factors – retarding the levain overnight and fermenting the dough, after the final mixing, at 85 dF.

This baguette is still a favorite.

David 

Submitted to YeastSpotting

txfarmer's picture
txfarmer

30% rye sourdough sandwich loaf - yes, even rye breads can be fluffy and soft!

Sending this to Yeastspotting.

Click here for my blog index.


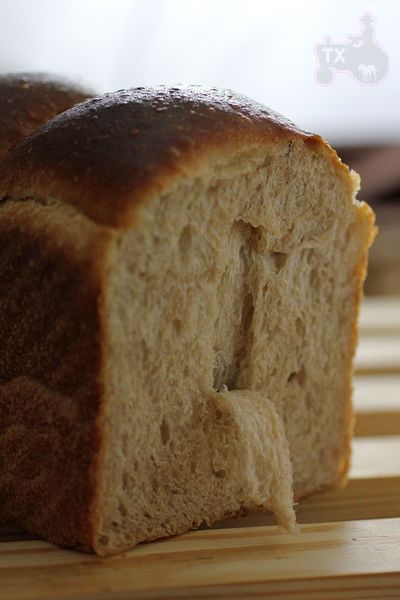
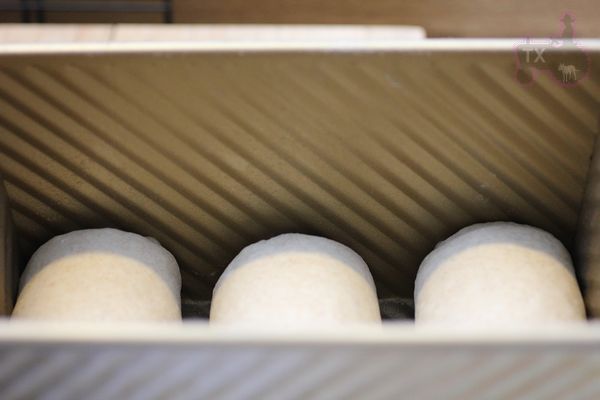
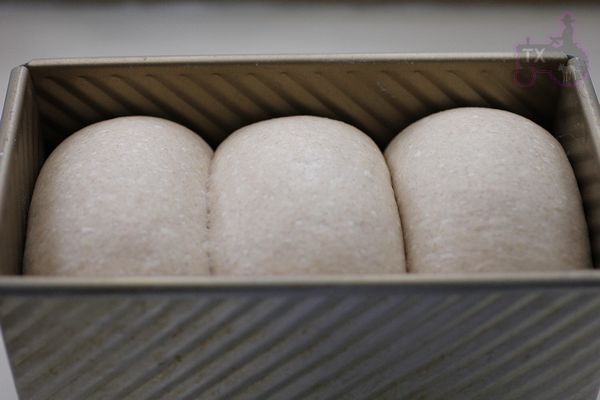
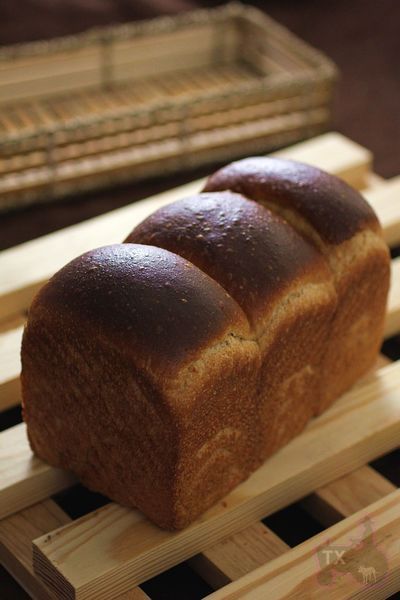
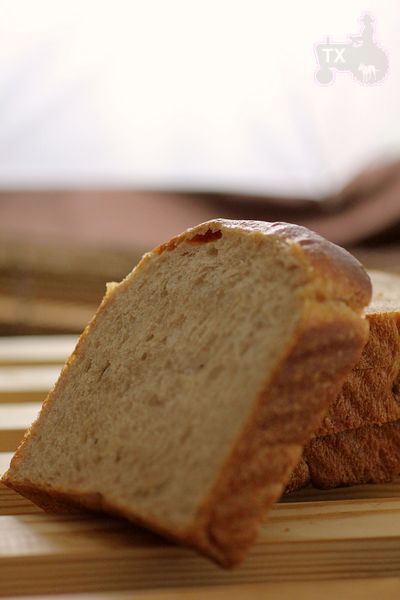
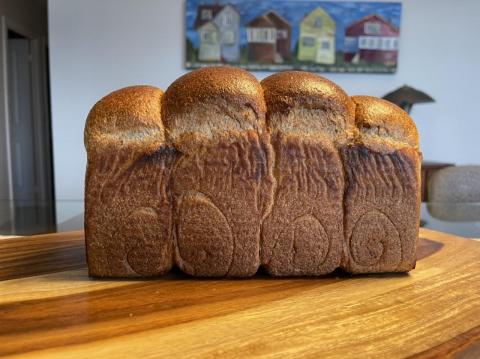
It's another variation for my favorite sourdough sandwich breads. This time there are 30% rye in the flour, 15% of which in levain, the rest in final dough. Before this loaf, I tried other rye ratios, 30% seems to be the sweet spot - enough rye flavor yet the dough is still strong enough to be soft, bouncy, and fluffy. The total flour amount is 280g for my Chinese pullman tin, which is 30g more than an all white flour sandwich dough. I knew I would need more dough to compensate for the rye, but 30 is much less than I anticipated, just shows that a bit of rye won't hurt the dough strength that much.

30% rye sourdough sandwich loaf
Note: 15% of the flour is in levain
Note: total flour is 280g, fit my Chinese small-ish pullman pan. For 8X4 US loaf tin, I suggest to use about 302g of total flour. For KAF 13X4X4 pullman pan, I would suggest using about 481g of total flour.

- levain
rye starter (100%), 12g
water, 19g
medium rye flour, 36g

1. Mix and let fermentation at room temp (73F) for 12 hours.

- final dough
bread flour, 196g (I used half KAF bread flour and half KAF AP flour for a balance of chewiness and volume)
medium rye, 42g
brown sugar, 28g
oil, 28g, softened
milk, 143g
salt, 6g
egg, 34g

1. Mix everything until stage 3 of windowpane (-30sec), see this post for details.

2. Rise at room temp for 1 hours, punch down, put in fridge overnight.
3. Takeout, divide, round, rest for 1 hour. shape as instructed here for sandwich loaf.

4. rise at room temp for about 5 hours. For my pullman pan, it should be about 80% full; for US 8x4inch pan, it should be about one inch above the edge. The dough would have tripled by then, if it can't, your kneading is not enough or over.

5. for sandwich loaf, bake at 400F for 15min, then 375 for 25-30min, brush with butter when warm.


To counter the effect of rye flour, there needs to be enough tenderizing ingredients in the dough: oil, sugar, egg, milk all serve this purpose. The slices were extremely soft and fluffy, yet full of flavor.


Used brown sugar rather than white sugar, oil rather than butter, to better complement the rye flavor

dmsnyder's picture
dmsnyder

Walnut Raisin Sourdough Bread from SFBI Artisan II


Most of the breads we baked in the Artisan II workshop at the San Francisco Baking Institute (SFBI) are found in Michel Suas' “Advanced Bread & Pastry” (AB&P) textbook. A couple of the breads I and the other students enjoyed the most are not, and one of them was a delicious Walnut Raisin bread made with a firm levain and a small amount of instant yeast.

The following is my scaled down version which made two loaves of 563 gms each. (The 26 g by which the dough exceeded the ingredient weights must be due to water absorbed by the raisins.) I incorporated an autolyse in the procedure which we did not use at the SFBI.


Total Formula


Ingredients

Baker's %

Wt (g)

KAF AP flour

71.57

383

KAF Whole Wheat flour

19.77

106

BRM Dark Rye flour

8.66

46

Water

67.62

362

Walnuts (toasted)

15.81

85

Raisins (soaked)

19.77

106

Salt

2.13

11

Total

206.41

1100


Levain


Ingredients

Baker's %

Wt (g)

KAF AP flour

95

77

BRM Dark Rye flour

5

4

Water

50

40

Stiff Starter

60

48

Total

210

169

  1. Mix all ingredients until well incorporated.

  2. Ferment 12 hrs at room temperature.


Final Dough


Ingredients

Baker's %

Wt (g)

KAF AP flour

65

275

KAF Whole Wheat flour

25

106

BRM Dark Rye flour

10

42

Water

72

305

Yeast (dry instant)

0.1

0.4

Walnuts (toasted)

25

85

Raisins (soaked)

20

106

Salt

2.7

11

Levain

40

169

Total

259.8

1100

Procedure

  1. Mix the flours and the water to a shaggy mass. Cover tightly and autolyse for 20-60 minutes.

  2. Toast the walnuts, broken into large pieces, for 15 minutes at 325ºF. (Can be done ahead of time)

  3. Soak the raisins in cold water. (Can be done ahead of time)

  4. Add the salt and the levain and mix at Speed 1 until well incorporated (about 2 minutes).

  5. Mix at Speed 2 to moderate gluten development (about 8 minutes).

  6. Add the nuts and raisins (well-drained) and mix at Speed 1 until they are well-distributed in the dough.

  7. Transfer to a lightly floured board and knead/fold a few times if necessary to better distribute the nuts and raisins.

  8. Round up the dough and transfer to a lightly oiled bowl. Cover tightly.

  9. Ferment for 2 hours at 80ºF.

  10. Divide the dough into two equal pieces. Pre-shape as boules. Let the pieces relax for 20-30 minutes, covered.

  11. Shape as bâtards or boules and place, seam side up. In bannetons or en couche. Cover well.

  12. Proof for 1.5 to 2 hours.

  13. An hour before baking, pre-heat oven to 500ºF with baking stone and steaming apparatus in place.

  14. Transfer the loaves to a peel. Score them. Transfer to the baking stone.

  15. Turn the oven down to 450ºF and bake for 15 minutes with steam, then another 15 minutes in a dry oven. (Boules may take a few more minutes to bake than bâtards.)

  16. When the loaves are done, turn off the oven but leave the loaves on the baking stone with the oven door ajar for another 8-10 minutes.

  17. Transfer the loaves to a cooling rack.

  18. Cool completely before slicing.

Notes

Because of the water in the soaked raisins, The dough was wetter than expected from the 67% hydration given for the total dough. It felt more like a 70-72% hydration dough.

The crust was thinner and got soft faster with this bake than that done in the deck oven at SFBI. I might try baking at 460ºF and also leaving the loaves in the turned off oven for longer. Perhaps a shorter period baking with steam would help get the crunchier crust I would like with this bread.

This bread has a delicious flavor which is exceptionally well-balance between the grains, nuts and raisins. There is a very mild sourdough tang. Definitely a bread I'll be baking frequently.

David

Submitted to YeastSpotting


Mixing and Dough Development

This is the part of baking that is intimidating to many new bakers, and it doesn't need to be. Please take a few minutes to read this section and begin to learn what the dough should feel like and how to get it feeling like it is well developed. Many of us started baking by using a bread machine or a Kitchen Aid stand mixer to mix and knead the dough. While this works reasonably well, and other methods are described below, you will learn more quickly how the dough should feel in the different stages of development if you use the tools god gives us, our hands. For thousands of years humans have made good bread using only a crude bowl and their hands as tools. While commercial bakeries don't have the time to hand mix and shape thousands of loaves daily, much of what is wrong with commercial bread starts here in the first phase of bread making.

Mixing: Start by gathering all of the needed ingredients for the recipe. If you are making a basic French style bread that uses just the basic four ingredients (flour, water, salt and yeast), measure or better, weigh each item carefully ahead of time and have it in front of you ready to use. This might seem like over simplifying this procedure but I can tell you from experience you will forget the salt or pour all the water in without having measured it or can't remember some additional ingredient, if you don't get organized, first.

In a large bowl, add all of the dry ingredients first and stir or mix them together well. This means that Instant Dry Yeast and salt are added to the flour and any other dry ingredients you may be using with your recipe. NOTE: If you are using Active Dry Yeast, the directions for re activating this type of yeast call for adding the yeast to a cup or so of the water (warmed) needed for the recipe  5 or 10 minutes ahead of mixing the dough. If you are using Cake Yeast, crumble it with and into the flour using your fingers.
Continuing; Next, add all of the water and begin combining the flour into the water. You can use your fingers, (yes it will be a mess but it is supposed to be) or a spoon to accomplish this first mixing. Wood, Stainless Steel, Plastic, any kind of spoon or bowl will do fine. When the mixture is mostly a shaggy mass and looks like most of the dry flour is combined into the mass, you can stop, clean your hands over the bowl and cover the bowl with a plastic bag or a damp towel or plastic wrap. Plastic grocery bags are my favorite. Wait at least 15 minutes and as long as an hour for the flour to absorb the water. When you come back to the mix, it won't feel anything like it did after first mixing. Scrape everything you can onto a clean counter and quickly clean and dry the mixing bowl.


Kneading or Developing: This is the fun part of bread making. You are starting with a mixture of flour, water, salt and yeast. At the moment it is just those things put together in a bowl. We need to develop these things into something more, a smooth dough. The best way to show you or tell you how to accomplish this is with a video. There are many video clips that show similar techniques but this one I like the best. Richard Bertinet has produced an excellent video with Gourmet Magazine that shows the mixing technique above, and the slap and fold kneading technique that many of us now use in some form or another. I urge you to watch this video and learn to do this maneuver with the dough. As you will see in the video, the dough gradually comes together and becomes smooth and flexible. Bertinet is making a sweet dough with eggs and sugar but the method works on any kind of dough or bread type. Finish by rounding and putting tension on the outer skin of the dough and forming a ball.

Once the dough is well developed, smooth and rounded, lightly oil the now clean mixing bowl with a few drops of oil on your fingers (or lightly spray regular cooking oil into the bowl) and place the dough into the bowl, seams down and roll the ball around to coat all the surfaces. Cover the bowl as before during what is called the Primary Ferment. During the primary ferment, the dough will expand in volume as the yeast begins to eat the sugars in the flour and create Carbon Dioxide. Your well developed dough will trap those CO2 bubbles and form pockets that will become the air pockets in the bread, making it lighter.

NOTE: For Whole Grain and Multi-Grain breads, It is advisable to not try and develop the dough entirely by kneading. The sharper grains will cut the gluten strands and allow the CO2 gas to escape. A Stretch and Fold will often work as well, done during the primary ferment. A link to this procedure is provided below.

You can always come back to using some appliance to mix and knead your dough. In fact some doughs are somewhat better suited to machine mixing, but not many. You can easily produce wonderful bread in the manner of our ancestors.

Once the dough has doubled in volume you are ready for the next step, Shaping

There are a number of ways to develop dough. The easiest is probably to put it in a KitchenAid-type mixer. About 8 to 10 minutes of mixing the ingredients in a KitchenAid on low speed will generally do the trick.

There’s no need to buy a KitchenAid, though, to make good bread. Here are three ways of developing dough by hand.

Traditional Kneading:
Use this method when the dough will rise fairly quickly (1-2 hours for the first rise) or if I’m in a hurry to get it developed.

First, mix the ingredients with a spoon until everything is hydrated. Cover and wait about 15 to 20 minutes – this way, you’ll let the water do most of your work for you (if you don’t have time for this step, feel free to skip it – you may have knead just a little more, though). After this waiting period is done, scrape the dough out of the bowl onto a smooth surface, and push on the down and forward with the heels of your hands. Fold it up back on itself, give the dough a quarter turn, and repeat.

Knead for about 4-5 minutes, and then cover it. Let it rest about 5 minutes, and then knead once again for 1-2 minutes. It should be well developed at this point.

One way to test dough development is to tear off a small chunk and then gently stretch it. If the dough is ready, you should be able to stretch it thin enough so that it becomes translucent. This is called the “windowpane” test.

Stretch and Fold: This method adds about an hour to the rise of an ordinary yeasted loaf, but when you’re working with sourdoughs or yeasted breads that have a long rise anyway, it doesn’t make that much difference. And it takes hardly active time at all – just a few minutes total. Really!

Mix the ingredients with a spoon until hydrated. Cover and wait 30 minutes to 1 hour. After this rest, scrape the dough out of the bowl and stretch it to about twice its length, if possible. For the first fold, the dough will still be pretty shaggy, so only go as far as you can without ripping. Fold the dough like a letter, give it a quarter turn, and then stretch and fold once again. Place it back in the bowl and cover.

Repeat this folding process twice more with 20-30 minutes in between each one.

More information and a video may be found here: http://www.sourdoughhome.com/stretchandfold.html


Stretching and Folding Illustrated: Here is the Stretch and Fold method illustrated by Mebake (Khalid). He has artfully depicted the process of keeping the dough in the bowl while developing the gluten and incorporating air into the dough. This easy to do technique is employed by many members here and allows the baker the opportunity to develop the gluten in a bowl during fermentation with little effort and no mess. Once you understand how this works, I'm sure you will use it every time.


French fold: This is a great, quick method for developing dough, but it requires a relatively long rest after everything is hydrated, so it’s most appropriate for doughs with a long bulk rise.

Once everything is hydrated, cover and let the dough rest for a least an hour. Remove the dough from the bowl onto a smooth surface. With one hand on either side of the dough and your thumbs underneath, stretch the dough parallel to your body while simultaneously folding it in half along its length with your thumbs.

Give the dough a quarter turn, pick it up, and then throw it down onto the surface, smooth side down. Really, smack it down. Stretch it again while simultaneously folding it over with your thumbs, make another quarter turn, and give it yet another smack with the smooth side down.

Do this about 10 times, and you’ll have a well developed dough. If it doesn't seem as developed as you'd like or if it starts to tear, let it rest for 5 minutes, and repeat.

A good video of this technique may be found here: http://www.gourmet.com/magazine/video/2008/03/bertinet_sweetdough

An alternative method: that  keeps the dough in the bowl and all of the kneading is done there.

I use my fingers and scrape the dough into a single lump and flatten it and then fold it in half, turn it a quarter turn and fold again and flatten it. I continue this for about twenty folds. Often it gets very stiff and needs to rest for a few minutes to relax. As noted the dough will let you know when you have done enough.  This stretches the original surface a million times the size it was at the start and assures a complete blending of the ingredients. I use this method because it confines the mess and permits making bread in less than ideal places. See the illustration mentioned above for a pictorial that describes this process.

There is no wrong way to knead bread but some ways are much better than others. Some breads benefit from special kneading and handling and some are very hard to get wrong. Before kitchens and mechanical mixers and tables there were dough troughs and all of the mixing and kneading was done there. You could make bread in a dough trough and bake it on a hot flat stone on an open fire.

No knead bread: For bread mixes that use very little leavening and are fairly wet, time provides the development.
Simply mix everything up until hydrated, cover and go to sleep. Anywhere from 12 to 18 hours later, give the dough one stretch and fold, shape as necessary, and then let it rise a couple of hours until it’s ready to bake. Learning to use a plastic scraper to handle dough in the mixing bowl, as described below, is a big help.

Alternative video: If you are just a little adventurous, Check out this excellent video, provided by Mark Sinclair of The Back Home Bakery. Mark demonstrates folding in the bowl using a plastic scraper over a period of time to develop strength in the dough. This and all of Marks videos are excellent training aids.

zolablue's picture
zolablue

Thom Leonard's Country French

I'm posting this recipe for discussion as we have been talking about it on the Glezer firm starter thread.  I have made this bread often with variations because I did not have the high-extraction flour yet.  I recently purchased the Golden Buffalo flour from Heartland Mill in Kansas and it was superb.  I didn’t take photos of those so will next time I make it.


The one pictured here was made using Hodgson Mill WW graham flour sifted for the WW portion (250g) and mixed with the 750g King Arthur bread flour.  I’ve also made it sifting the King Arthur traditional and organic WW flours but I like the sweetness of the graham flour.  Still, I think after using that high-extraction flour the flavor was so extraordinary I would choose to make it that way more often.


Mountaindog has also posted her variation on this bread here and she makes beautiful loaves of it. 

http://www.thefreshloaf.com/node/1806/thom-leonard-country-french-boule-recipe

This is a great recipe to play around with and it always comes out fabulous bread.  Another note – I generally like to make four smaller boules but when I made them with the high-extraction flour I made two boules and they were large and fantastic. 


Here are the some photos of the ones I made a few months ago (more photos here: http://zolablue.smugmug.com/gallery/2671417#141408937 ) and the recipe follows:

Thom Leonard’s Country French Bread - © Maggie Glezer, Artisan Baking  

Makes one 4 pound (1.8-kilo) loafTime: At least 18 hours with about 30 minutes of active work 

Much of what makes this bread so special is the high-extraction flour used in it.  This is a bolted whole-wheat flour much lighter in color and sweeter in flavor than a whole-wheat flour (at 100% extraction), but much darker and more flavorful than a white flour (at 72% extraction).


The method I give here for making your own high-extraction flour will work best on coarsely ground whole wheat flour.  If you already have a good high-extraction flour, substitute it for the whole-wheat and bread flour in the final recipe.  Thom also includes a little of his sourdough rye starter in the dough, but it is such a small amount that I have bumped up the levain slightly and added rye flour to the final dough instead.

RECIPE SYNOPSIS The evening before baking - making the Levain: 

25 grams (1 1/2 tablespoons or 0.8 oz) fermented firm sourdough starter refreshed 8 hrs before (17%)

140 grams (2/3 cup or 4.9 oz) water, lukewarm (100%)

140 grams (1 cup minus 1 tablespoon or 4.9 oz) unbleached bread flour (100%)


Dissolve the sourdough starter in the water in a small bowl.  Add the flour and beat this batter-like dough until very smooth. Place in a covered container and let it ferment overnight for 8 hours, or until fully risen and just starting to sink in the middle.

Bake Day – Mixing the Dough: 

350 grams (about 12 oz or about 2 1/2 cups) Coarsely ground whole-wheat flour, preferably milled from an organic, hard winter wheat (eventually 25%)

750 grams (26.5 oz or 5 cups) unbleached bread flour, preferably organic (75%)

30 grams (1 oz or 1/4 cup) organic whole-rye flour (3%)

660 grams (24 oz or 3 cups) water (66%)

Fermented levain (30%)

23 grams (0.8 oz or 1 tablespoon plus 1 1/2 teaspoons) salt (2.3%)

Preparing the flour: 

Sift the whole-wheat through your finest sieve or flour sifter.  The large flakes of bran should be caught in the sieve (use them for flouring your peel or for muffins).  Measure out 2 cups 3 tablespoons (8.8 ounces, 250 grams) sifted flour.  Mix this dark flour with the bread flour and the rye flour in a large bowl or in the work bowl of your mixer.


Add the water to the fermented levain to loosen it from the container.


Mixing the dough: 

By hand:  Pour the watered levain into the flours and stir with your hands or a wooden spoon just until a rough dough forms.  Turn the dough out onto the unfloured work surface and continue kneading until the dough is very smooth and shiny, about 10 minutes.  This is a lot of dough and will take some muscle.  Sprinkle on the salt and continue to knead the bread until the salt has fully dissolved and the dough is very smooth and shiny.


By stand mixer:  Add the watered levain to the flours in the work bowl and stir the dough together with a wooden spoon or your hand (this will make the mixing go more quickly).  Using the dough hook, mix the dough on medium speed for about 10 to 15 minutes, or until the dough is very smooth and almost cleans the bowl.  Add the salt and continue mixing until the dough is much tighter and cleans the bowl, about 5 more minutes.

This should be a soft, sticky, and extensible dough.  

Fermenting and turning the dough:  

Place the dough in a container at least 3 times its size and cover it tightly with plastic wrap. Let it ferment until it is airy and well expanded but not yet double in bulk, about 3 hours.  Turn the dough 3 times at 30-minute intervals, that is, after 30, 60, and 90 minutes of fermenting, then leave the dough undisturbed for the remaining time.

Rounding and resting the dough: 

Flour the surface of the dough and your work surface and turn the dough out.  Tuck the edges of the dough in to tighten it, round it, and cover it loosely with plastic wrap.  Let it rest until well relaxed, 10 to 15 minutes.  While the dough is resting, sift flour over a linen-lined basket or line a large colander with a well-floured tea towel.

Shaping and proofing the dough: 

Shape the dough into an even and tight round loaf without deflating it.  Place the dough topside down in a linen-lined basket or large colander, lightly sprinkle it with flour, and cover it well with plastic wrap.  Proof the dough until it is well expanded, about doubled in volume and remains indented when lightly pressed with a floured finger, after about 4 hours.

Preheating the oven: 

At least 45 minutes before the dough is fully proofed, arrange a rack on the oven’s second-to-top shelf and place a baking stone on it.  Clear away all racks above the one being used Preheat the oven to 450°F (230°C).

Baking the bread: 

If desired, just before baking the bread, fill the oven with steam.  Turn the bread out onto a sheet of parchment paper or a floured peel and slash 3 to 4 diagonal slashes and 3 to 4 horizontal slashes into the top.  It will look like a skewed grid with diamond-shaped openings.  Slide the bread, still on the paper, onto the hot stone and bake until the bread is dark and evenly browned all around and sounds hollow when thumped on the bottom, 70 to 80 minutes, rotating it halfway into the bake.  If the bread is browning too quickly, reduce the oven temperature to 400°F (205°C), but still bake the bread for at least 70 minutes.  Let the bread cool on a rack.


browndog's picture
browndog

Evolution

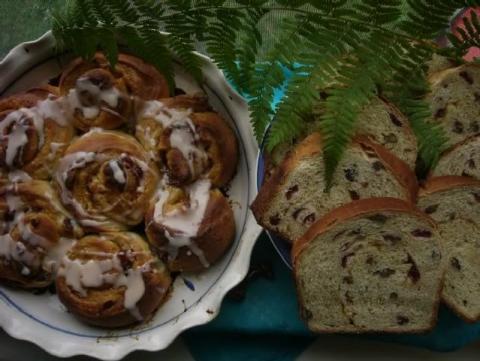
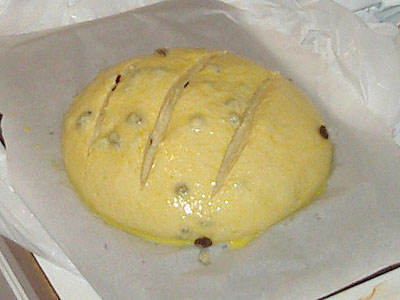
Here is an adaptation of an adaptation. The original recipe was featured in a bed & breakfast cookbook, adapted and published by the Boston Globe, and tweaked once again by me.

Cranberry Nut breakfast Rolls

1/4 c orange juice

1/3 c sweetened dried cranberries

1/4 c unsalted butter, melted and cooled

1 c buttermilk or 1 c water + 2 tbsp buttermilk powder

2 eggs

1/4 c granulated sugar

1/2-2/3 c marmalade

1 1/8 tsp salt

2 tsp active dry yeast

3 c unbleached all-purpose flour

1/3 c coarsely chopped roasted pecans

6 tbsp butter, softened

(This is a good place to use up some starter discard if you have it. I used 50 grams firm discard and reduced the liquid by 1/4 c initially, then added a little more during kneading to make a tacky, silky dough.)

1. Combine juice and berries in a small saucepan, bring to a boil, remove from heat and let sit 10 minutes. Drain and reserve liquid.

2.Warm your buttermilk, add yeast to proof, then combine with the melted butter, eggs, 1/4 c sugar, and salt. Stir thoroughly.

3. Add flour and knead til dough comes together. Add cranberries and nuts, continue kneading til dough is smooth and elastic.

4. Let rise til doubled. Grease two 9" cake pans. Divide dough in half. Roll one half into a 12x8 rectangle. Spread with 3 tbsp soft butter, then enough marmalade to cover in a thin, even layer. Roll up from the long side and seal seam well. Cut into 12 even slices. Place the slices cut side down, in one of the cake pans. Repeat with remaining dough. Cover and refrigerate overnight.

5. 30 minutes before bake time, remove from refrigerator and set in a warm place to rise til doubled. Set the oven at 375. If desired, drizzle 1/4 c heavy cream over each pan of rolls. (My Puritan up-bringing would not allow this.) Bake 20-30 minutes, til golden brown.

Icing

1 c powdered sugar

reserved juice

additional milk as needed

Combine, stir, and spoon over rolls. Serve warm.

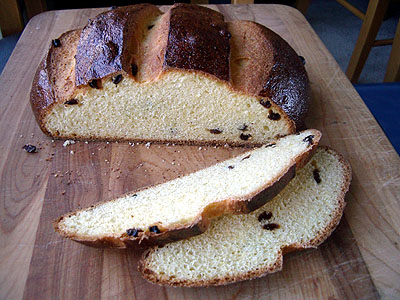
Note: Not needing, for a family of three, 24 rolls to face first thing on a Saturday morning, I chose to make and bake the same day a small pan loaf with the remaining half of the dough. I spread the dough with butter and marmalade, rolled it without slicing and baked it for about 30 minutes. Lovely. The original recipe did not call for marmalade but a quarter cup of granulated sugar and half an orange's worth of zest. I found the marmalade to donate a fine bit of texture and piquancy.

And with this entry I'm pleased to be part of Bread Baking Day #2.

Pages