The Fresh Loaf

A Community of Amateur Bakers and Artisan Bread Enthusiasts.

Most bookmarked

Cedarmountain's picture
Cedarmountain

Cracked Grain Porridge Sourdough Bread

The basic ingredients for good bread - flour, salt, water, yeast - are simple yet can produce such a wonderful variety of breads with complex flavours, crumb textures, crusts.  Sometimes in my tinkering and experimenting I need to remind myself that bread made just with these basic ingredients can be really good bread!  So with that in mind, today's bake focused on the basics - good grain, salt, water and yeast. 

Cracked Grain Porridge Sourdough Bread

  • 250 g sifted mix of freshly ground organic rye, emmer and Marquis wheat (bran set aside for coating the loaves)
  • 750 g organic all purpose flour
  • 750 g filtered water (est.FDH 82% after addition of porridge)
  • 22 g sea salt
  • 225 g levain (4 hour)
  • 300 g mixed cracked grains (rye, emmer, khorasan, Marquis, hulless oats, flax) cooked into a porridge

The cracked grain porridge was gently mixed into the dough after the second of four stretch/folds. After four hours the loaves were pre-shaped, rested for thirty minutes and then shaped and cold proofed overnight for 10 hours. I baked the loaves directly out of the fridge; covered for 25 minutes at 500 F; 10 minutes at 450 F and then uncovered, directly on the baking stone for 20 minutes at 450 F.  


golgi70's picture
golgi70

Farmer's Market Week 18 (Whole Wheat Walnut YW/SD Combo)

Yeast Water is alive and it's time to play.  A big thanks to dabrownman for his simple instructions to get this culture going and maintenance.  I highly suggest a post on this as was explained to me for those who might be interested in making their own culture.  Then it will be an archived easy approach to a natural levain.  My YW is being fed with currants/apples and has a lovely sweet hard cider smell to it.  Since it was so young I decided to do a hybrid with some White Starter as backup and to add a bit of the twang.  So I pre fermented 20% of the flour.  10% was wheat using the YW, the other 10% was my white starter (100% hydration).  I've gotten great feedback on this loaf.  It's quite fantastic actually and would match well with cheese and wine.  Also makes an excellent turkey sandwich and Nut Butter and Jelly. Essentially a classic bread here and I highly suggest this one. 


YW Levain (if you don't have yeast water this could simply be a wheat sour @ 100% hydration)

These are kept as two seperate levains.

------------------------------------------------------------------------------DDT 78F for 8-12  hours

100 g     Freshly Ground Whole Wheat 

100 g     Yeast Water (again mine is Currant/Apple/Honey)

-----------------------------------------------------------------------------

200 g     Mature White Starter (@100% hydation)

------------------------------------------------------------------------------

400 g    Total 

-----------------------------------------------------------------------------------------------

Dough:  DDT 75F

-------------------------------------------------------------------------------------------------

560 g    Central Milling High Country Hi-Protein Flour (13%)

300 g    Freshly Milled Wheat

40 g      Freshly Ground Whole Rye

713.4g  H20

23.6 g    Salt

150  g    Walnuts, toasted

--------------------------------------------------------------------------------

Total Flour:   1100 g

                              White 660 @ 79%  Hydration  =  521.4

                              Wheat 400 @ 90% Hydration  =  360

                              Rye       40 @ 80% Hydration  =    32

Total H20 913.4 (83% Total Hydration) 

Total Dough 2187 g  (3 loaves at 729 g) 

1)  Autolyse Flour and Water for 1 hour. 

2)  Add Levains and mix to combine well.

3)  Add salt to combine well.

4)  Turn up and devlop to medium (should just start really pullin from bowl but not completely)

5)  Add Walnuts and stir in on low speed until incorporated.

6)  Bulk Ferment for me was 4 1/2 hours with 4 stretch and folds at 40 minutes

7)  Divide, preshape, rest 20-30 minutes

8)  Shape to floured bowls and retard immediately.  

9)  Bake 500 with steam for 13 minutes and then 460 for 20-25 longer rotating as needed.


d_a_kelly's picture
d_a_kelly

Panettone a tre impasti - the perfect panettone?

Anyone browsing through TFL will sooner, rather than later, come across mention of the Tartine Bread Book. I'll confess, I don't have a copy of this, but it does seem to be one of the go-to books at the moment for sourdough, no-knead, and lots of other techniques. Likewise, if you want to make enriched breads, there's really only one port-of-call, and that's Cresci by Massari and Zoia. I have a love/hate relationship with this book: it's expensive, the photography is not particularly beautiful (my opinion only but everything is so dark!) and the instructions are absolutely FULL of mistakes and omissions. But when the recipes work... well, everything seems worthwhile.

I've been interested in the panettone a tre impasti for some time now. For those who've never made a panettone, there are usually two separate mixing stages (excluding feeding the starter). The first one late at night and the second in the morning, followed by shaping and a 6-7 hour proof. The panettone a tre impasti is, as the name suggests, produced through three separate mixes. Cresci claims that a panettone made with more impasti will be lighter, softer, moister, and last longer. Better in every way therefore.

But I had my doubts. First, the dough looked far too lean compared to other panettone recipes in the book. If we look at the panettone a gusto moderno and the tre impasti it is easy to see what I mean:

(Baker's % of total ingredients)

ingredients

al gusto moderno

a tre impasti

Flour

100

100

Starter (at 50%)

20

25

Water

40

40

Sugar

45

30

Butter

60

36

Yolk

54

27

Honey

5

0

Salt

1.6

0.8

Aroma panettone

0.2

-

Powdered milk

-

3.2

Inclusions (raisins etc)

80

75


The other thing which put me off is that the instructions (I have the Italian edition) are definitely very wrong. It seems as if the first page has been printed twice and page 2 is missing, leading straight into a mysterious page 3.

But I thought I'll have a go! And I'm thrilled I did. This panettone is excellent! The volume increase is truly unbelievable. I thought it would never stop growing in the oven. And the flavour is wonderfully rich and complex - it really is a celebration of the magic of a good starter and slow proofing!

I started mine at midnight and left it to proof for 7 hours at 28C. It had just over doubled in this time. I did the second impasto at 7 in the morning, put it back in to proof for another 5 hours, and then did the final impasto. I left it to rest for about 30 minutes and then shaped it (folding it repeatedly works best before making the final shape). Final proof was at 28C for 6 hours, then 45 minutes in the oven at 175C.

To give you an idea of how much this thing grows, the pirottino here is 20cm by 6cm, and I put in only 750g of dough. It must have increased its volume by at least 6 times. Instead of using candied fruit I used gianduia. Yum! I also added the seeds from half a vanilla pod and the zest of half an orange. Because I had decided to substitute chocolate for the candied fruit and raisins, I included 5% acacia honey, to act as a humectant, and a sweeter, but mostly because I like the taste.

I made a little too much impasto to take into account loses during mixing and then took 583g of it before adding the chocolate.

My recipe was:


1st (at midnight)

2nd (at 7am)

3rd (at 12pm)

Flour (w320 - v. strong white)

135

60

34

Starter (at 50%)

57

-

-

Water

58

23

11

Sugar

23

21

25

Butter

43

16

23

Yolk

15

24

23

Honey

-

-

12

Salt

-

-

2

Vanilla & zest

-

-

Half and half

Powdered milk

3

3

2

Gianduia chocolate (milk and dark)


167


This might be the best panettone I've ever tasted, and the beauty of it is, is that it is a lot cheaper to make (though very inconvenient in its timings) than the gusto moderno.

I might have to make another one very soon, but not here in Perugia. My time here is at an end... a pity, because it's a wonderful city, and I recommend it if you ever get the chance to visit. And it's great as a base to explore Umbria, which might be one of the most perfect places I've ever seen.

David


dmsnyder's picture
dmsnyder

Shaping a boule: a tutorial in pictures.

I have read so many bread baking books and viewed so many videos on shaping boules, but I didn't really "get it" until I saw our instructor, Miyuki, do it in the SFBI Artisan I workshop I attended a couple weeks ago.

I will attempt to show what I learned in still photos with descriptions. I hope that viewing these and then reviewing some of the excellent videos available might help others who are struggling with this technique.

Mis en place

You will need:

1. a batch of fully-fermented dough

2. a lightly floured "board" on which to work.

3. a scale, if you are dividing the dough.

4. a bench knife or other cutting implement, if you are dividing the dough

5. prepared bannetons or a couche on which to rest the formed boules for proofing


Procedure


1. Weigh your dough

2. Divide it into equal pieces.

3. Pre-shape each piece gently, incorporating any small pieces of dough on the inside. 

4. Rest the pre-shaped pieces, seam side down and covered with plastic or a towel  on the board for 20-30 minutes.

5. Prepare your bannetons or couche for receiving the shaped boules.


6. After the pre-shaped pieces have rested, shape each as follows:

* Pick up the piece and turn it smooth side down.

* Gently fold the long ends together under the piece.

* Rotate the piece 90º in your hands, and fold the other two sides together.

* Place the piece on an un-floured board, smooth side up.


* Cup your hands around the piece, and gently drag it 3 inches or so towards you in such a way that the edge closest to you sticks to the board and is dragged under the dough, thus stretching the top of the piece into a tight sheath containing the dough.


Note the position of the markers before stretching

After the stretching, the marker at the apex of the boule is unmoved, but the one that was at about 40º North, is now about at the equator.

* Rotate the dough 90º and repeat. Do this 3-4 times until the bottom of the boule is relatively smooth and the whole boule has an unbroken, smooth sheath.

Note that there are no visible seams on what will be the bottom of the boule, after the procedure described.


* Place the boules in bannetons, smooth side down, spray with oil and place each banneton in a food-grade plastic bag to proof. (Alternatively, place the boules seam side down on a couch and cover with a fold of the couche, plasti-crap or a towel.)


Well, there it is. For me, being able to visualize the stretching of the "skin" of the boule between a fixed North Pole and a point on the side, using the board to "grab" the bottom of the boule as I dragged it towards me was the "aha moment." I hope it makes sense to others.

The goal (to form a tight gluten sheath) in forming other shapes is fundamentally the same, but the method is entirely different.

Comments and questions are welcome.

Happy baking!

David


Shiao-Ping's picture
Shiao-Ping

Mr. Nippon's Baguette Formulas

It was raining outside my tea room.  Polly my dog was happy in her house.  I was in heaven painstakingly (not contradictory in terms) typing the French letters (the annoying à and é and ç) into my on-line translator.  The music was vibrating the thin rice-paper calligraphies on my mahogany-colored wall.

I consulted a couple of translations for Lionel Poilâne's Pain Rustique recipe in his Le Pain par Poilâne, page 143.  The 390-page book contains a dozen recipes.  I studied the translations.  I read the recipe very carefully.  And in the end, I said to myself, disbelieving, "Is that it, so simple?"  "Is this the recipe that makes the famous Miche Poilâne?"  (No.)

One of my sisters told me there is a single product hawker's stand in Taipei which sells red bean pancakes.  Any time of the day you go there, there is a long queue waiting to buy the man's red bean pancakes.  He has a dedicated pot to cook his red bean paste at home; the pot is never used for anything else.  He has several other dedicated utensils for the job.  My sister gave me his recipe.  It sounded so simple, I said, "Is that all? You are not leaving any steps out?"  She said, "No."  She gave me the man's list of ingredients: red beans, sugar, flour, and water.  I said, "You are not leaving any secret ingredients out?"  She said, "No."

Still disbelieving from reading the Poilâne formula, I got up from my chair and walked past a neglected pile of books left there since I came back from Taipei last October.  At the rate I buy books there is no way I can finish reading all my books in my lifetime, but I keep on buying.  The postman, the DHL man, and the Fedex man, as well as the occasional sub-contractor for Australia Post, all know there is somebody whose name sounds like (to pronounce slowly) "shopping" that lives behind that gate (and what an annoyance having to ring the bell for the gate to open!).

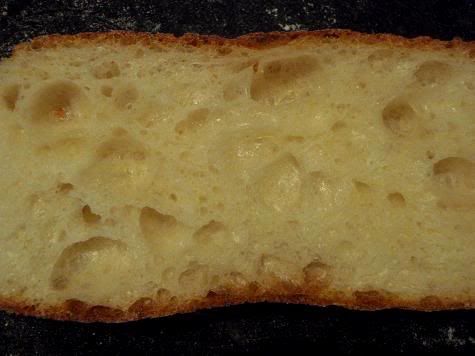
Anyway, I retrieved from that pile a book which is, on the surface, dedicated to baguettes, a Mandarin translation of the best Japanese baguette formulas.  And, boy, can you get any more perfectly shaped baguettes than those any where else in the world?  My oh my, the formulas are so detailed!  And, interesting!


                                  Baguette no Gijutsu (Baguette Techniques), published by Asahiya Shuppan, Japan    


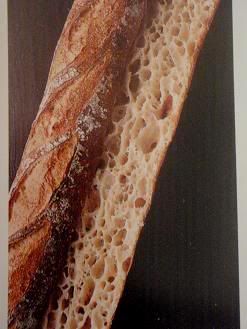
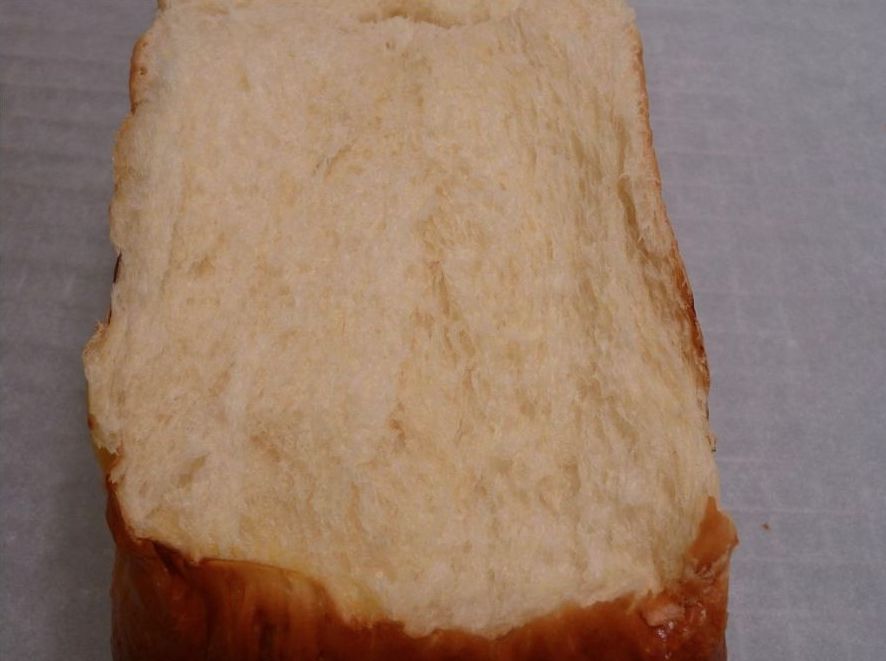
   right: Totszen Baker's Kitchen, Yokohama (page 28)    

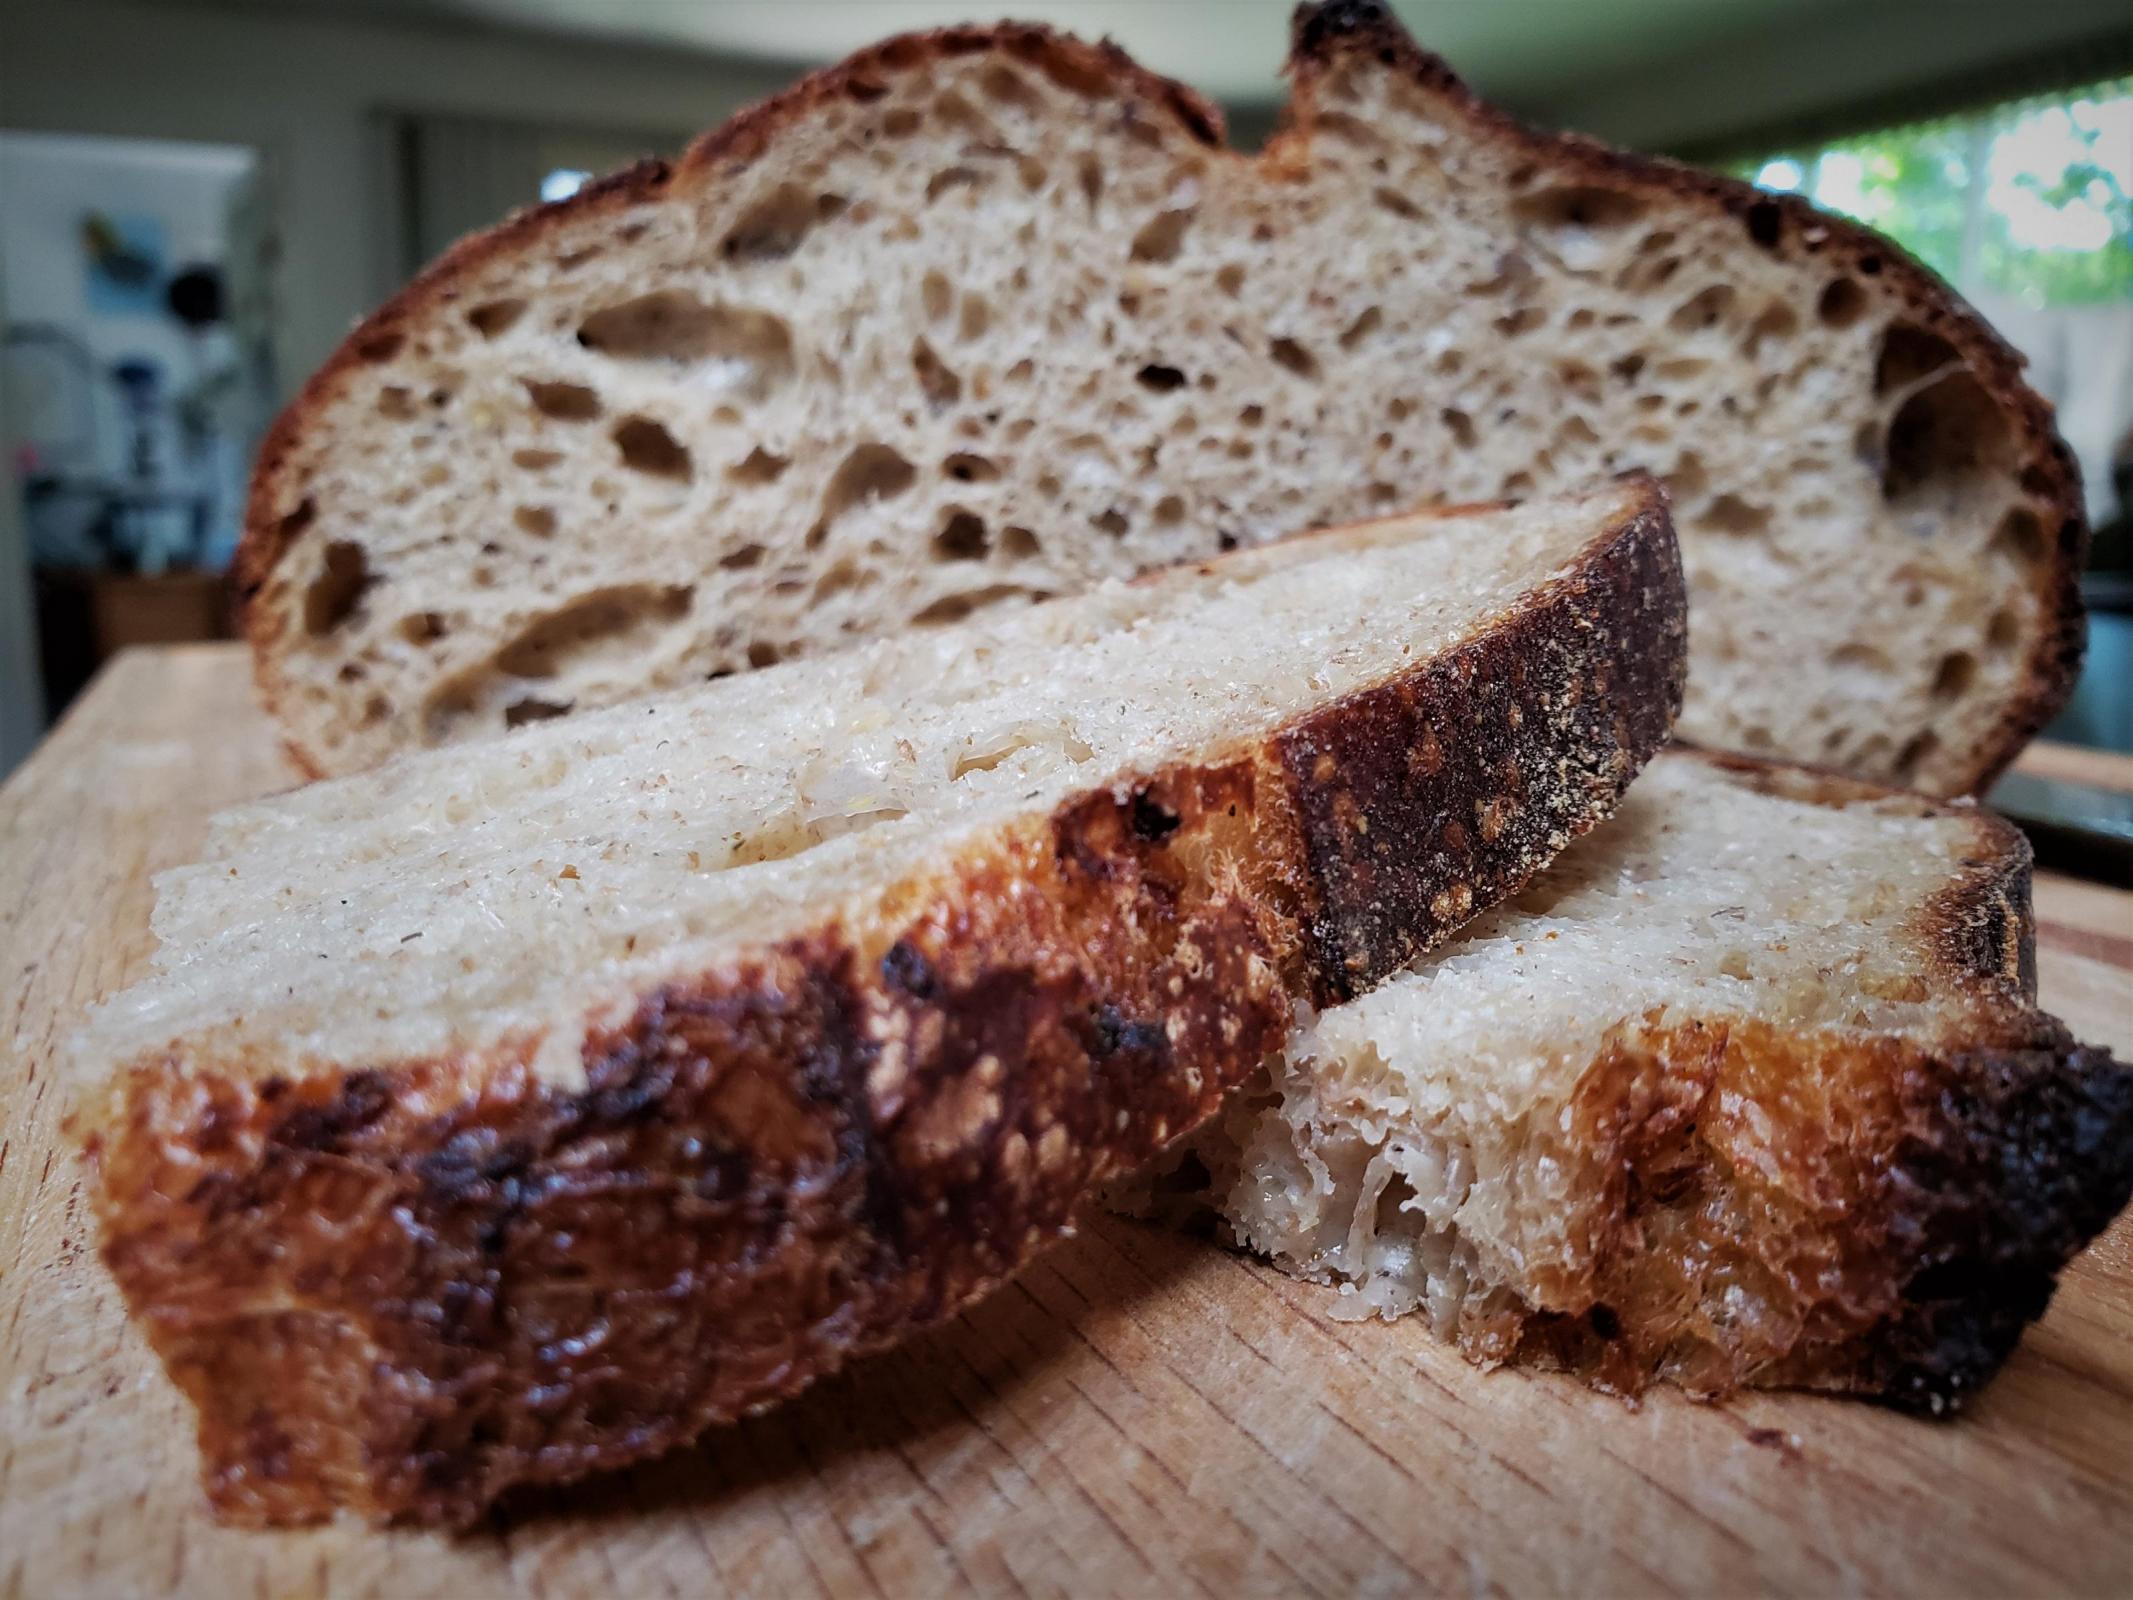
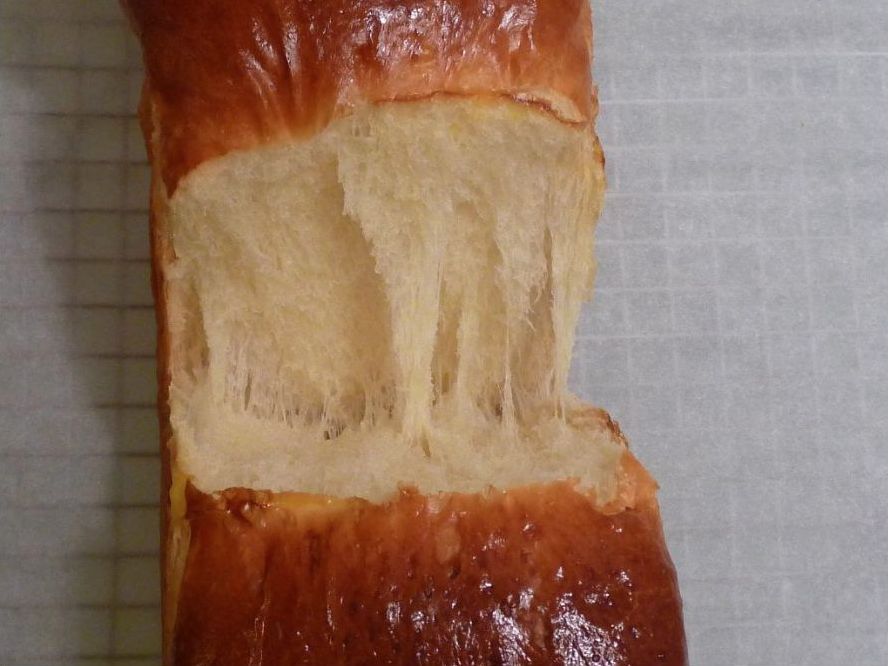
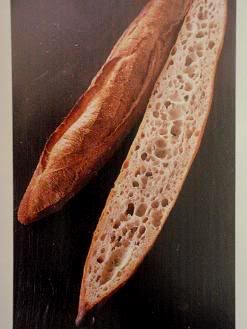
   middle: Fournier Bakery, Osaka (page 8)

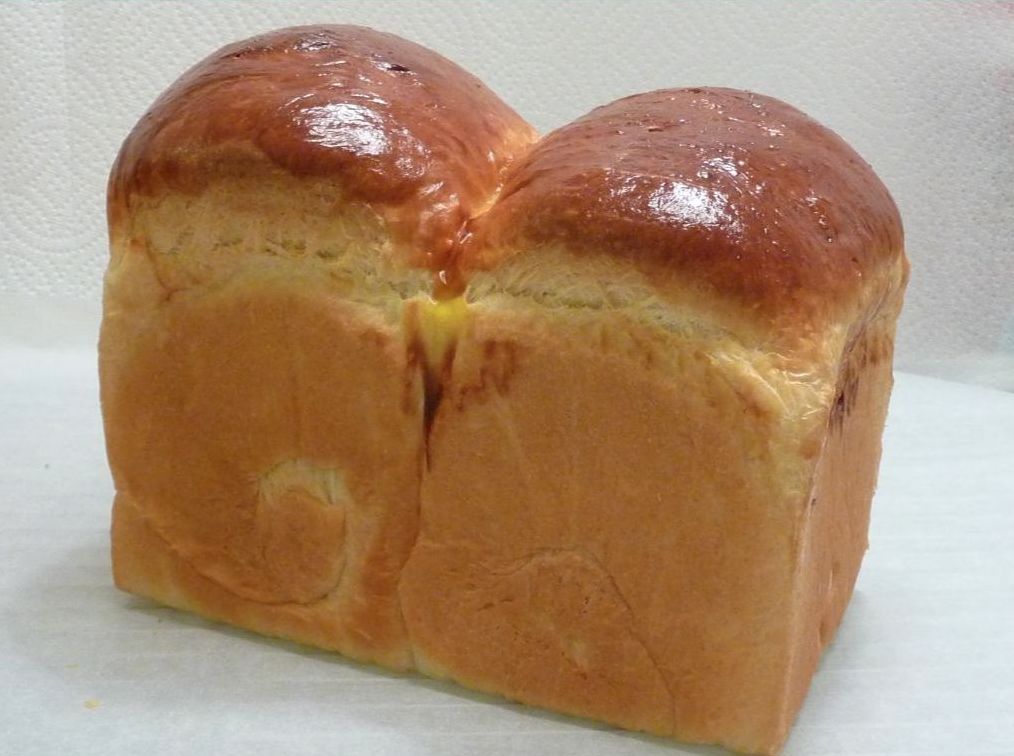
   left:  Lobros Bakery, Tokyo (page 124)

The way I see it, this book is about methods of pure fermentation of flour.  Baguette is only the form in which the result is show-cased; the bread could be in any shape or form.  There are 35 very detailed baguette formulas by today's top Japanese bakers in a very easy to follow format.  The bakers play with fermentation possibilities in a wide ranging ways and dough hydrations of between 57 and 83%.  The book reads to me like 35 flour fermentation love stories.  The baguettes are solid works of fine craft and done in tightly controlled environment (the Japanese way!).  Using the simplest ingredients, their objectives are all the same: to bring out the best flavour in flour through their individual fermentation methods.  Only a third of recipes use levains, and not even at high baker's percentages, for a more clean taste of flour.  Some use other pre-ferments; but pre-ferments are nothing new.  What I find interesting is pre-fermenting the main dough flour. 

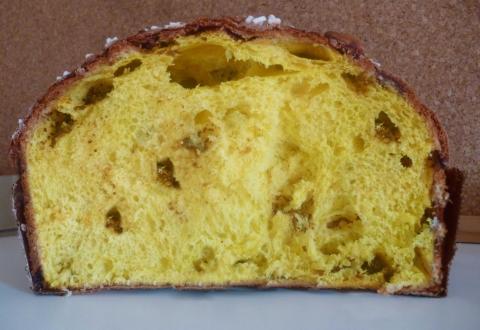
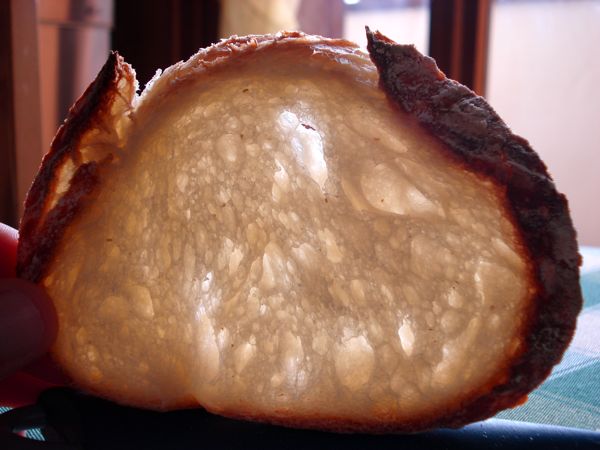
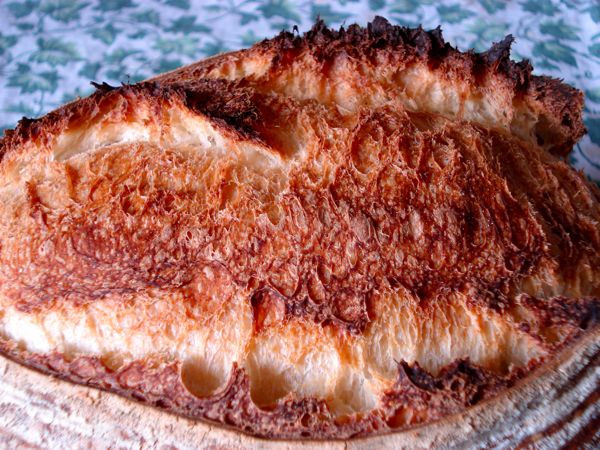
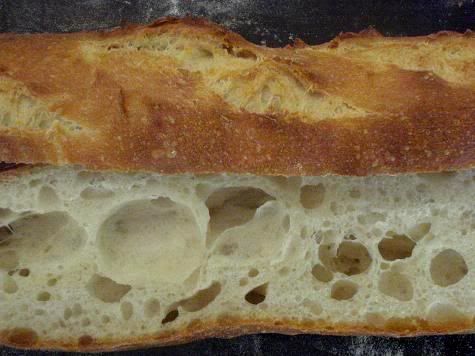
Have you ever heard of autolysing flour and water for 12 hours?  Maybe you have, but I haven't.  With this post, I am making baguettes using Fournier Bakery's formula on which the gorgeous looking crumb pictured in the middle above is based.  The book says Fournier won the 2006 French Baguette Competition organized by Torigoe, the oldest Japanese miller of French style of flours. 

Fournier Bakery's baguette formula

Ingredients in baker's percentages

  • 100% bread flour (I used 650 grams of Australia's Kialla Organic unbleached plain flour)
  • 70% water (I had 455 grams)
  • 15% liquid starter (I had 98 grams. See note * below)
  • 0.1% instant dry yeast (I used two-thirds of a 1/3 tsp)
  • 1.9% salt (I had 12 grams)

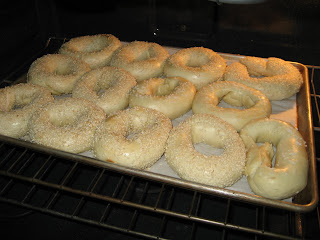
Overall dough hydration is 72.1%.  My dough weighed about 1200 grams.  I did three times the formula in three days, totaling 18 baby baguettes of 200 grams each (see below).

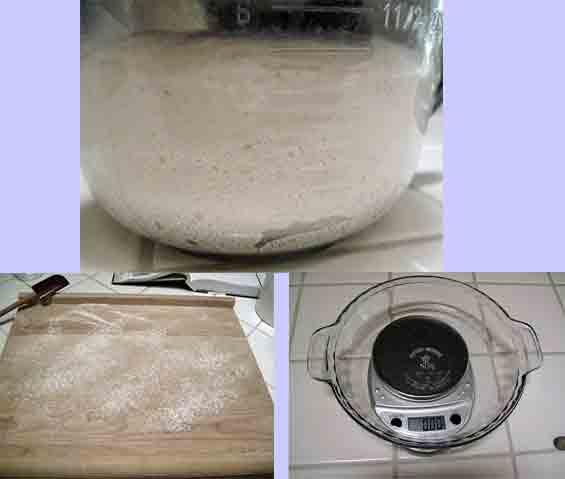
Note *: As most of us are weekend bakers, it is best that our starter undergo at least two refreshes (ie, refreshment build and levain build) before being incorporated into the final dough.  I did three builds for my levain, each time discarding all but 20 grams for the next build.  I timed the last build to coincide with the 12 hour autolyse of flour and water (see step 2 below). 

  1. Place only flour and water in the mixer, turn on first speed for two minutes.
  2. Autolyse for 12 hours at 16 ºC.  (I did about 9 hours.  As it is summer here in Australia, my temperature averages around 25 - 27 ºC.) 
  3. Add liquid starter and instant dry yeast and mix in first speed for one minute.  (The book says the levain is ready for use when its pH is 3.7.  I had no way of knowing the exact pH of my levain but because it had just gone through 3 builds, I would guess that the pH value might be a lot higher than 3.7.)
  4. Add salt and mix in first speed for 2 more minutes, and second speed for 1 minute and 30 seconds.  When kneading is complete, the dough temperature should be 22 ºC.  (Note: I did all my mixing and kneading by hand.  It was very messy, especially trying to get the liquid starter mixed into the dough.  I did not use ice water to try to get my dough temperature exactly as per the formula.  I figured that I would just watch the fermentation carefully.)
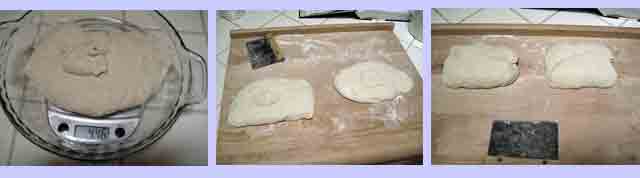
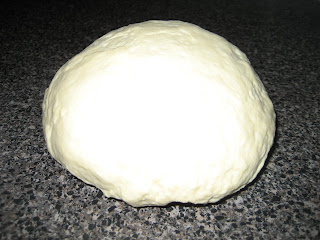
  5. Bulk fermentation is 3 hours in total at 22 ºC as follows: three times 2 letter-folds in a plastic container at 20 minutes intervals, then twice more 2 letter-folds at 60 minutes interval, totaling 5 times.  (As my room temperature and dough temperature was about 25 - 27 ºC, I did only 2 hours bulk.)
  6. Divide the dough into 350 grams pieces and pre-shape them (I divided my dough into 6 pieces of 200 grams each because my baking stone is small, 34 cm x 34 cm.)
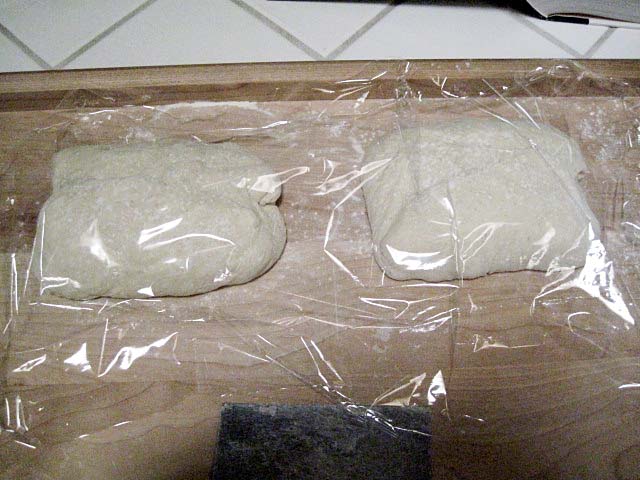
  7. Shape into baguette, 60 cm long. (I shaped mine into 32 - 34 cm long).
  8. (Note that it should only be 30 minutes from Divide to Shape, including the rest in between, during which time the dough pieces should be placed in temperature controlled room at 22 ºC.)
  9. Proofing is 60 minutes at 22 ºC and 70 degree humidity.  (The book says when the dough completes its fermentation, its pH should be 5.2.)  (For the last 30 minutes of proofing, I moved my dough into the refrigerator as I was afraid that it might over-prove.)
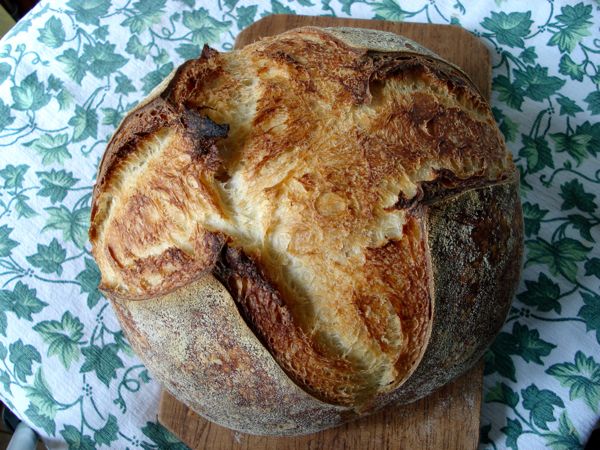
  10. Pre-heat oven to 250 ºC.  Score the dough with 7 slashes.  Steam the oven before loading the dough.  Once the dough is in the oven, turn the oven down to 240 ºC.  After 3 minutes of baking, steam the oven again.  Bake for a total of 30 - 32 minutes.  (My dough only needed 23 minutes of baking at the highest temperature my oven could go.  I could only manage 4 slashes on my dough.)


To recap: Fournier's fermentation is 4 1/2 hours all-up at 22 ºC.  I did 3 1/2 hours at 25 - 27 ºC, including 30 minutes in the refrigerator, which had an added advantage of chilling the surface of the dough for easier slashing.


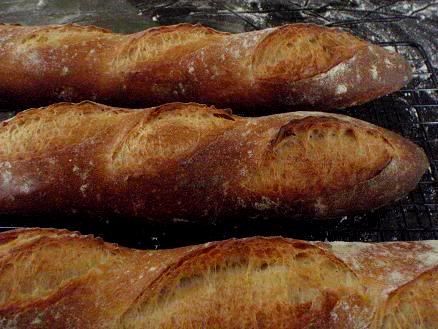
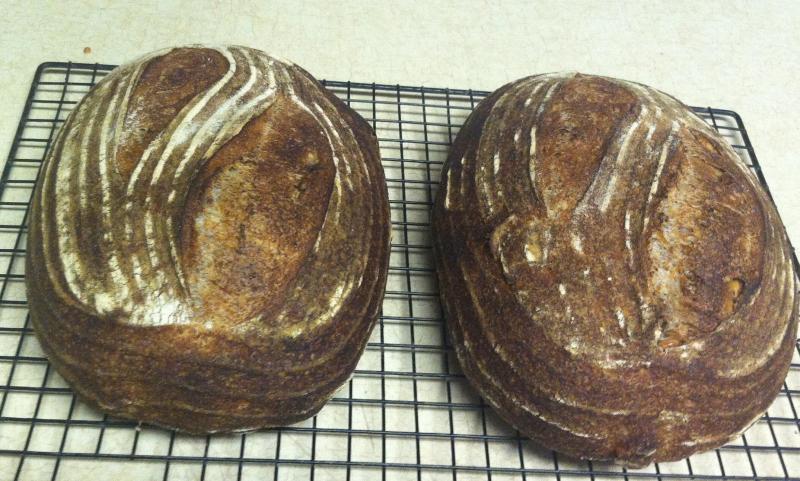
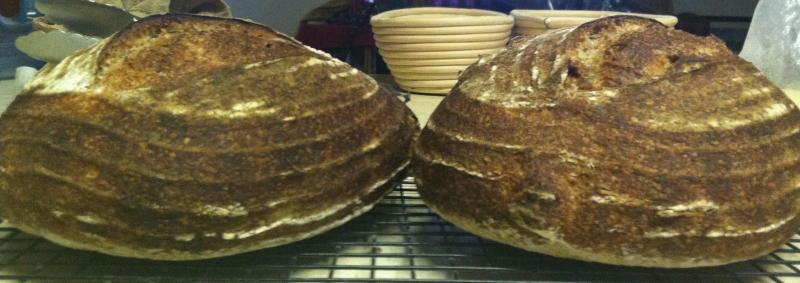
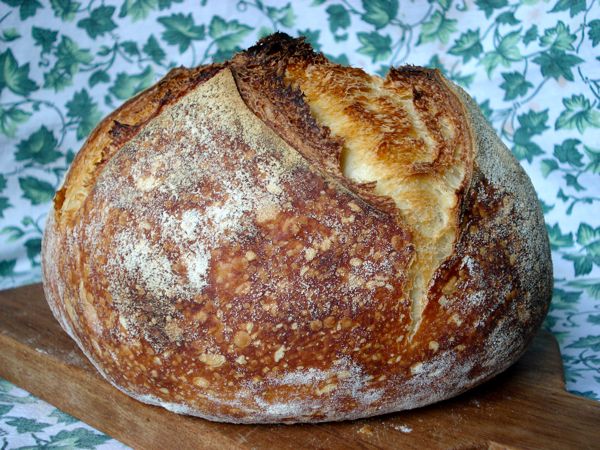
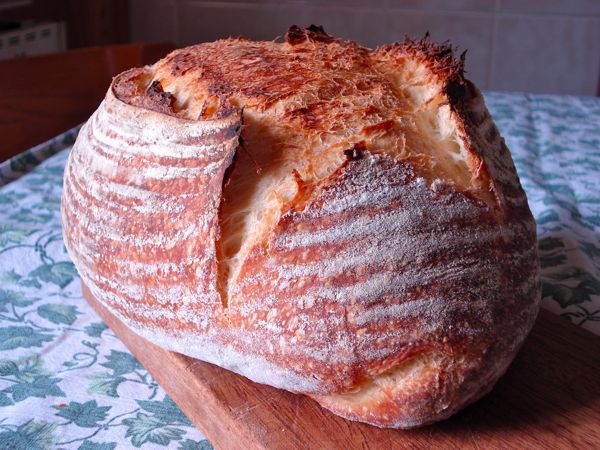
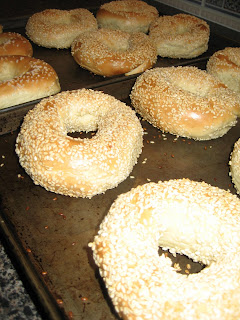
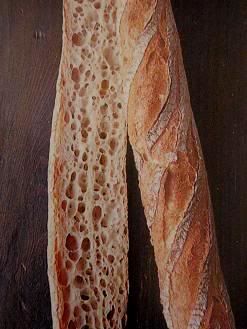
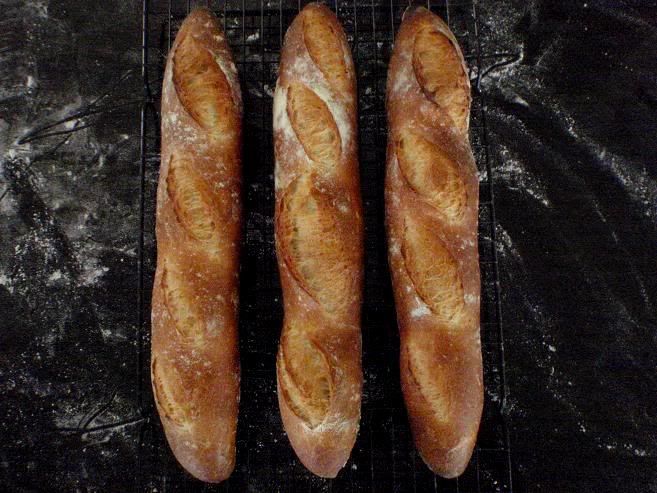
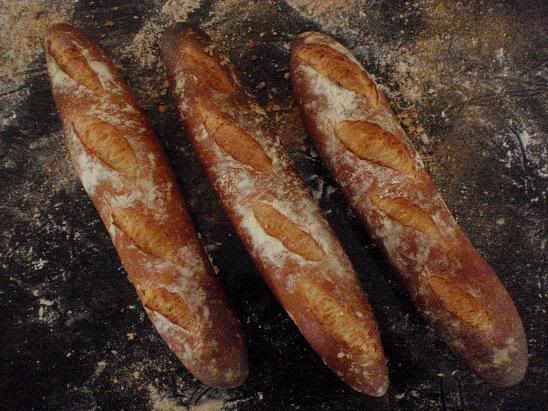
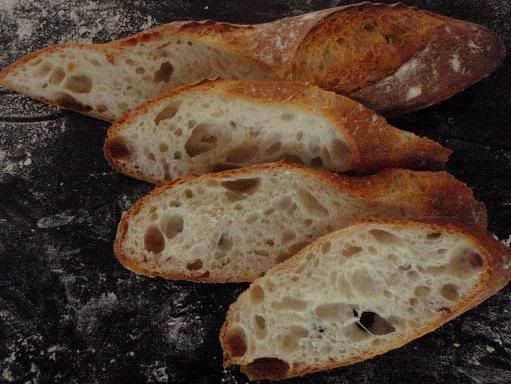
The challenge of baguettes to me is how to shape them uniformly.  There is no better way than repetitive practice.  It was only towards my last 3 baguettes (those pictured above) that I worked out how to do them with same length and thickness.  The key for me is, after pre-shaping and rest, pat the dough out to very flat (not to worry, I was not squeezing the gas out by patting).  Then, use minimal movements possible to shape the dough.  I find that excessive handling serves no purpose.   Out of the 18 baguettes that I made, the three next best ones are below:


I find slightly under-proof works better than slightly over-proof.  As my dough pieces were small, just 15 minutes more than necessary could make it over-proved.   Once the dough is done fermenting and ready to go, no amount of chilling in the refrigerator can arrest it because of the internal dough temperature.  The flavour will still be good but oven spring would suffer.


It would be interesting to try out more formulas in the book to learn more ways of pure fermentation.  There is nothing wrong of using other type of flours (for instance, various whole grains flours) on these baguette formulas, paying attention to temperature and time issues etc., and see how they affect fermentation outcomes.  I learn in this book that there are infinite possibilities.

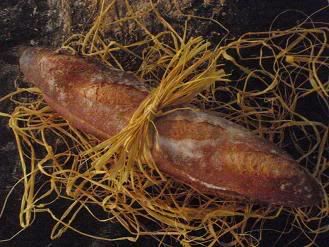
Just as I was cleaning up from today's mess, it's almost time to go and pick up my son from his tennis.  I tied up two baby baguettes to give to Andrew's coach.  Don't people just envy us because we possess these presents to give away?


I was late collecting my son.  When he saw me, he said, "Soft effort, Mum, soft effort."   Gee.

It has stopped raining now.  It is lush and green outside the window.  Polly would not be allowed to go out for a while yet, not until the grass is dry.


Shiao-Ping

JoeVa's picture
JoeVa

Pane con Semola Rimacinata di Grano Duro

This bread is another of my "everyday sourdough" (I do not bake everyday! just ones in the weekend, and one pizza baking every week).

It's a lean dough made with 60% durum (re-milled) flour and 40% wheat flour. This is not "Pane di Altamura" which is 100% durum flour, but a variation of "Semolina Bread" from "Bread - J. Hamelman". I like durum flour but not 100%, I prefer to mix it with bread flour the get a more light bread. So the name of the bread is "Pane con Semola Rimacinata di Grano Duro" (bread with re-milled durum flour).


Here you can see the durum flour I used in the dough: "Semola Rimacinata di Grano Duro - Il Mugnaio di Altamura (Molino Martimucci)"


Note: this is finely milled durum flour, that is "re-milled".

The flour, and the grain from which it's extracted, is from Altamura a city in the south of Italy (in the region of Puglia). Altamura is famous for its bread: Pane di Altamura.

One thing a like of durum is the color: gold! the flour is a light yellow and gives the crumb a yellow tone, the crust has a golden shadings. I'm not so good in flavor descriptions ... the bread is medium sour (not aggressive); the crumb is soft airy but substantial; the crust is nutty (I like the contrast between crumb and crust when they are mixed in your mouth).

Durum wheat is the hardest wheat, high in protein and used for pasta and bread. It caryopsys is almost transparent (like glass) and very hard and can be milled coarsely or finely. In spite of the high protein content (12% / 16%) its gluten is not "strong" like soft/hard wheat. For this reason I suggest a gentle mixing. This is not a problem for me, I never use intensive mixing because I like hand mixing (gentle mixing with S&F) and improved mixing (by machine).

Overall Formula

Durum Flour 60%
Bread Flour 40%
Water* 60%
Salt 2%

*water should be adjusted with the absorption of **your** flour.

Preferment

15% of the total flour (bread flour) is prefermented at 80% hydratation (12h / 14h at about 21/22°C - with a 20% inoculation). Remember to subtract the flour and water from the final dough ingredients. 

Dough consistency

Medium soft, not too much sticky.

Process

  • Mix all ingredients except salt (desired dough temperature 25/26°C).
  • Autolyse 00:30, then add salt on top
  • 10 stroke (stretch and fold)
  • Repeat 3 more times at 00:10 intervals (10 stroke or until the dough starts to oppose resistance)
  • Bulk fermentation 01:45 with 1 fold
  • Divide and shape (I use a banetton or a bowl)
  • Proof 01:30 at 25°C
  • Retard 12:00 at 4°C
  • Bake on stone at 225°C 00:40, first 00:15 covered, last 00:10 with the door ajar.


Crumb shoot


Slice


Crust


apprentice's picture
apprentice

Montreal Style Bagels

Woman does not live by rye or barley alone.

So this woman decided to follow suit, when she saw that a lot of other bloggers on The Fresh Loaf were having fun with bagels. I have a formula for Montreal-style bagels from my instructor at baking school. He got it, scribbled in pencil on a brown paper bag, from bakers at the St. Viateur Bagel Bakery where they've been supplying bagel lovers since 1957.

First, I had to scale back the formula. St. Viateur makes almost 10,000 bagels a day at its main location, so the original formula is a big one. It uses 40 kilos of flour, which they make several times a day. At school, we cut that back to 5 kilos. I thought I might manage with 1 kilo at home, which would produce just a baker's dozen. Even so, my poor Kitchen Aid mixer was straining. I quickly moved to hand kneading after the dough came together.

I'll publish the recipe below. There are two significant differences from others I've seen. Firstly, no salt. That always surprises people. I never know how to answer. Either the baker forgot to write it down, or it's what makes this particular bagel extra chewy and delicious. I don't miss it -- not a bit. Secondly, no proofing. At all. You can even skip bulk fermentation, if you let the bagels rest in the fridge overnight after shaping. Or production can be a continuous process after bulk fermentation where you go directly to dividing, shaping, boiling and baking. Then eating. :)

Here's the dough after 8 minutes of kneading:

bagel dough

You can see the stiffness characteristic of bagel dough.  I flattened the ball to a circle about 2" high and used my bench scraper to divide it into 4 oz. wedges. These, I rolled into strips much as Jeffrey Hamelman describes in Bread. As you handle the dough, it becomes smoother and more pliable.

I hadn't made these in over two years, but it was coming back to me. (Don't stack them like that...argh, they'll stick together. Oh yeah, keep a spray bottle handy to mist them or remember to cover with plastic while I process the rest. Wait a minute, no dusting flour...best worked on a damp surface!) The stream of consciousness continued, as I talked myself through the vague memories that my hands recalled better than my brain.

shaping bagels

Then came the boiling and seeding. We never worried about colouring the water much. A handful of brown sugar or some malt syrup if it was handy -- just enough to help gelatinize the starch on the surface in a tasty way, making the bagels smooth and shiny. The dough already has sweetness from malt extract. Today, I used about 2 T of brown sugar in the boiling water. I love sesame seeds, so I used them for most of the bagels and coarse salt for the rest.

boil n seed bagels

Here's what they looked like at half-time on my baker's half sheet pan in the oven. #13 of the baker's dozen got squished. That's okay. I found they needed extra time to brown properly. So near the end, I divided them between two smaller sheet pans without parchment and jacked the heat back up for about three minutes. Did the trick.

bagels at half time in oven

Who's got the cream cheese?

    fresh from oven

Montreal Style Bagels

1 kilo bread flour (about 8 cups)

2 grams instant yeast (2/3 tsp)

40 grams sugar (3 tbsp + 1/2 tsp)

9 grams malt (4 1/2 tsp)

50 grams egg (1 large)

463 grams water (scant 2 cups)

2 1/2 tsp vegetable oil

Scale or measure out all ingredients. Blend dry ingredients together in mixing bowl. Add wet ingredients and mix until dough starts to come together. If using a stand mixer, change to hand kneading at this point rather than strain the motor of your machine. Continue kneading until developed fully. At this point, you have some choices. The instructions that follow are for continuous processing. If you want to incorporate overnight retardation, see my two replies to Michael below.

Cover the dough and give it about 45 minutes rest on your counter, aka a period of bulk fermentation. When the time is nearly up, put a large pot such as a Dutch oven full of water on to boil and throw in 2 T brown sugar or some barley malt syrup. (Honey or maple syrup are fine, too.) Divide the dough into 13 units of about 113 grams (4 oz) each. Roll into strips and shape as bagels. There is no need to proof the bagels once shaped, but keep covered and/or mist so they don't dry out. Place on a sheet pan beside the pot of water. Process 6 or 7 at a time, however many will comfortably fit in your pan, moving them around in the water periodically for a minute or so. When ready, they float. Remove back to the sheet pan, and put the next batch on to boil.

While still damp, dip the boiled bagels in your preferred topping and place on a second baking sheet which has been lined with parchment and sprinkled with cornmeal. (If you have a hearth-style oven, the bagels may be placed on a peel or other loading device sprinkled with cornmeal and transferred to the oven to bake directly on the hearth. The technique with a wood-fired, brick oven is different again, one with which I'm not familiar.)

Bake out completely until a nice, golden brown, about 20 minutes at 460F. Reduce the temperature after the first 10 minutes, if your bagels are getting too dark. As mentioned above, I had all 13 bagels on a baker's half sheet, roughly 17" x 12", and they weren't quite baked through where they touched. I transferred them to two smaller sheet pans without parchment and gave them an additional 3 minutes. There was a lovely smell and a small bit of smoke when I opened the oven door. The bagels were perfect!

Yippee's picture
Yippee

Formula - Japanese Style White Sandwich Bread - Water Roux Starter / Sponge

Formula - Japanese Style White Sandwich Bread - Water Roux Starter / Sponge


 http://www.flickr.com/photos/49353374@N06/sets/72157623866998940/show/


From 'The 65 C Bread Doctor" by Yvonne Chen    
      
      
Water Roux Starter     
      
any amount is finebread flour50g  
as long as the 1:5 ratio is followedwater 250g  
      
 Whisk both until well mixed    
 Heat it up on stove, keep stirring     
 until temperature reaches 65 C or 149 F    
 (Yippee uses the microwave, about 4 minutes, stir halfway.)   
 (Final product should leave a trail when stirred.)   
 Put a plastic wrap directly on top to prevent forming a 'skin'.  
 Must be cooled to at least room temperature before use.  
 Refrigerate up to 3 days.      
 Do not use if turns grey.    
      
      
Makes 2 loaves     
Original recipe uses water roux starter only, sponge not necessary.     
Yippee threw in an additional step of developing the sponge out of the total, see side column for her portions.  
      
     Yippee's Sponge
A.bread flour540g 400
 sugar86g  
 salt8g  
 yeast11g 8
B.whole eggs86g 86
 whipping cream (can substitute with either half n half or milk)59g 59
 milk54g 54
 milk (recipe calls for flavor enhancer but Yippee uses milk instead)9g 9
      
 water roux starter144g 2 TBSP out of the 144g
C.butter49g  
      
Mix:Combine A. and B. until a ball is formed.     
 Add C. and knead until the dough passes the windowpane test.  
 (Yippee says:  use your judgment, each machine is different)  
 (Yippee kneads her dough in her Zojirushi breadmaker for 30 minutes.  
      
1st Fermentation:About 40 minutes at 28 C or 82.4 F, 75% humidity  
      
Scale: into 4 pieces if making twin loaves, each at 265g   
 (Yippee makes 2 log loaves, each at 530g)    
Rest:     
 15 minutes at room temperature    
      
Shape:For twin loaves:    
 Degas    
 Roll into an oval    
 With the long side facing you:    
 Fold 1/3 from top to bottom, press to seal    
 Fold 1/3 from bottom to top, press to seal    
 Turn seam side down    
 Roll and elongate the dough to about 30cm or 12 "   
 Upside down and roll into a cylindrical shape   
 Seam side down, into the loaf pan    
      
 For log loaves:    
 Shape like regular sandwich bread    
      
Final Proof:About 40 minutes at 38 C or 100.4 F, 85% humidity   
 (Yippee lets the dough rise for 20 more minutes to get a taller loaf)  
      
Bake:Whole egg wash, no water added    
 350 F, 35-40 minutes    


Sponge preparation:


a.                   Use the ingredients listed on the side column, mixed until all are well incorporated

b.                  Leave at room temperature ~ 76-80F for an hour

c.                   Grease a food grade plastic bag, pour dough in, leave enough space to allow the dough to expand to about 160% of its size, reinforce the bag with double or triple bagging before tightening it, retard overnight

d.                  Subtract the above ingredients from the main formula, whatever remaining will be mixed at the 'Mix' stage with the sponge.  Follow the rest of the formula. 


However, if your dough feels cold after mixing due to the refrigerated sponge, instead of following the time suggested in the formula, watch your dough:


1st Fermentation:           Completes when the dough has risen to about 180% of its size


Final Proof:                   Completes when a dent is formed and very slowly bounces back

                                    when dough is poked with a floured finger


To make rolls:

Scale: 60g each

Bake: 350F, about 15 minutes

rest of the procedures unchanged

Choice of fillings, if preferred: bacon, roast chicken, cheese, red bean, pork, curry and custard cream.

Pictures of assorted buns I made before:


http://www.flickr.com/photos/33569048@N05/sets/72157617619002761/show

gothicgirl's picture
gothicgirl

Flour Tortillas

When I was growing up in South Texas we had this neighbor who would, on Saturday afternoons, make her tortillas for the week.  Believe me, I made friends with her children so I could make myself available for tortilla day.  I think she enjoyed my enthusiasm and always had a few extra tortillas for me to take home. 

They were sublime!  My family would fight over them, and no matter how many she sent home with me they were always gone before dinner.  My mom asked for the recipe, yet no matter how my mother pleaded, or bartered with her own secret recipes, she refused to give up her recipe.

Eventually we moved to North Texas and that ended my weekly tortilla gorge.  It seemed I was destined to eat rubbery store-bought substitutes for the rest of my life.  I survived on them until a few years ago when I was reminded, quite by accident at a local Tex-Mex place, of our neighbor and her delicious tortillas.   I watched as the woman behind the counter rolled and cooked beautiful tortillas and I thought, why couldn't I do that too?

I had quite a bit of culinary know-how, and I had the internet which would surely hold the key to delicious tortillas, right?

You would be surprised!

I tested a number of recipes for tortillas with all manner of ingredients.  Some had vegetable oil, others butter, and some had vegetable shortening.  They used a variety of flours from regular all-purpose to bread flour to even cake flour.  Some used milk, others water.  None of them turned out the way I wanted. 

I discovered pretty early that all-purpose was the flour to use.  It developed a moderate amount of gluten so the tortillas were chewy but not tough.  The liquid I had the most success with was milk.  Water works fine, but the cooked tortillas are not as soft as when you use milk.  As for fat, that was more tricky.  Butter burned too easily and the vegetable oil gave the tortillas an odd texture.  Vegetable shortening left the tortillas with an almost fishy smell, which happens when the shortening gets too hot.

I despaired that I would never find what I was looking for when, while looking at the shortening shelf at the grocery store, I remembered one thing from the Saturday's at my neighbors.  Manteca!!  That is lard to be specific.  So, with my tub of lard in hand, I went back to the kitchen and tried one of the more successful recipes with the lard and ... EUREKA!  I had it.

Now, this is the point where I am supposed to be sorry that I like lard, that I know it is supposed to be evil, and gross, and made from animals.  I'm not.  No, I am PROUD to say I cook with lard.  Using lard I can make tortillas that make people beg.   Some have offered me cash to make them a batch.  I'm not kidding.  Lard adds a depth of flavor with out any funky aftertaste.  It has a high smoke point so it does not scorch, and it lasts for a really long time in the pantry.  It is also versatile.   I use it combined with butter in my pie crusts.  But that is an entry for another day.   

Flour Tortillas   Makes 12

2 cups all-purpose flour
1/4 cup lard, or vegetable shortening
1/2 teaspoon salt
1/2 teaspoon baking powder
3/4 cup warm milk, or water

Combine the dry ingredients in a bowl.  Transfer to the bowl of a stand mixer.

Add the lard and mix until it is well combined and the mixture looks grainy.

Add the warm milk and mix until a smooth ball of dough forms, about 5 minutes.

Divide the dough into 12 equal pieces and roll the pieces into balls. 

Cover and let rest 30 minutes.

Once rested, roll the balls of dough into 6″ to 7″ tortillas. 

Cook on a griddle, or in a heavy pan, over medium heat until golden brown and puffy.

Transfer to a plate and cover with a towel while the rest cook.

Enjoy!  Or, allow them to cool and store them in a plastic bag in the fridge.  They last for five days ... if you can keep from eating them hot off the griddle.

Posted on www.evilshenanigans.com - 2/18/2009

subfuscpersona's picture
subfuscpersona

Wheat: Red vs White; Spring vs Winter

Wheat: Red vs White; Spring vs Winter

Home millers have definite preferences when it comes to wheat. Many favor hard spring wheat over winter wheat for it's somewhat higher protein value (and stronger gluten). Furthermore, some prefer the red variety for it's robust flavor while others prefer the milder taste of white.

Some Background: Hard Red Wheat vs Hard White Wheat

Hard white wheat was developed from hard red wheat by eliminating the genes for bran color while preserving other desireable characteristics of red wheat. Depending on variety, red wheat has from one to three genes that give the bran its red cast; in contrast, white wheat has no major genes for bran color. The elimination of these genes results in fewer phenolic compounds and tannins in the bran, significantly reducing the bitter taste that some people experience in flour milled from red wheat. Nutritional composition is the same for red and white wheat.

Spring wheat is planted in April to May, makes a continuous growth and is harvested in August to early September. Winter wheat is planted in the fall. It makes a partial growth, becomes dormant during the cold winter months, resumes growth as the weather warms and is harvested in the early summer (June and July).

Flour from hard red winter wheat is often preferred for artisan breads.

Artisan bread flour, which is milled from hard red winter wheat, resembles French bread flour in its characteristics, that is, it is relatively low in protein (11.5–12.5 percent). The low protein content provides for a crisper crust and a crumb with desirable irregular holes...Artisan bread flour often has a slightly higher ash content than patent flour. This creates a grayish cast on the flour and is thought to improve yeast fermentation and flavor. (source: How Baking Works by Paula I. Figoni)


This photo shows hard red wheat on the left and hard white wheat on the right

(I don't find the color contrast as marked as in this photo, so be sure to keep your grains clearly labeled.)


The Test

I wanted to see if the slightly higher protein of spring wheat made a signficant difference in gluten development and rising power. A secondary interest was whether there was a marked difference in taste between white and red wheat.

I decided to do a two pronged test of home milled wheat flour: red vs. white wheat and winter vs. spring wheat. I used my tried-'n-true recipe for a fifty percent whole wheat loaf bread. I made the bread four times - twice with home-milled hard red winter wheat and twice with home-milled hard white spring wheat. The baker's percentage was the same for all trials, as were the other ingredients and the procedure followed.

Here are few recipe details...

  • The dough is leavened with instant dry yeast.
  • The recipe uses a biga, which constitutes about 30% of the dough.
  • Flour is 50% home-milled whole wheat flour, 50% commercial (white) unbleached bread flour (including bread flour in biga)
  • total hydration (including water in the biga) is 68%.
  • The recipe includes a small amount of oil (3%) and buckwheat honey (4%) in addition to flour, water, salt and yeast
  • Wheat is milled very fine with a Nutrimill. Flour is used within a few hours of milling.


Fresh Milled Four

I get an equally fine flour from winter and spring hard wheat using my Nutrimill grain mill. As expected, red wheat is more tan than white wheat, though the real life difference is somewhat more obvious than the photo below shows. Bran flecks tend to concentrate in the center of the flour receptacle, which accounts for the darker color in that area.

Final Dough

By the time the final dough is ready for bulk fermentation, the color differences have become more apparent. Since the wheat is finely milled, the bran pretty much disappears into the dough. I made no adjustments in water content for the two different grain flours and could find little difference in water absorption, feel or gluten development. All doughs passed the windowpane test.

Baking

For all trials the dough was baked in loaf pans in a 350F oven using the cold start / no preheat method. Total baking time was same same for both kinds of whole wheat flours. There was no difference in oven spring; all loaves rose about one inch during the bake. The photos below show the loaves at the start of baking and after about 15 minutes in the oven.

The Final Product

Doesn't look much different on the outside, does it?

Only way to tell the difference is to cut it. Crumb is virtually identical. The red wheat looks like what most of us think of when we think of whole wheat bread. The white wheat looks a lot more like 100% white bread.

Evaluation

I should have believed the North Dakota Wheat Commission. Their brochure on hard white wheat says...


Before I started this test, I'd never worked with hard white wheat. While others frequently comment on it's mild taste, I wasn't prepared for a fifty percent whole grain bread that tasted like - ummmm - white bread! OK, not exactly like white bread, maybe an eensy bit denser and an eensy bit more taste but close enough to make me question the wisdom of purchasing 25 pounds of hard white spring wheat.

A lot of posters here use only whole grain flour, mixing white and red wheats to get the flavor profile they prefer. When they describe white whole grain as mild, you'd better believe it.

Pages