The Fresh Loaf

A Community of Amateur Bakers and Artisan Bread Enthusiasts.

Most bookmarked

breadforfun's picture
breadforfun

Mixed Flour Levain with Long Autolyse - Take 2 (and 3)

A few weeks ago I wrote about this formula, and after many suggestions from readers out there, I followed up with two bakes.  This post shows the outcome when including all the flours in the long autolyse, based on suggestions from Khalid and David.  Essentially the method was the same as previous with these two exceptions: for bake 2, the autolyse included all the water and all the flours as listed plus 3 gm salt, and for bake 3 the salt was eliminated in the autolyse and the overall hydration was increased to 75%. 

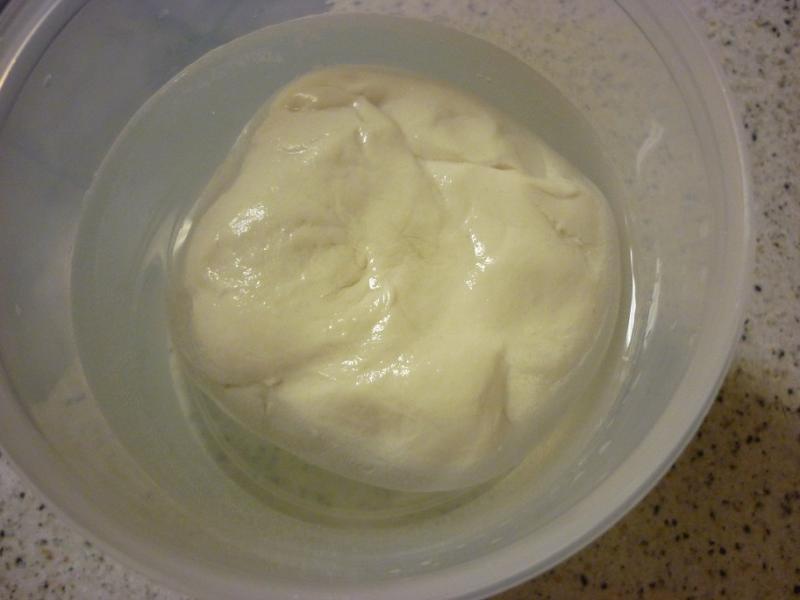
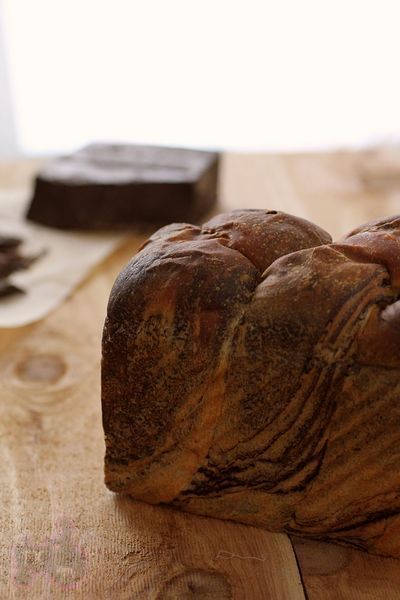
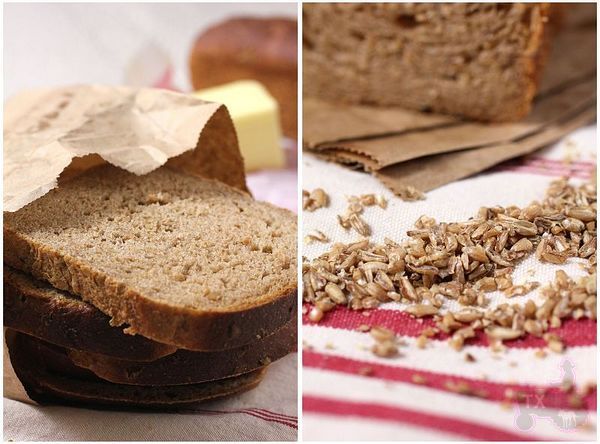
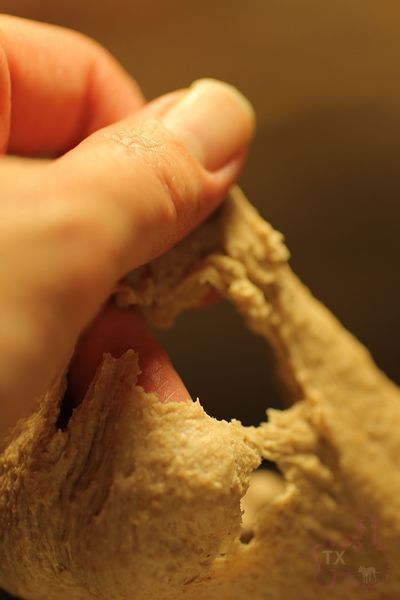
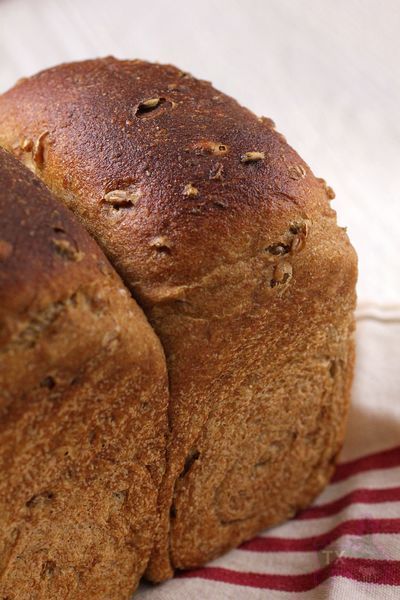
Bake 2, I included the small amount of salt as a hedge against overactive enzymatic activity of the rye (and possibly the spelt) flour.  The autolysed dough was maintained at 74˚F for a little more than 11 hours, the same time to allow for the final levain build to mature. It was more hydrated than the original version, and the autolysed flours already had a nutty aroma.  Here are the final bakes:


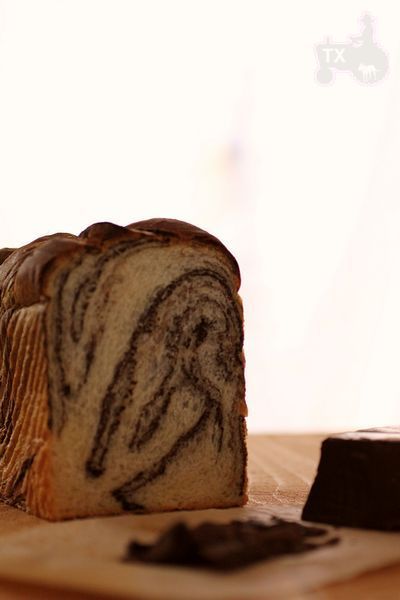
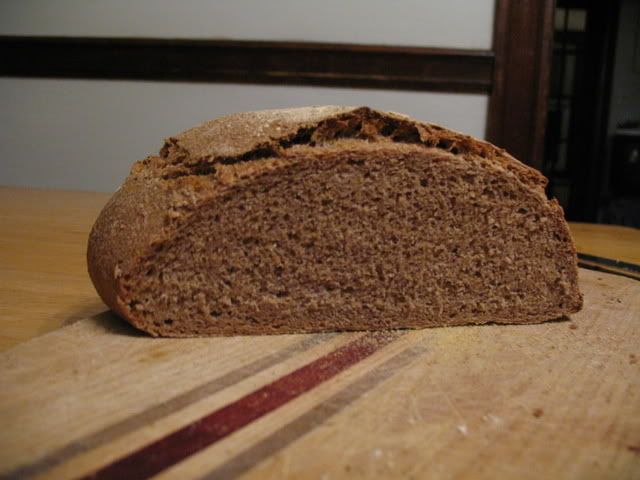
The loaves seemed more flavorful than the last time (but it may be wishful thinking), and the crumb was definitely moister.  Sorry, no crumb shot, but it was very similar to the one below.

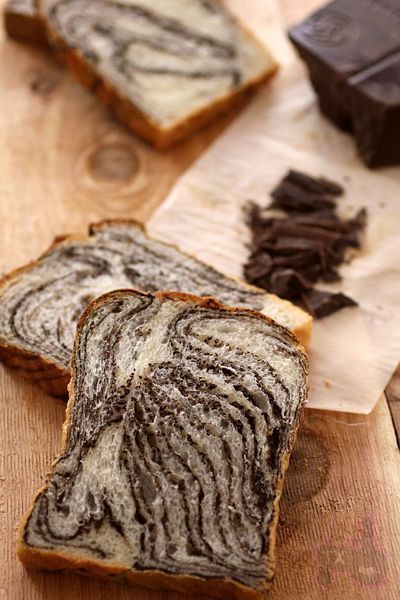
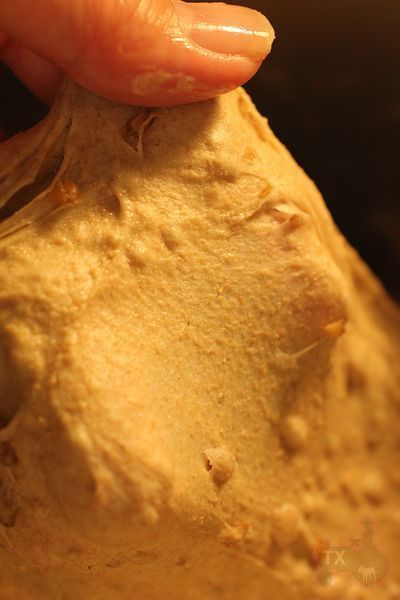
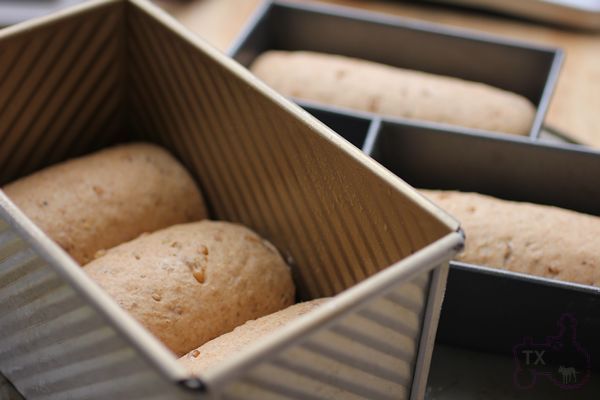
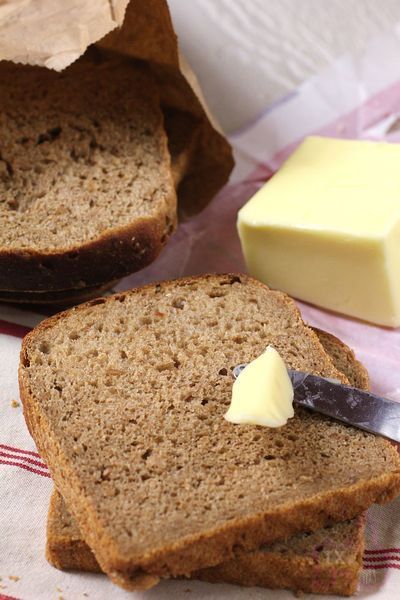
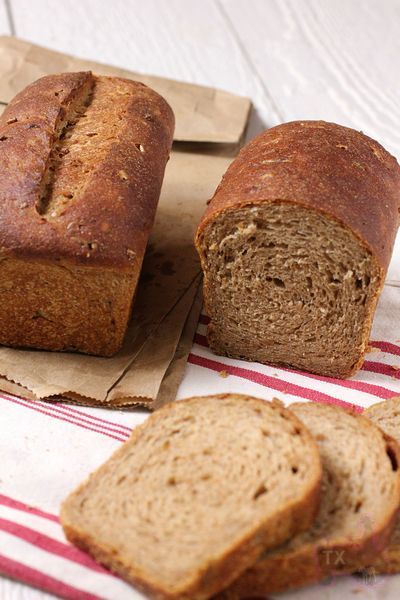
For Bake 3, I eliminated the salt altogether from the autolyse, and increased the overall dough hydration to 75% from about 72.5%.  I also made a double batch, which turned out to be a bit problematic as I am not really equipped to handle over 4 kg of dough.  It also turned out to be an unusually hot week in San Francisco, so the bulk fermentation got a bit out of hand and I probably went too long.  This made the dough a bit sticky and more difficult to shape.  Still, the breads turned out fine, although the bloom was not as large as usual for this bread.  The crumb, again, ws quite moist, even moreso than the previous bake due to the added hydration.


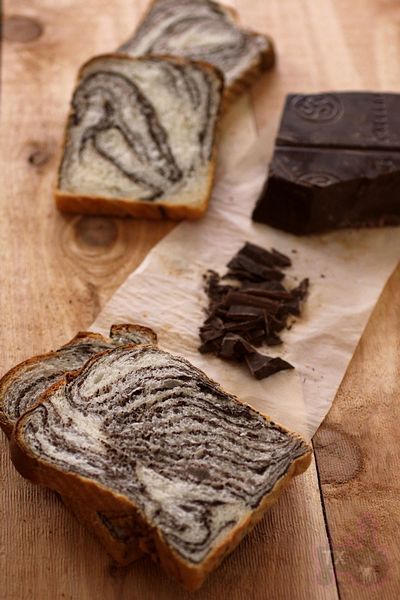
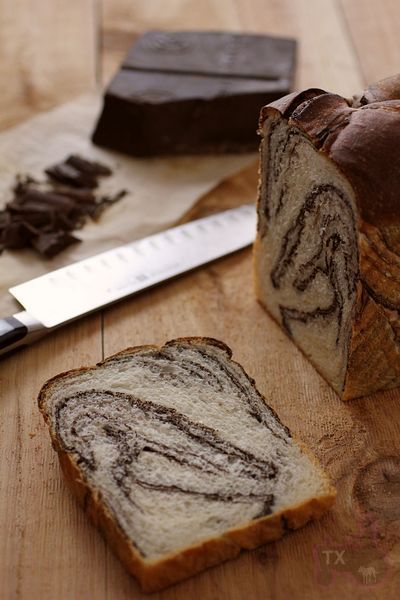
As mentioned, the crumb was moist and airy.

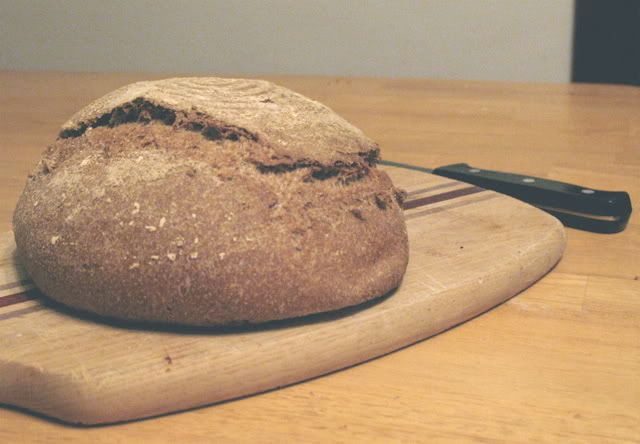
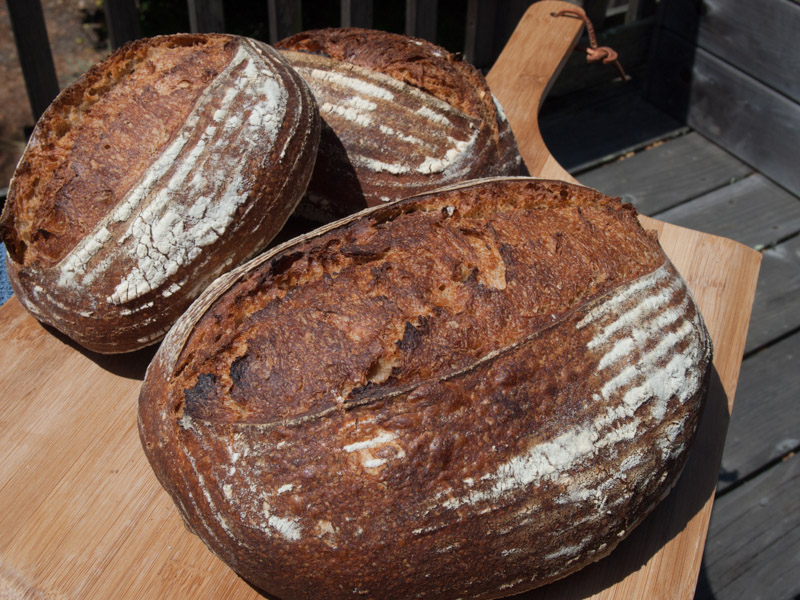
A few of folks have mentioned the boule scoring, so here are some photos. This boule was 1500 gm of dough, which is the largest I've done with this score.

The flavors of both bakes were quite close, with good nuttiness and noticible tang that increased over the next few days.  Bake 3 was a bit bolder, in part to compensate for the added hydration, and had nice singing and cracks are seen throughout the loaves.  It was also more sour, presumably due to the increased fermentation from the higher ambient temperature.

I don't really have a conclusion on whether the salt was necessary for the autolyse, but I think it is not.  The autolysed flours for bake 3 were softer, but that was more likely due to the increased hydration rather than omission of salt. 

Another thing I learned: the wheat germ absorbs a lot of water, much more than I expected.  Since it was the only ingredient other than the salt added when mixing the final dough, and I held back a small amount of water for the add, it was easy to see that all the water went straight to the wheat germ.  Next time, maybe include the wheat germ in the autolyse - has anyone ever done that?

Have fun baking!

-Brad

mwilson's picture
mwilson

Perfect Panettone

To me, the pinnacle Panettone. Formula comes from Iginio Massari.

This is the most challenging formula for Panettone, hence why I have been so drawn to it. I rise to technical challenges. I followed the formula, timings and temperatures without compromise.

Iginio Massari’s formulas typically use only 25% natural yeast and cooler temps for the first dough. The result, more flavour… I can still recall that familiar aroma after the first rise. So aromatic!

Oven spring was huge. I didn’t know when it was going to stop… Lasting nearly 20mins.

The taste and texture was perfect. I made the choice to use super strong Canadian flour to get that fluffy character I was looking for. A clean taste, not a hint of acidity or sourness. Just sweet, light, fluffy goodness, natural and nutritious.

The volume increase from dough to finished product was about 6 fold. All that lift created by my natural yeast...
 
Here it floats in water fermenting away. Beloved lievito 2.0! 

-Michael

txfarmer's picture
txfarmer

Sourdough Chocolate Marble Loaf - MUST. LAMINATE. CAN'T. STOP.

Sending this to Yeastspotting.

Click here for my blog index.

In reply to my soft chocolate sandwich loaf post, lumos tossed me a bone, and I took the bait immediatly. Hey, it involves chocolate and lamination, two of my many bread related obsessions. Essesntially it's a technique popoular in Japan a while ago: a sheet of chocolate laminated into an enriched soft dough, displaying random but cool looking marble effect, and a subtle chocolate taste. You can use ANY lightly enriched dough for this, I used the classic Sourdough Hokkaido Milk Loaf, but any of the following would work as well (click for detailed formulas):

Some notes:

- It's still a soft shreddy bread, so you still have to do the intensive kneading required, no shortcuts here.

- Use the same dough/flour amount as a normal sandwich loaf. For my Chinese pullman loaf pan, I used 250g of total flour just like the Sourdough Hokkaido Milk Loaf post specifies, for a 8X4inch loaf tin, you can either increase the flour amount to 280g or leave it at 250g, depending on how tall you want the loaf to be.

- I got the chocolate sheet recipe online, but later lumos sent me a very similar one, thanks!

Sourdough Chocoate Marble Loaf

- Chocolate sheet
Dark chocolate, 50g
butter, 20g
bread flour, 20g
cocoa powder, 10g
corn starch, 5g
milk, 60g
sugar, 20g
egg white, one

1. Melt chocolate and butter seperately
2. Mix and shift bread flour/corn starch/cocoa, add milk and sugar, mix until blend
3. Add melted chocolate then melted butter, mix thoroughly
4. Put on low heat, stir constantly, until the mixture thickens and clears the side and bottom of the pot.


5. Put the mixture between two sheets of plastic, roll to a 18CMX18CM square, freeze until use.


- Sourdough Hokkaido Milk Loaf dough enough for your tin (or similar soft white enriched dough), after first rise and put in fridge overnight.

- Assembling:

1. Take the dough out of fridge, press flat, let rest at room temp for one hour.
2. Roll out to 25X25CM square, put the frozen chocolate sheet in the middle

3. Seal the chocolate sheet in, roll out again to 18X36CM, do a single book fold (i.e. fold in thirds, envelope fold, three-fold)

4. Roll out to 18X36CM and do the single book fold again (may need to rest dough for 10-20min before rolling out )
5. Roll out to 18X36CM and do the single book fold for the third time (may need to rest dough for 10-20min before rolling out )
6. Rest dough for 20min, roll out to be slightly longer and wider than the loaf tin, cut in 3 stripes with one end connected

7. Braid and put in oiled loaf tin

8. Proof and bake as the original dough formula requires, in this case it took 6.5 hours to proof, and 40min at 375min to bake.


Marble effect inside out


Do note that this is not a dessert-like sweet bread, it's a typical Asian soft loaf - slightly sweet, shreddably soft, with subtle chocolate flavors.

Oh yeah, it's A LOT easier than making croissants, the chocolate sheet is not easy to melt.

txfarmer's picture
txfarmer

SD 100% WW sandwich loaf with bulgur (cracked wheat) - discovered a new favorite ingredient


Another winning recipe I adapted from "Laurel's Kitchen Bread Book" - my main change is to use SD starter instead of dry yeast, changed fermentation schedule accordingly, and used more water. This my first time baking with bulgur, why did I wait for so long? They are fragrant, full of flavor/nutrients, AND easy to work with. Do note that bulgur is different from cracked wheat, the former has been par-cooked, and the latter has not, which means they require different method of cooking. To make it more confusing, stores often label bulgur as "cracked wheat".


Sourdough 100% Whole Wheat Sandwich Bread with Bulgur(Adapted from "Laurel's Kitchen Bread Book")

Note: 15% of the flour is in levain

Note: total flour is 415g, fit a 8X4 loaf pan. For my Chinese small-ish pullman pan (shown in picture), I used 385g total flour. For mini loaf pans in the picture, I used 138g of flour each.


- levain

ww starter (100%), 17g

water, 29g

ww bread flour, 54g

1. Mix and let fermentation at room temp (73F) for 12 hours.


- soaker

bulgur, 64g

water, 90g

molasses, 17g

2. Mix and bring to boil, set aside before start mixing the dough. By the time it's incorporated into the dough, it would've been soaked for at least two hours.


- final dough

ww flour, 353g (I used KAF)

water, 121g

butter, 17g, softened

salt, 5g

milk, 150g

honey, 17g

all levain

all soaker

3. Mix together flour, water, milk, honey, butter, salt and all levain, autolyse for 40-60min. Knead until the gluten has just been developed. More kneading will be done later, so do not fully develope the gluten network now.

4. Rise at room temp (74F) for 2 hours. Punch down, add soaker, and knead until the dough is very developed. This intensive kneading s the key to a soft crumb, and proper volume. The windowpane will be thin and speckled with bulgur grains, but NOT as strong as one would get form a white flour dough. For more info on intensive kneading, see here.

5. Put in fridge overnight.

6. Take out dough, punch down, divide and rest for one hour.

7. Shape into sandwich loaves, the goal here is to get rid of all air bubles in the dough, and shape them very tightly and uniformly, this way the crumb of final breads would be even and velvety, with no unsightly holes. For different ways to shape (rolling once or twice, i.e. 3 piecing etc) see here.

8. Proof until the dough reaches one inch higher than the tin (for 8X4 inch tin), or 80% full (for pullman pan). About 4 hours at 74F.

9. Bake at 375F for 40-45min for the big loaves, only 30min for the mini ones. Brush with butter when it's warm.


Don't be fooled by all the visible grains, the bread is NOT tough, nor dry, nor hard


It's soft and full of flavor


I live it lightly toasted, so fragrant! Still got enough bulgur left to play with, cant wait.


Sending this to Yeastspotting.

gothicgirl's picture
gothicgirl

Flour Tortillas

When I was growing up in South Texas we had this neighbor who would, on Saturday afternoons, make her tortillas for the week.  Believe me, I made friends with her children so I could make myself available for tortilla day.  I think she enjoyed my enthusiasm and always had a few extra tortillas for me to take home. 

They were sublime!  My family would fight over them, and no matter how many she sent home with me they were always gone before dinner.  My mom asked for the recipe, yet no matter how my mother pleaded, or bartered with her own secret recipes, she refused to give up her recipe.

Eventually we moved to North Texas and that ended my weekly tortilla gorge.  It seemed I was destined to eat rubbery store-bought substitutes for the rest of my life.  I survived on them until a few years ago when I was reminded, quite by accident at a local Tex-Mex place, of our neighbor and her delicious tortillas.   I watched as the woman behind the counter rolled and cooked beautiful tortillas and I thought, why couldn't I do that too?

I had quite a bit of culinary know-how, and I had the internet which would surely hold the key to delicious tortillas, right?

You would be surprised!

I tested a number of recipes for tortillas with all manner of ingredients.  Some had vegetable oil, others butter, and some had vegetable shortening.  They used a variety of flours from regular all-purpose to bread flour to even cake flour.  Some used milk, others water.  None of them turned out the way I wanted. 

I discovered pretty early that all-purpose was the flour to use.  It developed a moderate amount of gluten so the tortillas were chewy but not tough.  The liquid I had the most success with was milk.  Water works fine, but the cooked tortillas are not as soft as when you use milk.  As for fat, that was more tricky.  Butter burned too easily and the vegetable oil gave the tortillas an odd texture.  Vegetable shortening left the tortillas with an almost fishy smell, which happens when the shortening gets too hot.

I despaired that I would never find what I was looking for when, while looking at the shortening shelf at the grocery store, I remembered one thing from the Saturday's at my neighbors.  Manteca!!  That is lard to be specific.  So, with my tub of lard in hand, I went back to the kitchen and tried one of the more successful recipes with the lard and ... EUREKA!  I had it.

Now, this is the point where I am supposed to be sorry that I like lard, that I know it is supposed to be evil, and gross, and made from animals.  I'm not.  No, I am PROUD to say I cook with lard.  Using lard I can make tortillas that make people beg.   Some have offered me cash to make them a batch.  I'm not kidding.  Lard adds a depth of flavor with out any funky aftertaste.  It has a high smoke point so it does not scorch, and it lasts for a really long time in the pantry.  It is also versatile.   I use it combined with butter in my pie crusts.  But that is an entry for another day.   

Flour Tortillas   Makes 12

2 cups all-purpose flour
1/4 cup lard, or vegetable shortening
1/2 teaspoon salt
1/2 teaspoon baking powder
3/4 cup warm milk, or water

Combine the dry ingredients in a bowl.  Transfer to the bowl of a stand mixer.

Add the lard and mix until it is well combined and the mixture looks grainy.

Add the warm milk and mix until a smooth ball of dough forms, about 5 minutes.

Divide the dough into 12 equal pieces and roll the pieces into balls. 

Cover and let rest 30 minutes.

Once rested, roll the balls of dough into 6″ to 7″ tortillas. 

Cook on a griddle, or in a heavy pan, over medium heat until golden brown and puffy.

Transfer to a plate and cover with a towel while the rest cook.

Enjoy!  Or, allow them to cool and store them in a plastic bag in the fridge.  They last for five days ... if you can keep from eating them hot off the griddle.

Posted on www.evilshenanigans.com - 2/18/2009

Section II: Bread Basics

You can jump right in and start baking without knowing much about the ingredients or how the process works, but if you'll take the time to learn a little bit about the baking process you'll find baking to be much more rewarding.  You'll also be equipped to modify recipes to fit your taste if you first understand how those modifications will change the results.

dmsnyder's picture
dmsnyder

Sour Rye Bread from George Greenstein's “Secrets of a Jewish Baker”

Greenstein's Sour Rye

Greenstein's Sour Rye

Greenstein's Sour Rye Crumb

Greenstein's Sour Rye Crumb


Back in May, 2007, there was an extended discussion about Greenstein's book and how come he provided only volume and not any weight measurements for ingredients. For anyone interested in that discussion, the link is: http://www.thefreshloaf.com/node/3042/keep-secrets-jewish-baker-better-secret.

I have made Jewish Sour Rye from Greenstein's recipe many times. It's one of my favorite breads. But, although I always weigh ingredients when the recipe gives weights, I have always made this bread according to the volume measurements in the book – that is, with adjustments to achieve the desired dough characteristics.

Today, I actually weighed the ingredients and can provide them for those who get all upset when they encounter a recipe that instructs them to use, for example, “4 to 5 cups of flour.” By the way, if you make this bread using ingredient weights, and the dough doesn't seem right, I advise you to add a little bit more water or flour accordingly. (Irony intended.)

Ingredients

750 gms Rye Sour

480 gms First Clear Flour

240 gms Warm Water (80-100F)

12 gms Sea Salt

7 gms Instant Yeast

½ cup Altus (optional but recommended)

1 Tablespoon Caraway Seeds

Cornmeal for dusting the parchment or peel.

Cornstarch glaze for brushing the breads before and after baking.

Method

  1. If you have a white rye sour, build it up to a volume of 4 cups or so the day before mixing the dough. If you do not have a rye sour but do have a wheat-based sourdough starter, you can easily convert it to a white rye starter by feeding it 2-3 times with white rye flour over 2-3 days.

  2. In a large bowl or the bowl of an electric mixer, dissolve the yeast in the water, then add the rye sour and mix thoroughly with your hands, a spoon or, if using a mixer, with the paddle.

  3. Stir the salt into the flour and add this to the bowl and mix well.

  4. Dump the dough onto the lightly floured board and knead until smooth. If using a mixer, switch to the dough hook and knead at Speed 2 until the dough begins to clear the sides of the bowl (8-12 minutes). Add the Caraway Seeds about 1 minute before finished kneading. Even if using a mixer, I transfer the dough to the board and continue kneading for a couple minutes. The dough should be smooth but a bit sticky.

  5. Form the dough into a ball and transfer it to a lightly oiled bowl. Cover the bowl and let it rest for 15-20 minutes.

  6. Transfer the dough back to the board and divide it into two equal pieces.

  7. Form each piece into a pan loaf, free-standing long loaf or boule.

  8. Dust a piece of parchment paper or a baking pan liberally with cornmeal, and transfer the loaves to the parchment, keeping them at least 3 inches apart so they do not join when risen.

  9. Cover the loaves and let them rise until double in size. (About 60 minutes.)

  10. Pre-heat the oven to 375F with a baking stone in place optionally. Prepare your oven steaming method of choice.

  11. Prepare the cornstarch glaze. Whisk 1-1/2 to 2 Tablespoons of cornstarch in ¼ cup of water. Pour this slowly into a sauce pan containing 1 cup of gently boiling water, whisking constantly. Continue cooking and stirring until slightly thickened (a few seconds, only!) and remove the pan from heat. Set it aside.

  12. When the loaves are fully proofed, uncover them. Brush them with the cornstarch glaze. Score them. (3 cuts across the long axis of the loaves would be typical.) Transfer the loaves to the oven, and steam the oven.

  13. After 5 minutes, remove any container with water from the oven and continue baking for 30-40 minutes more.

  14. The loaves are done when the crust is very firm, the internal temperature is at least 205 degrees and the loaves give a “hollow” sound when thumped on the bottom. When they are done, leave them in the oven with the heat turned off and the door cracked open a couple of inches for another 5-10 minutes.

  15. Cool completely before slicing.

 Notes:

  • Comparing Greenstein's recipe to Norm's, the former is a wetter dough and also has a higher proportion of rye sour to clear flour. Both recipes make outstanding sour rye bread. Interestingly, Greenstein says, if you want a less sour bread, use less rye sour.
  • Having never weighed Greenstein's ingredients before, I've never even thought about baker's percentages and the like. FYI, the rye sour is 156% of the clear flour. A rough calculation of the ratio of rye to clear flour indicates that this bread is a "50% rye."

Enjoy!

David

wao's picture
wao

Baking with natural wild yeast water (not sourdough)

Hi, everyone.

I'm new to this site and have a question.

This sled is about capturing wild yeast and bake with it, right?

It seems like people are making sourdough starter and baking sourdough bread.

Is anybody baking non-sourdough with fresh fruit yeast (or dried fruits yeast) like me? 

http://originalyeast.blogspot.com/

This is my blog. I don't know if there are many people out there baking with fresh fruits / dried fruits yeast here...

If you are interested, please leave comment here or at my blog.

I want to have friends who has same interests!

Thanks!

LilDice's picture
LilDice

Quick Rustic Ciabatta Pizza - Recipe, Full Howto with Pics


I started making this pizza after I had left over dough from my quick ciabatta recipe, (which you can make by following the same instructions but doubling the ingredients). Anyway, I like this better than the traditional olive oil enriched overnight proofed pizza doughs. It takes only about 2 hours start to finish to make, so you can make it after work.

A kitchen aid style stand mixer is required, unless you're comfortable working with high hydration doughs and hand mixing. People have assured me it's possible, but it's much easier with a mixer. You could also use a food processor to mix the dough, but the time will be much shorter. Probably less than a minute.

The resulting pizza is light, delicious, and full of huge holes in the crust. If you grow tomatoes and basil in your garden, this pizza is just the ticket.

Also I created a page on google for this whole article that's more linkable if you'd like to share this with other - http://hollosyt.googlepages.com/quickrusticciabattapizza

Ingredients

Crust

  • 250 g Bread Flour (All Purpose will also work in a pinch)
  • 1 cup water
  • 1 tsp yeast
  • 7 g salt

Toppings

  • 2 Tomatoes
  • Handful of fresh basil
  • Olive Oil
  • Mozzarella Cheese

Step 1, make the dough

Mix the flour,yeast,salt & water in your stand mixer with the paddle on high speed, it won't look like it is doing anything for a while. Then after about 10 minutes or so it will start to come together

Initial Ingredients


Initial mixing, notice the dough is sticking to the sides


Dough is done as soon as it stop sticking to the sides and is just coming off the bottom. It has the consistency of rubber but is very sticky.

Step 2, proof until triples.

I like to proof this dough in a narrow plastic container that has markings on it, it's important that the dough triples so it's easier to observe that then just throwing it in a bowl. Spray the container you use with spray oil, you'll thank me later.

Be quick moving the dough from the mixer to the proofing container. You'll probobly still end up with a little dough stuck to your hands, because it's very wet.

Here's my dough, now it will be very easy to see when it triples.

Step 3, heat oven and shape pizza.

Place your pizza stone into the oven and preheat to 500 degrees.

Now on a heavily floured counter, pour out your dough into a nice blob.

Now turn a baking sheet upside down and cover it with parchment paper. Not wax paper! Parchment paper is silicone treated and won't melt or light on fire in your hot oven. It will make getting this thing in the oven much easier.

I like to get the dough into a rough pizza shape while on the counter by grabbing it from underneath and stretching. Since the dough is floured on the bottom, you won't stick too much. You don't want it paper thin, but fairly thin in the center

The next step is tricky, we need to get our pizza to the parchment paper on the baking sheet. If you have corn meal handy, you might dust the parchment with that for re-shaping once we get the unruly dough on.

So pick up this thing and quickly move it to the parchment, if you need to do some reshaping once it's on the parchment move fast. It will eventually stick to the parchment. Then your only choice is to dump it out and try again with fresh parchment.

Phew! That was a close one, but I got in on the parchment. And it resembles a pizza dough!

Now it's time to top the pizza, I really just want some light olive oil, garlic powder, fresh tomatoes, basil and cheese. If you want sauce, you're on your own. You can really do whatever you want from this point.


One thing I've noticed with my oven though is that if I put the cheese on from the start, it'll burn and I'll have a raw pizza with burnt cheese. So I usually add cheese 2/3 of the way through baking.

Step 4, Baking

Time to bake! I always trim the parchment so it fits the pizza since loose parchment will brown a bit and might even catch on fire in the oven. So you can see in the photo above I've trimmed it up.

Once your oven has hit 500 degrees, slide your cheese-less pizza on to the pizza stone using the baking sheet. If you don't have a stone, just leave it on the sheet.

After 5 minutes my pizza looked like this, nice oven spring!

Once the crust has just started to brown (after about 8 minutes for me). I add the cheese.

Now I just let the cheese get to the point that I like and the crust to be nice and brown and I'm done. The all together baking time for this pie was 14 minutes.

Finished!

Looks good to me, though maybe i put on too much olive oil since it kind of pooled in the center. Also I probably could have put the cheese on a minute or two earlier since it's not brown all over.

Yum, yum yum.

Crust is looking perfectly golden.

Once again, nice airy crust, not dense and sticky, but light and delightful. That's the pay off from our 100% hydration ultra lean sticky dough.

JMonkey's picture
JMonkey

Desem -- I take it all back


Laurel Robertson, I owe you an apology. I pulled a loaf of Desem bread out of my oven about an hour ago, and, unable to wait any longer, just cut a slice to eat. Without doubt, it is the most delectable, fully flavored whole wheat loaf I have ever eaten. Why it took me this long to get it right, I don't know. But I'm glad I did. When I'm making dinner bread from now on, I'll be making this.

First of all, folks should know that I didn't use a starter made according to the methods described in The Laurel's Kitchen Bread Book, which requires 10 lbs of freshly ground flour. I'm sure you can make it that way, but there's an easier method. I just took some of my regular whole wheat sourdough starter, created a dough ball at about 60% hydration when I fed it, and left it in my chilly (55 degrees F) basement to ripen. I fed it once a day for three days, building it up each time, until I had about 200 grams or roughly 7 ounces of dough. On the final build, I increased its size by a factor of 3, and let it ripen for about 16 hours at 55 degrees, more out of convenience and necessity than calculation. If you don't have a whole wheat starter, it's simple to convert. Just take some of your regular ripe starter, and feed it in the following weight ratio of 1:4:4 -- starter: water: whole wheat flour. Refresh it two or three times like this, and you'll have your 99.99% whole wheat starter. (I won't tell anyone if you don't that it's not absolutely pure).

I screwed up my math in preparing the dough, so I ended up with about 38% of the flour as starter rather than the 30% I'd hoped for, but I'm not sure it would make that much difference. You do want a fairly large amount of starter, if I'm reading Laurel's recipe right -- somewhere in the range of about 30%. I also went for the customary 2% salt and aimed at a hydration of 75%.

Here's my formula:

  • Whole wheat flour: 100%
  • Water: 75%
  • Salt: 2%
  • 30% of the flour was pre-fermented at 60% hydration.
That worked out to roughly:
  • 220 grams starter
  • 260 grams water
  • 320 grams flour
  • 8 grams salt
I mixed it up and kneaded for about 300-400 strokes, until I could stretch a small piece of it into a translucent film (i.e. the "windowpane" test). As for consistency, I was aiming for dough that felt very tacky, but not exactly sticky. Then I formed it into a ball and let it ferment for four hours at about 64 degrees F (the temperature of my kitchen). It more than doubled in size and when I poked a wet finger into the dough, it didn't readily spring back.

Next, I gave the dough a stretch and fold, let it rest 15 minutes, and then shaped it into a ball. I placed it in a banneton (well-floured) and then used my makeshift proof-box to keep it at roughly 85 degrees for 2.5 hours. At that point, the dough had inreased about 75% in size -- perhaps it even doubled. In any case, I slashed it and put it into my cloche, which had been warming in a preheated, 500 degree F oven for about an hour. I had a slight mishap getting it into the cloche (I was a bit too forceful with the peel, and slammed the loaf into the side of the cloche, turning it over on its side. It mushed it a bit, but nothing serious -- the bake took care of it, mostly. You can see the dent on the bottom right of the loaf above.). I repositioned the bread and covered it. The bake was 30 minutes covered at 500, then 15-17 minutes uncovered at 450. I let it cool for one hour.


As you can see, the crumb does not have the huge holes one expects in white bread (I'm just about convinced that any "whole wheat bread" that has sports huge holes probably consists of at least 50% white flour), but, even so, the bread is not at all heavy or dense. The crumb is light and chewy, with a wonderful crispy crust. The flavor? It's tangy, but not overpoweringly so. There's a buttery undertone, maybe? The flavor lingers long in the mouth after eating. Really, the flavor is tough to describe aside from being complex and delicious.

Like I said, when I have company in the future, this is the bread I'll serve. Utterly delicious.

Well done, Laurel Robertson. And thank you.

Pages