The Fresh Loaf

A Community of Amateur Bakers and Artisan Bread Enthusiasts.

Most bookmarked

alfanso's picture
alfanso

Bouabsa Batards - Against the tide

Reversing direction from my recent thang to make baguettes from boule/batard formulae.  I searched TFL and found minor but inconclusive evidence that anyone had published their results for creating batards from the Bouabsa baguette format.  So it was high time that some silly goose decided to do it.  I waddled into the tide with both webbed feet.

As I'd mentioned earlier when I made a batch of Bouabsa baguettes for the first time in a long time, this is the baguette that "put me on the board", so to speak.  The simplest of them all, by the clock the quickest way to bulk fermentation fame and fortune, and the longest retard period.  Since I got on the levain bandwagon quite a ways back now, I hardly ever bake anything that is purely a commercial yeast product.  Neither political statement nor religious conviction nor an us vs. them confrontation.  It just happens that basically everything else I decide on baking contains either no or scant amounts of IDY.   Fine by me either way.

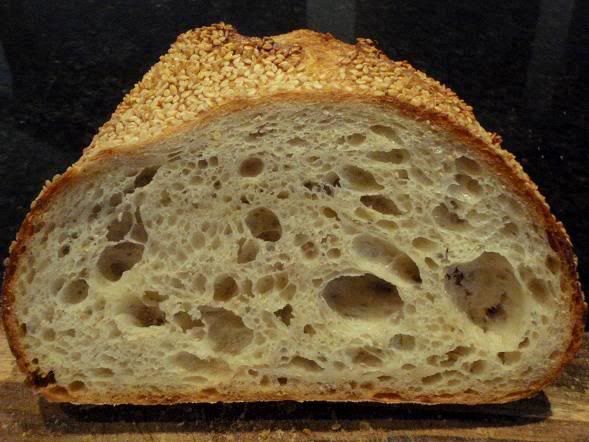
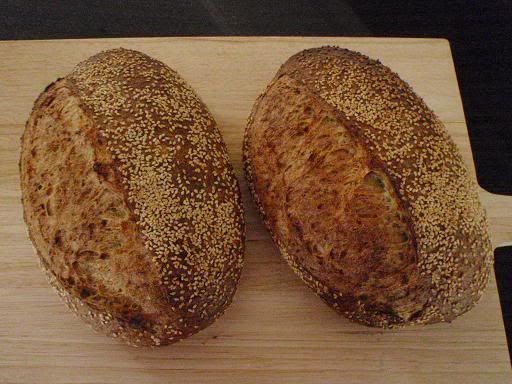
A roll in the sesame seeds for 2 of the boys because I love the look as well as the taste of them.  These should have been handled with a bit more kid gloves than I did, and I think that perhaps the lovely open crumb structure on these suffered due to that.

I should have paid attention to my own heed from that recent bake.  With no out-of-the-retarder warm up and proof, as I bake directly from the refrigerator, I neglected to give the bulk dough an additional 30 minutes of bench rest after the 3rd letter fold.  And of course, my old war cry of "I should have let them take on a half shade more color", was forgotten.

Oh well, they are still nice.  Can't hit a home run every time.

I was a bit too aggressive on shaping the center and right batards, particularly the "nude" batard.  Notice the tear in the skin on the lower left portion of this one.  That means trouble ahead.  Indeed!

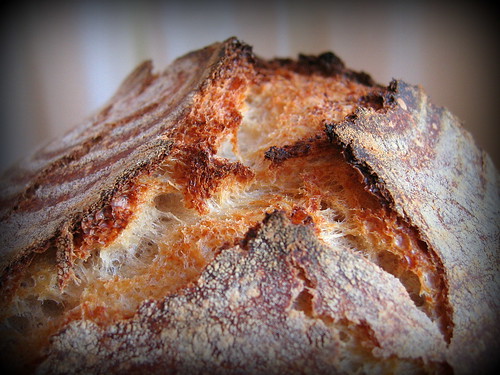
And as evidenced by the final product, the tear in the skin did in fact affect the bloom and shape of the center batard.  The bloom and shape of the left batard was also affected by aggressive shaping, although less so.  The right batard is just dandy.  

The two seeded bookends.

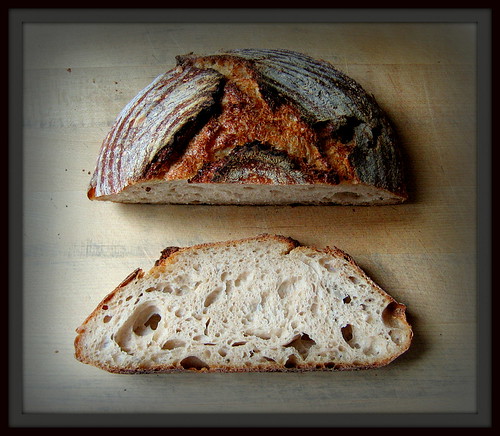
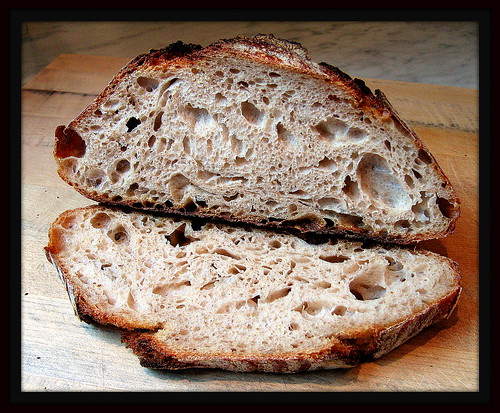
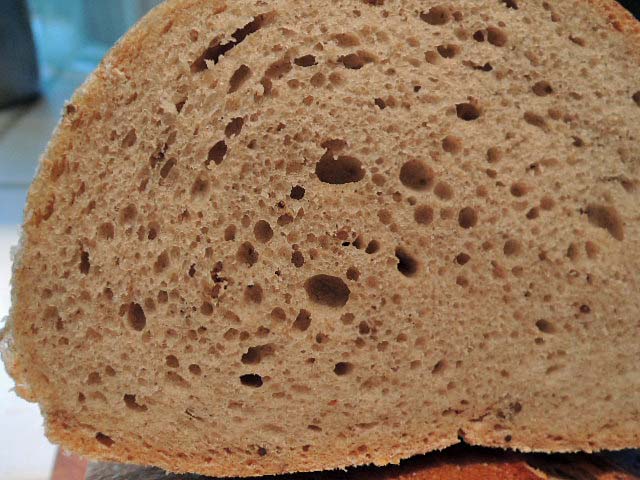
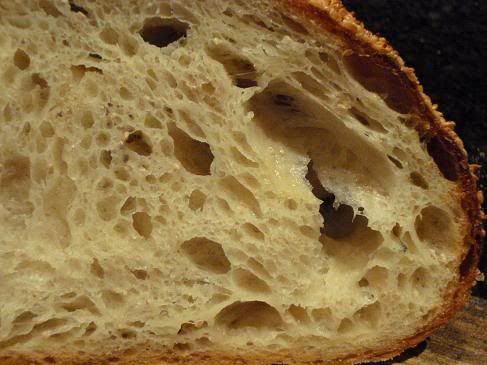
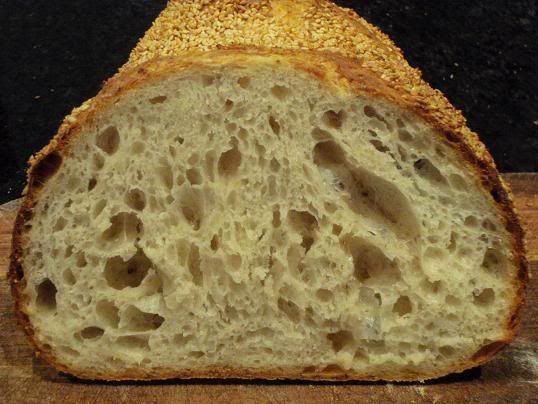
The crumb suffered from the aggressive shaping.  This is the innards of the nudie.  The other two had destinations beyond my own kitchen and gullet.

page1image4184 page1image4344alan page1image5088
RoundhayBaker's picture
RoundhayBaker

A collection of Mark Sinclair videos

TFL stalwart, Mark Sinclair is a quiet chap - never says a word - but then again he doesn’t need to in these videos. His technique speaks for him. I though some might find it useful to have them collated in one place.

Here’s the current list (May 2015):

Making Bread: from Scaling to Baking

kneading and folding

No Knead

Kneading and Folding- Español

Three Breads from Start to Finish

Stretch and Fold - Rustic White & Kalamata Herb

Shaping Dough

More Bread Shaping

___________________________________________

Baguettes

Baguette-pre and shaping

100% Rye - a.k.a. "Cocktail Rye"

brioche machine mix

brioche

Rolls

Filled Rolls

potato bread Dutch subtitle

Potato Rolls

Ciabatta

Sticky Buns

baking bread (Portuguese Sweet Bread)

___________________________________________

Indoor Market

2015 Baking Tour

Trailer Tour

Market Day

Market Day 2

5 minutes at The Back Home Bakery

Baby Deer visiting the Back Home Bakery

I’ve got to admit I’m more than a little jealous of his trailer (thanks to AlanG for pointing me to the clip).

emkay's picture
emkay

San Francisco Country Sourdough

I think my 17-day old starter is ready for prime time. I baked this San Francisco Country Sourdough using Glenn's formula.


sfsd_0324c

  • Everything was done at room temperature (approximately 73F). No retarding.
  • Autolysed for 45 minutes, then I pinched in the salt and 50 g reserved water.
  • Bulk fermented for 4 hours (S&F every 30 minutes for the first 3 hours and then untouched for 1 hour).
  • Preshaped and bench rested for 30 minutes.
  • Proofed seam side down in brotform for 2.5 hours.
  • Baked with seam side up (no scoring) in a preheated cast iron combo cooker.
  • 450F for 20 minutes with the lid on and 25 minutes with the lid off. 


sfsd_0324b

sfsd_0324d

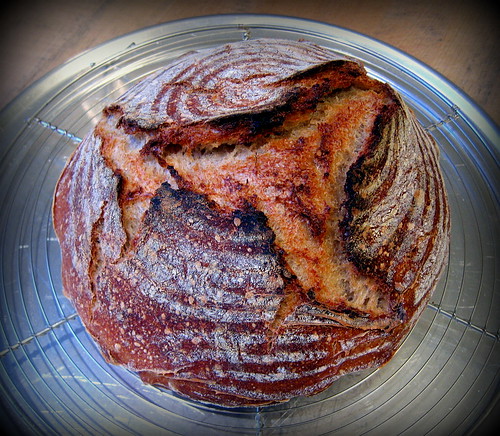
It's the best naturally leavened bread I have baked to date. Well, that's not really saying much since this is only my 4th time baking bread using a starter. But I think it's a good start!


sfsd_0324a


:) Mary


dmsnyder's picture
dmsnyder

Jewish Sour Rye

Jewish Sour Rye Bread

March 15, 2013

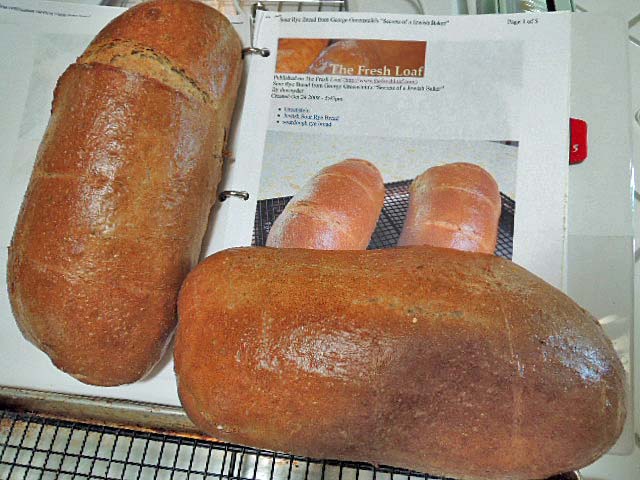
As some of the TFL old-timers may recall, I started baking bread again about 7 years ago, in part because I had a craving for Jewish Rye Bread, and I had no local source. One of the first baking books I bought was George Greenstein's Secrets of a Jewish Baker, and found that his recipe for “Jewish Sour Rye” produced just what I had hoped. However, Greenstein provided ingredients only in volume measurements. In October, 2008, after making this Jewish Sour Rye quite a few times, I weighed all the ingredients and have been using those measurements ever since.

Today, I baked this bread again. The formula I have been using makes two good-sized loaves of 750 g each. I am providing baker's percentages for the convenience those who might wish to scale up or down.


Total dough ingredients

Wt. (g)

Baker's %

Medium rye flour

375

44

Bread or First Clear flour

480

56

Water

615

72

Instant yeast

7

0.8

Salt

12

1.4

Caraway seeds

11

1.3

Altus (optional)

1/2 cup


Cornmeal for dusting parchment

1/4 cup


Cornstarch glaze


Total

1500

175.5

Notes: I have always used First Clear flour in the past. Today, for the first time, I used Bread Flour (14% protein). I did not use altus today.

Traditionally, Jewish Sour Rye is made with white rye flour. I found I much prefer the fuller flavor of medium rye flour.

If you have a rye sour, build it up to a volume of 4 cups or so the day before mixing the dough. If you do not have a rye sour but do have a wheat-based sourdough starter, you can easily convert it to a white rye starter by feeding it 2-3 times with rye flour over 2-3 days.


Rye sour ingredients

Wt. (g)

Baker's %

Medium rye flour

365

100

Water

365

100

Active rye sour

20

20

Total

750

220

  1. Dissolve the rye sour in the water in a large bowl.

  2. Add the rye flour and mix well.

  3. Cover the surface of the sour with a thin layer of rye flour.

  4. Cover the bowl and ferment until the dry flour forms widely spread “islands.” If necessary, refrigerate overnight.


Final dough ingredients

Wt. (g)

Bread or First Clear flour

480

Water (80ºF)

240

Salt

12

Instant yeast

7

Caraway seeds

11

Rye sour

750

Altus (optional)

1/2 cup

Total

1500


Method

  1. In a large bowl or the bowl of an electric mixer, dissolve the yeast in the water, then add the rye sour and mix thoroughly with your hands, a spoon or, if using a mixer, with the paddle.

  2. Stir the salt into the flour and add this to the bowl and mix well.

  3. Dump the dough onto the lightly floured board and knead until smooth. If using a mixer, switch to the dough hook and knead at Speed 2 until the dough begins to clear the sides of the bowl (8-12 minutes). Add the Caraway Seeds about 1 minute before finished kneading. Even if using a mixer, I transfer the dough to the board and continue kneading for a couple minutes. The dough should be smooth but a bit sticky.

  4. Form the dough into a ball and transfer it to a lightly oiled bowl. Cover the bowl and let it rest for 15-20 minutes.

  5. Transfer the dough back to the board and divide it into two equal pieces.

  6. Form each piece into a pan loaf, free-standing long loaf or boule.

  7. Dust a piece of parchment paper or a baking pan liberally with cornmeal, and transfer the loaves to the parchment, keeping them at least 3 inches apart so they do not join when risen.

  8. Cover the loaves and let them rise until double in size. (About 60 minutes.)

  9. Pre-heat the oven to 500F with a baking stone in place optionally. Prepare your oven steaming method of choice.

  10. Prepare the cornstarch glaze. Whisk 1-1/2 to 2 Tablespoons of cornstarch in ¼ cup of water. Pour this slowly into a sauce pan containing 1 cup of gently boiling water, whisking constantly. Continue cooking and stirring until slightly thickened (a few seconds, only!) and remove the pan from heat. Set it aside.

  11. When the loaves are fully proofed, uncover them. Brush them with the cornstarch glaze. Score them. (3 cuts across the long axis of the loaves would be typical.) Turn down the oven temperature to 460F. Transfer the loaves to the oven, and steam the oven.

  12. After 15 minutes, remove any container with water from the oven, turn the oven temperature down to 440F and continue baking for 20-25 minutes more.

  13. The loaves are done when the crust is very firm, the internal temperature is at least 205 degrees and the loaves give a “hollow” sound when thumped on the bottom. When they are done, leave them in the oven with the heat turned off and the door cracked open a couple of inches for another 5-10 minutes.

  14. Transfer the loaves to a cooling rack. Brush again with the cornstarch glaze.

  15. Cool completely before slicing.


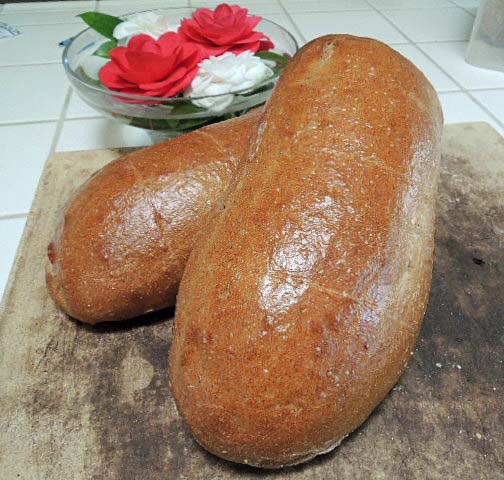
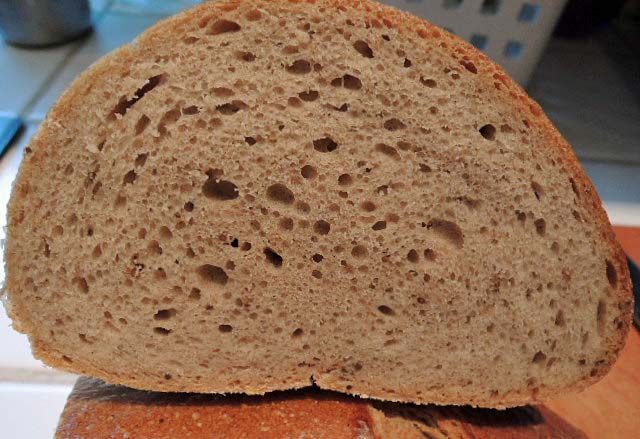
The crust was chewy as was the crumb. I have never been able to get the classic crackly crust that Sour Rye should have. The flavor was very good, with a mild sour tang and just enough caraway flavor to my taste. However, there was a flavor note missing, again, to my taste, because of my having substituted bread flour for first clear. Although KAF sells first clear flour, Hamelman never prescribes its use, even in his formula he likens to Jewish Rye. I prefer this bread made with first clear, based on today's experience, but it is really good with bread flour too.

David

Submitted to YeastSpotting

Addendum: On March 7, 2014, I amended the baking temperatures and timing. The higher temperature and shorter baking time yield a darker, crisper crust which I prefer. There also seems to be less frequent bursting of the loaves.

PiPs's picture
PiPs

Honest bread - 100% whole-wheat desem bread and some country bread

The idea of honest bread and its making found its way into my thinking over the weekend. I find myself slipping more and more into this way of baking. Using less but wanting more from it. I didn’t bake any differently to past weekends yet I felt more connected and relaxed throughout the process. The slightly cooler temperatures certainly helped both my peace of mind and the resulting bread. The kitchen felt less frantic.

 I haven’t been pushing the envelope. Just practising consistency while noticing and adapting to the subtle differences the change of seasons is bringing. Perhaps this might be seen as boring or lazy … nevertheless I enjoyed it thoroughly and it keeps us well fed.

I baked two small batches of 100 per cent whole-wheat desem bread and country breads on the weekend. This will feed the family during the week and left us with a loaf to take away on a picnic to a country market in the northern New South Wales town of Bangalow. We had the best handmade organic doughnuts while wandering through the markets. One of the country breads was given to Nat’s parents on our trip home to help ease their struggling brought on by home renovations.

I have been trying a new method of milling where the flour is constantly stirred and moved around in the bowl as it falls from the mill. I want to disperse the heat as quickly as possible and noticed a definite improvement in the time it took for the flour to cool. Whether this translates into the final bread I really have no idea. Any ideas? I sifted the wheat flour for the country bread as normal and retained the bran for coating the desem loaves.

Mixing the desem starter

Autolyse and desem starter

Squeezing in desem starter

Stretch-and-fold


100% Whole-wheat Desem

Formula

Overview

Weight

%

Total dough weight

2000g


Total flour

1081g

100%

Total water

919g

85%

Total salt

20g

1.8%

Prefermented flour

162g

15%


Desem starter build – 10 hrs 18-20°C


Starter

61g

50%

Freshly milled organic wheat flour

122g

100%

Water

61g

50%


Final dough


Desem starter

243g

26%

Freshly milled organic wheat flour

919g

100%

Water

838g

91%

Salt

20g

2%


Method

  1. Mix desem starter and leave to ferment for 10-12 hours at 18-20°C
  2. Mill flour and allow to cool to room temperature before mixing with water (hold back 50 grams of water) and autolyse for a minimum of one hour.
  3. Add levain to autolyse then knead (French fold) 5 mins. Return the dough to a bowl and add salt and remaining 50 grams of water and squeeze through bread to incorporate (dough will separate then come back together smoothly) then knead a further 10 mins.
  4. Bulk ferment two and a half hours with three stretch-and-fold 30 mins apart.
  5. Preshape. Bench rest 20 mins. Shape.
  6. Final proof was for 1.5 hours at 24°C
  7. Bake in a preheated dutch oven at 250°C for 10 mins then reduce temperature to 200°C and bake a further 10 mins. Remove bread from the dutch oven and continue to bake on a stone for a further 20mins to ensure even browning.


I am continuing to expand the desem starter with one build straight from the fridge and as the overnight temperature continues to cool the desem starter is achieving a more controlled fermentation and sweeter aroma by the following morning. I have been looking forward to this kind of weather all summer and it is so nice to not have sweating dough racing away from me into a sticky mess. I even had to increase proofing times by an extra half-an-hour for this bake.

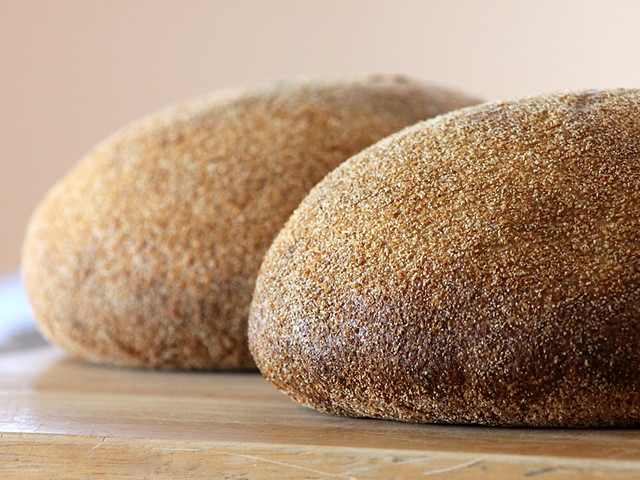
For an aesthetic change to previous desem loaves I baked these without slashing in a dutch oven after coating them in bran sifted from the country breads. I was really surprised with the increased oven spring … quite possibly the best I have had with this form of bread.

Country bread baking

The most telling tale that the cooling temperatures are affecting the bread came with the cutting and tasting. Nat took a bite and then looked at me and asked quite seriously, ‘Have you added anything else to this … it tastes sweet?’ Not only does it taste sweet, but you can smell the sweetness in the kitchen while slicing through a loaf. The crust is delicate with the bran coating adding a crunchy contrast to the soft crumb within.

So far we have eaten it with Nat’s special ‘sick soup’, with honey and ricotta, toasted with peanut butter, with plum jam, with apricot jam … and the list goes on and on.

Happy baking all ...
Cheers
Phil

dmsnyder's picture
dmsnyder

Light and fluffy 100% Whole Wheat Bread

100% Whole Wheat Bread from BBA

I've been admiring the whole wheat pan loaves txfarmer has shown us in recent weeks. Her use of intensive mixing to achieve a higher rise and airier crumb has particularly intrigued me. (See SD 100% WW sandwich loaf with bulgur (cracked wheat) - discovered a new favorite ingredient). When I read her blog, I decided to make the same bread. However, on further reflection, I changed my plan. I have a favorite 100% whole wheat bread – that in BBA – and I really don't like the combination of sourdough tang and whole wheat flavors. So, I decided to fiddle with Peter Reinhart's formula for 100% whole wheat bread using some of txfarmer's techniques to see if I could get a lighter-crumbed version of a bread I already know well and love. The crumb texture I have gotten with this bread is moist but rather dense and crumbly, following Reinhart's suggestions for mixing time. This is not at all unpleasant to eat, but is very different from the airier crumb txfarmer and khalid have shown.

Reinhart's formula calls for a soaker with a coarsely-ground grain and a whole wheat poolish. As usual, I used bulgur for the soaker, and I used fresh-milled whole wheat flour for the poolish. The flour in the final dough was KAF Organic Whole Wheat. The procedures described are those I used. They deviate from both Peter Reinhart's and txfarmer's in significant ways.


Soaker

Baker's %

Wt (oz)

Medium bulgur

100

4.25

Water

141

6

The day before baking, measure the bulgur into a 3 cup bowl. Pour the water over it and cover tightly. Leave at room temperature until used.


Whole Wheat Poolish

Baker's %

Wt (oz)

Whole wheat flour

100

6.75

Instant yeast

0.41

0.028 (¼ tsp)

Water

88.9

6

The day before baking, mix the poolish ingredients. Cover the bowl tightly. Allow to ferment until bubbles start to form (2-4 hours), then refrigerate.


Final dough

Baker's %

Wt (oz)

Whole wheat flour

100

9

Salt

3.7

0.33

Instant yeast

1.2

0.11 (1 tsp)

Honey

16.7

1.5

Vegetable oil (optional)

5.6

0.5

Egg, slightly beaten

18.3

1.65 (1 large)

Seeds to garnish (optional)


2 T

Soaker

114

All of above

Poolish

142

All of above


Procedure

  1. Mix the soaker and poolish, as instructed above, the night before mixing the final dough.

  2. One hour before mixing, take the poolish out of the refrigerator to warm to room temperature.

  3. Place all the ingredients in the bowl of a stand mixer.

  4. Using the paddle, mix at Speed 1until a ball forms on the paddle and the ingredients are well-mixed (1-2 minutes). Note that the dough should be quite tacky – neither dry nor sticky. Adjustments can be made by adding either water or flour during this step or during the next mixing step. (I added about 15-20 g additional water.)

  5. Let the dough rest, covered in the mixer bowl, for 20-40 minutes.

  6. Switch to the dough hook and mix at Speed 2 until a medium window pane can be made. (20-25 minutes) Note: Reinhart's instruction is to knead for 10-15 minutes, “less” if machine kneading.

  7. Transfer the dough to a lightly oiled bowl.

  8. Ferment for two hours or until the dough has doubled in volume, with a stretch and fold on the board at 60 minutes.

  9. Divide the dough into two equal pieces and form them into pan loaves.

  10. Place the dough into lightly oiled medium loaf pans and place the pans in food-grade plastic bags or cover well with a towel or plasti-crap.

  11. Proof until the loaves have almost doubled and are peaking above the rims of the pans. (About 90 minutes)

  12. Pre-heat the oven to 350ºF with a rack in the middle.

  13. Optionally, spray the loaves lightly with water and sprinkle on seeds or rolled oats.

  14. Optionally, score the loaves.

  15. Bake for 45-60 minutes. At 30 minutes, rotate the pans 180º, if necessary for even browning. The interior temperature should be at least 195ºF, and the crust should be firm on the top and on the sides of the loaves. If necessary, return the loaves to the oven and bake longer. (My loaves were done in 45 minutes.)

  16. Immediately transfer the loaves to a cooling rack.

  17. Cool thoroughly before slicing.

I noticed two significant differences in this dough, compared to my previous bakes of this bread. First, the dough was less sticky than usual. Second, the loaves achieved significantly greater volume during proofing. I attribute this to the more intensive mixing, but also the S&F which serves to further strengthen the dough but also equalized the dough temperature and redistribute the products of fermentation.

Once baked, the loaves felt much lighter than usual. When sliced, the reason was quite obvious. Rather than the cakey, somewhat crumbly crumb this bread has always had in the past, the crumb was airy and, in txfarmer's words, “shreddable.”

Crumb from a previous bake of the BBA 100% Whole Wheat Bread, made following Reinhart's mixing time instructions

Crumb of the 100% Whole Wheat Bread from BBA mixed as described above

"Shreddable"

The flavor of the bread is basically unchanged, but the mouth feel is entirely different - light and mildly chewy. I was amazed.

I'm looking forward to having toast for breakfast.

Thanks, txfarmer, for your inspiring and informative postings!

David

Submitted to YeastSpotting


txfarmer's picture
txfarmer

Sourdough Ciabatta Rolls - no kneading at all


This formula is adapted from Wild Yeast's great recipe here: http://www.wildyeastblog.com/2008/07/28/sourdough-ciabatta-rolls/, with the following changes:

1. Increased the hydration to 85%

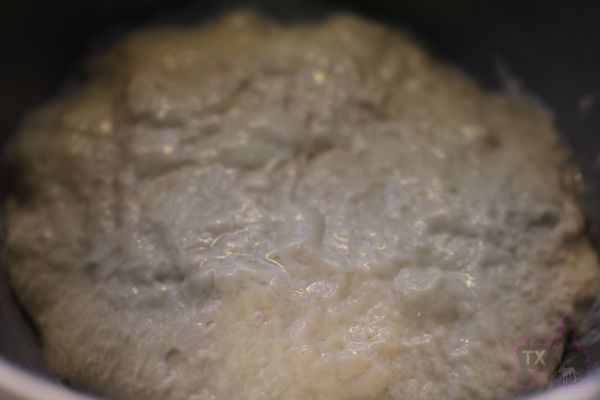
2. The original formual requires no machine kneading but does do a bit of hand kneading in the beginning, I don't knead at all, not with machine, not with hand. I used the same technique from my 36 hour sourdough baguettes: a long cold autolyse (4 hours in this case) to develope the initial gluten, then add in the 100% starter and salt, mix until roughly even. At that point, the "dough" looks like following, don't worry, it will be fine.


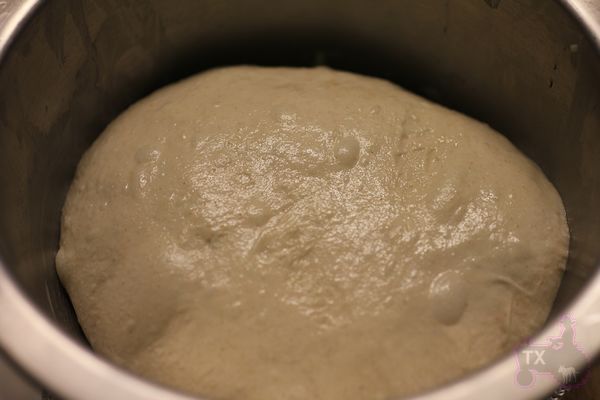
3. Added a S&F during bulk rise, which makes 4 S&F in total. And look how smooth the dough looks at the end of the 2 hour bulk rise! Magic!


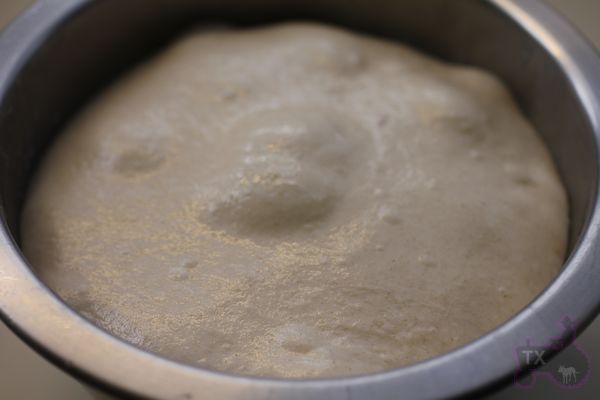
4. After an overnight stay in the fridge and 1.5 hour of warm up at room temp, it full of bubbles, beautiful.


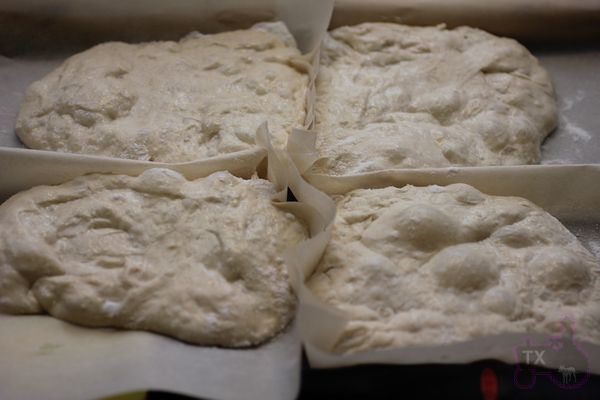
5. I only made 1/3 of the recipe since I didn't have enough starter, so 4 rolls rather than 12. They look very flat and sad proofing, I decreased the proofing time to 1 hour since the house was warm.


6. Flip over one by one then into an hot oven they go. Amazing ovenspring. They sang loud and proud out of the oven.


Nice open crumb. Nice delicious flavor.


I think all that dividing for rolls destroyed some bubbles. Next time I will just make one big loaf with this amount of the dough, I think the crumb will be even more open.


Submitting to Yeastspotting.


msgenie516's picture
msgenie516

The PERFECT bread recipe for the beginning baker! Think Wonder Bread!

Hi,

First, I want to mention I'm not talented enough to be able to claim I created this recipe.  I found it on another forum and I really don't know who the original author is, but whoever it is, created a WINNER!  This bread has a soft crust and interior (somewhat like store bought white but much tastier with a nicer texture) so for those of you who only want to tackle a crusty bread, this one is not for you.   The crust also does not get very dark, but you could probably mist it with a bit of water if you want it darker.

But, if you're even a little like me in that you desperately want to be successful in making ANY kind of bread, you will LOVE this recipe!  After I struggle for days to get a more complicated recipe to work for me, this one is a RELIEF to work on.  I have never had a failure, even when I threw it together in a hurry.  And EVERYONE here loves it!   My grandson, who never asks for seconds of anything, asked me for a second slice of this tasty bread.  My husband, who is difficult to please to say the least, is very happy when I use it to make his sandwiches to take with him to work in the morning.  He's actually so proud that I can make it that he shares his sandwiches from time to time so his associates can sample it.

This is the recipe:

Combine in the slightly preheated bowl from your stand mixer (you can also do this entirely by hand, but it's a lot more work):

2 cups of 110-112 degree water

1 tablespoon plus one teaspoon instant yeast (a total of 4 teaspoons)

1 tablespoon sugar

Cover and let rise in a warm place for 5 minutes (to create warm place, I put my oven on 350 degrees for about 10 seconds and shut it off)

Add to the yeast mixture:

¼ cup oil

5 cups bread flour (I find the best way to measure flour for this recipe is to scoop it, as recommended by the America's Test Kitchen Family Baking Book.  I have tried weighing it--which really should work--and spooning into the measuring cup, as recommended by the King Arthur Flour Baker's Companion, but with both methods the dough was too slack and I had to add flour.)

2 teaspoons salt

Knead until smooth and elastic.  I use the dough hook to combine it for a couple of minutes (while scraping down the sides to help combine the ingredients) and knead for at least an additional 5 minutes on speed 2.

Place the dough (sometimes you have to aid it with a scraper to release it from the bottom of the mixer bowl as it doesn't seem to hold the ball shape on the hook each and every time) in a greased bowl, turn it, and cover it with plastic wrap that has been sprayed with a nonstick coating, such as Pam.

Cover and let rise in a warm place for 20-25 minutes.  I use the minimum time for both the first and second rise.  Punch the dough down and divide it into two equal portions.  Then roll each piece into two rectangles that each measure approximately 10" by 14".  Starting from the long end, roll each rectangle up in jelly roll fashion and tuck in the ends slightly.  Pinch the seam together and place each loaf with the seam to the bottom on a greased 12" by 16" (or similar size) cookie sheet or shallow baking pan.  I find the two loaves work fine on one pan.  Diagonally slash each loaf about 3 times with a sharp, floured knife.

Lightly spray the loaves with nonstick spray and cover with plastic wrap. Let the loaves rise for 20-25 minutes in a warm place.  Since I will have to preheat my oven while these loaves are rising, I cannot let the loaves rise in there and I turn on my toaster oven and leave it on for several minutes.  After I shut if off, I check to see how hot the top has become and layer the appropriate amount of kitchen towels on top of it so that the bottom of the cookie sheet I will be placing on it doesn't get too hot.  I then place the loaves on top of the towels on the toaster oven, making sure they are situated to the back (under the cabinets), where I believe the most heat would be trapped.  Your situation may be different so I am only offering this as a suggestion.

Preheat the oven to 350 degrees and bake the bread for 20-25 minutes.  I use the maximum time as this bread does not get a very dark crust.  Let the bread cool for at least 10 minutes before slicing--it will still be warm.

ENJOY!  (Bread is pictured below)

Shiao-Ping's picture
Shiao-Ping

Chia Sourdough, two ways

Trying a new ingredient or a new formula excites me.  If I find a new method or a new ingredient to make my daily bread the next morning, I go to sleep with a smile the night before.   I read about the Chia seed in one of Johnny's comments on Sourdough Companion a long while ago and had tried Chia seeds with other grains and seeds several times but never on its own.  I was happy with the results each time but never stopped to think why the results were good; I just moved on.  I looked upon the Chia seed the same as any other grains and seeds. 

It just so happened that last week I ran out of all the grains and seeds, except the Chia seeds.  It was 10 days before my family were due to travel again and I was trying to run the fridge down and not to bake any more bread before we leave - the freezer was already chuck full of sourdoughs to bring away with us.  But, I got excited over questions like: what would it be like to have Chia seeds, and Chia seeds alone, in my sourdough? and what would Chia seeds do to my daily bread? 

I chose a simple sourdough recipe and added 7% Chia, pre-soaked in four times its weight in boiling water - only 7% because this is not like walnut bread where you want to actually bite into walnuts.  I did not know at first how much water Chia seeds would absorb; nor did I want to trouble myself by soaking the seeds the night before.  I knew boiling water could do the job on the spot.  I first poured double its weight of boiling water over the seeds; the water was gobbled up in seconds, so I poured a bit more, and a bit more again a few minutes later, totaling four times the weight of the seeds.   So, this is my first ever Chia sourdough:


                                                         White Chia Sourdough


You cannot believe how moist the crumb was.  It was so incredible. 

I am so amazed at how good the bread was that I started to read up on the Chia seed.  There is an article here that talks about Chia as the ancient grain of the future but it looks at it from the angle of nutrition which is not my concern here.  I would recommend the article to anyone who is interested in the topics of omega-3, diet, antioxidants, vegan, or even gluten free solutions; but I am interested in what effects there are on bread, not nutrients.  Here is what I have found with my experiments together with the relevant points from the article:

(1) Moisture:  Chia has a very unusual property - a gelatinous, glue-like substance due to the soluble fiber that is able to absorb up to 12 times its weight in water.  The seed's hydrophilic saturated cells hold the water when it is mixed in with flour.  I picked up some pre-soaked Chia seeds and they did not wet my fingers one bit at all.  With the bread in this post, I have found that the hydrophilic colloids in Chia prolonged moisture in the bread in the most spectacular way.  The moisture which was initially contained in the cells of Chia slowly released itself, like a low GI food slowly releasing its sugar.  (The article says that the Chia gel can form a barrier between carbohydrates and enzymes that break them down, thus slowing down the conversion of carbohydrates into sugar.) 

This moisture is completely different from that in a super-high hydration loaf like Ciabatta which, in my experience, if not finished within a couple of days, turns as dry and tough, and as quickly, as anything I can think of.  But it is similar to Hamelman's Five-Grain Levain, because of flaxseed, one of the five grains used in that bread.  I have found that flaxseed, once soaked, has a similar gel-like property like Chia. 

(2) Texture:  The gelatinous, glue-like substance seems to have also altered the texture of the bread, resulting in softer crumb.  In this regard, I think it is important not to over-hydrate the dough, otherwise you may lose the springiness and chewiness, typical of sourdough bread.  I have also tried soaking the Chia seeds with six times their weight in water, while maintaining my other bakers percentages, and the result was very gummy crumb, most unpleasant to have. 

The article mentioned above says that 8 parts water to one part Chia can be added to bread dough, but I think this would work only if you add a couple of tablespoons, not more, as was suggested and beautifully done by Sharon, the glutenfreesourdoughbaker, here.

(3) Taste:  This may sound strange, but I have noticed my wholemeal sourdough now tastes sweeter than before.  For people who don't like 100% whole wheat, Chia gel is like a "tonic" that would modify the bitterness in 100% whole wheat bread.  We know most kids choose white bread over whole wheat bread because of the high fiber and bitter taste in whole wheat flour.  Well, I've got news.  I gave my kids and their friend a 100% wholemeal sourdough (with 7% Chia), they thought it tasted like a white sourdough and between the three of them they finished a 750g loaf!


                                                                                      Whole Wheat Chia Sourdough


Formula for my white Chia Sourdough

  • 125 g Wholemeal Starter @100% hydration
  • 500 g Flour (I used Australia's Laucke's unbleached bakers flour, protein 11.9%)
  • 343 g Lukewarm Water *
  • 11 g Salt
  • 40 g white Chia Seeds
  • 160 g Boiling Water
  • Sesame Seeds for dusting

*  I used lukewarm water to bring the final dough temperature to 26 C/ 78 F as my room temperature was cold, around 19 C/ 66 F  

**  Dough hydration was 72% (not taking into account the Chia and the boiling water to soak it).  You may want to adjust hydration to suit your flour.  Total dough weight was 1.1 kg.                               

Formula for my wholemeal Chia Sourdough 

  • 200 g Wholemeal Starter @100% hydration
  • 600 g Wholemeal Flour (I used Australia's Four Leaf's 85% Light Flour, protein 14%)
  • 460 g Lukewarm Water*
  • 14g Salt
  • 50 g white Chia Seeds
  • 200 g Boiling Water for soaking the Chia seeds
  • Sesame Seeds for dusting

***  Dough hydration was 80% (not taking into account the Chia and the boiling water to soak it).  My wholemeal flour is a high gluten flour which is very thirsty for water.  Adjust hydration if your WW flour is not as thirsty as mine.  Total dough weight was 1.57kg.


Method

Following were my steps that produced the breads pictured in this post.  You can use your own dough process.   One thing of note is that my white Chia sourdough had a total of 6 1/2 hours fermentation before overnight proof-retarding, while my WW sourdough had 6 hours all-up and that was too much.  I overlooked the fact that there was more pre-fermented flour and the fact that wholemeal flour (especially the organic version I used) has more enzyme and ferments faster than plain white flour.  As a result, my whole wheat Chia sourdough had less oven spring and less volume.  

(1) Pour the boiling water over the Chia seeds.  Stir and set aside the Chia gel to cool.

(2) Dilute starter by adding the lukewarm water a little bit at a time until all is added.

(3) Add flour and salt into the diluted starter, stir to combine.  Cover.  Autolyse for 30 minutes.  (My dough temperature at time off mixing was 26 C.)  

(4) Knead the dough by way of stretching and folding it in the bowl, about 25 strokes (for the white one) or 20 strokes (for the WW sourdough).  Cover.  Rest for 30 minutes or longer until the dough is completely relaxed and extended.

(5) Pat the dough out inside the bowl and spread half of the Chia gel over the dough; flip the dough over, and spread the remaining half of the Chia gel over it.  Flip the dough over again and start stretching and folding it inside the bowl to incorporate the Chia, about 25 strokes (for the white one) or 20 strokes (for the WW sourdough) but not more as the dough is now loaded with the seeds and is fragile.  Be careful not to tear the skin of the dough on the bottom.  The Chia seeds won't be evenly dispersed yet.  They will get more evenly dispersed in the following S&F's.  (Alternatively, you can do this step on a work bench.) 

(6) Lightly oil your bowl and place the dough back, right side up.  More dough strength develops if the dough rests right side up.  Give it 30 - 45 minutes rest until it is relaxed and extended again.

(7) Turn the dough over and gently stretch it to as far as it can go between two hands without tearing it.  Fold 1/3 from one end to the centre and 1/3 from the other end to the centre, the same way as you would fold a letter; then, from the other direction, fold the dough again like a letter.  Place the dough back to the bowl, right side up.   Rest for another 45 minutes or for as long as it takes for the dough to relax.

(8) Another double letter-folds.  Rest.  Repeat the folds and the rest, if your dough needs it.

(9) Pre-shape and shape the dough.  By the time I finished shaping the dough into a batard, it was six hours from the time my dough was first mixed.  The temperature of my shaped dough had come down to 19 - 20 C.  If your dough &/or room temperatures is higher, shorten the fermentation time accordingly.

(10) I let the white dough sit for 1/2 hour then I removed it to the fridge for overnight retarding.  (For the wholemeal version, I removed it to the fridge straight away.)

(11) The next morning, my dough had nearly doubled in size in the fridge.

(12) I pre-heated my oven to as high as it could go for over an hour.

(13) I sprayed the top of the dough with water (if you don't have a spray bottle, you can use a damp towel), then sprinkled lots and lots of sesame on the top.

(14) I poured 1/4 cup boiling water onto the lava stones sitting in a roasting pan underneath my baking stone.  Then, I slashed my batard and peeled it onto the banking stone.  I poured a cupful of boiling water over the lava stones.

(15) Immediately I turned the oven down to 230 C and baked for 25 minutes, then I turned the oven down to 220 C for another 25 minutes baking.

(16) Rest the loaf for an hour before slicing.


On day 4 of my white Chia sourdough, I toasted a slice of it:
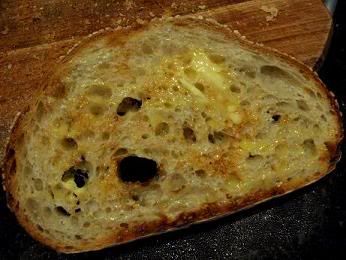


We know that toasting a slice of dry bread temporarily gelatinizes the starch and makes the crumb crunchy and edible.  But try toasting a moist bread, Wow!  The soft crispiness you get from Chia sourdough is amazing.

It has been a gloomy old day, drizzling and overcast.  It's been like that for the last few days.  Nothing to look out of the window for, but something warm in my kitchen:



Shiao-Ping

SylviaH's picture
SylviaH

Baking this pound cake since 1964
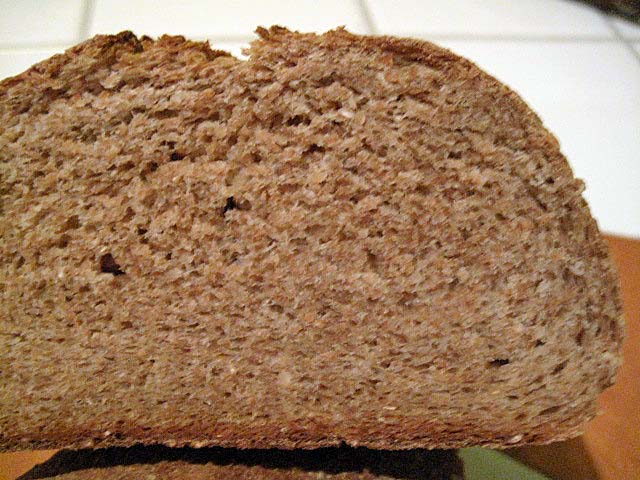
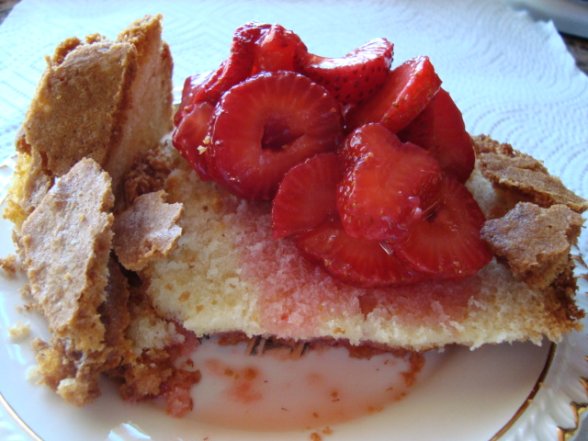
I have decided to give the recipe for this wonderful pound cake I have been baking since 1964 and only given the recipe out to family in the past 45+ years.  It is very close to the same recipe given by Paula Deen called mama's pound cake.  I think only the milk and salt differs a little.  I have referred to this recipe always as 'Grandma Turners Pound Cake'.  It was given to me by my mother in law Elsie Turner in 1964 and was given to her by her daugter in law from Atlanta, GA.  What is so great about this pound cake and the reason I don't turn it upside down out of my large bundt pan or angle food cake pan is it has a cookie crunchy crust that is fabulous and I think very desirable on a pound cake.  It is a very large cake and can be made nicely also in loaf pans.   We love it with fresh sliced strawberries, sprinkled with a little sugar to bring out some juices...yumm.  A real family favorite for over 45 years.
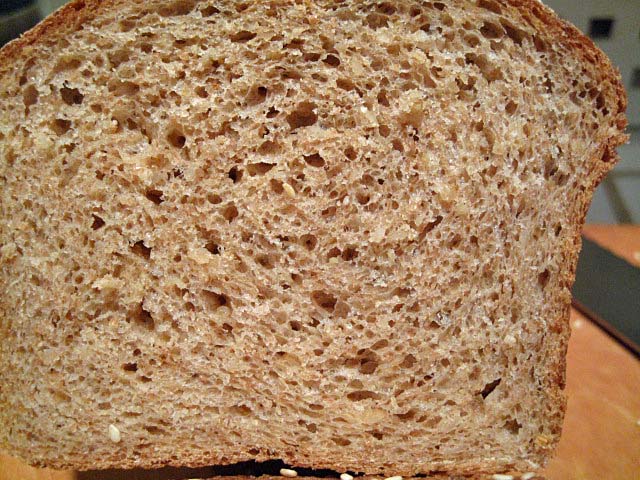
1.  2 sticks of butter

2. 1/2 cup vegetable oil

3.  3 cups all purpose flour

4. 3 cups of Sugar

5. 1/2 teaspoon Baking Powder

6. 1/2 teaspoon vanilla -Added-vanilla extract used 

7. 5 Eggs

8. 1 1/4 cup whole milk

Bring your eggs and butter to same room cool temperature - so the butter is fairly soft -this helps prevent the curdling effect you get when mixing the batter together at different temperatures.

By hand or electric mixer

Grease and flour pans - Preheat oven to 325F - I use convection oven and bake for 1 hour and 20 min. for my 10+ cup large non-stick bundt pan.  Testing with a spagetti noodle poked down into the cake and coming out dry.  The crust will be a nice dark golden brown. 

Sift flour, salt and baking powder together in a bowl '3 times' now I just shake it though a wire sifter once.  In a large bowl or mixer, Cream butter, oil and sugar until light and fluffy - Add eggs one at a time to creamed mixture ' I lightly beat them - Add milk and flour to creamed mixture alternately. I end with the flour.  Add vanilla extract.  You can also use lemon extract. 

After the cake is baked.  Cool for about 5 minutes.  Lay a cooling rack on top of the pan and invert.  Lay another cooling rack on top of the bottom of the cake and flip back over to see the cookie crust side...try not to eat it all!

                  ADDED - These freeze great.  I wrap them up in plastic wrap and then foil.


                                                                 Gets crunched a little more when removing but you can see why I prefer this top to the

                                                                  molded bundt top.  It's hard not eat this delicious crunchy cookie crust top.


                   Sorry we didn't have any whipped cream today.  The strawberries make a nice juice when sliced with a bit of sugar sprinkled over them.  Or you also make a lovely puree strawberry sauce to go with some sliced strawberries. 

Sylvia                            


Pages