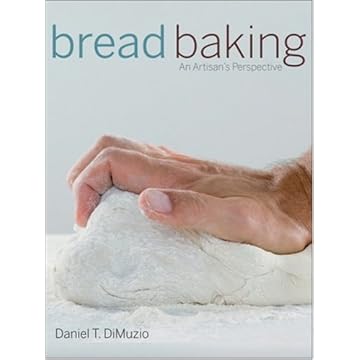
 Daniel T. DiMuzio, Baking and Pastry instructor at Culinard, The Culinary Institute of Virginia College, is the author of Bread Baking: An Artisan's Perspective, a new textbook on the art of artisan bread baking. Dan has owned his own artisan bakery, managed and consulted with numerous other bakeries, and studied and baked with master bakers such as Didier Rosada and Jeffrey Hamelman.
Dan was kind enough to discuss his new book with long-time TFL member Eric Hanner (EHanner) and myself.
Floyd: My first reaction to your book is "Wow, a textbook on Artisan Baking written in English for a North American audience! Artisan baking has really made it, hasn't it?!?"
Dan: Well, yes, I’d say it has made it. That’s a testament, I guess, to the growing number of sophisticated palates among Americans and others in the world. It used to be hard to find good bread, and you had to ask around to find anything approximating a good baguette. Now you can actually go to most supermarkets and get decent, par-baked breads from companies like LaBrea, Ecce Panis, or others. Heck, 20 years ago croissants were considered exotic, and now they’re as common as a cheese danish.
The thing is, even though there was a sort of renaissance in craft baking over the 90’s, the textbooks covering bread for culinary students didn’t really change to keep up with the new awareness about that. There was still a focus upon a somewhat arbitrarily chosen “12 Steps of Baking”, and “artisan breads” were seen as some kind of avant garde offshoot that could be covered completely in a separate 15-page chapter.
One of the reasons I wrote this book was to present an entirely different perspective on bread in culinary education. All bread can be “artisan” if it is prepared by an educated baker who respects the ingredients, mixing, and fermenting that are crucial to creating good flavor and texture. So that can include anything from baguettes and ciabatta to pan breads or hot dog buns. It isn’t all about brick ovens or flour-covered hearth loaves. My hope is that culinary schools will embrace the idea that artisanal bread baking is an entirely different philosophy of baking, and that its principles should be applied to almost any bread -- not just a specialized set of very old recipes.
Floyd: Do you have any idea how many culinary programs there are now teaching artisan baking in North America? Have you noticed an upsurge in interest in artisan baking among students enrolled at Culinard in the past few years?
 Dan: When Wiley sent out first drafts of the chapters for review, the people chosen for the task were baking instructors from a real cross section of the schools out there. There were larger private ones with high-profile names, medium-sized vocational schools, and fairly small community colleges as well. The one common refrain we’d hear from them was that they wanted to find a culinary textbook that covered the renewed awareness about great bread baking in depth.
I don’t know how many programs now embrace artisanal perspectives in bread baking, but it is many more than I first thought. The only schools I know about that have a “dedicated” bread curriculum now (not associated with pastry) are Johnson & Wales, the CIA, and the French Culinary Institute. There are probably a few more I don’t know about, so if anyone reading this knows of any that I missed, accept my apologies.
In my opinion, there’s a very real, practical divide between the things that appeal to a pastry chef and the things that motivate bread bakers. There are people who are passionate about both areas (Nancy Silverton comes to mind), but that’s more of an exception. Pastry chefs are usually very artistic in their outlook, and they are obsessed with aesthetics. Sugar sculptures, petit fours, gorgeous cakes – all of these come from a desire to please with the eye. And while these confections can be good to eat occasionally, their flavor or texture often takes a back seat to impressive looks. That’s possibly why most wedding cakes don’t have a taste that matches their $1000-2000 price tag.
Bread baking is more visceral than aesthetic in its appeal, and I think the conscientious practitioners are better seen as craftspeople than as artists. It’s part science and part skill, and the goal is to make something great to eat – looks are important, but only in a secondary way. So, in too many cases, pastry students often aren’t as passionate about good bread as the students from the savory end of the culinary school. Pastry people mostly want to improve their artistic skills, and while they may want to include bread baking as part of their skill set, they often don’t see it as essential. I really think there’s more of an affinity between the “savory” culinary students and a curiosity about making great bread. When I started showing students in Culinard’s garde manger program (they make pate, hors d'oeuvres, etc,) how to make their own dough for focaccia and tiny buffet sandwiches, they were usually very appreciative.
Floyd: As a (former?) bakery consultant, you must have insight into the economics of running a bakery. I always wonder how folks make it pencil out with the low volume and high ingredient and labor costs that go into making bread. Is it as hard to make a living baking as I imagine it is? What are some of the tricks to making a bakery successful (besides baking great breads)? Location? Sell lots of coffee?
Dan: It’s very, very hard. You have to love bread baking to be a successful artisan baker, and you might even have to refashion your definition of success. During the 90’s a lot of people tried to change careers away from being office types to starting a bakery, pastry shop, or even a restaurant. Most of them had no idea how physically and financially draining the move would be. Food magazines and stylists had done a good job of making that work seem very chic, cerebral, and meditative. While you may find solace in owning an artisan bakery, it has most of the same challenges as owning any small business, with the added hurdles of starting your work day at 2 to 3am and working 12 hour days.
So, yeah, location is very essential, and if Panera Bread wants to lease the same great spot you do, guess who the landlord is going to sign? I think that independent artisan bakeries will continue to thrive in bigger cities and around many university campuses, because enough people there will go out of their way to get exceptional quality in bread and other foods. In most of America, though, there’s been a big shakeout over the last 10 years, and even in some big cities the shops that used to thrive are getting less and less traffic. Some of that is due to Panera deceiving people into thinking that they embrace artisanship, some is due to good par-baked breads being available in supermarkets, and I think the rest is about the novelty wearing off and people just wanting to do all their shopping in one trip at the grocery.
Floyd: Though your book is geared more for people seeking to make a living as a baker, I think there is quite a bit that serious home bakers would find valuable in it. I know I particular found your chapter on designing a formula insightful.
Dan: Thanks, Floyd. I certainly hope that more bakers or baking students see that chapter and the worksheets as ways of thinking more in terms of “formulas” and less in terms of “recipes.” Ultimately, that’s how you become a baker – professional or not – and not just a recipe reader. Designing your own formula forces you to think analytically about the baking process, and how the ingredients don’t just come together in the bowl, but actually affect and change each other. Eventually, that understanding helps you to troubleshoot your problems with anyone else’s formulas, as well.
Floyd: I like that you offer many of the formulas both with preferment and without. More often than not the version with preferment will have a better flavor, won't it?
Dan: That’s a good question, and I think my opinion about it has changed a lot over the years. Aspiring artisan bakers in the 90’s were looking for the magic bullet that would transform their bread from just OK to being extraordinary. Whenever a different ingredient, technique, or equipment choice made its way across the ocean to us, we’d embrace it as the “essential” idea of the moment, even when it might contradict or ignore earlier “artisan” perspectives we’d recently discovered.
Pre-ferments were part of that search for a magic bullet. A lot of folks got seriously into using levain (sourdough), then Professor Raymond Calvel educated people about “pate fermentee” – which is just leftover baguette dough -- , and others traveled to France and saw poolish being used extensively. Eric Kayser promoted a more liquid type of levain by the mid-90’s, and fans of Italian bread had discovered Carol Field’s excellent “The Italian Baker,” which featured biga. Any of these pre-ferments could add flavor and nice aromas to your bread, and – importantly -- they shortened the time you had to wait before the dough was ready to divide and shape. In bread competitions like the Coupe du Monde, some of the USA contestants even used two or three pre-ferments to add complexity to their flavor profile or adjust the speed of the process.
What got lost in all that excitement about different pre-ferments was that in the 1920’s there were Frenchmen who made a long-fermented straight dough (using the “Direct” method) that had no pre-ferments. James MacGuire writes extensively about it in his article in the Art of Eating, 2006, Nos. 73-74. It was still very, very good in flavor due to its long bulk fermentation time (5 hours or so), and its light texture and eggshell crust were different somehow from baguettes made with poolish or old dough. Not better or worse -- just different. Raymond Calvel (who taught Julia Child how to make bread) insisted that, despite the fact that he promoted “pate fermentee” as an ideal pre-ferment, he really thought that the “direct method” baguettes of his early career were his favorites. The big downside of the direct method was that it took 4-5 hours of bulk fermentation, and probably 7-8 hours overall. Pre-ferments used in conjunction with manufactured yeast could shave 2 hours or more off of that time.
So any or all of those methods for making bread are good, and they’ve all had their periods of favor. Preferences there are often a matter of taste. One technique might work better with certain styles of bread than others. Straight doughs are only advisable if you can dedicate a lot of time (at least 5 hours) to fermenting the dough before it reaches maturity, and you should use less yeast to achieve that. Sourdoughs (levain breads), of course, aren’t going to BE sourdough unless you use a sour pre-ferment. But any dough leavened primarily with manufactured yeast can be made as a straight dough, if you have the time.
Floyd: Interesting. Thank you.
Eric: First let me say I find your new book very interesting from a number of standpoints. I like the fact that it is a teaching reference book. I know much of the material in the beginning chapters because I have read it at one time or another in a variety of places but this is the first time I have been able to scan the pages and be reminded about the basics of the craft. There isn’t so much detail that it would be hard to read and focus on, just the broad strokes to spark an interest.
Dan: Thanks. Of course, the book was originally conceived as a tool for use in culinary classrooms. I tried to get into the detail that I thought was critical to understanding WHY artisan bakers do what they do without burdening the reader with so much data that it might induce a coma (!). We wanted to give the bread instructor a way of providing background (of their choosing) while they taught bread fundamentals from an artisanal perspective.
Eric: I see there is also a web component for the teacher’s side with lessons and further material. That would be interesting to see also from my perspective.
Dan: You know, you’re not the first person to ask me about that, and I’m going to TRY to get as much of that stuff as possible available to readers who aren’t in school. I doubt that the quizzes or exams would be made available, for obvious reasons, but possibly the worksheets for formulas could be made downloadable. Still, Wiley has the copyright to the book, so we’d need their cooperation and agreement.
Eric: I think this would make a good gift for a young person who is expressing an interest in cooking or baking. Sort of a leg up on further education. I have a person in mind now that might appreciate some early knowledge.
Dan: Thanks again for the kind words. I would say that the book makes the most sense as a reference or instructional work for very serious bread bakers. People who are happy with being casual in their approach – and that’s still great, by the way – might want to find it in a bookstore and check it out before getting it, since it isn’t really like a typical bread book. You can also check out parts of it at online bookstores, to get a general sense of it.
Eric: One of the things I have been trying to get my hands around this year is improving the aroma and taste of my sourdough breads. Do you have an opinion on what a good compromise would be for a feeding regimen and storage temperature to promote the esters I am trying to create? You have a nice section on the general subject on Page 66 under fermentation. I’m looking for something a little more specific for a white starter.
Dan: I have pleasant and not-so-pleasant news: The pleasant news is that if you are willing to be disciplined in your approach to creating and maintaining a sourdough starter, you can usually reproduce whatever flavor profile you discover that appeals to you. So using the exact same feeding schedule, fermentation times, mix temperatures, ambient temperatures and hydration will get you what you want when you know what that is.
Unfortunately, only you can decide what’s optimal and what isn’t. I’ll provide a framework for beginning, but you’ll need to customize it to your ingredients, your environment, and your lifestyle.
I keep a firm levain (after it has stabilized) at a 60% hydration, around 70°F using something like KA All Purpose flour. I try to stick with a twice-a-day feedings, 12 hour intervals if possible. I determine the weight of ripe starter I’m going to feed, and then I use enough fresh flour and water (combined) to create a newly-fed mass that is three times the size of the original piece of ripe starter. Again, I do that every 12 hours, so you usually need to discard some ripe starter as you go to keep from making a barrel of it.
For three-times-a-day feeding, I’d probably only double it every time instead of tripling it. For once-a-day, I’d probably quadruple or even quintuple the size of the ripe nugget of levain. All of these feeding schedules may produce usable levain, but the flavor of the differently scheduled feedings will yield some differences, with less feeding yielding more acidity (lower pH) and less yeast activity, and more frequent feeding producing less acidity and greater yeast activity.
You can change the hydration of the feedings, as well, but keep in mind that wetter starters ferment more quickly and need more frequent feedings or larger feedings, or both.
Eric: A couple of things that I think are problems for home bakers is 1.) Knowing when the proofing is done and 2.) Getting the dough in during the window of opportunity that will deliver a good result. In my own case I was distracted while writing this note and missed the chance to get my Whole Wheat into the oven on time. It’s a little over proofed and totally my fault. In a commercial kitchen, people are paying attention. In my home office there are many distractions. Is it true that I can extend my window of opportunity for baking if I lower the dough temp by a few degrees? I know the process will slow but are there any side effects in terms of structure?
Dan: Well, at the risk of covering stuff you already know, let me just state that the classic three points of control are time, temperature, and hydration. So, yes, you could go for a slightly cooler final dough temperature (or DDT, as I think Jeff Hamelman calls it) and slow things down a bit without many other noticeable effects. I wouldn’t recommend going anywhere below 74°F for a same-day bake, or you might slow things too much. Slower fermentation rates do give you a wider window for realizing that your product is ready for baking.
Eric: I haven’t read them all yet but I really am enjoying the side comments from the noted Artisan Baker Profiles in the book. I think these are excellent resources for aspiring bakers. Knowing what the key words are ahead of time would give a candidate the confidence to know they are prepared. Also I think it is important to understand what the job is really all about and that baking is still evolving.
Dan: It never occurred to me that readers not in school would find the opening list of key concepts interesting, but that’s great. And I’m glad you like the profiles – they do help point out to aspiring artisans what some of the essentials are in making a bread business work. Another thing I wanted to do there – and I don’t know yet if I succeeded – was to portray how there are different ways of looking at what’s essential and what’s not.
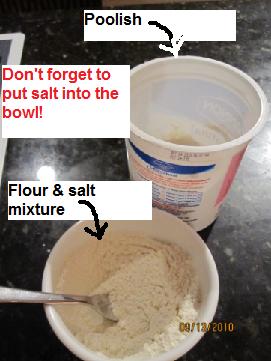
Eric: I noticed on Page 182 talking about using pre ferments, you didn’t reduce the amount of yeast in the final dough when using a Poolish. I have believed that I should reduce some because of the growing activity I created in the Poolish with the small amount of yeast hours before. Am I wrong about this? In general I try to use as little yeast as necessary for all the reasons you talk about creating acids and esters over time.
Dan: You’re right that you should use as little yeast as you think is necessary to produce a selected bulk fermentation time and a mature, easily handled dough. No matter who’s formula you’re using, you should feel free and not at all “wrong” to make minor adjustments to things like yeast quantity, hydration levels, or fermentation times to get the results you prefer. I selected yeast levels that I believe work for me when I designed those formulas, but if the parameters I selected (2 hr ferment, 3 hr ferment, whatever) don’t fit what you want to do, you should change them. Just keep a record of those changes so you don’t have to keep re-discovering them.
Eric: Thank you Daniel for making your self available to us. As it turns out your new book is a lot like this community. We tend to be oriented more toward techniques and practices rather than just a source for recipes. “Bread Baking, An Artisan’s Perspective” is much the same.
Dan: I appreciate your positive comments about the book, and I’m happy to make myself available to answer questions whenever I may be here, now or in the future. I have been surprised to see the interest from many home bakers to this book, despite its technical, school-oriented perspective. There seems to be a thirst out there for more in-depth explanations about certain baking concepts, and I’m just very happy to play a small part in providing some of that.
Bread Baking: An Artisan's Perspective is available from Wiley & Sons right now.
If you have additional questions for Dan, ask them below.
May 14, 2009 update: The question and answer period is now closed. Thank you again for your time, Dan!

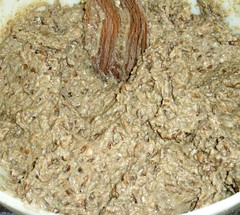
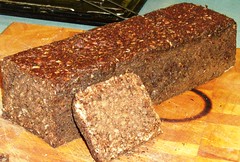
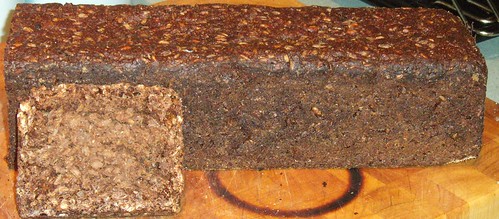
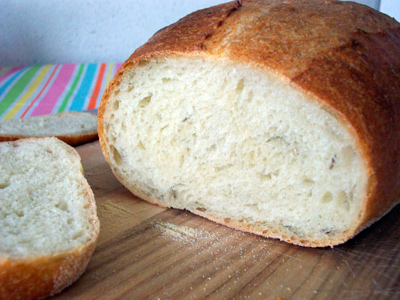
 Feinbrot - 37% bread flour, 35% whole wheat, 28% rye
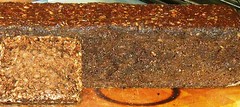
 Feinbrot crumb


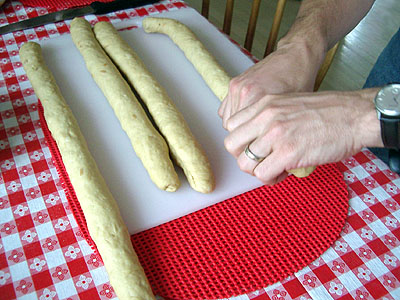
 Take the dough out of the FP
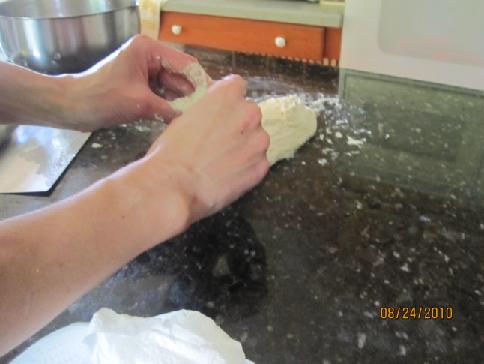
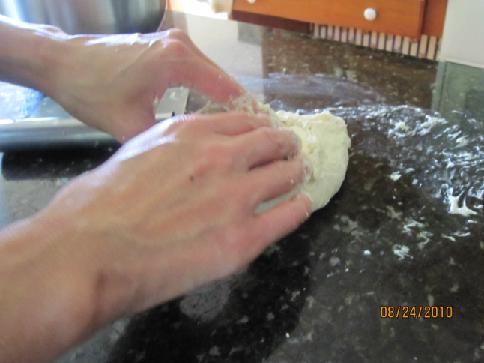
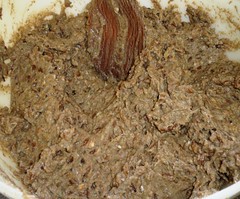
 and turn the dough angle 90 degree, and repeat and repeat.... (around 1-2 minutes) You will feel the dough has gluten development. Don't do too much! * I think that you can stroke it too.

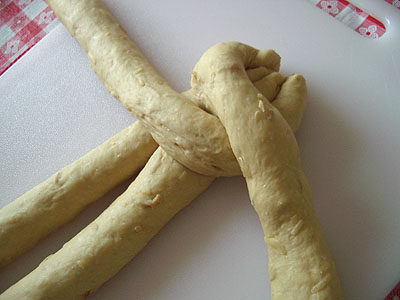
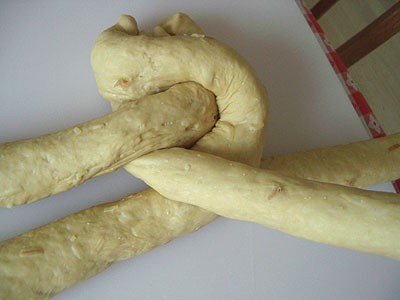
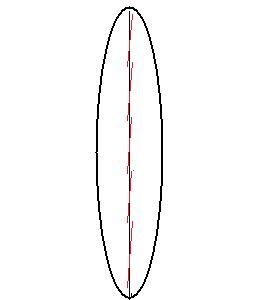
 Pull the both sides from the center very gently.
 Using a dough cutter, lift the edge on your side( bottom) and...
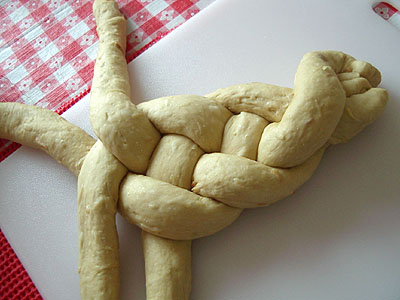
 bring it to the center.
 Next, Lift the edge on your over side ( top)
 bringing it to your side ( bottom ) and pinch very lightly
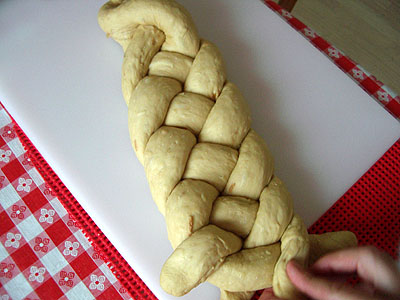
 take the seam line onto the center..
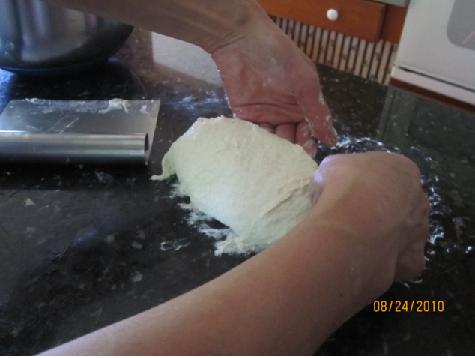
 Take the dough on your over side (top) toward the dough on your side ( bottom) and pinch very well.
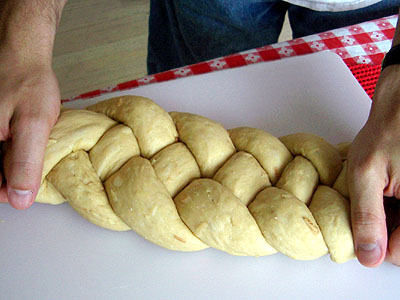
 Roll the dough using a dough cutter.
 Place the dough onto a parchment paper.
 Prepare Flour, Greased razor with shortening, Spray water bottle, and the ziplock is shortening inside( I was squeezing into the cuts after scoring to have ears and glooms. )
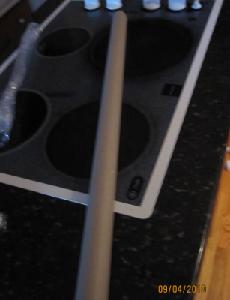

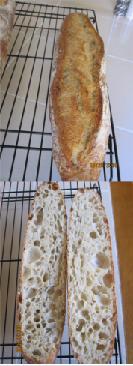
 You can slide it into the oven!!
 !! The side which you slide it in must be really smooth and flat like this picture.!!
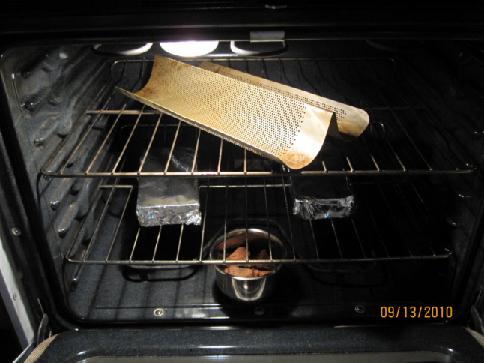
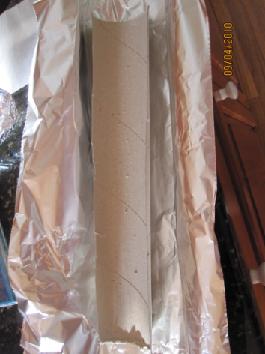
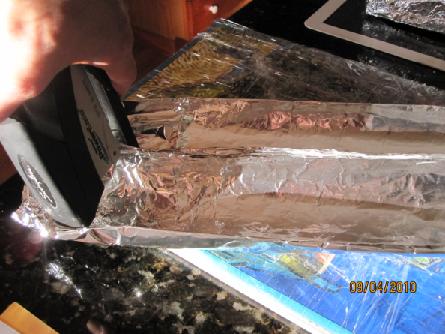
 I made a lot of holes for the dough to breath when you place the dough onto the canvas or cloth.
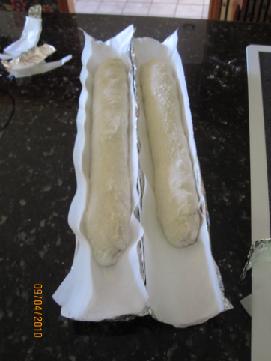 .
. 
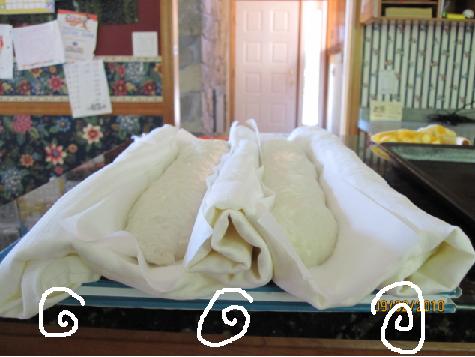
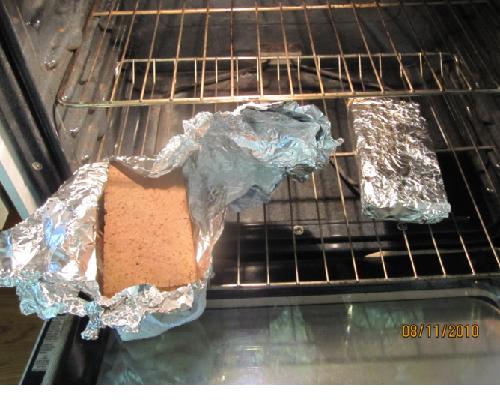
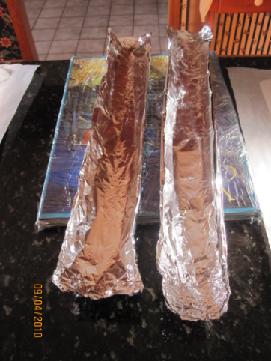
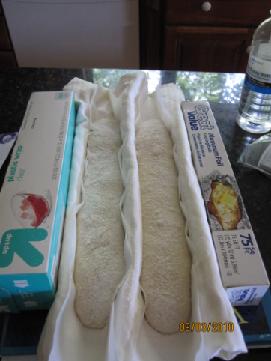 When you use a cloth for such high hydration dough, I suggest you to have some nice supports for the dough like these pictures above)
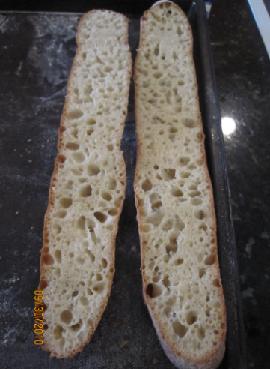
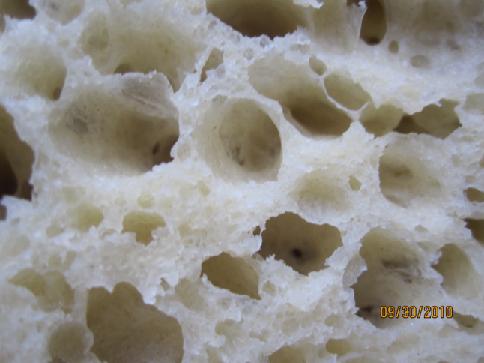
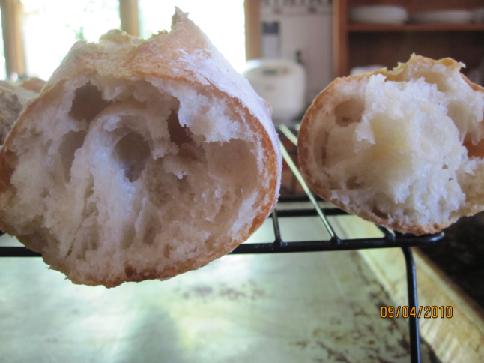 Result : 0.4% yeast ( Poolish 1/8tsp, final dough 1/8tsp)
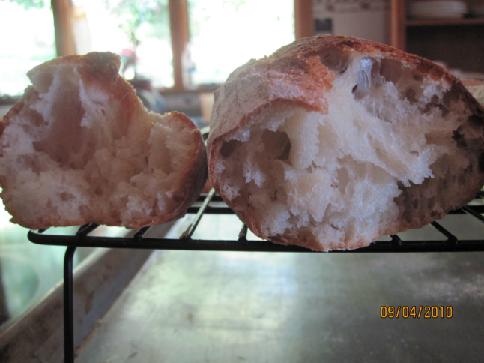 Result 0.8% yeast ( poolish 1/4tsp, final dough 1/4tsp )