The Fresh Loaf

A Community of Amateur Bakers and Artisan Bread Enthusiasts.

Most bookmarked

a_warming_trend's picture
a_warming_trend

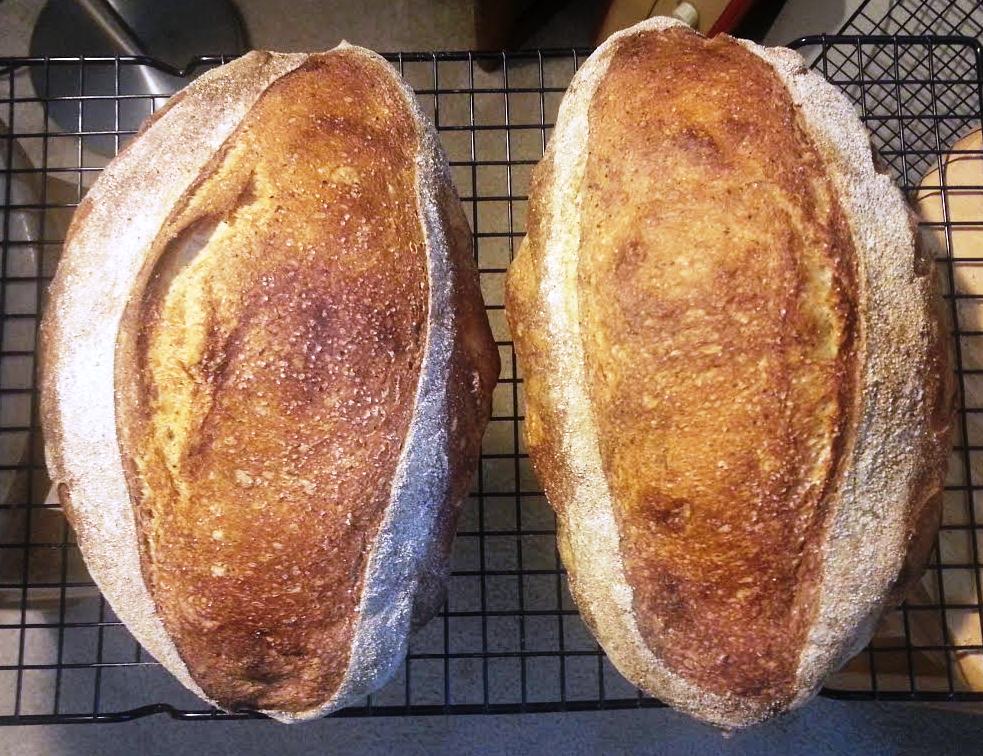
Sourdough Batards with Rosemary and Cream Cheese

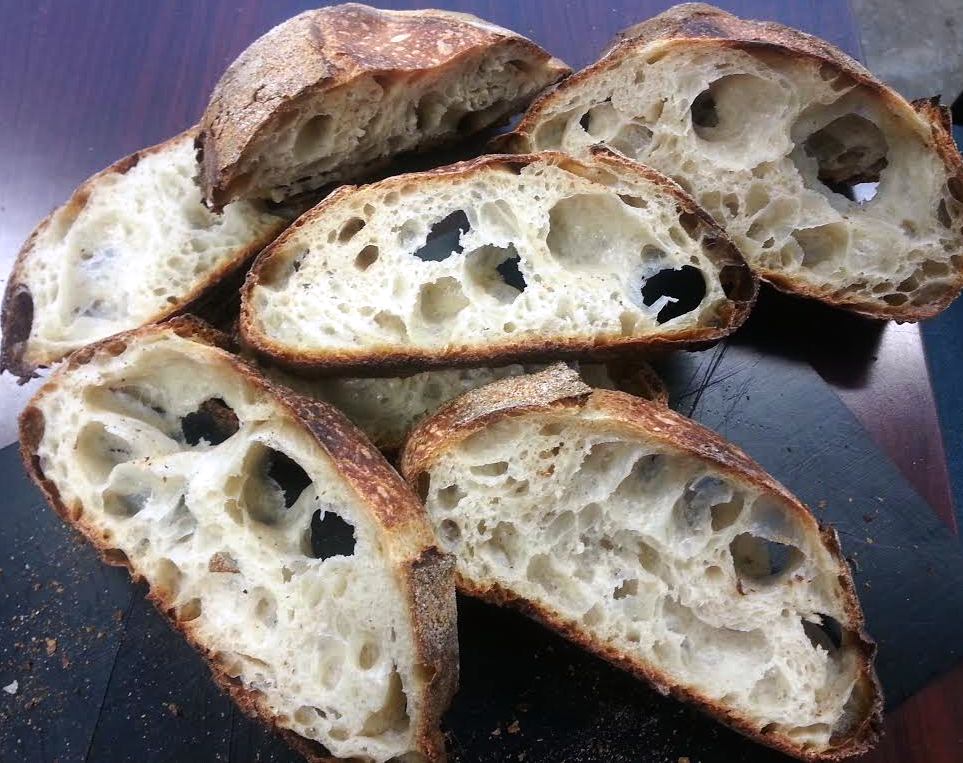
Hello, Fresh Loafers! I haven't posted a formula in awhile, and I think that this one for 76% hydration batards with rosemary and cream cheese is nice and reliable. 

Ingredients:
550 g all-purpose or bread flour (substitute in 70 g whole wheat if you're going for country-style)
410 g cool water
100 g 100% hydration active white starter
12 g salt
6 g non-diastatic malt powder (sub brown sugar or honey if necessary)
1/4 tsp black pepper
1-2 tablespoons of fresh, very finely chopped rosemary (I used 1.5)
40 g cream cheese
40 g pate fermentee (optional)

Method:
1) Feed your starter/mix your levain such that you have 100 g of active starter by the time you want to mix your final dough.
2) Mix flour and water in a food safe container with a lid, and autolyse for 1-10 hours (I like a very long autolyse when I'm able to plan for it; it often works out that I allow my starter to ferment while autolysis is happening!)
3) Add starter, rosemary, cream cheese, pepper, salt, malt, and pate fermentee to the flour + water mixture. Pinch and squeeze until combined, and then stretch or slap-and-fold for 3-4 minutes.
4) Stretch-and-fold every 30 minutes for 2 hours.
5) Allow the dough to rest at room temperature until increased about 20% in size, between 30 minutes and 2 hours, then transfer the container to the refrigerator.
6) Retard in a refrigerator no warmer than 45 degrees F for 8-24 hours (the longer you retard, the more open your crumb will ultimately be, and the tangier the loaf; I was only able to retard for 8 for the batards below).
7) Remove the container from the refrigerator. Sprinkle flour over the top of the dough and spread over the top, then gently loosen the dough from the sides of the container, allowing flour to fall around the dough. Flip it onto a work surface so that the floured side forms the bottom of the loaves.
8) Carefully cut into two equal pieces. Gently pull each piece into a long oval.
9) Allow to rest for 5-10 minutes. (I am not big on pre-shaping, so these ovals are quite loosely formed.)
10) Shape into batards using whatever method you are most comfortable with. One day soon, I will share pictures of my method of batard shaping -- it's the one I'm most consistently successful with as a novice home baker!
11) Allow the loaves to proof in a couche seam-side up for 45 minutes to 1 hour, or until increased roughly 40-50% in size. Watch carefully at this stage!
12) Optional: Transfer the couche to the freezer for 10 minutes. This step is not absolutely necessary, but I find that the "freezer trick" helps with both oven-spring and ease of scoring.
13) Score and bake the loaves at 475 degrees F for 15 minutes with steam, then 20-25 minutes without steam. For small batards such as these, I love to bake on the stone, with a turkey roaster lid creating the steam. For some reason, the crust I achieve this way is thinner and crispier than the crust I achieve using a dutch oven.

Rosemary is a slightly divisive herb, but I find that those who like it really, really like it. This bread is great as a side for a hearty meal, eaten straight with olive oil, or, my personal favorite: A smear of apricot jam.

Enjoy!

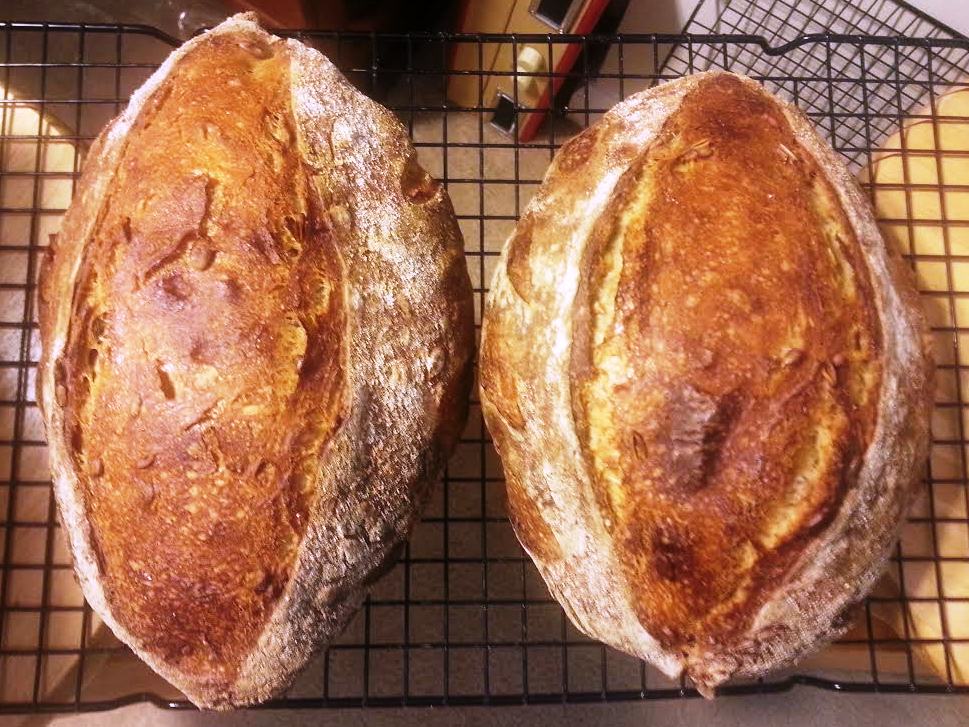
And some bonus photos of loaves created since the last time I posted: 


PDLarry's picture
PDLarry

Nostalgia

Grew up eating this stuff. Custard buns. My cousin who now lives in Hong Kong sent me a recipe and I was able to make some... tears.

my daily bread

If you ever read my baker blog, you'll know that almost every week, regardless of what else I am baking, I bake a batch of pain sur poolish. I began baking a bread like this while reading The Village Baker. I've since adapted it to be even simpler.

This recipe really has become my control, my baseline for experimentation. Whether it be a new mixing technique, a new brand of flour, or a new baking schedule, when I apply a change to this recipe I have the easiest time perceiving how that change modified the outcome of my bread.

I'm offering up this recipe here because a few people have asked for it. But more than advocating this recipe in particular I'm advocating the method of finding something you like and using it as your baseline for experimentation.

My Pain Sur Poolish (Daily Bread)
Makes 2 loaves

Poolish
1 cup flour
1 cup water
1/4 teaspoon instant yeast

Final Dough
1 pound flour
10-12 ounces water
1 teaspoon instant yeast
2 teaspoons salt
all of the poolish

Combine the ingredients for the poolish in a small bowl the night before baking. Cover the bowl with plastic wrap and leave the poolish out at room temperature overnight.

The next day, prepare the final dough, either by using the autolyse method of flour and water first then the rest of the ingredients with minimal mixing or by combining them all and mixing until you have decent gluten development (8 to 10 minutes).

I typically fold the dough once an hour twice during primary fermentation, then shape the loaves and give them a longer final rise, typically around 90 minutes. Meanwhile, my oven and baking stone are preheating as hot as they can safely go.

Baking, with steam, takes me 20 minutes, 5 minutes or so at maximum oven temperature, the remainder at 450-475. I rotate the loaves once half way through the baking.

my daily bread

That is it. Simple, tasty, and a great recipe to practice with.

Relate Recipes: Italian Bread, Rustic Bread.

Do you have a bread recipe that is your standard? Please, share it!

My Daily Bread

dmsnyder's picture
dmsnyder

Sourdough Italian Baguettes

Sourdough Italian Demi-Baguettes: Variations on a Theme 

David M. Snyder

May 3, 2015


Last month, I made some Sourdough Italian Rolls, using a formula I had developed and used previously to make bâtards. This week, I continued to play with this formula. I increased the proportion of durum flour in the dough, doubling the amount in the final dough, and I shaped the dough as demi-baguettes. (I wanted to make bâtards. My wife wanted more rolls to use for sandwiches. Demi-Baguettes was the compromise. We use that shape for sandwiches frequently.)


Total Dough


Ingredient

Amount (gms)

Bakers' %

AP flour

334

60.7

Fine Durum flour

200

36.4

WW flour

11

2

Whole Rye flour

5

1

Water

400

72.7

Salt

10

1.8

Sugar

14

2.5

EVOO

14

2.5

Total

988

179.6


Liquid Levain


Ingredient

Amount (gms)

Bakers' %

Liquid starter

40

40

Water

100

100

AP flour

70

70

WW flour

20

20

Whole Rye flour

10

10

Total

240

240

  1. Disperse the liquid starter in the water.

  2. Add the flours and mix thoroughly.

  3. Ferment at room temperature until expanded and bubbly (8-12 hours). If necessary, refrigerate overnight and let warm up for an hour before using.


Final Dough


Ingredient

Amount (gms)

AP flour

300

Fine Durum flour

200

Water

350

Salt

10

Sugar

14

Active liquid levain

100

EVOO

14

Total

988

Procedures

  1. In a large bowl, disperse the levain in the water.

  2. Add the flours and sugar to the liquid and mix to a shaggy mass.

  3. Cover the bowl and let it rest for 20-60 minutes.

  4. Add the salt and olive oil and mix thoroughly. (Note: I squish the dough with my hands until it comes back together, then do stretch and folds in the bowl until it forms a smooth ball and the oil appears completely incorporated.)

  5. Transfer the dough to a 2 quart lightly oiled bowl, and cover the bowl tightly.

  6. After 30 minutes, do stretch and folds in the bowl. Repeat 3 more times at 30 minute intervals.

  7. Continue bulk fermentation for another 30-90 minutes, until the dough is puffy. If fermented in a glass bowl, you should see lots of little bubbles throughout the dough. Volume of the dough may have increased by 50% or so.

  8. Refrigerate for 12-36 hours.

  9. Divide the dough into 4 equal pieces and pre-shape as rounds or logs. Cover with a clean towel, baker's linen or plasti-crap and let rest for one hour.

  10. Shape as Demi-Baguettes or Ficelles.

  11. Roll the loaves on damp paper towels, then in a tray of sesame seeds. Alternatively, you can brush the loaves with water and sprinkle with sesame seeds.

  12. Proof for about 45 minutes, seam-side down, on parchment paper pleated to separate the loaves and supported at both long sides by rolled-up dish towels. Cover with a damp towel, baker's linen or plasti-crap.

  13. One hour before baking, pre-heat the oven to 480ºF with a baking stone and steaming apparatus in place.

  14. When ready to bake, uncover the loaves. Pull the parchment from both long sides to flatten out the pleats and separate the loaves.

  15. Transfer the loaves, on the parchment, to a peel. Score them as baguettes. Transfer them to the baking stone. 

  16. Steam the oven, and turn the temperature down to 460ºF.

  17. After 10-12 minutes, remove the steaming apparatus. (Note: If you have a convection oven, switch to convection bake and turn the oven down to 435ºF for the remainder of the bake.) Continue baking for another 6-8 minutes or until the loaves are nicely browned and the internal temperature is at least 205ºF.

  18. Transfer the loaves to a cooling rack. Cool completely before eating.


After cooling, the Italian bread crust was soft. The crumb was nicely aerated, but not as open as expected for this level of hydration. I suspect this is because of the durum flour (higher protein but poorer quality gluten) and the extra handling installing the sesame seeds. The flavor is heavenly. This is a sweet white roll with the nuttiness of durum and sesame seeds, dipped in high quality EVOO. How could that not be delicious?

One of the baguettes was consumed for dinner. 

Panino with roast chicken breast, caramelized onions with balsamic vinegar, sliced dried calmyrna figs, emmenthaler cheese and a light smear of Dijon mustard.

Such a sandwich can only be washed down with good Italian beer, of course. 

I also baked a couple boules based on the "Overnight Country Blonde" from Ken Forkish's Flour Water Salt Yeast. Summer has arrived, and my kitchen is running 75 to 78 dF, so fermentation runs faster than the book specifies. The result is that bulk fermentation was complete in 5 hours. I refrigerated the dough overnight and divided and shaped the next morning. Even with the dough starting out cold, proofing was complete in about 2 hours. 

All of the sourdough breads I have made from FWSY have a strong family resemblance but more or less distinctive flavor profiles, depending on the flour mix used, the percentage pre-fermented flour and the fermentation routine. This bread had a crunchy crust and cool, chewy crumb. The flavor had that nice wheaty sweetness and a quite present but mild sourdough tang, with the creamy lactic acid tone dominating. Although this is a higher hydration dough, the flavor profile is very much like the Pain de Campagne from Hamelman's Bread. And that's not bad! Like my San Joaquin Sourdough, it contains mostly AP flour but with about 10% whole grain flours, divided between whole wheat and whole rye. The procedures I used for this bake, with the overnight retardation before dividing and shaping, gave such nice results, I am going to use it for a while and try increasing the whole grain flours, maybe adding some toasted wheat germ for its nutty flavor and who knows what else.

It has been a good bread baking day.

Happy baking!

David

Kjknits's picture
Kjknits

Sourdough english muffins

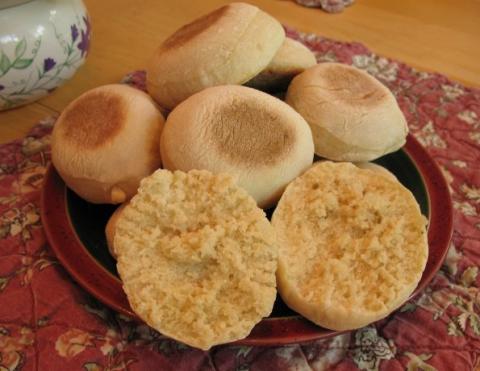
I used some of my starter that would have been discarded last night during refreshment to make some english muffins.  I found this recipe about 3 years ago on the KAF Baking Circle.  It was submitted by a user going by the name chard.  It makes great english muffins!

engmuff2


The texture is similar to Wolfermans, not big "nooks and crannies", but a little meatier.  I know a wetter dough would create larger holes, but I like them this way.  I used semolina on the parchment while they rested, and the flavor it gives to the bottom of the muffin is fantastic.  Other than only using 2 cups of flour for the whole recipe, I followed the amounts and ingredients exactly.

Sourdough English Muffins

Makes about 12

1/2 C starter (mine is a 100% hydration white starter) 

1 C milk

2-3/4 C AP flour

1 TBSP sugar

3/4 tsp salt

1 tsp baking soda

Semolina or cornmeal, for dusting

Combine starter, 2 C of flour and milk in a large bowl.  Stir to combine, cover with plastic wrap, and leave out for 8 hours or overnight.

After the overnight rest, add remaining flour (I didn't add any), sugar, salt and baking soda and mix well.  Turn onto a lightly floured surface and knead for 4-5 minutes.  Roll out to 3/4" and cut with a biscuit cutter into rounds.  You can reroll the scraps, but you may need to let the dough rest before cutting more muffins from them.  Place muffins on a piece of parchment dusted with semolina and let rest for 45 minutes.

Spray griddle or skillet lightly with spray oil.  Heat to medium and cook muffins for about 6-8 minutes on each side, or until browned on the top and bottom and cooked through.  These have great griddle spring and rise quite a bit during the "baking".

Split with a fork and enjoy with your favorite topping!  I don't even toast them if I want to eat them right off the griddle--they don't have that raw taste that storebought english muffins have.

Enjoy! 

FlourChild's picture
FlourChild

Tortas de Aceite

Our family traveled to Spain this past Spring, and Sevilla was our favorite city on the trip, we were there during Semana Santa.  We particularly enjoyed the Tortas de Aceite- yeast-leavened olive oil wafters laced with sesame and anise.  This version is a little different than the standard torta in that it is leavened with sourdough and uses star anise instead of anise seed.


A view of the courtyard in Sevilla's Alcazar, the Royal Palace.


Tortas de Aceite Recipe


Levain  Baker's   %  
 Sourdough starter, 60% hyd.6g  Total flour200g 
 KAF AP30g  White flour100% 
 Water, room temp18g  Hydration60% 
     Salt0.7% 
Main Dough   Levain flour10% 
 Unbleached AP, 10% protein180g  Sugar6% 
 Sesame seeds, toasted1Tb + 3/4 tsp  Olive oil27% 
 Sugar1 Tb     
 Salt1/4 tsp     
 Water, room temp108g     
 Levain32g     
 Olive oil54g     
        
Topping      
 Star anise1 piece     
 Granulated sugar2 tsp + 2 Tbs     


Night Before:

Mix levain, allow to ferment ovenight at 68-70F.  It should rise but not yet be fully mature.


Next Morning:

Weigh flour into mixing bowl and coat a 3-4 cup bulk ferment container with olive oil.

Use spice grinder to grind toasted sesame seeds, salt and main dough sugar until fine.  Stir into flour.

Add 32g levain (the rest is for perpetuating the culture), water and oil to the flour mixture and mix until combined, then knead by hand about 10 minutes.

Transfer to oiled container and cover. 

Ferment until dough has doubled, about 5 hours at 81F.

Using olive oil to grease work surfaces and dough, stretch and fold 3 times in first 3.5 hours, then allow to rise.  Ready when rounded peak reaches a little past 2 2/3 cups.


Afternoon:

Divide and pre-shape into 12 rounds.  Place on oiled sheet pan and rest one hour, covered.

In spice grinder, grind star anise with 2 tsp sugar until fine, then scrape into bowl.

Preheat oven to 450F, placing rack in middle of oven.  Prep a half sheet pan with silpat or parchment.

Spread 2 Tbs granulated sugar on a plate.

Flatten dough balls slightly, then sprinkle the top with 1/4 tsp of the anise-sugar mixture.  Spread mixture over dough disc with fingertip.

Shape six discs into pizza-like tortas about 3 1/2 inches in diameter, then turn face down in sugar plate to coat with sugar. 

Place six tortas on one half sheet pan and bake 8 minutes, then rotate and bake 3-5 more minutes, until nicely caramelized.

Repeat with remaining six tortas.


Editing to add notes:  

Don't be tempted to add the anise into the main dough- it has potent anti-bacterial and anti-fungal qualities and will kill off every discernable trace of sourdough culture (did this with my first go at these).

These re-heat and re-crisp beautifully in the toaster.


Dough Rounds:


Flattened Discs with Anise-Sugar Mixture:


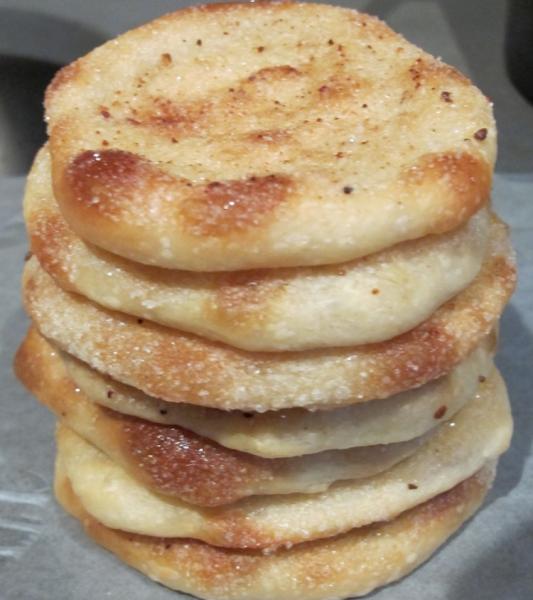
The Shaped Tortas:


Plaza Nueva at Sunset:


Sevilla's Cathedral:


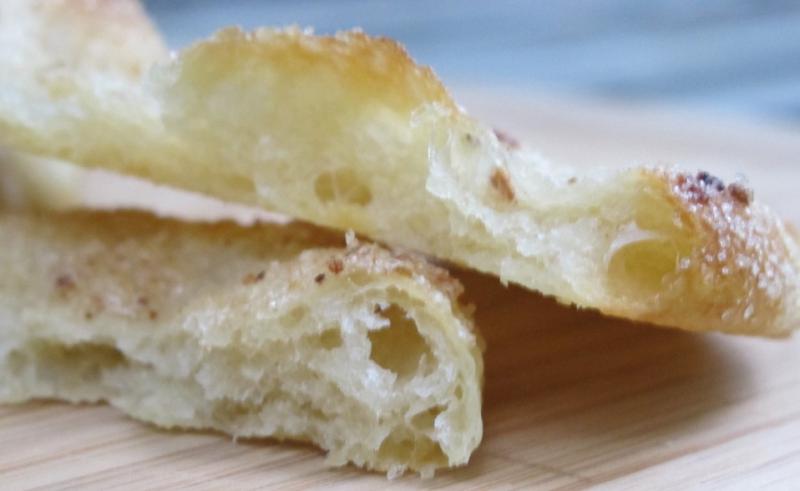
Torta Crumb:

More Tortas:


Looking for Tapas:


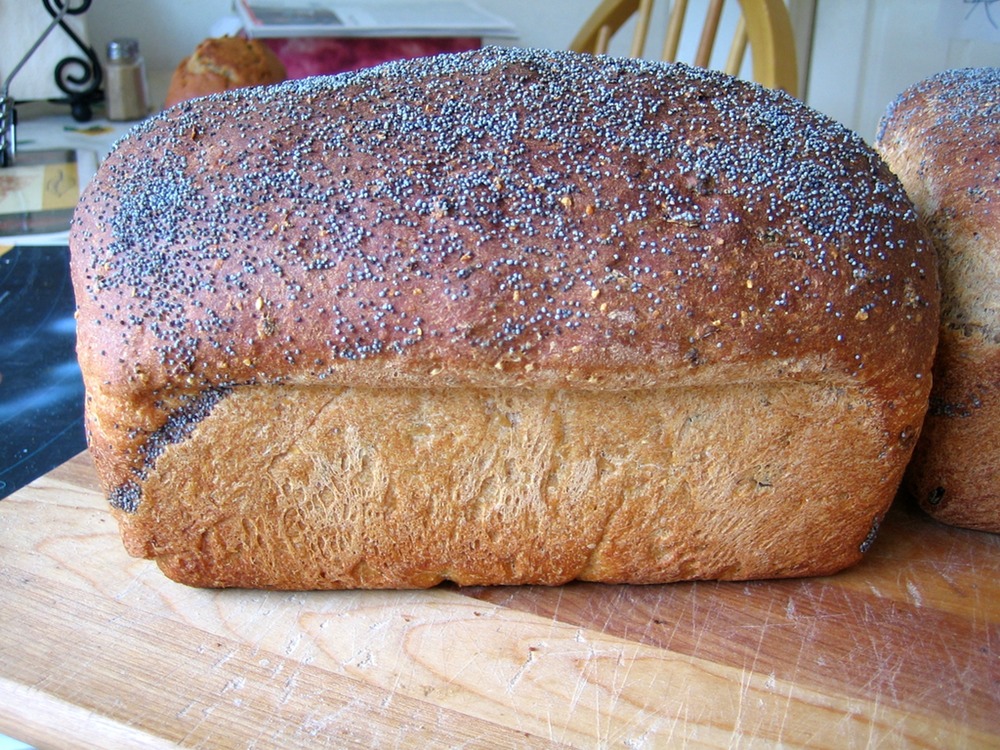
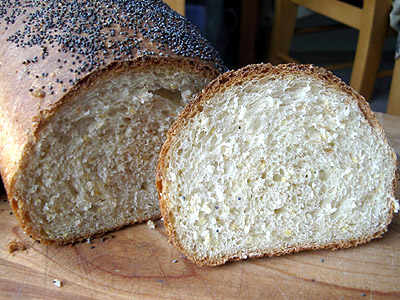
In the 15 years since I first tried Brother Juniper's Struan Bread, I've tasted a lot of great bread, but I still don't think I've tried anything that makes as great toast as Struan Bread does. Nor have I tried any bread is so universally enjoyed: everyone who tries it agrees that this bread makes killer toast.

It isn't bad for sandwiches either.

I have to admit though that this bread occasionally gives me nightmares. Click "Read More" to learn why.


The Nightmares

When I was in high school I worked in the Brother Juniper's bakery and cafe. For the most part I worked on the slicing machine, but I also helped scale and shape the loaves. Oh yes, and top the loaves with poppy seeds.

The poppy seeds. The poppy seeds are what give me nightmares.

I have no idea how many pounds of poppy seeds we went through a day, but I know we made as many as 500 loaves of Struan Bread, each one covered with hundreds of poppy seeds. Those seeds would get everywhere: in your hair, under your fingernails, in your clothes, everywhere you can imagine. Even a few places you can't imagine: I recall a number of times pulling poppy seeds out of strange places (like my book bag for school or a clean pair of pants) and wondering "How in the world did poppy seeds get in there?!?

I still avoid poppy seeds most of the time, though I'll admit they are wonderful on top of this loaf.

About Struan Bread

Struan Bread (properly pronounced "STRU-en bread", but most people I know call it "STRON bread") is a harvest bread. I believe the story is that Peter Reinhart read something about a traditional bread that Irish villagers baked into which they threw a little bit of everything they were harvesting. Struan Bread as we know it is an attempt to capture the spirit of that loaf.

Regardless of the origin, this bread is wonderful. One is certainly free to experiment with including different or additional grains. I've done so a bit and the bread has turned out quite good, though I don't think any of them have be as excellent as the combination found in the original recipe (reproduced below).

Oh yeah, I need to add that this recipe is roughly the recipe found in Peter Reinhart's Bread Baker's Apprentice. I believe he includes versions of it in most of his other baking books (Crust & Crumb and Brother Juniper's Bread Book come to mind). If you don't already have one of his bread books on your shelf you owe it to yourself to pick one up.

Struan Bread

Makes 1 large loaf or 2 small loaves

Soaker
3 tablespoons polenta
3 tablespoons rolled oats
2 tablespoons wheat bran
1/4 cup water

Dough
3 cups unbleached bread flour
3 tablespoons brown sugar
1 1/2 teaspoons salt
1 tablespoon instant yeast
3 tablespoons cooked brown rice
1 1/2 tablespoons honey
1/2 cup buttermilk
3/4 cup water

topping
1 tablespoon poppy seeds

Mix together the ingredients for the soaker. Cover and allow to soak for at least half an hour or as long as overnight.

In a larger bowl, combine the dry ingredients, then stir in wet ingredients and soaker. Add more flour or water until the dough can be formed into a ball that is tacky but not sticky. Place the ball of dough on a clean work surface and knead it for 10 to 12 minutes, then return it to the bowl. Cover the bowl with plastic wrap and allow the dough to ferment until doubled in size, approximately 90 minutes.

struan bread

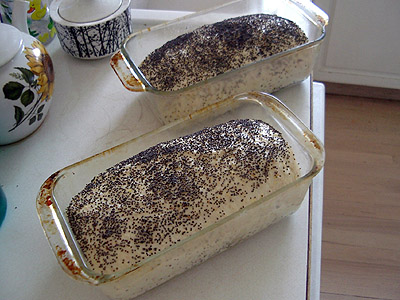
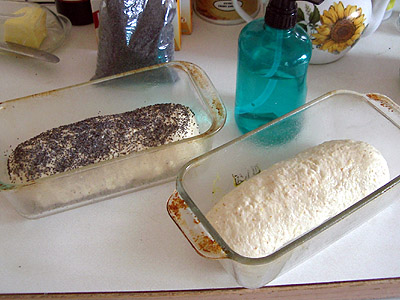
Remove the dough from the bowl, degas it gently, and split it for two loaves or shape it as is for one. Place the loaves in greased bread pans, spritz or sprinkle water on top, and sprinkle a handful of poppy seeds on top.

struan bread

Cover the pans loosely with plastic and allow the loaves to rise until doubled in size again, approximately 90 minutes.

struan bread

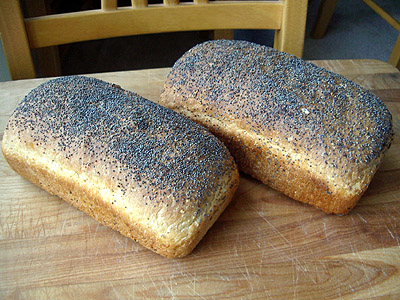
Bake these loaves at 350 for 40 to 60 minutes, until the internal temperature is around 190 degrees. When ready the loaves will be quite brown on top and will make a hollow thud when tapped on the bottom.

struan bread

struan bread

Doesn't that look good? Trust me, it is WONDERFUL! Try it, it is worth the work!

Related Recipes: Maple Oatmeal Bread

Struan Bread

txfarmer's picture
txfarmer

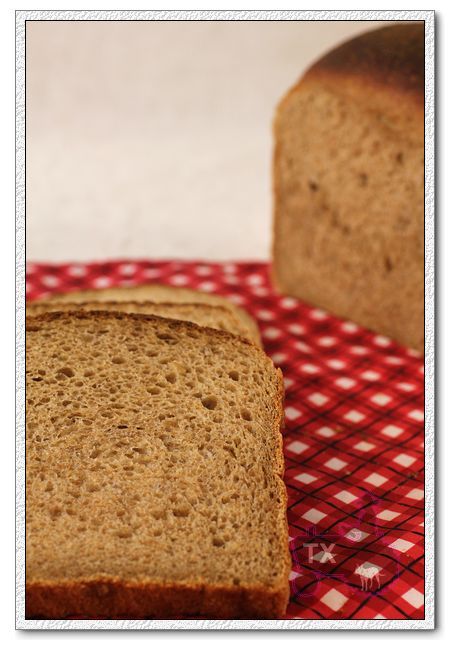
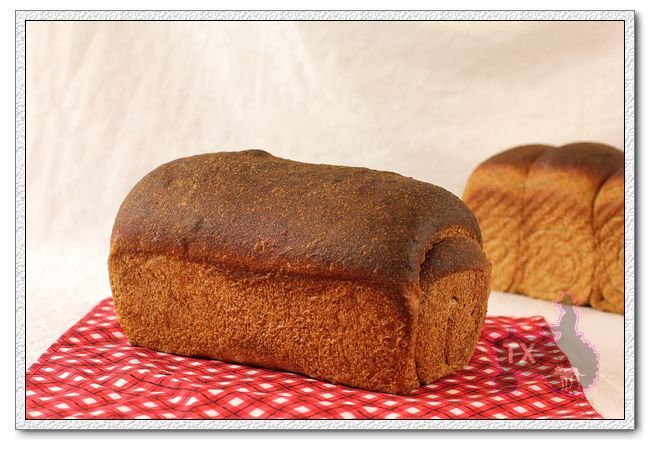
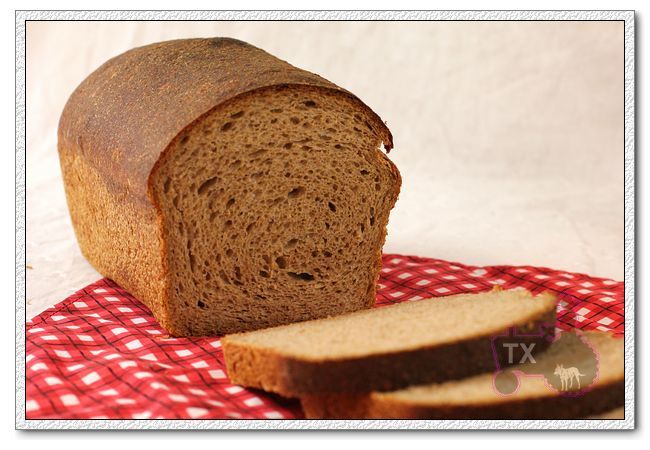
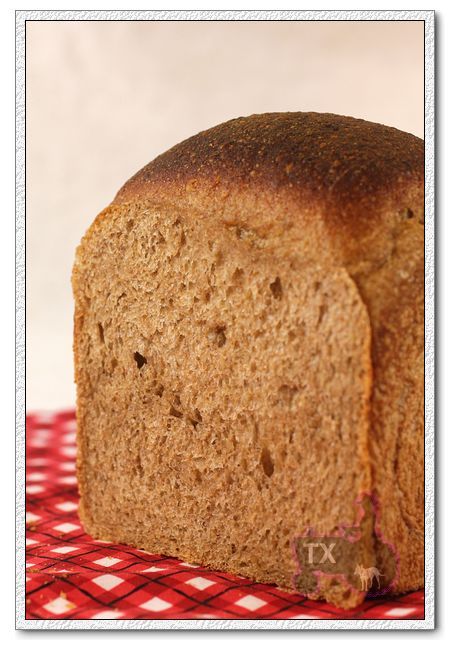
Sourdough 100% Whole Wheat Oatmeal Sandwich Bread - whole grain breads can be soft too

A while ago, I posted about how to make "shreddably soft" sourdough sandwich bread (see here). I got some questions regarding whether the same thing can be achieved with whole grain breads. Well, yes and no. The more whole grain flour there is in the dough, the lower the gluten is, so 100% whole grain breads won't be exactly AS SOFT AS the white flour one. However, with the right formula, and proper handling, 100% whole grain breads like this one CAN be very moist and soft - even shreddably so.This one is made using just sourdough starter, extra delicious when the rich flavor of ww is combined with the slight tang of sourdough.

First of all, there needs to be enough ingredients in the formula to enrich and moist the crumb. This bread is adapted from my all time favorite whole grain bread book "Laurel's Kitchen Bread Book" , in addition to oil, honey, and sourdough levain, oatmeal is soaked in boiling water the night before to add moisture to the final dough, which contributes to the soft crumb. My adaption to the formula is to chagne the dry yeast to sourdough, and increased hydration a tiny bit.

Secondly, ww doughs have lower gluten level, which means while you still have to knead it really well (to full developement), the windowpane you achieve won't be as strong as the white flour one. This also leads to a denser bread, which means for the same tin, you will need to add more dough to get the same volume. Since ww flour absorb more water, but absorb it slower, so it really helps to autolyse, and autolyse longer (40-60min) than for white doughs. It's easier to overknead a ww dough (in a mixer) too, so be very careful - for that reason, I usually finish kneading by hand.

Thirdly, it's also easy to over fermentate ww doughs. I kept the levain ratio in this dough pretty low, and made sure when it's taken out of fridge for proofing, the temperature is relatively warm(~72F). I found if it takes too long for the dough to finish proofing (once I left it by the window, where it's only 68F, it took 10hours instead of 6 hours to finish proofing), the crumb gets rough, and the taste gets unpleansantly sour.

Finally, the ww flour I used here is King Arthure WW, I have used other ww flour before, but KAF gives me the most consistent result.


Sourdough 100% Whole Wheat Oatmeal Sandwich Bread (Adapted from "Laurel's Kitchen Bread Book")

Note: 15% of the flour is in levain

Note: total hydration is 89%, higher than usual because of the oatmeal soaker

Note: total flour is 375g, fit a 8X4 loaf pan. For my Chinese small-ish pullman pan, I used 330g total flour. For KAF 13X4X4 pullman pan, I have not tried it myself, but I would suggest using about 600g of total flour. Obviously for pullman pans, you can bake with or without lid.

- levain

ww starter (100%), 16g

water, 26g

ww bread flour, 48g

1. Mix and let fermentation at room temp (73F) for 12 hours.

- soaker

rolled oats (I used old fashioned), 53g

boiling water, 240g

salt, 8g

2. Mix and cover for 12 hours.

- final dough

ww flour, 319g (I used KAF)

water, 60g

oil, 30g

honey, 38g

all soaker

all levain

3. Mix together everything, autolyse for 40-60min.Knead until the gluten is very developed. This intensive kneading s the key to a soft crumb, and proper volume. The windowpane will be thin, but NOT as strong as one would get form a white flour dough. For more info on intensive kneading, see here.


4. Bulk rise at room temp (73F) for 2 hours, the dough would have expanded noticably, but not too much. Fold, and put in fridge overnight.

5. Divid and Rest for one hour.

6. Shape into sandwich loaves, the goal here is to get rid of all air bubles in the dough, and shape them very tightly and uniformly, this way the crumb of final breads would be even and velvety, with no unsightly holes. For different ways to shape (rolling once or twice, i.e. 3 piecing etc) see here.

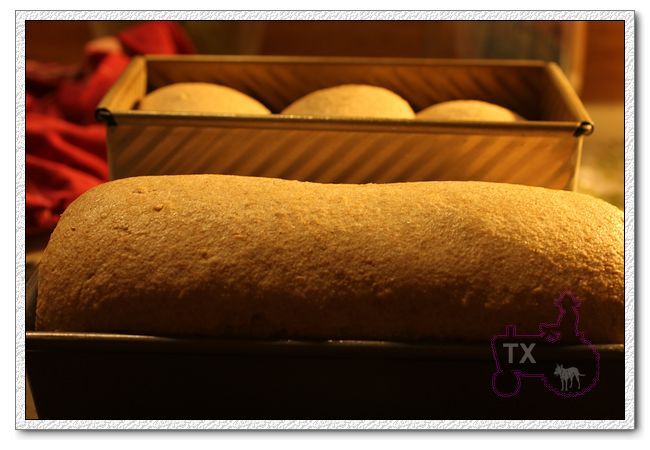
7. Proof until the dough reaches one inch higher than the tin (for 8X4 inch tin), or 80% full (for pullman pan). About 6 hours at 72F.

8. Bake at 375F for 40-45min. Brush with butter when it's warm.

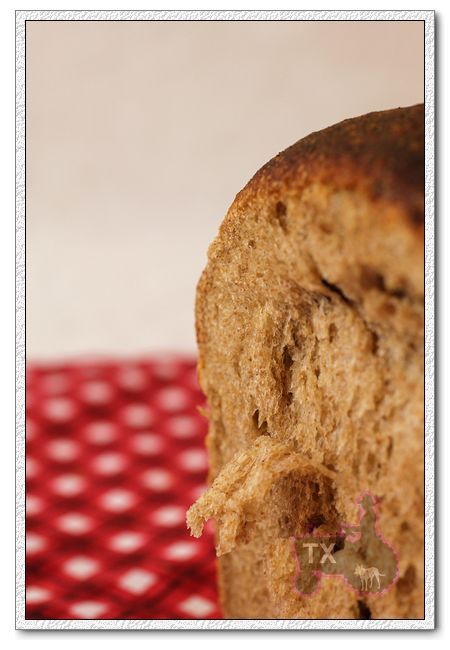
Nice and soft crumb from both the 8X4inch tin (rolling once) ...

Baked another one in a small pullman tin (rolling twice, 3 piecing, baked without lid)


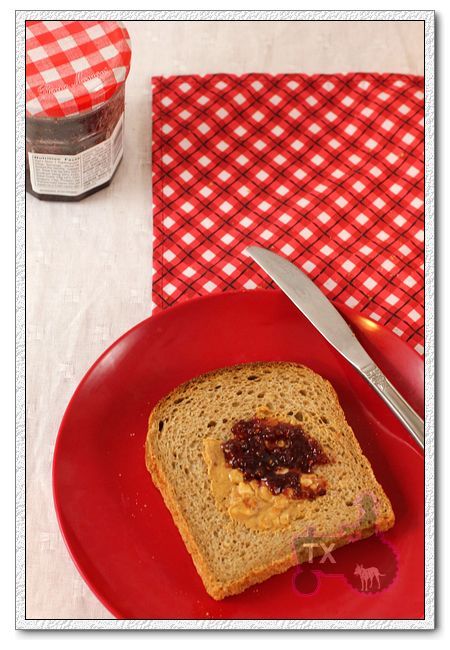
Excellent ww flavor enhanced by sourdough, without any hint of bitterness. Stays soft and moist for days.


So, yes, 100% whole wheat breads can be soft, like THIS

Sending this to Yeastspotting.

bwraith's picture
bwraith

Maintaining a 100% Hydration White Flour Starter

The following is a description of how I maintain my 100% hydration (1:1 flour:water by weight) starter. The term 100% hydration refers to the baker's percentage of water in the starter, i.e. the water in the starter is 100% of the weight of the flour in the starter.

This maintenance regime assumes that your starter is already healthy, fresh, and active. This is not what I would do to "start a starter", but rather it is the maintenance regime I follow to store, revive, and use my starter over time.

The following characteristics are for a 100% hydration starter. The characteristics, signs of health, problems, and readiness for use are different for starters maintained at different hydration levels.

Characteristics of my 100% hydration white flour starter:

  • The weight of flour and water in the starter are equal.
  • The flour is either bread or AP flour with protein content around 11-13%.
  • The water is bottled (Poland Spring).
  • Normally fed at room temperature.
  • Stored in the refrigerator when not being fed.
  • The consistency can be described as a thick, stirrable paste after it is fed.

Characteristics of a recently fed, fresh, active 100% hydration starter:

  • It rises by double in about 4-5 hours at room temperature after a feeding of 1:2:2 (starter:flour:water by weight)
  • It maintains a reasonably thick, elastic consistency after rising by double.
  • It smells very pleasant. The smell could be described as flowery, tangy, and slightly sweet.
  • No liquid layers develop on top or in the middle even hours after rising by double.
  • Hooch (an alcoholic layer of liquid on top) forms eventually when it is stored in the refrigerator for a week or more or left out for a long time at room temperature after doubling.

Characteristics of a 100% hydration starter that is not yet ready or is possibly unhealthy:

  • Unpleasant odors a few hours after feeding.
  • Separated layers of liquid form a few hours after feeding.
  • Takes longer than 4-6 hours to rise by double at room temperature after a 1:2:2 feeding (starter:flour:water by weight).
  • Develops a runny consistency a few hours after feeding.

An Important Note on the Large Effect of Temperature on Rise Times

Before launching into the information below on maintaining starters, it is worthwhile to point out one of the largest points of confusion in sourdough starter maintenance. Temperature has a big effect on the speed of reproduction and the activity of the organisms in a sourdough culture. For example my kitchen may average 76F in the summer and only 69F in the winter. At 76F, my starter may rise by double after a 1:2:2 feeding in 4.2 hours, whereas at 69F it will double in 6.4 hours. At 64F, it would take 9.4 hours. It is not a problem to follow the procedures below in a kitchen with a temperature averaging 64F; but clearly, you need to allow for rise times of roughly double in the various discussions below. So, adjust your expectations and timing accordingly, if your temperatures don't hover fairly close to 74F or so, which is the temperature assumed for the discussions below.

Assuming a healthy, active starter, here is the maintenance regime I follow to feed, store, revive, and use my starter.

Feeding

I almost always feed my starter 1:2:2 (starter:flour:water by weight) and then allow it to rise by double at room temperature, which should take about 4.5 hours when it is fully active and recently fed. Once it has risen by double, it is placed in the refrigerator. The starter can then be used directly from the refrigerator in a recipe for the next 3 days. On the first day, it is almost the same as it was right after it rose by double. On the second day, it has a little more flavor and may be ever so slightly weaker, but it is still at an excellent point to use in a recipe. After 3 days, it can still be used, but it will have stronger, more sour flavors, and it will be noticeably weaker in terms of rising power. If you have a recipe that uses a very small percentage of starter in the dough, it won't matter much if you use old starter. I've used week old starter in recipes where the flour contributed to the dough was only 5% of the total flour weight. If you are using the starter in a recipe that has a high percentage of starter, it may be better to use the starter after 2 days or less in the refrigerator.

Although it may not make much difference, I actually maintain my starter with a 1:2:2.2 feeding ratio, i.e. at a 90% hydration. With the bread flour I use (KA Bread Flour) that results in a consistency of a thick paste that is a little difficult to stir once you mix it up well. The amounts you work with don't matter much, either, other than the amount of flour being thrown out. I typically work with a total culture size of about 80 grams. My scale will measure down to 1 gram of precision. A typical 1:2:2.2 feeding would be (16g:30g:34g) of (old starter:water:flour). Below I am doing 1:10:11 feedings, which are done by feeding (4g:40g:44g) of (old starter:water:flour).

The above method works great, but see in the variation section below for an update on how I am feeding most recently to better accomodate a 12 hour feeding cycle. Also, I now use an even thicker consistency, around 80% hydration. It seems to keep longer this way on the counter or in the refrigerator.

Storage

Once the starter has been in the refrigerator for more than three days, I consider it to be in storage. It can't be used directly in a recipe, but instead will have to be revived. If I plan to store my starter for a period of time longer than 2 weeks, I usually will thicken it up, as it keeps better at a thicker consistency. However, even at 100% hydration, I've had no problems reviving my starter after 2 months. At thicker consistencies, the starter can last for many months in the refrigerator. I believe Glezer says it can last more than a year in a very stiff consistency, like 50% hydration. However, the longest I've gone with my starter is 2 months. I use glass canisters for both feeding and storage. I usually pour the ready to refrigerate starter into a fresh container, so that the sides are clean and the starter is stirred down to take up less volume. The containers have a rubber gasket that seals them from the air in the refrigerator but allows some gas to escape if pressure and gasses build up in the container.

Revival

When the starter has been in the refrigerator for more than a few days, it must be revived first before it can be used in a recipe. I do this by simply feeding it once or twice in the manner described under "Feeding". After being stored for a week or two or more, rising by double after a 1:2:2 feeding may take something like 6-8 hours at room temperature. If it only takes 6 hours, one feeding works fine. However, if it takes more than 6 hours to rise by double at room temperature, I generally feed it one more time. The second feeding usually takes much closer to 4.5 hours, which is an indication it is fully revived. On the occasion where it had been stored for 2 months, it took a third feeding at room temperature before the starter would rise by double in 4.5 hours at room temperature after a 1:2:2 feeding.

One subtle aspect of all this is the question of how long after the starter has doubled should you wait to feed it again. The starter needs to ripen enough to bring the cell counts up to their maximum level. In the period after you feed the starter, the cell counts of yeast and lactobacillus will double every couple of hours or so. Once the starter is ripe enough, the yeast and lactobacillus cell counts will stop increasing. The pH and acid levels get to a point where they attenuate the cell activity, and they can no longer multiply in numbers. So, you want to let the starter mature enough to reach that maximum cell count, and then feed it again or store it. Just based on experience, it seems like my starter does well as long as I let it sit for an hour or two beyond the point it doubles. I usually "stir it down" at the point it doubles, and then let it rise some more. However, I refrigerate it right when it doubles, since it will continue to ripen in the refrigerator. Recently, I was rushing my feeding schedule and slowed my starter down by trying to feed too early, just before it had completely doubled, in fact. The result was that it was taking longer than usual to rise. The solution was to let it sit a while longer for a few feedings in a row. It didn't take long at all for it to bounce back to doubling in 4.5 hours from a 1:2:2 feeding at room temperature.

Variations

You can feed at a lower or higher ratio than 1:2:2 in order to adjust the amount of starter you want to build to match a recipe or to better match the times when you can feed the starter conveniently. However, I never feed at a lower ratio than 1:1:1 to avoid any problems with acid building up or the starter becoming too ripe or underfed. Higher ratios can be used to lengthen out the rise time if you know you will not be back within 4-6 hours to store the starter in the refrigerator before it becomes too ripe. At warmer temperatures, the starter will rise by double much more quickly after a 1:2:2 feeding, taking something like 2.5 hours at about 85F, for example. At 85F the timing for rising by double will be very roughly half as long as at room temperature, and at 65F the timing will be very roughly twice as long (very, very roughly).

Recently, I've been experimenting with feeding ratios for a 12 hour room temperature maintenance schedule. I have found that feeding 1:10:11 (for a slightly thicker consistency I'm using 90% hydration), results in a 12 hour cycle. The starter will double 8 hours after the 1:10:11 feeding, and then I stir it down and let it ripen some more. If I feed every 12 hours on this cycle, the starter is at full strength from about 8 to 12 hours after being fed (all this at room temperature). When you feed a starter routinely at higher ratios, like 1:10:11, it will ferment for longer periods of time at higher pH. The result should be that the starter will have relatively more lactobacillus in it compared to a starter maintained with a 1:2:2 feeding ratio, since the lactobacillus thrive in a slightly higher pH environment (around 5 pH).  I can't say what the effect on flavor would be, but it makes sense that the aromatic compounds and acids produced by the lactobacillus would be more evident in the one maintained with the high feeding ratio. Although this is not at all scientific, I do think that the starter I've maintained with a 1:10:11 feeding ratio has a more intense aroma than the one fed with a 1:2:2 ratio.

Even more recently (added 12/14/2007), I've settled on feeding every 12-17 hours using a feeding of 1:4:5 (starter:water:flour by weight). Using this procedure, the starter doubles in volume in about 4.75 hours at 76F or about 7.25 hours at 69F. Even at 69F, the starter has peaked in 12 hours, so it can be fed again. At 76F, it will peak and fall after 12 hours, but it is still at full strength and will rise vigorously when fed. It seems like a good compromise that can be used year-round for a 12 hour cycle. The starter can be maintained on the counter at room temperature indefinitely using this procedure. If I know I won't be baking bread for a while, I thicken up the starter by feeding it 1:4:7 to thicken it up when I feed it next, and put it in the refrigerator immediately after feeding. Then, I take it out a day or two in advance of the next bread-making session and revive by letting it rise by double and feeding 1:4:5 every 12 hours. Although I generally go through the revival procedure, I've found that the starter is at close to full strength even after 7 days in the refrigerator when stored this way. So, it's possible to take the starter out of the refrigerator, let it rise by double, and use most of it in a bread recipe, and take a tiny portion of it to revive for a couple of feeding cycles before returning it again to the refrigerator using the 1:4:7 feeding and refrigerating immediately.

When to Refrigerate

I like flavors to be less sour and more mild in sourdough breads I make. I've found that the right flavors and lower amounts of sour flavor seem to be there when I don't let the starter become overly ripe before using it in a recipe. That's why I tend to refrigerate when the starter has just doubled. You can experiment with feeding schedules that allow the starter to become more ripe before refrigerating. It will change the balance of organisms in the culture and therefore the flavor. Also, when you use a large percentage of starter, the larger amount of accumulated byproducts of fermentation in a more ripe starter will contribute directly to the flavor and texture of the dough, in addition to the contribution made by the subsequent fermentation.

An Additional Tip on Refrigerated Starter Storage

If you are using your starter fairly frequently, like once a week, then just refrigerating it when it doubles will work very well. You can use the starter directly out of the refrigerator for a period of time if stored that way. For storage it works well, as I've had no problem reviving my starter after 2 months when stored just after doubling. However, as Mike Avery commented below, and I've verified as well, feeding a well revived and healthy starter in such a way as to thicken it to a firm consistency and then refrigerating it immediately allows the starter to keep very well for longer periods of time. It can be removed from the refrigerator and allowed to rise by double or a little more and used directly in a recipe, even after a week, I've found. If you use this procedure, the starter should still be "revived" with enough feedings, usually one or two more, at room temperature to verify that the starter is rising at full strength again before it is again stored in the refrigerator.

Converting Starters

I sometimes make a recipe starter for a whole grain bread by feeding some of my starter with spelt or whole wheat. I have never fed a starter with whole grain repeatedly to completely convert it, so I have to accept the flavor as is and a small amount of white flour in my whole grain recipes. I'm sure there are many subtle flavor differences if you feed repeatedly and fully convert a starter from being fed exclusively with white flour to being fed exclusively with a whole grain flour. I've found the feeding and rising process works about the same way with whole grains for a recipe starter, except that the rise times seem a little bit faster with the whole grain flours.

Mistakes

It's pretty hard to kill a healthy starter, but here are a few ways to possibly send yours over the edge.

  • Heat the starter to over 95F and kill the organisms - easier than you might think, for example...
    • Use actual oven heat and get up over 100F very quickly.
    • Place the starter in an oven with the light on - check carefully first - it can be much hotter than you think in there with just the oven light on and the door closed.
    • Use hot water to feed your starter
  • Put acids in the culture
    • The culture doesn't need acid if it's healthy. It generates all the acid it needs on its own.
    • Sometimes a small shot of vinegar or other acid, such as pineapple juice, may help fix a sluggish culture, but if you feed acid repeatedly, you can put too much in and kill the starter.
  • Not feeding the culture for too long at warm temperatures or repeatedly underfeeding over long periods.
    • When out of the refrigerator, the culture will be very active and must be fed to stay healthy.
    • It is especially easy to underfeed a culture when temperatures are warmer.
  • Overfeeding the culture
    • If you feed before the culture has ripened enough repeatedly you can dilute the culture and eventually kill it.
    • More likely to happen at colder temperatures, stiffer consistencies, or higher feeding ratios. Let the culture rise by double, then let it ripen for a number of hours beyond that. A dip should form in the middle when the culture is at its peak. You can let it go for a number of hours beyond the point it dips, but it should be ready to feed at the point it is dipping or collapsing on itself.
    • If you refrigerate the culture for storage, you can let it just rise by double and then refrigerate it. It will continue to ripen in the refrigerator. However, allow it to come to full ripeness at room temperature over a couple of feedings once in a while, normally done when reviving the culture for baking, to avoid any decline similar to overfeeding caused by repeatedly refrigerating when it has just doubled.

Given the above, it makes a lot of sense to keep back a small amount of old starter in the refrigerator, even if just the scrapings from the inside of the container that came out of the refrigerator, until you're sure the feeding went well. It's also not a bad idea to make a small amount of stiff starter and keep as a backup. Some dry their starter and freeze or store it for backup.

Tips on Quantities Used, Mixing Technique, and Volumes (a scale is highly recommended, but to use measuring spoons...)

As I've gained experience, the amounts of starter I work with have dropped. I haven't found any disadvantages to using smaller quantities. For example, my most recent feeding routine (mentioned in the variations section above) is 1:4:5 (starter:water:flour by weight) is done by taking a clean jar, putting it on the scale and adding 5 grams of starter and 20 grams of water. I stir vigorously with a tiny whisk to aerate and thoroughly mix the starter into the water. Then, I add 25g of flour and use a fork to thoroughly mix the flour into water, forming a fairly thick paste - not quite a dough, but very thick. I then take a small spatula and scrape down the sides, put the lid on the jar, and place the jar in a nice unobtrusive spot on my counter where hopefully no one will disturb it.

If you don't have a scale, my first advice is to get one. It makes baking much more reliable, especially when you are trying to reproduce another baker's recipe. A good digital scale costs about $25 and is very much worth the trouble. Still, the procedure in the previous paragraph is easy to do by taking 1 teaspoon of starter, adding 2 tablespoons of water, and stirring vigorously to aerate and completely mix the starter into the water. Then, add 3 tablespoons and possibly another teaspoon or so of flour, and mix thoroughly with a fork. Scrape down the sides of the jar, cover, and place on the counter.

If you are planning to store the starter for a long time in the refrigerator, it helps to carefully drop the recently fed and thickened starter into a clean jar, so that there is no film of flour or paste stuck to the sides at all. Over a longer period, it is possible for mold to grow on a residue of flour paste left on the sides of the jar.

Comments

What I describe above is just one way to do it. I'm sure there are many other ways, but I find this method convenient and robust. It's hard to kill a healthy freshly fed and risen starter that is stored in the refrigerator. It is convenient that the starter remains in a good usable state for several days. Very small amounts can be used when storing it for long periods to avoid large amounts of flour waste. I store something like 100 grams when I'm planning to store the starter for more than a few days, so my revival can be used in a recipe without wasting much if any flour. Maintaining only one starter and converting it for recipes each time is easy and convenient, although by not fully converting the starter to a whole grain flour some flavor or other characteristics may be missed with this approach.

bagels
I don't know why, but I thought making bagels was considerably more complicated than making a loaf of bread. Well, it's not: it is easy.

A recipe and a description of how easy it was to make these below.

I knew making bagels involved boiling them. Somehow this left me with the impression that it would be as complicated as deep frying is, where you have to get the oil just the right temperature or else you end up either setting your kitchen on fire or eating little wet balls of grease. Plus there is the whole pot of grease clean up factor. Yuck. Not something I've wanted to deal with.

So when I read a couple of bagel recipes and all they said was "bring a pot of water to a boil. Drop bagels in and boil for a minute or two on each side" I... well, I felt like a dolt. Why didn't I try making these sooner?

About Bagels

There are a ton of bagel recipes out there. A large percentage of them include eggs and butter. Most suggest using high protein bread flour. Some include sugar, some include honey, and others include malt syrup or powder.

For my first time baking bagels, I decided to use the recipe from the The Bread Baker's Apprentice. It appealed to me because it had an extremely simple ingredient list (only one ingredient that don't routinely keep around the house, and it was simple to find and inexpensive) and included an overnight retardation of the dough that made it perfect for baking in the morning. As regular readers will recall, preparing bread in the evening for baking first thing in the morning is an ongoing desire of mine. This recipe fit that model perfectly.

Recipe

Makes 1 dozen bagels

Sponge:
1 teaspoon instant yeast
4 cups bread flour
2 1/2 cups water

Dough:
1/2 teaspoon instant yeast
3 3/4 cups bread flour
2 3/4 teaspoons salt
2 teaspoons malt powder
OR
1 tablespoon malt syrup, honey, or brown sugar

Finishing touches:
1 tablespoon baking soda for the water
Cornmeal for dusting the pan
Toppings for the bagels such as seeds, salt, onion, or garlic

The Night Before
Stir the yeast into the flour in a large mixing bowl. Add the water and stir until all ingredients are blended. Cover with plastic wrap and allow to rise for two hours.

Remove the plastic wrap and stir the additional yeast into the sponge. Add 3 cups of the flour, the malt powder (the one unusual ingredient, which I was able to find at the local health food store), and the salt into the bowl and mix until all of the ingredients form a ball. You need to work in the additional 3/4 cups of flour to stiffen the dough, either while still mixing in the bowl or while kneading. The dough should be stiffer and drier than normal bread dough, but moist enough that all of the ingredients are well blended.

Pour the dough out of the bowl onto a clean surface and knead for 10 minutes.

Immediately after kneading, split the dough into a dozen small pieces around 4 1/2 ounces each. Roll each piece into a ball and set it aside. When you have all 12 pieces made, cover them with a damp towel and let them rest for 20 minutes.

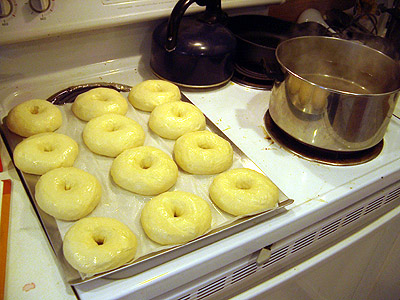
Shaping the bagel is a snap: punch your thumb through the center of each roll and then rotate the dough, working it so that the bagel is as even in width as possible.

Place the shaped bagels on an oiled sheet pan, with an inch or so of space between one another (use two pans, if you need to). If you have parchment paper, line the sheet pan with parchment and spray it lightly with oil before placing the bagels on the pan. Cover the pan with plastic (I put mine into a small plastic garbage bag) and allow the dough to rise for about 20 minutes.

The suggested method of testing whether the bagels are ready to retard is by dropping one of them into a bowl of cool water: if the bagel floats back up to the surface in under ten seconds it is ready to retard. If not, it needs to rise more. I didn't bother doing this, instead counting on it taking about 20 minutes to get my son's teeth brushed and get him to take a bath. In the quick interval between bath time and story time, I placed the pan into the refrigerator for the night.
Baking Day
making bagels
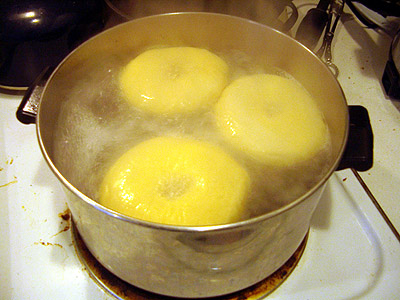
Preheat the oven to 500. Bring a large pot of water to a boil. Adding one tablespoon of baking soda to the pot to alkalize the water is suggested to replicate traditional bagel shop flavor. I went ahead and did this, though I have no idea if it made any difference.

boiling bagels
When the pot is boiling, drop a few of the bagels into the pot one at a time and let them boil for a minute. Use a large, slotted spoon or spatula to gently flip them over and boil them on the other side.

Before removing them from the pot, sprinkle corn meal onto the sheet pan. Remove them one at a time, set them back onto the sheet pan, and top them right away, while they are still slightly moist. Repeat this process until all of the bagels have been boiled and topped.

Once they have, place the sheet pan into the preheated oven and bake for 5 minutes. Reduce the heat to 450 degrees, rotate the pan, and bake for another 5 minutes until the bagels begin to brown. Remove the pan from the oven and let cool for as long as you can without succumbing to temptation.
bagels

Wrap Up

These bagels were awesome. I may try a different recipe next time, like an egg bagel recipe, but I have no complaints about this one.

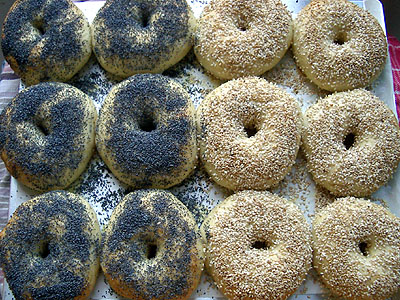
I did learn that you can put too many seeds on top of a bagel. I went particularly overboard with the poppy seeds. Next time I'll use a few less, but the bagels were still a hit with everyone.

bagels

Related Recipes:Challah Bread, English Muffins, Struan Bread.

Bagels

Pages