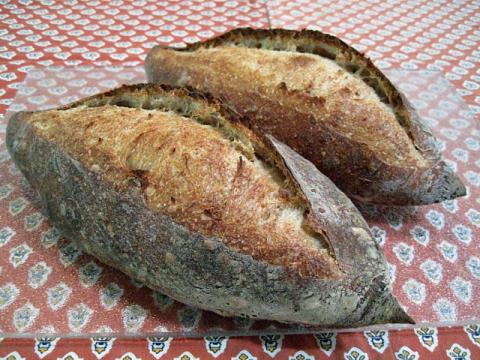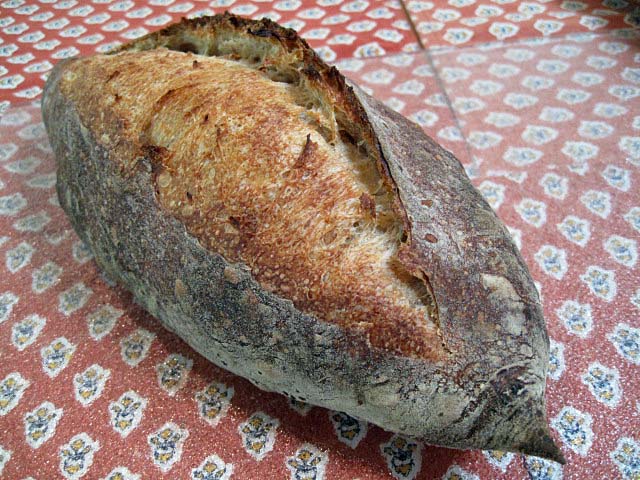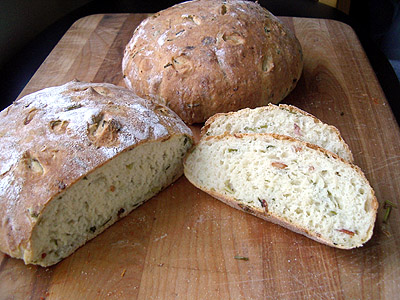
The Fresh Loaf

A Community of Amateur Bakers and Artisan Bread Enthusiasts.

Most bookmarked

pain de provence

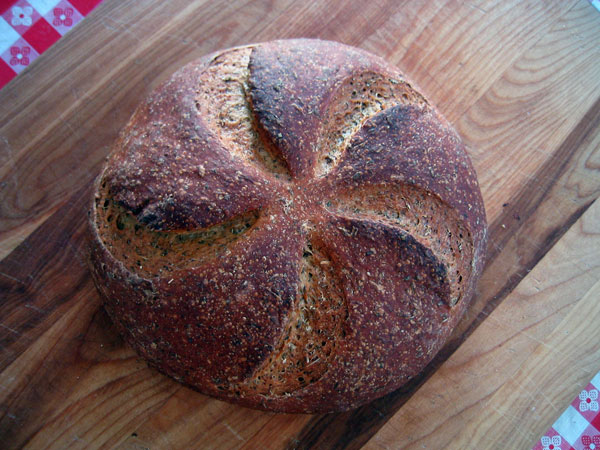
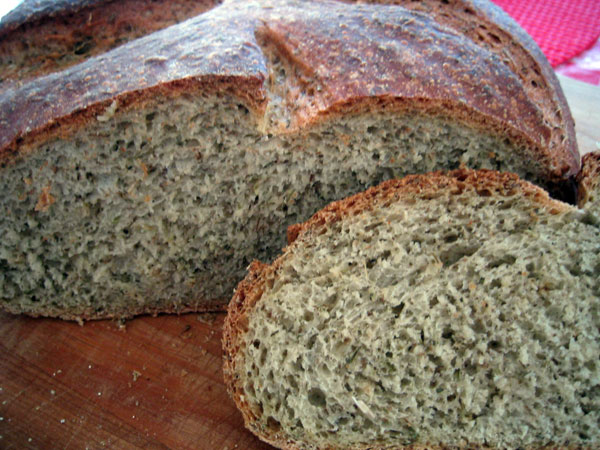
It is getting to be harvest season in my part of the world, and that means herbs are cheap and plentiful. Now is a great time to try baking an herb bread.

You can bake wonderful herb breads with whatever you have on hand: rosemary, dill, basil, thyme, mint, chives, you name it. I happen to have an excess of Herbes De Provence on hand, a mixture of savory, thyme, fennel, and lavender that you can find in most specialty grocery stores or order online.

I used my standard poolish french bread as the base for this, then added the liqueur and herbs recommended by Bernard Clayton in his recipe for Pain de Provence in his Complete Book of Breads. Feel free to experiment and use a different dough as the base.

pain de provence

Pain De Provence

Makes 1 large loaf

Poolish:
1 cup bread or all-purpose unbleached flour
1 cup water
1/2 teaspoon instant yeast

Dough:
All of the poolish
2 cups bread or all-purpose unbleached flour
1/2 cup Herbes de Provence
1 1/2 teaspoon instant yeast
1 teaspoon salt
1/4 cup liqueur such as Beauchant, Grand Marnier, or orange Curaçao
1/4-1/2 cup water, as necessary

The night before baking, make the poolish by mixing together 1 cup of flour, 1 cup of water, and 1/2 teaspoon of yeast to make a batter. Cover the container with plastic wrap and set aside for 8 to 16 hours until you are ready to make the final dough.

To make the dough, combine the remaining flour with the remaining yeast, salt, and herbs. Add the poolish, the liqueur, and 1/4 cup of the additional water. Mix the ingredients, and, if necessary, add more water or flour until the proper consistency is reached (tacky but not so sticky that the dough sticks to your hands).

Knead by hand for 10 to 15 minutes or in a mixer for 5 to 10 minutes. Place the dough in a well-greased bowl and cover the bowl with plastic wrap. Set aside to rise until doubled in size, approximately 90 minutes. Remove it from the bowl and gently degas it, then return it to the bowl, cover it, and allow it to double in size again.

Remove the dough from the bowl and shape it into a ball or long loaf. Cover the loaf with a damp towel and allow it to rise again until doubled in size, which takes between 60 and 90 more minutes.

While the loaf is in its final rise, preheat the oven and baking stone, if you are using one, to 450. I also preheat a brownie pan into which I pour a cup of hot water just after placing the loaf in the oven. This creates steam in the oven which increases the crunchiness of the crust.

Just prior to placing the loaf in the oven, score the top of it with a sharp knife or razor blade.

Place the loaf in the oven and bake for 20 minutes at 450, then rotate it 180 degrees and reduce the oven temperature to 375 and baked it another 25 minutes. The internal temperature of the loaf should be in the ball park of 200 degrees when you remove it from the oven.

Remove from the oven and allow to cool for at least a half an hour before serving, if you can resist.

pain de provence

I couldn't.

Pain de Provence

mrjeffmccarthy's picture
mrjeffmccarthy

Seed Monster Sourdough

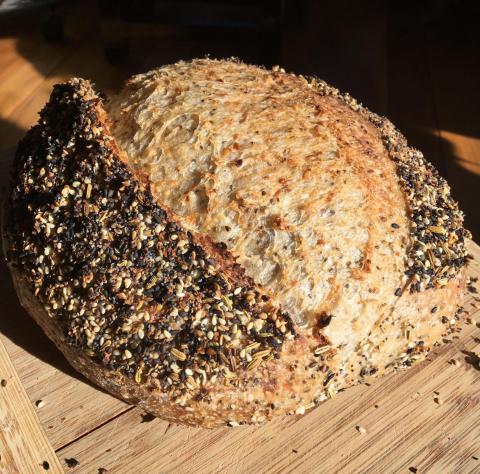
Naturally Leavened seeded sourdough with chia, golden flax, and hemp seeds. Crusted with everything topping. Nutritionally dense and packed with flavor. 

Soaker

60g hemp seed

60g ground flax seed

60g chia seed

360g h20 @210F

Dough 

580g bread flour (I used locally milled) 

144g whole wheat (I milled my own hard red winter wheat) 

22g wheat germ 

557g H20 (77%)

17g salt  (2.4%)


110g active sourdough starter (100% hydration) 


Everything Topping 

Combine the following- 

Equal parts dried onion, dried garlic, poppy seeds, sesame seeds, fennel seeds

Salt to taste (A good amount of quality flake salt or coarse kosher salt)

Fresh ground black pepper to taste

Prepare the Soaker: 

Mix the chia, hemp, and ground flax seeds together in a vessel large enough to hold them and the water. Heat the water to 210 F and pour over the seeds. Mix together and let stand 1 hr or overnight. 

Prepare the dough: 

Mix flours and germ to combine. Scale the water and pour 10-20 g of it over the scaled salt. Set salt/water aside. Add remaining water to flour and mix to create a shaggy dough. Autolyse 30 min to 1 hr. 

Add starter to dough and mix to combine. Once the starter is incorporated, add the reserved salt/water mixture. Mix to combine. 

Mix the dough to develop gluten. I use my kitchen aid stand mixer with the hook on medium speed, takes 6-7 minutes to reach full development. 

Bulk ferment for 3-6 hours depending on your temps. Stretch & fold dough every thirty minutes for first 1 1/2 hours. Add seed soaker during second set of folds. Fold once every hour or so until dough has  risen 30-50% 

Scale dough, pre-shape and shape as desired, I do two 950g loaves because that's what fits into my combo-cooker dutch ovens. Pre-shape should sit at least 20 minutes before shaping. You can either evenly sprinkle your tea-towel lined banneton with the everything topping or if you make enough roll the whole loaves in the topping before you place into the banneton. Cold proof loaves overnight in the fridge. 

Next day preheat oven with combo cooker lids (larger part) inside as hot as your oven will go. My goes 550F. Preheat at least 1 hour. When oven is ready take the dough from the fridge, turn it out into the combo cooker base which is lined with parchment or sprinkled with semolina. Slash loaf as desired. Bake covered at 550F for ten minutes. Lower oven temp to 450F and bake additional 15 minutes. Remove lid and bake until desired color is reached and internal temp of loaf is at least 205F. Takes about 5 minutes in my oven. Cool at least 2 hrs before slicing. 

Enjoy!  


pjkobulnicky's picture
pjkobulnicky

Steel-cut Oat Bread

Steel-cut Oat Bread


Makes two large loaves. 


Steps1  evening before bake day


1. Refresh 100% starter to yield +200 grams for the next morning.  Overnight room temps can be 60F.  Use 50 gm whole wheat, 50 gm AP, 100 gm H2O and 30 gm natural leaven at 100% hydration.

Steps 2 - 12 , bake day AM.  Work at 70F

2. Pour 600 gm boiling H2O over 300 gm steel cut oats in a pot or bowl with a lid or cover.  Stir the oats once and  cover. Let steep 45 minutes.

3.  (45 minutes later) Pour the steel cut oats and associated water into a large sieve  set over a bowl. Let drain about 30 minutes but capture and reserve the water. After 10 minutes use the accumulated water.

4. Into your bulk dough bowl, add the oat water and enough other water to yield 650 gm. 

5. Add to the bulk dough water, 200 gm starter and whisk to incorporate.

6. In a small bowl add 50 gm of remaining oat drainage water (add more water if necessary) to 25 gm kosher salt.  Set aside.

7. Add 1 kg AP flour to water and starter in bulk dough bowl. Mix by hand or on a work surface until all flour is moistened. Dough may be rather stiff.

8. Let dough autolyse for 30 minutes. 

9. Add salt and associated water to dough by hand. When the salt-water is incorporated, do a set of stretch and folds. Return to bowl and let rest 30 minutes. Do another set of stretch and folds. Let rest 30 minutes. 

10.  Add the oats.  Turn the dough out on to a wet work surface. Stretch the dough into a large rectangle. Incorporate the oats using letter folds. [Sprinkle 1/3 of the  steel cut oats on to the middle 1/3 of the dough. Fold an end 1/3 of the dough over the oats. Sprinkle another 1/3 of the oats over the middle and fold the final 1/3 of the dough over the middle. turn the dough and sprinkle 1/2 of the remaining oats over the middle. Fold the end over the middle, sprinkle the remaining oats over the middle and fold again.]  Give the dough a few kneads to ensure good distribution of the oats. Return the dough to the bowl. Cover and rest at 70F until doubled ( maybe 3-4 hrs.)

11. Turn the dough out on to a lightly floured surface. Divide in half. Form into balls and let rest 15 minutes.  Shape into logs (for oval loaves) or rounds (for boules) depending on whether you are baking in round or oval dutch ovens (or oval Romertopfs , as I do).  Roll smooth (non-seam)  surface of shaped doughs into rolled oats to cover the surface and place seam side up into appropriately shaped forms. Let proof about 1hr 30 minutes at 70F. 

12. At the 1 hr, 30 minute mark, place dutch ovens into oven and preheat to 500F for about 30 minutes.  Remove dutch ovens, turn loaves out onto dusted work surface, score, place into dutch ovens, cover and place in the oven.  Lower oven temp to 475F and bake 30 minutes. Remove dutch oven covers and bake for 25-30 minutes uncovered at 450F. Let cool completely.  While they can be eaten as soon as completely cooled, the loaves will hold perfectly, uncut,  1-2 days as the moisture from the steel-cut oats permeates the crumb.


PiPs's picture
PiPs

Home with bread / Fighting gravity

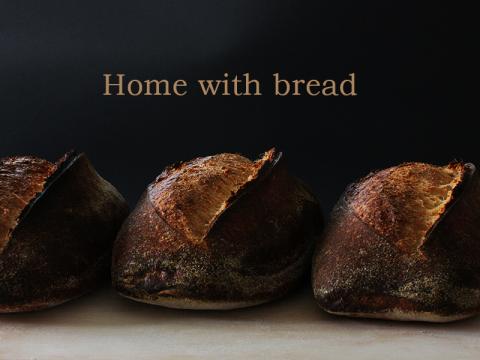
For the first time in five months I baked bread at home and it made me very nervous.

It is an entirely different proposition to make a hand full of breads in a home oven as opposed to the rhythm and flow that working in large batches provides. My attention and perfectionist streak is focused on too few ... the dough is essentially the same (though not quite as rewarding) ... but the loading of a home oven is problematic and inefficient.

... the nicest dough in the world can be ruined by a lousy oven.

So while my time with a wood-oven at Chester St has come to a close it seems that more possibilities may be ahead of me soon. Bread is my way forward ... it is my future ... but in the meantime I am thankful for some time to spend with my family and friends ... they have missed this busy baker.


There has been sadness this week though, as my good friend Daryl sadly lost his father Keith Taylor. Daryl worked with me in the kitchen at Chester St and his parents would visit us on occasions which was always a treat. Keith would stand opposite my bench and chat as I busied myself shaping or rounding loaves. He loved bread ... it was from his past ... it was a part of him.  As a young boy his father owned a bakery in Brisbane running a large scotch wood-fired oven and Keith was granted a special license at the age of 14 to deliver bread to the local community. The smell of dough and baked bread transported him back and he had many tales to tell. I will cherish those talks.

These breads are for you Keith ...

Keith Ian Taylor 23/12/1933 - 3/6/2013. R.I.P


My time at home has also allowed me to catch up on another activity ... reading. The latest book I am ploughing through is Cooked: A Natural History of Transformation by Michael PollanIn it he has a chapter called "Air" which is related to bread fermentation where he discusses the many aspects of bread and its production with the likes of Richard Bourdon, Chad Robertson and Dave Miller (my biggest bread influences).

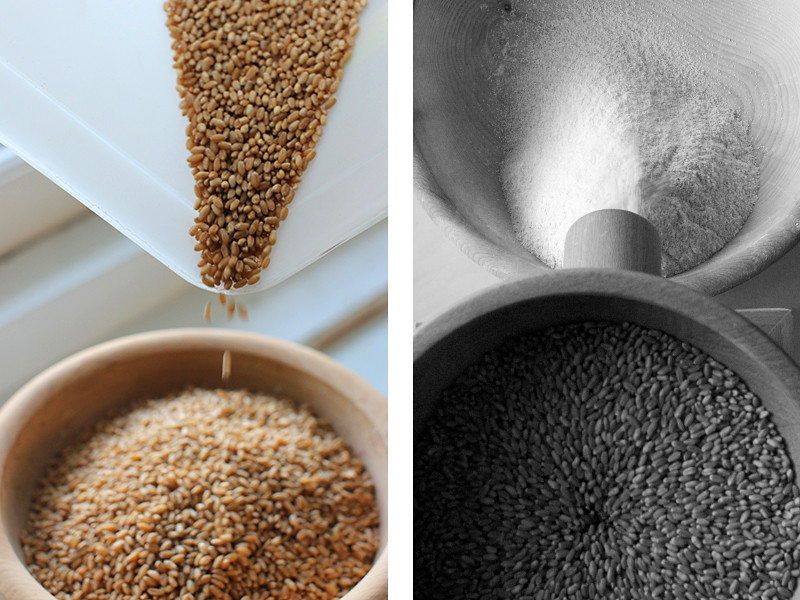
While reading this I was inspired to begin milling and fermenting freshly milled flour. I couldn't help but do it ... I had to ... It has been so long since I have made honest heart-felt bread like this. This formula is influenced by Dave Miller's method of milling and mixing on one day then shaping and baking the next.

Fresh milled wholewheat (4 x 1000g)

Formula


Final starter build – 3 hrs 27°C


Starter

93g

50%

Freshly milled organic wheat flour

186g

100%

Water

120g

65%


Final dough - 24°C


Whole wheat starter @ 65%

348g

18%

Freshly milled organic wheat flour

1899g

100%

Water

1709g

90%

Salt

44g

2.3%


Method

  1. Mix final starter and leave to ferment for 3 hours at 27°C
  2. Mill flour and allow to cool to room temperature before mixing with water (hold back 100 grams of water) and autolyse for a one hour.
  3. Add starter to autolyse then knead (French fold) 5 mins. Return the dough to a bowl and add salt and remaining 100 grams of water and squeeze through bread to incorporate (dough will separate then come back together smoothly) then knead a further 10 mins.
  4. Bulk ferment for one hour at room temperature. Stretch-and-fold after one hour and place in a fridge at 4°C for 12 hours.
  5. Remove from fridge. Divide. Preshape.
  6. Bench rest 30 mins. Shape.
  7. Final proof was for 1.5 hours at 22°C
  8. Bake in a preheated oven at 250°C for 10 mins with steam then bake for a further 40 mins. 


While shaping the bread the words of Dave Miller resounded in my head "You're always fighting gravity with wholegrains" ... I shaped them tight ... If I was going to struggle to get loft then I wanted bloom!

... and after 5 months of baking in ovens without windows I was again awestruck as I sat before my glass fronted home oven and watched oven spring unfold ... perhaps my home oven is good for something :)

Happy baking everyone ...
Phil 

This weekend I found myself staring out the window at the abundant chives growing in my garden. What could I possibly do with them, I wondered, except eat them on baked potatoes? And how many baked potatoes can I eat before I never want to see another spud again?

Then it occurred to me that I've made potato bread before, so why not add chives to potato bread? And, heck, while I'm at it, why not throw in some other tater toppings like sour cream and bacon and have a full-on Baked Potato Bread?

By the time I had second thoughts about it, all of the ingredients were mixed together. But, you know what? It turned out excellent, the perfect accompaniment to a pot of corn chowder on a rainy day.

The full recipe is below.
Freestyle Baking

As I have written about time and time again, I think the real fun in baking comes once you have mastered the basics and understand how adding different ingredients in different proportions will change the character of your loaf.

Whether I am making up a recipe or checking out a new recipe in a cookbook, my point of reference is always the loaf I introduced in lesson 1, which is 3 cups flour, 1 + a little cups of water, 2 teaspoons yeast, 2 teaspoons salt. If I read a recipe and it has more water than, say, a cup and a quarter of water per three cups of flour I know it is going to a slack dough; more fats (butter, milk): a softer loaf; contains sugars: a sweet loaf; and so on.

When thinking up this recipe, I took the lesson one recipe, substituted potatoes for about 20 percent of the flour, substituted sour cream for about 50% of the water, and added the chives and bacon and bacon fat. It sounded easy enough, though I made some adjustments as I started baking, as you'll see below.

Potato Bread

I don't believe that I've every posted about a potato bread on this site, so a little introduction is in order.

Replacing between 10 and 30 percent of your flour with mashed potatoes results in a wonderful soft, moist loaf of bread. Potato flakes or potato starch can be used, as well, but leftover mashed potatoes work great even if they have some butter or milk or salt in them.

Do be careful, though: potatoes are considerably lower in gluten than wheat, so add too much potato and you will end with a dense, moist loaf, probably too much like a baked potato for anyone's liking. I find 1/2 cup potatoes to around 3 cups flour to be plenty.

In this recipe I used a couple of small red potatoes that we had steamed up as a side dish for dinner the night before. All I did was mash them up with a fork and mix them into the flour. I left the skins on before mashing them because I find the little red flakes speckling the loaf to be quite attractive.

Bacon isn't to everyone's liking, either for dietary or religious reasons. I see no reason why this recipe wouldn't be good even if you excluded it, but if it something you are able to indulge in I suggest you do. I definitely think it improved the flavor and consistency (and appearance, for that matter) of the loaf.

Enough blabbing. On to the recipe!

Baked Potato Bread

Makes 2 small (one pound) loaves or one large loaf

1/2 cup mashed potatoes
3 to 4 cups all-purpose unbleached flour (I'll explain the ambiguity below)
3/4 cup water
1/2 cup sour cream
2 teaspoons instant yeast
1 teaspoon salt
1/4 cup cooked bacon
1/2 cup chopped fresh chives

To begin, chop up two or three slices of bacon and fry them up. Remove them from the heat.

Mix the mashed potatoes, yeast, salt, and 2 cups of the flour together in a large mixing bowl or the bowl of an electric mixer. If you have active dry yeast and want to substitute, read this. Add the sour cream, water, chives, and bacon and mix together until all ingredients are combined. I also mixed in the bacon fat, which there was about a tablespoon of in the pan, because it improves the flavor of the loaf.

At this point you'll have a very wet, sticky mess, probably more of a batter than a dough. Add additional flour a handful (1/8 cup) at a time and mix or knead it in.

(I lost track of exactly how much extra flour I added, but it seems like it was around 9 or 10 hands full. I added 4 or 5 hands full and mixed them in while the dough was still in the bowl, then I poured the dough out onto a well-floured cutting board and added more, kneading it with my hands which I repeatedly dipped in flour to keep the dough from sticking to them. After 5 or 10 minutes of this I ended up with something that was still quite sticky, but was definitely in the realm of a dough and not a batter: it could be formed into a ball and generally held its shape.)

Once you have combined the ingredients well and gotten the balance of flour and water to a level that seems acceptable, return the dough to a well-oiled bowl. Cover the bowl with plastic wrap and allow the dough to rise for 90 minutes at room temperature or until it has doubled in size.

Remove the dough from the bowl and shape the loaf or loaves. Notice how moist and gummy my dough was when I cut it to shape it into two loaves:
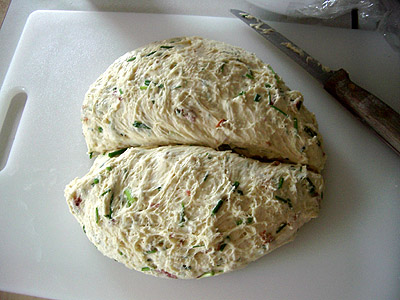
One probably could add more flour and make an acceptable loaf of bread with a drier dough, but I've been finding that I get better results the wetter I am able to leave it. But this really is an art, not a science, so use your own best judgement.

At this point you need to shape the loaves, cover them loosely and let them rise until they double in size again, about 45 minutes. You could put them in greased baking pans and let them rise and bake them in those. I wanted round loaves, so I put them in a couple of couche lined baskets:
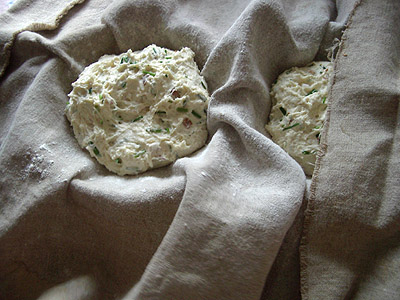
Professional bakers use these kinds of baskets, which are very nice but completely out of my price range. I found two small baskets at Goodwill for 49 cents each and have found that they help keep the shape of my rounds very well.

The baking couche I got from a neighbor who works in bakery. It works very well, but you can fake the same thing with a well floured kitchen towel (the linen kind, not a fuzzy one).

As you can see in the picture above, I placed the baskets on a table, the couche over the baskets, and the dough in the floured couche in the baskets. I wrapped the edges of the couche around the balls of dough and let them rise. When they had risen I simply unwrapped the loaves and shook them out of the couche onto my peel (which I dust with semolina flour) and threw them into the oven.

While the loaves are rising again, preheat the oven to 425. If you have a baking stone, be sure to put it in early to heat.

When they have doubled in size (as I said before, about 45 minutes after shaping), put the loaves in the oven to bake. I baked them at 425 for 5 minutes and then reduce the temperature to 350 and baked them another half an hour. The loaves are done when the internal temperature reaches the 185 to 195 degree range (as read with an instant-read thermometer) or when they are nice and brown on the outside and sound hollow when tapped on the bottom. For me this took about 35 minutes.
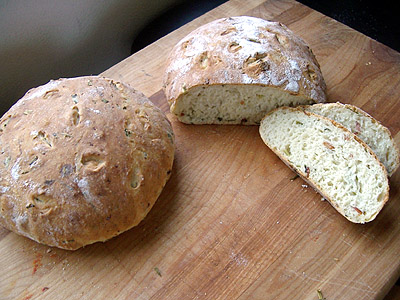
And there we have it. The bread was wonderful while still warm with a pot of soup, but I actually think I preferred it the next day cold. With the bacon fat and sour cream, there was plenty of fat in the bread so it didn't need to be buttered; just plain it was rich and moist enough.
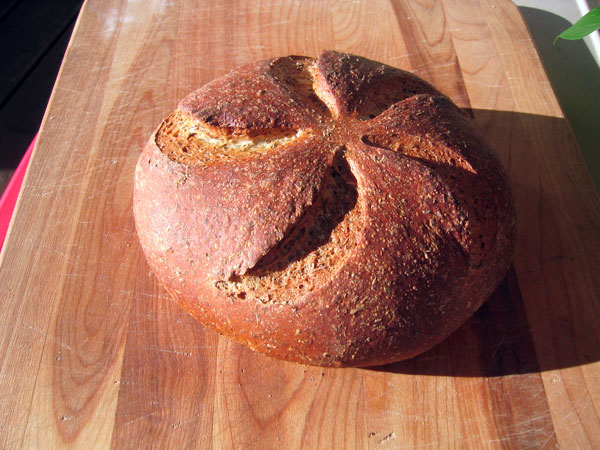
Baked Potato Bread

Floydm's picture
Floydm

Lazy Man's Brioche

In The Bread Baker's Apprentice Peter Reinhart offers up three variations of brioche: Poor Man's Brioche, Middle-Class Brioche, and Rich Man's Brioche, each version getting more full of eggs and butter than the previous.

This weekend I came up with a brioche recipe that I'm extremely happy with. I dubbed it the "Lazy Man's Brioche."

This recipe is based on the brioche recipe from Ciril Hitz's Baking Artisan Bread. I started with Hitz's recipe but then rounded every number and cut every corner I could. The result is perhaps not as authentic as Hitz's recipe but still delicious.

There are two pieces of gear required to keep this recipe lazy: a mixer and a scale. I'm sure you could make the same thing using measuring cups and kneading by hand but that would take work. Using brioche pans or adding little tetes on top of each bun would also be more authentic and attractive, but the goal here was not to be beautiful or complex, just come up with something simple, repeatable, and delicious.

Lazy Man's Brioche


My baking notes

Makes 12 buns
 
Dough
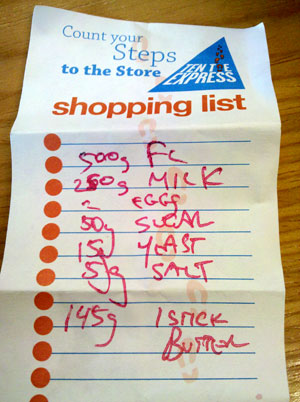
500g bread flour
250g milk
2 eggs
50g sugar
15g instant yeast
5g salt
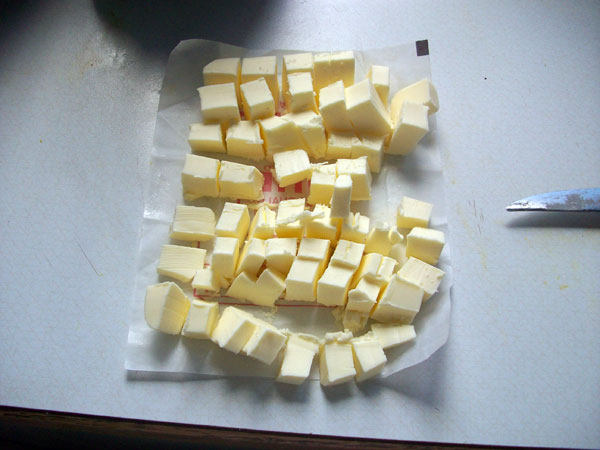
1 stick (113g) unsalted butter, diced
 
Filling
1/2 cup chocolate chips (optional)
 
Egg Wash
1 egg
a pinch of salt
a teaspoon water
 

Add all of the ingredients to your mixer and mix it until the dough becomes silky. This takes a long time, somewhere in the 10-20 minute range (I think I did around 15). If the dough sticks to the sides or the paddle too much, take breaks and scrape the dough back down into the bowl.

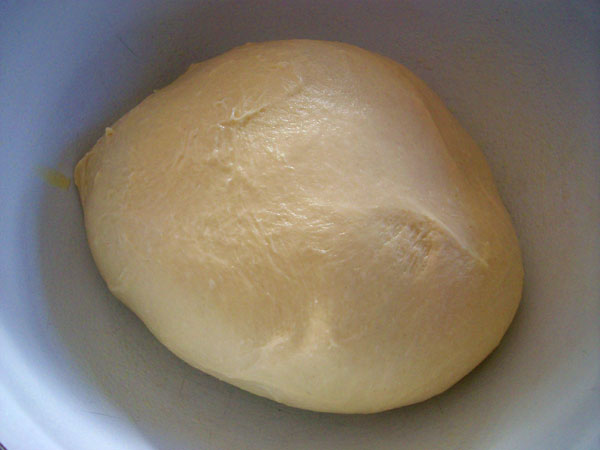
When it is well mixed, shape the dough into a ball and place in a greased bowl. Cover and let rise until doubled in size, approximately 1 hour. Degas the dough and allow it to rise a second time, for another hour or so.

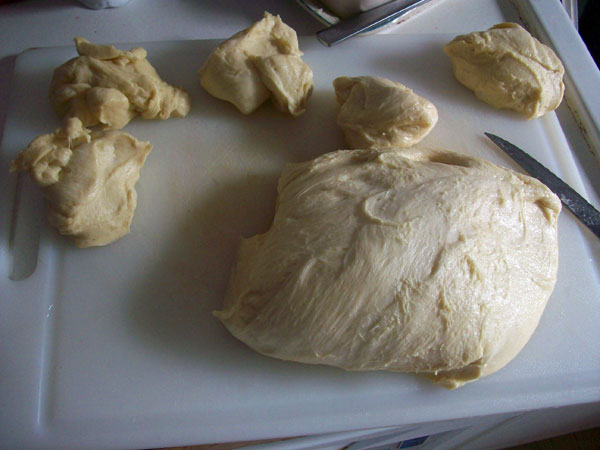
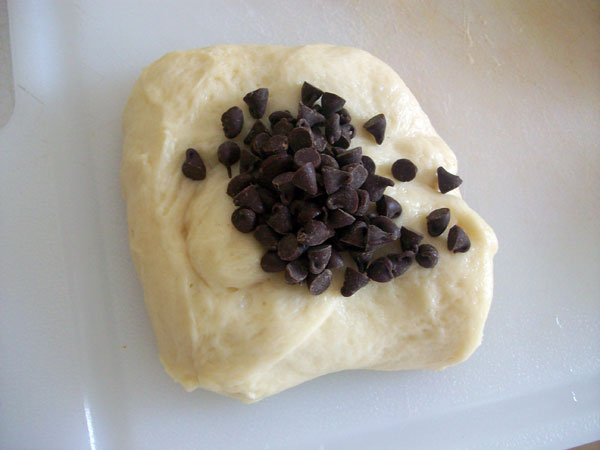
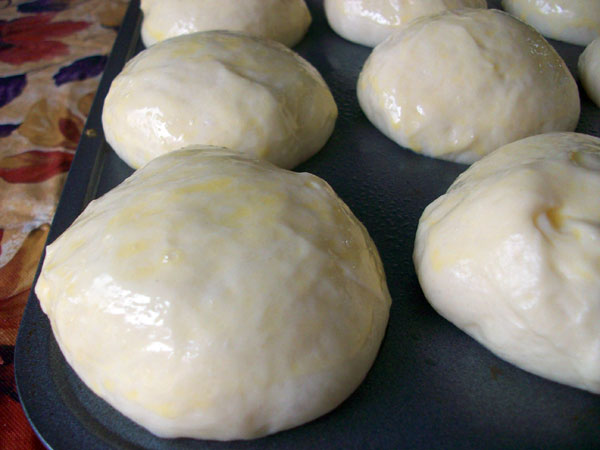
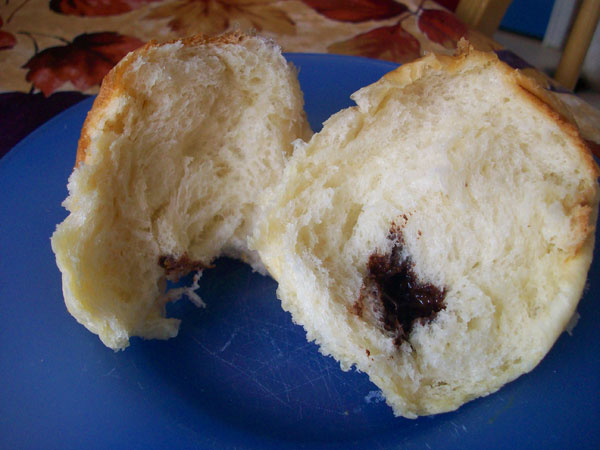
Cut the dough into 12 pieces (I used the scale and weighed them out at 3 ounces each). Shape the dough into balls. If you want to fill them, do so here by placing the chocolate chips on them before pinching them closed.

(Those are mini-chocolate chips by the way... the entire bun is only two or three inches across.)

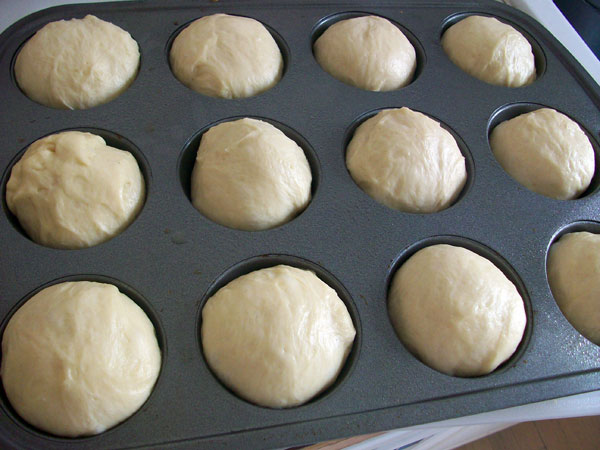
Place the dough balls seam side down in brioche pans or muffin tins. Cover loosely with plastic and allow to rise until doubled in size and well above the pan, approximately 45 minutes.

While they are rising, make the egg wash and preheat the oven to 365.

Brush the brioche gently with egg wash before putting the pans near the middle of the preheated oven. I placed mine on the third shelf down out of four.

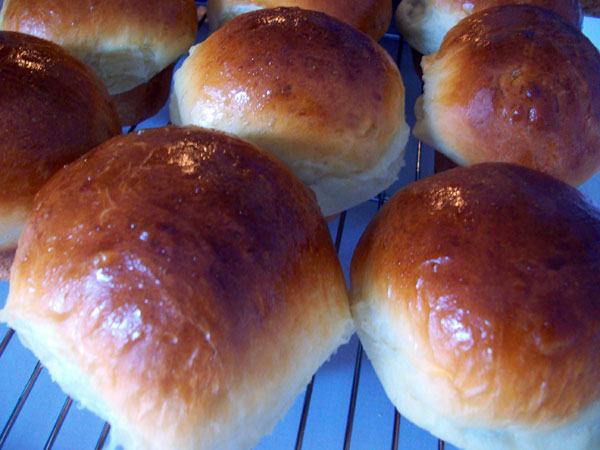
Bake the brioche for 10 minutes then rotate the pan. Bake them another 10 minutes or until they appear to be done.

If your pans were greased well, you should be able to shake the brioche out of the pan while they are still hot. Be careful if the eggwash spilled onto the pans though, because the cooked egg will "glue" the brioche into the pans. I had to gently break through the eggwash with a knife before I could get a few of my buns out of the pans.

Enjoy!

Danni3ll3's picture
Danni3ll3

Honeyed Spelt and Oat

This recipe is from Sourdough: Recipes for Rustic Fermented Breads, Sweets, Savories, and More from
Sarah Owens. She won the James Beard Award for 2016 in baking books. I don't own the book but I found a copy of the recipe online.

I changed the method a bit to allow for an autolyse with just flour but the dough was really stiff and I probably should have added the oat soaker in at the same time. Anyhow, this was my method which differs a bit from the book.

1. Make levain with 40 g water, 30 g starter and 40 grams spelt. Let sit overnight.

2. Make soaker with 140 g rolled oats (old fashioned) and 275 g boiling water. Let that sit overnight too.

3. Next morning, autolyse 245 g of warm water and 45 g honey with 445 g flour and 105 g spelt. I let it sit for one hour.

4. I mixed in the 110 g of levain, 415 g of soaker and 16 g of salt. I added 25 g of water here to adjust the feel of the dough. I did slaps and folds to integrate the oats right through the dough.

5. I started the bulk fermentation with folds every half hour and this went on and on and on. The dough just didn't seem to  want to rise at all. 7 and a half hours later, the dough had risen about 30% and was finally ready to be divided and pre-shaped.

6. I pre-shaped using the letter fold method and let sit for a half hour before doing the final shape. I shaped it again using the letter fold method and put it into floured baskets.

7. I let it proof on the counter for a half hour (next time I am doing the full hour) and it went into the fridge for an overnight proof.

8. Late the next morning, I baked it in dutch ovens at 500F for 20 minutes, and took off the lid. I realized 10 minutes later that I had not dropped the temp at the 20 minute mark and had taken off the lid instead. So I dropped the temp to 430F and let it bake for another 20 minutes. Once again, I wasn't paying close attention but it worked out anyhow.

The results were a delicious bread with a super fluffy crumb. The one loaf disappeared in one day. Mind you, the loaves were tiny and next time, I am doubling the recipe and not forgetting to autolyse the oat soaker along with the flour.

Crumb shot:

With butter and honey:

dabrownman's picture
dabrownman

YW Primer

Teketeke Bread

teketeke got me going with my YW a couple of years ago and I have helped quite a few others, as she helped me, to get theirs going. Here is what I basically sent them but fixing all the spelling and grammar errors I could find.  Hope this will help all who want give YW a shot – it is so worth having another child in the kitchen.

 teketeke's post on YW is a good one if you scroll down far enough when the pictures start to appear again - way down. She is a great YW baker from Japan and I bugged the heck out of her to get my YW going.  Worked first time too - and she is a master and I named my first original YW concoction after her as thanks!

The idea is to get a slightly acidic base to start from, be a little on the warm side temperature wise, don't use any sugar - use honey instead, use bottled water, open the lid often, right before shaking and get some fresh air in the jar by fanning it with a piece of paper, shake the container often and be patient - like starting any other wild yeast

The fruit you start with matters. I started mine with orange and tangelos from the back yard because they are acidic, I left the skins on the pieces for one day to inoculate the water with the wild yeast on the skins and then replaced the fruit with skinned oranges and tangelos because the skin can be a little toxic to the yeast. - but I would do it differently today.


Teketeke's Japanese White Sandwich Bread

You want to make sure the fruit you use is organic thus no fungicides and herbicides on the skins and it has to have the skin on. What you want to do is get an organic apple and some organic raisins. People have their own opinions as to which ones work best but using both is really the cat's meow. Don't wash the apple or the raisins since the yeast you want is on the skin. I use a plastic 14 oz re-purposed peanut butter jar for my YW container but anything with a screw top lid will work.

Take 20 raisins and mash half of them. Take half an apple, leave the skin on, take the stem and base off and core the seeds out. Chop the 1/2 apple into 1/4 inch cubes. Mash half the apple pieces. Save the other half of apple by rubbing the cut side with lemon, lime or orange juice and refrigerate it.

Place all the 1/2 apple and raisins in the jar including the mashed portions. Add 1 T of orange juice. Fill jar 3/4 of the way up with bottled mineral or reverse osmosis water that is absolutely chlorine free. If you are using other tap water then pour it into an uncovered container 24 hours ahead of time so the chlorine can dissipate.  Do not add any honey at this point.

Keep the jar warm around 78 -80 F. I used a heating pad with kitchen towels folded on top till I got the right temperature and then covered the whole shebang with another towel to keep the heat in.

For the first 2 days, every couple of hours, open the jar fan some new air in it, close the lid shake the jar vigorously, loosen the lid a tad to let CO2 out and let it sit on the heating pad that way till you do it all again.

Yeasr Water Babka

On the 3rd day add 1 tsp of honey.  Keep up the fanning, shaking, loosening the lid till day 4. By that time, after you shake, the mix should bubble, easily be visible and remain for awhile. The jar lid should hiss as compresses CO2 escapes when you open the lid after shaking it.

After a week or so you should have some nice YW to bake with. To know if it is ready just make a levain with 50 g or the yeast water and 50 g of flour and see if can double in volume in 6-12 hours.

YW/SD multigrain bagels

Each week after the beginning week, strain everything out of the jar. Put 3 T of old YW back in the jar with a few pieces of old fruit say 4 raisins and 4 pieces of apple. Add more fresh raisins and half a diced apple you put in the fridge (you don't have to mash them up anymore).

Add 1 T of honey and fill 3/4th full with water. Leave on the counter. The next day it will be ready to build a levain with again. After it settles itself in, after a couple or three weeks, you can then refrigerate it 4 hours after feeding it and it will be ready and peaked to make bread after 2-3 days in the fridge. I now feed mine every 3 weeks and keep it in the fridge all the time

YW/ SD combo levain multi-grain with scald and seeds - YW will open the crumb of any usually heavy crumb.

You can replace any SD levain with YW.  If the recipe calls for 220 g of levain just use 110 g of YW and 110 of flour to make it. When it doubles it is ready to go about 6 hours or so. If you bake a lot like Janet does, or a little like me, when you use the YW just replace it with new bottled water and a little honey shake it up and leave it on the counter for a couple of hours before refrigerating.

 Happy YW baking.

YW/ SD Durum Ricotta with pistachio pumpkin and millet seeds.


wassisname's picture
wassisname

Polenta Pepita Sourdough

I haven't made this bread in a long time but it is a real treat, and gets devoured as treats tend to do.  The precise formula doesn’t really matter so much with this bread – any light sourdough will do - it is the addition of polenta and pepitas (aka, pumpkin seeds, “polenta pepita” is just more fun to say) that makes the magic.  The combination is featured in Tartine Bread with the addition of rosemary and corn oil but I’ve never tried it that way.  I like the versatility of this herbless version.  A little cranberry sauce on a toasted slice really sings.

 Marcus


Day One-

Build starter and ferment for 8-10 hours.

Prep the polenta – mix with boiling water and leave to soak 8-10 hours. Use plenty of water, the excess will be discarded before the polenta is added to the dough.

Day Two-

Lightly toast the pepitas if desired.  Allow time to cool before adding them to the dough.

Drain the polenta.

Mix flour, water and polenta.  Autolyse 20 minutes.

Add the starter and salt.  Knead about 2 minutes to incorporate

Stretch and fold about every 15 minutes until the gluten is developed.  Add the pepitas on the second or third round.  I think I did five rounds of S&F, but this varies depending on the flour so I go by the feel of the dough rather than a set number.

Total bulk ferment was about 4 hours at 76⁰F.  Final ferment was about 2 hours.

Bake at 450⁰F for 45 minutes total.  Steam the first 15 minutes.


San Joaquin Sourdough

dmsnyder's picture
dmsnyder

Description

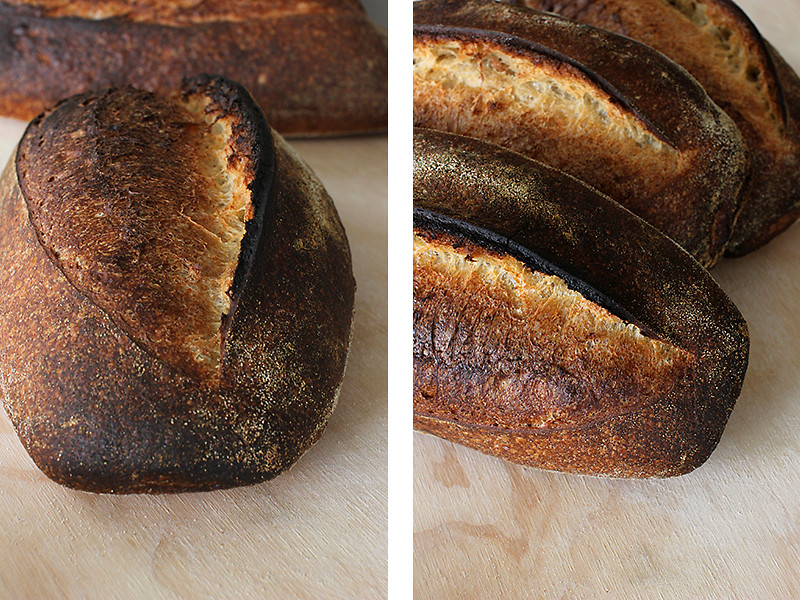
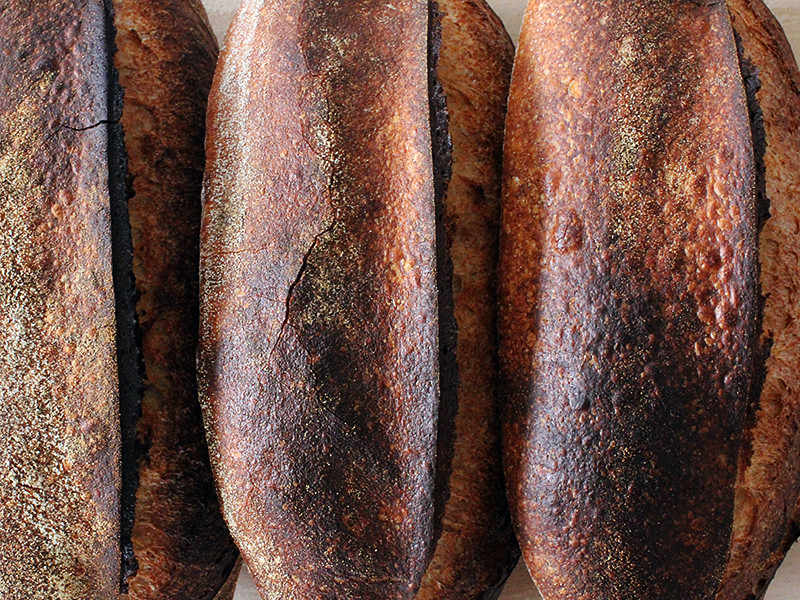
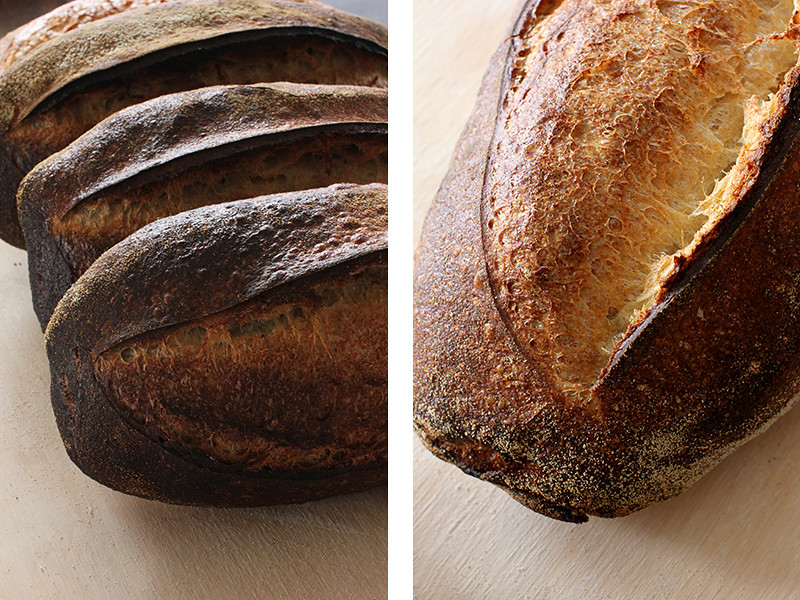
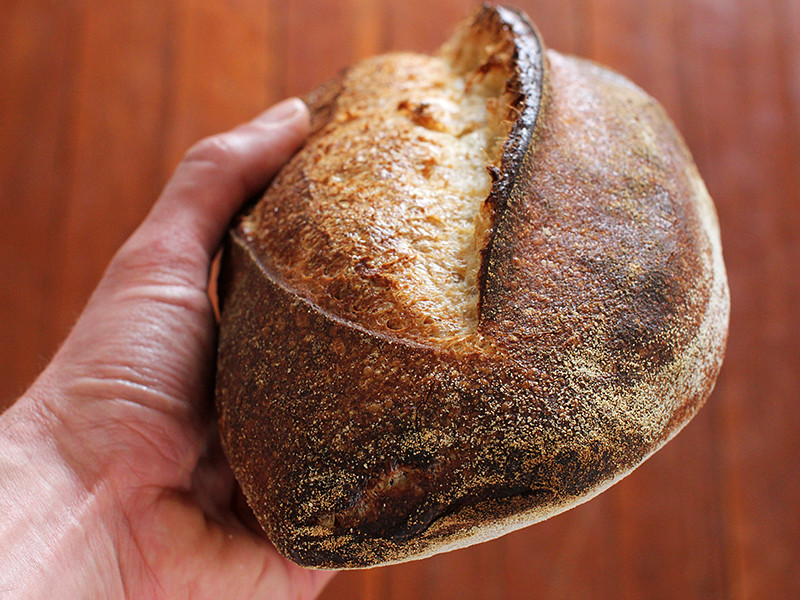
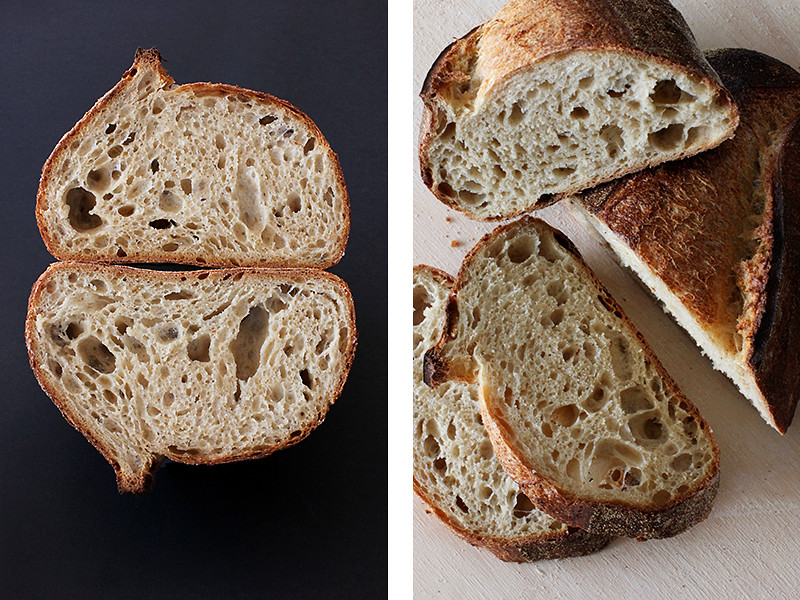
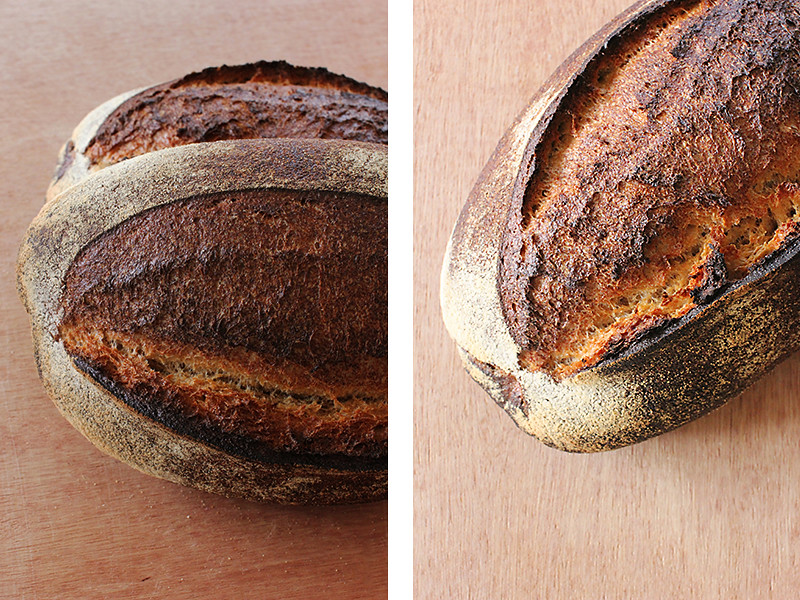
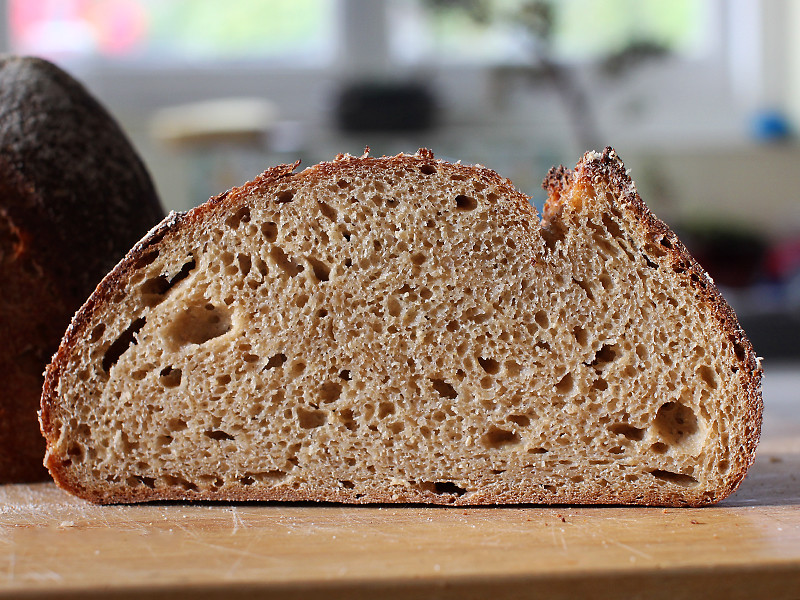
While I enjoy a variety of breads, the San Joaquin Sourdough remains my “go to” bread. It's easy to fit into a busy schedule. It uses few ingredients. It always tastes delicious. It's wonderful freshly baked but also makes great toast, French toast, garlic bread and croutons for salads or onion soup. It is almost as good after being frozen as fresh. What's not to like?

I first developed this formula about 3 years ago. Since then, I've tweaked the formula and methods in many ways. I know many TFL members have made this bread and enjoyed it. So, I thought an update on my current recipe might be of interest.

To summarize the changes I've made in the past 6 months:

  1. I substituted 25 g of whole wheat flour for an equal amount of the rye flour in the original formula. The difference in flavor is subtle, but I like it better.

  2. I adopted the oven steaming method for home ovens we were taught in the SFBI Artisan I and II workshops. 

Summary

Yield
556 g Bâtards
SourceMy own recipe.
Prep time6 hours
Cooking time30 minutes
Total time6 hours, 30 minutes

Ingredients

450 g
all-purpose unbleached flour
25 g
Medium rye flour
360 g
water
10 g
salt
100 g
Liquid levain (100% hydration)

Instructions

Procedures

Mixing

In a large bowl, mix the active starter with the water to dissolve it. Add the flours and stir to form a shaggy mass. Cover tightly and let rest (autolyse) for 20-60 minutes.

Sprinkle the salt over the dough. Using a plastic scraper or silicon spatula, stretch and fold the dough 30 times, rotating the bowl 1/5 turn between each stroke. Cover tightly. Repeat this stretch and fold procedure 3 times more at 30 minute intervals.

Fermentation

After the last series of stretches and folds, scape the dough into a lightly oiled 2 quart/2 liter container and cover tightly. (I use a 2 quart glass measuring pitcher with a tightly fitting plastic lid manufactured by Anchor Glass.) Ferment at room temperature for 90 minutes with a stretch and fold after 45 and 90 minutes, then return the dough to the container and place it in the refrigerator and leave it there for 21 hours. 

Dividing and Shaping

Take the dough out of the refrigerator and scrape it gently onto a lightly floured work surface. Gently pat it into a rectangle. Divide the dough into two equal pieces.

To pre-shape for a bâtard, I now form a ball rather than a log. Place each piece of dough smooth side down. Pat into a rough circle, degassing the dough gently in the process. Bring the far edge to the middle and seal the seam. Then go around the dough, bringing about 1/5 of the dough to the middle and sealing it. Repeat until you have brought the entire circumference of the piece to the middle. Turn the piece over, and shape as a boule. Turn each ball seam side up onto a lightly floured part of your board.

Cover the dough with plastic wrap and/or a kitchen towel and let it rest for about 60 minutes. (The time will depend on ambient temperature and how active your starter is. The dough should have risen slightly, but not much.)

To shape a bâtard, I now favor the method portrayed in the King Arthur Flour instructional video. I encourage you to watch the video, but here is a verbal description of the method:

  1. For each piece of dough, place it in front of you on an un-floured board.

  2. Hold down the near side and stretch the far side of the piece into a rough rectangle about 8 inches front to back.

  3. Now, fold the far end two thirds of the way to the near end and seal the seam with the heel of your hand.

  4. Take each of the far corners of the piece and fold them to the middle of the near side of your first fold. Seal the seams.

  5. Now, the far end of the dough piece should be roughly triangular with the apex pointing away from you. Grasp the apex of the triangle and bring it all the way to the near edge of the dough piece. Seal the resulting seam along the entire width of the loaf.

  6. Turn the loaf seam side up and pinch the seam closed, if there are any gaps.

  7. Turn the loaf seam side down. Then, with the palms of both hands resting softly on the loaf, roll it back and forth to shape a bâtard. Start with both hands in the middle of the loaf and move them outward as you roll the loaf, slightly increasing the pressure as you move outward, so the bâtard ends up with the middle highest and the ends pointed .

Preheating the oven

One hour before baking, place a baking stone on the middle rack and put your steaming apparatus of choice in place. (I currently use a 7 inch cast iron skillet filled with lava rocks.) Heat the oven to 500F.

Proofing

After shaping the loaves, transfer them to a linen couche, seam side up. Cover the loaves with a fold of the linen. Proof until the loaves have expanded to about 1-1/2 times their original size. (30-45 minutes) Test readiness for baking using “the poke test.” Do not over-proof, if you want good oven-spring and bloom!

Baking

Pre-steam the oven, if desired.

Transfer the loaves to a peel. (Remember you proofed them seam side up. If using a transfer peel, turn the loaves over on the couch before rolling them onto the transfer peel. That way, the loaves will be seam side down on the peel.) Score the loaves. (For a bâtard, hold the blade at about a 30 degree angle to the surface of the loaf. Make one swift end-to-end cut, about 1/2 inch deep.)

Transfer the loaves to the baking stone. Steam the oven. (I place a perforated pie tin with about 12 ice cubes in it on top of the pre-heated lava rocks.) Turn the oven down to 460F.

After 12-15 minutes, remove your steaming apparatus from the oven. Rotate the loaf 180 degrees, if it is browning unevenly. Close the oven door. (If you have a convection oven, switch to convection bake, and turn the temperature down to 435ºF.)

Bake for another 12-15 minutes, then remove the loaf and place on a cooling rack. Check for doneness. (Nice crust color. Internal temperature of at least 205F. Hollow sound when you thump the bottom of the loaf.) If necessary, return to loaf to the oven to bake longer.

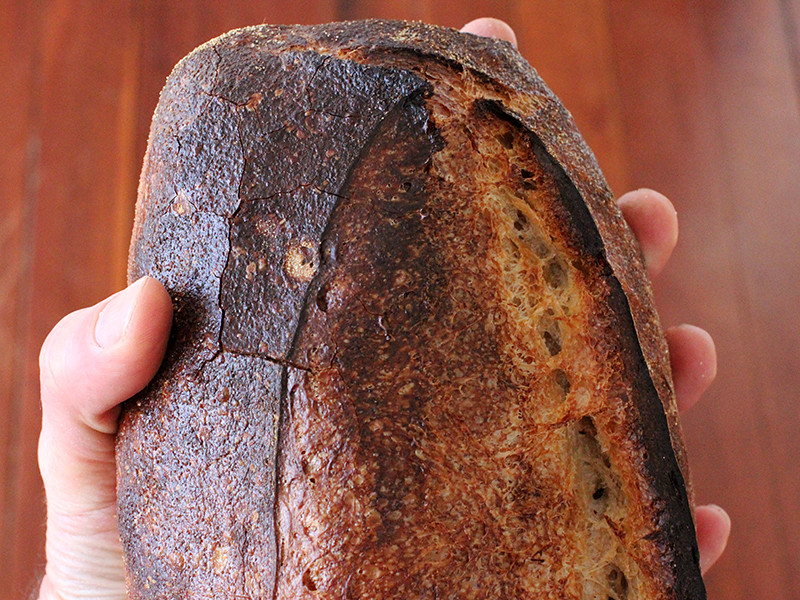
When the loaves are done, turn off the oven but leave the loaves on the baking stone with the oven door ajar for another 7 minutes to dry the crust.

Cooling

Cool on a rack for two hours before slicing.

Notes

Pages