The Fresh Loaf

A Community of Amateur Bakers and Artisan Bread Enthusiasts.

Most bookmarked

dmsnyder's picture
dmsnyder

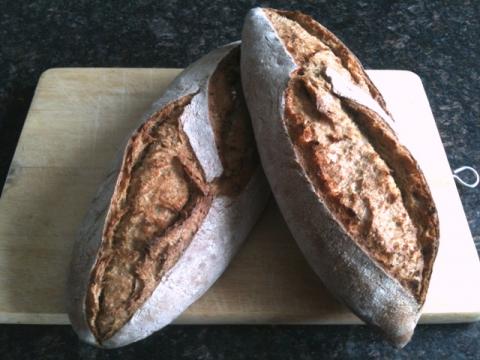
San Joaquin Sourdough: another variation produces the best flavor yet.


My San Francisco Sourdough starter from sourdo.com is now two weeks old. I made another pair of my San Joaquin Sourdough breads with it yesterday. I modified my formula somewhat. I used a 60% hydration starter fed with AP flour only. I increased the amount of starter by 50%. I used KAF AP flour for the dough. I used no added instant yeast.


Ingredients

Weight

Baker's Percentage

Firm starter

150 gms

30.00%

KAF AP flour

450 gms

90.00%

BRM Dark Rye flour

50 gms

10.00%

Water

360 gms

72.00%

Salt

10 gms

2.00%


Procedure

  1. Mix the firm starter (1:3:5 – Starter:Water:Flour). Let it ferment at room temperature for 12 hours.

  2. Pour the water into a large mixing bowl. Add the starter and dissolve it in the water.

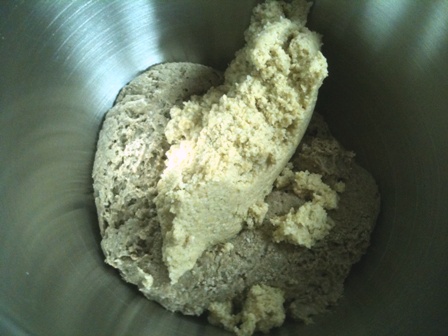
  3. Add the flours and mix to a shaggy mass. Cover tightly and let it sit for 20-60 minutes.

  4. Sprinkle the salt over the dough and mix thoroughly using the “stretch and fold in the bowl” technique. Let it rest for 30 minutes.

  5. Repeat the “stretch and fold in the bowl” for 30 strokes 2 more times at 30 minute intervals.

  6. Transfer the dough to a lightly floured board, and do one stretch and fold.

  7. Form the dough into a ball and place in a lightly oiled bowl. Note the volume of the dough. Cover the bowl tightly. Let it rest for 30 minutes.

  8. Repeat the stretch and fold on the board. Reform the dough into a ball and replace it in the bowl.

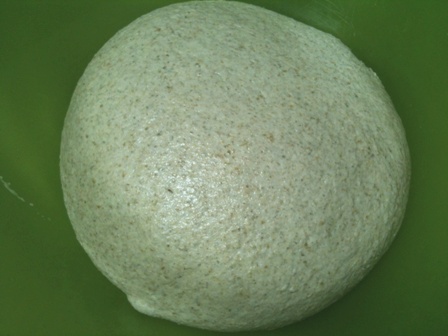
  9. Allow the dough to continue fermenting until the volume has increased 50%.

  10. Cold retard the dough for about 20 hours. (The dough had more than doubled and was full of large and small bubbles.)

  11. Take the dough out of the refrigerator and immediately transfer it to a lightly floured board.

  12. Divide the dough into two equal pieces and pre-shape them into logs or rounds, depending on whether you want to make boules or bâtards. Cover the pieces with plasti-crap and let them rest for 60 minutes. (Give them a shorter rest if the kitchen is very warm. You don't want them to expand very much, if any.)

  13. Pre-heat the oven to 500ºF with a baking stone and your steaming method of choice in place.

  14. Shape the pieces and place them in bannetons or on a couche. Cover the loaves and proof them until they have expanded by 50-70%. (30-45 minutes)

  15. Pre-steam the oven. Then transfer the loaves to a peel (or equivalent). Score them, and load them onto your baking stone.

  16. Turn the oven down to 460ºF.

  17. After 12 minutes, remove your steaming apparatus. Turn the loaves 180º, if necessary for even browning.

  18. Continue to bake the loaves for another 15-18 minutes or until their internal temperature is 205ºF.

  19. Turn off the oven, but leave the loaves on the stone with the oven door ajar for another 7-10 minutes to dry the crust.

  20. Transfer the loaves to a cooling rack.

  21. Cool the loaves completely before slicing.


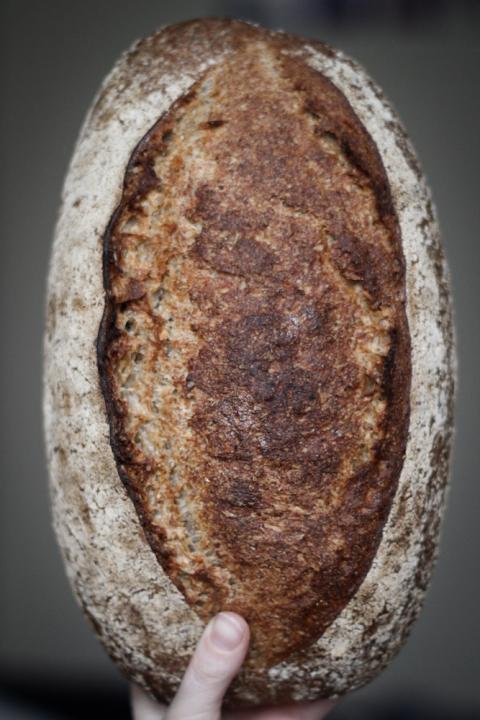
The loaves were already singing when I took them out of the oven. The crust developed crackles, which can be credited to the use of AP rather than higher gluten flour and the drying in the oven (Step 19., above).


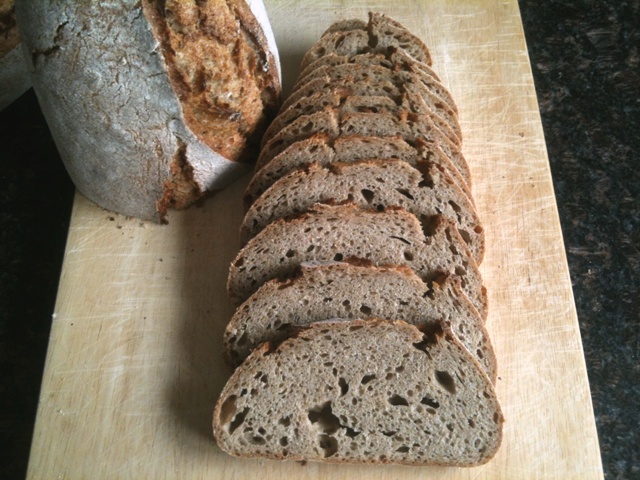
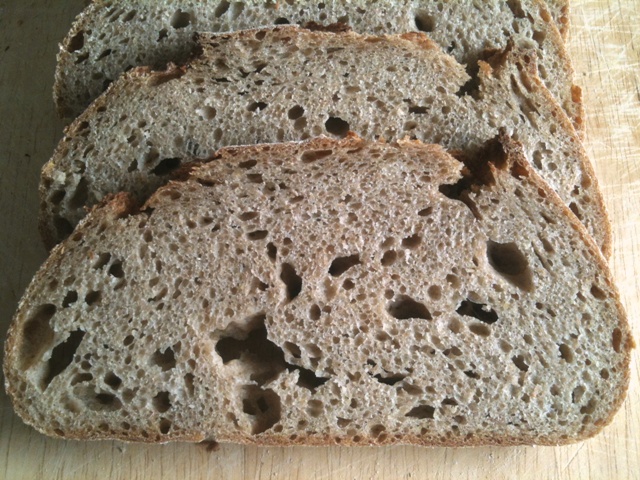
The crumb was nice and open.


The crust was crisp when first cooled and crunchy/chewy the next morning. The flavor was sweet and wheaty, like a good baguette, with the barest hint of sourness. This was po

ssibly the best tasting San Joaquin Sourdough I've made. I think I'm going to stick with this version. Next time, I may use this dough to make baguettes.

David


Submitted to YeastSpotting


Janedo's picture
Janedo

The Great Baguette quest N°3: Anis Bouabsa

Tuesday morning, we decided to go visit the Duc de la Chapelle, Anis Bouabsa's bakery in Paris. As you probably know, he won this year's Best Baguette. The bakery is situated in a modest neighborhood, far from the typical tourist traps and chic areas. We entered the bakery and asked he woman behind the counter several questions before buying a selection of breads. She was very nice and helpful. As we left the bakery, we took some pictures of the young baker/apprenti who was scoring baguettes and sliding them in to the oven. Disappointed by the quality of the photos through the window, Florence returned and asked if we could go inside and take just a few pictures. The woman showed her the way, no questions asked!

Once inside, who came through, but Anis himself! I felt like a teenager who was getting a real-live view of her movie star hero. He looked at me through the window and asked Flo who I was. I think he thought I was a bit idiotic because I had such a huge grin on my face! He opened the door and told me to come on in.

So, here you have two passionate home bakers in front of a master, and may I say the sweetest, nicest and most generous master. We started asking him questions and he told us EVERYTHING! He explained from A to Z how he makes his famous baguette. He adapted the recipe for home use for us and explained how we could do the steps at home. He showed us how to form the baguettes, slide them in the oven, what temperature.... EVERYTHING!

We even asked him if we could come and have a real lesson and he didn't say no, he said in September it could be possible.

Now, what he told us was actually quite surprising! The baguette dough has a 75% hydration, very little yeast, hardly kneaded, folded three times in one hour then placed in the fridge 21hrs. They are not fully risen when placed in the oven, it is the wet dough and the very very hot oven (250°C) that make give the volume. 

When I get some time, I will be trying his recipe. I feel success is near!!!!

Anis gave me permission to publish his pictures. They were all taken by Florence, "photographe extraordinaire".

Jane  

Anis Bouabsa

 ExplanationsExplanations

Baguettes à cuireBaguettes à cuire
OvenOven

BaguettesBaguettes


dabrownman's picture
dabrownman

Sprouting and Malting Primer

The 25% extraction sprouted multi grain bran sifted from the 75% extraction sprouted flour.

The little green rosettes will make your muffins taste bettah and sprouted grains will make your breads taste bettah too!  Sprouting is way easier than making bread so it is perfect for Lucy and I to do for just about every bake ……and a great way to turn a 3 day sourdough bake into a 5 day one – also perfect for us retired folks looking for something to do.
 

Make sure you re using hulled grains if you don’t like hard to digest fiber and roughage in your flour.   I’ve seen sprouting directions out there saying to soak the grains in water for 24 hours for the first step.  Don’t do it.  You are trying to sprout them – not drown them which is what you will likely do if you soak them for 24 hours.  You want to keep grain genocide far away from you.  The first step is to weigh the grains to be soaked.


After a 4 hour max soak in water you have to put them n something so that they can sprout, you can easily rinse and drain them every 8-12 hours so that the mold is kept at bay, keep light out so no green shoots stay white instead of turning green and the cool humid air in.


I found a plastic cheese mold with small colander holes in the bottom to let the whey out when forming and pressing cheese which is also perfect for sprouting grain..  it was a bargain a 50 cents at Goodwill.


You can buy sprouting gadgets and containers online, at health food stores and in some ethnic markets too.  Many folks just use a mason jar with the solid lid removed and substitute a screen to let water out when they rinse the grain and just keep it in a dark place.


What you are trying to do is replicate how the seeds would normally germinate in the ground.  Damp – not wet, dark – no light and cool – not hot or cold.  64-70 F works  best but since you are only going to be sprouting for 24 hours total or so from when the first soaking water hits the seeds,  a bit warmer won’t mold the seeds  just rinse them more often.,


This 5 grain mix took different times for each variety to chit but no worries - it is all close enough.

After soaking, I drain the seeds in the cheese mold and rinse them in water, shake out the excess water, cover in plastic wrap and a kitchen towel to keep out the light.  I repeat this every 8- 12 hours until the seeds chit.  Different seeds chit at different rates with rye being the fastest and some ancient grains being the slowest but they all close enough to sprout together which is what I do’
 

Once the first white rootlets break through the seed bran shell it is called ‘chitting’ and you are now done with sprouting to make sprouted flour and ready to dry the grains.  Once the grain has chatted, I dry it in a dehydrator at 105 – 110 F for 3 hours and 30 minutes with the seeds spread pout thinly, on a single layer on the trays. 
 

You will know that you are done drying them enough, so they won’t clog up your mill, when they weigh about the same as they did when you first weighed them before soaking.  Once dry you can mill them and sift them like you do any flour.  Your taste buds will reward you for taking the time to make sprouted flour for all kinds of things. 

If you don’t have a dehydrator I used to dry my grain outside in the AZ but you have to figure out a way to keep the birds from eating it.  I used the broiler pan from the mini oven with the seed on the bottom covered with the vented broiler top.  I have also dried them in my mini convection oven where the lowest temperature was 150 F.  With the door ajar the seeds never got over 140 F. 

Some will say that this is too high a temperature and kills off the enzymes you are trying to promote but brewers have always been right, They use the same grain and enzymes to extract all the sugar from the starch in the grain to make beer at the fastest rate and the best temperature to do so – 150 F.  So keeping it under 150 F will do the trick.

Time to make white & red malts when the seed shoot is the length of the seed p here are two pictures showing when the seeds are finished malting

Now if you sprout your grain, in this case rye or barley, for 4 or 5 days until the shoot, not the 3 rootlets that first chit out of the seed, is the length of the seed itself then it is ready to dry to make rye malt or barley malt.  This much longer time requires more rinsing and cool temperatures to keep the mold at bay.

Once dry at 105 F you can just grind into white diastatic malt, below right, or you can take the temperature up to 325 F like the seeds above to brown them to make red non diastatic malt, below left.


 Both malts above were made from the same malted berries 

If you dry this grain at low temperature you have white, diastatic malt and if you dry it at higher temperature up to 325 F you have red, nondiastatic malt – both of which are fine bread ingredients for all kinds of reasons.

Happy Sprouting and Malting


Mebake's picture
Mebake

Rye Sourdough with Spelt and soaker

Last week, I had some left over whole spelt flour, some corn meal, and some semolina in addition to a ripe Rye starter. Therefore, I decided to put them all to use in a new recipe as follows:

UPDATE** INSTRUCTIONS:

Prepare the Rye sour by adding a tablespoon and a half of your active rye starter to the 250g water, and mix well to disperse. Add the Whole rye flour, mix well, and let stand for 8-12 hours at room temperature until the surface just starts to crack and collapse. To prepare the soaker, weigh all soaker ingredients into a bowl, and then weigh 160 grm of water, boil it, and add it to the soaker. Mix well, cover, and let stand until overnight, or when your rye sour is ready.

Next day, mix all ingredients at once, by hand or using a mixer for 5-10 minutes. The dough will remain relatively sticky, so try to resist adding any flour at this stage.Shape as a round and let ferment in an oiled bowl for 2 hours at preferably 78 F or 24-25C, folding it half way through at the 1 hour mark. By the end of bulk fermentation, the dough will have risen by 50-60%. scrape your dough onto a heavily floured surface, pat the dough even (Don't knead), divide into the desired dough pieces, and round each piece leaving them to rest for 15- 20 min, covered. Dust your basket with a mixture of all purpose flour and rice flour, and shape your dough and invert it smooth side down into the basket. The final fermentation will be only 45 minutes, but watch the dough NOT the clock. Preheat your oven at this stage with a stone in place to a 500F or 260C. 5 minutes before loading the bread, place your steaming dish filled with wet towels on the bottom of your oven.  When ready, invert the dough on baking paper lined peel/ board and close the oven immediately. Bake for 15 minutes with steam, and then remove the steaming dish and reduce the temperature to 400F for another 20-25 minutes. 

When the time is over, remove your bread from the oven. Wear oven mitts, and tap on the bottom of one loaf, It should  sound hollow. Furthermore, you may insert a thermal probe into the center of the loaf from the bottom, and the temperature should register 195-200F or 90-95C. If it doesn't, put it back in the oven for another 10 minutes. Cool the bread completely on a wire rack, prior to cutting. 


Due to the soaker, the aroma of this bread is really attractive. When cool, The crust was somewhat chewy, and the crumb slightly moist but not chewy. The flavor of this bread is earthy sweet and very pleasant. The crumb is close textured and compact due to all the whole grains, the bread might have benefited from extra lightness by increasing bread/all purpose flour.

I have eaten this bread thinly sliced with a spread of cheese, and it was fabulous. This bread keeps really well.


- Khalid


zolablue's picture
zolablue

Firm Sourdough Starter - Glezer recipe

I’m finally getting around to posting Maggie Glezer’s firm sourdough starter recipe.  For those of you having problems with your starters you might wish to give this a try.  Most people here are using batter-style starters so it might be interesting to see if there is any discussion on firm starters.  Plus I need help in learning to convert properly for use in recipes which don’t use a firm starter and there are always questions that come up. I have photographed my starter from mixing the dough ball and pressing it into the pint-sized jar through several hourly increments where you can see how grows and finally it quadruples in 8 hours, or in this case just short of 8 hours, which is the “gold standard” Maggie talks about for a firm starter to be ready to leaven bread.


I realize there are many opinions and methods on sourdough starters and this is only the one I’ve chosen and that works for me.  But as many of you know, I’m a bread newbie and a sourdough newbie and I’m interested in all the information.  Some of you were asking about a firm starter so thought this might help. 

PHOTOS on firm starter: 

http://zolablue.smugmug.com/gallery/2617049#138085923

(NOTE: Edited to correct recipe 9-25-07 so if you copied it prior to this date please recopy and accept my apologies!)

SOURDOUGH STARTER DIARY – © Copyright, Maggie Glezer, Blessing of Bread

(How to make sourdough bread in two weeks or less)  

To begin a starter, you need only whole rye flour, which is rich in sourdough yeasts and bacteria, bread flour, water, time, and persistence (lots of the last two).  Amounts are small because I like to use the minimum of flour practical for building the sourdough, as so much of it will be thrown away.  If you are baking bread in the meantime, you can add any of these discards to a yeasted dough for extra flavor. 

WEEK ONE: 

SUNDAY EVENING:  Mix 1/3 cup (50 grams/1.8 ounces) whole rye flour with 1/4 cup (50 grams/1.8 ounces) water to make a thick paste and scrape it into a clean sealed jar.

TUESDAY MORNING:  The starter should have puffed a bit and smell sharp.  Add 1/3 cup (50 grams/1.8 ounces) bread flour and 1/4 cup (50 grams/1.8 ounces) water to the jar, stir it well, and scrape the sides with a rubber spatula to clean them.  Reseal the jar. 

WEDNESDAY MORNING:  The starter should have risen quickly.  It is now time to convert it into a stiff starter.  In a small bowl, dissolve a scant 2 tablespoons (30 grams/1.1 ounces) starter (discard the rest) in 2 tablespoons (30 grams/1.1 ounces) water, then add 1/3 cup (50 grams/1.8 ounces) bread flour and knead this soft dough.  Place it in a clean jar or lidded container, seal it, and let it ferment.

THURSDAY EVENING:  The starter will not have risen at all; it will have only become very gooey.  Repeat the above refreshment, throwing away any extra starter.

WEEK TWO: 

SATURDAY EVENING:  The starter will not have risen at all; it will have only become very gooey.  Repeat the same refreshment.

MONDAY MORNING:  The starter will finally be showing signs of rising, if only slightly!  Repeat the refreshment.

TUESDAY MORNING:  The starter should be clearly on its way and have tripled in twenty-four hours.  Repeat the refreshment.

WEDNESDAY MORNING:  The starter should be getting stronger and more fragrant and have tripled in twenty-four hours.  Repeat the refreshment. 

WEDNESDAY EVENING:  The starter should have tripled in eight hours.  It will be just about ready to use.  Reduce the starter in the refreshment to 1 tablespoon (15 grams/0.5 ounce) starter using the same amounts of water and bead flour as before.

THURSDAY MORNING:  The starter is ready for its final refreshment.  Use 1 1/2 teaspoons (10 grams/0.4 ounce) starter, 2 tablespoons (30 grams/1.1 ounces) water, and 1/3 cup (50 grams/1.8 ounces) bread flour.THURSDAY EVENING:  The starter is now ready to use in a recipe or to be refreshed once more and then immediately stored in the refrigerator.


Refreshment for a complete Sourdough Starter 

MAKES:  About a rounded 1/3 cup (90 grams/3.3 ounces) starter, enough to leaven about 3 1/3 cups (450 grams/16 ounces) flour in the final dough 

This stiff starter needs to be refreshed only every twelve hours.  Use this formula to refresh a refrigerated starter after if has fully fermented and started to deflate.  If the following starter does not quadruple in volume in eight hours or less, refresh it again, with these proportions, until it does.  If your kitchen is very cold, you will need to find a warmer area to ferment your starter.

1 1/2 teaspoons (10 grams/0.4 ounce) fully fermented sourdough starter

2 tablespoons (30 grams/1.1 ounces) water

1/3 cup (50 grams/1.8 ounces) bread flour 

MIXING THE STARTER:  In a small bowl, dissolve the starter in the water, then stir in the flour.  Knead this stiff dough until smooth.  You may want to adjust the consistency of the starter:  For a milder, faster-fermenting starter, make the starter softer with a little more water; for a sharper, slower-fermenting starter, make the starter extra stiff with a bit more flour.  Place it in a sealed container to ferment for 8 to 12 hours, or until it has fully risen and deflates when touched.


Conversion of a Batter-Type Starter into a Stiff Starter 

MAKES:  About a rounded 1/3 cup (90 grams/3.2 ounces) starter, enough to leaven about 3 1/3 cups (450 gram/16 ounces) flour in the final dough

If you already have a batter-type starter – that is, a starter with a pancake-batter consistency – you will need to convert it into a stiff starter for the Glezer recipes, or to check its strength.

1 tablespoon (15 grams/0.5 ounce) very active, bubbly batter-type starter

1 tablespoon (15 grams/0.5 ounce) water

1/3 cup (50 grams/1.8 ounces) bread flour 

MIXING THE STARTER:  In a small bowl, mix the starter with the water, then stir in the flour.  Mix this little dough until smooth, adjusting its consistency as necessary with small amounts of flour or water to make a stiff but easily kneaded starter.  Let it ferment in a sealed container for 8 to 12 hours, or until it is fully risen and starting to deflate.  If the starter has not quadrupled in volume in 8 hours or less, continue to refresh it with the proportions in “Refreshment for a Completed Sourdough Starter” until it does.

 
WoodenSpoon's picture
WoodenSpoon

Rye Levain

I have been busily working away on my Rye levain formula and the one I just baked off this morning on one of the best yet. Recently I have started to shy away from my standard 100% hydration white or primarily white levain towards much firmer entirely whole grain levain starters. I still keep my chef at 100% hydration and I think that going from a cold wet chef to a warm dry levain to a warm wet final mix is really contributing to the flavor complexity.

Here's how I made it.

Levain build #1

  • 3g 100% hydration rye chef
  • 21g fresh milled whole rye
  • 10g warm water
  • 12 hr ferment at room temp

Levain build #2

  • 5g 50% hydration rye levain
  • 50g fresh milled whole rye
  • 25g warm water
  • 12 hr ferment at room temp

Final dough

  • 480g bread flour 70%
  • 170g fresh milled whole rye 25%
  • 45g levain 7.5% (5%rye, 2.5% water)
  • 55g rye chops 8%
  • 536g quite warm water (hold 36g) 79%
  • 13g salt 2%

First I mixed the flours and rye chops and hydrated them with all but 36g of the warm water and let it sit for 45 minutes. Then I added the salt and in a different bowl I moistened/mashed with a fork the 45 grams of firm levain in the remaining 36 grams of water and added that to the dough. After a quick mix with a wooden spoon to incorporate the salt I mashed the whole dough in my hands and as adding water to already partially developed dough isn't always the easiest thing to do. 

Once the dough came back together I gave it a firm two or so minutes of slap and folds followed by a twenty minute rest, then I gave it another quick set of slap and folds and a ten minute rest then another quick set and a fifteen minute rest then another quick set and an hour rest.

After an hour I have it a good stretching and folding in the bowl followed by a very quick slap and fold half an hour later and one more another half an hour later. 

By now the dough has been fermenting for around 3 hours and forty minutes. I gave it an additional 5 hours and forty minutes of room temp bulk fermentation shaped it and popped it in the fridge for 19 hours.

Around noon today I put the loaf in a 500 degree oven, poured hot water over my preheated lava rock and baked it for 55 minutes turning the oven down to 450 after the first two minutes.

This is one heck of a good loaf with a pretty prime aroma to boot. Earthy, hearty and lactic with that characteristic rye spiciness followed by a light acetic zing. So tasty.

WoodenSpoon's picture
WoodenSpoon

Lavender&Honey Levain with Salt Crusted Crust.

The other day I noticed that the lavender bush in fornt of my house was blooming, so I figured hey why the heck not. the day before baking I mixed 5g of chef with 5g rye 35g bf and 40g cold water. I let this ferment for around 12 hours then 100g bf and 100g warm water to 50g of the elaborated chef, I let this ferment for around five or six hours then added it to my flour and water and autolysed for around an hour, then i added my lavender buds and honey and proceeded with slap and folds until the dough was properly developed., I then bulk fermented for two or so more hours, shaped and rolled the loaf in a mixture of very corsely ground Himalayan salt and blue cornmeal then proofed it for another two hours. then I baked it on the shy side of an hour at 450 then flipped it out of the pan and browned it up for another few minutes... hot dang it smells so darn good and the salt on the crust really goes well with what could otherwise be a pretty overwhelming flavor.

  • 441g BF
  • 29g Rye
  • 30g AP
  • 175g Levain
  • 47g Raw Honey
  • 11g Fresh Lavender
  • 11g Salt
  •   Corse Salt&Blue Cornmeal for rolling.
breadsong's picture
breadsong

Pumpkin Sourdough Rye - for BBD #62

Hello everyone,

It was lovely see all of the breads bakers around the world contributed for World Bread Day in October –
thank you to Zorra for her work to round all of these up!

                                                                               
BBD #62 - Bread Baking Day meets World Bread Day (last day of sumbission December 1st)

November’s Bread Baking Day (BBD #62) celebrates the breads contributed for World Bread Day,
inviting bakers to bake a World Bread Day bread for BBD #62.

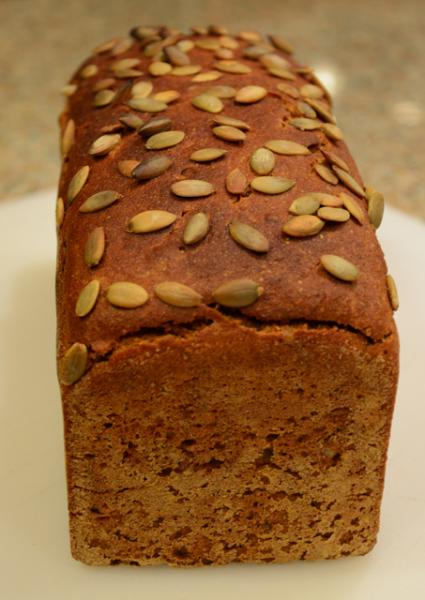
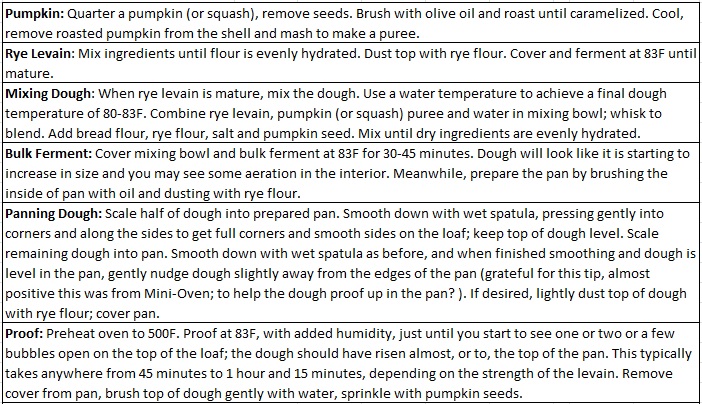
One of the rye breads contributed for World Bread Day really caught my eye:  a Pumpkin Rye Sourdough bread, kindly posted by a Polish baker on the blog ‘The Scent of Bread – Zapach Chleba’.

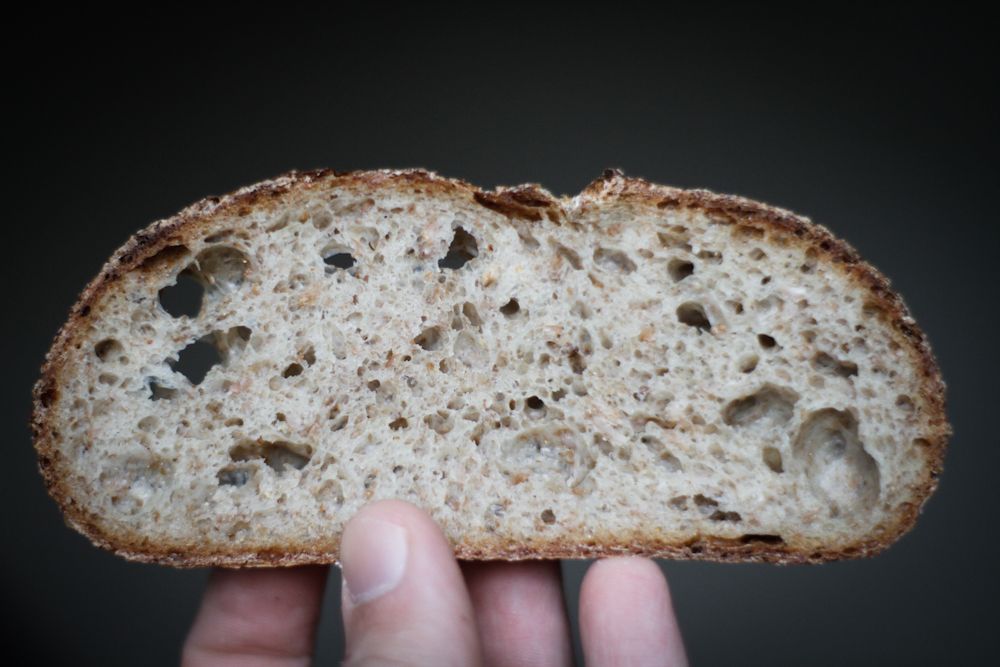
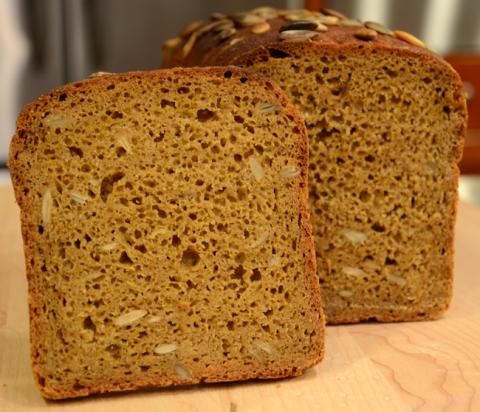
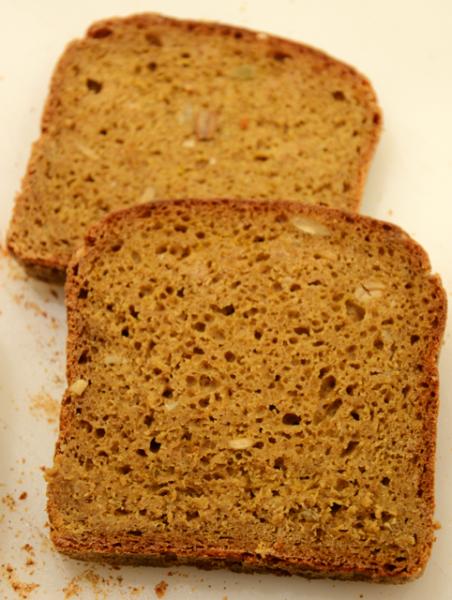
Wasn't this an incredibly gorgeous rye? The beautiful, airy crumb and glorious color – I had to try making this one! This is my attempt at re-creating this amazing Polish baker’s bread.


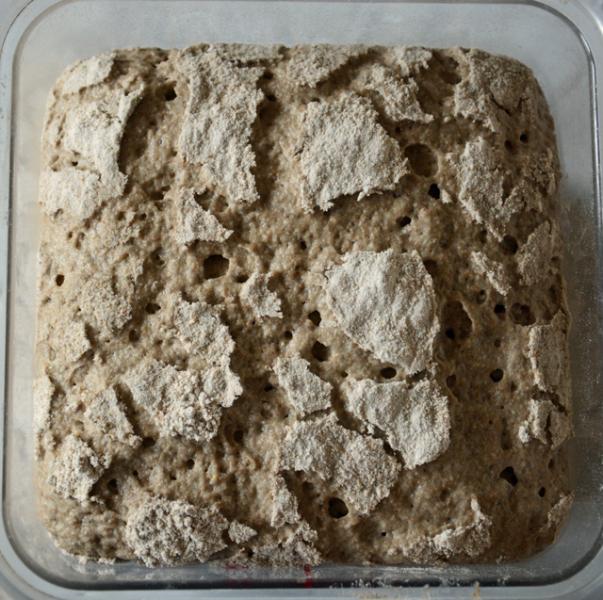
I couldn’t find any information on the type 720 flour this baker used, so I used some whole, dark organic rye flour from Nunweiler’s.  This is a really, really nice flour to work with – I was very happy with the fermentation.
My rye levain was very happy, too – this picture was taken just before mixing the dough:


This bread has a fantastic flavor. I used squash and roasted it until it was really caramelized.
The sweetness from the squash is delicious in the baked bread!
                                                  (another picture of the crumb)


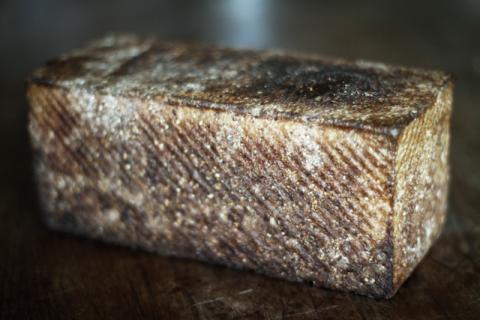
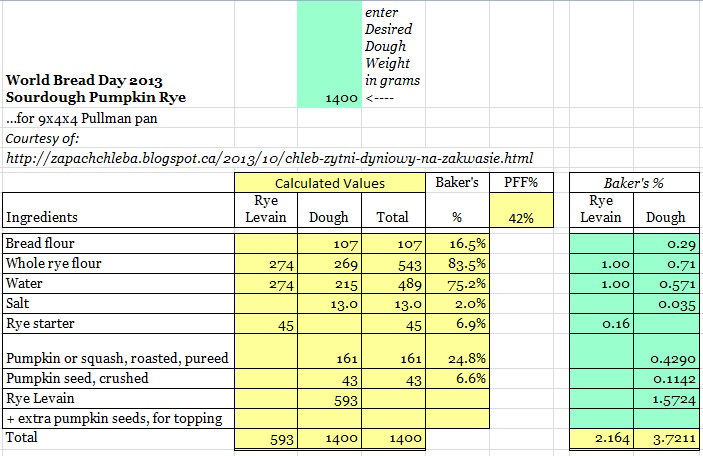
Here are the quantities I used for a 9x4x4 Pullman pan:


Thank you Zorra, for providing a venue for bakers around the world to share bread, and thank you to the baker from Zapach Chleba for baking this Pumpkin Sourdough Rye.


Happy baking, everyone, and Happy Thanksgiving to all those celebrating this week!
:^) breadsong

(submitted to YeastSpotting)


txfarmer's picture
txfarmer

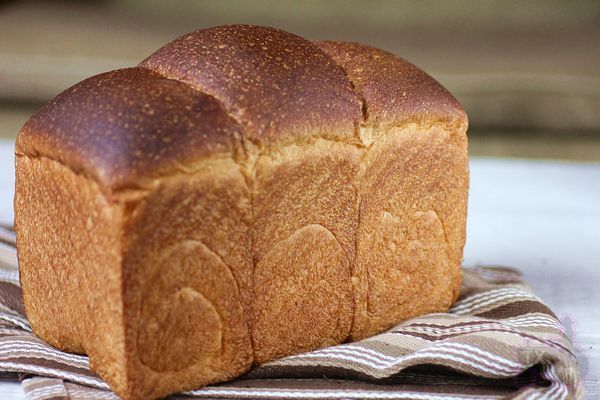
SD 100% WW Hokkaido Milk Loaf - an oxymoron?

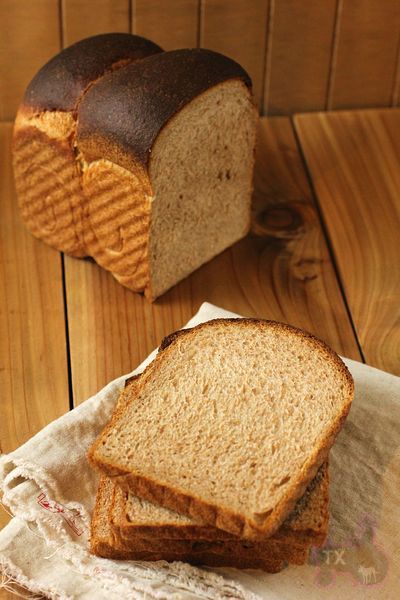
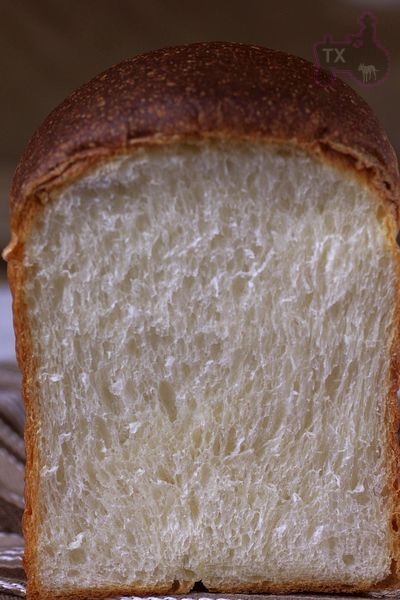
Recently, I have posted about my SD version of the classic Hokkaido Milk Loaf (see here: http://www.thefreshloaf.com/node/23662/sourdough-hokkaido-milk-loaf-classic-shreddable-soft-bread), this time I adapted it to use all ww flour. Yes, the original Hokkaido Milk Loaf is quite enriched, and this ww version is not any "leaner", however, I do think ww flour adds more dimension to the flavor, and all the enriching ingredients bring incredible softness to this 100% ww loaf. To me, "healthy eating" is not about restricting, on the contrary, it's about bringing in different kinds of natural food groups into my diet and thriving for a balance.


SD 100%ww Hokkaido Milk Loaf

Note: 19% of the flour is in levain

Note: total flour is 420g, fit my Chinese small-ish pullman pan. For 8X4 US loaf tin, I suggest to use about 450g of total flour.


- levain

starter (100%), 22g

milk, 37g

ww flour (I used KAF ww), 69g

1. Mix and let fermentation at room temp (73F) for 12 hours.

- final dough

ww flour, 340g

sugar, 55g

butter, 17g, softened

milk powder, 25g

egg whites, 63g

salt, 6g

milk, 150g

heavy cream, 118g


1. Mix together everything but butter, autolyse for 40-60min. Add butter, Knead until the dough is very developed. This intensive kneading is the key to a soft crumb, and proper volume. The windowpane will be thin and speckled with grains, but NOT as strong as one would get form a white flour dough. For more info on intensive kneading, see here.

2. rise at room temp for 2 hours, punch down, put in fridge overnight.

3. Take out dough, punch down, divide and rest for one hour.

4. Shape into sandwich loaves, the goal here is to get rid of all air bubles in the dough, and shape them very tightly and uniformly, this way the crumb of final breads would be even and velvety, with no unsightly holes. For different ways to shape (rolling once or twice, i.e. 3 piecing etc) see here.

5. Proof until the dough reaches one inch higher than the tin (for 8X4 inch tin), or 80% full (for pullman pan). About 5 hours at 74F.

6. Bake at 375F for 40-45min. Brush with butter when it's warm.


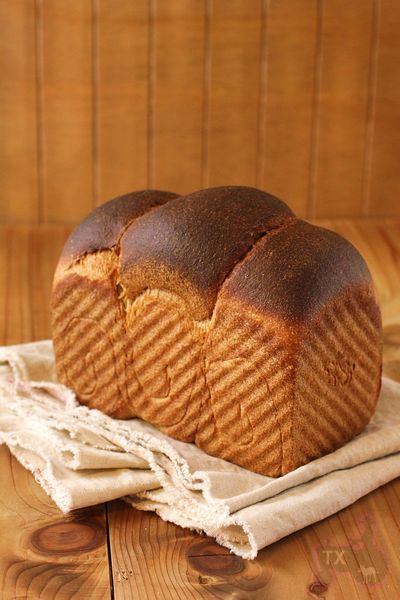
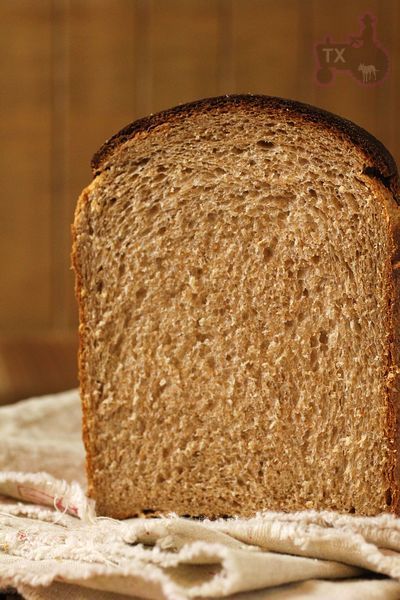
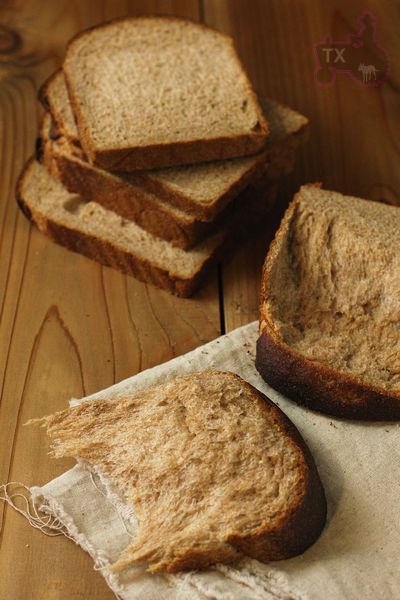
A crumb and flavor even whole grain haters would love.


Tear/shread away...


Sending this to Yeastspotting.

txfarmer's picture
txfarmer

Sourdough Hokkaido Milk Loaf - a classic shreddable soft bread


Some facts first:

- Hokkaido is a place in Japan.

- Hokkaido Milk Loaf is THE most classic/common/well-loved sandwich bread in Asia. It's enriched with milk, heavy cream, butter, egg, milk power, and quite a lot of sugar - which makes it richer than most Asian soft sandwich bread recipes, pushing toward brioche territory. The finished loaf is very tall, very soft, rather rich tasting.

- Hokkaido Milk Loaf has nothing to do with the place Hokkaido. Nothing. Well, other than the name.

- Hokkaido Milk Loaf is usually made with dry yeast, a sample recipe can be found here using straight method: http://schneiderchen.de/237Hokkaido-Milky-Loaf.html, many TFLers have also done this bread successfully.

My notes:

- I adapted the recipe to use SD only. In fact it was over a year ago that I first attempted, since then, I have gone through many iterations on ingredient ratios, fermentation schedule etc. This is my measuring stick on how well my SD sandwich bread method works. What I am posting below is the latest version. In the begining I reduced sugar/fat ratio, but now I know my SD starter is strong enough to take on what the original Hokkaido recipe calls for, so I have slowly raised fat/sugar ratio back up, now it's comparable to the dry yeast version. The bread has the classic rich flavor and soft texture of Hokkaido loaf, and a slightly tangy taste thanks to SD starter.

- Like other soft sandwich breads, the success of this bread relies on intensive kneading. Please see the following two previous posts about this topic:

http://www.thefreshloaf.com/node/20669/sourdough-pan-de-mie-how-make-quotshreddablyquot-soft-bread

http://www.thefreshloaf.com/node/23061/extremely-sourdough-soft-sandwich-bread-most-shreddble-soft-velvety-ever

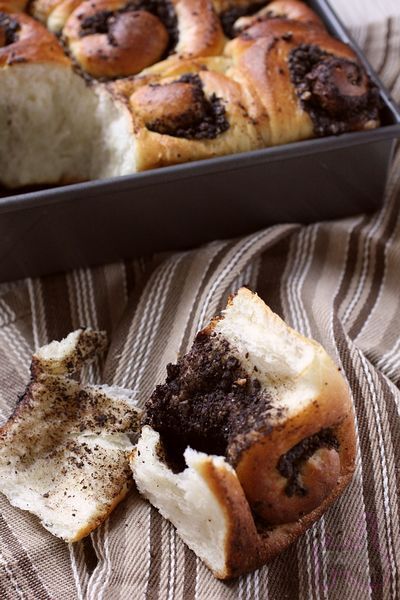
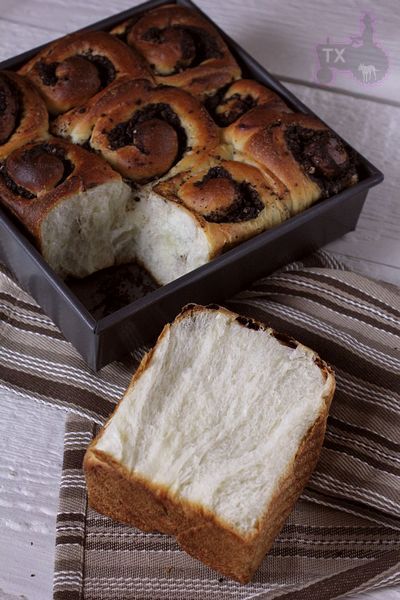
- The same dough can be used for rolls and other breads. Other than the sandwich loaf, I also made some rolls filled with chocolate hazelnut paste. I didn't specify ratios for the filling because I winged it, using whatever was on hand. I like to over fill the rolls with filling, which means lots of coca/hazelnut/sugar mixture, AND lots of softened butter to absorb it.

- Comparing to my previous soft sandwich breads, you might notice that baking temperature is higher (400F rather than 375), I find it gives a better lift to the bread.


SD Hokkaido Milk Loaf

Note: 19% of the flour is in levain

Note: total flour is 250g, fit my Chinese small-ish pullman pan. For 8X4 US loaf tin, I suggest to use about 270g of total flour. For KAF 13X4X4 pullman pan, I would suggest using about 430g of total flour.

Note: for the rolls, I used a 8X8 square tin, and 340g of total flour.


- levain

starter (100%), 13g

milk, 22g

bread flour, 41g

1. Mix and let fermentation at room temp (73F) for 12 hours.

- final dough

bread flour, 203g (I used half KAF bread flour and half KAF AP flour for a balance of chewiness and volume)

sugar, 33g

butter, 10g, softened

milk powder, 15g

egg whites, 38g

salt, 4g

milk, 74g

heavy cream, 63g


1. mix until stage 3 of windowpane (-30sec), see this post for details.

2. rise at room temp for 2 hours, punch down, put in fridge overnight.

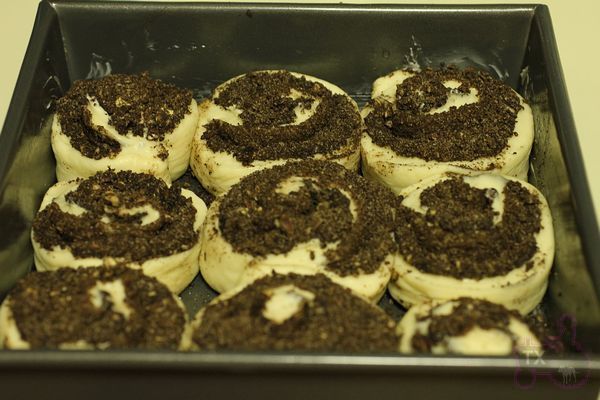
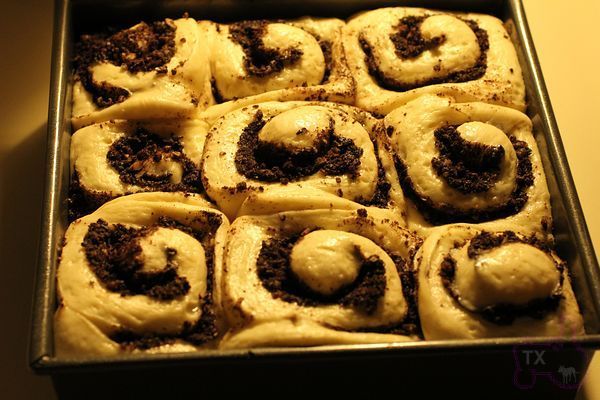
3. takeout, divide, round, rest for 1 hour. shape as instructed here for sandwich loaf. For rolls, roll out the dough into 16X12in (quite thin), mix together coca, toasted hazelnut, and sugar in a blender, first brush the dough with lots of softened butter (LOTS), then spread on coca/hazelnut/sugar mixture (again, LOTS), roll up, cut off two ends, then divide into 9 pieces, and put in 8inch squre pan.

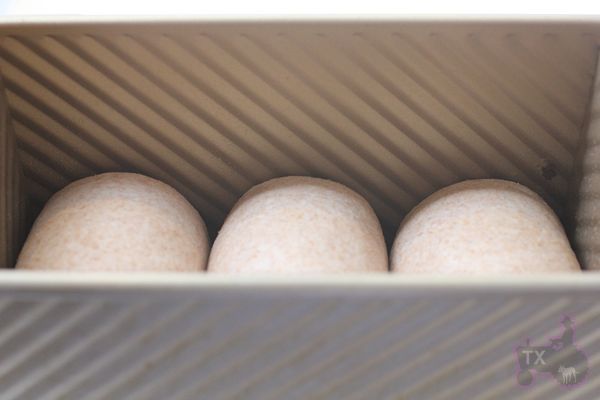
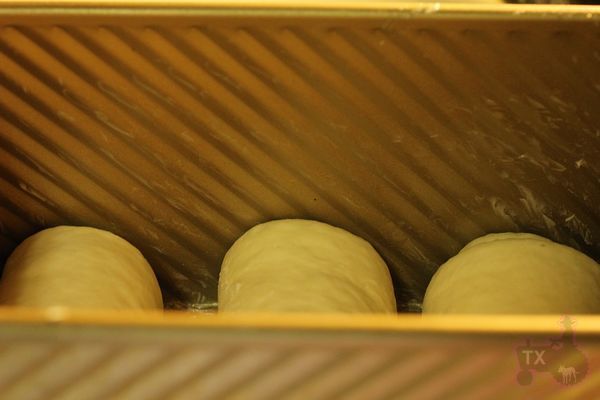
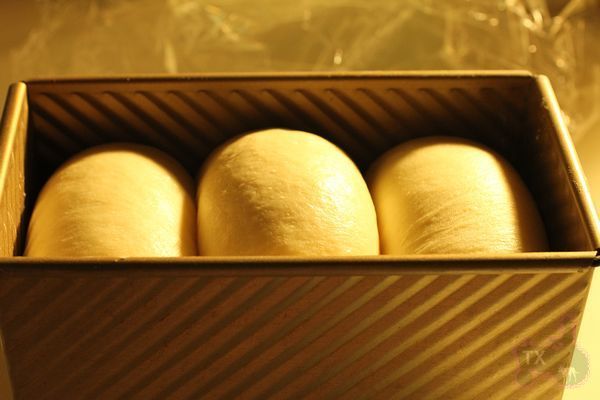
4. rise at room temp for about 6 hours. For my pullman pan, it should be about 80% full; for US 8x4inch pan, it should be about one inch above the edge. The dough would have tripled by then, if it can't, your kneading is not enough or over.

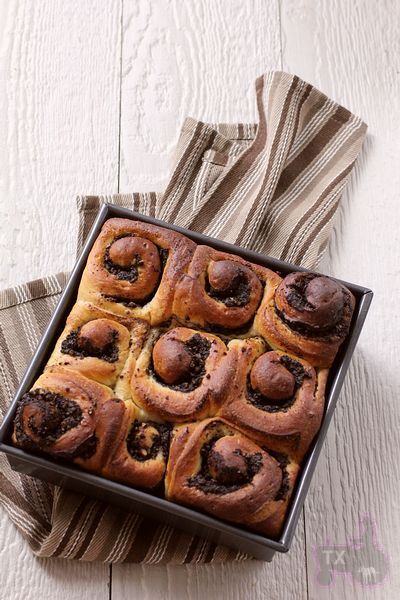
5. for sandwich loaf, bake at 400F for 45min, brush with butter when warm. for rolls, bake at 400F for 25min.


Thanks for all the protein, fat, and sugar in the dough, the bread should be very tall - if not, more kneading is needed.


With enough (but not too much) kneading, and proper fermentation, the crumb should be velvet soft.


Same for the rolls. The rich taste of the dough matches well with the filling.


I am sure I will keep tweaking the recipe, since I just can't leave a good thing alone. :P


Sending this to Yeastspotting.

Pages