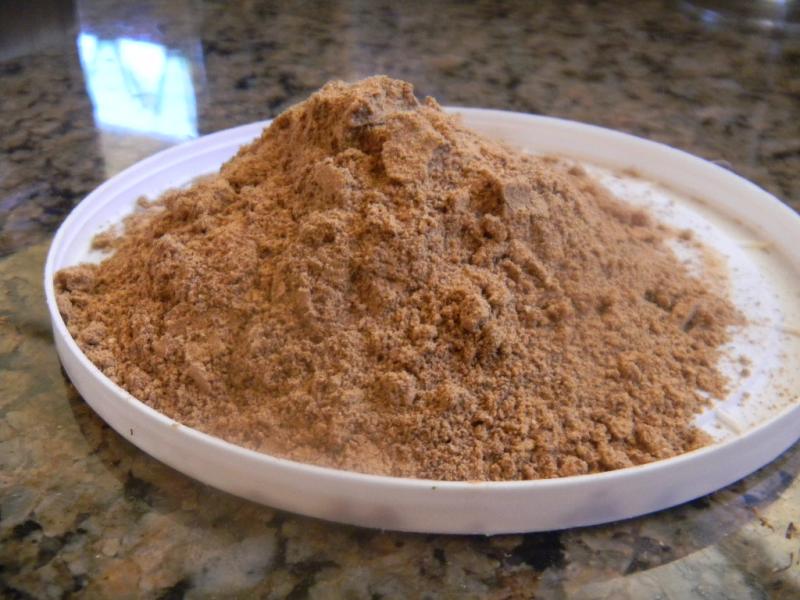
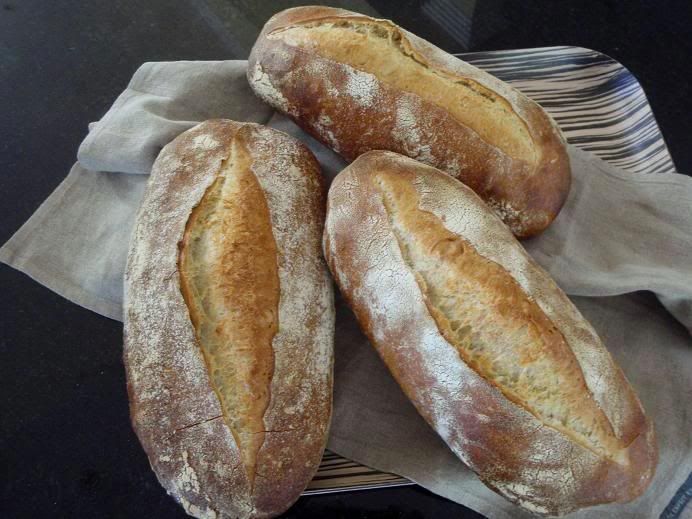
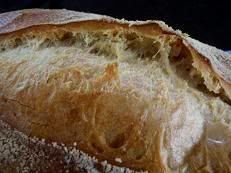
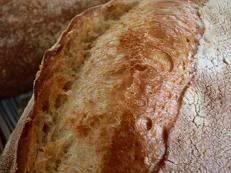
Because all of the pictures below are broken. Very sorry for this inconvenience, that my computer crushed and lost all pictures I had.
--------------------------------------------------------------------------------------------------------------------------------------------------------------------------------
Once I had made my raisin yeast water, I really didn't care about methods to make - I had mine, and that was all I cared about. After I was asked by some TFL members about yeast water, I realized that I really didn't know what the nature of raisin yeast water was. I 'd like to leave my recent research and thoughts here for anyone who is interested in for reference.
How to make raisin yeast water
Ingredients:
- 45 g Raisins( * I use organic Thompson raisins. they are NOT coated with oil, I recommend to use organic one)
- Water ( I used purified this time, I also use filtered water from a refrigerator. NO using chlorine water .
- A jar ( I use emptied jelly jars all the time.)
Method
Day1:
1) Sterilize your jar: put the jar in the boiling water for a few minutes and take it out . Leave it until it is dry.
 2) Add the raisins and the water as to 1:1 ratio like the picture below.

(
No chlorine water! It kills yeast!) 3) Shook the jar vigorously * Tighten the lid
Before shaking

After shaking vigorously /

Close up
4) Keep the jar at 82 F / 28℃. * Tighten the lid
( The right one is correct. the left jar is the other way to make yeast water )
5) 4-5 hours later : * Keep the jar at 82 F / 28℃. Tighten the lid 
Before shaking

After shaking vigorously * The raisins are soaked with the water. Now it is the time to add more water.
6) Add some purified water until double the raisins. 
After shaking vigorously,
* Keep the jar at 82 F / 28℃. Tighten the lid
Day 2 7) Shake the jar vigorously as many as you can. * Keep the jar at 82 F / 28℃. Tighten the lid
---- I did that was
6:30 am ~ 8:20 pm --- shook the jar vigorously 13 times. * Tighten the lid* All of the raisins stayed up to the top of the water.
6:20 am
Before shaking

After shaking vigorously * Tighten the lid
8) At the night *Close the lid not too tight not too loose.

* I think that the yeast needs to get some little oxygen to breath to activate for over night so I didn'tclose the lid tight anymore because the raisins stayed up to the top of the water for a half day.
Day 39) In the morning
Shake the jar vigorously. *Close the lid not too tight not too loose
Before shaking

close up

After shaking vigorously

Close up
10) Refrigerate it when you hear shwwwwww... sounds while it was fermented at 82 F.). *Close the lid tightly after shaking vigorously. Day 411)
 in the morning:
*Close the lid tightly after shaking vigorously andPut it back in the refrigerator .
Before shaking

Close up

After shaking vigorously

Close up
Day 512) In the morning:
Shake the jar vigorously. Tighten the lid and put it back in the refrigerator.
Before shaking * I smell a bit strong alcohol smell which means fully fermented but it needs more rest before baking bread.


After shaking vigorously * The alcohol smells was weaken.( mild level)
13) At the night( Approximately 12 hours later)-- READY TO BAKE!To make levain for my sandwich loaf with raisin yeast water.Levain:
- King Arthur all purpose flour 149g
- Raisin yeast water 107g
----------------The day before-----------1. Pour 107 g raisin yeast water into the container.

The taste: Sweet and little bit of alcohol.The result of the PH level test

Between PH 5.5 and 5.75.

Added 149 g KA AP and made the levain.Viscosity: Hard. I had to knead by hand.* "Hard " means that there is a lot of sugar in the dough.------------------------------------------------------------------------------Next day--- Final dough
- King Arthur bread flour 281g
- 1 egg yolk + Whipping heavy cream=58g
- Water 144g
- Sugar 13g
- Butter 29g
- Salt 6.8g
Method
- Mix all the final ingredients and the levain except the butter and salt.
- Autolyze 30minutes.
- Add the salt and butter and knead until you pass a window pane test.
- Bulk fermentation at the room temperature until triples.
- Preshape
- Shape
- Bake 35 minutes at 410F until golden brown. *Cold oven method: Spray a couple time in the oven and put the loaf in. Set up 284F for 20 minutes. increase the temperature to 410F for 10 minutes, lotate 180 degree the loaf pan and bake 10 more minutes until golden brown.

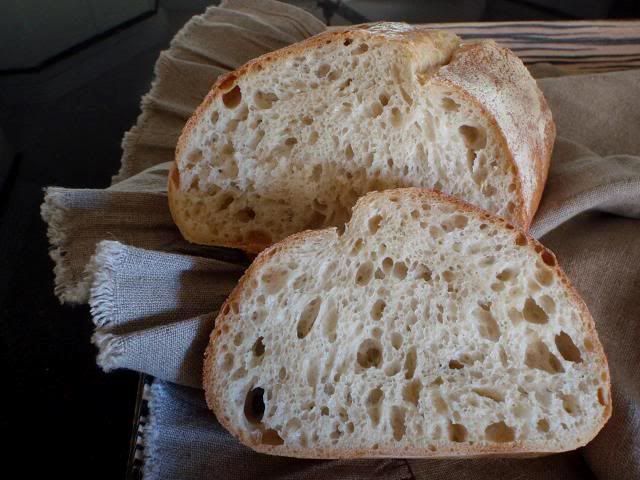
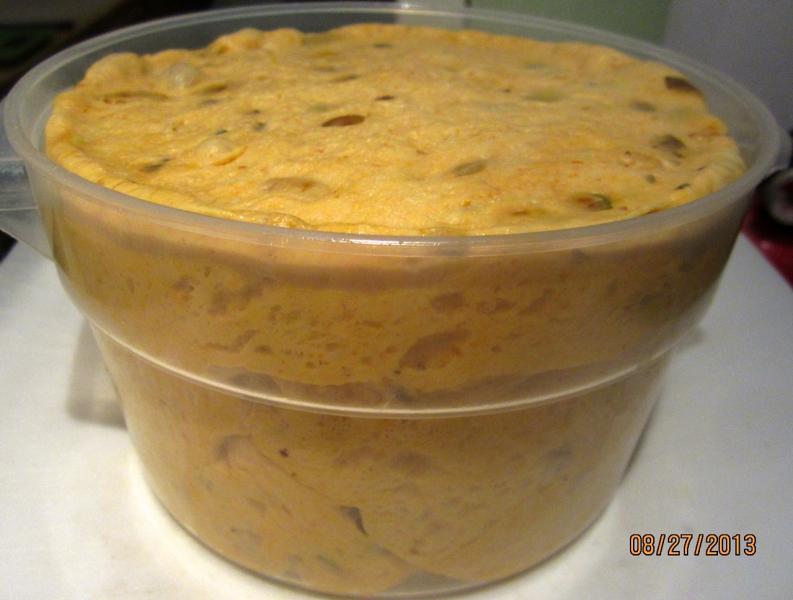
The levain rose tripled ( 9 hours later)

Bulk fermentation: The final dough rose almost tripled in 5 hours at 72-73F.

Final proof: The dough rose over the top of the tin in 2 hours at 82F.

Baked for 35 minutes at 410 F.( I couldn't use " cold oven method" because I was using the oven a hour ago before )

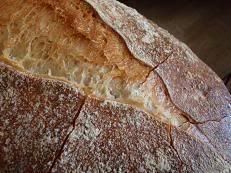
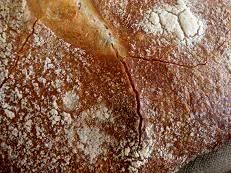
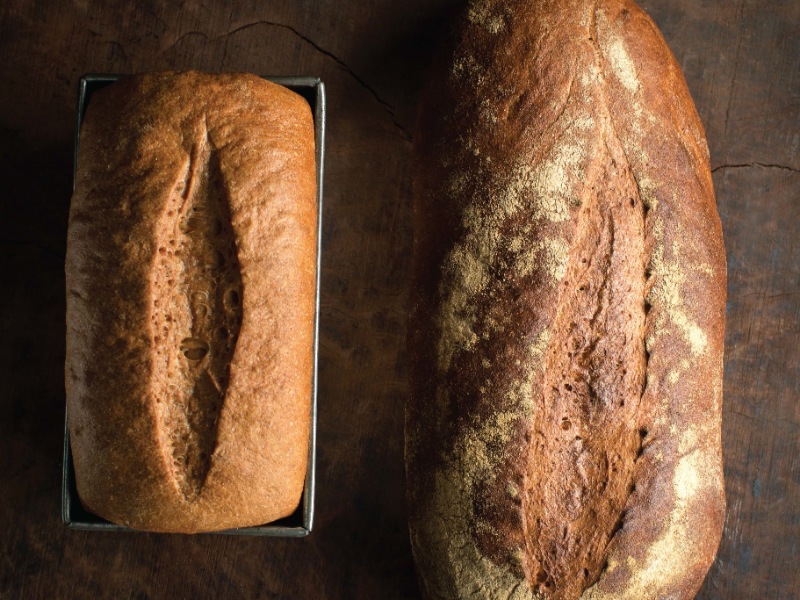
When I ferment the final dough at colder temp, I can see the cracks.


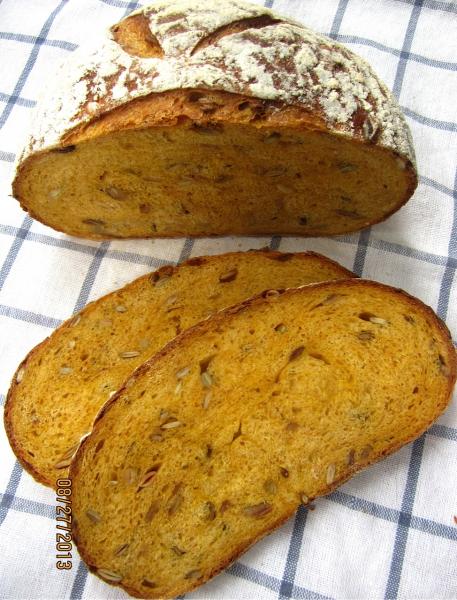
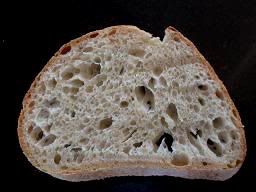
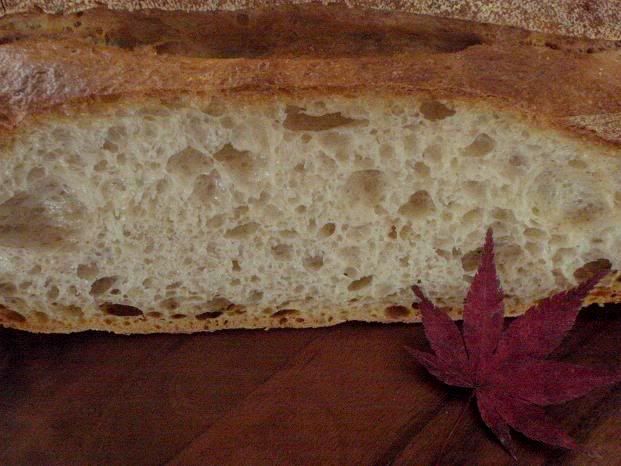
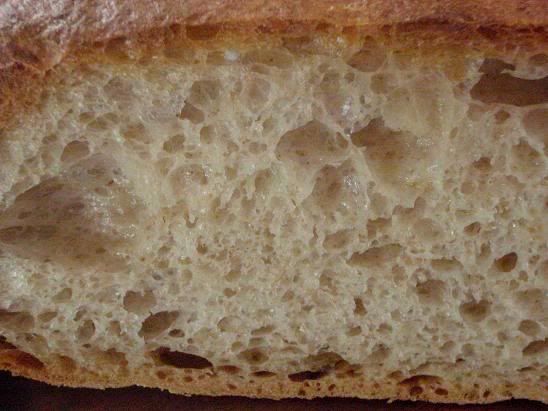
The taste was really good. nice volume. The crumb was not wet, it was nice texture.I smelled a bit of fruity smell from the raisins when I sliced it after 5 hours I baked, but the smell was very slightly and very pleasant.------------------------------------------------------------- Comparison:5/267 :00 am--

From left: No lid / Vigorous shakes/ my old one - generous shakes10:30 am--

From left: No lid/ Vigorous shakes/ my old one5/27 5:50 am

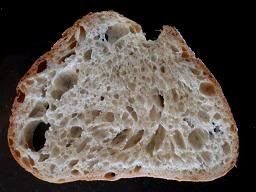
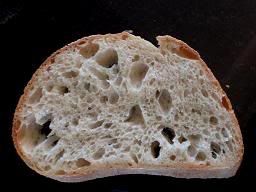
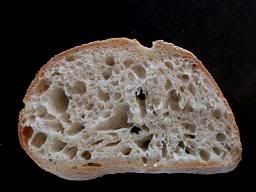
From left: No lid/ Vigorous shakes/ my old one (I just refreshed)Comparison of the crumb:

( 12 g sugar not 13g used in the final dough)

Vigorous shakes

No lid* I didn't like No lid bread because I smelled strong yeast like Active dry yeast when I put it in my mouth.


No lid raisin yeast water itself has no strong yeast smell neither taste , which gave me a surprise.Our taste gives us more details than this PH test in my opinion.
----------------------------------------------For reference, I want to mention about yeast water that I found from some Japanese sites and the others from winery .
"Yeasts will activate in two different ways:
1. with oxygen: - {Sugar -C6H12O6+Oxygen--O2}→{ Carbon dioxide-Co2+Water -H2O}
- (* We call it " Breath" which means the yeast is active. )
2. with no oxygen:
{Sugar-C6H12O6 }→{Carbon dioxide gas 2(CO2) + Alcohol(Ethyl alcohol)-2(CH3CH2OH)}
(※ We call it "Alcohol fermentation")When there is no sugar in, it turns to acetic acid ( quite sour), except apple and raisin which contain malic acid. ( milder )
When we make raisin yeast water using a jar, The yeast water will activate with the oxygen in the jar first ( Breath), and occur alcohol fermentation when it is no oxygen in the jar. Alcohol has bactericidal action which prevents to have mold and unwanted bacteria. Natural yeast is tolerant to alcohol so that they live together, however, he doesn't grow without new oxygen.While alcohol fermentation is working, natural yeast stops growing, therefore, it is not time to congratulate yourself yet because of the bubbles ( carbon dioxide gas) , you have to get more oxygen to have your yeast water activate by loosing a lid to access air ( oxygen) into your yeast water.
To make non sour bread, grow Saccharomyces cerevisiae ( S.ellipsoides) in the raisin yeast BEFORE Lactic and acetic acid bacterias grow at proper temperature. Saccharomayces cerecisiae will be tolerant to them. ( Saccharomayces cerecisiae >Lactic acid and acetic bacteria)
*Lactic bacteria and acetic bacteria are in the air. Especially acetic bacteria increases in summer. They exist in the air and grow in all kind of fruit and vegetables and other kind of food that they contain glucose. To make kimchi, we use the power of lactic bacteria that is in the Chinese cabbage. Japanese sake is also used the power of lactic acid bacteria that is in the rice. Acetic bacteria will really activate at over 30℃. To make sweet raisin yeast water ( or other fruit yeast), We should fully grow Saccharomyces cerevisiae ( S.ellipsoides) in the raisin yeast ( or other fruit yeast) BEFORE lactic and acetic bacteria grow. Lactic bacteria is not bad when we make yogurt yeast to make sweet bread. When Lactic bacteria is fully grown in yogurt yeast, Other unwanted bacteria can't grow in the yogurt yeast because the lactic bacteria is tolerant to them at proper temperature. * Exception: Sourdough
-----------------------------------------------------------------------------------------------------
*How I maintain my raisin yeast water: *Use a sterilized jar and filtered water. (
no chlorine water)

*And the raisins are NOT coated with OIL. Organic ones taste much better.
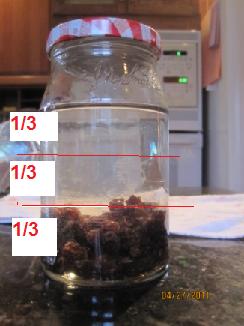
* I don't measure the water actually but by volume like the picture above.
Ingredients:This volume will be about - 13-25g raisin yeast water (5-7% -in the summer 10-11% in the winter) * The temperature by the snake light differs from all season so that I adjust the raisin yeast water amount by the room temperature.
- 45 g raisins (20%)
- 225 g water ( 100%)
Method:1) Shake the jar vigorously after putting all the ingredients in the jar.2) Close the lid not too tight /not too loose and keep it at 76-82F around for overnight.3) Shake the jar vigorously and store it in the refrigerator. ( I don't discard the raisins in the jar)* It is very important to keep some sugar in your yeast water not to get your yeast water hungry. I use the refreshed raisin yeast water after 12 hours I store it in the refrigerator to stabilize.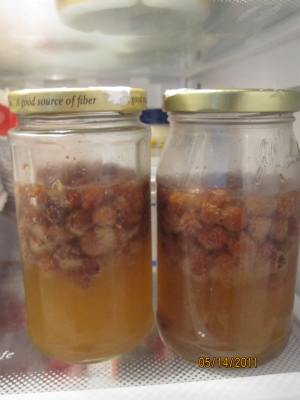
4) Shake the jar vigorously every morning 1 time to get some f your raisin yeast water. I shake it vigorously every morning and night which is 2 times in total now. (September,20011)
If you store it more than several days, I will *refresh it before baking.*Using this maintain raisin yeast water method.
Here is the link that you might be interested in:
http://en.wikipedia.org/wiki/Yeast--------------------------------------------------------------
Other methods that I found in Japanese sites1)
http://levadura.exblog.jp/12421595/I read one of Japanese home baker’s method of making raisin yeast water: To make non sour (sweet) and well risen bread, she tighten the lid and shake the jar gently once or twice a day during the process, and she said" if you make bread with this yeast water, you will have dense bread because the yeast didn't get enough oxygen while it was fermented although the taste is wonderfully sweet. In according to make bread that has volume, she add mashed mixed fruit in the yeast water to ferment it again in a bowl that is covered with plastic wrap at room temperature .It sounds good, but it will give me more work. I rather make raisin yeast simply in good condition.
2) No lid method:
http://cookpad.com/recipe/543057 She tested 2 kind of methods between with lid and no lid like me. She said that No lid doesn't have any alcohol smell and rise very well. She is right but I had a different result after baking. I smelled alcohol from the crumb and the crumb remains wetter in the crumb but I also think that no lid one rise well in the oven.
This is the result:
https://www.evernote.com/shard/s46/sh/aae4b7bd-4181-42f3-b4fd-af43f60b70d7/bfbb002b43291f87240bb662ec67d05e
----------------------------------------------------------------------------------
Q & A:
Q: Does the taste of yeast water affect to the bread?
A: I say " Yes" That is why I smell and taste my raisin yeast water if it is fine. My raisin yeast water is sweet with mild alcohol generally. When the raisin yeast water is just made, You may smell strong alcohol, but it will be milder and read to bake in the next day. If you smell sour or funny, I strongly recommend you to throw away all of your raisin yeast water, and make a new one.
--------------------------------------------------------------
Q : Why do you shake it vigorously during the process?
A: I have two purposes. I can squeeze more sugar to feed the raisin yeast water by the vigorous shakes, which also activate the raisin yeast.I don't recommend this technique for fresh fruit yeast water which have bitter skins because the bitters remains in the yeast water and the bread.
----------------------------------------------------------------------------------------------
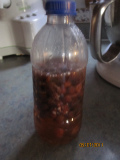
Q: Can I use a water bottle to make raisin yeast water ?
A: I prefer a jar. It depends on you. However, I highly recommend not to use a weak water bottle like "Walt-mart" brand.I tested it before. On the second day, I smelled some chemical from the bottle. Although I noticed that the raisin yeast water in the bottle had a lot of bubbles and very active, which reminded me of the process to make beer.http://www.youtube.com/watch?v=sSrbukazO_Q
Day 1 Day2 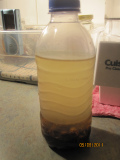
 ------------------------------------------------------------Q:
 How do make bread with raisin yeast water?
A: I use my yeast water like sourdough I used to have.Example:
http://www.thefreshloaf.com/node/23726/thank-you-syd I also use my raisin yeast water as sherry wine or mirin ( sweet Japanese sake for cooking) to make teriyaki sauce, orange sour chicken sauce, and so on. I also keep my alcoholic raisins that are fermented in the jar for home made rum raisins. So I can make Daisy's Panettone.
http://www.thfreshloaf.com/node/21104/my-first-panettone-milanese-notes-trial-run-formula-and-method-thanks-all-advice Once, I used 2 tbsp this rum syrup to fix the sour flavor when I made David's miche:
http://www.thefreshloaf.com/node/23593/david039s-miche-raisin-yeast-water ( NO.5)

Home made rum raisins.I add some sugar in whenever I add more alcoholic raisins.I discard the raisins that I make raisin yeast water from beginning because they are smashed and less sugar left in them.
-------------------------------------------------Q : Is it okay to smell strong alcohol from my raisin yeast water?
A: Yes. When the raisin yeast water is just made, You may smell strong alcohol, but it will be milder and read to bake in the next day. Also,If your raisin yeast water is kept in the refrigerator for a couple days only, It will be fine. If you smell it strong, I will shake the jar vigorously. The smell will be weaken. It is very important to see how active your raisin yeast water is. Very healthy one is the raisins keep floating around the top of the water, and you can hear strong pops ( shwwww..) when you shake it and open it up.Here is the result of a sandwich loaf when I used my old raisin yeast water that was little strong alcohol smell.
https://www.evernote.com/shard/s46/sh/039147ff-264d-4fa4-959d-65cf8cab1c3c/94659bd4a5655d3db0b0b2d4ddc79392------------------------------------------------------------Q: How is it different from between non organic and organic raisins?
A: I have some experiments using Sun-maid raisins ( golden and regular ones)
Regular one is okay, but I tasted weird flavor in the bread a little bit when I compare to organic one.I strongly recommend not to use sun-maid golden raisins. It smelled and tasted very weird.
------------------------------------------------------------Q: Is it okay that my raisin yeast water sank on the bottom in the refrigerator?
A: This is depends. If all of the raisins doesn't float back up to the top of the water within a day after shaking vigorously, I think that the yeast is weak or some unwanted bacterias are in it. I did throw it away and made a new one when I had the problem. It happened when I didn't take care of the raisin yeast water for a couple weeks.
------------------------------------------------------------Q; What temperature is better to make bread for raisin yeast water?
A: For Levain bread:
In the summer, I use colder temperature around 70-73 F for bulk fermentation, 70-76 F around for final proof .
In the winter, The temperature is around 76F for Bulk fermentation, 70-76F for final proof.
I think that raisin yeast water bread is not sour unless you retard it for a long time. But it differs from what king of flour you use. Rye and Whole wheat flour give it more acid or earthy flavor.
Happy baking,
Akiko


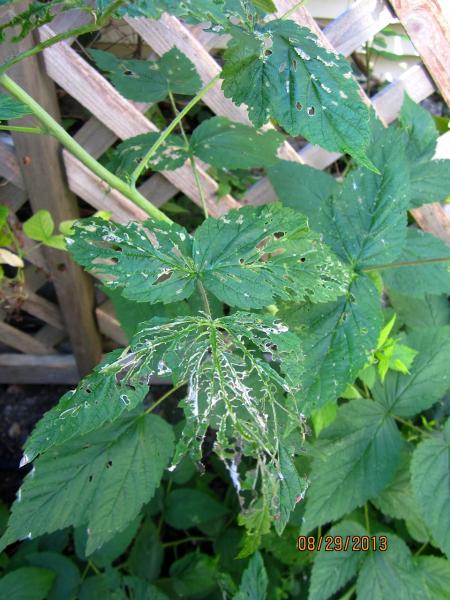 Beetle "Lace"

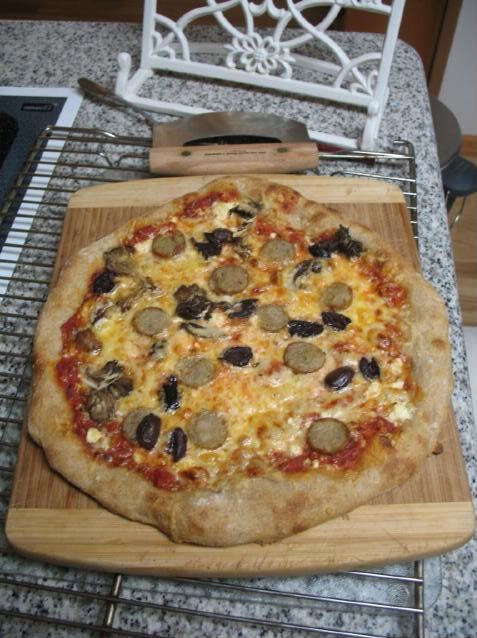
 Ready for the oven