The Fresh Loaf

A Community of Amateur Bakers and Artisan Bread Enthusiasts.

Most bookmarked

DanAyo's picture
DanAyo

123 Sourdough No Knead - Do Nothing Bread

123 Sourdough, No Knead - Do Nothing Bread   Originated by Flo Makanai and submitted by dabrownman 

 A simple recipe with simple procedures. Did you know that you don’t have to knead dough to get great bread. And you don’t need a mixer or really any other tools. But an inexpensive digital scale that weighs grams would be a worthwhile investment. HERE is an example.

 The bread is called 123 Sourdough because the ratios are 1 part Levain, 2 parts water, 3 parts flour, and 2% salt. Let’s choose 100 grams of Levain for this example. So if the Levain is 100g then 2 parts water would be 2 X 100 or 200g water. The flour is 3 parts (remember 123) so 3 X 100 is 300g of flour. Now a tiny bit of math to calculate the required salt. Since the formula calls for 2% salt, you would multiply 0.02 X 350 and you get 7. So 2% times the total weight of the flour, which is 350g equals 7g of salt. Now, if you are paying close attention you should be questioning the 350g of flour. 3 parts of flour is 100 X 3. Where did the extra 50g come from? The Levain is 100% hydration, meaning equal parts of flour and water. Therefore 100g of Levain contains 50g of flour. Salt is calculated as 2% of the total flour in the formula, which is 350g. 

 These instructions assume that you already have an established starter that is active and ready to go. If you don’t have a starter and would like to make one HERE is link that might interest you. Teresa Greenway takes you through the day by day experience of making a starter.

 Make the 1 part levain (for this example of 100g) by taking 10g of starter and mixing equal weights of 45g flour (either All Purpose or Bread Flour) and 45g water in a bowl and cover with plastic wrap and place in a warm spot for 12 hours or until it doubles .

 Put 2 parts water (200g) in a large mixing bowl.  Add the prepared 100g of levain and mix with a spoon until levain dissolves in the water - about 15 to 20 seconds.   Add in 3 parts flour (300g) and 7g of salt.  Mix everything together for about a minute or two in large bowl with a spoon or hands making sure there is no dry flour and everything looks Kosher even if you are not Jewish :) There is no need to knead this dough, thus the name “No Knead - Do Nothing”

 Place bowl in plastic grocery bag.  Make bag air tight by closing with a simple knot.  Let dough double in volume - an estimate of 4 to 6 hours.  Watch the dough not the clock.

 Turn the dough out on counter, gently pat out big bubbles, round into ball with hands and cover with the over turned mixing bowl. 15 minutes later, round into tight ball again and put ball into a proofing basket (a bowl will work) lined with a smooth floured cloth with seam side of the dough facing down.  Place container back into the plastic grocery bag again and tie as before.

 Let it proof 1-2 hours till it reaches 90% increase in volume.  Watch the dough not the clock again.  Click HERE for a video showing how to perform a finger polk test. Preheat your oven to 450F with the Combo Cooker inside 45 minutes after you place your dough in basket to proof.

 Gently dump the dough into the preheated cast iron combo cooker, (optional - Spritz dough with water from spray bottle),  cover with the deep lid and put in the 450F oven for 15 minutes of baking with the lid on.

 After 15 minutes remove lid and bake about 12-15 more minutes until bread is nicely browned, cracked open and blistered.  NOTE - since the seam was placed up in the cooker, you should have beautiful, natural looking cracks. Remove bread from Cooker and move it to a wire cooling rack. Let it cool for 2 hours before slicing on a cutting board with a serrated bread knife or just tear off hunks to eat.

 Optional - You can check temperature if you want with instant read thermometer.  When it reads 208 F- 210 F on the inside it is done. If you don’t have a thermometer you can tap the bottom of the loaf and it should make a hollow sound.

 Exercise caution when placing the dough in the hot cast iron pot.  Most of all, enjoy a nice loaf of bread that you made and was easy as pie.

 It you don't have a combo cooker preheat a baking sheet or jelly roll pan.  Dump dough out on parchment paper on a peel and transfer to the pan.  Cover with the stainless steel bowl or some other oven proof large pot.  If you have a baking stone use that in place of the baking sheet. If you choose to bake your bread without a cover (Dutch Oven, Combo Cooker, etc) you can get outstanding results using a technique called Mega Steam. Click HERE to to learn more.


Fully documented 123 SD bake with images can be seen HERE.


 Happy baking


Nice tools to have, but none are necessary. 

Digital Scale

Dough Knife

These links are examples, and not an endorsement for a particular item.


IgorL's picture
IgorL

Multigrain sourdough with seeds

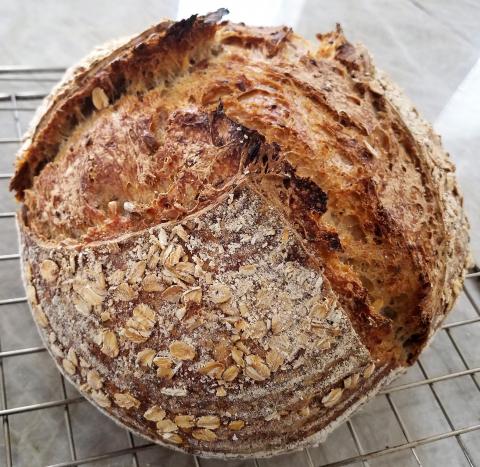
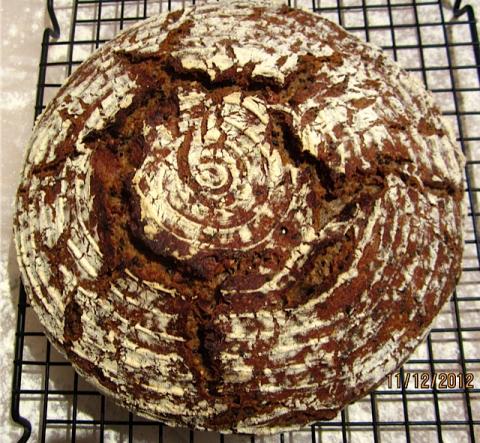
Well, Passover is over, and leavened bread is back, with the vengeance. :-) Today's creation: sourdough multi-grain bread with seeds. I wish Internet had the ability to transmit the emotion which crunchy crust elicits while one tastes a slice with good salted Irish butter. 

I started with same sourdough recipe I blogged before, which works well for me.  The only modifications were: I upped the percentage of whole wheat flour a bit, and also added about 1/2% of water because I figured that all the seeds would need it. The seeds included chia, which I understand likes absorbing water, so I could probably easily go with the whole extra 1% of water.  I'll try it next time.

For the seeds mix I used some arbitrary amounts of pumpkin seeds, sunflower seeds, flax, chia, white sesame, and rolled oats.  I toasted everything lightly on a dry pan, and let them cool completely before adding into the dough after fermentolyse phase, together with salt.  The total amount of seeds weighed after toasting was 88g.

I also sprinkled some oats inside the banneton before I put the dough inside, and a bit more along the sides of the dough ball, between it and the walls of the banneton.  The advantage turned out to be dual: I got oats stuck to the surface of my bread and baking perfectly crunchy, which is what I wanted.  Those same oats also kept the dough completely from sticking to the form, so it practically fell out on its own while I was inverting the form on the cooking sheet. 

Levain (100% hydration) - 50g starter, 50g warm water, 50g  KA WW flour, mixed in the morning and put in warm place.
Water - 315g
Flour - 400g Wegmans AP unbleached (I didn't have any BF on hand) + 50g  KA WW 
Salt - 10g
Flour total 450+75 (from levain) =525g
Water total 315+75 (from levain) =390g 

Baker's math:
AP flour - 81%
WW flour - 19%
Water - 74%
Salt - 1.9%
Various seeds - 1.7%


PiPs's picture
PiPs

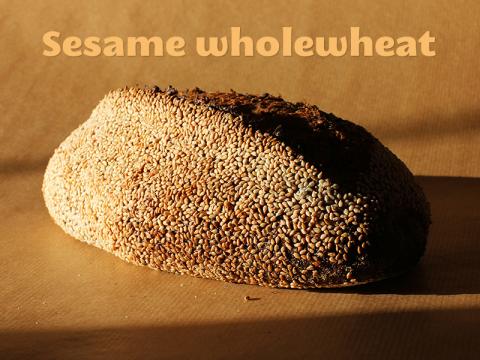
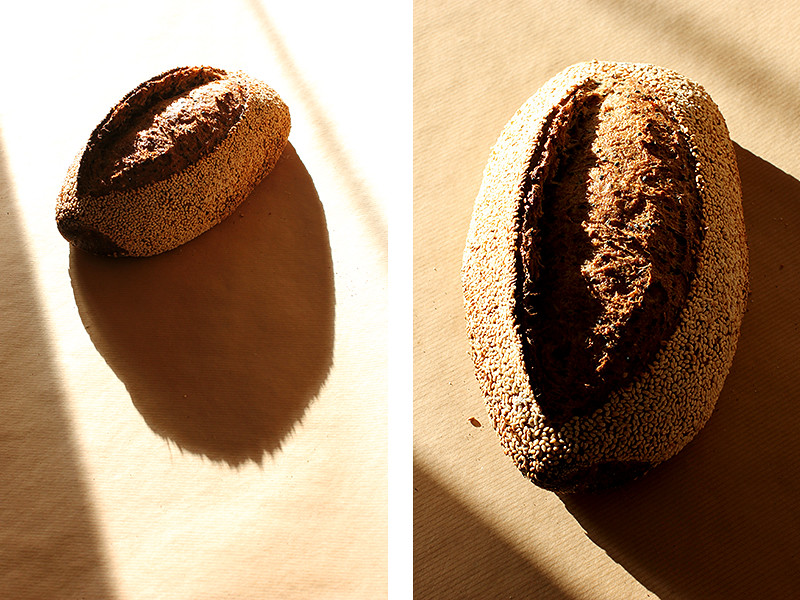
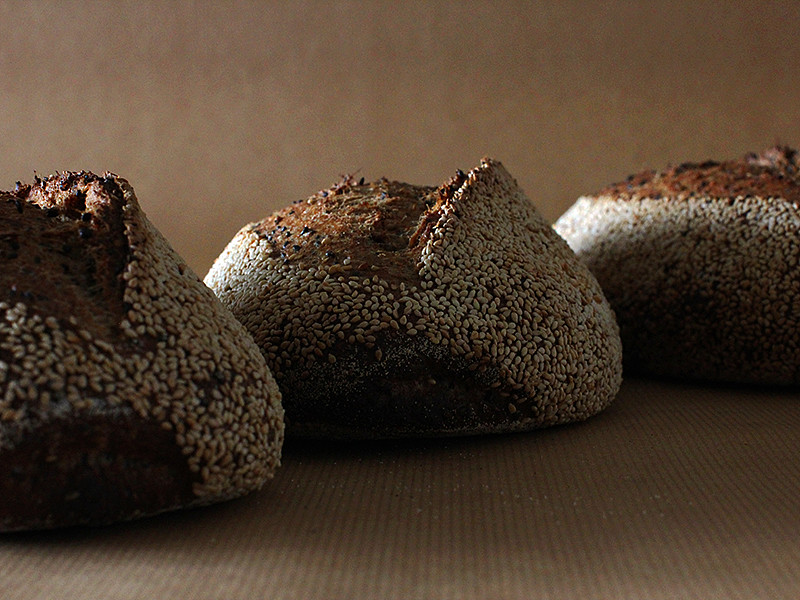
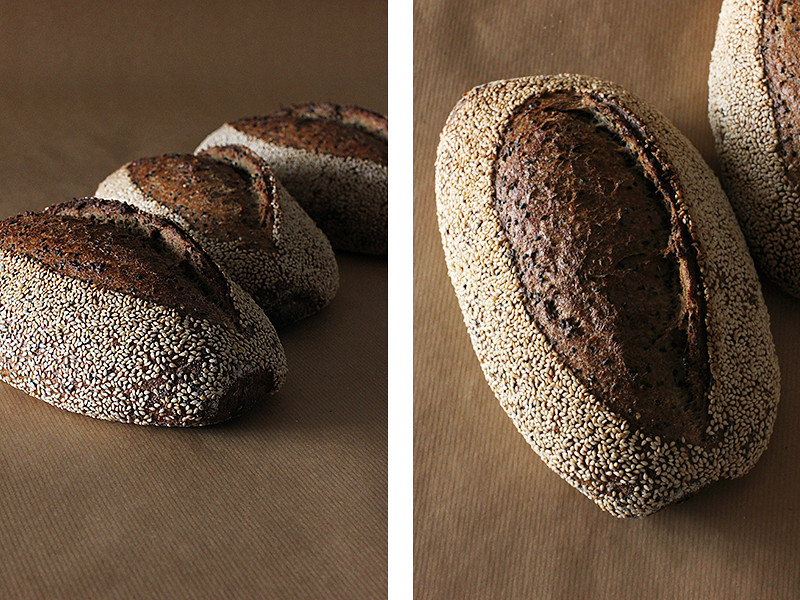
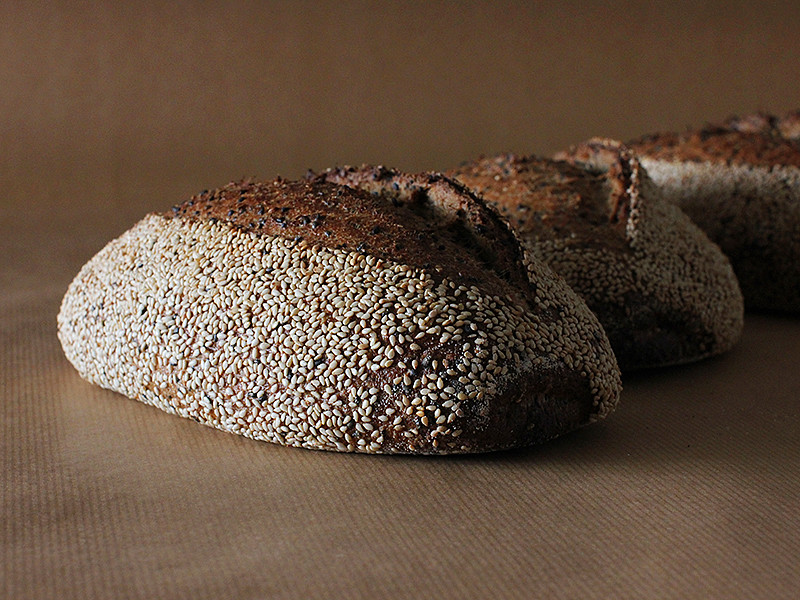
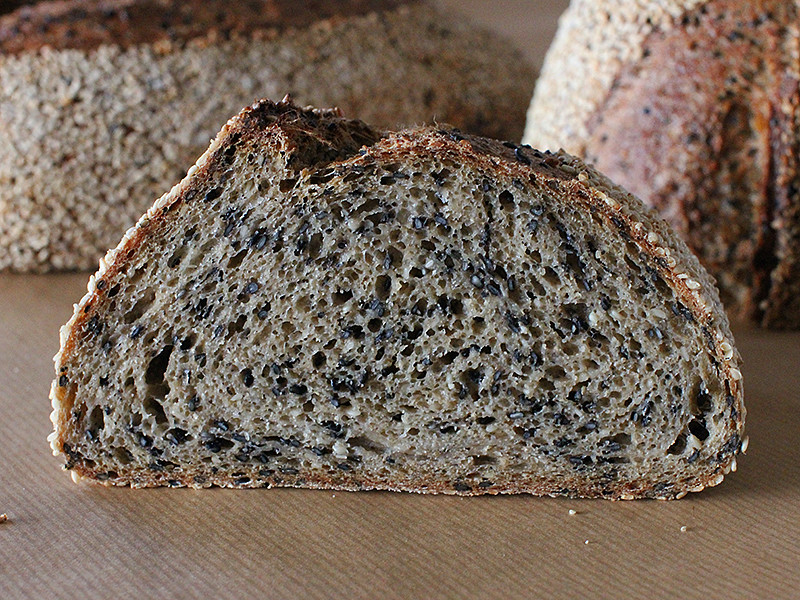
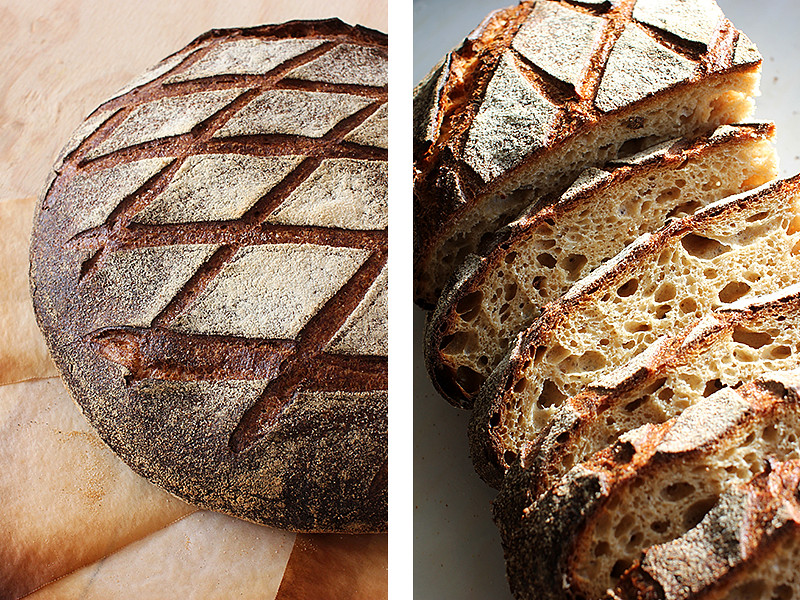
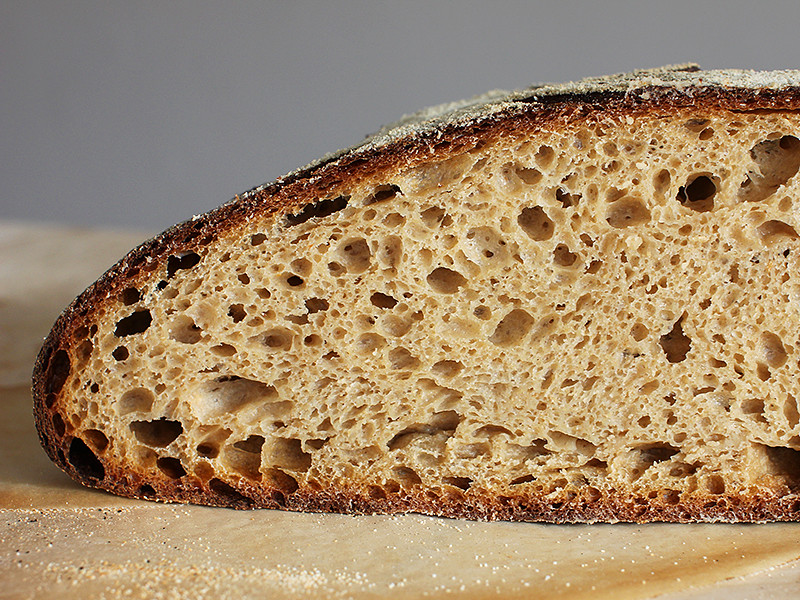
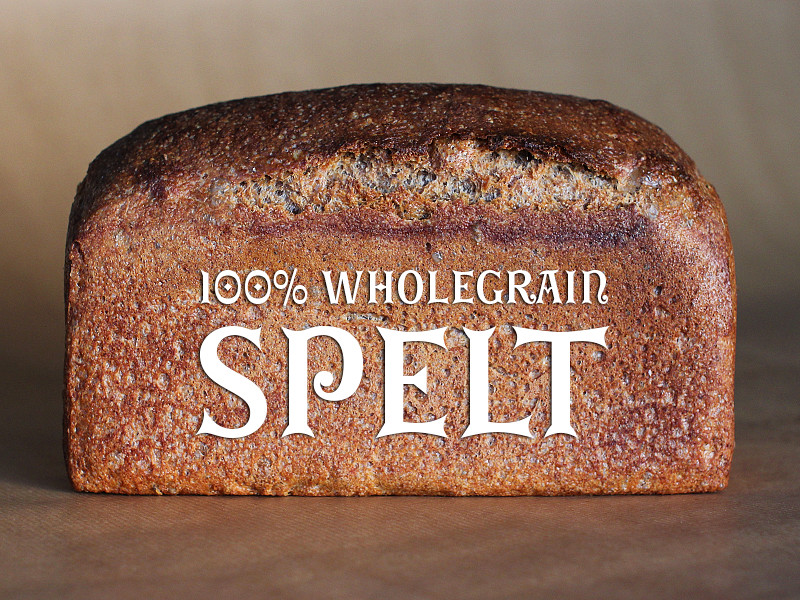
Sesame Wholewheat + Red Gum Miche + 100% Wholegrain Spelt


Peering over my computer monitor I can see it is still raining. My computer lurks in the smallest room in our house with a single window that allows a narrow view through to another room and then another window before a tiny glimpse of the outside world finally emerges. My computer cave seems so removed from the country roads under expansive skies that I was travelling on the week before.

Some free time that week had allowed me the opportunity to spend a time out of the city in Pittsworth baking wood-fired breads with my friend Laurie. I always treasure the time spent with Laurie and Rhonda and try to breath in as much country air as I can possibly hold before making the trip back to my city home.


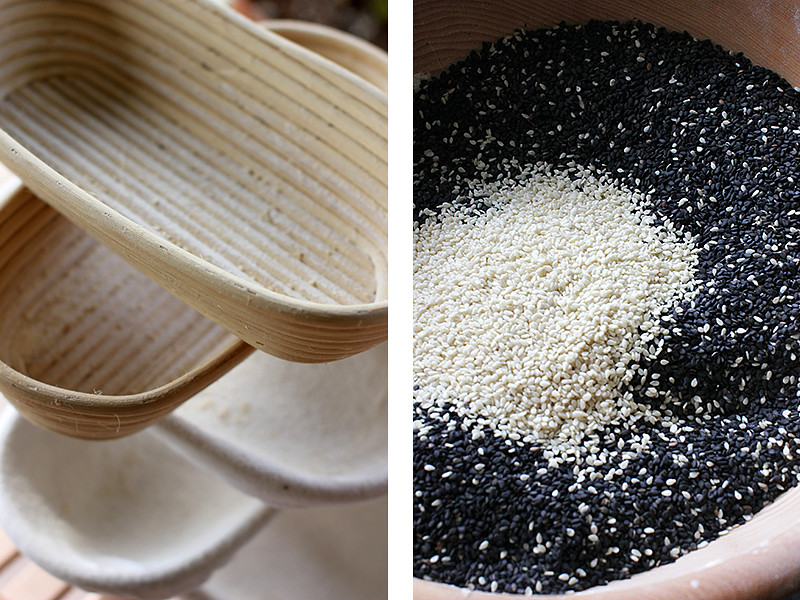
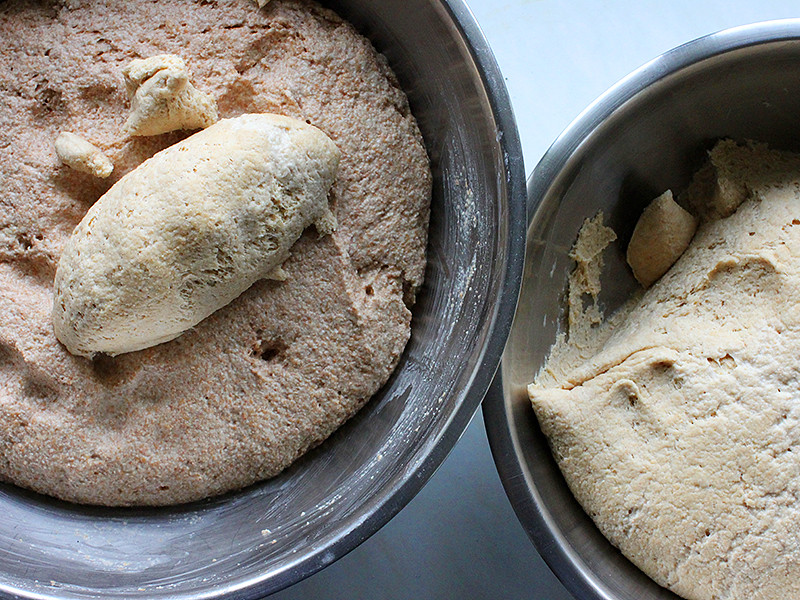
Arriving home I wanted to further pursue the wholegrain baking I have been working on—freshly milled flour, high hydration dough and sourdough starters. I had picked up a bag of richly coloured organic unhulled sesame seeds while out of town and this was to be the catalyst for a delicious bread. I am continuing the practice of retarding the wholegrain dough in bulk. Not only does this control the fermentation, but it also allows for an extended ‘wet time’ … this is always a good thing when baking with wholegrains.

The roasted seeds mixed through the wet dough add flavour, texture and a softness that remains for days after baking. This is bread that tastes and feels as good as it looks.


Sesame Wholewheat

Formula 6 x 750g

Overview

%

Weight grams

Levain build – 3 hrs 26°C


Starter

50

93

Freshly milled organic wheat flour

100

186

Water

64

120


Final dough  24°C


Levain

20

369

Freshly milled organic wheat flour

100

1846

Water

109

1938

Salt

2.5

46

Unhulled sesame seeds roasted

18

320

Hulled sesame seeds

As needed


Total


4519


  • Mix final starter and leave to ferment for 3 hours at 26°C
  • Roast sesame seeds for 10 mins. Turn occasionally to redistribute.
  • Mill flour and mix with water (hold back 10% of water) and autolyse for 20 mins.
  • Add starter to autolyse then mix in bowl for 5 mins. Add salt and remaining 10% of water and squeeze through bread to incorporate (dough will separate then come back together) then mix and squeeze a further 5-10 mins. The dough is very wet but should start to feel some strength by the end of this mixing.
  • Add roasted sesame seeds at the end of mixing.
  • Place in a fridge at 4°C for 15 hours. I gave the dough three folds at 30mins apart.
  • Increase or decrease the number of folds depending on the strength of your wheat.
  • Remove from fridge. Divide at 750g. Preshape.
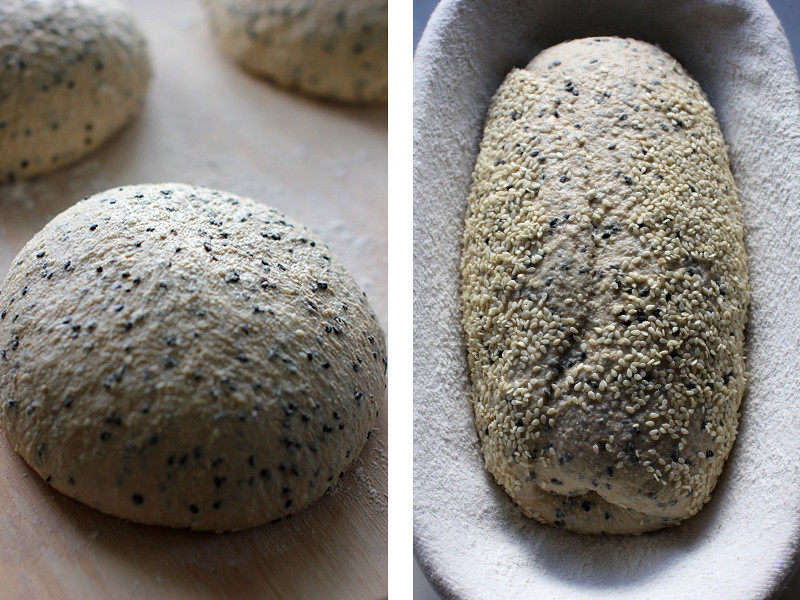
  • Bench rest 45–60mins. Shape and roll the dough on a wet cloth and then hulled sesame seeds. Proof in couche or narrow basket.
  • Final proof was two hours at room temperature. Watch the dough!
  • Bake in a preheated oven at 250°C for 10 mins with steam. Reduce temp to 200°C then bake for a further 40 mins.


Laurie and I had a great bake in Pittsworth. For me it was an interesting experience going back and baking in a much smaller oven than I had been using at Chester Street. Size does make a difference :)

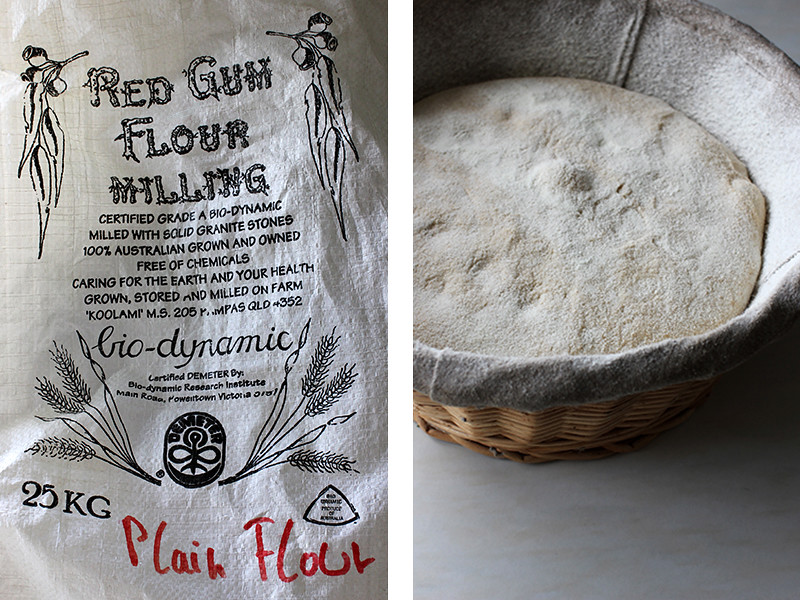
The day before the bake while the oven was full of fire, Laurie and I travelled out along straight flat roads to local biodynamic farmer Barry Bowden.  Barry is milling grains and selling flours under the name of Red Gum Milling. Laurie has been using Red Gum Milling flour for quite a few years now and I have always been a little jealous that he had such a great local resource at his disposal. Barry is an ingenious bloke … he has built his own milling and sifting equipment that sits within a large flour-coated shed on his farm.


Barry has been growing and milling all manner of biodynamic grains depending on the seasons and his clients requirements. His large industrial granite stone mill feeds into a rustic, almost steam punk looking sifter where two different streams of flour are produced depending on the screens he has in place. Even though the mill wasn't running at the time I found a bag of sifted bran and was impressed by the beautiful bran separation he could achieve. Puts my little Komo shredder to shame :)


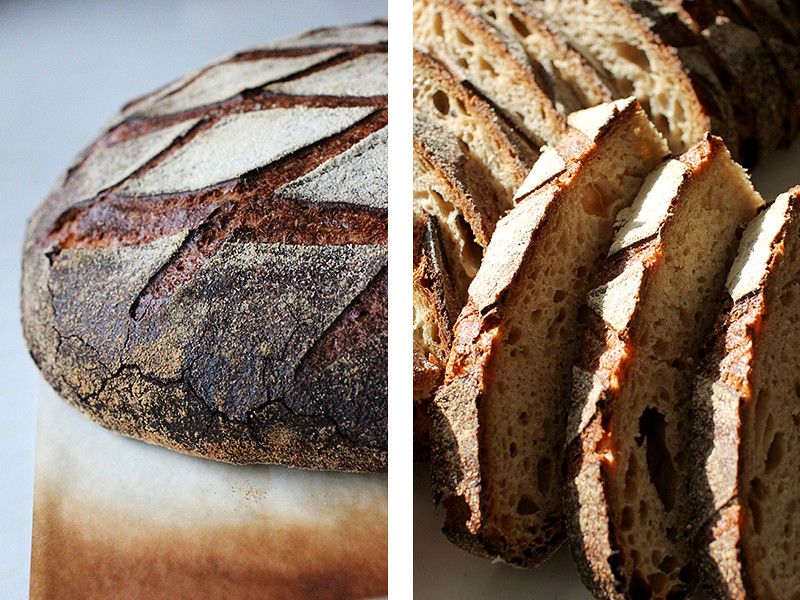
I arrived back in Brisbane  a few days later with a few kilograms of Red Gum Milling’s ‘plain flour’and couldn't wait to bake with it. It is most definitely a high extraction flour, and although Barry couldn't give me an extraction level, I would guess that it was 80% or higher. It has lovely golden colour and fresh aroma but what surprised me most about this flour was its strength.

I started with a rough hydration level of 75% but quickly had increased this to 85% … this probably still wasn't enough. The finished bread was pretty chewy and the crumb was tough but delicious. Perfect for spreading butter :)


I have been baking a lot of wheat breads of late and I need to start diversifying. Spelt has been a long time challenge of mine, and although I have baked successful white spelt breads on a hearth, I find they are usually to dry for my liking. For me, it’s actually the colour of the spelt bran that is most appealing—rusty coloured bran that peels off nicely even in my little Komo mill.

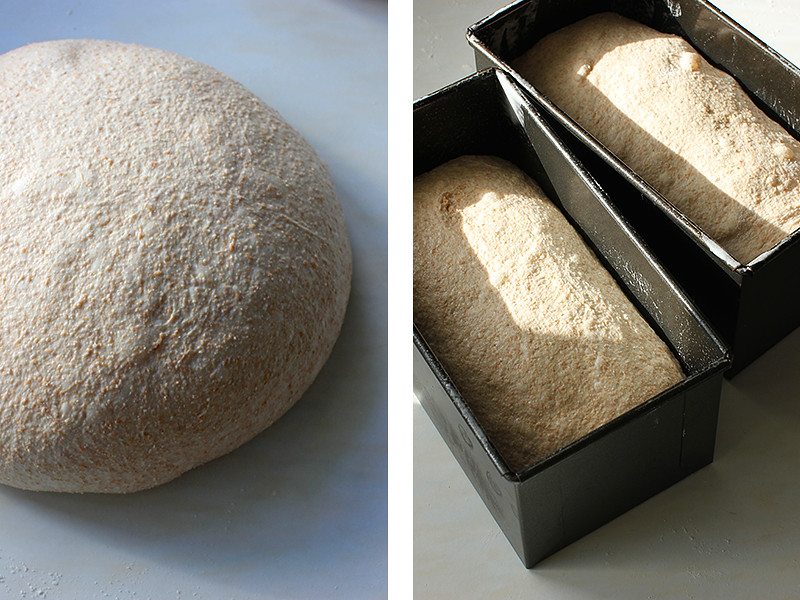
The nicest spelt breads I have eaten have been baked in tins—and this seemed to fit nicely with my current method of baking wholegrain breads using lots of water. The tin supported the slack dough through it's final rise and pushed it further upwards during the bake.

This has been my go-to bread all week … I cannot get enough of it! The crumb is soft and moist—hardly comparable to the dry crumbly feeling that some breads seem to have.


100% Wholegrain Spelt

Formula 2 x 1350g tinned loaves

Overview

%

Weight grams

Levain build – 3 hrs 26°C


Starter

50

93

Freshly milled organic wheat flour

100

186

Water

64

120


Final dough - 24°C


Levain

20

245

Freshly milled organic spelt flour

100

1224

Water

100

1224

Salt

2.5

31

Total


2724


  • Mix final starter and leave to ferment for 3 hours at 26°C
  • Mill flour and mix with water (hold back 10% of water) and autolyse for 20 mins.
  • Add starter to autolyse then mix in bowl for 5 mins. Add salt and remaining 10% of water and squeeze through bread to incorporate (dough will separate then come back together) then mix and squeeze a further 5-10 mins. The dough is very wet but should start to feel some strength by the end of this mixing.
  • Place in a fridge at 4°C for 15 hours. I gave the dough three folds at 30mins apart.
  • Increase or decrease the number of folds depending on the strength of your wheat.
  • Remove from fridge. Divide and preshape.
  • Bench rest 45–60mins. Shape and proof in tins
  • Final proof was three hours at room temperature. Watch the dough!
  • Bake in a preheated oven at 250°C for 10 mins with steam. Reduce temp to 200°C then bake for a further 60 mins.


And it seems the word is out on the street that I am baking at home again … and this has meant quite a few ‘home sourdough’ have been baked for friends and family.

Happy baking to all ... I know I am!

Cheers,
Phil

hanseata's picture
hanseata

Aroma Bread - A Love Story


One of my most favorite cookbooks is "Ancient Grains for Modern Meals".

Award winning Author Maria Speck combines her German father's love for hearty grains, and her Greek mother's culinary talents in dishes that make you grab your shopping bag, hop on the bike or in the car, and drive to the next natural food store to buy those ancient grains, veggies and fruits for Maria's mouthwatering meals.

Normally I consider a cookbook worth its money, if it contains at least one recipe I really like to cook. "Ancient Grains" has so many, that I still haven't prepared all the ones I want to try. (No, I DON'T get a commission!)

 A few of the dishes are breads, among them the Aroma Bread. A no-knead bread by trade, its evocative name spiked my interest, and my love affair with the spicy loaf began.

"Ancient Grains" is very user friendly, with detailed, easy to follow instructions, no sophisticated culinary equipment needed. No-knead breads meet these expectations, a mixing bowl, a wooden spoon, a clean kitchen towel, a Dutch oven, and you are all set.

These low maintenance breads don't want you to slave over them, they are free spirits, and perfectly willing to go and develop themselves, if you give them enough time (and a little bit of yeast.) They show their gratitude by rising eagerly, and tasting better than many other loaves that had been kneaded, slapped and punched into submission.

You have the choice between a crunchy, and an XX-crunchy Aroma Bread. If you opt for the super chewy, you need to soak whole grain berries for several hours, before mixing them into the dough. This is definitely no impulse bread, so plan to bake it 24 hours ahead.

Maria called her loaf "Aroma Bread" for a good reason. This truly aromatic loaf is not for the faint hearted! But in our old home country Germany breads are often flavored with coriander, fennel and caraway, these herbs are even commonly referred to as "Brotgewürz" (bread spices.) You can use them whole, or coarsely ground.

Bread spices fennel, caraway and coriander

As easy as no-knead breads are to mix, handling wet dough always remains a bit of a challenge. And here comes the sticky wicket: the dough has to be shaped into a loaf, and transferred from the mixing bowl to a place where it can rise. And, after that, it has to be turned out into a piping hot Dutch oven.

That leaves you with two choices: either to lower the bread gently into the pot, risking nasty burns (aka Baker's Badge of Honor). Or you let it drop from a secure height - and have your bread sigh and deflate!

Maria solves the problem by having you scrape the bubbly fermented mass onto a well floured countertop (flour is your friend, creating a barrier between the sticky dough and its surroundings), so that you can fold it into a round.

Then you place the loaf on a floured kitchen towel, fold the corners over it, and, voilà, you have a cozy proofing place. Of course, it takes a rather amorphous shape from being bundled in a kitchen towel. 

My first bread went into a large, oval Dutch oven (I didn't have a smaller one), and eagerly spread to fill the void.

My first Aroma Bread - shaped like a roly poly!

Baked into a rather flat loaf, it reminded me of those little things that scurry away when you lift a stone. But when I took the first bite, my eyes glazed over. My flat roly poly bread tasted awesome!

The next time I decided to set the bread more boundaries, changing its Armadillidiida appearance. Instead of proofing it simply in a towel, I used my pretty brotform to contain it.

Proofed in a rising basket, the bread is round but still...


It came out of the oven nice and round, but still... way too much room to spread during the baking.

Alas! My main source for discounted kitchen gadgets, Home Goods, was letting me down when I needed it most. Still without the right sized pot, I decided to experiment with a free-standing, self- contained sourdough version, made with pre-doughs à la Peter Reinhart's "Whole Grain Breads".

Aroma Bread made as free-standing loaf (with sourdough)

My hearth baked sourdough loaf turned out beautiful. Though I couldn't find much difference in taste, this method is a good alternative for people who either have no Dutch oven, love wild yeasts, hate wet doughs, or prefer to bake their bread as free-standing loaf.

The next time I visited Marshall's (another treasure trove for kitchen stuff) I found a snazzy turquoise cast iron pot in just the right size - for half the price! And soon was mixing the ingredients for my fourth Aroma Bread - again the no-knead version.

And out of the oven came (TATAAA!): the perfect Aroma Bread - looking just as good as it tasted!

The last task left to do for inquiring minds, was to try the sandwich version of Aroma Bread, baked in a loaf pan. A cold cut-friendly shape, and the easiest way to make this wonderful bread. And it has an additional benefit: you can bake more than just one loaf at a time. (My customers will be happy!)

Aroma Sandwich Bread - the easiest version


COMMENTS:

  • If you use the optional whole grain berries (I made the bread with and without, both versions are great) add more salt: 9 g/0.3 oz instead of 7 g/0.25 oz. 
  • Instead of sunflower seeds you can also take pumpkin seeds (or a mixture of both.)
  • Toast the seeds, before adding them to the dough.
  • For an easier, risk free transport of the proofed bread into the hot pot, use a large piece of parchment paper as a sling to lower the bread gently into the pot. You don't have to remove it.


AROMA BREAD    1 (2-pound) loaf


Grain Berries (optional):

1/2 cup whole wheat, rye, kamut, or spelt berries

cold water, for soaking


Dough:

340 g/12 oz whole spelt flour (3 cups)

107 g/ 3.75 oz whole rye flour (1 cup)

  57 g/2 oz coarse or medium stone ground cornmeal (1/2 cup)

  67 g/ 2.35 oz sunflower or pumpkin seeds, toasted (1/2 cup)

  35 g/ 1.25 oz flax or sesame seeds, toasted (1/4 cup)

   2 tbsp. aroma spice blend*)

    7 g/ 1 1/2 tsp fine sea salt (or 9 g/0.3 oz if using whole grain berries)

    1 g/ 1/4 tsp. instant yeast

     all soaked whole grain berries (if using)

475 g/2 cups cold water

cornmeal, for sprinkling

 *) Aroma spice blend: mix 6 tablespoons whole coriander seeds with 3 tablespoons each fennel and caraway seeds (enough for 6 loaves).


 DAY 1

In the morning, place whole grain berries in a bowl and cover with at least 1-inch cold water. Cover, and leave at room temperature to soak. Before using, drain them through a strainer (by the way, the soaking water is an excellent fertilizer for your plants.)

Mixed dough - I used black sesame seeds for a nice contrast

In the evening, whisk together all ingredients for the dough in a large bowl, except for soaked grain berries and water. Scatter grain berries on top, and add almost all the water. Stir with a dough whisk or wooden spoon until all flour is hydrated. (Dough will be wet and sticky, if not, add a bit more water.) Cover with plastic wrap, and let sit at room temperature to ferment for 12 - 18 hours.

Overnight the dough grows to a puffy, swollen mass

 DAY 2

Use a rising basket, (or improvise by placing a clean kitchen towel over a basket or bowl.) Sprinkle with fine cornmeal (other flours work, too). Generously flour your work surface. Using a bowl scraper or rubber spatula, scrape the stringy, bubbly dough onto the work surface.

Scraping out the fermented dough you will see its spongy structure

 With floured hands (or two oiled bench knifes or bowl scrapers), fold dough exactly 4 times, always towards the center, from the top, the bottom, the right and the left side. Turn the dough package around and place it, seam side down, into the towel lined rising basket. Sprinkle with cornmeal or flour, cover with a kitchen towel, and let it rise for about 1 hour.

After 30 minutes, position a rack in the bottom third of the oven, and preheat oven to 475ºF. Place a 4 1/2- to 5 1/2-quart cast iron pot or Dutch oven (with lid) on the rack to heat up.

When the dough has grown about 1 1/2 times its original size, poke it gently with your finger. The dimple should not fill up again (it can come back a little bit, but should remain visible). If not, wait another 15 minutes.

Fitting snugly in the Dutch oven, the bread will rise more than spread

Remove hot pot from the oven and open the lid. Gently turn out the proofed bread from the rising basket into the Dutch oven, seam side up, guiding it with your hand, (or turn it out onto a parchment paper and, holding the paper on both sides, gently lower the bread into the pot (with paper).

Cover with the lid, and bake for 30 minutes. Uncover, and continue baking for 20 - 25 minutes, until the loaf is nicely browned, sounds hollow when thumped on the bottom, and an instant thermometer, inserted in the middle, registers 200ºF.

Remove bread from cast-iron pot and transfer it to a wire rack to cool.


AROMA SANDWICH LOAF

Grease a 9 x 5-inch loaf pan with oil, and sprinkle it with 1-2 tablespoons of flax- or sesame seeds. After folding the risen dough, place it, seam side up, right in the prepared loaf pan. (My suggestion: brush top with water, and sprinkle it with more flax- or sesame seeds.) Let it proof as described.

Preheat oven only to 425ºF, placing an oven proof pan or broiler tray for steaming on a the lowest level to heat up.

When loaf is proofed, place in the middle of the oven, pour 1 cup boiling water in the hot steam pan , and bake loaf for 30 minutes. Remove steam pan, rotate bread 180 degrees for even browning, and  bake it for about 30 minutes more, or until it registers 200ºF.

Let loaf cool in the pan for 5 minutes, than turn it out onto a wire rack (if it sticks to the pan, loosen it with a butter knife or spatula.)


AROMA SOURDOUGH BREAD 

Starter:

64 g/2.25 oz rye mother starter (100%hydration)

205 g/7.25 oz whole spelt flour

124 g/4.4 oz lukewarm water


Soaker:

  57 g/2 oz coarse or medium ground cornmeal

  75 g/2.65 oz whole rye flour

  92 g/3.25 oz whole spelt flour

168 g/6 oz water

    4 g/0.15 salt


Final Dough:

   all soaker and starter

  43 g/1.5 ozwhole spelt flour

    5 g/0.2 oz salt

    1 g/1/4 tsp. instant yeast

  67 g/2.35 oz sunflower- or pumpkin seeds, toasted

  35 g/1.25 oz sesame seeds, toasted

    2 tbsp. aroma spice blend (see original recipe)

182 g/6.4 oz water, add more as needed


DAY 1

In the morning, stir together all ingredients for soaker. Cover, and leave at room temperature.

Mix all starter ingredients at low speed (or by hand) for 1 minute, until all flour is hydrated. Knead for 2 minutes at medium-low speed (or by hand.) Let rest for 5 minutes, then resume kneading for another minute. Cover, and leave at room temperature.

In the evening, mix all ingredients for final dough for 1- 2 minutes at low speed (or by hand) until all flour is hydrated. Knead at medium-low speed (or by hand) for 4 minutes, adding more water as needed. Dough should be very tacky and not dry to the touch. Let dough rest for 5 minutes, then resume kneading for 1 more minute. (Dough should be tacky, but not sticky.)

Gather dough into a ball, and place it in a lightly oiled bowl, turning it around to coat it with oil. Cover well, and place it in refrigerator overnight.


DAY 2

Remove dough from fridge 2 hours before using, to warm up. (It should have risen nicely overnight.)

Preheat oven to 500ºF, with bread stone and steam pan.

Transfer dough to lightly floured work surface, and shape into a round. Place boule, seam side down, in a floured rising basket. Sprinkle with more flour. Cover, and let it rise for 45 - 60 minutes, or until it has grown 1 1/2 times its original size, and a dimple stays visible when you gently poke it with a finger.

Turn bread out onto a parchment lined baking sheet (or use a peel) and place it in the oven, pour a cup of boiling water in the steam pan and reduce heat to 475ºF. After 10 minutes, reduce heat to 425ºF. Continue baking for another 10 minutes, rotate bread 180 degrees, remove steam pan, and bake for about 30 minutes more, or until it is nicely browned, sounds hollow when thumped on the bottom, and registers 200ºF.

Cool on wire rack.

This Aroma Bread was made with whole kamut berries

 You can also follow Maria Speck on facebook or on twitter (I do!)

 (Reprinted with permission from Ancient Grains for Modern Meals by Maria Speck, copyright © 2011. Published by Ten Speed Press, a division of Random House, Inc.)

 Submitted to YeastSpotting

ananda's picture
ananda

Laminated Yeasted Dough Construction

Hi,

I thought some detail on creating laminated dough for croissants etc may be a popular subject.


CROISSANT DOUGH


MATERIAL

FORMULA

[AS % OF FLOUR]

RECIPE

[GRAMMES]

RECIPE [GRAMMES]

Strong White Flour

100

600

1000

Salt

1.3

8

13

Milk Powder

5

30

50

Fresh Yeast

6

36

60

Cold Water

63

378

630

SUB-TOTAL

175.3

1052

1753

Butter

41.7

250

417

TOTAL

217

1302

2170

Method:

  • Mix the ingredients for the dough to form cool, developed dough.
  • Put in a plastic bag in the chiller and rest for 30 minutes. Cut the butter into 4mm thick strips and put back in the chiller.
  • Roll the dough out to a rectangle 8mm thick. Put the butter pieces flat onto 2/3 of the rectangle, and fold as below:


  • Turn the dough piece clockwise through 90°. Roll out to the same size as before, fold as above, and turn. Repeat once more.
  • Chill the billet for half an hour and give 2 more folds and half turns as described. This gives 168 layers of butter in the croissant dough. Chill again for half an hour.
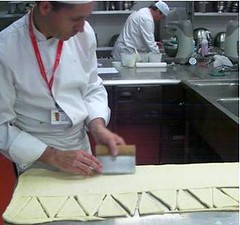
  • Roll the dough piece out to 5mm and use a croissant cutter to cut out triangle shapes. Stack into piles of 6 and rest covered for 2-3 minutes.   You can use a template made from wood, or, cardboard, to cut out the individual triangle shapes instead.   Please see the video, at 1 min 35secs, for a brief view of the croissant cutter on the left of the screen.
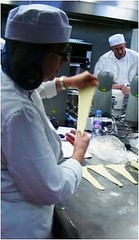
  • Tease out each triangle, fold up the top edge and roll up tightly. Roll out the feet to pointed ends and move round so these feet join up to make the classic shape.   See Vicki demonstrating this in the pictuure below.   For Pain au Chocolat and Pain Amande, cut the dough into strips, 6 x 10 cm; cover with small chocolate chips, or a thin layer of almond paste, and roll up so the seam is well pressed down on the bottom.
  • Place on silicone lined baking sheets and brush with beaten egg.   For the pain amande, dip in flaked almonds
  • Prove at 38-40°C, 80%rH for 40 minutes.

Bake in a hot oven, 235°C for 12-15 minutes; a deck oven should be set at 7 for top heat, and 5 for bottom.   No steam is used, and a damper is not needed.

[Almond Paste to make Pain Amande]

150g Icing Sugar, 150g Caster Sugar, 300g Ground Almonds, 50g Egg, beaten, 1 tbsp Lemon Juice


Key Principles of successful laminated dough:

  • 1. The dough should not be too wet. If the dough is soft, it will stick to the bench and the pin, and the laminations will quickly be ruined. If the dough is too tight, it will be difficult to roll out without the dough insisting on springing back. Some have advised that the dough need not, therefore, be fully-mixed. This is because all the rolling and folding will continue the dough development. My own thought on the matter is that the dough should be developed to the level allowed by the choice of flour used. So if a top grade flour is used, the dough should be mixed accordingly. If the flour is not so strong, it will not tolerate intensive mixing anyway; by hand, or, machine.
  • 2. The best way to deal with dough which springs back is to allow extra resting time. Allowing plenty rest between turns is the first key principle to grasp. If you compare the folding process to working out bicep muscles in the gym, you should not go far wrong. Bicep curls would be repeated to the point where the muscle is so tensed up it cannot do any more. After a period of rest the same moves are repeated. The moves are designed to strengthen the muscle by continued work. But there has to be rest in between to allow the muscles to relax. It is exactly the same for the gluten-based protein fraction in the dough.
  • 3. The other key principle is to be able to work cold. It is generally cold and raining here in the UK, but I am aware many who write on this site have problems creating cool enough conditions in the kitchen to lessen the burden of making these items; I wish I lived where it was warm too, don't you believe it! Here are a few options:
  • Use a chilled marble slab, or, a refrigerated work surface.
  • Use crushed ice in the dough, or chill the dough water for an extended period prior to dough mixing.
  • A good trick is to chill the dough overnight. Give the dough 3 half turns, then bag and chill overnight. Waken up early the next morning, give the dough its last half turn and process from there. Bake off the croissants and serve straightaway for breakfast. You have just made yourself soooo popular with everyone in the house, forever!
  • 4. What about the choice of laminating fat? Commercial croissants tend to be made with specialised and plasticised fats. This means the final product tends to be just a lot of air! Worse still if the fat is cheap, the melting point will be high, and the product will stick in the roof of the mouth [palate cling] These fats are not exactly renowned for their health-giving properties, either. So they are used on cost and performance grounds. As far as I am concerned croissants are made with all-butter. It is possible to buy a concentrated butter commercially. This is great, because all the water has been removed, so it means the butter block can be rolled out to a sheet, without it melting. Household dairy butter has a water content of 15-20%, so the problem with not working cold, is that the butter can easily start to melt, meaning the death of all the laminations you have worked so hard to achieve. So, performance-wise, butter is not the best, but for flavour, it obviously has no competition. I'm pretty sure concentrated butter is only available commercially; this is definitely the case for the UK and rest of the EU too.
  • 5. Regarding lamination; due care and skill is the 3rd principle. I teach that croissant are given 4 half turns. Danish are often given only 3. Full puff paste employs equal laminating fat to flour used in the dough. This is usually given 6 half turns. The more turns, the more layers created. Above I state 4 turns gives 168 layers. Another 2 half turns works out as follows

168 x 3 = 504   504 x 3 = 1512.   So many layers is incredibly difficult to achieve.   Yet, to commercial bakers it is essential.   The number of layers dictates the amount of "lift" in the product, giving greater volume to weight ratio!   This affects product yield; well-aerated puff paste yield more products.   Given these doughs use expensive ingredients, a baker cannot afford to miss out on achieving correct product yield.

  • 6. In terms of volume and lift, it is important to explain how this works with yeasted doughs like these. When the product goes into the oven, the fat layers melt into the dough layers beneath, creating cavities between the dough layers. These cavities are filled with steam from the water content of both butter and dough. The steam exerts pressure on the dough layer above, causing the product to expand. See diagram below. So, it follows that the more layers, the greater the pastry will rise. So, what of the yeast? Well, the benefit is in terms of a first fermentation for sure, but it has to be achieved in cold conditions, as we have noted. This should mean the yeasts are far from worked through when the croissants are set to prove. Note the yeast level is relatively high. Any benefit has to be derived from rapid expansion as the croissants hit the hot oven. So, testing the dough for evidence that fermentation is slowing down is not a relevant test. We have no need for any sort of complex fermentation at this stage.

7. Lastly, oven treatment tends to be incredibly forgiving to croissants , so long as the oven is hot enough. Although, I think I'd be hedging my bets with items that were becoming tired and spent, in line with the notes just above.   My practical classes last anywhere between 3 and 5 hours.   3 hours is really not very long to make these items with skill from start to finish; and the resting between turns really can be so crucial here.   But I cannot think of a single class I have facilitated on this product where the students have been anything other than delighted by the tasks they have carried out, and the products they have made. It's the colour, and aroma; these items just look and smell great when they are baked. Fabulous!

 See the photos attached below, and the link to the video below that.


Here's the video:

Susan's picture
Susan

Well, I finally did it!

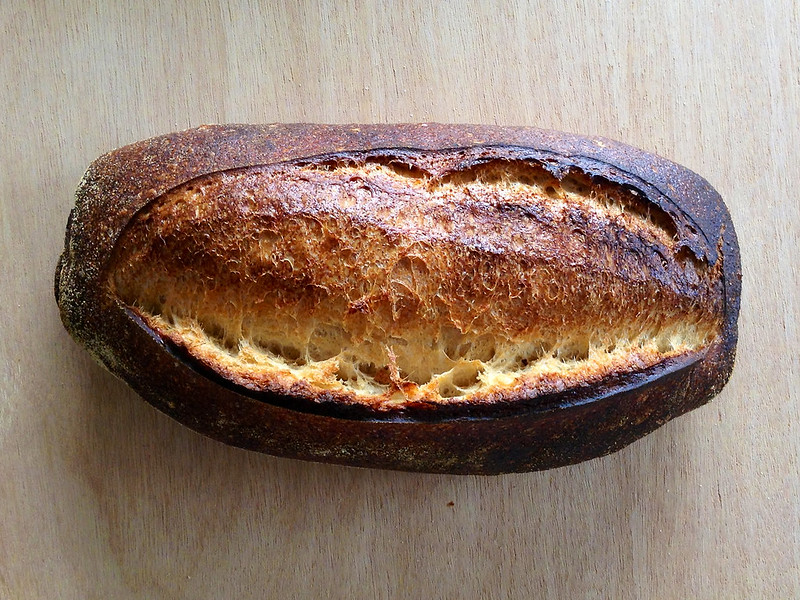
Today I baked the sourdough bread I've been looking for ever since starting this odyssey. It has a crispy crust and a stretchy, holey crumb. And it's easy. As I told a couple of friends earlier, "...it's reproducible, if the weather stays exactly how it is today."

I'm not suggesting that this could be anyone else's ultimate sourdough, but it sure is mine, at least for right now. Thanks to all who have helped me over the past year or so, even unwittingly. It continues to be great fun. The recipe is below.

My Ultimate Sourdough

Susan's Ultimate Sourdough

Starter is made the way Peter Reinhart suggested to us in class: 1:3:4 (starter:water:flour)

A single small boule, made by hand:

12g starter

175g water

25g whole wheat flour

225g hi-gluten flour (All Trumps, to be exact)

5g salt (I use Kosher)

Mix starter and water, mix in flour. Rest a few minutes, then re-mix. Dump into a greased bowl, let rise until doubled, about 8 hours. Turn the very soft dough onto your counter and pat it out, then sprinkle salt over the top. Roll it up, then gently knead a few times to distribute the salt. Let relax. Do the following until the dough is hard to fold: round up, let the dough relax, stretch and fold. Round up, let relax, shape, and put it in a banneton for proofing 3-4 hours in a warm spot.

The oven was preheated for 30 minutes at 500F, and reduced to 450F after I put the loaf in. It was baked on a tray, covered, for 18 minutes. The cover was then removed and the loaf baked until dark brown, about another 8 minutes.

zolablue's picture
zolablue

Sourdough Challah (photos & recipe)

I baked my first challah last Thursday and wanted to share.

I was unsure what to expect but it was so much fun. I’d been meaning for some time to bake a recipe from Maggie Glezer’s book, A Blessing of Bread, which is a wonderful compilation of traditional Jewish recipes from around the world. Floyd has written a very nice review of the book here.

http://www.thefreshloaf.com/bookreviews/ablessingofbread

I decided to start with Glezer’s own personal recipe for sourdough challah. I love making sourdough and was interested to see what the texture of this bread would be compared to a yeasted challah which I have eaten only a couple times.

The recipe seemed easy to me despite the fact Glezer calls it expert. I’m not sure why but, again, I’m new to challah. The dough was so easy to mix together and then, as Glezer puts it, the time involved is mostly waiting after that.

She says to bake it to a dark brown which I did. I’m not sure if it is considered too dark or not but it was really a beautiful color and I do typically bake my bread darker as she instructs in Artisan Baking.

The crumb was amazing to me. It was very creamy and soft and almost reminded me of an angel food cake. It has remained moist to this day (5 days later) as there are only two of us to eat and can’t quite get rid of all the bread I bake. I am going to cut very thick slices of what is remaining to freeze and later use to make French toast.

I decided for my maiden voyage into challah bread I would make an elaborate braid. I used the six-strand braid version and got a lot of help from the video Glezer did showing how to do it. Gosh, the internet is awesome! Just as she said it makes a beautiful, very high loaf.

Braiding ChallahFine Cooking Video, Maggie Glezer

http://www.taunton.com/finecooking/videos/braiding-challah.aspx?

I’m posting the recipe so those of you who are new to challah as I am can have a chance to make it and perhaps will be inspired to buy this lovely book. For those who have made challah for years I’d love it if you tried the recipe and let me know your thoughts on it compared the some of your favorite traditional recipes.

More of my photos can be seen here:

http://zolablue.smugmug.com/gallery/3500289#197395950

Thank you to each and every one of you on this site that have been such inspirations in baking such as Floyd, Bill Wraith, Susanfnp, Mountaindog, JMonkey, Browndog, Bluezebra, Eric, SDBaker, Mini Oven, Dolf, Qahtan, Zainab and so many others. All you wonderful bakers have helped me incredibly along the way over the past few months that I have been baking so many thanks to all.

My Sourdough Challah - Maggie Glezer's personal recipe from her book, A Blessing of Bread

Sweet sourdough breads are delicious and well worth the time (which is mainly waiting time) if you are a sourdough baker. The sourdough adds a subtle tang to my challah, and the crumb has a moister, creamier texture that keeps even longer than the yeasted version. While it’s true that challah or, for that matter, all bread was at one time sourdough (the Hebrew word for leaven, chametz, means “sour”), challahs have definitely gotten sweeter and richer since the introduction of commercial yeast. To convert such recipes back to 100 percent sourdough, the sugar has to be cut back in order for the dough to rise in a reasonable length of time (sugar that is more than 12 percent of the flour weight inhibits fermentation), so this version will taste slightly less sweet than the yeasted one, a deficit completely overridden by the rich complexity of the sourdough. I have also changed the all-purpose flour to bread flour, which has more gluten, to counteract the starter’s propensity to loosen the gluten (the acids in the starter change the proteins, a natural part of sourdough baking).

Skill Level: Expert

Time: About 20 hours (about 8 1/2 hours on baking day)

Makes: Two 1-pound (450-gram) challahs, one 1 1/2-pound (680-gram) challah plus three rolls, or sixteen 2-ounce (60-gram) rolls

Recipe synopsis: Make the sourdough starter and let if ferment overnight for 12 hours. The next day, mix the dough and let it ferment for 2 hours. Shape the dough and let it proof for 5 hours. Bake the breads for 15 to 40 minutes, depending on their size.

For the starter:

2 tablespoons (35 grams/1.2 ounces) very active, fully fermented firm sourdough starter, refreshed 8 to 12 hours earlier

1/3 cup (80 grams/2.8 ounces) warm water

About 1 cup (135 grams/4.8 ounces) bread flour

For final dough:

1/4 cup (60 grams/2 ounces) warm water

3 large eggs, plus 1 for glazing

1 1/2 teaspoons (8 grams/0.3 ounce) table salt

1/4 cup (55 grams/1.9 ounces) vegetable oil

3 tablespoons (65 grams/2.3 ounces) mild honey or a scant 1/3 cup (60 grams/2.1 ounces) granulated sugar

About 3 cups (400 grams/14 ounces) bread flour

Fully fermented sourdough starter

Evening before baking - mixing the sourdough starter: Knead starter into water until it is partially dissolved, then stir in the flour. Knead this firm dough until it is smooth. Remove 1 cup (200grams/7 ounces) of the starter to use in the final dough and place it in a sealed container at least four times its volume. (Place the remaining starter in a sealed container and refrigerate to use in the next bake.) Let the starter ferment until it has tripled in volume and is just starting to deflate, 8 to 12 hours.

Baking day - Mixing the dough:

In a large bowl, beat together the water, the 3 eggs, salt, oil, and honey (measure the oil first, then use the same cup for measuring the honey — the oil will coat the cup and let the honey just slip right out) or sugar until the salt has dissolved and the mixture is fairly well combined. With your hands or a wooden spoon, mix in the bread flour all at once. When the mixture is a shaggy ball, scrape it out onto your work surface, add the starter, and knead until the dough is smooth, no more than 10 minutes. (Soak your mixing bowl in hot water now to clean and warm it for fermenting the dough.) This dough is very firm and should feel almost like modeling clay. If the dough is too firm to knead easily, add a tablespoon or two of water to it; if it seems too wet, add a few tablespoons flour.

The dough should feel smooth and very firm but be easy to knead.

Fermenting the dough:

Place the dough in the warm cleaned bowl and cover it with plastic wrap. Let the dough ferment for about 2 hours. It will probably not rise much, if at all.

Shaping and proofing the dough:

Line one or two large baking sheets, with parchment paper or oil them. Divide the dough into two 1-pound (450-gram) portions for loaves, one 1 1/2 pound (680-gram) portion for a large loaf and three small pieces for rolls (the easiest way to do this without a scale is to divide the dough into quarters and use one quarter for the rolls and the rest for the large loaf), or sixteen 2-ounce (60-gram) portions for rolls. Braid or shape them as desired, position them on the prepared sheet(s), and cover them well with plastic wrap. Let proof until tripled in size, about 5 hours.

Meanwhile, 30 minutes before baking, arrange the oven racks in the lower and upper third positions if using two baking sheets or arrange one rack in the upper third position if using one sheet, and remove any racks above them. Preheat the oven to 350°F (180°C/gas mark 4). If desired, preheat one or two baking sheets to double with the baking sheet(s) the loaves are on. Beat the remaining egg with a pinch of salt for glazing the breads.

Baking the loaves:

When the loaves have tripled and do not push back when gently pressed with your finger but remain indented, brush them with the egg glaze. Bake rolls for 15 to 20 minutes, the 1-pound (450-gram) loaves for 25 to 35 minutes, or the 1 1/2-pound (680-gram) loaf for 35 to 45 minutes, until very well browned. After the first 20 minutes of baking, switch the loaves from front to back so that they brown evenly; if the large loaf is browning too quickly, tent it with foil. When the loaves are done, remove them from the oven and let cool on a rack.

JMonkey's picture
JMonkey

Lesson: Squeeze more sour from your sourdough

I am far from a sourdough expert. I’ve only been baking sourdough since February, and I still have a lot to learn about shaping, scoring and proofing to perfection.

However, there is one thing I have learned well: how to squeeze more flavor out of my naturally sweet starter. Here's the basic tips.

1) Keep the starter stiff
2) Spike your white starter with whole rye
3) Use starter that is well-fed
4) Keep the dough cool
5) Extend the rise by degassing
6) Proof the shaped loaves overnight in the fridge

Photos and elaboration follow.

It’s a common lament that I see on bread baking forums – Why isn’t my sourdough sour?

Personally, I blame Watertown. My evidence? I gave some of my starter to a friend who lives six miles away in Lexington. Within 6 weeks, she was making sour tasting sourdough. Her local yeastie beasties are clearly more sour than mine.

I don’t know what it is about the microflora that live in the little hollow between the hills that I occupy in Watertown, Mass., but treated traditionally, my white starter and my whole wheat starter pack as much sour taste as a loaf of Wonder Bread. That’s not to say that the loaves don’t taste nice. They do. They’re wheaty with a touch of a buttery aftertaste.

But they don’t taste sour, which is how I think sourdough ought to taste.

Anyway, I’ve finally figured out how to get the tangy loaves I love. If you’re facing the same sweet trouble as me, perhaps some (or all) of these tips will help.

1) Keep your starter stiff:

Traditionally, sourdough starter is kept as a batter. The most common consistency is to have equal weights of water and flour, also known as 100% hydration because the water weight is equal to 100% of the flour weight. That’s roughly 1 scant cup of flour to about ½ cup of water. Jeffrey Hammelman keeps his at 125%, and quite a few folks keep theirs at 200% (1 cup water to 1 cup flour).

I keep my sourdough starter at 50% hydration, meaning that for every 2 units of flour weight, I add 1 unit of water.

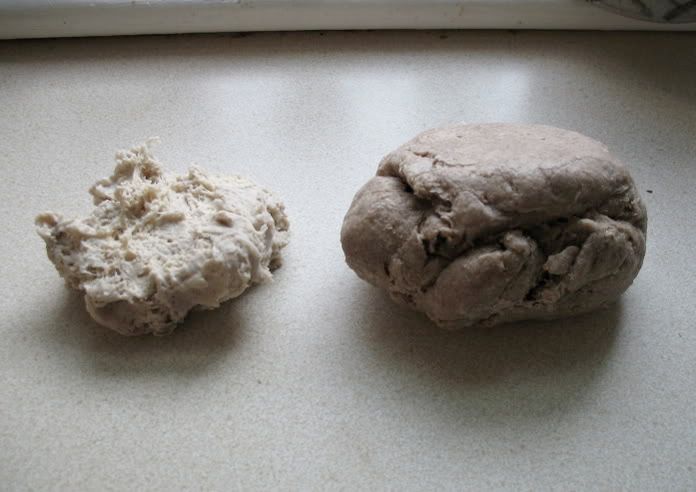
Barney Barm, my white starter is on the left; Arthur the whole wheat starter on the right. The bran and germ in whole wheat absorb a lot of water, so that starter is even stiffer than the white.

There are two basic types of bacteria that flourish in a sourdough starter. One produces lactic acid, which gives the bread a smooth taste, sort of like yogurt. It does best in wet, warm environment. The other makes acetic acid, the acid that gives bread its sharp tang. These bacteria prefer a drier, cooler environment.

(Or so I've read, anyway. I ain't no biochemist; I just know what they print in them books.)

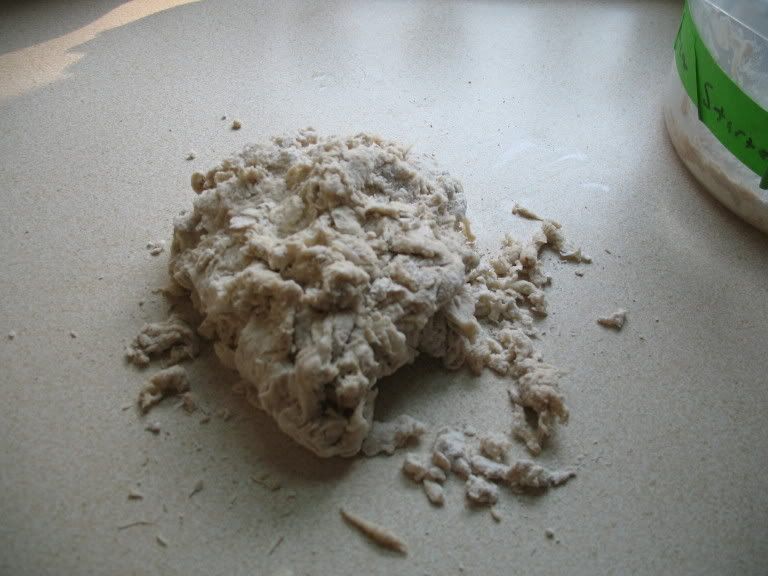
A hydration of 50% is pretty stiff, especially for a whole-wheat starter. You really have to knead strongly to convince the starter to incorporate all the flour.

For example, here's my white starter after I've done my best to mix it up in the bucket. Time to knead a bit.

Here's what it looks like after kneading.

And here's what it looks like 5 hours later once it's ripe.

Conversion from 100% to 50% isn't hard to do if you've got a kitchen scale.

Take 2 ounces of your 100% starter. Then add 5 ounces of flour and 2 ounces of water. This should give you 9 ounces of starter. Leave it overnight, and it should be ripened in the morning.

From there on out when you feed it, add 1 unit of water for every 2 units of flour. I'd recommend feeding it 2 or 3 more times before using it, though, so that the yeast and bacteria can acclimate to the new environment.

There are additional advantages to a stiff starter beyond producing a more sour bread.

First, a stiff starter is easier to transport. Just throw a hunk into a bag, and you’re done.

Supposedly, the stiff stuff keeps longer than the batters. You can leave stiff starter in the fridge for months, or so I hear, and it can still be revived. Never tried it myself, though, so don't take my word for it.

Finally, the math for feeding is easy at 50% hydration, much easier than 60% or 65%. Just feed your starter in multiples of threes. For exmaple, if I’ve got 3 ounces of starter and I need to feed it, I'll probably triple it in size. To get six additional ounces for food, I just add 4 ounces flour and 2 ounces water. Piece of cake.

Converting recipes isn’t hard either. First, figure out the total water weight and total flour weight in the original recipe, including what's in the starter. If the recipe calls for a 100% hydration starter, then half of the starter is flour and the other half is water. Divide it accordingly to get the total flour and total water weights in the final dough.

Now, add the total water and total flour together. Take that figure and multiply by 0.30. This will tell you how much stiff starter you’ll need.

Last, subtract the amount of water in the stiff starter from the total water in the final dough, and the amount of flour in the stiff starter from the total flour in the final dough. The results tell you how much flour and water to add to the starter to get the final dough. Everything else remains the same.

2) Spike your white starter with whole rye flour:

It doesn’t take much. Currently, my white starter is about 10-15% whole rye. Basically, for every 3 ounces of white flour that I feed the starter, I replace ½ ounce with whole rye. That small portion of rye makes a big difference in flavor. Rye is to sourdough microflora as spinach is to Popeye. It’s super-food that’s easily digestible and nutrient rich. That’s why so many recipes for getting a starter going from scratch suggest you start with whole rye.

Here I am, about to add rye to "Barney Barm," my white starter. I haven’t added rye to my whole-wheat starter, though. It hasn’t needed it – there’s more than enough nutrients in the whole wheat to keep the starter party going strong.

3) Use starter that is well fed: Early in my search to sour my sourdough, I’d read that, if you leave a starter unfed and on the counter for a few days before baking, it will make your bread more sour.

I’ve found that’s not the case. The starter gets more sour, but the bread doesn’t taste very sour at all.

The better course is to take your starter out of the fridge at least a couple of days before you use it, and then feed it two or three times before you make the final dough. Healthy microflora make a more flavorful bread.

4) Keep the dough cool:

When I first started out, I was following recipes that called for the dough to be at 79 degrees, and I’d often put it in a fairly warm place to rise. Warmth kills sour taste. Nowadays, I add water that’s room temperature, not warmed, and aim for a much cooler rise, no higher than 75 degrees and often as low as 64.

The cellar is your friend.

5) Extend the rise by degassing:

When I make whole wheat sourdough, I usually let the dough rise until it has doubled and then degass it by folding until it rises a second time. Along with cool dough, this means the bulk fermentation usually lasts 5-6 hours.

When I’m making pain au levain or some other white flour sourdough, I usually have the dough very wet, so it needs more than one fold to give it the strength it needs. In this case, I fold once at 90 minutes and then again after another 90 minutes. Usually, the full bulk rise lasts about 5 hours.

Here's a sequence showing how I fold my whole-wheat sourdough.

First, turn the risen dough out on a lightly floured surface (heavily floured if your dough is very wet).

Stretch it to about twice its length.

Gently degass one-third of the dough, fold it over the middle, and degass the middle section to seal.

Do the same for the remaining side. Take the folded dough, turn it one-quarter, and fold once more before returning to the bowl or bucket to rise again.

6) Proof the shaped loaves overnight in the fridge:

This final touch really brings out the flavor. So much so that, if you’ve incorporated all the other suggestions, proofing overnight might make your bread a bit too sour for your taste. My wife and I like it assertively sour, however, so this step is a must.

Normally, I’d suggest proofing your loaves on the top shelf where it’s warmest, so as not to kill off any yeast, but I find that if I put my loaves in the top, they’re ready in about 4-6 hours, at which time I’m usually sound asleep. So I started putting them in the bottom, and had better luck.

I hope this helps those of you who dread pulling another beautiful loaf from the oven, only to find it looks better than it tastes. Best of luck!

Steve Petermann's picture
Steve Petermann

Soaker Ingredient Hydration Percents -- Some Data

I really like to use soakers but it can be a pain to try to get the final dough hydration right when playing around with different soaker ingredient combinations and ratios. The problem, as I see it, is that the water absorption of soaker ingredients can vary drastically depending on the ingredient. So what I wanted to do was parameterize the hydration levels of the various ingredients.  I decided to do some tests to see if I could get some reasonably accurate hydration percents for the ingredients and avoid a lot of trial and error.  

So the first thing I did was measure out a known weight of an ingredient. Then I'd put it in a great excess of water (both room temp and boiling) so that I know it would get fully hydrated.  I let them soak overnight. Then the next day I put each soaker mix in some cheesecloth and squeeze out as much of the water as I could.  Then I weighed that again (minus the cheesecloth) and that gave me the supposed weight of water absorbed, and the hydration percent.  What I found was this seemed to work pretty well with some ingredients like most seeds but was a bit dicey when it came to ingredients that made a goo like oatmeal and flaxseeds.  So, I wasn't too sure how accurate that was but it gave me a baseline to work with for the next step.

The next step required some subjectivity like when we make hydration adjustments to a dough. So I got some store brand whole wheat for the tests.  I made three small batches of dough.  One was the control with no soaker and a known hydration.  I chose 67% because it was stiff enough to get a good feel for its hydration.  For the two soakers (room temp and boiling) I used the first cut hydration level to calculate the water needed for the soaker to get fully hydrated and also added another 100% water to make sure they would be. So, I had the supposed free water amount with the soaker.  Then I could adjust the amount of water I put in the dough (without the soaker) such that at the end I should have the right final hydration.  Now, I figured that the first cut soaker hydration percents were really too high and that there would be more free water than the hydration said.  What that would mean is that when I mixed the soaker in with the dough it would be too loose -- at least I hoped that.  It turns out, in many cases, that was true.  So then I could add flour to the dough until I got the same hydration feel as the control dough. I had weighed an excessive amount of flour before and after so I knew how much flour I added.  Then it was a simple calculation to determine the amount of real free water in the soaker and the real hydration % of the ingredient.  So, I had to adjust the hydration percents down for many ingredients except the hard seeds.  

Now in making a real loaf, I could know how much water the ingredient would absorb and then add 100% more to the soaker to make sure it got fully hydrated.  So finally, that told me how much to decrease the water I added to the final dough (because of the excess water I added to the soaker).  The nice thing about it is that you can use any combination of grains, meals, seeds, etc. and still get pretty close.  Of course, some final adjustments may still be needed -- just like with different flours, but in my experience, they aren't that significant. The breads I've made using soakers and this method seem to be pretty close. I haven't made real bread loaves with all these so if anyone tries something and finds it off, I'd appreciate the info.

I have a spreadsheet that does the calculations for all this and will be posting it here as soon as I get a help video done but here's the data. 

IngredientWater Temp% Hydration
   
BarleyRoom Temp138%
BarleyBoiling156%
Barley FlakesRoom Temp125%
Barley FlakesBoiling200%
BuckwheatRoom Temp88%
BuckwheatBoiling91%
Chia SeedsRoom Temp237%
Chia SeedsBoiling276%
Coarse CornmealRoom Temp58%
Coarse CornmealBoiling173%
Cracked WheatRoom Temp178%
Cracked WheatBoiling225%
FlaxseedsRoom Temp130%
FlaxseedsBoiling136%
MilletRoom Temp48%
MilletBoiling48%
Oat GroatsRoom Temp60%
Oat GroatsBoiling85%
Oats, RolledRoom Temp90%
Oats, RolledBoiling206%
Oats, Steel CutRoom Temp70%
Oats, Steel CutBoiling104%
Pumpkin SeedsRoom Temp38%
Pumpkin SeedsBoiling48%
QuinoaRoom Temp78%
QuinoaBoiling104%
Rye ChopsRoom Temp65%
Rye ChopsBoiling154%
Sesame SeedsRoom Temp58%
Sesame SeedsBoiling68%
Sunflower SeedsRoom Temp80%
Sunflower SeedsBoiling80%
TeffRoom Temp72%
TeffBoiling76%
Wheat BranRoom Temp96%
Wheat BranBoiling168%
Wheat FlakesRoom Temp100%
Wheat FlakesBoiling180%
Antilope's picture
Antilope

My Tangzhong Roux FAQ

I put together this FAQ about using a Tangzhong Roux in yeast breads based on my experiences using the technique.
.
.
.
--WHAT IS A TANGZHONG ROUX?--
.
A Tangzhong Roux (also called a Tangzhong Water Roux or Water Roux) is a flour and water roux that is added to yeast bread recipes. This is done in order to make a loaf of bread that is lighter, that has a more tender crumb and a longer shelf life.
.
Bread flour or all-purpose flour is usually used to make the roux. Water is the liquid usually used to make the roux, but milk or a mixture of milk and water can also be used, if desired.
.
The flour and water are mixed and heated to 149-F (65C). This gelatinizes the flour and forms an unflavored translucent pudding-like roux. The roux ingredients come from the original recipe amounts. This roux is added to remaining liquids in the yeast bread recipe. The water roux traps and retains moisture during baking. Using this technique is similar to adding pudding to a pudding cake. The final result is a moister, lighter loaf of bread with a more tender crumb and a longer shelf life. These beneficial effects are all the result of the moisture retained by the water roux during baking.
.
The Tangzhong roux technique was developed in Asia around 2000. The technique was first mentioned by Yvonne Chen in her book, “Bread Doctor”, published in Taiwan in about 2003. Tangzhong means "soup" in Chinese.
.
.
--WHAT YEAST BREAD RECIPES BENEFIT FROM A TANGZHONG ROUX?--
.
The Tangzhong roux technique will work with pretty much any yeast bread recipe, making a lighter, more tender and longer lasting loaf of bread. I've only used the technique for straight dough breads. I haven't used it for sponge breads, etc. But there is no reason it shouldn't work on those, also.
.
I've used the Tangzhong roux technique on white bread, sourdough bread, hawaiian bread, cinnamon rolls and cinnamon swirl bread, light wheat bread (part bread flour and part whole wheat flour), rye bread, vienna bread, French bread, hamburger buns, lean breads, rich breads and sweet bread doughs, etc.
.
The Tangzhong roux technique will work for most hand kneaded, mixer kneaded and bread machine recipes. I've even used it on 65% hydration, stretch and fold, yeast bread recipes.
.
The only type of yeast bread recipe where it didn't seem to have much effect was one that used whole wheat flour to make the water roux for a 100% whole wheat bread. It didn't seem to lighten the loaf very much. However, using 3 Tablespoons (20g) of white flour in the roux of the 100% whole wheat loaf did seem to lighten it. In this case, we are adding 3 Tbsp (20g) of white flour to the recipe, so remove 3 Tbsp (20g) of the whole wheat flour to keep the recipe in balance.
.
When I make a light wheat bread (part bread flour and part whole wheat) I take 3 Tbsp (20g) of the roux flour from the white flour. This will lighten the light wheat loaf, don't use whole wheat flour in the roux.
.
.
--HOW DO I USE A TANGZHONG ROUX IN AN EXISTING YEAST BREAD RECIPE?--
.
Use 3 level tablespoons (20g) of white flour in 1/2 cup (120g) of water, for either 1-1/2 lb (750g) or 2 lb (1kg) yeast bread loaves. I use bread flour or all-purpose flour in the roux.
.
The Tangzhong roux ingredients come from the original recipe amounts. Don't add extra amounts. Measure out the original recipe ingredients and take the Tangzhong roux ingredients from that. If the recipe uses only milk, make the roux using milk.
.
I make the roux in a microwave. Mix 3 Tbsp (20g) of flour and 1/2 cup (120g) of water (or milk) in a microwaveable cup. Microwave on High for 25 seconds. Stir well. Microwave 15 seconds more. Stir. The roux temperature should be at about 149 F (65C) and a white translucent pudding should have formed. If not, microwave another 5 seconds and stir well. If necessary, continue microwaving 5 seconds at a time and then stir well, until the white translucent pudding forms. I use a 1000-watt microwave.
.
The roux can also be made on the stovetop in a saucepan.
.
Be careful to only heat the roux to around 149-F (65C). Five or ten degrees more doesn't hurt. I haven't explored heating the roux higher than that. I'm not sure what higher temperatures would do to its effectiveness. References I have reviewed don't address overheating the roux.
.
I mix the hot roux into the remaining recipe liquid ingredients immediately. Mixing well. The recipe liquid will then end up lukewarm. The roux can also be cooled to room temperature first or stored in the fridge, if desired.
.
Once you confirm that the recipe liquid is lukewarm, it's then safe to mix in instant yeast or proofed active dry yeast, if desired. Otherwise, follow the original recipe instructions for adding yeast. Just be careful to keep the hot roux away from the yeast.
.
After mixing the Tangzhong roux into the remaining recipe liquid ingredients, continue with your original yeast bread recipe just as you always do.
.
.
--HOW MUCH TANGZHONG ROUX SHOULD BE USED IN A YEAST BREAD RECIPE?
.
I use 3 level tablespoons (20g) of white flour (bread or all-purpose) in 1/2 cup (120g) of water, for either a 1-1/2 lb (750g) or a 2 lb (1kg) loaf.
.
Here is how these quantities are arrived at: (You really don't have to be this exact, unless you want to, this info is just for background info):
.
Most Tangzhong roux references say to use 5% of the total recipe flour weight as roux flour. The roux flour is mixed with five times its weight in water. So a loaf using 500 grams of flour would use 25 grams as roux flour (5% the total flour weight) and 125 grams of roux water (5 times 25 grams ). Both of these ingredient amounts are taken from the original recipe ingredients. Extra amounts are not added to the recipe.
.
Once again, this is roughly equal to about 3 level Tablespoons (20g) of flour mixed in 1/2 cup (120g) of water. I use this same amount in 1-1/2 lb (750g) and 2 lb (1kg) loaves. It's close enough for the recipes I have tested.

Pages