The Fresh Loaf

A Community of Amateur Bakers and Artisan Bread Enthusiasts.

Recent Blog Entries

pmccool's picture
pmccool

Although my overall baking activity is less than it used to be, I have made some breads recently.

First up, cranberry-orange cream cheese braids. These were donated to a fundraising cookie walk that our local Friends of the Library held.

I also baked some small sweet vanilla challot yesterday that will be gifted to friends:

Paul


Yippee's picture
Yippee


I need some lard for baking. Instead of buying hydrogenated lard at the supermarket, I air fry strips of (lightly seasoned) pork fat @ 200°C x 13 minutes to render lard. Re-fry the strips @ 200°C until crispy and use them in soup noodles, fry rice, or eat them as is as a snack.


✌✌✌

👏👏👏


Porky fries🐖🐖🐖😋😋😋 Some say it goes well with beer!


Noodles with cracklins (🐷)油渣麵 - an authentic Hong Kong street food.  I followed Jerry's recipe


Also made a whole-spelt noodle version, but I forgot to add the cracklins to the broth!


A whole-durum noodle version. This time I made sure I didn't leave out the cracklins!


I could have lowered the frying temperature to make it more "snowy-white",  but I think it's not bad for a first try.

HeiHei29er's picture
HeiHei29er

I've tried making a single baguette a few different times.  Each time was a different recipe and each time it was a last minute "Let's throw this together and make a baguette" approach.  Got really lucky the first time with nice spring and an open crumb.  Told myself that baguettes were easy.  The next couple of tries had no spring at all and turned out dense enough to be used as dowel rods.  This is the first time I went into it with a plan.  I based the approach off Boubasa's recipe, but I used a flour blend that I had recent success with on a regular yeasted loaf that contains 30% semolina.

I used a small preferment (7.5%), a small amount of yeast in the overall formula (0.15%) with a 24 hour cold bulk after gluten development, and 72% hydration.  Due to timing, I did a relatively short preferment (4 hours) by using more yeast than I typically would.  The semolina was re-milled using my Mock Mill and given a 1 hour autolyse prior to mixing.  For the next bake, I will go bake to the 12 hour poolish fermentation to help with flavor development.  Baked on stone that was preheated to 490 deg F with steam for 12 minutes and then at 450 deg F with convection for 10 minutes.

Happy with the crumb,  Soft and moist and the flavor was not too bad.  I will increase the ferment time on the poolish next time.  Jury is still out on the crust.  Good flavor but quite chewy.  I've never had a baguette before, so I'm not really sure what the target is for the bread.  Is a baguette crust typically really chewy?  How do you store your baguettes after they're baked?


Ilya Flyamer's picture
Ilya Flyamer

Haven't posted anything for a while, thought to rectify with this quick and easy recipe for sourdough deli rye bread.

Here is the formula: https://fgbc.dk/2rfu

Process is simple. Refresh a rye starter, so you have enough (I keep mine in the fridge, and I fed it in the morning with warm water and it was ready in the afternoon), keep it at 28C. Just before going to sleep, make a somewhat stiff rye preferment with all of the rye flour for the bake, keep at 28C for around 8-9 hours - it should grow significantly, get spongy, acquire prominent sour smell. In the morning mix the final dough, using warm water. I used a mix of 1:1 Ruchmehl (Swiss very high extraction flour) and white bread flour for the non-rye portion. It should be on the stiffer side, around 70% hydration in my case. Keep the dough warm (28-30C), for me bulk was done in under 2 hours! It grows quite a lot and quite quickly. I gave it a couple of sets of folds in that time to strengthen the dough.

Turn out the dough, divide into portions, preshape. Leave for 20 min, then shape. The dough doesn't handle very tight shaping, the prettier of the two breads was just shaped by flattening of the preshaped boule, folding and then rolling like baguettes to give a nice tapered shape.

Final proof on a couche, time would depend on the temperature, I gave them around 1 hr and then baked the first one with steam (20 with, then until done without), while the second one was moved to the balcony with around 0C there. I think the second one was proofed a little better, so perhaps I jumped the gun with the first one somewhat. Not sure baking with steam was the right choice, but that's up to the baker. I also applied a cornstarch glaze when taking them out of the oven.

I am no expert on what deli rye bread tastes like, but this is the taste I remember from the community bake a couple of years ago, and from my few encounters with this style of bread "in the wild" - except the crust, I guess it shouldn't be baked with steam?

Anyway, a very quick recipe (bread can be ready for lunch, just need to start the preferment) with convenient easy to use and remember gram measurements!

Benito's picture
Benito

A visit to Fort Lauderdale wouldn’t be the same anymore without visiting with Alan (Alfanso) and his lovely wife.  We spent last evening chatting about life, travels and many other topics and a little bit about bread (actually very little). We were lucky enough to get to enjoy Alan’s famous baguettes.  In this case he had baked a set of Hamelman’s seed SD baguettes that I have always admired in his posts.  Well I can say that they look and taste even better than the photos and descriptions on TFL make them appear.

There was a wonderful crunch to the thin crust and the slightly chewy crumb was enhanced by the flavours of the seeds.  Absolutely wonderful bread to have with butter or cheese and a wonderful way to spend the evening.

Alan kindly sent us home with one baguette that will enjoy for dinner.  Lucky us!

I will have to bake these in the near future.  Here’s the thread that I found where Alan shares the formula for these amazing baguettes.

Benito's picture
Benito

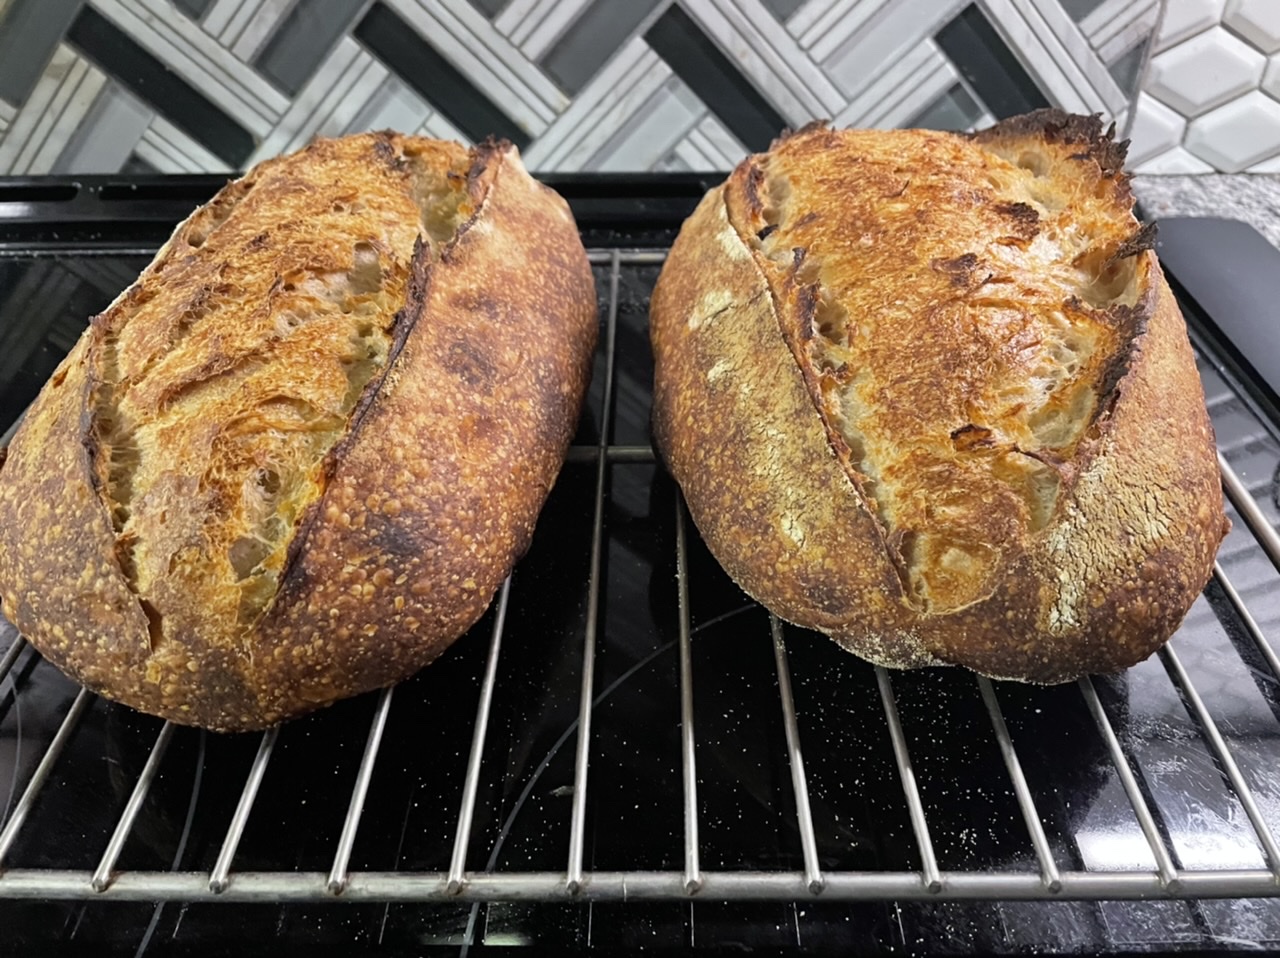
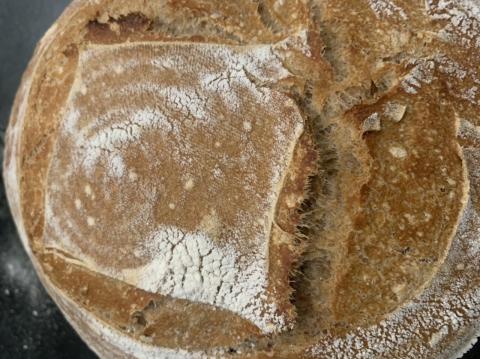
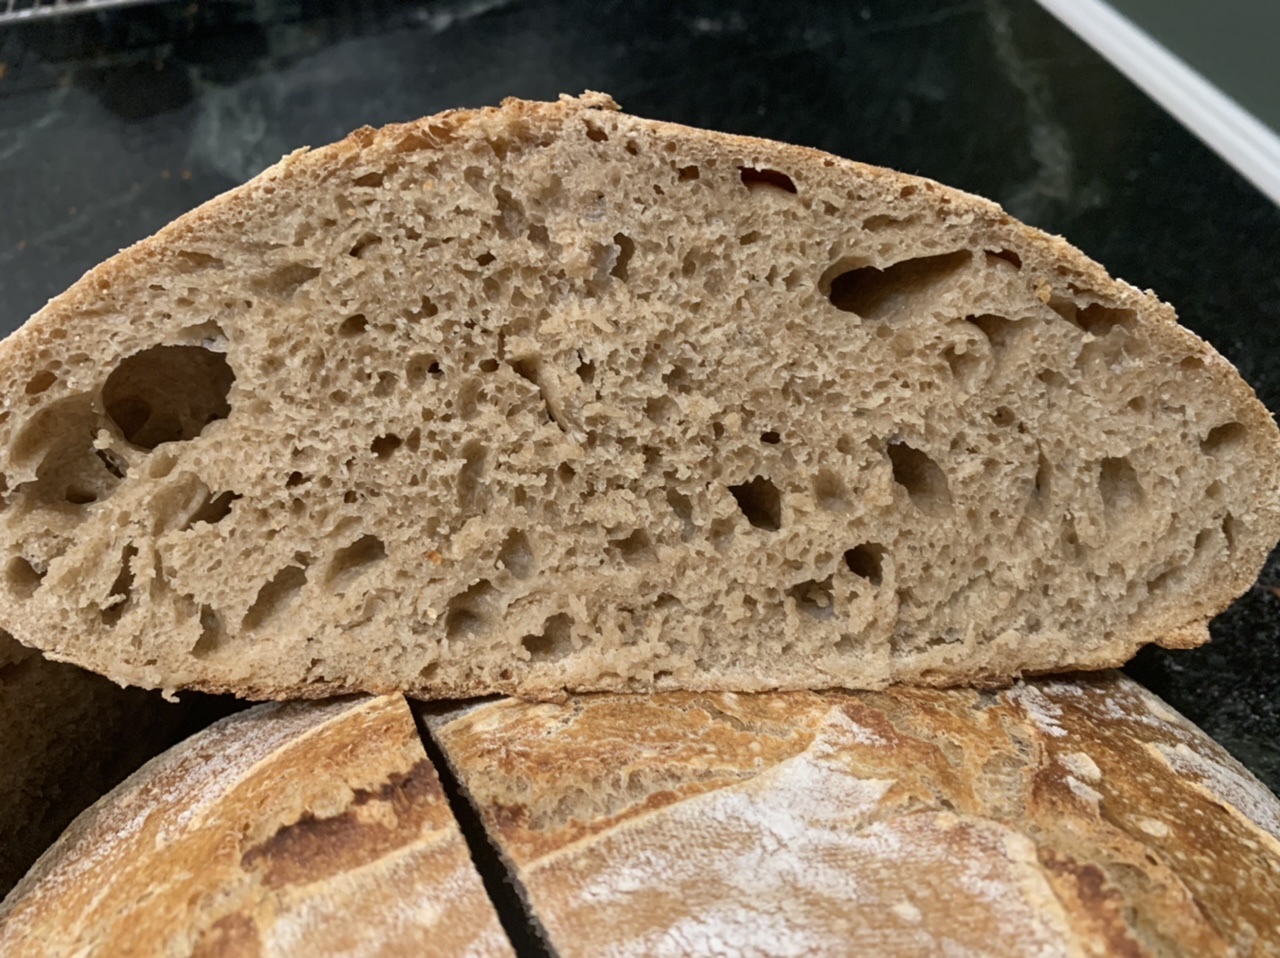
This loaf was a gift to Alfanso (Alan) and his wife.  We got together for a lovely evening at their place here in Fort Lauderdale last night so I wanted to bring them something different so I came up with the idea to use mashed cooked sweet potato with some cinnamon as a filling for a milk bread.  The baked loaf had some structural issues that made me concerned that it was either overproofed, underbaked (due to the added moisture of the sweet potato) or just too tall to handle its height.

100 g mashed sweet potato

15 g brown sugar

10 g butter

Cook on medium low heat in a pan until it slightly dries.


For 1 loaf in a 9x4x4” pullman pan


Egg/milk wash: 1 yolk and 1 tbsp milk, beaten


Cook Tangzhong mixing flour and milk constantly until it becomes a thick roux.  Let cool before adding to final dough.  Or add to cold milk and egg to cool it down.


Blend room temperature butter and flour together and set aside to incorporate after the dough is well developed.


Whisk together dry ingredients flour salt and yeast. 


To mix by hand, add the salt and yeast to the wet ingredients (milk, tangzhong and egg) to dissolve.  Next add the flour and mix with a silicone spatula until no dry flour remains.  Rest 10 mins.  Next perform French folds until the dough is well developed.  Smear the blended butter/flour onto the dough and then fold to incorporate and then perform further French folds until well developed.  Form into a tight ball and place in a bowl covered with plastic or a damp cloth and place in a warm place until doubled (about 1hr 30 mins).   Place in fridge for 1 hour to firm up the dough to make shaping easier or cold retard until next day.


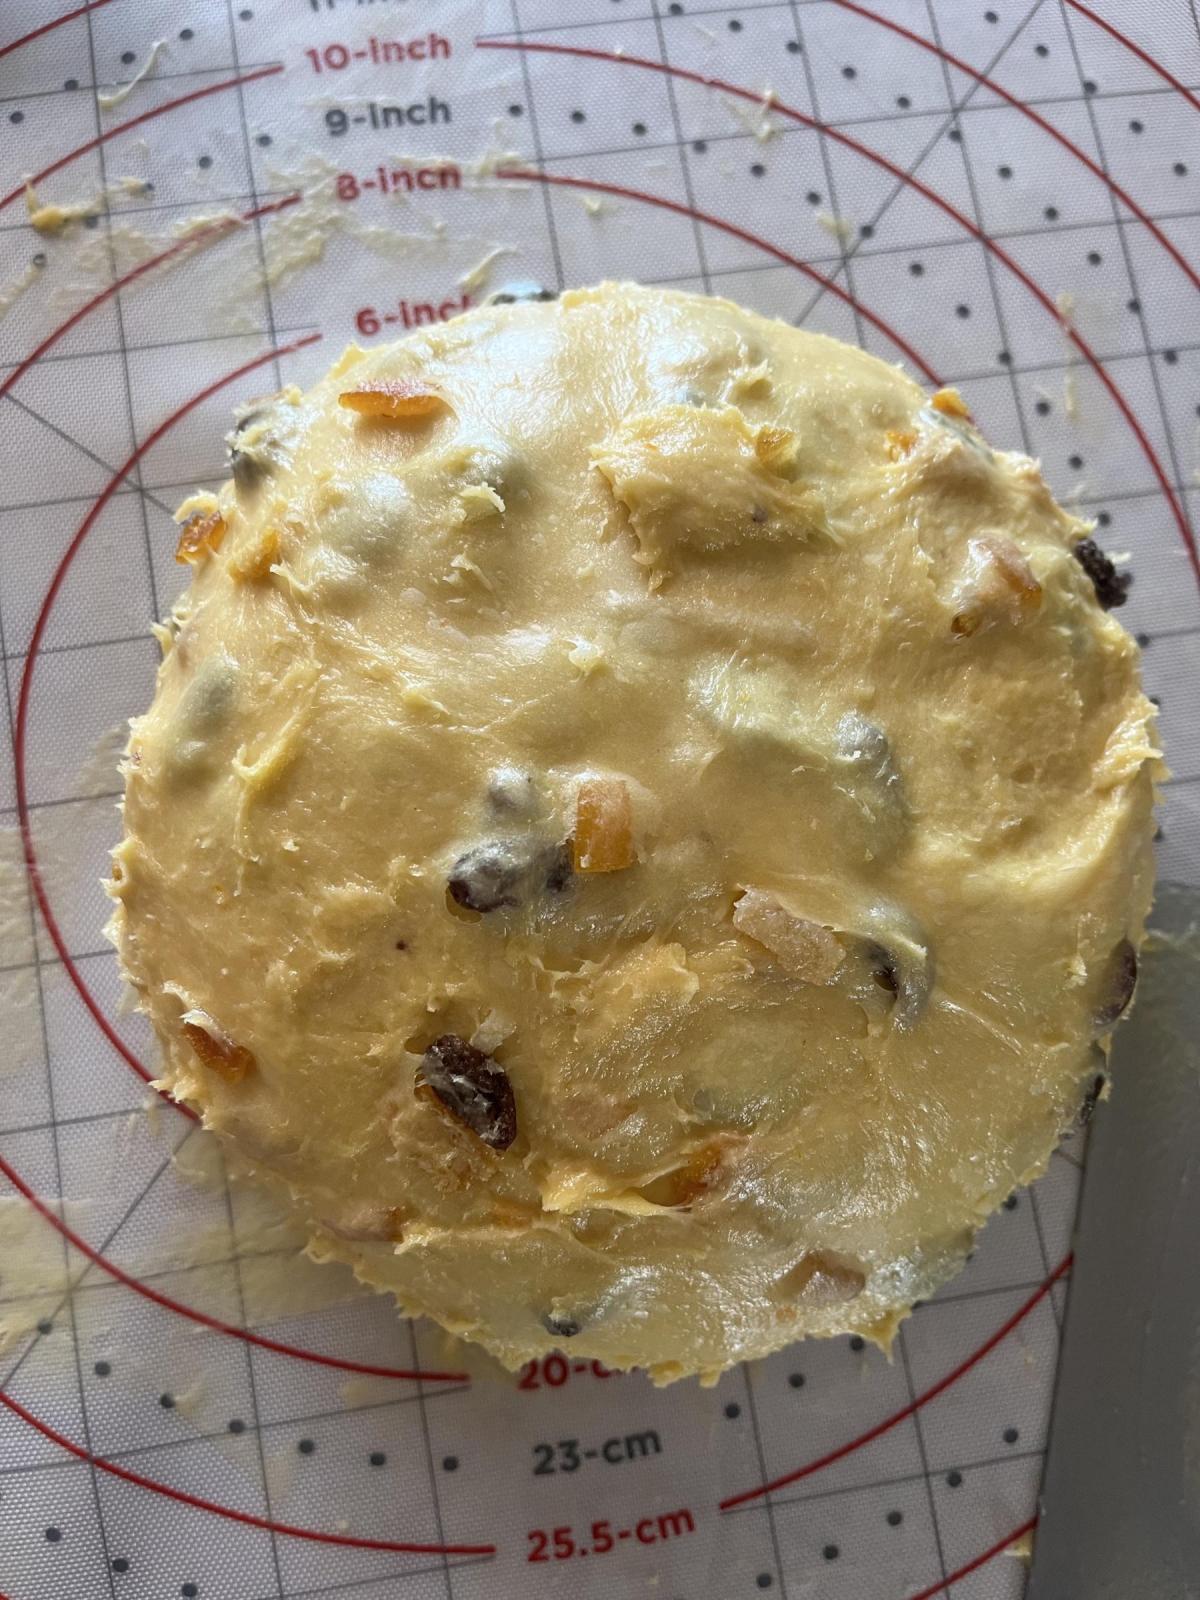
Butter a large baking pan.  Punch the dough down and then divide into 2 equal portions.  Form each into tight boules.  Stretch and then roll each piece of dough into a large rectangle, approximately equal sizes.  Spread the prepared sweet potato evenly over one of of the rectangles of dough leaving about 1cm at the edge of dough without mashed potato.  Place the other rectangle of dough onto the other sandwiching the sweet potato between them.  Using a rolling pin, roll the dough out a bit more aiming for more than 12” in length and just under 9” in width.  


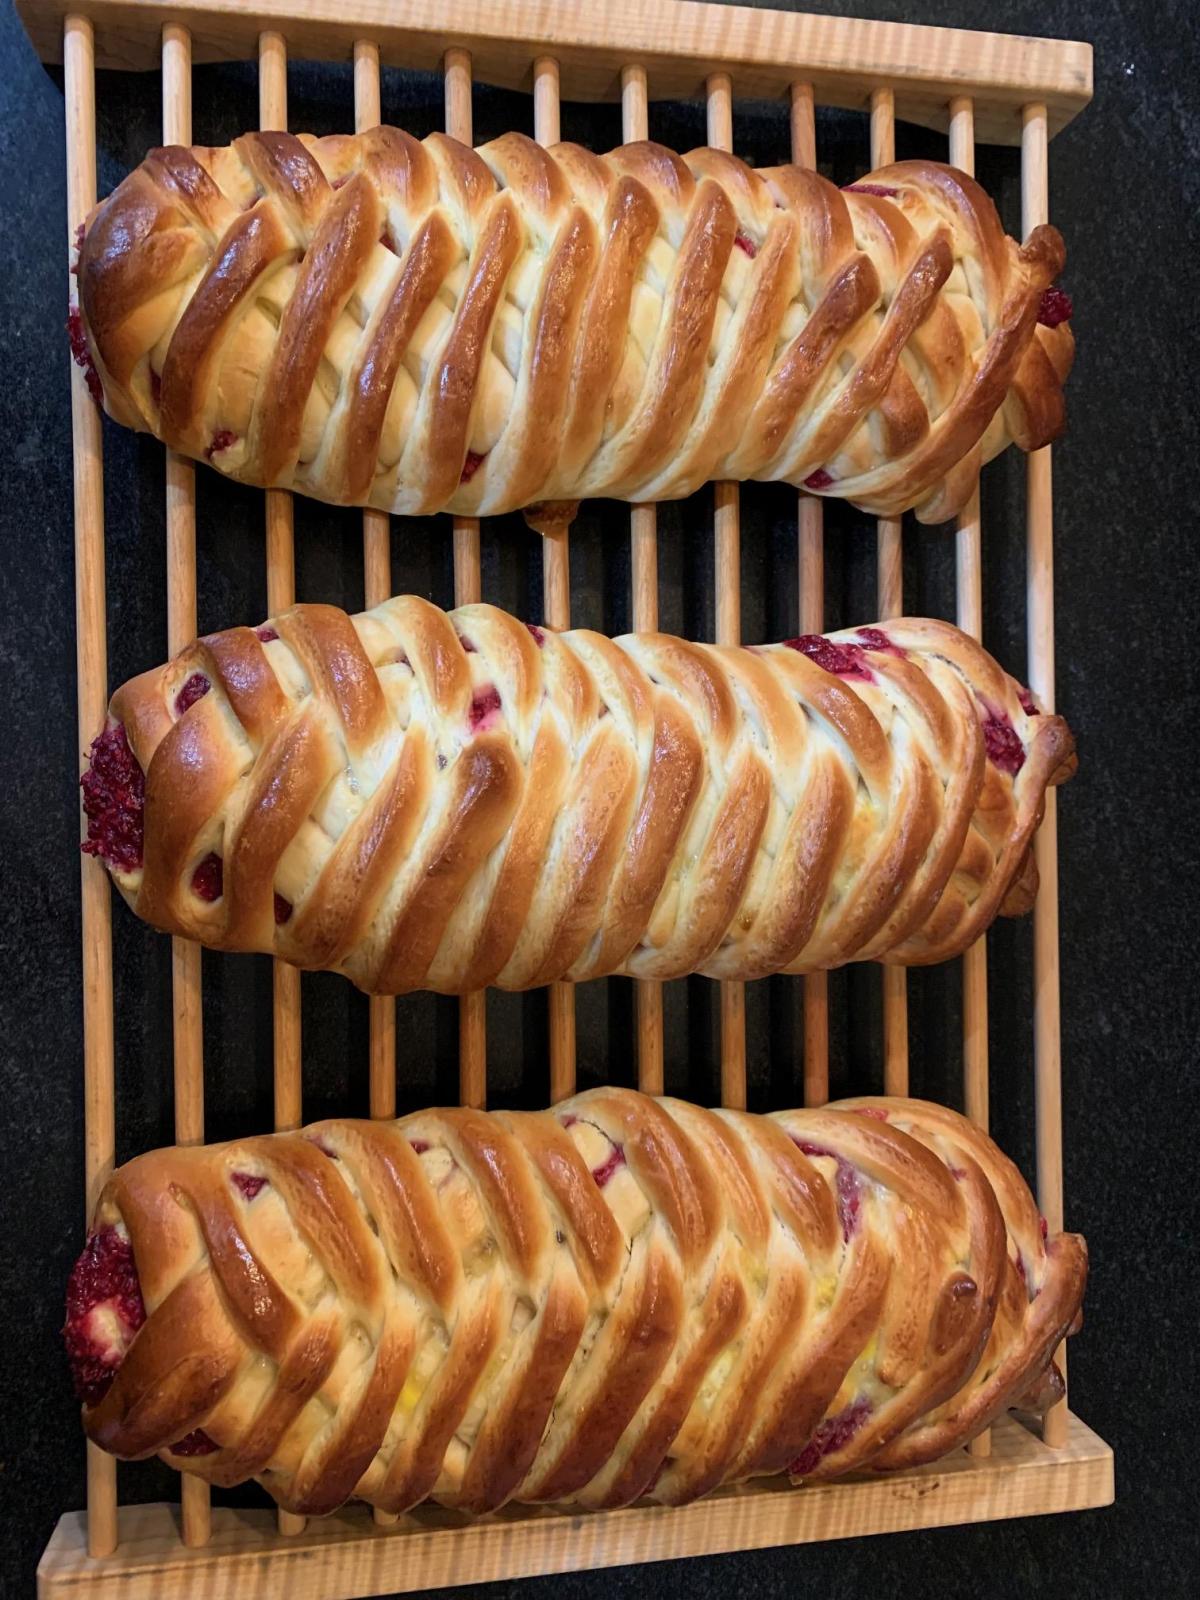
Using a ruler and pizza cutter, cut the dough into evenly wide strips about 1.5-2 cm wide along the length of the dough but leaving about 2-4 cm of dough uncut at the end furthest away from you.  When all the strips are cut, twist the strips in alternating directions, clockwise and then counter clockwise.  Once all the strips are twisted, roll the whole thing into a log starting furthest away from you getting a nice tight roll at the start.  Transfer the dough into your prepared pullman pan with the seam side down.


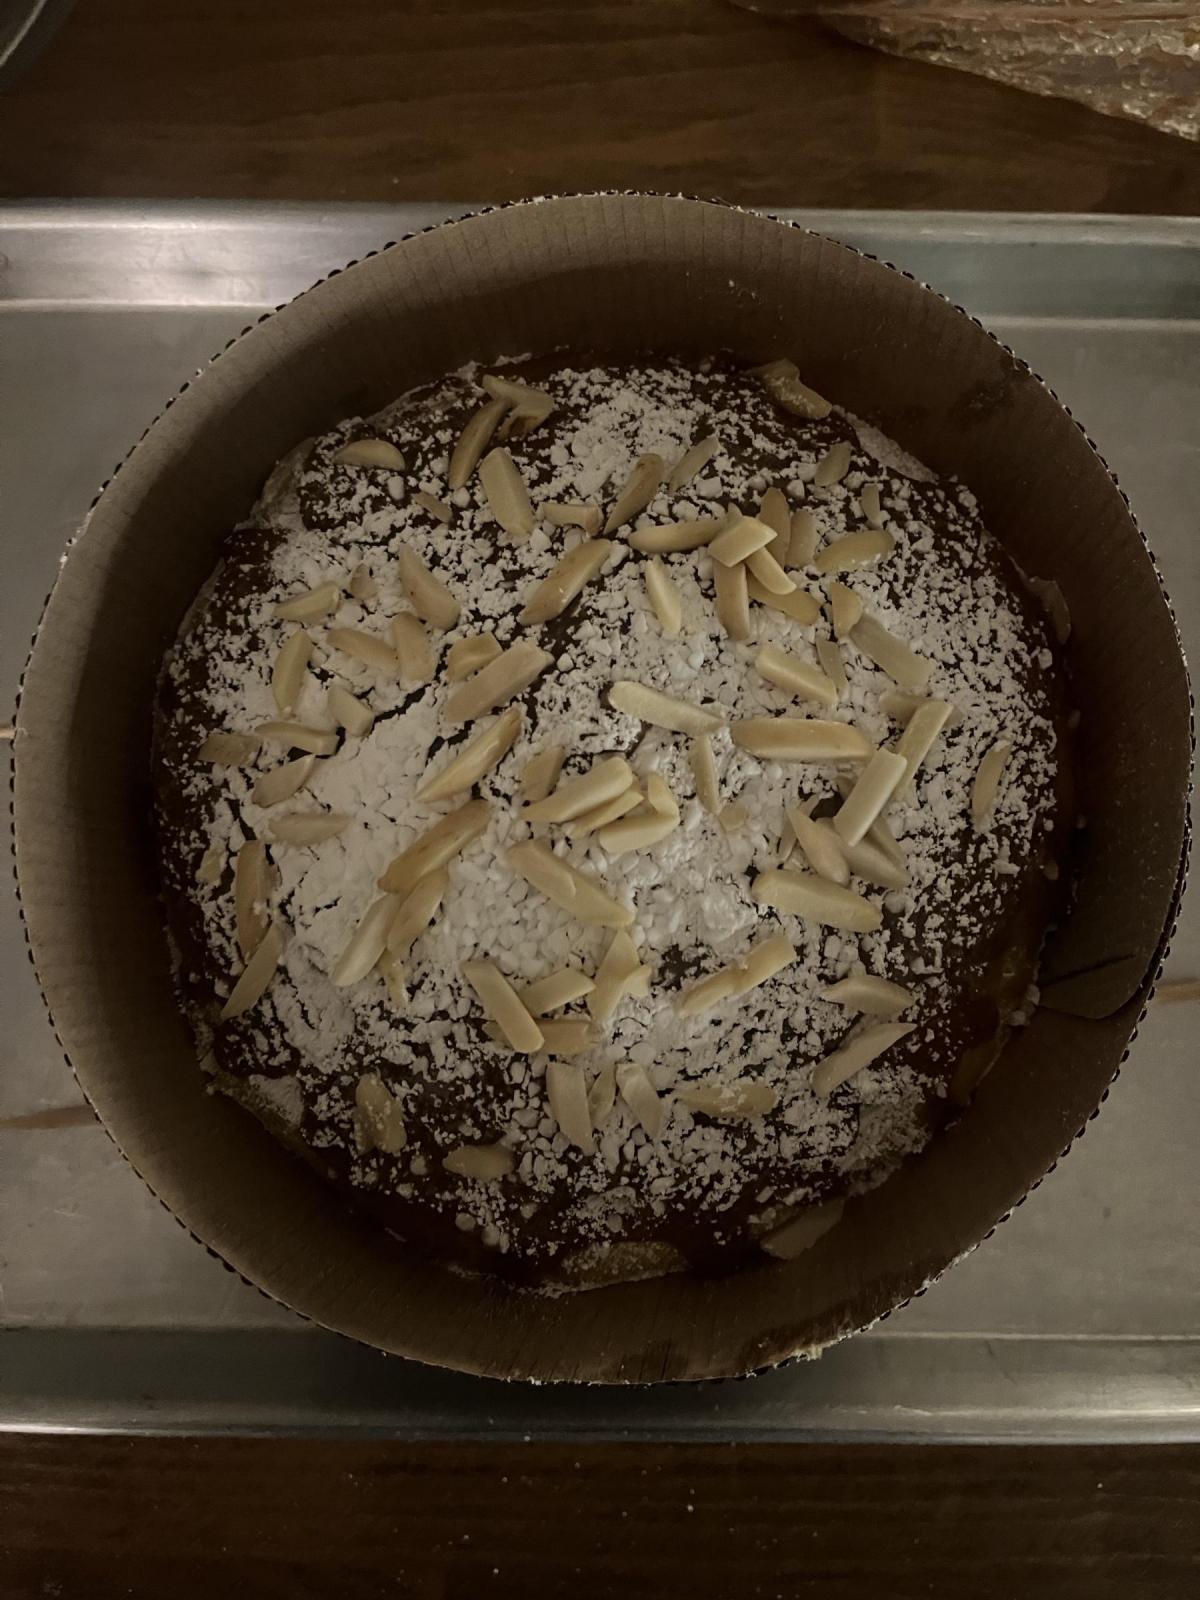
Place in the buttered baking pan seem side down.  Cover them and allow them to fully proof about 1 hour to 1 hour and 20-30 mins, it should pass the poke test.


After about 30 mins of proofing time, prepare your egg and milk wash and then brush the top of the loaf.


About 30 mins prior to end of final proof preheat the oven to 350°F. 

Immediately prior to baking brush the dough again with the egg and milk mixture.


Bake the bread for 50 minutes or until the internal temperature is at least 190F. Cover if your loaf gets brown early in the baking process.


Remove the bread from the pan and return to the oven baking directly on the rack if the sides of the loaf aren’t yet crisp baking for another 5 mins.  Cool on a rack, enjoy.

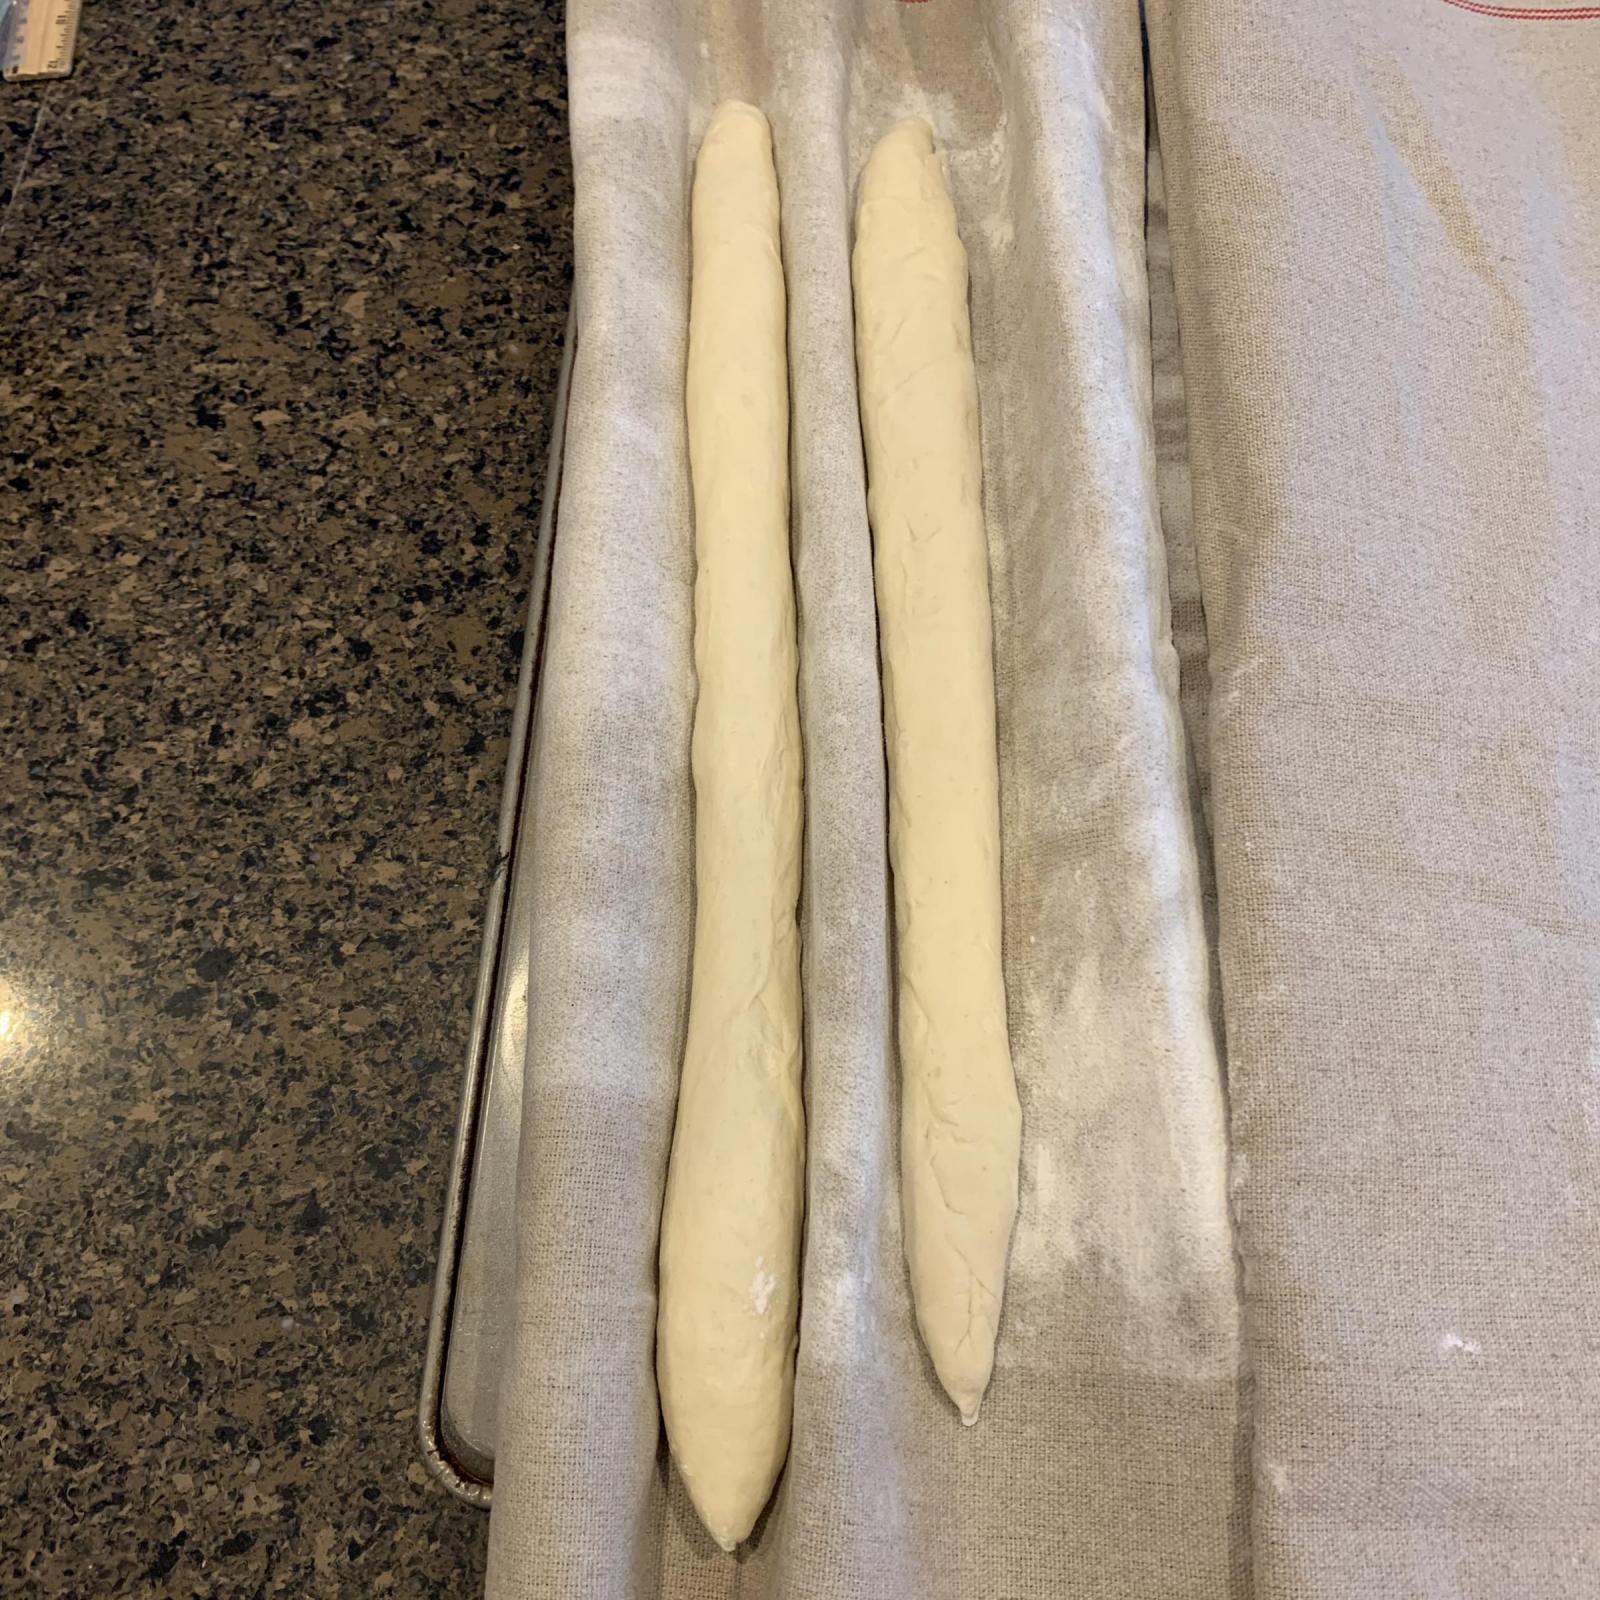
The steps to shape this loaf.

After dividing and rolling the two halves of the dough into large rectangles, the sweet potato is spread on one half and then the others is placed on top, rolled out further and finally cut into 1 cm widths leaving one  end of the dough intact.

My index of bakes

MTloaf's picture
MTloaf

The latest twist and shout version of Maura and Martin’s “Don’t be a bread hostage.” I had some cooked rolled oats leftover from breakfast and mixed it in to make a porridge bread. 

  • 720 grams KAAP 
  • 180 grams home milled hard red wheat 
  • 150 grams cooked oat meal
  • 720 grams water (hold back 100 grams to account for water in the oats
  • 18 grams sea salt
  • 36 grams starter fed in the morning 

Mix starter in the water stir then the WW folllowed by the AP flour and rest for 20 minutes. Add the oats and salt a squeeze together plus any additional water to make a loose foldable dough. Do 3 or 4 folds before bedtime. Dough will double in 12 hours at 72 degrees. Divide, rest and shape then refrigerate until ready to bake. 
Porridge breads have always been hit or miss for me. This one ended up slightly over fermented and was sticky, gassy and not easy to shape. Perhaps too much water as well. Extra stitching was required and I was sure it was going to pancake when it went into the oven. However It did firm up in the fridge and held its shape and ended baking up better than I expected. Someone said an over proofed dough will bake better in a hotter oven so that’s what I tried to do.  Although I should have gone for a bolder bake because of the extra hydration. 
Oat bread

Oat crumb
I like the soft crust and custard like crumb and will be making this again! I am now a captive to this way of making bread;-)

Jdgerbs's picture
Jdgerbs

After a long hiatus, I've returned to panettone. I started training a new LM a couple weeks ago and attempted my first bake. This is a 1kilo alto, following the EIDB recipe (with a couple small modifications). I scaled the recipe a little too small and didn't account for mixing loss so I ended up with only a 950g loaf in a 1000g mold. I think I would have had more volume with 1050-1100g. 

My primo still suffered from being overly acidic in terms of PH but it smelled nice and not sour so I went with it. Still working on this. Solving this is the big mystery. 

As always, scouring these forums has helped me learned, so thanks to all for sharing info.

Here are some photos - I use @mwilson recipe for glaze.

Crumb - 

My primo in the mixing bowl

2nd dough after the bench rest 

Glazed after the final proof


Isand66's picture
Isand66


   Who doesn’t like a good English Muffin…toasted with butter or cream cheese?  Nobody that I know of or at least admits to it!  

I’ve made English Muffins many times with varying degrees of success and I have to say this formula is by far my favorite.  It’s adapted from a version I found on King Arthur Flour but with many changes.

I used KAF bread flour along with some fresh milled Whole Wheat using Rouge de Bordeaux berries from Barton Springs Mill.  It is one of my favorite grains I have tried from them.  If you want more info here it the link to the product page.

I used  60% buttermilk along with water in the final mix and added some dried cherries rehydrated in water which gave the final muffins a wonderful flavor.  I probably could have easily increased the amount of cherries to 150 grams and it would made them even better.

The final muffins had a nice English Muffin open crumb filled with nooks and crannies and were extremely flavorful from the buttermilk, SD levain and fresh milled whole wheat flour.  I like to keep a bunch out for the week and then freeze the rest and defrost for 30 seconds in the microwave and toast them up as I need them.

Formula

Levain Directions 

Mix all the levain ingredients together for about 1 minute and cover with plastic wrap.  Let it sit at room temperature for around 6-7 hours or until the starter has almost doubled.  I used my proofer set at 76 degrees so it took around 5 hours for me.  Either use in the main dough immediately or refrigerate for up to 1 day before using.

Cherries Preparation

I used dried semi-sweet cherries and soaked them in some water for about an hour.  Drained the water and used it as part of the main dough water.

 Main Dough Procedure

Mix the flour and water/buttermilk  (leave about 50 -70 grams to add after the first mix), together in your mixer or by hand until it just starts to come together, maybe about 1 minute.  Let it rest in your work bowl covered for 20-30 minutes.  After 30 minutes or so  add the salt, starter (cut into about 7-8 pieces),  honey, and remaining water as needed and mix on low for 5 minutes. Lastly, add in the cherries until they are evenly distributed for about a minute.  Note: If you are using the Ankarsrum mixer like I do, add your water to the bowl first then add in the flours.  After your autolyse add in the starter, salt, remaining water and mix on low to medium low for 15-20 minutes.  Add the cherries in in the last minute of mixing.

Remove the dough from your bowl and place it in a lightly oiled bowl or work surface and do several stretch and folds.  Let it rest covered for 10-15 minutes and then do another stretch and fold.  Let it rest another 10-15 minutes and do one additional stretch and fold.  After a total of 2 hours place your covered bowl in the refrigerator and let it rest for 12 to 24 hours.

When you are ready to bake remove the bowl from the refrigerator and let it set out at room temperature still covered for one hour or so.    Remove the dough and roll out on a lightly floured countertop to about 1/2″ to 3/4″ thickness depending on how thick you want your English Muffins.  Cut them with a circular metal cutter to the size you desire and place them on a cookie sheet with parchment paper sprinkled with cornmeal.  Cover them with a damp tea towel or plastic wrap sprayed with cooking spray to avoid sticking.  Let them proof in a warm place for 1-2 hours depending until they pass the poke test.  Make sure not to over proof them or you will end up with hockey pucks.

I use an electric skillet to cook mine and warm it up to 375-400 F.  I spray some canola cooking spray in the skillet and after placing the English Muffins inside I place the cover on top which creates a perfect steamy environment. I flip them over once they start getting nice and brown on the bottom and let them cook another few minutes before taking them out to cool on a wire rack.  Use a fork to split them open to keep the nice open crumb, toast them nice and dark and slather on your favorite condiment.

trailrunner's picture
trailrunner

I wanted to see how this would work with really old stored starter and a substantial amount of fresh milled whole wheat. Worked beautifully! 

My stored YW starter hasn’t been refreshed in I don’t know how long… maybe months. I milled 400g of a generic WW . I used 40 g of the stored starter and for good measure subbed 200g of stored Apple YW for part of the water. 

 Mixed everything in the KA til no dry parts. Let autolyse for 30 min. Turned on KA speed 1 , rather than do folds , for 1 min x 3. Bulked at room temp 70 degrees for 9 hours. That’s when I woke up and checked and it had at least tripled. Ok… stuck it in the fridge and went back to bed. 

Took out dumped on countertop at 8 AM it was very soft and spread so I did a couple folds and shaped placed in floured cloth lined bannetons and right back into fridge. 

4 pm turned out scored and baked per Another Girl’s post. I used her weights for everything. 

This bread is delicious! Crust is very chewy and the crumb is very soft and chewy . Quite like a good ciabatta. Really happy with it. Amazing open crumb for 40% WW. 

Pages

Subscribe to Recent Blog Entries