The Fresh Loaf

A Community of Amateur Bakers and Artisan Bread Enthusiasts.

Most bookmarked

audra36274's picture
audra36274

Why milk powder in milk bread, and not just milk?

    I just got my copy of Secrets of a Jewish Baker, and got up this morning going to make milk bread. Scanning over them I noticed that they all contained milk powder instead of just plain milk. I have seen the ads in KA claiming the the rise is far superior with their milk powder. I had some but it has gotten old. Surely little old Jewish men and women centuries ago were not going out to milk the cow for milk powder to make bread. Maybe its a dumb question, but why can't I just use milk? Help!

                                                                      Audra

Stephmo's picture
Stephmo

Soft Pretzels - Alton Brown Style

I love soft pretzels - who doesn't?  I just never seem to get them outside of fair settings.

And then the other week, Alton Brown did a show on homemade pretzels - it was a sign! So I went to the food network's site and I grabbed the recipe. (http://www.foodnetwork.com/recipes/alton-brown/homemade-soft-pretzels-recipe/index.html)

The Ingredients:

1 1/2 cups warm (110 to 115 degrees F) water

1 tablespoon sugar
2 teaspoons kosher salt
1 package active dry yeast
22 ounces all-purpose flour, approximately 4 1/2 cups
2 ounces unsalted butter, melted
Vegetable oil, for pan
10 cups water
2/3 cup baking soda
1 large egg yolk beaten with 1 tablespoon water
Pretzel salt (note, I simply used Kosher salt)

ALTON: Combine the water, sugar and kosher salt in the bowl of a stand mixer and sprinkle the yeast on top. Allow to sit for 5 minutes or until the mixture begins to foam.

So Alton's all into proofing the yeast - and I must say that I only do this because the instructions say so.  At some point I'll stop since I'm really only convinced this is a leftover from poor production methods of old - but look, it bubbles:

ALTON: Add the flour and butter and, using the dough hook attachment, mix on low speed until well combined. Change to medium speed and knead until the dough is smooth and pulls away from the side of the bowl, approximately 4 to 5 minutes.

Now it's all about letting the KitchenAid do the work. I add the melted butter and the flour. You may notice Alton's recipe does specify flour by weight. I actually do have a scale where I can zero out my mixing bowl with ingredients, so I'm able to pour 22 ounces of flour exactly. From here, I let the mixer do it's thing for 5 minutes until the dough is nice and ready:

ALTON: Remove the dough from the bowl, clean the bowl and then oil it well with vegetable oil. Return the dough to the bowl, cover with plastic wrap and sit in a warm place for approximately 50 to 55 minutes or until the dough has doubled in size.

Rising time. Recipe calls for an hour, but this is fast-acting - in 30 minutes, I'm more than doubled:

ALTON: Preheat the oven to 450 degrees F. Line 2 half-sheet pans with parchment paper and lightly brush with the vegetable oil. Set aside.

Bring the 10 cups of water and the baking soda to a rolling boil in an 8-quart saucepan or roasting pan.

In the meantime, turn the dough out onto a slightly oiled work surface and divide into 8 equal pieces. Roll out each piece of dough into a 24-inch rope. Make a U-shape with the rope, holding the ends of the rope, cross them over each other and press onto the bottom of the U in order to form the shape of a pretzel. Place onto the parchment-lined half sheet pan.

Place the pretzels into the boiling water, 1 by 1, for 30 seconds. Remove them from the water using a large flat spatula. Return to the half sheet pan, brush the top of each pretzel with the beaten egg yolk and water mixture and sprinkle with the pretzel salt. Bake until dark golden brown in color, approximately 12 to 14 minutes. Transfer to a cooling rack for at least 5 minutes before serving.

I tear my into 8 pieces and lightly oil my counter so I can roll these into ropes and form them into pretzel shapes. I'll admit that it's not as supple as I'm expecting it to be, but that's okay. While I do this, I have water boiling on the stove and the oven preheating:

Hint from me to you - do put in the baking soda before the water is boiling - if you think you see white crusty stuff on the sides of the pot, you do. I added the baking soda while the water was boiling and got a mini-science experiment. Luckily no spillover, but I laughed. I basically boiled each pretzel for 30 seconds and scooped it out with a wire scoop (this gives the pretzel texture):

At this point, I give the pretzels an egg wash and bake them for 13 minutes. Look what I get:

If you're wondering - but is it a chewy, doughy piece of pretzel goodness? Well - take a look at this crumb:

Yes, this is good stuff - I will be making this again!


Sourdough

Before the 19th century, sourdough was really the only leavening available (unless you’re talking about salt rising bread, which uses bacteria alone – a leavening with which this book does not deal). Sourdough is really not that hard to work with – as some Internet sage once wrote, “People who thought the earth was flat made bread like this for thousands of years.”

First, what is this stuff? Sourdough starter is a stable symbiotic culture of wild yeasts and bacteria. The yeasts break down starches into sugars, which the bacteria eat. The bacteria, on the other hand, create an acidic environment that kills off competitors to the yeasts. The yeasts were almost certainly already living on the grains when they were out in the field. As for the bacteria, that’s a trickier question, but the consensus seems to be that they come from us – studies have failed to isolate Lactobacillus Sanfranciscensis anywhere except in long-lived sourdough starters and on human teeth. The individual mix of yeasts and bacteria varies from starter to starter, and region to region. It’s part of their charm; every starter is unique, and produces bread that tastes somewhat different from those produced with other starters.

Sourdough starters work more slowly than commercial yeasts, which are much more concentrated that starters and have been carefully selected for their gas production. Typically, a sourdough loaf will rise for at least three to four hours in the bowl and will then need another two to three hours as a shaped loaf before it will be ready to bake.

Not all sourdough breads are sour. The French pain au levain and Flemish desem breads are typically not very sour at all, while San Francisco-style sourdoughs and many German ryes are very sour, indeed!

Different starters will produce different levels of sourness, but by far the most important factor in a sourdough bread’s flavor is temperature. If the dough is allowed to ferment at 80 to 85 degrees or is allowed to rise slowly overnight in the fridge or in a cool room (35 to 50 degrees F), the bread will have a markedly stronger flavor than a sourdough that rose at room temperature (65 – 70 degrees F).

Sourdough breads generally keep well, because their acid content slows down the staling process. In addition, the acid in sourdough both reduces the impact of bread on one’s blood sugar and also neutralizes phytic acid in whole wheat breads. Phytic acid prevents the body from absorbing many nutrients.

I still recall hearing the buzz around my hometown, Forestville, California, about the new cafe that had opened there when I was growing up, Brother Juniper's.

Inevitably people's comments sounded something like "My sandwich/chili/coleslaw was excellent, but did you try the bread? It was incredible!" The bread people were talking about was Struan Bread, Peter Reinhart's attempt to recreate a Scottish harvest bread he had read about known as Struan Micheil.

The original Struan was baked on Michaelmas (Spetember 29) and would contain small amounts of all of the grains being harvested that season. So, if you've never tried it, this is definitely the time of year to try baking Struan.

In his latest book, Peter Reinhart's Whole Grain Bread, Peter offers an updated whole wheat, multigrain version of Struan Bread (a previous version of Struan is available here). I baked a double batch of it this evening using a mixture of cooked brown and wild rice as well as uncooked coarse ground corn meal as the grains. Handily, along with volume measurements his book includes weights (in both metric and imperial) as well as the baker's percentages for all recipes. I'm posting just volume. If you want the weights or Peter's more in-depth instructions, get the book!


Multigrain Struan

makes 1 large loaf
Soaker
7 tablespoons whole wheat flour
1 1/3 cups cooked and uncooked grains (rice, quinoa, millet, etc.)
1/2 teaspoon salt
3/4 cup milk or buttermilk
Biga
1 3/4 cup whole wheat flour
1/4 teaspoon instant yeast
3/4 cup water
Final Dough
Soaker
Biga
7 tablespoons whole wheat flour
5/7 teaspoon salt
2 1/4 teaspoon instant yeast
3 tablespoons honey or sugar
1 tablespoon melter butter or oil extra whole wheat flour as needed

DAY ONE Soaker: Mix all of the ingredients ingredients to make a thick porridge-like dough. Cover and leave at room temperature for 12 to 24 hours.

Biga: Mix all of the ingredients to form a ball of dough. Knead for a minute or two by hand until all flour is fully hydrated. Let the dough rest for 5 minutes, then knead again for 1 minute. Place the dough in a bowl, cover, and refrigerate overnight.

struan bread

biga and soaker

DAY TWO

Remove the biga from the refrigerator an hour or two before preparing the final dough. Chop or tear the biga into smaller pieces and combine with the soaker. Add the remaining ingredients and mix well. Knead by hand or machine for roughly 5 minutes until all the ingredients are evenly distributed. Add additional flour or water to achieve the proper consistency (a slightly sticky dough that'll hold its shape). I added as much as a cup of extra flour because the grains I added were precooked and did not absorb a great deal of moisture.

struan bread

Place the dough in a greased bowl and allow to rise until 1 1/2 times its size, roughly 45 minutes to an hour.

Shape the dough and place in greased pans for the final rise. If you want poppy seeds on top, spritz the loaf with water and sprinkle seeds before the final rise.

struan bread

Pre-heat the oven to 425 while the loaves are rising.

struan bread

To bake, place the loaf in the preheated oven. After 5 minutes, reduce the temperature to 350 and bake for 20 minutes. Rotate the loaf 180 degrees and bake about 20 to 30 minutes until the loaf is deep brown, makes a hollow sound when tapped on, and when the internal temperature reads at least 195 degrees. Remove the bread from the oven and allow to cool for at least one hour.

struan bread

Peter Reinhart's Whole Grain Bread is now available from Ten Speed Press.

Multigrain Struan

bwraith's picture
bwraith

Whole Grain Sourdough Sandwich Bread

Whole Grain Sourdough Sandwich Bread Loaves

This bread is an attempt to improve on the results from a previous blog entry. This one also has a spelt levain, but it was designed to rise overnight with only a small quantity of 90% hydration white flour starter added. The levain was added to the dough when it was not very ripe, before it had peaked and dipped. The percentage of fermented flour is about 32%, but the less ripe starter results in flavor and dough handling more like what you would expect if you used a lower percentage of fermented flour. The whole spelt flour contributes a characteristic nutty, slightly sweet flavor to the bread. I was very happy with the flavor resulting from this combination of flours and plan to use it more often for this bread and for my favorite mixed grain miche recipe. The hydration is about 83%, which for a whole grain bread is not enough to make it very wet or difficult to handle. However, it is a slightly slack and sticky dough. It should spread out only a little bit after sitting on the counter, not like a very wet ciabatta dough that might spread out more quickly and more or less pour out of the bowl until it has been folded more.

Whole Grain Sourdough Sandwich Bread Crumb

I have posted some photos, videos of my version of doing a "French Fold" and of periodic "Folding" during bulk fermentation, and also a spreadsheet with some further information such as baker's percentages, fermented flour percentages, and hydration.

Ingredients:

Firm Levain:

  • 90% hydration storage starter 11g (0.4 oz) (use any healthy active sourdough starter here, ideally contributing the same amount of fermented flour, e.g. use more like 9 grams of 60% hydration firm starter)
  • whole spelt flour 298g (10.5 oz)
  • water 184g (6.5 oz)

Overnight Soak Ingredients:

  • malt syrup 40g (1.4 oz)
  • diastatic malt powder 5g (.16 oz)
  • whole red wheat flour 397g (14 oz)
  • whole white wheat flour 170g (6 oz)
  • KA rye blend 57g (2 oz)
  • water 581g (20.5 oz)

Final Dough Ingredients:

  • overnight soak from above
  • firm levain from above
  • salt 17g (.6 oz)
  • olive oil 28g (1 oz)

Levain

Mix levain ingredients the night before you plan to bake. The levain is designed to rise by about double in 10 hours at a temperature of 75F. Adjust accordingly if you have different temperatures. It is not a problem if the levain rises by more than double or peaks and dips. However, if it is allowed to ripen too much, you may experience a sluggish rise or other symptoms similar to overproofing sourdough, since the amount of fermented flour contributed by this recipe is fairly high. I added this levain when it had a little more than doubled, but it was clearly not at its peak yet.

Overnight Soak

Mix all the flour and other dry ingredients for the overnight soak together well, so they are fully integrated and uniformly distributed. Mix the malt syrup and water so that the malt syrup is fully dissolved and well distributed in the water. Pour the water into the bowl and use a dough scraper to work around the bowl and mix the flour and water well enough to fully and uniformly hydrate the flour. This should be very easy and take only a couple of minutes of mixing. You can also use a mixer, but use very slow settings and do not overdo it. The idea is to just mix the ingredients. Cover and put in the refrigerator.

Mix Final Dough (next morning)

Chop up the levain into small pieces about the size of marshmallows. Wet your hands and rub the counter with water. Pour the dough from the overnight soak out onto the counter and spread it out like a pizza. Distribute the pieces of levain evenly across the dough. Press them in with the heel of you hand. Roll up the dough in one direction, then the other. Allow it to rest for a few minutes. Again wet your hands and the counter if it needs it. Spread out the dough again like a pizza. Evenly spread the salt and the oil over the surface of the dough and press it into the dough again with the heel of your hand. Roll up the dough in one direction, then the other. Let it rest a few minutes. Spread it out one more time like a pizza. Work across the dough pressing the heels of your hands deep into the dough to integrate any oil and salt that may not have already been well integrated into the dough. Roll up the dough in one direction, then the other.

Let rest for 15 minutes.

Do two or three "French Folds", as shown in the video. Note that this is a good technique for developing the gluten in a wet dough that may not respond well to conventional kneading. Also, note, when I say two or three, I mean literally about 10 seconds, like two repetitions of the motion, as shown in the video. That is all the "kneading" that was done to make this bread. Place the dough in a covered bucket or bowl to rise.

Bulk Fermentation and Periodic Folding

The dough should rise by double in about 4 hours at 75F, but the folding will degas the dough somewhat, so lean toward less than double, depending on how much you are degassing the dough while folding. Also, adjust accordingly if your temperature is different or your starter is faster or slower. Try not to let this dough ferment too long. The high percentage of fermented flour in the dough and the spelt flour will conspire against you if you allow the dough to rise for too long. If in doubt, stop the bulk fermentation and go on to shaping, even if the dough doesn't rise by double.

Fold the dough about three times approximately on the hour, as shown in the "Folding" video. If the dough appears to be wet enough to relax significantly before one hour, then fold sooner. If the dough appears to be fairly stiff and holding its shape or is hard to stretch when you fold it, then fold less often or fewer times.

Shaping

Create sandwich loaves using a typical batard technique or whatever method you prefer. Place loaves in typical loaf pans that are about 9 inches long by 4.5 inches wide. I sprayed the pans lightly with oil beforehand to avoid any sticking.

Final Proof

Allow loaves to rise by roughly double in about 2.5 hours at 75F. Again, adjust your proofing time as necessary for different temperatures or different starter. Once again, avoid overproofing, which is easier to do inadvertently with less tolerant spelt flour and the higher percentage of fermented flour in this recipe.

Bake

I slashed the loaves and baked them from a cold start for 1 hour and 5 minutes at 400F after proofing for 2 hours and 15 minutes. Although the dough is not as wet as some, it still should be thoroughly baked. Otherwise the crumb will be overly moist and the crust will become soggy.

Cool

When the loaves are done, remove them from the pans and allow them to cool on a rack. Do not cut into them, if you can resist, at least until they are no longer warm to the touch.

Results

I was very pleased with the flavor of this bread. The sourdough flavor from the spelt starter is delicious, there is no bitter flavor of whole wheat that I can detect, and the spelt adds a unique and mild flavor. The bread toasts very well and carries any type of topping, since the crumb is open and light but not so irregular that honey or other wet ingredients fall right through it.

meedo's picture
meedo

khobiz mohala (sweet round bread)


Makes 16.

A traditional bread recipe in Arabic gulf area, bakes in a special tanor build in the ground.

Serve in weddings, special occasions (Eid al adha), or the religion occasions, with coffee and dates.

This recipe is so healthy and full of nutrition.

For the dough:

5 1/2 cups all purpose flour.

1 1/2 cup wheat bran.

1 tablespoon yeast.

1/2 teaspoon baking soda.

1/4 cup sugar.

1/3 cup date molasses.

A pinch of saffron socked in 2 tablespoon of rose water.

1 cup pitted dates socked in 1 cup of boiling water (let it cool before use it).

3/4 cup water.

In a small bowel mix together:

2 tablespoons boiling water.

2 teaspoons sugar.

1/2 teaspoon baking soda.

 Toasted sesame seeds.

(dates)


(date molasses )

1)To make the dough mix the entire ingredient, knead the dough for 10 minutes. Place it in a bowl, cover, let rest for 1 hour.

2)Divide dough into 16 pieces,Shape each into a smooth ball.

3)Flat each to make a flat round square, then brush each with the (sugar and baking soda mixture), make indents with fingertips.

4)sprinkle with sesame seeds, Place on baking sheet, Cover let rise 30 minutes.

5)Bake at 350 for 20 minutes.or until it golden brown.

http://arabicbites.blogspot.com/

browndog's picture
browndog

Dan Lepard's Walnut Bread


My favorite bread changes as often as a teenager changes boyfriends. Here's this week's:

Dan Lepard's Walnut bread. It has yeast and leaven both; what makes it wonderful is the paste of

ground walnuts, honey and butter that infuses the dough with walnut flavor and a hint of purple.


JMonkey's picture
JMonkey

Video tutorial: Shaping a sandwich loaf

Here's a video that I put together this weekend on how to shape, slash and bake a sandwich loaf. Nothing too hard, but it gave me a great excuse to play around with iMovie. Fun!

I hope you all enjoy the video. Here's a link. Hopefully, it'll show up as an embedded video soon.

Benito's picture
Benito

Saccharified Polenta Sourdough

A recent blog post about grain mash is awesome if you haven’t read it yet. Reading it motivated me to apply saccharification to the polenta porridge thinking it might enhance the flavour of the polenta. As you know saccharification of the polenta brings out its sweetness that is hidden in the starches in the polenta. Adding the diastatic malt and holding it at a warm, but not too warm temperature will allow the diastatic malt (amylase) to break down theses starches to sugars which we will be able to taste as the natural sweetness in the polenta that otherwise would be hidden from our tastebuds.

I used my Instant Pot and after a bit of experimentation found that using its Keep Warm setting Normal holds a temperature of 148°F for up to ten hours. After cooking the polenta I placed it into a jam jar lightly capped and placed it into a water bath in the instant pot and cooked it for 6 hours. Comparing the flavour pre and post water bath the difference was remarkable. After six hours the porridge had a lovely sweetness that wasn’t there prior to the six hours at 148°F. When using the Instant Pot for this saccharification process put the lid on but keep the vent open so there is no pressurization of the pot.

Cook coarse corn meal with the water until softened and water fully absorbed. Once the temperature is down to 150°F or less add the diastatic malt and mix well.
Place the corn porridge in a jar, covered lightly and place in a water bath in an instant pot. Set to [keep warm] normal (148ºF) for 3-6 hours. I did 6 hours.

 Build levain overnight with the aim to be at peak in the morning. At 76°F 3x rise and dome flattening at 11 hours.

Add water and salt to the bowl of a stand mixer, dissolve salt. Add the stiff levain and break into small pieces. Add the bread flour, mix on speed 1 until no dry flour remains. Rest for 10-15 mins. At medium speed mix to develop the gluten. When the gluten is moderately to well developed add the polenta porridge in small aliquots. Mix until well incorporated.

Bulk fermentation aiming for 40% rise to shape. Perform coil folds every 30 mins until dough is strong and isn’t spreading.

Once the pH has dropped by 1.0 then shape the dough into a batard and then start final proofed shaped and resting in a banneton.

Once the pH has dropped by a further 0.3 it will be time for baking. Place the dough in the freezer when the pH drops by 0.25 and then pre-heat oven at 500°F with cast iron skillet in the oven and set up for open steam baking. 30 mins prior to baking, pour 1 L of boiling water into metal loaf pan with Sylvia towel and place on baking steel on the lowest rack of the oven.
Once oven reaches 500ºF turn dough out of banneton, brush excess rice flour off, score and then brush with water. Transfer to oven. Pour 250 mL of boiling water into the cast iron skillet on a high shelf, high enough that the dough have fully bloom. Drop temperature to 450ºF and bake with steam for 25 mins. Then vent oven and remove all steaming gear and drop temperature to 425ºF. Bake for another 25-30 mins rotating as needed.

My index of bakes.

GaryBishop's picture
GaryBishop

Flourless Sourdough Starters

We've been discussing flourless starters of various kinds in another thread and Mariana brought up flourless sourdough starters. I'm going to move the discussion over here so I don't have to keep searching for her comments.

First I'll quote comments from Mariana.

I prefer other flour based sourdough starters. But I love flourless sourdough starters. They are the greatest, really. As the topic starter mentioned, they are unbelievable as bread improvers, they improve both wheat and rye breads. Mine are true sourdough starters, with wild yeast, not just with LAB, prepared in at 32-33C, ready to bake with them in 2 days. This is how it looks like, flourless rye starter, this one was made from 20g of rye flour and a cup of water.

it is really all about temperature ranges. Otherwise nothing is different from FLAS method. You could easily use the same rye malt and keep it at 28C, instead of 43-45C and obtain a true sourdough starter in the end. It would have a healthy yeast community in it, because sourdough yeasts multiply best at 28-30C (whereas lactic acid bacteria prefer 32-50C range).

So, you could try this experiment, do exactly as you do for FLAS, but set it to 28C and you will have a true sourdough starter from scratch. DO NOT close the cover tightly. Cover with plastic wrap with a small hole in it.

Now, rye is famous for being low on yeast and high on LAB, so you would do better if you add a tsp of any wheat grain, whole wheat flour (soft or hard, durum, spelt, etc) to your rye malt solution, or even a spoon of raw wheat bran would do - as a source of while yeasts. You can also add wild yeasts the way YW people do - by adding a few chopped raisins, or fruit peels.

Another way to develop a sourdough starter is to add yeasts to your already existing lactic acid starter. If you like its flavor that is (because at 28-30C OTHER lactic acid bacteria would thrive in flourless starter even if made from the same rye malt and it will smell differently). I did it once with LAS based on white bread flour (again, a very pour source of yeasts and a rich source of LAB) and it worked just fine.

I added to my LAS a few squished grapes and a spoon of spelt flour and kept it at 28C for a few hours and la voila. It became a true sourdough starter with plenty of yeast in it.

It became boozy, gassy, like sparkling wine. Such intense yeast propagation can take up to 2 days at 28C/82F if there was really zero yeasts in your LAS.

You use flourless starters in the same way you use flour-based starters. There are two ways of making bread

- straight method (starter -> bread dough)

- sponge method (starter - > levain -> bread dough)

So, you use your flourless starter

either to prepare a flour-based starter as in the recipe (or even directly mix your bread dough using flourless starter as liquid or part of liquid)

or to prepare a levain with it and from there - bread dough.

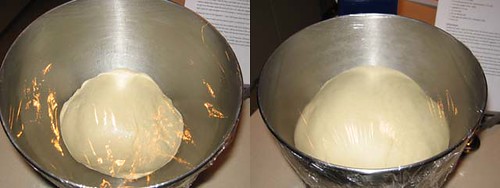
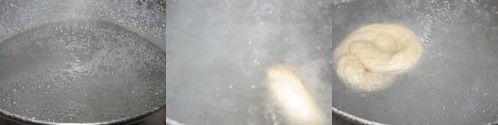
Example of flourless starter based levain: a sourdough poolish, so to speak (100% hydration)

at peak (max volume, domed top surface)

mature (flat top surface)

When you get there, I will give you specific examples.

I will also describe another, ancient, method of preparing a flourless sourdough starter by using scalded flour later. It's very good.

But for now, Gary, experiment with the two methods described above. Either use FLAS method, starting from scratch, but at 28-32C (keep it for 12hrs at 32C, then for 12hrs at 28C, alternating during the three days of starter development), or add to your existing FLAS some wheat (or wheat bran) and some fruit peels and keep it at 28 to populate it with wild yeast. Remember to add some sugar or even molasses. Yeast needs sugar.

Have fun with it, Gary! Seeing how different sources of microbes and of their food in combination with temperature and hydration affect your outcomes is eye opening, but most importantly it is fun. I am more into bread than into sourdough starters, but I had to learn about them in a hard way, to troubleshoot or to at least make "normal" bread dough, and now I am glad that I did.

Afaik yeast water and FLAS combo should give you the same outcomes as FLAS with commercial yeast with one exception: the crumb might be a shade darker. Also, flas&yw combo will never have the same aromas as true sourdough, because in true sourdough yeasts and LAB live in symbiosis and produce three kinds of flavors: typical of yeasts, typical of LABs, and typical of yeasts in symbiosis with LABs. It's impossible to reproduce those aromas and tastes by blending CY or YW with LAS.

My first attempt.

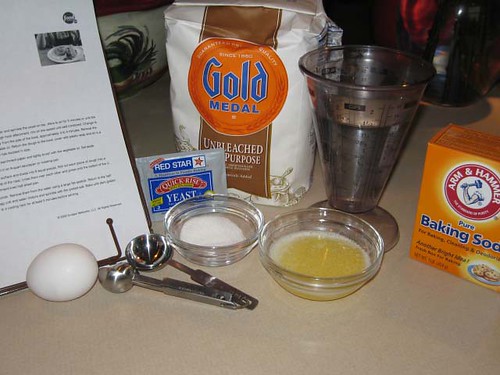
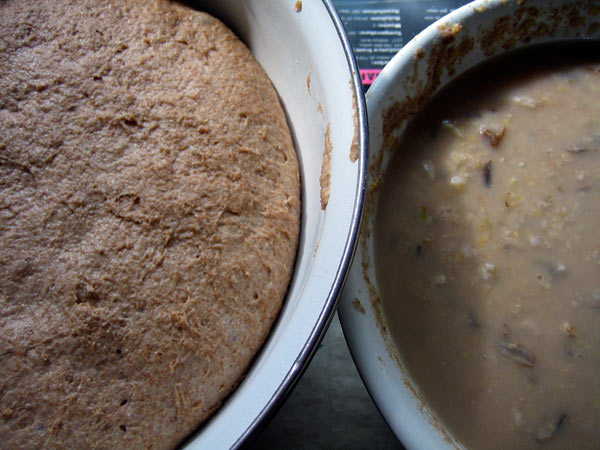
I used 50g of rye malt, 25g of whole wheat flour, 25g of raisins 700g of water, and 1.1g of vitamin C crystals. I set my controller to cycle between 28C and 32C at 12 hour intervals for 3 days. I fed it 1 tsp of sugar every 24 hours.

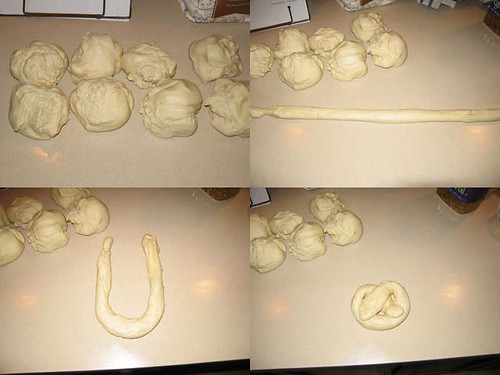
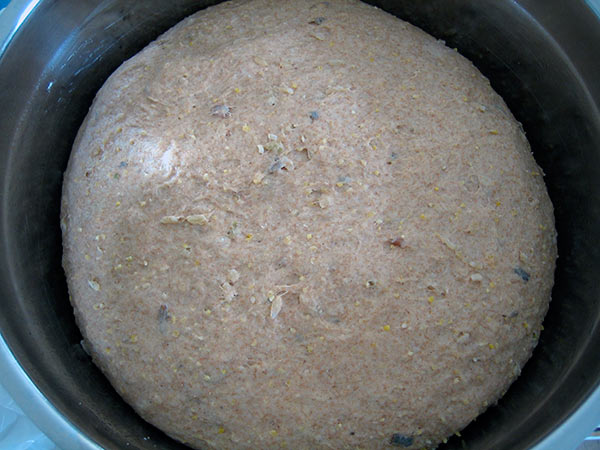
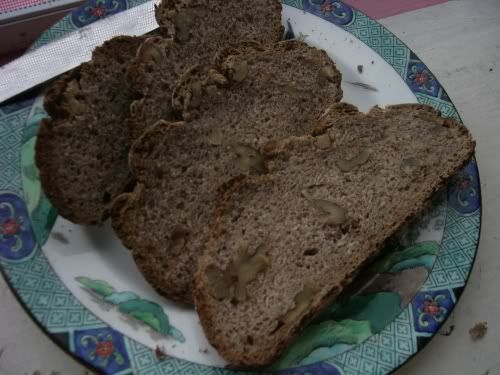
It smelled bousy and fruity. I had company so I couldn't bake with it right away but I did mix 93g of the liquid with 93g of WW flour to see what it would do. It tripled in 8 hours at 27C. I then refrigerated it for 5 days and finally got a chance to bake with it.

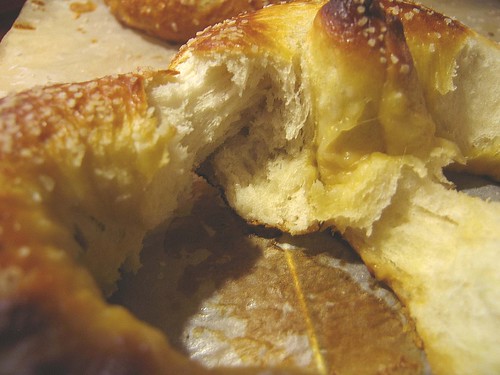
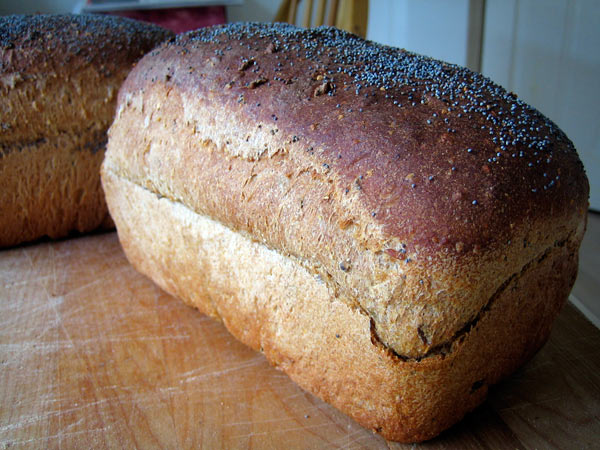
I baked with the 100% hydration flour/starter combo today and the loaf tastes great. I really like the complexity of the flavor.

Mariana had some further comments.

It obviously has yeast in it and can be used in sourdough baking, especially in rye breads with overnight warm preferments, but its value is even higher in yeasted breads.

Try feeding that flourless SD starter as well to propagate its microbial culture. Usually half a cup of the old starter is enough to make a quart of new starter.

If you like its flavor and do not want to alter it, you can use the same ingredients as in the initial batch, except for making water very warm, about 45C/115F. This is to encourage its SD bacteria, to make them multiply first.

To one quart of 115F water add rye malt, wwf or whole rye flour (or any other whole grain flour or flakes), chopped raisins, half a cup of previous starter (liquid or the sediment, the bottom portion)and keep it at 28C/82F for 3-4hrs or longer, until it feels slightly, but distinctly sour to taste and its temperature slowly drops from 115F down to 80-85F so that its yeasts may begin to multiply as well. Then add sugar and refrigerate for up to one month.

After 24hrs, use directly from the fridge, it does not need to be refreshed before using it.

Pages