The Fresh Loaf

A Community of Amateur Bakers and Artisan Bread Enthusiasts.

Most bookmarked

Stephmo's picture
Stephmo

Soft Pretzels - Alton Brown Style

I love soft pretzels - who doesn't?  I just never seem to get them outside of fair settings.

And then the other week, Alton Brown did a show on homemade pretzels - it was a sign! So I went to the food network's site and I grabbed the recipe. (http://www.foodnetwork.com/recipes/alton-brown/homemade-soft-pretzels-recipe/index.html)

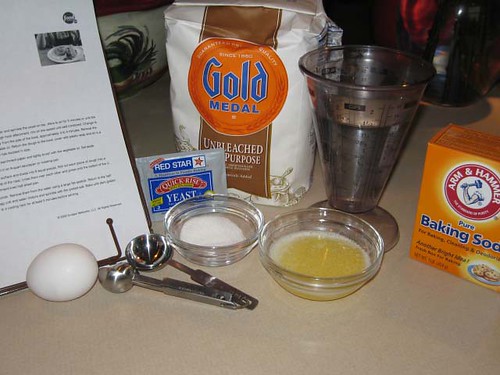
The Ingredients:

1 1/2 cups warm (110 to 115 degrees F) water

1 tablespoon sugar
2 teaspoons kosher salt
1 package active dry yeast
22 ounces all-purpose flour, approximately 4 1/2 cups
2 ounces unsalted butter, melted
Vegetable oil, for pan
10 cups water
2/3 cup baking soda
1 large egg yolk beaten with 1 tablespoon water
Pretzel salt (note, I simply used Kosher salt)

ALTON: Combine the water, sugar and kosher salt in the bowl of a stand mixer and sprinkle the yeast on top. Allow to sit for 5 minutes or until the mixture begins to foam.

So Alton's all into proofing the yeast - and I must say that I only do this because the instructions say so.  At some point I'll stop since I'm really only convinced this is a leftover from poor production methods of old - but look, it bubbles:

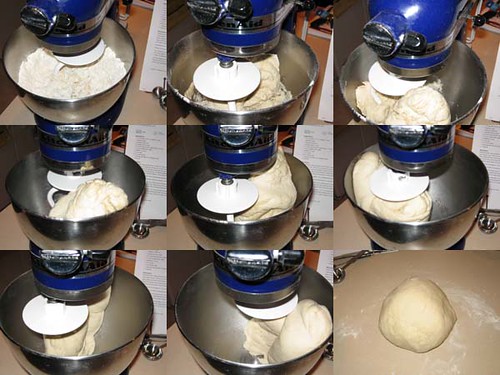
ALTON: Add the flour and butter and, using the dough hook attachment, mix on low speed until well combined. Change to medium speed and knead until the dough is smooth and pulls away from the side of the bowl, approximately 4 to 5 minutes.

Now it's all about letting the KitchenAid do the work. I add the melted butter and the flour. You may notice Alton's recipe does specify flour by weight. I actually do have a scale where I can zero out my mixing bowl with ingredients, so I'm able to pour 22 ounces of flour exactly. From here, I let the mixer do it's thing for 5 minutes until the dough is nice and ready:

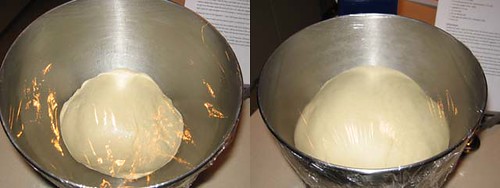
ALTON: Remove the dough from the bowl, clean the bowl and then oil it well with vegetable oil. Return the dough to the bowl, cover with plastic wrap and sit in a warm place for approximately 50 to 55 minutes or until the dough has doubled in size.

Rising time. Recipe calls for an hour, but this is fast-acting - in 30 minutes, I'm more than doubled:

ALTON: Preheat the oven to 450 degrees F. Line 2 half-sheet pans with parchment paper and lightly brush with the vegetable oil. Set aside.

Bring the 10 cups of water and the baking soda to a rolling boil in an 8-quart saucepan or roasting pan.

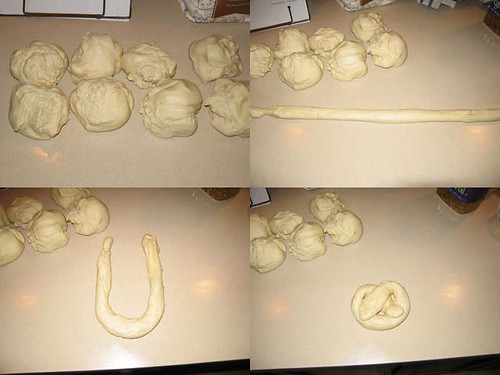
In the meantime, turn the dough out onto a slightly oiled work surface and divide into 8 equal pieces. Roll out each piece of dough into a 24-inch rope. Make a U-shape with the rope, holding the ends of the rope, cross them over each other and press onto the bottom of the U in order to form the shape of a pretzel. Place onto the parchment-lined half sheet pan.

Place the pretzels into the boiling water, 1 by 1, for 30 seconds. Remove them from the water using a large flat spatula. Return to the half sheet pan, brush the top of each pretzel with the beaten egg yolk and water mixture and sprinkle with the pretzel salt. Bake until dark golden brown in color, approximately 12 to 14 minutes. Transfer to a cooling rack for at least 5 minutes before serving.

I tear my into 8 pieces and lightly oil my counter so I can roll these into ropes and form them into pretzel shapes. I'll admit that it's not as supple as I'm expecting it to be, but that's okay. While I do this, I have water boiling on the stove and the oven preheating:

Hint from me to you - do put in the baking soda before the water is boiling - if you think you see white crusty stuff on the sides of the pot, you do. I added the baking soda while the water was boiling and got a mini-science experiment. Luckily no spillover, but I laughed. I basically boiled each pretzel for 30 seconds and scooped it out with a wire scoop (this gives the pretzel texture):

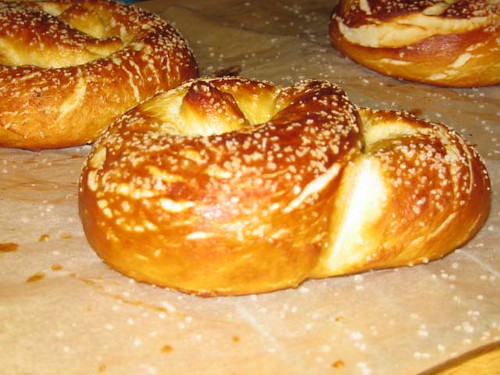
At this point, I give the pretzels an egg wash and bake them for 13 minutes. Look what I get:

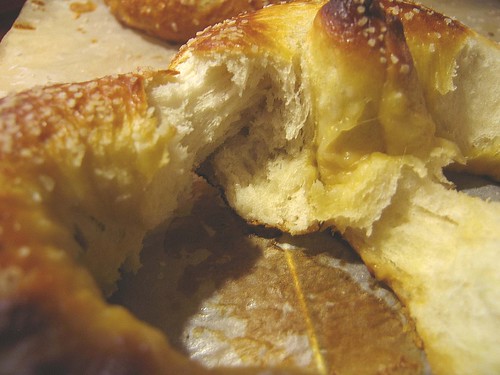
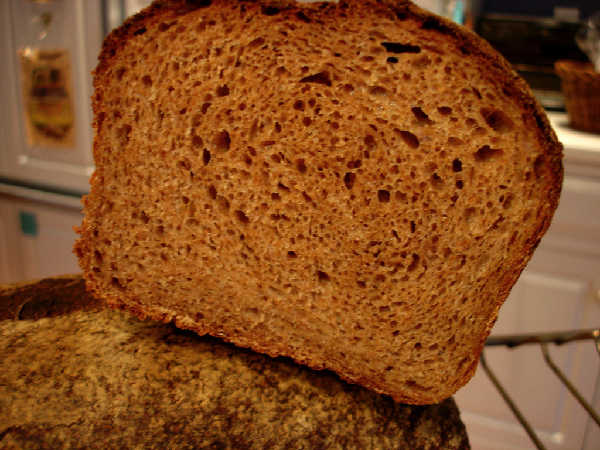
If you're wondering - but is it a chewy, doughy piece of pretzel goodness? Well - take a look at this crumb:

Yes, this is good stuff - I will be making this again!


Mixing and Dough Development

This is the part of baking that is intimidating to many new bakers, and it doesn't need to be. Please take a few minutes to read this section and begin to learn what the dough should feel like and how to get it feeling like it is well developed. Many of us started baking by using a bread machine or a Kitchen Aid stand mixer to mix and knead the dough. While this works reasonably well, and other methods are described below, you will learn more quickly how the dough should feel in the different stages of development if you use the tools god gives us, our hands. For thousands of years humans have made good bread using only a crude bowl and their hands as tools. While commercial bakeries don't have the time to hand mix and shape thousands of loaves daily, much of what is wrong with commercial bread starts here in the first phase of bread making.

Mixing: Start by gathering all of the needed ingredients for the recipe. If you are making a basic French style bread that uses just the basic four ingredients (flour, water, salt and yeast), measure or better, weigh each item carefully ahead of time and have it in front of you ready to use. This might seem like over simplifying this procedure but I can tell you from experience you will forget the salt or pour all the water in without having measured it or can't remember some additional ingredient, if you don't get organized, first.

In a large bowl, add all of the dry ingredients first and stir or mix them together well. This means that Instant Dry Yeast and salt are added to the flour and any other dry ingredients you may be using with your recipe. NOTE: If you are using Active Dry Yeast, the directions for re activating this type of yeast call for adding the yeast to a cup or so of the water (warmed) needed for the recipe  5 or 10 minutes ahead of mixing the dough. If you are using Cake Yeast, crumble it with and into the flour using your fingers.
Continuing; Next, add all of the water and begin combining the flour into the water. You can use your fingers, (yes it will be a mess but it is supposed to be) or a spoon to accomplish this first mixing. Wood, Stainless Steel, Plastic, any kind of spoon or bowl will do fine. When the mixture is mostly a shaggy mass and looks like most of the dry flour is combined into the mass, you can stop, clean your hands over the bowl and cover the bowl with a plastic bag or a damp towel or plastic wrap. Plastic grocery bags are my favorite. Wait at least 15 minutes and as long as an hour for the flour to absorb the water. When you come back to the mix, it won't feel anything like it did after first mixing. Scrape everything you can onto a clean counter and quickly clean and dry the mixing bowl.


Kneading or Developing: This is the fun part of bread making. You are starting with a mixture of flour, water, salt and yeast. At the moment it is just those things put together in a bowl. We need to develop these things into something more, a smooth dough. The best way to show you or tell you how to accomplish this is with a video. There are many video clips that show similar techniques but this one I like the best. Richard Bertinet has produced an excellent video with Gourmet Magazine that shows the mixing technique above, and the slap and fold kneading technique that many of us now use in some form or another. I urge you to watch this video and learn to do this maneuver with the dough. As you will see in the video, the dough gradually comes together and becomes smooth and flexible. Bertinet is making a sweet dough with eggs and sugar but the method works on any kind of dough or bread type. Finish by rounding and putting tension on the outer skin of the dough and forming a ball.

Once the dough is well developed, smooth and rounded, lightly oil the now clean mixing bowl with a few drops of oil on your fingers (or lightly spray regular cooking oil into the bowl) and place the dough into the bowl, seams down and roll the ball around to coat all the surfaces. Cover the bowl as before during what is called the Primary Ferment. During the primary ferment, the dough will expand in volume as the yeast begins to eat the sugars in the flour and create Carbon Dioxide. Your well developed dough will trap those CO2 bubbles and form pockets that will become the air pockets in the bread, making it lighter.

NOTE: For Whole Grain and Multi-Grain breads, It is advisable to not try and develop the dough entirely by kneading. The sharper grains will cut the gluten strands and allow the CO2 gas to escape. A Stretch and Fold will often work as well, done during the primary ferment. A link to this procedure is provided below.

You can always come back to using some appliance to mix and knead your dough. In fact some doughs are somewhat better suited to machine mixing, but not many. You can easily produce wonderful bread in the manner of our ancestors.

Once the dough has doubled in volume you are ready for the next step, Shaping

There are a number of ways to develop dough. The easiest is probably to put it in a KitchenAid-type mixer. About 8 to 10 minutes of mixing the ingredients in a KitchenAid on low speed will generally do the trick.

There’s no need to buy a KitchenAid, though, to make good bread. Here are three ways of developing dough by hand.

Traditional Kneading:
Use this method when the dough will rise fairly quickly (1-2 hours for the first rise) or if I’m in a hurry to get it developed.

First, mix the ingredients with a spoon until everything is hydrated. Cover and wait about 15 to 20 minutes – this way, you’ll let the water do most of your work for you (if you don’t have time for this step, feel free to skip it – you may have knead just a little more, though). After this waiting period is done, scrape the dough out of the bowl onto a smooth surface, and push on the down and forward with the heels of your hands. Fold it up back on itself, give the dough a quarter turn, and repeat.

Knead for about 4-5 minutes, and then cover it. Let it rest about 5 minutes, and then knead once again for 1-2 minutes. It should be well developed at this point.

One way to test dough development is to tear off a small chunk and then gently stretch it. If the dough is ready, you should be able to stretch it thin enough so that it becomes translucent. This is called the “windowpane” test.

Stretch and Fold: This method adds about an hour to the rise of an ordinary yeasted loaf, but when you’re working with sourdoughs or yeasted breads that have a long rise anyway, it doesn’t make that much difference. And it takes hardly active time at all – just a few minutes total. Really!

Mix the ingredients with a spoon until hydrated. Cover and wait 30 minutes to 1 hour. After this rest, scrape the dough out of the bowl and stretch it to about twice its length, if possible. For the first fold, the dough will still be pretty shaggy, so only go as far as you can without ripping. Fold the dough like a letter, give it a quarter turn, and then stretch and fold once again. Place it back in the bowl and cover.

Repeat this folding process twice more with 20-30 minutes in between each one.

More information and a video may be found here: http://www.sourdoughhome.com/stretchandfold.html


Stretching and Folding Illustrated: Here is the Stretch and Fold method illustrated by Mebake (Khalid). He has artfully depicted the process of keeping the dough in the bowl while developing the gluten and incorporating air into the dough. This easy to do technique is employed by many members here and allows the baker the opportunity to develop the gluten in a bowl during fermentation with little effort and no mess. Once you understand how this works, I'm sure you will use it every time.


French fold: This is a great, quick method for developing dough, but it requires a relatively long rest after everything is hydrated, so it’s most appropriate for doughs with a long bulk rise.

Once everything is hydrated, cover and let the dough rest for a least an hour. Remove the dough from the bowl onto a smooth surface. With one hand on either side of the dough and your thumbs underneath, stretch the dough parallel to your body while simultaneously folding it in half along its length with your thumbs.

Give the dough a quarter turn, pick it up, and then throw it down onto the surface, smooth side down. Really, smack it down. Stretch it again while simultaneously folding it over with your thumbs, make another quarter turn, and give it yet another smack with the smooth side down.

Do this about 10 times, and you’ll have a well developed dough. If it doesn't seem as developed as you'd like or if it starts to tear, let it rest for 5 minutes, and repeat.

A good video of this technique may be found here: http://www.gourmet.com/magazine/video/2008/03/bertinet_sweetdough

An alternative method: that  keeps the dough in the bowl and all of the kneading is done there.

I use my fingers and scrape the dough into a single lump and flatten it and then fold it in half, turn it a quarter turn and fold again and flatten it. I continue this for about twenty folds. Often it gets very stiff and needs to rest for a few minutes to relax. As noted the dough will let you know when you have done enough.  This stretches the original surface a million times the size it was at the start and assures a complete blending of the ingredients. I use this method because it confines the mess and permits making bread in less than ideal places. See the illustration mentioned above for a pictorial that describes this process.

There is no wrong way to knead bread but some ways are much better than others. Some breads benefit from special kneading and handling and some are very hard to get wrong. Before kitchens and mechanical mixers and tables there were dough troughs and all of the mixing and kneading was done there. You could make bread in a dough trough and bake it on a hot flat stone on an open fire.

No knead bread: For bread mixes that use very little leavening and are fairly wet, time provides the development.
Simply mix everything up until hydrated, cover and go to sleep. Anywhere from 12 to 18 hours later, give the dough one stretch and fold, shape as necessary, and then let it rise a couple of hours until it’s ready to bake. Learning to use a plastic scraper to handle dough in the mixing bowl, as described below, is a big help.

Alternative video: If you are just a little adventurous, Check out this excellent video, provided by Mark Sinclair of The Back Home Bakery. Mark demonstrates folding in the bowl using a plastic scraper over a period of time to develop strength in the dough. This and all of Marks videos are excellent training aids.

mountaindog's picture
mountaindog

Cherry Pecan Pain au Levain

I've always liked the walnut raisin pain au levain Dan Leader sells at Bread Alone Bakery near me, and I've been wanting to try something like this for awhile and finally got around to it this week, but with cherries and pecans.

Both Susan's yeasted version on her Wild Yeast blog and SteveB's version on his Bread Cetera blog gave me a craving for cherry pecan bread when I saw their photos....thanks for the ideas you two, your baked goods are so mouthwatering and professional looking...(I am unworthy of breadblogging in the same sphere as you two!)

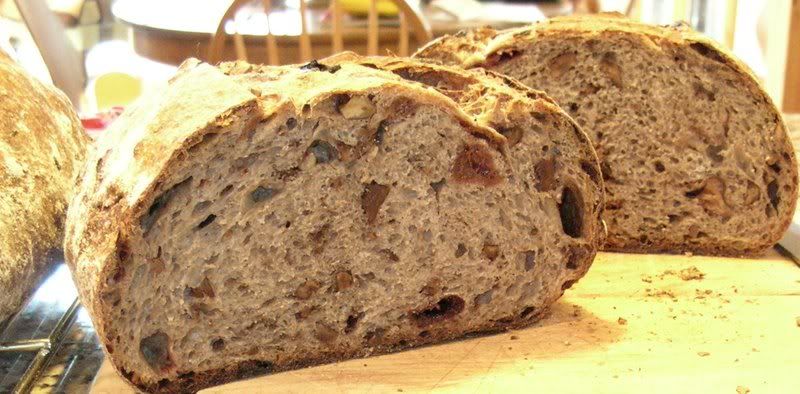
I made this as a sourdough-only version and mixed about 30% whole wheat and 2.5% rye with AP flour. This mix gave a nice dark-colored but light-textured open crumb that tasted good with the fruit and nuts. You could obviously substitue rasins and walnuts, or anything else you can think of. I find it especially tastes great sliced, toasted, and served with cream cheese, and lasts a long time.

I soaked the cherries for a bit too long as they were a little too mushy and a some color washed out, but the bread tasted great, I'll be making this again a lot I think. It was very easy.

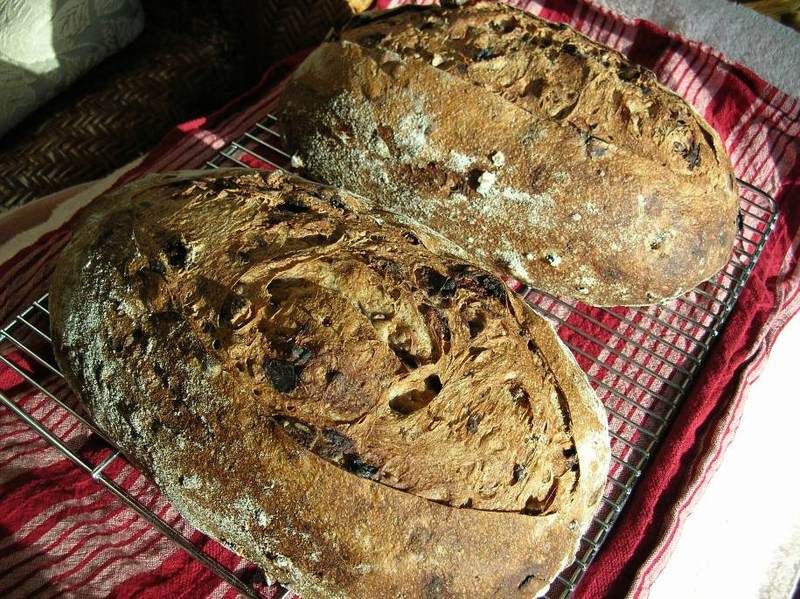
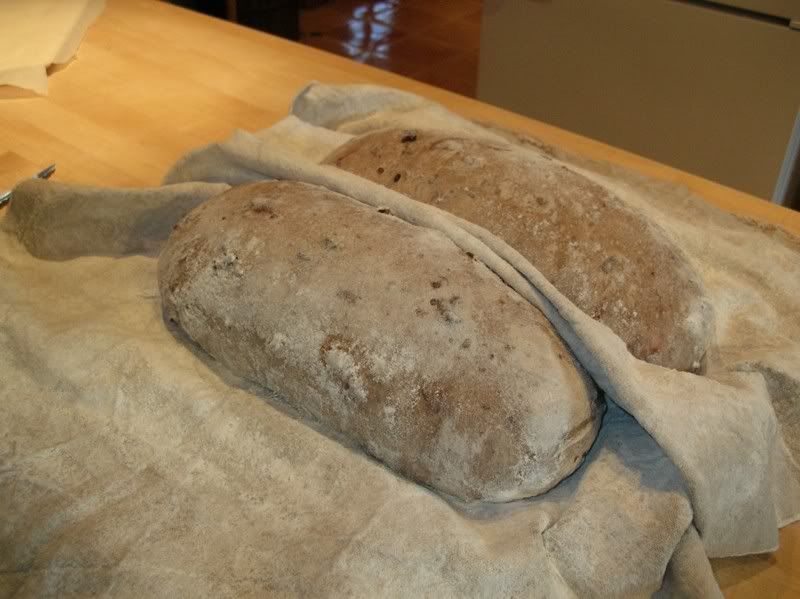
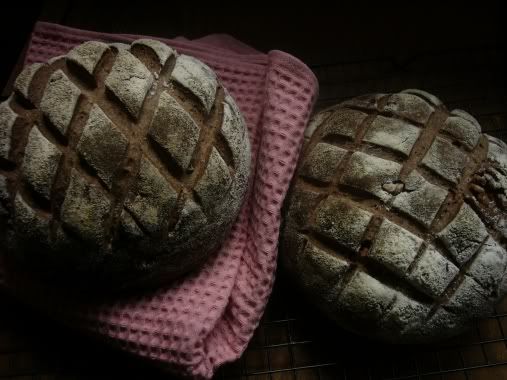
Here are the loaves just before slashing and loading into the oven, after their overnight cold retarding:

Here's the formula:

Pecan Cherry Pain au Levain

Makes 2 large 2.5 lb batards or oblong loaves.

Levain Build

% flour of levaingrams
starter (100% hydration with WW flour) 32.1% 45
warm water 85.7% 120
All-Purpose flour 100.0% 140

Final Dough

% flour final doughgrams
All-Purpose flour 66.4% 750
100% whole wheat flour 31.0% 350
100% whole rye flour 2.7% 30
flour subtotal 100% 1130
 
warm water 69.5% 785
sea salt 2.0% 23
ripe levain 27.0% 305
dried pitted sour cherries, soaked   240
toasted pecans   240

1)  12 hours before making final dough, create the levain using some ripe starter that has been fed and doubled. Mix well and cover in bowl until levain has risen to over double but has not yet begun to collapse, aprox. 10-12 hours at 65-70F. Toast the pecans at 350F for 10-20 minutes and let cool, then coarsly chop and set aside. Soak dried sour cherries in water overnight and strain next morning before making final dough.

2)  When levain is ripe, create final dough by mixing warm water with levain to dissolve. Mix all flours and salt in large bowl until evenly distributed, then add watered levain to flour mix with dough whisk, spoon, or hands until well combined. Cover and let rest for 1 hour at @ 70F. Tip dough onto counter, knead in the cherries and pecans lightly, and french fold for approx. 10 minutes with short 1-2 minute rests as needed to scrape together dough or relax it, and tuck in the fruit/nuts. The cherries and pecans may fall out and it will be quite messy at first, but eventually the dough will come together into a neat lump after 5-6 minutes or so. At end of kneading, round out the dough so that fruit/nuts are tucked inside and good skin of dough is on outside. Place dough in lightly oiled container and cover to rest for 30 min. After 30 min., turn out dough onto lightly oiled counter to give it one good gentle stretch and letter fold, then place dough back into oiled covered container. Repeat one more stretch and fold after another 30 minutes, then let dough continue to rise until doubled at @ 70F (approx. 2 more hours).

3)  Shape dough into 2 batards, place batards in floured couche, cover well so loaves don't dry out, and let loaves cold proof overnight at 40-50F for approx. 8-10 hours. Next morning, place loaves in warmer area (65-70F) while oven preheats for 45 minutes to 450F. Bake loaves on oven stone with steam (I pour 1 cup hot water from tea kettle into pre-heated cast iron pan on oven floor) at 450F for 15 minutes, then turn heat down to 400F for another 30-35 minutes until center registers 200-205F with instant read thermometer and crust is well-browned.

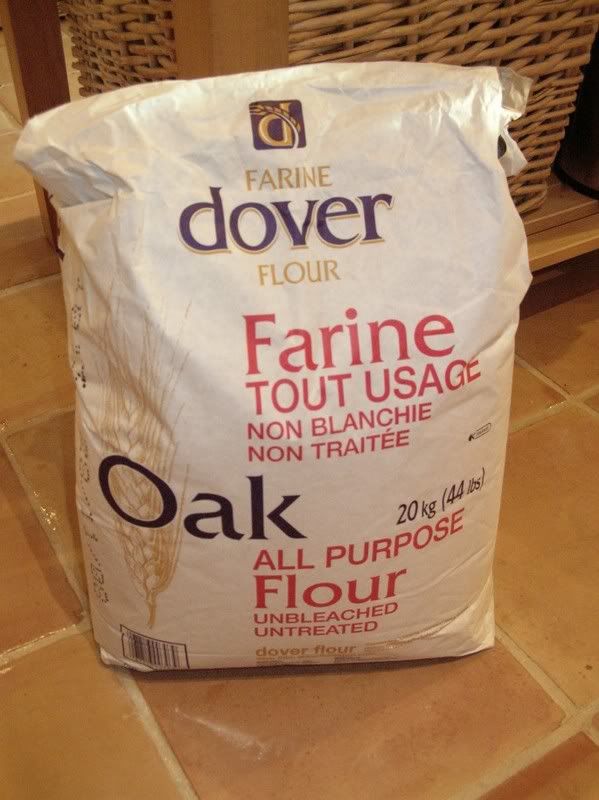
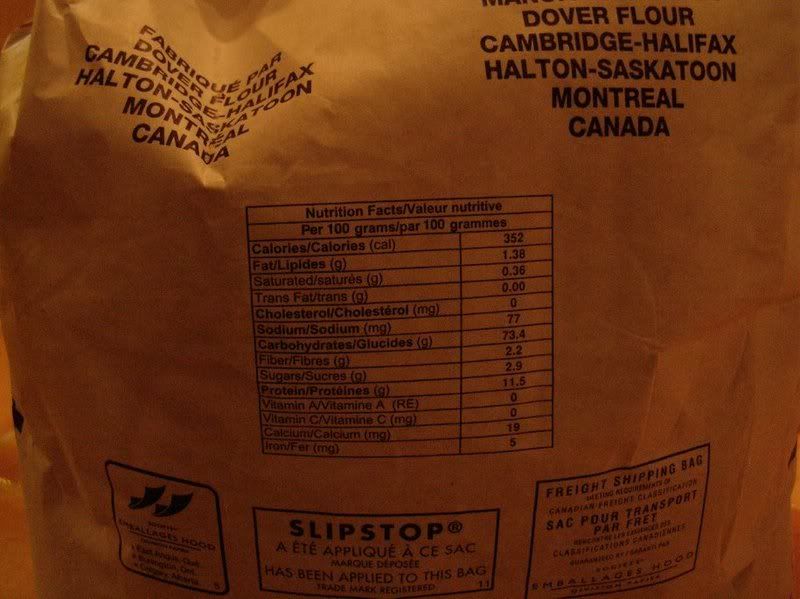
On a slightly different note: my last few batches of bread have been coming out smelling and tasting better than ever, I think it may just be this new flour I was able to pick up in a 50lb bag from Bread Alone Bakery down the road from me. It is an All-purpose flour from Canada with 11.5% protein, not sure about ash content. Anyone ever used or heard of this Oak AP flour before?I like it a lot. It handles nicely in dough.

Search Results

I still recall hearing the buzz around my hometown, Forestville, California, about the new cafe that had opened there when I was growing up, Brother Juniper's.

Inevitably people's comments sounded something like "My sandwich/chili/coleslaw was excellent, but did you try the bread? It was incredible!" The bread people were talking about was Struan Bread, Peter Reinhart's attempt to recreate a Scottish harvest bread he had read about known as Struan Micheil.

The original Struan was baked on Michaelmas (Spetember 29) and would contain small amounts of all of the grains being harvested that season. So, if you've never tried it, this is definitely the time of year to try baking Struan.

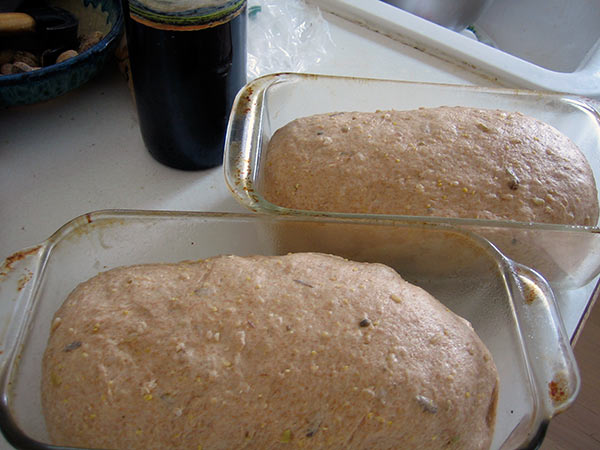
In his latest book, Peter Reinhart's Whole Grain Bread, Peter offers an updated whole wheat, multigrain version of Struan Bread (a previous version of Struan is available here). I baked a double batch of it this evening using a mixture of cooked brown and wild rice as well as uncooked coarse ground corn meal as the grains. Handily, along with volume measurements his book includes weights (in both metric and imperial) as well as the baker's percentages for all recipes. I'm posting just volume. If you want the weights or Peter's more in-depth instructions, get the book!


Multigrain Struan

makes 1 large loaf
Soaker
7 tablespoons whole wheat flour
1 1/3 cups cooked and uncooked grains (rice, quinoa, millet, etc.)
1/2 teaspoon salt
3/4 cup milk or buttermilk
Biga
1 3/4 cup whole wheat flour
1/4 teaspoon instant yeast
3/4 cup water
Final Dough
Soaker
Biga
7 tablespoons whole wheat flour
5/7 teaspoon salt
2 1/4 teaspoon instant yeast
3 tablespoons honey or sugar
1 tablespoon melter butter or oil extra whole wheat flour as needed

DAY ONE Soaker: Mix all of the ingredients ingredients to make a thick porridge-like dough. Cover and leave at room temperature for 12 to 24 hours.

Biga: Mix all of the ingredients to form a ball of dough. Knead for a minute or two by hand until all flour is fully hydrated. Let the dough rest for 5 minutes, then knead again for 1 minute. Place the dough in a bowl, cover, and refrigerate overnight.

struan bread

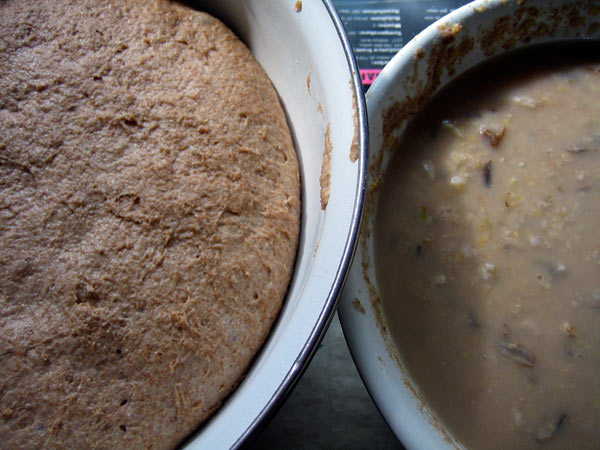
biga and soaker

DAY TWO

Remove the biga from the refrigerator an hour or two before preparing the final dough. Chop or tear the biga into smaller pieces and combine with the soaker. Add the remaining ingredients and mix well. Knead by hand or machine for roughly 5 minutes until all the ingredients are evenly distributed. Add additional flour or water to achieve the proper consistency (a slightly sticky dough that'll hold its shape). I added as much as a cup of extra flour because the grains I added were precooked and did not absorb a great deal of moisture.

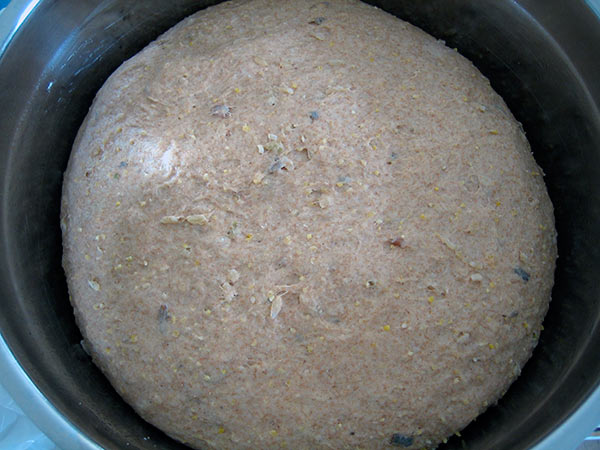
struan bread

Place the dough in a greased bowl and allow to rise until 1 1/2 times its size, roughly 45 minutes to an hour.

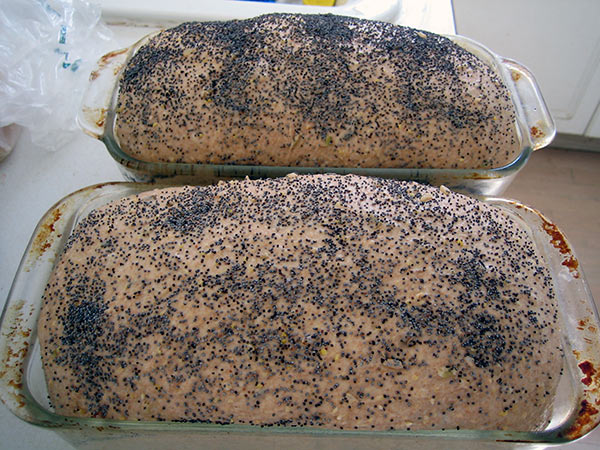
Shape the dough and place in greased pans for the final rise. If you want poppy seeds on top, spritz the loaf with water and sprinkle seeds before the final rise.

struan bread

Pre-heat the oven to 425 while the loaves are rising.

struan bread

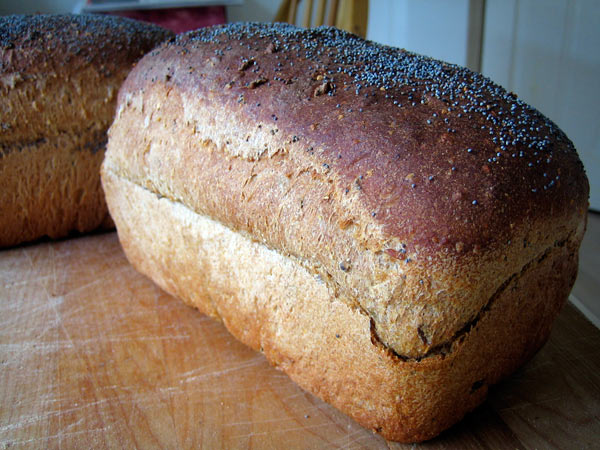
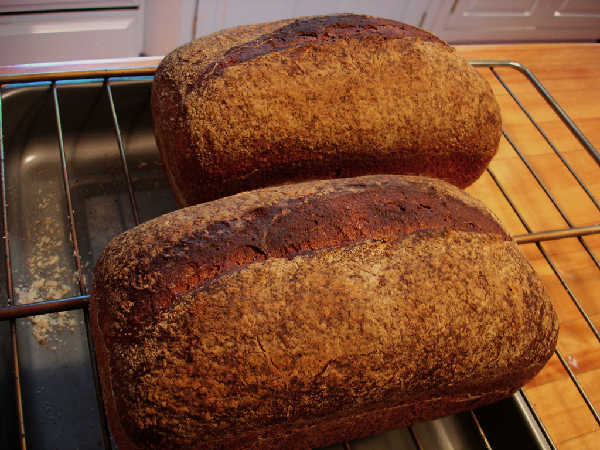
To bake, place the loaf in the preheated oven. After 5 minutes, reduce the temperature to 350 and bake for 20 minutes. Rotate the loaf 180 degrees and bake about 20 to 30 minutes until the loaf is deep brown, makes a hollow sound when tapped on, and when the internal temperature reads at least 195 degrees. Remove the bread from the oven and allow to cool for at least one hour.

struan bread

Peter Reinhart's Whole Grain Bread is now available from Ten Speed Press.

Multigrain Struan

Prairie19's picture
Prairie19

Sourdough Potato Bread

Sourdough Potato Bread


The following recipe is based on Jeffrey Hamelman's “Roasted Potato Bread” converted to a liquid levain sourdough. The recipe is scaled down to make one loaf of about 780 grams. I think the adding potato improves crust color and makes for a milder sourdough flavor. The little flecks of potato add a surprising sweetness.


Bread Flour 318 grams

Whole Wheat Flour 68 grams

Water 193 grams

Liquid Levain (125% hydration) 153 grams

Salt 11.5 grams

Cooked Potato 114 grams


  1. Mix the levain: I have a very active starter, so I make the liquid levain about 6 to 8 hours before mixing the dough. Mix 80 grams of bread flour, 100 grams of water, and about 50 grams of mature liquid starter (125%). If you use a stiff starter add enough additional water to bring the total hydration to 125%. Cover and let stand at 70 to 75 degrees F.

  2. Cook the potatoes: If you haven't already done so, bake or boil some potatoes. Yellow fleshed potatoes such as Yukon Gold are especially nice. You can remove the outer skin or leave it on, whichever you prefer. (I take the skins off) Mash the cooked potatoes without adding any additional liquid and set aside.

  3. Mix the dough: Measure and mix all ingredients. (Save the leftover levain for the next baking.) I mix by hand in a bowl until the all the flour is totally moistened, let it set for 30 to 40 minutes, and then knead briefly with a plastic dough scraper or wet hand. Don't add any additional flour at this stage.

  4. Fermentation: Cover the bowl with plastic cling wrap and set aside at room temperature for an hour or two. At this point I usually retard the dough overnight in the fridge.

  5. Folding and Shaping: Next morning take the covered bowl of dough out of the fridge and let it set at room temperature for an hour or so. Then turn the dough out on to a floured work surface and stretch and fold about 2 or 3 times. Shape roughly. Cover the dough and let rest for 15 to 20 minutes and then do the final shaping.

  6. Final Proof: Place the shaped loaf, seam side down on parchment paper that has been dusted with corn meal. Cover the loaf with a large bowl and proof at 70 to 75 degrees Fahrenheit for two hours or until doubled in size. When proofed, score/slash the loaf as desired. In this example I used a scissors to cut a star shape in the center of the loaf.

  7. Bake: I bake the scored loaf in a preheated cast iron pot at 450 degrees Fahrenheit. Bake covered for 30 minutes, remove the cover, and bake for an additional 10 to fifteen minutes. Remove the loaf and cool.

Sourdough Potato Bread - Baked in a potSourdough Potato Bread - CrumbSourdough Potato Bread - Baked in a pot


bwraith's picture
bwraith

Whole Grain Sourdough Sandwich Bread

Whole Grain Sourdough Sandwich Bread Loaves

This bread is an attempt to improve on the results from a previous blog entry. This one also has a spelt levain, but it was designed to rise overnight with only a small quantity of 90% hydration white flour starter added. The levain was added to the dough when it was not very ripe, before it had peaked and dipped. The percentage of fermented flour is about 32%, but the less ripe starter results in flavor and dough handling more like what you would expect if you used a lower percentage of fermented flour. The whole spelt flour contributes a characteristic nutty, slightly sweet flavor to the bread. I was very happy with the flavor resulting from this combination of flours and plan to use it more often for this bread and for my favorite mixed grain miche recipe. The hydration is about 83%, which for a whole grain bread is not enough to make it very wet or difficult to handle. However, it is a slightly slack and sticky dough. It should spread out only a little bit after sitting on the counter, not like a very wet ciabatta dough that might spread out more quickly and more or less pour out of the bowl until it has been folded more.

Whole Grain Sourdough Sandwich Bread Crumb

I have posted some photos, videos of my version of doing a "French Fold" and of periodic "Folding" during bulk fermentation, and also a spreadsheet with some further information such as baker's percentages, fermented flour percentages, and hydration.

Ingredients:

Firm Levain:

  • 90% hydration storage starter 11g (0.4 oz) (use any healthy active sourdough starter here, ideally contributing the same amount of fermented flour, e.g. use more like 9 grams of 60% hydration firm starter)
  • whole spelt flour 298g (10.5 oz)
  • water 184g (6.5 oz)

Overnight Soak Ingredients:

  • malt syrup 40g (1.4 oz)
  • diastatic malt powder 5g (.16 oz)
  • whole red wheat flour 397g (14 oz)
  • whole white wheat flour 170g (6 oz)
  • KA rye blend 57g (2 oz)
  • water 581g (20.5 oz)

Final Dough Ingredients:

  • overnight soak from above
  • firm levain from above
  • salt 17g (.6 oz)
  • olive oil 28g (1 oz)

Levain

Mix levain ingredients the night before you plan to bake. The levain is designed to rise by about double in 10 hours at a temperature of 75F. Adjust accordingly if you have different temperatures. It is not a problem if the levain rises by more than double or peaks and dips. However, if it is allowed to ripen too much, you may experience a sluggish rise or other symptoms similar to overproofing sourdough, since the amount of fermented flour contributed by this recipe is fairly high. I added this levain when it had a little more than doubled, but it was clearly not at its peak yet.

Overnight Soak

Mix all the flour and other dry ingredients for the overnight soak together well, so they are fully integrated and uniformly distributed. Mix the malt syrup and water so that the malt syrup is fully dissolved and well distributed in the water. Pour the water into the bowl and use a dough scraper to work around the bowl and mix the flour and water well enough to fully and uniformly hydrate the flour. This should be very easy and take only a couple of minutes of mixing. You can also use a mixer, but use very slow settings and do not overdo it. The idea is to just mix the ingredients. Cover and put in the refrigerator.

Mix Final Dough (next morning)

Chop up the levain into small pieces about the size of marshmallows. Wet your hands and rub the counter with water. Pour the dough from the overnight soak out onto the counter and spread it out like a pizza. Distribute the pieces of levain evenly across the dough. Press them in with the heel of you hand. Roll up the dough in one direction, then the other. Allow it to rest for a few minutes. Again wet your hands and the counter if it needs it. Spread out the dough again like a pizza. Evenly spread the salt and the oil over the surface of the dough and press it into the dough again with the heel of your hand. Roll up the dough in one direction, then the other. Let it rest a few minutes. Spread it out one more time like a pizza. Work across the dough pressing the heels of your hands deep into the dough to integrate any oil and salt that may not have already been well integrated into the dough. Roll up the dough in one direction, then the other.

Let rest for 15 minutes.

Do two or three "French Folds", as shown in the video. Note that this is a good technique for developing the gluten in a wet dough that may not respond well to conventional kneading. Also, note, when I say two or three, I mean literally about 10 seconds, like two repetitions of the motion, as shown in the video. That is all the "kneading" that was done to make this bread. Place the dough in a covered bucket or bowl to rise.

Bulk Fermentation and Periodic Folding

The dough should rise by double in about 4 hours at 75F, but the folding will degas the dough somewhat, so lean toward less than double, depending on how much you are degassing the dough while folding. Also, adjust accordingly if your temperature is different or your starter is faster or slower. Try not to let this dough ferment too long. The high percentage of fermented flour in the dough and the spelt flour will conspire against you if you allow the dough to rise for too long. If in doubt, stop the bulk fermentation and go on to shaping, even if the dough doesn't rise by double.

Fold the dough about three times approximately on the hour, as shown in the "Folding" video. If the dough appears to be wet enough to relax significantly before one hour, then fold sooner. If the dough appears to be fairly stiff and holding its shape or is hard to stretch when you fold it, then fold less often or fewer times.

Shaping

Create sandwich loaves using a typical batard technique or whatever method you prefer. Place loaves in typical loaf pans that are about 9 inches long by 4.5 inches wide. I sprayed the pans lightly with oil beforehand to avoid any sticking.

Final Proof

Allow loaves to rise by roughly double in about 2.5 hours at 75F. Again, adjust your proofing time as necessary for different temperatures or different starter. Once again, avoid overproofing, which is easier to do inadvertently with less tolerant spelt flour and the higher percentage of fermented flour in this recipe.

Bake

I slashed the loaves and baked them from a cold start for 1 hour and 5 minutes at 400F after proofing for 2 hours and 15 minutes. Although the dough is not as wet as some, it still should be thoroughly baked. Otherwise the crumb will be overly moist and the crust will become soggy.

Cool

When the loaves are done, remove them from the pans and allow them to cool on a rack. Do not cut into them, if you can resist, at least until they are no longer warm to the touch.

Results

I was very pleased with the flavor of this bread. The sourdough flavor from the spelt starter is delicious, there is no bitter flavor of whole wheat that I can detect, and the spelt adds a unique and mild flavor. The bread toasts very well and carries any type of topping, since the crumb is open and light but not so irregular that honey or other wet ingredients fall right through it.

browndog's picture
browndog

Dan Lepard's Walnut Bread


My favorite bread changes as often as a teenager changes boyfriends. Here's this week's:

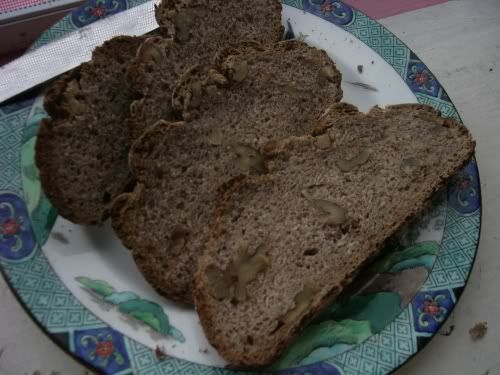
Dan Lepard's Walnut bread. It has yeast and leaven both; what makes it wonderful is the paste of

ground walnuts, honey and butter that infuses the dough with walnut flavor and a hint of purple.


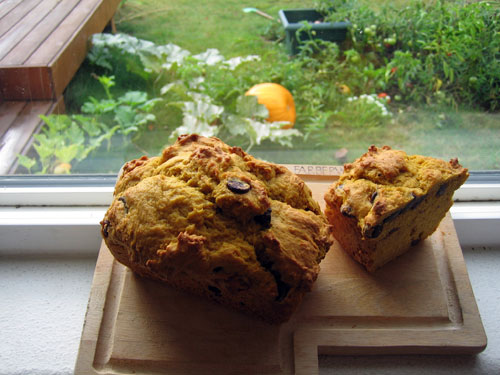
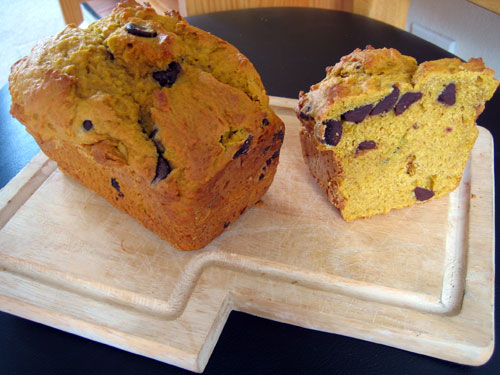
pumpkin bread in window
I love pumpkin bread and muffins any time of the year, particularly with chocolate chips in it and while sipping a cup of dark coffee, but pumpkin bread seems particularly appropriate this time of year.

This is a recipe for your standard pumpkin quick bread; yeasted pumpkin breads are rare, though not unheard of. Fresh pumpkin can be be used, though I usually take the easy way out and just use canned pumpkin puree. Whole wheat flour can also be substituted for some or all of the all-purpose flour for a change of pace.

Because the moisture content of the pumpkin can vary, as it can in the flour, the recipe recommends between 3 and 4 cups of flour. I used about 3 1/2 cups, but don't be afraid to trust your gut and adjust according to conditions.


Pumpkin Bread

Pumpkin Bread

Makes approximately 12 muffins, 3 small loaves, or 1 large loaf
1 3/4 cup (1 15 oz. can) pureed pumpkin
1 1/2 cup brown sugar
1/2 cup (1 stick) butter, softened
3 eggs
3-4 cups all-purpose unbleached flour
2 tablespoons baking powder
1 teaspoon ground cinnamon
1/2 teaspoon salt
1/2 teaspoon ground nutmeg
2 cups chopped walnuts or chocolate chips


Preheat the oven to 350.

Combine the pumpkin, brown sugar, butter, and eggs and mix until creamy. In a separate bowl, combine all of the dry ingredients except the nuts or chocolate chips. Mix 3 cups of the dry ingredients into the wet ingredients, then add as much of the 4th cup as necessary to achieve the proper consistency (moist, but thick enough to stand a spoon in). Add the nuts or chocolate chips and stir in.

Pour or spoon the batter into greased muffin tins or bread pans. Bake on the center rack until a toothpick poked into the center comes out dry. At sea level, muffins should take between 20 and 25 minutes to bake, small loaves between 25 and 30 minutes, and full sized loaves between 50 minutes and 1 hour.

pumpkin bread on cutting board
Autumn is here!

Pumpkin Bread

Benito's picture
Benito

Saccharified Polenta Sourdough

A recent blog post about grain mash is awesome if you haven’t read it yet. Reading it motivated me to apply saccharification to the polenta porridge thinking it might enhance the flavour of the polenta. As you know saccharification of the polenta brings out its sweetness that is hidden in the starches in the polenta. Adding the diastatic malt and holding it at a warm, but not too warm temperature will allow the diastatic malt (amylase) to break down theses starches to sugars which we will be able to taste as the natural sweetness in the polenta that otherwise would be hidden from our tastebuds.

I used my Instant Pot and after a bit of experimentation found that using its Keep Warm setting Normal holds a temperature of 148°F for up to ten hours. After cooking the polenta I placed it into a jam jar lightly capped and placed it into a water bath in the instant pot and cooked it for 6 hours. Comparing the flavour pre and post water bath the difference was remarkable. After six hours the porridge had a lovely sweetness that wasn’t there prior to the six hours at 148°F. When using the Instant Pot for this saccharification process put the lid on but keep the vent open so there is no pressurization of the pot.

Cook coarse corn meal with the water until softened and water fully absorbed. Once the temperature is down to 150°F or less add the diastatic malt and mix well.
Place the corn porridge in a jar, covered lightly and place in a water bath in an instant pot. Set to [keep warm] normal (148ºF) for 3-6 hours. I did 6 hours.

 Build levain overnight with the aim to be at peak in the morning. At 76°F 3x rise and dome flattening at 11 hours.

Add water and salt to the bowl of a stand mixer, dissolve salt. Add the stiff levain and break into small pieces. Add the bread flour, mix on speed 1 until no dry flour remains. Rest for 10-15 mins. At medium speed mix to develop the gluten. When the gluten is moderately to well developed add the polenta porridge in small aliquots. Mix until well incorporated.

Bulk fermentation aiming for 40% rise to shape. Perform coil folds every 30 mins until dough is strong and isn’t spreading.

Once the pH has dropped by 1.0 then shape the dough into a batard and then start final proofed shaped and resting in a banneton.

Once the pH has dropped by a further 0.3 it will be time for baking. Place the dough in the freezer when the pH drops by 0.25 and then pre-heat oven at 500°F with cast iron skillet in the oven and set up for open steam baking. 30 mins prior to baking, pour 1 L of boiling water into metal loaf pan with Sylvia towel and place on baking steel on the lowest rack of the oven.
Once oven reaches 500ºF turn dough out of banneton, brush excess rice flour off, score and then brush with water. Transfer to oven. Pour 250 mL of boiling water into the cast iron skillet on a high shelf, high enough that the dough have fully bloom. Drop temperature to 450ºF and bake with steam for 25 mins. Then vent oven and remove all steaming gear and drop temperature to 425ºF. Bake for another 25-30 mins rotating as needed.

My index of bakes.

Pages