January 8, 2012 - 10:24am

Brioche
I am looking for THE great brioche recipe. I have used the Nancy Silverton recipe from Baking with Julia and think that it is quite good. I am wondering what your favorite recipe might be and why.
Jeff
Share
I am looking for THE great brioche recipe. I have used the Nancy Silverton recipe from Baking with Julia and think that it is quite good. I am wondering what your favorite recipe might be and why.
Jeff


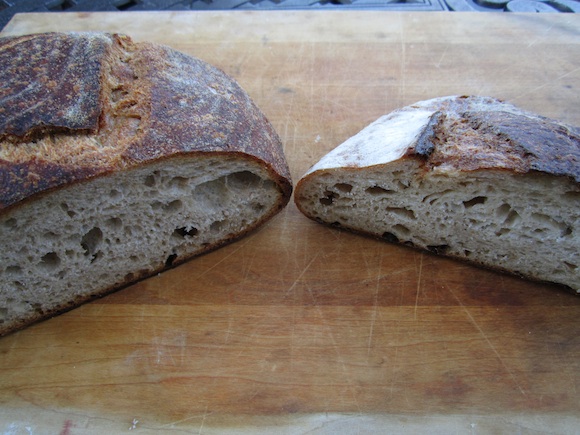
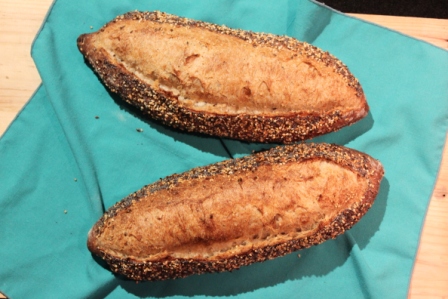
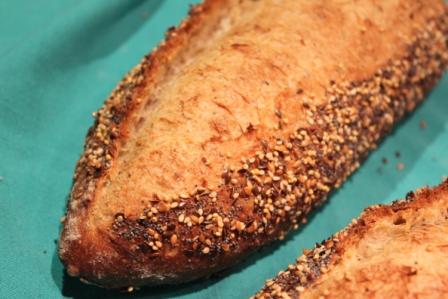
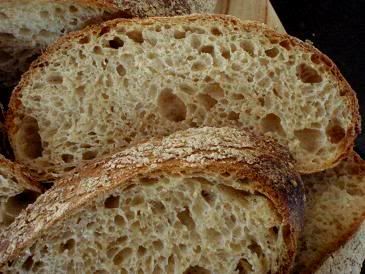
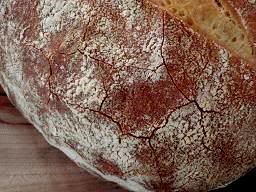
I've been cooking Chad Robertson's Basic Country Bread for awhile with great success. Last week I was in San Francisco and decided to get a loaf of the real thing for comparison. This is not an experience for the faint of heart: you have to order 72 hours in advance, and it is literally impossible to find parking in the neighborhood at 5 pm which is the appointed time to pick up your loaf.
But, I persisted. And was surprised to discover the loaf currently offered out of the bakery is quite different than the recipe in the book--with a darker and moister crumb, and distinctively more sour.
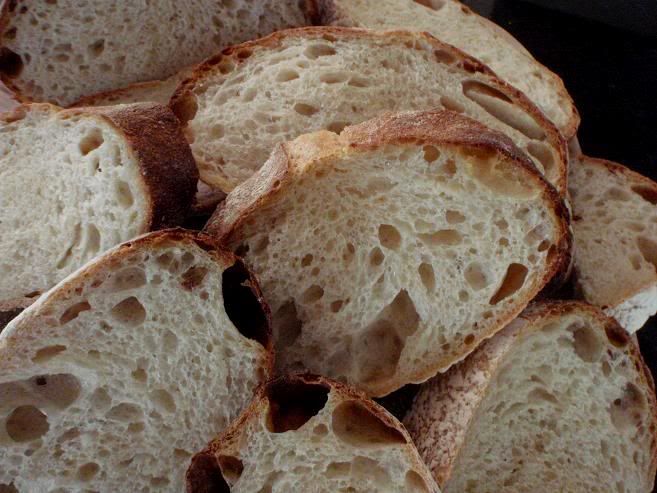
I brought the loaf back to New York with me and after a bit of fiddling think I'm pretty close--actually as close as I'm going to get considering the differences in flours between East and West Coast. (I used KAF)
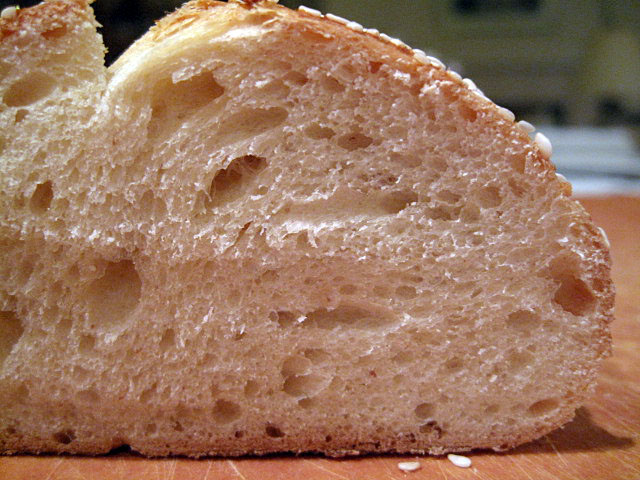
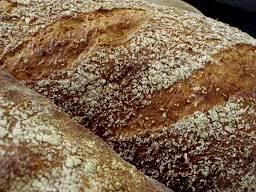
Here are the two loaves with Chad's on the right (what remained of a huge miche):
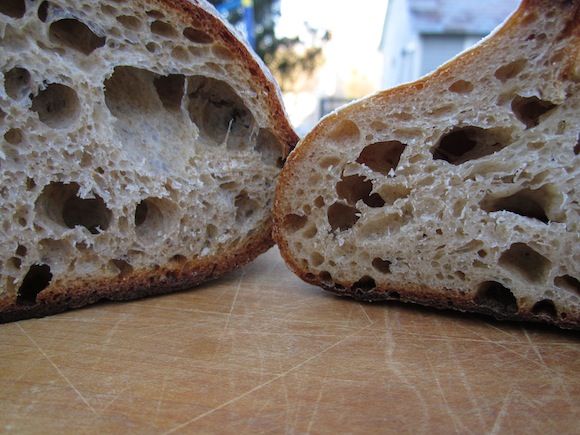
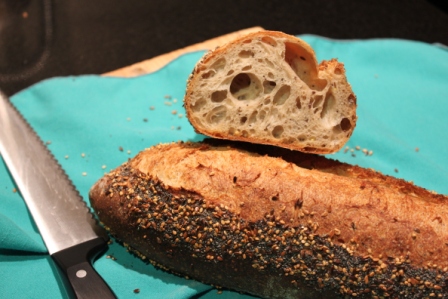
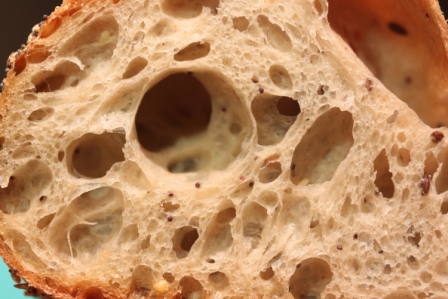
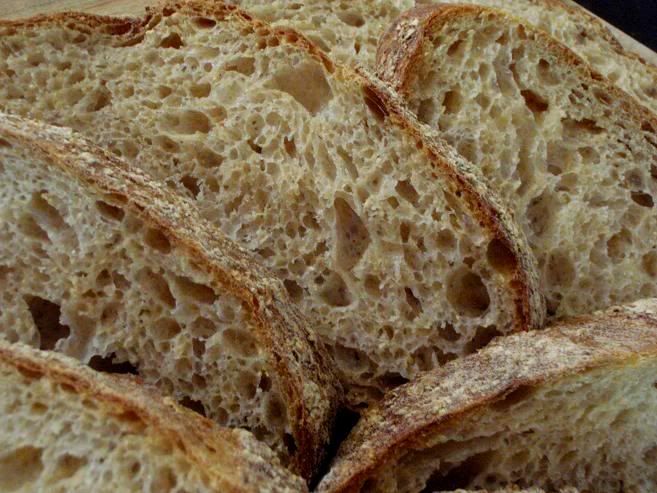
And here's a close up of the crumb (again, mine is on the left, theirs on the right)
I like the variation better and will be making it from now on. Here are the differences:
800 grams bread flour and 200 grams whole wheat flour (vs 900/100 in the recipe)
80% hydration (vs 75% in the recipe)
retarded 14 hours in refrig at 39 degrees F to increase sourness (and match the sourness of the loaf I purchased at the bakery).
Sending this to Yeastspotting.

This is the theme for this month's Daring Bakers' Challenge. One look at the original recipe (see here), I knew it wouldn't produce the croissants I want. Don't get me wrong, I worship Julia Child, but I think she made some compromises here so that it's less daunting for the home bakers, however, the quality suffers as the result. All the changes I made were based on the lessons I learned over the last few months of croissant marathon, you may find that they correspond closely to the tips I gave in this original croissant post.
1. Reduced the water amount by A LOT
2. Reduced the oil amount by A LOT. The original recipe yields incredibly wet doughs, while it's easier to roll out, it affects crumb negatively. The first 2 changes mean to make the dough drier, and crumb more crisp. Note that this recipe uses oil rather than butter in the dough, which makes the dough more extensible(i.e. easier to roll out). It would make the dough stronger if I replace it with butter, but I kept oil to stay somewhat true to the original recipe - I can get the dough strength in other ways.
3. Reduced salt. The original recipe yields VERY salty croissants.
4. The original recipe soften the roll-in butter then "smear" it onto the rolled out dough. It may see easier than making a butter block then enclose it, but softened butter is warmer butter, which means it's easier to melt, a big NO NO if you want clear flaky layers. In addition, smearing doesn't produce even butter layers either. I still used my usual method to enclose butter: make a butter block, fridge, enclose into dough. (picture below with recipe)
5. Used bread flour rather than AP flour.
6. Kneaded the dough much longer than what the recipe required. Both 5 and 6 aim to increase dough strength. Stronger dough rises higher during baking, creating clear layers and open honeycomb crumb. Yes, stronger dough is also harder to roll out, but it's worthwhile.
7. The original recipes requires 4 bookfolds, which IMO, is way too much for such small croissants (much smaller than the standard size I made before). More folds == more layers, good in theory, easy to have leaky butter in practice. Even if the butter doesn't leak, more layers in such a small roll would just make the crumb less "open". I only made 3 bookfolds as usual.
8. The original recipe doesn't produce a lot of dough, yet still makes 12 croissants, so each one is tiny-mini. On top of that, the shaping process has unusal sizes (bottom and sides are of the same length for each triangle, which means each croissant is very long, but doesn't have a lot of layers), and too much stretching (easy to melt the butter). I changed the sizes to make 8 croissants (still much smaller than standard size, but at least each croissant is rolled up enough times to create a layered crumb).
9. Extended proofing time from 1.5 hr to 3.5 hr. Croissants MUST be fully proofed for a good crumb.
Note: this recipe requires a builk rise , which is different from all the other croissant recipes I tried before. Bulk rise made the dough extra strong - again, harder to roll out, but crumb is better.
Croissants (majorly adapted from Julia Child)
Note: Makes 8 small croissants
Note: for details and tips, please see this post
Note: for more tips on making croissants in warm weather, see here
Bread Flour, 228g
Milk, 120g
Water, 13g
Sugar, 14g
Salt, 5g
Instant Yeast, 2.7g (a scant tsp)
Oil, 15g
Roll-in Butter, 125g
1. Mix everything together but the roll-in butter. Knead @ low speed for 3min, @medium speed for 7min, the dough should be very smooth, relatively strong, a relatively weak windowpane.
2. Bulk rise at room temp (24C) for 3 hours until doubled, mine even tripled. Knead to get rid of air, press flat, put in fridge for 2 hours or overnight.
3. Tap roll-in butter between two sheet s of plastic, roll into 5inch square. Put in fridge for at least one hour.
4. Roll out dough into 7inch square, enclose butter block as following, seal well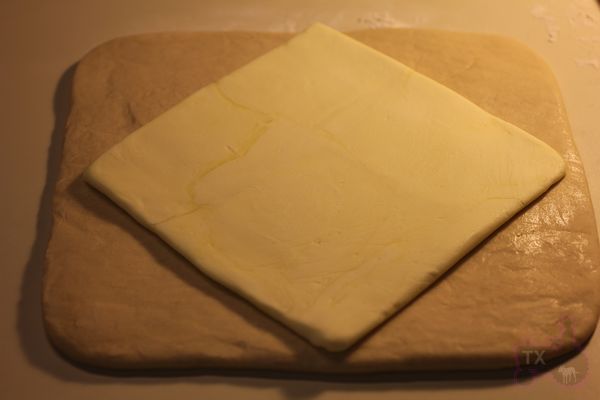
5. Roll out to 6X14inch rectangle, do first bookfold along the longer side. Don't forget to trim the edges.
6. Put in fridge and rest for 1 hour. Take out dough and repeat the rolling and folding 2 mroe times, which gives 3 folds in total.
7. Put in fridge and rest for at least 120min.Roll out to 8X16inch, 1/8inch thickness. You may need to rest the dough in fridge several times.
8a. For classic croissants: cut into 4 rectangles, each 8X4inch. Then cut each rectangle diagonally into 2 triangles. Trim edges, stretch lightly into skinny long triangles.
8b. For Bear claws, cut into 5X3inch rectangles.
9a. For classic croissants: roll up fairly tight, stretch out the tip with one hand when you roll the bottom with the other hand. Since they are smaller, you won't get as many layers as the standard ones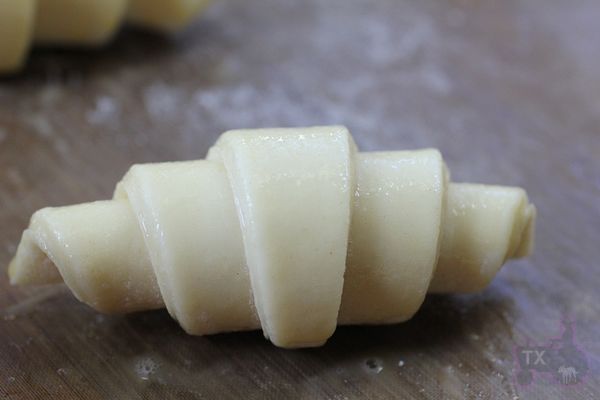
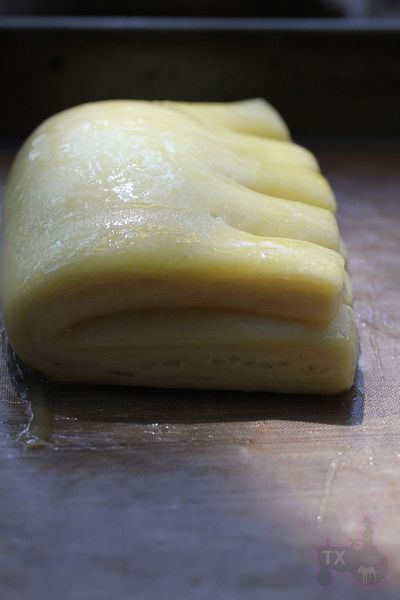
9b. For bear claws, put a TBSP of almond filling on the dough, fold in half along the longer side. Seal, and make 4 cuts for the "claw" effect.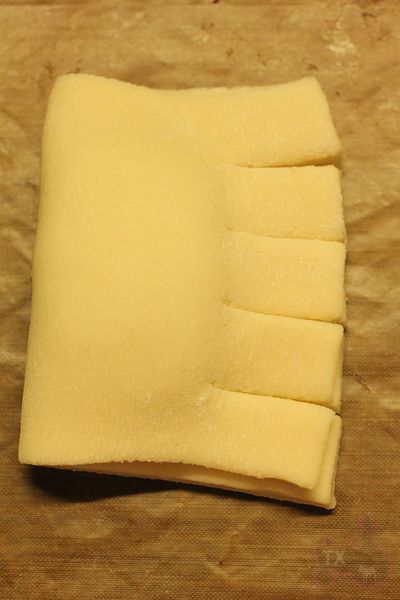
10. At this point, you can proof right away, fridge overnight and proof next day, or freeze (defrost overnight in fridge before proofing). Brush with egg wash (1 egg beaten with 1 TBSP of water), then proof @ about 80F until very soft and jiggly. About 3.5 hours for me. Brush another layer of egg wash after proofing.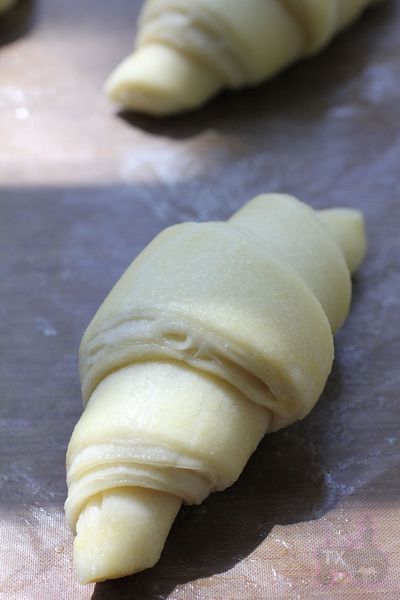
12. Bake at 425F for 10min, 375 for 15min.
The very round cross section indicates enough dough strength. The crumb is open with a clear honeycomb effect. 
I am fairly happy with the crumb, but there's always room for improvement. The smaller rolls has less layers than standard ones, which means the crumb has less "holes".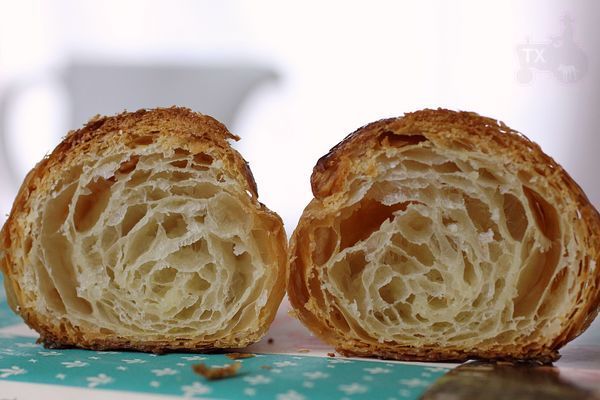
The bear claws came out pretty well, with or without powder sugar. And I used the leftover dough from bear claws for some mini chocolate croissants.

Bear claws and chocolate croissants were rolled up in less turns than croissants during shaping, so the layers are very clear and very flaky - easier to make than the standard ones IMO.
With some major overhaul, this recipe produces very good results. 


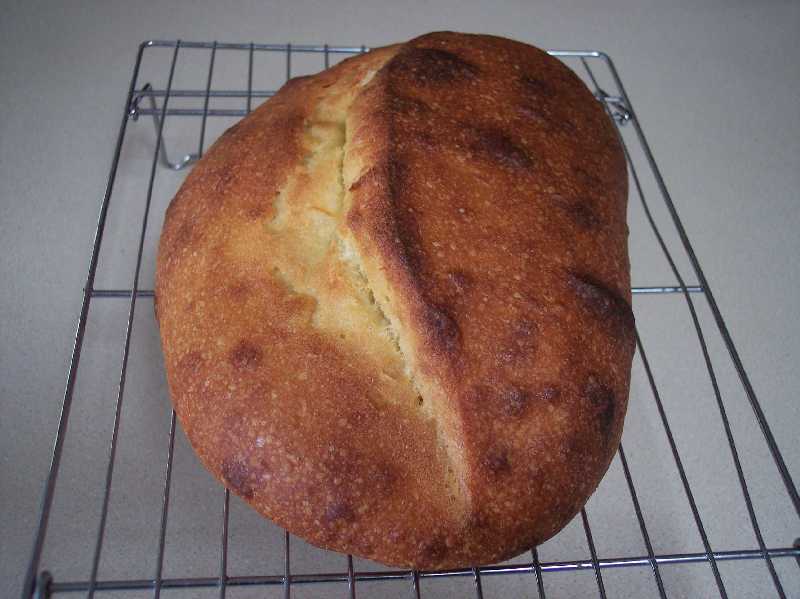
Carol Field's 'Italian Baker' is the oldest book in my ever growing collection of books on bread and pastry making, and still one my stand-bys that I refer to often. One of the breads included in her chapter on regional and rustic breads is the Altamura bread from the town of the same name in the region of Puglia. The bread is one I've wanted to make for many years but have never run across a local source for the type of durum flour needed to make it. Finally this Spring, as some folks may remember from previous posts to this blog, I was able to have some shipped from Giusto's in San Francisco to my home on Vancouver Island. A bit of an indulgence as far as the shipping costs involved and not one I'll be repeating anytime soon.
While I was waiting for the flour to arrive I began doing some online research on Pane di Altamura, as well as putting in some queries to Nico/nicodvb and Andy/ananda , both of whom kindly responded with lots of useful information from their own experiences with the bread. Many thanks to both of them for sharing their knowledge with me! One of the things I wasn't aware of, and that Andy mentioned in our correspondence is that Altamura bread has protected or 'DOP' status in the EU. "The bread of Altamura is 'officially the first product in Europe to bear the DOP in the category''Bread and bakery products.'' http://translate.google.co.uk/translate?hl=en&sl=it&u=http://www.panedialtamura.net/&ei=z8ypTaaxK5CahQe2kdzFCQ&sa=X&oi=translate&ct=result&resnum=11&sqi=2&ved=0CHQQ7gEwCg&prev=/search%3Fq%3Dpane%2Baltamura%26hl%3Den%26rlz%3D1R2ADFA_en%26site%3Dwebhp%26prmd%3Divnscm
With further searching I found the EU document proclaiming the status and historical background of the bread, along with information outlining the material and methods used to produce authentic Pane di Altamura, here; http://eur-lex.europa.eu/LexUriServ/LexUriServ.do?uri=OJ:L:2003:181:0012:0019:EN:PD
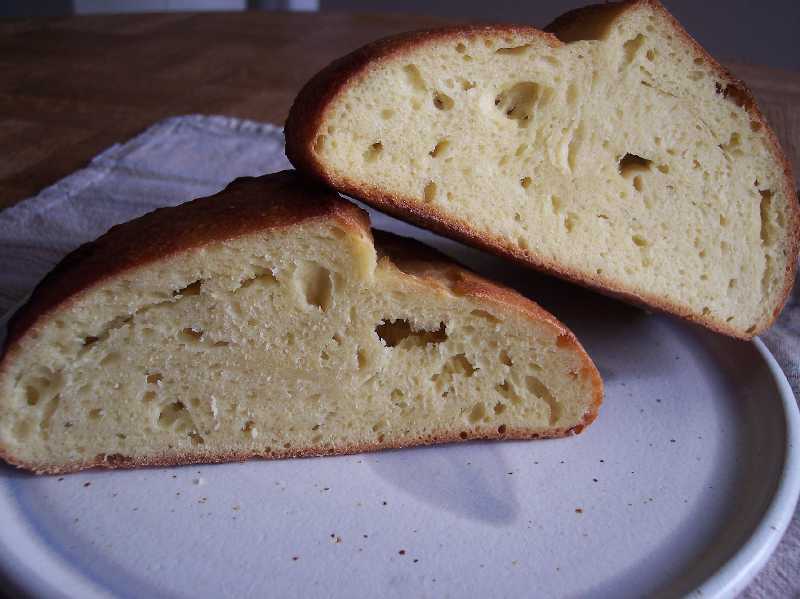
After reading through this document I decided to try and follow the authentic formula as much as possible rather than using Ms Field's recipe, which she describes as an "Altamura type" that uses a biga instead of the traditional natural leaven called for in the DOP formula outline. Developing an active durum/semolina flour starter from scratch takes a little less than 48 hours I discovered. Natural yeast just gobbles up the available nutrients of durum at a rate I've never seen before with other grains. This fact has been the biggest obstacle to me in trying to achieve a reasonably acceptable loaf, simply because the starter or the leaven was reaching it's peak long before my sleep and work schedules permitted me the time needed get a mix going. The first mix I made was pretty much a disaster and needed to be rescued with baker's yeast, the second and third attempts had slightly better results but still not great. This last attempt, while not a home-run by any means, is the best to date in terms of the final shape. This one has a much better flavour than the last three as well, but the crumb is not as open as I think it could be and the crust is not at all crusty. The original formula indicates a 60% hydration level, however I increased this by 9% as the dough was a little stiff for my liking. This, along with the fact I used steam instead of baking with the oven door open for the first 15 minutes as indicated in the DOP procedure,was likely a critical error on my part towards achieving a proper crust. Old habits die hard, so I've highlighted that part of the procedure in my notes for the next attempt.
Regardless of the fact I've only had what I'd call marginal results with this project so far, I am enjoying the challenge of trying to reproduce this ancient and venerable bread.
Best Wishes,
Franko


I have been after a good English Muffin since I started baking breads 2 years ago. I tried the BBA recipe, too bread like, crumb is even and soft, good for a dinner roll, not an English muffin. I tried Alton Brown's recipe. Simple, and gives lots of holes. However the crumb is more like a crumpt. In addition, with a very short rise, AB's EM lacks a little flavor.
Recently I tried Wild Yeast's Sourdough English Muffin (here), jackpot! Not only it gives the "PERFECT" crumb (for me), but also complex whole wheat flavor. On top of that, it was easy to make too! I have read that the nooks and crannies in English Muffin crumb can be achieved by a very wet dough, which is ALMOST overkneaded. Sounds odd, but I do think the rough crumb struture of a EM is indeed similar to a dough whose gluten is on the verge of breaking down. "Laurel's Kitchen Bread Book" advices to knead a wet dough to pass windownpane, then KEEP KNEADING until it's over kneaded. I trust her results, but dont' want to spend all the effort to "over knead" a dough. I think Wild Yeast formula accompolishes the same goal with a much easier method: creat a sourdough spong, let it fermentate for a long time until the gluten almost breaking down, add a little bit of flour so that it can take shape, proof for a bit, cook and done!
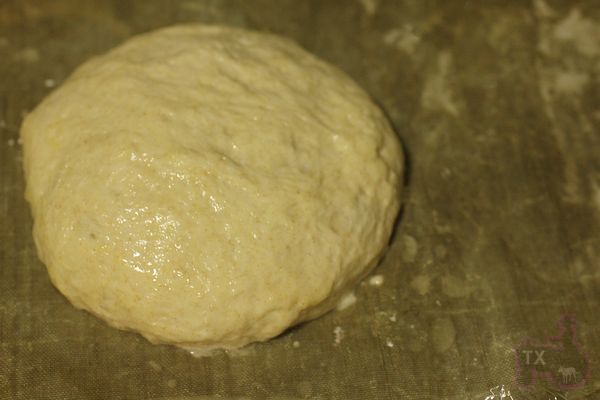
However I did modify the procedure: the original formula wants me to knead well after adding the flour, then pat the dough out flat and cut out rounds of dough. That is hard to do if the dough is very wet - and the dough simply has to be wet for good results. What I did was to skip kneading all together, we are not after gluten formation here anyway. Simply mix with a spoon, then scoop chunks of dough(I use a scale to make sure of their sizes) on a baking sheet, use WELL OILED hands to shape these little puddles of wet dough into flat disks, let proof, then cook them in English Muffin rings. Easy and prefect. Since I don't have to knead/pat/cut, I can affort to up the hydration even more.
Sourdough English Muffing (Adapted from Wild Yeast)
-Sponge
100% starter, 55g
AP flour, 80g
WW flour, 50g
milk, 140g
1. Mix and let rise for 12 hours. (I let it go longer than the original instruction since I want the gluten to almost break)
-Final dough
AP flour, 35g
salt, 1/2tsp
baking soda, 1/2tsp
agave nectar (or honey, but agave nectar tastes so great), 1t
all of sponge
2. Mix with a spong, then scoop chunks of wet dough onto a baking sheet (wiht bakign mat or parchment paper), each chunk is about 73g, 5 chunks in total. The size matters here, if the dough chunks is too large, it won't cook through/rise well. Well oil/water your hands and nudge the dough chunks into rough disks.
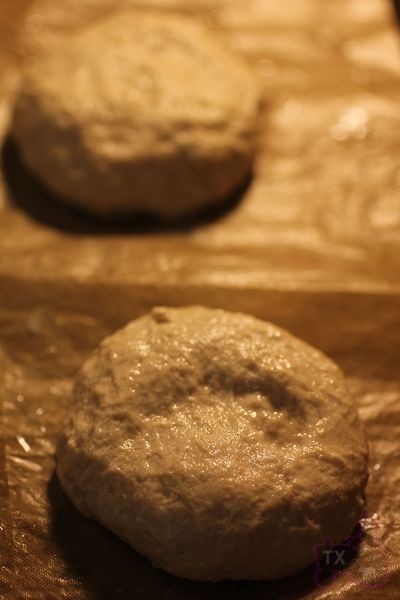
3, cover and let rise for 45min (73F), until very light
4 I don't have a griddle, so I cooked them in a cast iron pan. Preheat for 5min on medium low heat, with muffin rings inside. The pan and rings were all lightly oiled. Lift the parchment paper/baking mat, and flip the dough onto your oiled/watered hand, drop into the ring. Don't pick up the dough, do the lift and flip, it's much less sticky this way, and you can preserve most of the air bubbles.

5. Cook on medium low heat for about 5min before flipping, during that time, the dough would rise to the rim, or even over the rim a bit. Flip and keep cooking until done, about 15min in total, flipping every few minutes.
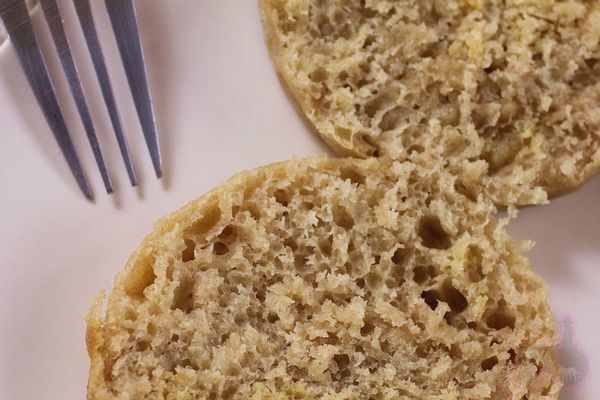
Let's look at the crumb, it'd my idea of a perfect EM
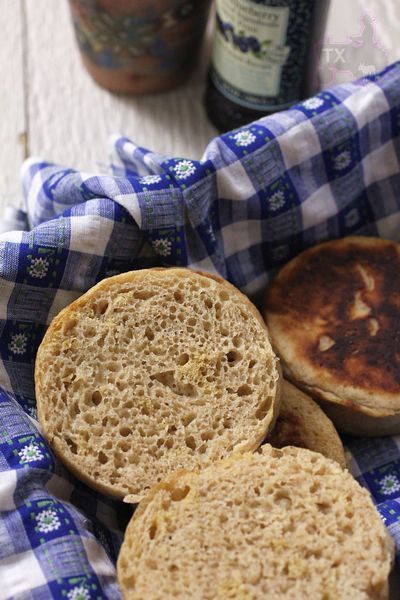
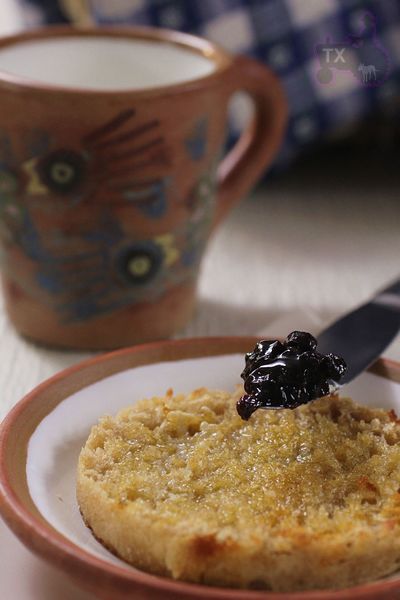
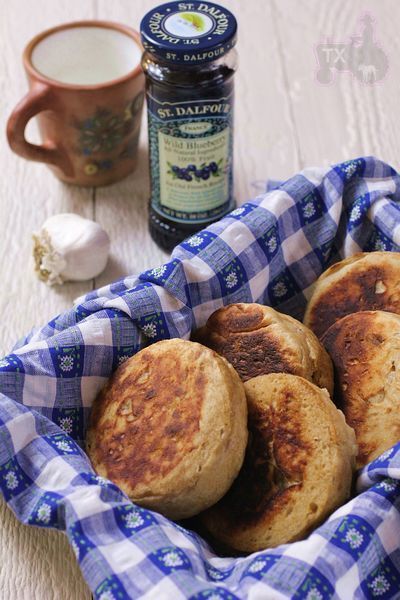
But of course, I only cut one for the picture, the rest I did the proper way: fork split, look at all that nooks and crannies!
Butter and jam has no way to escape!
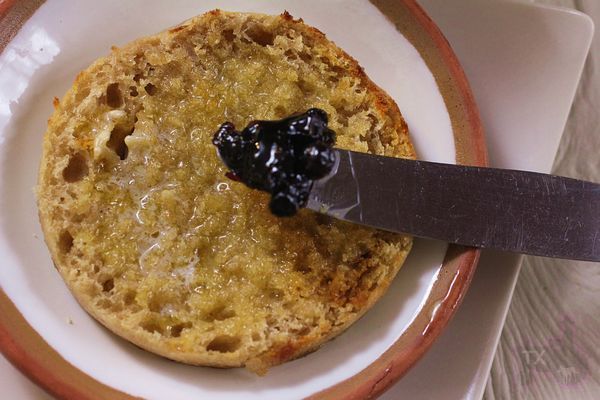
Perfect for a breakfast sandwich too, with a lot of sauce of course

Sending this to Yeastspotting.

STARTER:
100 g rye meal
26 g whole wheat or rye mother starter
200 g water, lukewarm
INTERMEDIATE DOUGH:
all starter
100 g rye meal
100 g whole wheat flour
150 g water, lukewarm
FINAL DOUGH:
all intermediate dough
100 g whole wheat flour
6 g salt
10 g honey
8 g molasses
25 g flaxseeds
25 g sesame seeds
25 g sunflower seeds, toasted
50 g water, lukewarm (or more, as needed)
sunflower seeds for topping
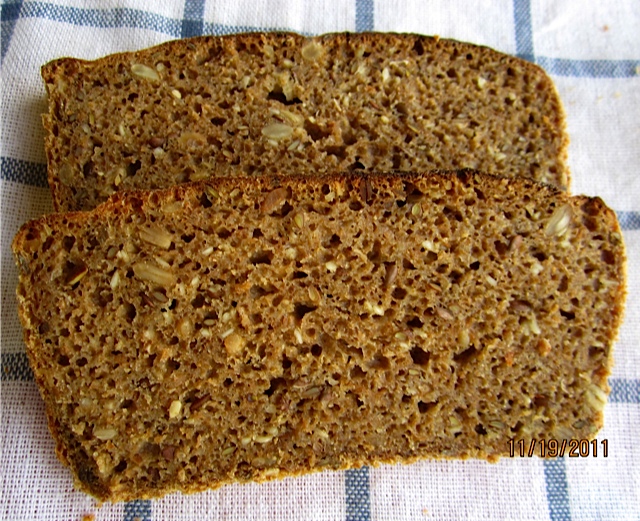
DAY 1
Using a large spoon, stir together all starter ingredients in a bowl. Leave at room temperature, covered with plastic wrap for 4 - 6 hours (or overnight). When the starter has fully developed, use it or refrigerate (take out 2 hrs. before using).
DAY 2
In the morning, using a large spoon (or stand mixer with paddle attachment), mix together all ingredients for intermediate dough until well combined. Cover and ferment at room temperature.
In the evening, using a large spoon (or stand mixer with paddle attachment), mix together all ingredients for final dough, adding lukewarm water until dough has consistency of cake batter. Fill dough (up to 3/4) in lightly oiled medium sandwich loaf pan (9"), smooth with wet rubber spatula, sprinkle with sunflower seeds, cover and refrigerate overnight.
DAY 3
Remove dough from refrigerator 2 hrs. before using.
Preheat oven to 475 F (with steam pan). Bake bread at 450 F (steaming with 1 cup boiling water) for 15 minutes, remove steam pan, reduce temperature to 375 F and continue baking for another 15 min.. Rotate 180 degrees, and continue baking for another 20 - 30 minutes (internal temperature 200 F). Mist with water while hot, and let cool on wire rack.
Updated 9/23/13
Background:
David Lebovitz, the celebrated American food blogger based in Paris has raved about Eric Kayser's Pain aux Cereales on numerous occasions, even proclaiming it to be perhaps the Best Bread in the World. A lot of bread aficianados from all over the world have made the pilgrimage to Paris to sample it and have posted photos as well as detailed description of this particular bread on the internet.
 Kayser's Pain aux Cereales from Lebovitz's Blog
I have the Eric Kayser's '100% Pain' bread book and the recipe for his Pain aux Cereales is included. However the photos, the ingredients and the formulation listed do not match the descriptions of the bread sold in his stores. After all, his bread empire is built on the originality and quality of his products, so who can blame him for not divulging all his secrets?
A couple days ago, I decided to formulate my own interpretation of Kayser's Pain aux Cereales based on my compilation of information gathered on the internet and relying loosely on the recipe in his book.
Formulation:
Flour Mix:
- 250 Gms KA Organic Artisan Select AP Flour
- 250 Gms La Milanaise T90 High Extraction Flour
Liquid Levain Build:
- 25 Gms ripe Liquid Levain (100% hydration)
- 50 Gms Flour Mix
- 50 Gms Spring Water
Seed Mix:
- 2 Tbs Golden Flax Seeds
- 2 Tbs Brown Flax Seeds
- 2 Tbs Yellow Sesame Seeds
- 2 Tbs Millet Seeds
- 2 Tbs Poppy Seeds
Final Dough Mix:
- 450 Gms Flour Mix
- 325 Gms Spring Water
- 125 Gms Liquid Levain Build
- 1/4 tsp Instant Yeast
- 10 Gms Grey Atlantic Sea Salt
- 1/3 of Seed Mix (toasted in a non-stick pan)
Procedures:
1- Prepare Final Levain Build and let ferment at room temperature until triple in volume.
2- Mix Flour and Water and autolyse for 30 mins.
3- Add Levain, Yeast and Salt and knead in mixer w/ dough hook on low speed for 4 mins.
4- Add the 1/3 toasted seed mix and incorporate into dough with dough hook for 30 secs.
5- Partially ferment dough at room temperature for 2 1/2 hours with stretch and fold in the bowl every 30 mins.
6- Retard dough in refrigerator for 18-24 hrs.
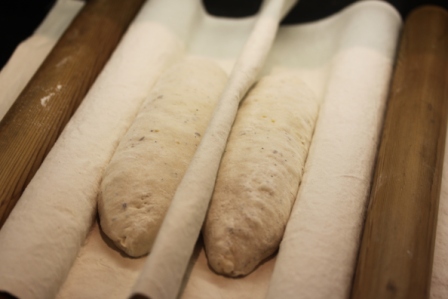
7- Divide dough into 2, preshape into ball and let rest 1 hr. Shape into batard and proof on couche for 1 hr.
8- Transfer loaves to peel, lightly mist with a vaporizer and sprinkle with remaining untoasted seed mix.
9- Score and bake at 440 degrees F with steam for 12 mins and 20 more mins at 390 degrees F on convection without steam.
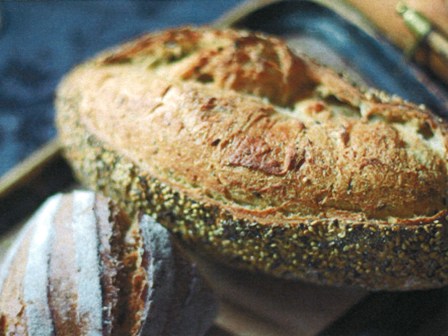
I kept the dough hydration higher than normal at about 77% to compensate for the seeds absorbing some of the moisture from the dough during fermentation. The dough was very responsive with just the right amount of elasticity and extensibility. I got good oven spring, the cuts opened up nicely and the crust was thin and crackly and had beautiful caramelization. The roasted seeds on the crust were colorful and fragrant and glistened from their oil.
The crumb was cream colored, translucent, soft and slightly chewy and speckled with crunchy seeds. The flavor was complex from the interplay of the nuttiness of the seeds and the slight tang of the levain.
Was it the Best Bread in the World? I would not say so but a darn good bread nonetheless.
Happy Baking!
Don

A while ago Debra Wink asked for information on English Muffins.
I attach details below, mostly from a Practical Class with my Foundation Degree students from last academic year.
The attached video is from very early days, and was prepared entirely by the students. You can hear me advising other students in the background; that's how I know I wasn't directly involved.
Recipe specifications are attached [many thanks to my baking mentor and tutor during my time studying for my bakery qualifications for letting me have a commercial recipe specification to use], and I will dig out some photos and attach manufacturing instructions below.
Here goes:
CRUMPETS
|
Material |
Formula [% of flour] |
Recipe [grammes] |
|
Strong Flour |
100 |
500 |
|
Salt |
2 |
10 |
|
Yeast |
6 |
30 |
|
Water |
110 |
550 |
|
TOTAL |
218 |
1090 |
|
Bicarbonate of Soda |
0.3 |
1.5 |
|
Cold Water |
28 |
140 |
|
TOTAL |
246.3 |
1231.5 |
Yields 20
Set plate to Mk4. and pre-heat. The temperature of the hot-plate should be just below 200*C
Method:
English Muffins
|
Material |
Formula [% of flour] |
Recipe [grammes] |
|
1. Sponge |
|
|
|
Strong Flour |
50 |
750 |
|
Water |
30 |
450 |
|
Yeast |
0.5 |
7.5 |
|
TOTAL |
80.5 |
1207.5 |
|
2. Final Dough |
|
|
|
Sponge |
80.5 |
1207.5 |
|
Strong Flour |
50 |
750 |
|
Salt |
2 |
30 |
|
Milk Powder |
8 |
120 |
|
Yeast |
8 |
120 |
|
Butter |
10 |
150 |
|
Water |
30 |
450 |
|
TOTAL |
188.5 |
2827.5 |
makes 40 muffins @ 65g
This is based on Rose Levy Barenbaum's recipe if I'm not mistaken; one of my Foundation Degree students was very keen to learn how to make these, so we did the developmental work together, and he had a go at making them; quite successfully I believe.
We made the sponge on an overnight basis. This would mean the sponge would be cool, so final dough water would need to be tempered accordingly to achieve a DDT of around 30*C. I would refer you to Walter T. Banfield's text "Manna; A Comprehensive Treatise on Bread Manufacture." London: Maclaren. 1947, which states one essential to success as warming the flour. Elizabeth David's English Bread and Yeast Cookery has some useful comments made over the years on English muffins too.
It is strange how we ended up basing our recipe on the work of a modern day American author, rather than on the works discussed above. I am pretty sure it is because we wanted to use a pre-ferment to make these, and all the recipes I came across used bulk fermentation. From my own studying time 6 years ago, working for my bakery quals, we definitely made these with a ferment. Given that my FdA students were working on complex fermentation methods, I specifically asked for English Muffins made using an Overnight sponge. this is what we came up with.
The dough should be soft, although hydration in the formula does not look alarmingly high. But, given you have plate-work, be wary of the dough being too soft; if this is the case, you will end up with crumpets, as shown in the first recipe. These are made from a batter which is piped onto the griddle: see video.
It is just a case of combining the sponge with all other ingredients and mixing to form a soft, warmish, and well-developed dough. I am aware American flours generally have a higher level of hydration, but please note the flour I used in this formula is strong, and one of the best commercial specs available over here. It is milled from 100% Strong Canadian Wheat.
Debra Wink indicated wanting to experiment with Wholegrain. I am sure this would work well, although I have only ever come across these goods made with all-white flour. The essence of the product is to have a soft and chewy "breadcake" like texture, where the dough rises substantially on the plate thanks to conduction. That is why we wanted to use a pre-ferment rather than a bulk-fermented straight dough. So, wholegrain flour: yes with the following provisos: the wholemeal would need to be strong, and finely milled. A brown flour, say of 85% extract would be excellent. Do not go above 50% brown flour in the flour "grist". The water content will need to be adjusted upwards to take account of extra absorption from the bran. Obviously, the formula can be adapted to use milk rather than the water/milk powder combination.
The dough should have a resting time of upto 30 minutes, then scale and divide, and mould each piece round. Dust the bench with rice cones, flatten slightly and rest the dough pieces on the rice dust, covered, for 45 minutes to an hour. Cook in batches on the griddle; they should take about 10 minutes, being flipped over half way through cooking. The gritty rice cones on the outside of the muffin are a wonderful contrast to the soft and chewy centre. The dough should rise slowly on the griddle as the muffin cooks; that was why we sought to use a pre-ferment in the formula.


Here's the video:
Best wishes
Andy

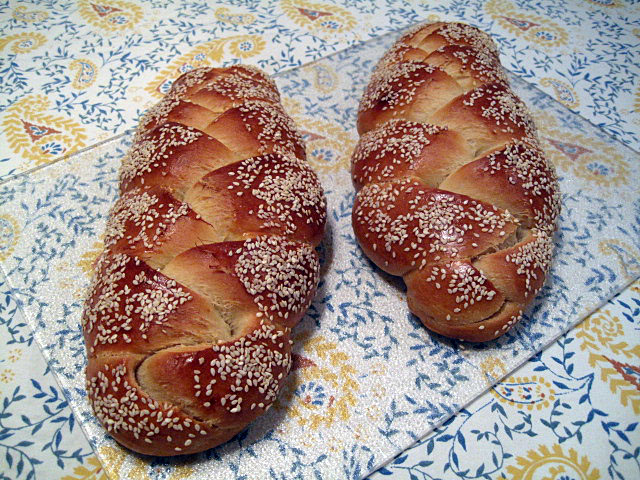
I'm rather fond of challah, but my wife isn't. Most challah is too rich and too sweet for her taste. The closer to brioche it tastes, the less she likes it. So, when I made “My Sourdough Challah” from Maggie Glezer's “A Blessing of Bread,” and both my wife and I loved it, I was delighted.
Of course, all challah was made with sourdough before the introduction of commercial yeast. Since then, according to Glezer, challah has tended to be made sweeter and richer. Sourdough challah has a “moister, creamier texture” and stays fresh longer that the yeasted variety. Glezer's version has a delightful sourdough tang which lends it an almost “sweet and sour” flavor. It is wonderful plain, as toast and as French toast.
|
Ingredients |
|
|
The starter |
Amount (gms) |
|
Active firm sourdough starter |
35 |
|
Warm water |
80 |
|
Bread flour |
135 |
|
|
|
|
The final dough |
|
|
Warm water |
60 |
|
Large Eggs |
3 eggs + 1 egg for glazing the loaves. |
|
Salt |
8 |
|
Vegetable oil |
55 |
|
Mild honey |
65 |
|
Or Granulated sugar |
60 |
|
Bread flour |
400* |
|
Sourdough starter |
All of the above+ |
* I added an additional 3 tablespoons or so of flour during mixing, because the dough seemed too wet. This may have been needed due to my using more starter than Glezer specifies. See below.
+ Glezer says to use only 200 gms of starter, but I used all of it (250 gms)
Procedures
The night before baking, mix the starter and ferment it at room temperature for 8-12 hours.
In the morning, in a large bowl or the bowl of a stand mixer, dissolve the starter in the water, then mix in the 3 eggs, salt, honey and oil until completely combined.
Mix in all the bread flour until it forms a shaggy mass.
Transfer the dough to a lightly oiled bowl and cover it tightly. Ferment for about 2 hours. It may not rise much.
To make two 1 pound loaves, divide the dough into two equal portions, and divide each portion into the number of pieces needed for the type of braiding you plan to do. (I did 3-strand braids.)
Form each piece into a ball and allow them to rest, covered, for 10-20 minutes to relax the gluten.
Form each piece into a strand about 14” long. (I like Glezer's technique for this. On an un-floured board, flatten each piece with the palm of your hand. Using a rolling pin, roll out each piece to about ¼ inch thickness. Then roll up each piece into a tight tube. Using the palms of your hands, lengthen each piece by rolling each tube back and forth on the bench with light pressure. Start with your hands together in the middle of the tube and, as you roll
it, move your hands gradually outward. Taper the ends of the tube by rotating your wrists slightly so that the thumb side of your hand is slightly elevated, as you near the ends of the tube.)
Braid the loaves.
Place each loaf on parchment paper in half-sheet pans (I used a quarter-sheet pan for each loaf.) Cover well with plasti-crap or place the pans in a food grade plastic bag, and proof at room temperature until the loaves have tripled in volume. (Glezer says this will take “about 5 hours.” My kitchen was rather cool. I proofed for 6 hours.)
Pre-heat the oven to 350ºF with the rack in the upper third of the oven.
Brush each loaf with an egg lightly beaten with a pinch of salt.
Optionally, sprinkle the loaves with sesame seeds and/or poppy seeds.
Bake until done – 25-35 minutes for 1 pound loaves.
Cool completely before slicing.
David
Submitted to YeastSpotting on SusanFNP's Wildyeastblog.

I went to my favourite neighbourhood coffee shop a few days ago to enjoy a cup of flat white. The lady owner there has a bit of an alternative flair about her and I enjoy the free air that she exudes to her place. She really knows her stuff because the sourdough she serves for snacks is one of the best in town. She told me her supplier is "Leavain Bakery" in Brisbane. I thought I might go and visit Leavain Bakery sometime so I Googled it when I got home. Wow - I had no idea! Leavain Bakery supplies to some of the best restaurants in Brisbane! I though, Shiao-Ping, well done! I am so privileged to have the same sourdough in this little café as those that would be enjoyed by patrons to some of the best restaurants in town. One of the restaurants is Philip Johnson's E'cco Bistro. The New Zealand chef in Brisbane, Philip Johnson, has some of the best dessert recipes I've ever seen, something to die for.
As I was reading up on Leavain Bakery on the net, it was brought to my attention that John Downes, the man behind the Australian sourdough movement in the late 70's has a cook book out. As I was buying the book on the Australian Sourdough Companion website, an user, Johnny's beautiful crumb shot caught my attention. His Ciabatta Integrale (a wholemeal ciabatta with multi-grains) involves a procedure which is most unusual to me. I would like to summarize it below, if I may:
I find Johnny's procedure very "elegant"- the least effort that allows you to arrive at the best possible result. The essence seems to be in his minimalist approach and its beauty is that it is great for a person who has a busy work life. I have since found that SourDom, another experienced baker of Sourdough Companion, talked about this flexible schedule at length in his Sourdough Timetables article. But (and this is a big BUT), I did not understand what made this timetable work for sourdough bread; I mean, what was happening behind the scene; ie, what was happening to the natural yeasts in the refrigerator?
I went to Peter Reinhart's The Bread Baker's Apprentice. Under page 191 of Pain a l'Ancienne, it says:
The unique delayed-fermentation method, which depends on ice-cold water, releases flavors trapped in flour.... The final product has ... character that is distinct from breads made with exactly the same ingredients but fermented by the standard method....
The cold mixing and fermentation cycles delay the activation of the yeast until after the amylase enzymes have begun their work of breaking out sugar from the starch. When the dough is brought to room temperature and the yeast wakes up and begins feasting, it feeds on sugars that weren't there the day before.
Peter Reinhart adds,
... this delayed-fermentation method... evokes the fullness of flavor from the wheat beyond any other fermentation method I've encountered. As a bonus, and despite all the intimidation science, this is actually one of the easiest doughs ... to make."
How beautiful is that!
Without further ado, let me go straight to my bread. My Pain a l'Ancienne is an adaptation of Peter Reinhart's formula, as well as that of Johnny's Ciabatta Integrale. Thank you Johnny, and thank you Peter.
My formula for Wholemeal Pain a l'Ancienne
Total dough weight 1.08 kg; overall hydration 85%
My formula for White Pain a l'Ancienne
Total dough weight 1.01 kg; overall hydration 78%

I recommend anyone to read SourDom's Sourdough Timetables. While SourDom's intention is to give home bakers flexibility in scheduling, the delayed fermentation achieved means that the home baker has everything to gain in terms of crumb flavor. Try it and wish you happy baking!
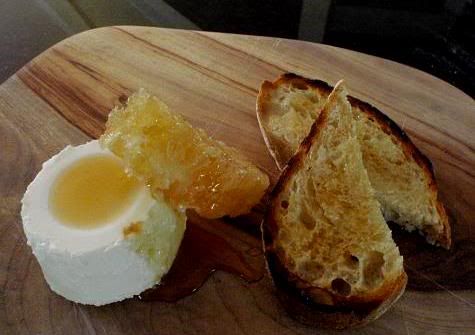
Grilled Pain a l'Ancienne with buffalo ricotta by Australia's Paesanella
Cheese Manufacturers, drizzled with honey and garnished with honeycomb
Shiao-Ping
Note 1: My Google translator tells me Pain a l'Ancienne means "old bread." According to jackal10 of eGullet Society for Culinary Arts and Letters, "A l'Ancienne" is a technique where the dough is mixed cold, and then retarded. The long cold period allows a long period for enzymatic breakdown of the starch into fermentable sugars but because of the cold there is little yeast activity, so that when the dough is later warmed up the yeast has more food available than would otherwise be the case. With slack dough it can give a highly aerated open structure."
Note 2: Johnny did not use ice cold water; however, his retardation schedule would mean that he would have achieved the same benefits. Peter Reinhart's formula calls for one night retardation only.