The Fresh Loaf

A Community of Amateur Bakers and Artisan Bread Enthusiasts.

Most bookmarked

siuflower's picture
siuflower

make your own diastatic malt

Make you own diastatic malt

You can make your own:  sprout a cup of wheat berries by covering
them with water in a jar for 12 or so hours, dump out the water &
rinse with clean water, and place the jar in a darkish, warmish,
place.  Rinse the berries every day with clean water and return to
their place.

In 2-3 days they will begin to sprout.  When the sprout is as long as
the berries themselves, dump them out on paper towels, dry them off,
and set on a cookie sheet in the sun for a day or so to dry out. Then
put the cookiesheet in a 100F oven for an hour or three.  Do not let
the temp get above 130F or the enzymes will be destroyed.

Then grind the dried malted berries into flour, and use it in your
favorite recipe at a rate of approx. 1t. per loaf.


I am new to this blog but I also could not find any diastatic malt in AL, so I search the internet and happened to find a web site to make your own diastatic malt. I did not saved the web address but I did copy the recipe and I did follow the direction and make my own diastatic  malt. I hope it will help some of you  to make your own diatatic malt. I sprout 1/4 cup of wheat berry instead of 1 cup and grounded it and store in the freezer.


Siuflower 

Elagins's picture
Elagins

Norm's Onion Rolls

So, here they are ... a bit too spherical, IMO, but the taste is absolutely right on the mark. The dough was gorgeous: silky, taut, very very gluten-rich. The trick is in the shaping: I wanted them flatter and bigger in diameter, but they came out softball-shaped. Maybe I ought to press them flatter before I mash them into the onion, or perhaps use a mini rolling pin on them to get them thin enough.

Anyway, here they are. At least if I close my eyes, I'm back in Brooklyn. Thanks, Norm.

Stan

Norm's Onion RollsNorm's Onion RollsNorm's Onion Rolls

CountryBoy's picture
CountryBoy

Rye Flour

Rye flour came up in a recent thread, and I thought it convenient for everyone if I started a separate thread devoted to just rye.  This way you can cut and paste it to a document if you wish to save it for future reference.

From my books so far, I have gleaned that:

RL Barenbaum in her Bread Bible discusses it in 2 paragraphs towards the end of the book but leaves quite a bit left unsaid. She does not specify what type should be used in her recipes although Leader and Hamelman do.

Peter Reinhart in his last 2 bks has said rather little on the topic.

Daniel Leader in his recent bk Local Breads points out the following:

  • Most rye flour sold in the US is whole, with none of the germ and bran sifted out.  To confuse matters, it is labeled not 'whole' but medium, to distinguish it from pumpernickel flour, which is a more coarsely ground whole rye flour.  Unless otherwise noted, whole rye labeled 'medium' or fine is called for in the recipes in his book.
  • Medium flour has some grit from the bits of bran
  • Fine rye flour will be more powdery.  You can use pumpernickel flour in the recipes that call for rye flour, but your breads will be a little darker than breads made with medium or fine rye flour.
  • White rye flour, from which the bran and germ have been sifted, used in lighter Polish and Czech rye breads, is paler than whole rye, grayish white rather than gray.  It is rarely available in stores but easily ordered by mail.

Hamelman in Bread discusses it at very considerable length and to summarize some of that says:

  • That it is higher in bran, minerals and fiber than wheat
  • Has more soluble sugars than wheat
  • It is high in a substance called pentosans and amylase enzymes
  • In Germany it is categorized by its ash content.
  • In the US, one has far fewer choices of rye flour-usually sold only as white, medium,medium dark, and whole.
  • White rye flour has little in the way of flavor or color, and is generally a poor choice in bread making.
  • Medium rye is better, producing more nutrition and flavor.
  • Whole rye flour is better yet in terms of flavor and food value.  It is the rye flour of choice for most of the recipes in his book.
  • Dark rye is the flour milled from the periphery of the grain.  It tends to be coarse and sandy, to absorbe quite a lot of water and in general is difficult to work with.
  • Pump0ernickel rye, often called rye meal, is just that: a coarse meal rather than a flour; it is made by milling the entire rye berry.  It can substitute for whole-rye flour, the main diffence being the mealy consistency of pumpernickel.
  • Rye chops, similar to the German Schrot in that the rye berry is chopped rather than ground, cracked rye, and whole rye berries.

Mike Avery has said in another thread that:

  • In the USA, there are 4 commonly available rye flours.  White rye, medium rye, dark rye and whole rye.  As you move from white to whole, the taste of the rye becomes more intense, and the rye flour will reduce the rise of your bread.  Medium rye is a good all-around rye.  Good taste and you still get a good rise.  However, in recent trips to the store, all I am finding is whole rye.  Which will make a BIG difference in your recipes.
  • Dark rye is the least well defined rye.  In some cases it is whole rye.  In others it is a lightly sifted whole rye.  In others, it is the stuff that is left over after the medium rye has been sifted out of the whole rye.
  • Also, rye has very little gluten in it, and what there is, is of very low qualty.  Most bakers tend to develop the dough, form loaves and bake it as soon as it rises.  Some bakers will tell you that a good loaf of white bread can sit for up to an hour after it has risen to it's optimum height and still bake up OK.  This is called tolerance.  The same bakers will tell you that a rye bread has about 6 minutes of tolerance.

Mike I did not ask you for this attribution but if you wish I will edit it out.  Just let me know.  Actually your discussion was the kernel that got me to start this thread.

Since so many people on the Forum are very experienced they are probably aware of all of the above.  However there may be more aspects to rye flour than have been mentioned here.  Since we have such an international make up of the forum others may have their own particular guidance to suggest.

I would start things off with two questions

  • How is it that Hamelman bakes with 80% rye and more in his bread but some members here have said that one can not have more than 15%.  It is possible that they are both right but referring have numbers refering to different things.  Can some one clear this up for a Novice?
  • Since nomenclature is rather loose when it comes to labeling and selling of rye, could someone tell me if they have ever used or know from experience about the flour that sells as:
    •          Hodgson Mill All Natural, Stone Ground, Whole Grain Rye Flour

JMonkey's picture
JMonkey

Ciabatta Integrale from KAF Whole Grains Baking

For my birthday, my mother bought me the brand-new King Arthur Flour Whole Grains Baking book. It's well timed. Their first book turned me on to bread baking, but after a few months, I moved toward whole grain breads almost exclusively, and the King Arthur Flour Baker's Companion is about 95% white flour recipes. I learned a lot from it, but I wasn't baking much from it. So, suffice to day, I was itching to knead something up out of this book as soon as possible.


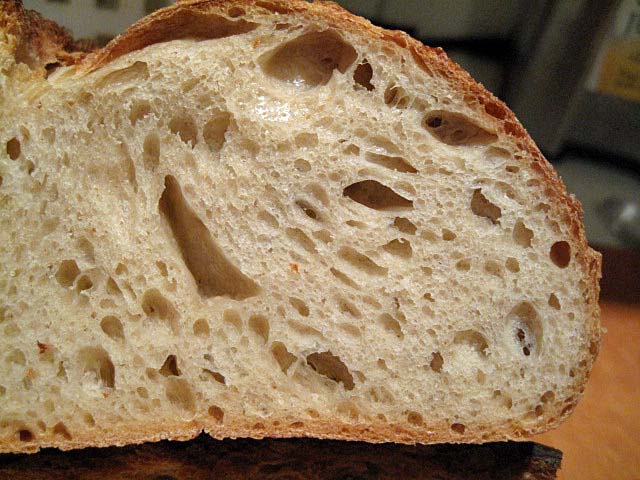
 I've made a few of the quickbreads. The Sailor Jack muffins, in particular -- an incredible cake-like concoction with raisins steeped in spices, molasses and brown sugar, along with whole wheat flour and oats, topped with a lemon sugar glaze -- are very, very tasty indeed. But I'd not tried a yeast bread until this weekend.  The first recipe to catch my eye was Ciabatta Integrale, a ciabatta made with half whole wheat flour, olive oil and a bit of powdered milk. I love ciabatta -- nothing is better for a sandwich or simply a bit of oil and balsamic vinegar. But whole grains just don't do ciabatta. Those holes? Forget it. Or so I thought. This recipe isn't 100% whole grains, but it's half, and I'll take it, given the results.  Here's one loaf all sliced up for sandwiches.
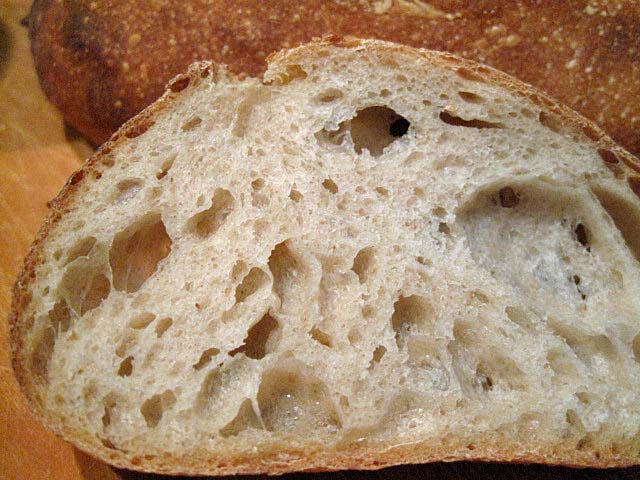
   And here's the other loaf, which served as dinner bread with some stuffed acorn squash (stuffed with quinoa, maple syrup, raisins, almonds and cinnamon), fresh corn and a green salad composed of our morning trip to the farmers' market. Olive oil and balsamic vinegar are in the gravy boat, natch. 
  I was really impressed with the results, especially since the recipe said it's impossible to mix completely without a stand mixer. I don't own a stand mixer, so here's how I did it, thanks to a little help from Peter Reinhart's Bread Baker's Apprentice.  Ingredients  Pre-ferment  1 cup or 4 oz. whole wheat flour 1/2 cup or 4 oz cool water Pinch of instant yeast  Dough  All of the pre-ferment 1 1/4 cups or 5 oz. whole wheat flour 2 1/4 cups or 9.5 oz white bread flour 1 1/4 cups or 10 oz. cool water 1/4 cup or 1.75 oz olive oil 1/4 cup or 1 oz. nonfat dry milk 1.5 tsp salt 1/4 tsp instant yeast  Yes, you read that right. This recipe makes two loaves of ciabatta with less than 3/8 tsp yeast.  The night before mix together the pre-ferment. The next morning dump all the ingredients (including the pre-ferment, which should be spongy and full of bubbles) EXCEPT for the salt and additional yeast into a bowl, and mix it together with a large spoon or a dough whisk until it seems mostly hydrated. Cover and let it stand for 45 minutes to an hour.      

After the autolyse (that's what you're doing when you soak), add the salt and yeast.

DON'T FORGET, OR YOU'LL REGRET IT. :-)

                  Get a small bowl of cool water, and dip your hands in it. Shake off most of the water (important, otherwise you'll end up overhydrating the dough and you'll have soup) and then, using your hand like a dough hook, impale the dough with all five fingers. Turn your wrist clockwise while you turn the bowl with your other hand counter clockwise. Continue to do this, occassionally changing direction and wetting your hands if the dough starts to stick, for about 10 minutes. The dough should pull away from the sides of the bowl, but it will stick to the bottom. Adjust the flour or water as necessary. Put the dough in a pre-greased bowl and cover it.  Every hour or so, copiously flour your work surface, remove the dough, copiously flour the dough and give it a good stretch and fold, brushing off as much of the flour as you can before folding. By stretch-and-fold, I mean gently pat out the gas, stretch the dough to twice its length and then fold it in thirds like a letter. Give the dough a one-quarter turn, and then stretch-and-fold once more. Place it back in the bowl and re-cover it. Here's a good lesson on the technique.  After about 3 hours and 2 or 3 folds (depending on how much strength the dough needs), remove the dough, and divide it into two. Gently stretch and pat each loaf into a 12 x 4 inch rectangle, and place them in a baker's couche (essentially, well-floured linen that you bunch up around the loaves so that they rise up instead of spreading out) or on parchment paper-lined baking sheets. Cover with greased plastic.  It took mine about 4 hours for the final proof, but then my house is a chilly 62-64 degrees F. If your house is around 70-75 degrees, you may only have to wait two hours or so. In any case, preheat the oven to 500 degrees and put the loaves in the oven either on a preheated baking stone or a cold baking sheet when they're good and puffy. Steam the oven (I keep a cast iron skilet in the bottom of mine and usually toss about 1 cup of boiling water in it) and turn the oven down to 425. The loaves should take 20-25 minutes to cook and should register 205 degrees when done. With all that oil, the crust is not as crisp as I usually like ciabatta, but I find I do like the flavor it adds.  Enjoy!

Bakers throw around a lot of terms and often don't define them. As I use jargon I'll try to start recording it here for the sake of building up a reference.

ABAA: Artisan Baking Across America, by Maggie Glezer. A book featuring profiles of artisan bakers and recipes for some of their breads.

AP: all purpose

autolyse: a technique for improving gluten development without heavy kneading. Combine the flour and water from your recipe in a bowl and mix until the flour is fully hydrated. Cover the bowl and let the flour hydrate for 20 minutes, then mix in remaining ingredients. The result is development comparable to a dough that has been kneaded for 5 or 10 minutes with less oxydation (which leads to a yellow crumb).

Baker’s percentage:a convention for listing the ingredients in a dough in which the quantity of each ingredient is expressed a percentage of the total amount of flour. Example: 1000g flour, 660g water, 20g salt, 10g yeast is expressed in baker’s percentage as 100% flour, 66% water, 2% salt, 1% yeast. Note that this always adds up to more than 100%.

BBA: The Bread Baker's Apprentice, a book by Peter Reinhart. One of the more popular book among amateur artisan bakers in the United States.

Banneton: a woven basket, sometimes lined with linen, used to hold a shaped loaf while it is proofing.

Batard: a loaf that has an oval or oblong shape.

Biga: a term used variously as a very stiff (~50% hydration preferment), or as a generic term for preferment.

Boule: a round loaf (French for "ball").

Brotform: a coiled cane basket used to hold a shaped loaf while it is proofing.

Couche: heavy linen fabric used to hold formed loaves for proofing. The fabric can be pleated around the loaves to help them hold their shape.

Crumb: When a baker talks about the crumb they are talking about the pattern of holes inside of a loaf.

Fermentation: (1) the process by which yeast metabolizes sugars to produce carbon dioxide and alcohol (2) (aka bulk fermentation, first fermentation) the period of time the dough rests after mixing and before dividing/shaping.

Folding: one of the best ways of encouraging gluten development in slack doughs. Folding the dough consists of taking a wet dough out of the bowl, spreading it out a little on a clean, well-floured surface, folding it in thirds like a letter, rotating it 90 degrees and folding it up again, picking it up and dusting the loose flour off of it, and then returning the dough to the bowl and covering it again. Like punching down, folding degases the dough some, but it also encourages gluten development.

FSWY: Flour Salt Water Yeast, a book by Ken Forkish

Gluten: "A tenacious elastic protein of wheat flour that gives cohesiveness to dough." Gluten is what allows bread dough to develop those long, beautiful strands and create large open pockets of air (think about the inside of a loaf of Ciabatta compared to the inside of a muffin). Bread flours tend to be made from hard wheats that are higher in protein than regular flour, providing more gluten.

Hamelman, Jeffrey: bakery director at King Arthur Flour and author of Bread: A Baker’s Book of Techniques and Recipes, a comprehensive book aimed at both professional and home bakers.

Hydration: the ratio of liquid ingredients (primarily water) to flour in the dough. A dough with 500g of flour and 340g of water has a hydration of 68% (340/500).

KA: Kitchen Aid or King Arthur.

KAF: King Arthur Four.

Lame: a thin blade on a handle, used to score (slash) loaves before baking.

Levain: usually used as a synonym for sourdough.

Leonard, Thom: A baker featured in ABAA whose Country French Bread is popular with many members of The Fresh Loaf.

Pâte fermentée (aka prefermented dough): a type of preferment in which the ingredients (flour, water, yeast, salt) are mixed in the same proportion as (usually) a basic white bread dough at about 65% hydration.

Poolish: A type of sponge. Typically quite wet, an equal weight of water and flour with an extremely small amount of yeast. For my batch of two French Bread loaves, I typically use 8 ounces of water, 8 ounces of bread flour, and 1/8 teaspoon a instant yeast. Mix it, cover the bowl, and leave it at room temperature overnight.

Proof: (1) the final rise of the shaped loaves before baking (2) the hydration of dry active yeast in water before it is added to the dough

RLB: Rose Levy Beranbaum, author of The Bread Bible, a book aimed at the home bread baker.

S & F: S & F can mean "stretch and fold" or "slap and fold." Slap and fold is usually done for about 20 minutes whereas stretch and fold is flipping the dough out and doing one round of folds every 30 minutes, then 30 minutes later at 60 minutes, then 30 minutes later at 90 minutes (after mixing the dough) and again, 30 minutes later at 120 minutes from mixing the dough. After folding the dough is flipped back over and corners tucked under. the dough covered and allowed to rest and rise until the next 30 minutes comes around.

Score (aka slash or dock): to cut the surface of the loaf prior to baking. This provides for controlled expansion of the loaves during baking so they do not “break” undesirably. Scoring is also used to enhance the appearance of the bread.

Sourdough: a preferment that is a culture of wild yeast and bacteria that is perpetuated by the periodic addition of flour and water, or a bread leavened in whole or part by this culture.

sponge: Also known as a "preferment," a sponge is a portion of the ingredients that is mixed ahead of time, typically overnight. Using a sponge extends the fermentation process longer and generally releases more complex flavors in your loaf. It can also be used to soften dry ingredients (such as whole grains) and release sugars from the grains.

WW: whole wheat.

Baking Glossary

The Fresh Loaf
Pocket Book of Bread Baking

Books are where amateur bakers get most of our information about how to bake. We are fortunate, because there are a lot of wonderful bread baking books out there, with new one's coming out each year. Whenever I get a chance to read another bread baking book, I read and review here. There is also a forum for site members to post their book reviews. If I am missing your favorite baking book, please, post something about there! The links to my reviews, each with a teeny synopsis:

Book Reviews

Benito's picture
Benito

Underproofed vs Overproofed

We frequently get questions about whether or not a crumb shows evidence of underproofing or overproofing.  Having baked plenty of examples of both I thought I would share how I look at the baked bread to decide if it is under or over.

This first loaf has some pretty classic signs of underproofing.  Looking at the crumb, I find it helpful to ignore the big holes first and have a look at the crumb.  Is the crumb very tight and dense or is the crumb actually quite nice and open.  Generally if it is very tight and dense, it is more likely to be underproofed than just right or overproofed.  Next look at the large holes.  Are these large holes actually big long tunnels through the bread?  Are they generally in the upper half of the bread and not immediately under the crust?  In underproofed breads the big holes have a tendency to be large tunnels in the upper half of the bread and not ones immediately under the crust.  Next, sometimes there are clues before you even slice the loaf.  I unfortunately didn’t get the best photos of the outside of this loaf to demonstrate this, but you might see an exaggerated oven spring and ear.  In fact the center of the bread might even be quite pointy as it is pushed upwards by the expansion of those huge tunnels in the bread while baking.


This next loaf has signs of overproofing.  Let’s start again with the crumb and ignore any larger holes.  The crumb in this example isn’t particularly tight or dense despite it being 100% whole grain, so it isn’t likely underproofed.  So it could be just fine or overproofed.  Now look for the larger holes.  In this case the larger holes are just under the crust and if you look closely you’ll see some broken gluten strands.  These broken gluten strand happen because as the dough overproofs, the gluten becomes weaker as the pH falls activating the proteolytic enzymes.  Then as the gases expand in the oven when baking the weakened gluten fails and smaller alveoli coalesce to become larger ones.  Next let’s look at the outside of the loaf.  The weakened gluten affects the outward appearance of the loaf.  Again rather than expanding upwards, the loaf spreads as the gases expand as the gluten breaks down so we often get a flattened loaf.  The ear is often unable to form properly so you might get only a small ear at best.  In the area of the score you’ll often a collapsed area rather than a crust that stands proud.

What do you look for to decide if a loaf is over or under?

Benny

Doc.Dough's picture
Doc.Dough

The 2% weight loss method for judging levain maturity

A few years ago, I was experimenting with various ways to increase the acidity of sourdough bread and found that I needed a way to produce levains that were similarly mature but at various hydration levels, including some as high as 250%. The “normal” method was to watch for the volume of the levain to rise and when it began to fall back it was declared to be “mature”.  But for high hydration mixes, there was not any rising and falling because it was simply too liquid to retain enough CO2 to allow it to increase in volume (other than producing some surface foam which did not seem to be very useful).

After thinking about this for a while, I wondered if there was enough CO2 escaping from the levain to measure the weight that was lost in the process.  To find out if there was enough being produced, I did a rough calculation based on the fermentation of glucose to ethyl alcohol and

C6H12O6 → 2 C2H5OH + 2 CO2

One mol of glucose weighs 180g and is converted into 2 mols of ethyl alcohol (46g/mol) and 2 mols of CO2 (44g/mol), so in the process 88g of CO2 is produced of which some escapes and the rest either remains dissolved in the liquid phase of the dough or is retained as gas in the bubbles of the dough.  When a levain is mixed, the amylase enzymes in the flour begin to break down some of the starch in the flour (which starts with a just a little maltose and some broken starch granules and after about 6 hours has as much as 6% maltose along with some other fermentable polysaccharides). [Saunders, Ng, and Kline]  And the enzymes are recycled so the process of starch degradation continues for as long as there is broken starch for it to work on and the rest of the required conditions are met.  So, if we take 10g of flour and after getting it wet and letting the enzymes do their thing for 6 hours, it contains about 600mg of maltose, and because maltose is made up of two glucose molecules, we have 600mg of glucose equivalent.  If the formula above held true, about 48% of the weight of the 600mg glucose should show up as CO2.  This would yield something like 293mg of CO2, and that should be measurable but would require a high resolution/high accuracy scale.

So, the initial estimate of how much CO2 might be lost was high enough to make it interesting to pursue measuring actual weight loss in a high hydration levain. My expectation was that the amylase enzymes would continue to produce sugars from the starch and the process would run until something (perhaps metabolic byproducts or pH sensitivity might poison the environment) slowed it down.

The next question was what else might be going on that could look like CO2 loss.  The first guess was that evaporation of water off the levain surface might be high enough to be a problem, and to address that I ran a simple experiment, measuring the weight of a container of water (about 36g of water in a 4g polypropylene food service cup with a snap-on but not gas-tight) lid in place) over a few days to see if it lost enough weight to get in the way of seeing the loss of CO2.


As you can see, the fluctuation in the weight of the water at refrigerator temperature (38°F) averages to be a very small number, with measured weight differences of less than 20mg over multiple hours when temperature variations may have affected scale accuracy.  Once the water was allowed to return to room temperature, evaporation became measurable, losing about 4% of the weight of the water over 15 days or ~0.25% per day. So, it is clear that evaporation is a measurable quantity but when it is refrigerated and the vapor pressure is low, the loss rate is effectively zero.

Now, how much weight does a levain lose over a refresh cycle?  And how does that compare with water evaporation?  To measure the weight loss on a consistent basis, I use the weight of the added flour to normalize the weight lost to CO2, so for a refresh cycle that starts with 6g of starter, adds 12g of water and 12g of flour, the weight loss is divided by the 12g of added flour to arrive at a percentage that grows with time.  If we use the 0.25% per day weight loss due to evaporation and assume (a conservative assumption) that the evaporation of water from the mix will be the same as from a container of pure water and that it will lose 0.25% of the weight of the water over 24 hrs, the weight loss looks like this:

The different starters each exhibits its own weight loss because each one is growing and giving off CO2 at a different rate and in this case, I have plotted a line at the bottom that models the evaporative loss. Thus, the weight loss of an actively growing starter is large enough and fast enough that we don’t have to worry about mistaking water evaporation for CO2 loss.  And we can differentiate between the growth rates of different starters (which doesn’t tell us much more than perhaps something about the numerical density of living yeast cells in the seed starter (which sets the initial growth rate).

If the growing starter is refrigerated at any point during the growth cycle, growth effectively stops (it does continue to grow but very slowly and we will see how fast it continues to grow a little later).

My observation has been that from the appearance of the rise and fall of the starter as it matures, the point at which it begins to fall is generally at the point where it has lost about 2% of the weight of the added flour, so I use this as a guide to judge when a starter is ready to use, even when I can’t tell whether it has begun to fall (perhaps because it rose up and contacted the cover of the container and I thus can’t tell if it fell because of that, or because it was of such high hydration that there is no bulk volume expansion of the growing starter, just some foam floating on the surface of the liquid.  When it has lost 2% of the weight of the added flour, it is (by definition) ready to use.  It works for me.  If you want to use a different number, feel free. “Trial and success” is the name of the game.

Now let’s look at how long you can leave a starter in the refrigerator before you need to feed it. For that experiment I didn’t let the starter get going before I refrigerated it, just mixed it, capped it, and stuck it in the refrigerator. And they were mixed stiff, using a refresh ratio of 5:10:15.


As you can see, in the refrigerator at 38°F, it takes about a week to lose 2% of the weight of the added flour, so if you don’t let your starter grow before you refrigerate it, it will take a week to mature but you can use it without feeding it again.

By day 14, there is some small divergence between the three starters in this test, but the growth rate is still fairly constant (linear growth) for all of them, and I have found that I can still use it to start a levain without an intermediate feeding.

By the end of the third week, there is additional divergence between the three samples shown here, and the weight loss curve is clearly beginning to flatten out, but there is still a significant amount of CO2 being produced.  I find that after three weeks I get better performance if I do a double refresh before making a levain.  I take this as strong evidence that the native amylase enzymes remain active and continue to convert broken starch into maltose, and the yeast continues to convert the maltose into CO2 and other metabolic products until something limits the process.

Now while all of these experiments demonstrate that weight loss is an adequate method for judging the maturity of starter, it is equally good for gaging the maturity of levain, and it has the advantage that you don’t need a milligram scale to use it.  For any levain where you are adding at least 100g of flour and assuming that you have a digital scale that is accurate to 1g, you just cover the bowl of levain with plastic wrap and weigh the bowl, levain, and plastic wrap, and make note of the total weight of the combination, calculate 2% of the weight of the added flour and subtract it from the total and that becomes your target weight for the bowl of starter when the levain is mature.  And from the extended cold propagation experiment we know that you can lose as much as 4% of the weight of the added flour and it doesn’t make much difference in terms of the health or proofing capacity of the levain.

Notes:

For stiff starters, there is less water in which the CO2 can dissolve, and any dissolved CO2 will not escape, plus CO2 will be trapped in the alveoli of the expanding starter. In all cases, there is little or no CO2 released until the starter is saturated with CO2 at which point it cannot hold any more. So, when you plot weight loss, expect for there to be a lag between when you mix the starter and when it starts to lose weight. Part of that is due to not having a lot of yeast cells actively consuming sugar and making CO2 soon after being mixed, and part is due to the fact that the early CO2 is being absorbed by the liquid in the starter as well as being stored in internal alveoli (bubbles) within the starter.

While both mechanisms are operating, you need a way to get accurate measurements, and I found that if I would thump (burp) the container on a towel or my hand, it would deflate the bubbles in the starter releasing trapped CO2 and knocking it down to some common (low) level of porosity.  If/when I did not do this, the weight loss data was very noisy since the starter will deflate on its own after a period of time and you can’t control it and probably don’t even observe it (it looks like surface bubbles popping but it gives off CO2 which impacts what you weigh). It is also important to remove the lid of the container and blow out any accumulated CO2 that is trapped in the head space between the top of the starter and the top of the container.  While CO2 is a gas, it is a heavy gas, and it is measurable and it contributes to measurement noise if you don’t flush it out.  Note that larger containers trap more CO2 and the difference in buoyancy is the difference between the molecular weights (at sea level that is 44g per 22.4 liters for CO2, and 29g per 22.4 liters for air).

Fifteen grams per 22,400 ml is 15 mg per 22.4 ml, and half of a 5.5 oz polypropylene food service cup (78 ml) filled with CO2 instead of air adds about 53mg to the measured weight if you don’t replace it with air before measuring.  You can do the same calculation for large bowl filled with levain and covered with StretchTite; there is a substantial amount of trapped CO2 and you need to flush it out before you weigh the starter when determining if it is mature.


Benito's picture
Benito

Aliquot Jar to determine bulk fermentation rise

Can I share a recent trick that I have been using to fine tune my sourdough baking?  I am now using an aliquot jar to gauge bulk fermentation.  A small piece of dough, about 30 g, removed from the dough after the first set of stretch and folds and placed into a small jar with straight sides.  Make sure you pressure the dough firmly into the bottom of the jar trying to eliminate any air pockets.  I got this idea originally from an IG post of Kristen’s (Full Proof Baking). This dough will ferment at the same rate as the larger dough mass assuming you keep it in the same conditions as the larger dough.  You will mark the starting point and can very accurately measure the volume rise of the large dough by the dough in the aliquot jar.

I’ve always had a very hard time measuring rise because I bulk ferment in a Pyrex 8” x 8” square dish and make one loaf at a time.  So when the dough starts out it isn’t even touching the sides of the dish.  I’ve started using the aliquot jar in the past 3-4 bakes and now I can really measure the rise so if the end result of the crumb is a bit too tight I can next time let bulk go further with confidence by using the aliquot jar and get a more fully fermented loaf.  Or vice versa of course if over fermented I can dial back on the fermentation next time.

I hope someone finds this as helpful as I have.  Using this I can learn to judge the visual and tactile features of my dough in a way that I haven’t been able to before.

Benny

idaveindy's picture
idaveindy

Various links, "bookmarks."

Bannetons:

Oval banneton, 10x6x4, with liner:

https://amazon.com/inch-Premium-Banneton-Basket-Liner/dp/B06XJ698WV?tag=froglallabout-20

Oval banneton, 11", with liner:

https://amazon.com/Agile-shop-Banneton-Brotform-Proofing-Handmade/dp/B01HXTLDH4?tag=froglallabout-20

Round banneton, 11.8", with liner:

https://amazon.com/Agile-Shop-Banneton-Brotform-Proofing-Handmade/dp/B01FXA5K3S?tag=froglallabout-20

Round banneton, 12", Brick Oven Baker: 

https://amazon.com/BrickOvenBaker-12-inch-Banneton-Proofing-Basket/dp/B01B9UEP3W?tag=froglallabout-20

Oval, high, 10", Brick Oven Baker:

https://amazon.com/BrickOvenBaker-10-inch-Banneton-Proofing-Basket/dp/B01B9UELCM?tag=froglallabout-20

---

80+ types of flour at General Mills: 

https://www.generalmillscf.com/products/category/flour

Of note to bread and pizza bakers:

See right side for form to locate a distributor based on zip code.

---

To get more tang, and lactic vs acetic:

https://www.thefreshloaf.com/node/62064/want-more-sour

https://truesourdough.com/best-temperature-for-proofing-sourdough-full-guide-how-to/

https://truesourdough.com/18-ways-to-make-sourdough-bread-more-or-less-sour/

https://www.kingarthurbaking.com/blog/2022/02/22/how-to-make-your-sourdough-bread-more-or-less-sour-part-1

-- 

addendum, other references

King Arthur professional flour, mostly 50 lb bags: https://www.kingarthurflour.com/pro/products

Explanation of various types of rye flour, and dark vs whole: https://www.kingarthurbaking.com/blog/2020/09/28/types-of-rye-flour

Volume to weight conversion chart: https://www.kingarthurbaking.com/learn/ingredient-weight-chart

Caputo (mill in Naples, Italy): http://www.mulinocaputo.it/en/flour link broken.
https://www.mulinocaputo.it/art-of-baking/?lang=en
https://www.mulinocaputo.it/linea-cucina/?lang=en

Moul Bie: https://www.grandsmoulinsdeparis.com/produits/farines.html

US distributor of Caputo/All Trumps / mail order/ repacks: https://brickovenbaker.com/collections/all/flour
Brick Oven Baker's explanation of Caputo Flours: www.brickovenbaker.com/pages/information-about-caputo-flours   Out of business.

Central Milling (Utah): www.centralmilling.com/store

Keith Giusto Bakery Supply, KGBS, Petaluma CA, part of Central Milling: https://kgbakerysupply.com/bakery-supply-products

Explanation of W, PL, ash%, extraction, Italian/French/German/US specification systems: www.theartisan.net/Flours_One.htm

Bakerpedia, baking encyclopedia: https://bakerpedia.com/
Ingredients, Processes, Terms, Resources/recipes.

Bread Bakers' Guild of America, formatting formulas: https://www.bbga.org/files/2009FormulaFormattingSINGLES.pdf
https://www.bbga.org/

Comparison of KitchenAid Mixers: https://mixitbakeit.com/compare-kitchen-aid-stand-mixers/

Hemp hearts vs hemp seeds. https://www.besthealthmag.ca/article/hemp-hearts-vs-hemp-seeds/

------

KitchenAid manuals, dough/flour limits:
https://www.manualslib.com/manual/372167/Kitchenaid-Ksm150ps-Artisan-Series-Mixer.html?page=21#manual

"NEVER use recipes calling for more than 9 cups of all-purpose flour or 6 cups of whole wheat flour when making dough with a 5-quart tilt-head mixer"

For a "bowl lift" model, example:
https://www.manualslib.com/manual/806754/Kitchenaid-Bowl-Lift-Mixer.html?page=10#manual

It says: "NEVER use recipes calling for more than 1.68 kg (12 cups) all-purpose flour or 840 g (6 cups) whole wheat flour when making dough with a 4.8 L (5-qrt) Stand Mixer."

------

Panman's How to clean and season cast iron: http://panman.com/how-to-clean-season-cast-iron/

Guide to GF binders: https://www.culturesforhealth.com/learn/gf-sourdough/guide-binders-gluten-free-sourdough-baking/

How butter, sugar, eggs hydrate flour: https://www.thefreshloaf.com/comment/481125#comment-481125

Importance of shaping to build surface tension: https://www.thefreshloaf.com/comment/489849#comment-489849

Starter to Levain to dough, flow chart: https://www.thefreshloaf.com/node/68585/methods-and-rationale-sourdough-starter-maintenance-and-elaboration

Soaker ingredient hydration percents:
https://www.thefreshloaf.com/node/61245/soaker-ingredient-hydration-percents-some-data

Freezing pizza dough:
https://www.thefreshloaf.com/node/68686/freezing-pizza-dough

Debra Wink,  pesky thiol compounds:
https://www.thefreshloaf.com/comment/121566#comment-121566

Summary of what TFL is:
https://www.thefreshloaf.com/node/69078/research-questions#comment-494753

--------------------------------

Australian flour and malt.  Web site specifically for Australian bakers:

https://www.sourdoughbreadrecipe.com.au

Based on this web page, some Australian bread recipes do require diastatic malt: https://www.sourdoughbreadrecipe.com.au/methods/how-to-make-a-bread-dough/

The malt is in step 5 where the water is added.

These two pages talk about Diastatic malt powder:

An australian recipe that calls for a pinch of diastatic malt, and some stoneground (presumably whole grain) flour which adds some bran and its attendant enzymes. https://www.sourdoughbreadrecipe.com.au/recipes/sourdough-baguettes/

--------------------------------

Recipes:

Favorite tortilla:  www.youtube.com/watch?v=Fy3VZcRJkl4 or www.paulaq.com  - don't use all the water. Or www.paulaq.com/mexican-flour-tortillas_1.html

Detroit Pizza, J Kenzi Lopez-Alt: https://www.seriouseats.com/detroit-style-pizza-recipe

Cast iron Pan Pizza: https://www.seriouseats.com/recipes/2013/01/foolproof-pan-pizza-recipe.html

Cast iron Pan Pizza, Ragusea: https://www.youtube.com/watch?v=uYxB4QBlrx4
Also see Binging with Babish channel.

Make your own GF mix: http://www.thebreadkitchen.com/recipes/gluten-free-flour-mix/

Great G/F web site:
https://glutenfreeonashoestring.com/all-purpose-gluten-free-flour-recipes/

Swedish "Polar bread" on a griddle: http://www.thebreadkitchen.com/recipes/polar-bread/

Naan with yeast: http://www.madhurasrecipe.com/

Borodinsky:


Whole wheat sandwich bread: https://www.seriouseats.com/100-whole-wheat-sandwich-bread

Mark Bittman's pizza dough: https://www.markbittman.com/recipes-1/pizza-dough

Egg pasta, Helen Rennie: https://youtu.be/m_fu5RaXMVk

How to make baking powder. 1 part baking soda, 2 parts cream of tartar, 1 part corn starch. https://www.allrecipes.com/article/how-to-make-baking-powder/

How to make cultured buttermilk:
https://www.thespruceeats.com/make-your-own-buttermilk-p2-995500#toc-how-to-make-cultured-buttermilk
https://www.foodnetwork.com/how-to/packages/food-network-essentials/how-to-make-buttermilk
http://benstarr.com/blog/all-about-buttermilk/

Citric acid to pH calculations: https://www.humblebeeandme.com/hive/topic/how-much-citric-acid-you-should-weight-to-get-a-specific-ph/
https://ezcalc.me/ph-calculator/

How to make rice paper
https://www.wikihow.com/Make-Rice-Paper

Trailrunner's Trinity: 9% of _dough_ weight: 3% evoo, 3% honey, 3% yogurt/buttermilk.  This replaces equal weight of water. IE, for 1000g dough, take out 90 g water, and add 30g evoo, 30g honey, 30g yogurt. https://www.thefreshloaf.com/comment/512335#comment-512335

--------------------

Recipe web sites:

www.thefreshloaf.com
www.theperfectloaf.com - Maurizio Leo. 
www.allrecipes.com
www.seriouseats.com
www.thespruceeats.com
www.theryebaker.com - Stanley Ginsberg. 
www.ploetzblog.de - Lutz Geissler. In German. 
www.brotdoc.com - der Brotdoc, Björn Hollensteiner. In German. 
https://brotgost.blogspot.com - "Rusbrot." In Russian. 

----

Cookbook errata:

Cresci, by Massari: https://www.facebook.com/groups/338771723354166/about/

Bread, 1st edition only, by Hamelman:
http://mellowbakers.com/ErrataSheetFeb2011.pdf
or: http://mellowbakers.com/HB/index.php/topic,242.msg1129.html#msg1129
or: http://www.bit.ly/BreadErrata

Crumb, by Bertinet: https://www.thebertinetkitchen.com/2019/03/28/crumb-whoops-erratum/

Inside the Jewish Bakery, by Ginsberg & Berg: https://www.stanleyginsbergbooks.com/ITJB/files/IJB_Errata.pdf

Southern Ground, by Jennifer Lapidus:
https://static1.squarespace.com/static/50f71f63e4b09e4ad0220969/t/60b7f449632f1b06b3f002d9/1622668361322/Errors+final2.pdf

The Pizza Bible, Gemignani. Errata for early printings:
https://web.archive.org/web/20191218172657/http://www.thepizzabible.com/errata

------

Videos:

TFL users:

DanAyo: www.youtube.com/channel/UC7mXjnPpTDoVJxRdrG3ZeYw/

Alfanso: www.youtube.com/channel/UCN9_G-eUBD5tMnrWItQGUPQ/

The Roadside Pie King (Will F.): www.youtube.com/channel/UCocnoxG7aduh6hUqB19UJkQ/

Benito: https://youtube.com/channel/UCw2VDjLY7eDXxwgzvLZJ8Gg/videos

Brotcraft: https://youtube.com/user/stefanjkramer

_JC_ : https://www.youtube.com/channel/UCUy-wB_IPjBl_cDydF0R2mg

Other baking video channels:

Steve Gamelin, no-knead but with yeast, not sourdough. His extremely simple method got me out of the bread machine, and into artisan/no-knead bread. A big round of applause for him. If you want K.I.S.S., this is it: www.youtube.com/user/artisanbreadwithstev/

The Bread Code: https://www.youtube.com/c/thebreadcode

Rus Brot (in Russian): www.youtube.com/c/rusbrot

Bake with Jack: www.youtube.com/channel/UCTVR5DSxWPpAVI8TzaaXRqQ/

Full Proof Baking, Kristen Dennis: www.youtube.com/channel/UCym_8JHA4htlFLIHGpNZGrQ/

Joshua Weissman: www.youtube.com/channel/UChBEbMKI1eCcejTtmI32UEw/

Jeff Hertzberg & Zoe François of Bread in 5 minutes/day fame: www.youtube.com/user/BreadIn5/videos

Shaping, gluten cloak: https://www.youtube.com/watch?v=bIb8fC9BdWs

Jeff's own channel: www.youtube.com/user/jhertz10/videos

Peter Reinhart on the TenSpeedPress channel: www.youtube.com/playlist?list=PLYzonddbxYw8ghFfHIUJz9POrnW4tmQ4E

Ken Forkish (FWSY and Elements of Pizza): www.youtube.com/user/KensArtisan/

King Arthur Flour (Jeff Hamelman & Martin Philip): Most excellent!
www.youtube.com/user/KingArthurFlour/playlists

Breadtopia: www.youtube.com/user/breadtopia/videos

Foodgeek: https://www.youtube.com/channel/UC7eLtGAzNECUqurqMdiNYJg

How to shape dough: https://www.youtube.com/watch?v=IxVSlizlt-s
More on shaping, why: https://www.youtube.com/watch?v=JvA6jJsr0HY

Foodgeek web site: https://foodgeek.dk/en/

Trevor J. Wilson: https://www.youtube.com/channel/UCRK2AFfEfjhFcpYtu44Uzvw

Trevor's website:  breadwerx . com

Stanley Ginsberg: https://www.youtube.com/watch?v=QuOv-v8h1L0
Websites: https://theryebaker.com
https://nybakers.com

Sourdough Journey: https://www.youtube.com/channel/UCvFd727zQvioesPXe3eKkfg

Northwest Sourdough, with Teresa Greenway: https://www.youtube.com/c/NorthwestSourdough/videos

or by playlist: https://www.youtube.com/c/NorthwestSourdough/playlists

Teresa's commercial video courses: https://www.udemy.com/user/teresalgreenway/

Teresa's website: https://northwestsourdough.com/

Proof Bread: https://www.youtube.com/channel/UCPYHRKEqMycep7r5kO-1org

Bread by Joy Ride coffee: https://www.youtube.com/channel/UCcLCX8VIcNWIu6BJyjWQDww

Elly's Everyday Whole Grain Sourdough channel:
https://www.youtube.com/channel/UCozBpyoi-j7plavuZKLIgQg

------------

Food storage: https://www.churchofjesuschrist.org/topics/food-storage/longer-term-food-supply?lang=eng

Pages