The Fresh Loaf

A Community of Amateur Bakers and Artisan Bread Enthusiasts.

Most bookmarked

SylviaH's picture
SylviaH

Lemon - Rosemary Cream Scones

These scones are lovely and moist and have a wonderful flavor.  They taste great with jam and butter.  I enjoyed a wedge with mascarpone cheese.  They make for nice looking Easter scone.

My variation on a lemon scone recipe.

8 oz. plus extra for some light kneading and adjusting hydration - I used Pillsbury All Purpose Flour

2 Tablespoon Sugar

1 Tablespoon Baking Powder

1/4 teaspoon Salt

1/4 cup Unsalted Butter

2 teaspoons Lemon zested

2 teaspoons Fresh Rosemary - clipped into small pieces

2 Medium Eggs

4oz. whipping cream - I only had heavy cream so I mixed half heavy cream and half milk

Sparkling sugar for sprinkling about 2 Tablespoons -

In a Medium bowl.  Wisk all the dry ingredients, lemon zest and rosemary in a medium bowl.

Using a pastry cutter add the butter until the butter is in very small pieces..the flour will look crumbly.

In a small bowl.  Lightly mix 2 Medium eggs and cream.

Make a well in the flour mixture and add the egg, cream mixture into the center.

Mix quickly and gently until all is moistened.  I use a fork.

Dump out onto a floured surface and gently knead and shape into a round.  

Brush with some cream and sprinkle with sparkling sugar.  Make slices with a wet knife into eight wedges.

Bake 400F pre-heated oven for 20-30 minutes or until lightly golden brown.  I baked for 20 min. on 400F convection.

Sylvia


dmsnyder's picture
dmsnyder

Gérard Rubaud Pain au Levain


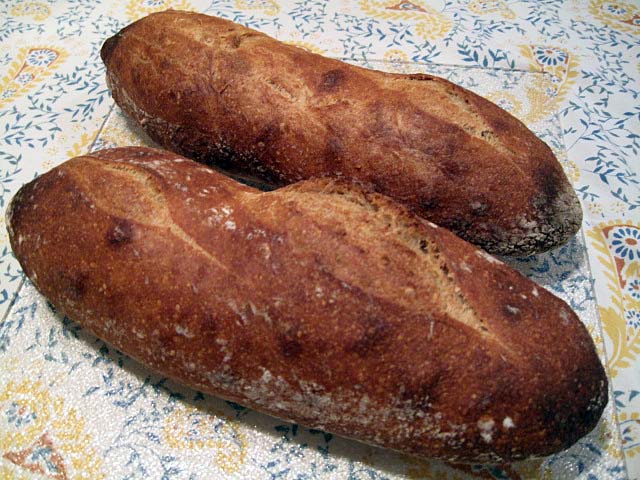
Shiao-Ping's beautiful miches, based on MC's interviews with Gérard Rubaud, inspired me to attempt Rubaud's pain au levain myself.


Rubaud's bread is made with 3 very firm levain builds, the final being incorporated in his final dough. He uses a flour mix with 70% AP flour and the remaining 30% a mix of whole wheat, spelt and rye flours. Remarkably, he grinds the flours to feed his levain fresh for each build, and he uses the same flour proportions for each levain build as used in his final dough. Not having a grain mill, I used store-bought flours. I measured out each flour for each build. If I make this bread again, I would make one batch of mixed flour for all the builds and the final dough. This would save time and also be more precise, given the very small amounts of flour in the levain builds.

Note that MC's interviews also indicate Rubaud salts his levain builds at 1% of the flour weight, in order to control their speed of ripening. I did not do this.

My formula is taken from Shiao-Ping's calculations which were taken from MC's interviews. I divided her quantities in half and, rather than a miche, made two smaller (480 gm) bâtards. Rubaud mixes his dough by machine. Shiao-Ping mixed her dough entirely by hand. I started my mixing in a stand mixer, but continued developing the gluten by hand, as described below.


First build


Ingredient

Amount (gms)

Ripe levain (stiff)

3

AP flour

5

Whole wheat flour

1

Spelt flour

0.5

Rye flour

0.5

Water

4

Total

14


Second build


Ingredient

Amount (gms)

Ripe levain (stiff)

14

AP flour

10.5

Whole wheat flour

2.5

Spelt flour

1.5

Rye flour

0.5

Water

8

Total

37


Third build


Ingredient

Amount (gms)

Ripe levain (stiff)

37

AP flour

35

Whole wheat flour

9

Spelt flour

4.5

Rye flour

1.5

Water

28

Total

115

Notes for levain builds

  1. The first levain was made with my usual firm sourdough starter which I feed 1:3:4 (starter:water:flour) with a flour mix of 70% AP, 20% Whole wheat and 10% Whole rye flours.

  2. To mix each build, dissolve the firm starter in the water in a small bowl. (I use a small dough whisk.), then add the flours and mix thoroughly into a ball.

  3. The first build was fermented for 10 hours, the second and third for about 8 hours each. This was in a cool kitchen, so your times my vary with the activity of your starter and the ambient temperature.


Final dough


Ingredient

Amount (gms)

Ripe levain (stiff)

115

AP flour

322

Whole wheat flour

82.5

Spelt flour

41.5

Rye flour

14

Water

377

Salt

10

Total

962


Method

  1. Mix the flours and the water. Cover and let it sit to autolyse for 20-60 minutes.

  2. Divide the starter into about 6 pieces and add them to the autolyse. Sprinkle the salt over all and mix thoroughly.

  3. In a stand mixer, mix with the dough hook on Speed 2 for about 10 minutes. There should be some gluten development, but the dough will be very gloppy. It will not clean the sides of the bowl.

  4. Transfer the dough to an oiled bowl. Cover the bowl tightly.

  5. After 20 minutes, stretch and fold in the bowl for 30 strokes. Cover the bowl tightly.

  6. Repeat Step 5. twice more.

  7. Transfer the dough to the board and stretch it to a large rectangle and fold it like an envelope. Replace it in the bowl and cover.

  8. After 45 minutes, transfer the dough to a floured board and do another stretch and fold.

  9. After another 45 minutes, transfer the dough to the board and divide it into two equal pieces.

  10. Pre-shape each piece into a round and let them rest, covered, for 15 minutes.

  11. Shape each piece into a bâtard.

  12. Proof en couche until expanded by 50-75%.

  13. One hour before baking, pre-heat the oven to 500ºF with a baking stone and steaming apparatus in place.

  14. When the loaves are ready to bake, pre-steam the oven.

  15. Transfer the loaves to a peel. Score them, and then transfer them to the baking stone.

  16. Steam the oven again. Turn down the oven to 450ºF.

  17. Bake for about 30 minutes, until the internal temperature of the loaves is at least 205ºF, the bottom gives a hollow sound when thumped and the crust is nicely browned.

  18. Transfer the loaves to a cooling rack.

  19. Cool completely before slicing.


Although I got good gluten development, the dough remained very loose. This was expected, given its high degree of hydration. However, I did not expect how the loaves stuck to the “well-floured” couch and transfer peel. The loaves deflated significantly in the process of transferring them to the Super Peel ™. The latter handled the loaves beautifully in transferring to the stone. No additional sticking.

There was very good oven spring, and the cuts on the loaf which didn't stick to the transfer peel as much opened up reasonably well, suggesting that the loaves were not as over-proofed as their deflation on transferring had suggested.

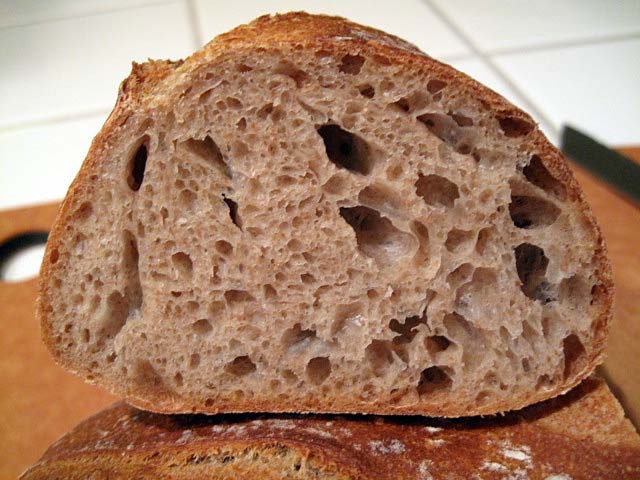
By time the bread had cooled, the crust was chewy with just a bit of crunch. (I did not follow my customary practice of drying the loaves in the cooling oven for a few minutes after they are fully baked.) The crumb was very well aerated. It had an aroma that seemed whole-wheaty, yet different. The flavor was excellent – complex and wheaty with some sweetness and more sourdough tang than I expected.


Wonderful bread. I want to make it again, but next time I'll flour the couche more heavily.

David


Shiao-Ping's picture
Shiao-Ping

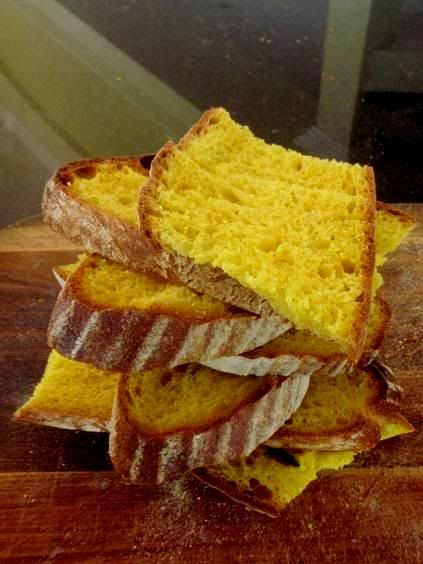
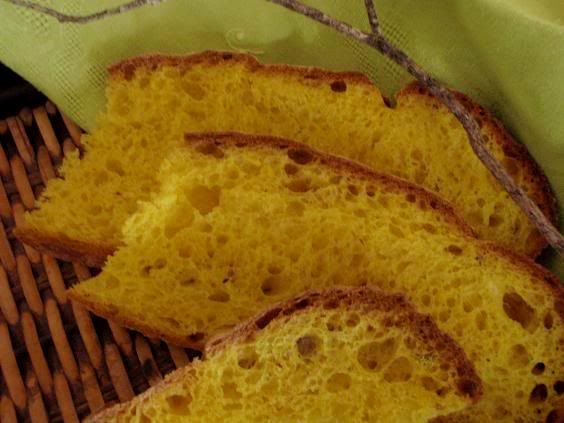
Orange Turmeric Pain au Levain

Many years ago I went to South India with a group of Taiwanese friends to attend Dalai Lama's annual congregation.  It turned out to be a bad idea for me as I never liked group activities.  I deflected half way through the event and years' later I still felt embarrassed by it. 

It may sound funny but one of the things I missed about the trip was the Tibetan butter tea that they served throughout the congregation.  Dalai Lama is a very personable leader; he made sure that everyone gets his share of butter tea.  I first read about this strange salty tea from Alexandra David-Neel's My Journey to Lhasa.  She was French and the first Western woman to ever step foot in Lhasa early last century.  When there is nothing else to eat, this butter tea can be a meal on its own.

The second thing I missed about the trip was the vegetarian lentil curry soup that they served for lunch with Nan breads.  It was so delicious that I asked to have a tour at their kitchen facility and see how they cooked this dish.  But it was many years ago now and I have never been able to replicate it.  In memory their soup was a lot more soupy and flavorsome than mine.

Anyway I made a big pot of lentil curry soup with chicken the other day and I was wondering what bread I would make to go with this soup until I saw my husband juicing an orange.  I had decided that I wanted to make some sort of yellow/orange colored bread and so the issue was how to get that color into the bread and what the dominant flavor it would be in the bread.  I have been making Pain au Levain variations and I knew this bread would be no exception.  I thought orange and a mild curry flavor using Turmeric powder would go well together - orange would soften the taste of turmeric and gives it an extra dimension.  Hence, Orange Turmeric Pain au Levain.


My Formula 

  • 465 g starter at 75% hydration (5% rye)
  • 465 g flour (5% rye flour and the balance white flour)
  • 155 g orange juice (about 2 medium oranges)
  • 120 g water
  • 6 g (2 tsp) turmeric powder
  • Very fine zest (from one orange)
  • 14 g salt

Total dough weight 1.2 kg and dough hydration 65%

Bulk fermentation 2 hours with 2 stretch and folds and proofing 2 hours (assuming dough and room temperature around 23 - 25C / 73 - 76F).  Retardation in the refrigerator 9 hours.  Pre-heat oven to 250C / 480F.  Bake with steam at 220C / 430F for 15 minutes, then lower the temperature to 210C / 410F for another 25 minutes.  


I always love orange zest in baked goods; the aroma is very refreshing.   Turmeric, like ginger, is a root vegetable and is an important ingredient for curry.  Turmeric and coriander go very well together.  Dipping a slice of this Orange Turmeric Pain au Levain into a lentil soup which is garnished with fresh coriander herb, you pick up some beautiful coriander aroma as you bite into the bread.

We were watching the latest series of Great British Menu on TV while we were having our soup dinner.  In this series the chefs in Britain competed to honor the returning soldiers serving in Afghanistan with a homecoming banquet that captured the authentic tastes of Britain.  One of the dishes that were chosen was a curry dish.  What was interesting to me was that one of the judges said that curry is an authentic British taste.  Hmm... how interesting.


Shiao-Ping 

Shiao-Ping's picture
Shiao-Ping

100% Sourdough Pain de Tradition with 85% Hydration - Miche, Pointe-a-Calliere or Pain Poilane?

I've been threatening to collapse my San Francisco starter and call it a day because it performs much slower than my other starters.  At the last minute, David (dmsnyder) brought to my attention James MacGuire's other recipe, Miche, Pointe-a-Calliere in Hamelman's "Bread," as well as Pain Poilane in Daniel Leader's "Local Breads."  The full title of the latter is "Whole Wheat Sourdough Miche inspried by Pain Poilane, pain au levain complet," and according to Daniel Leader, it is "a symbol of artisanal excellence in France and around the world."  David also mentioned Peter Reinhart's Poilane-Style Miche in "The Bread Baker's Apprentice."  

As all three formulae employ a whole wheat starter (to be exact, the flours used for the starters and the final doughs are, respectively, high-extraction whole-wheat flour in Hamelman's book, stone-ground whole wheat flour in Leader's book, and a sifted medium-grind whole wheat flour in Reinhart's book), I thought I'd convert my San Francisco starter into an Australian wholemeal starter first before I decide on an avenue to pursue.  I have been warned that my Australian wholemeal flour is actually white whole wheat flour for North America.  All the better for my endeavour here as the standard whole wheat flour is hard red spring wheat which may not be the most desirable flour for hearth loaves.   

Formula Synopsis Comparison     


Miche, Pointe-a-Calliere

(Hamelman)

Pain Poilane

(Leader)

Poilane-Style Miche

(Reinhart)

Starter hydration 

60%

50% 

59.4%

Starter as % of final

dough flour

40%

25% (or 45%)*

62%

Final dough hydration

82%

71.5%

61.6%

Mixing

Mix flour & water, autolyse

20-60 min, then add salt &

starter

Mix flour & water, autolyse

20 min, then add salt &

starter

Mix everything in one go

Kneading

On 2nd speed for 2 - 2.5 min,

the dough is loose & gluten

only moderately developed

By hand for 12 - 14 min,

the dough should pass

windowpane test

By hand for 12 - 15 min,

the dough should pass

windowpane test

Bulk fermentation

with folding

2.5 hrs with 2 - 3 foldings

@ 40 - 50 min intervals

3 - 4 hrs with one brief

kneading (1 - 2 min)

after one hr

4 hrs or until nearly

doubles in size

(no folding)

Shaping

miche

miche

miche

Final proofing

2 - 2.5 hrs

2 - 3 hrs

2 - 3 hrs

Dough size for home

baker

1665 g

1010 g (or 1110 g) *

2060 g

Baking

440F for 15 min, then

420F for 45 min

470F for 40 - 50 min

Heat oven to 500F, once

dough is loaded, turn it

down to 450F, bake 25 min

then 425F for 30 - 40 min

* There is a discrepancy in figures in Leader's book (page 120); the instruction says leveain of 125 g (25%) is to be used however the table lists a figure of 225 g (45%); hence, the resulting difference in final dough sizes. 

Just by looking at the comparison above, I immediately know that I would like the Hamelman's (ie, James MacGuire's) formula the best.  However, I have a very basic problem here that I cannot reconcile with intellectually.  In Hamelman's book, it specifically says to make the final levain build 12 hours (@ 70F) before the dough mix, and also in Leader's book, it is 8 - 12 hours (@70 - 75F).   My problem is: if final levain build takes 12 hours, why, then, would the dough fermentation (bulk & final proofing all-up) only take half that time?  (Note: in both cases, dough fermenting temperature is recommended roughly the same as the starter temperature.)   There seems to be the pressumption that if your starter is very strong (after 8 - 12 hours' final building), it should be able to leaven dough many times its size with half the time (at roughly the same temperature).   From past experience, I already know what my sourdough would look like if I followed the instruction to the letter.

Anyway, I didn't want to go there.  I decided I wanted to do something bold - no harm, it's only an experiment:

  • 85% dough hydration: my thinking is if white flour can take 80% hydration, wholemeal can take 85%!
  • 12 hours all-up for bulk fermentation and final proofing: my rationale is my San Francisco starter performs very slowly and the Australian mild winter gives me 70 - 75F room temperature, the ideal temp for the fermenting dough.

My Formula

  • 220 g Australian white wholemeal starter @ 75% hydration
  • 414 g Australian white wholemeal flour
  • 365 g water
  • 10 g salt

 You cannot get ingredients more simple than the above list of 4 items!

Main points of my steps are:

  1. 4 & 1/2 hours of bulk fermentation (@ 70 - 75F ) during which 5 sets of 8 - 10 folds were performed, the last set of which also served as pre-shaping as in my Pain de Tradition post.
  2. Then, shaped the dough into a boule and placed it in a basket line with floured towel.
  3. 7 & 1/2 hours of proofing  (@ 70 - 75F).  For the whole time, I checked it every 15 minutes or so to make sure it's not over-proofed. 
  4. When I checked it the last time before I put it into the fridge for the night (for 7 hours) with a floured finger, the dough still sprang back with some "force."
  5. This morning, I brought it out of the fridge, let it sit at room temp for 4 hours! before I baked it. 

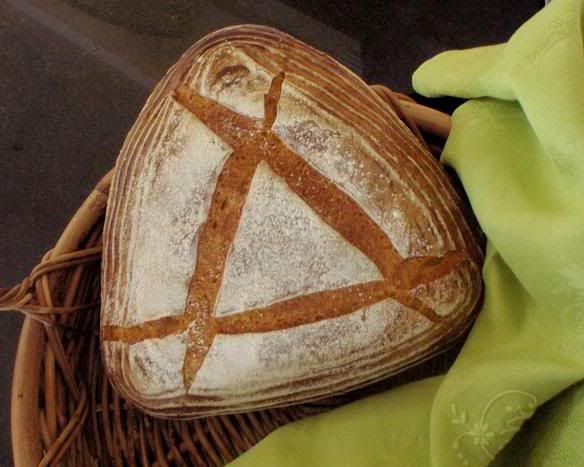
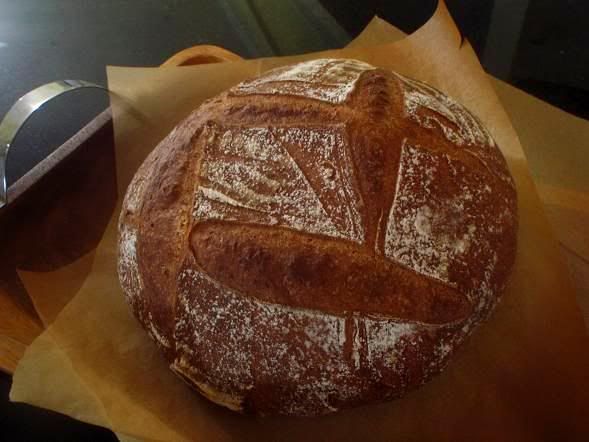
And here is this little baby,


    100% Sourdough Pain de Tradition with 85% Hydration (100% Australian wholemeal flour)


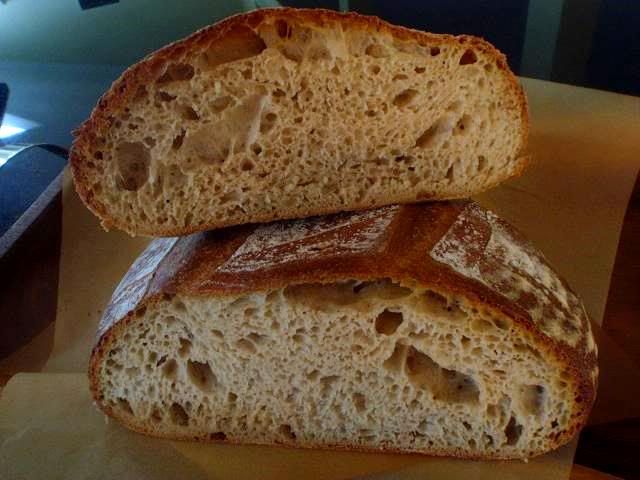
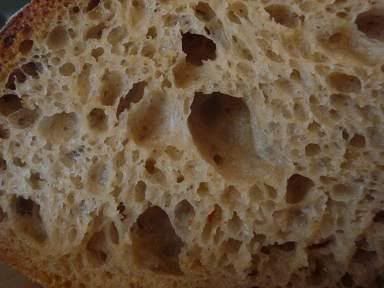
                                  the crumb


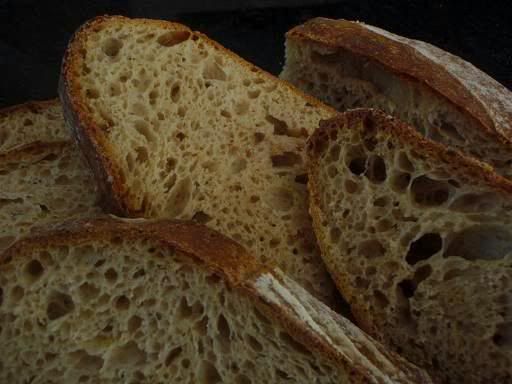
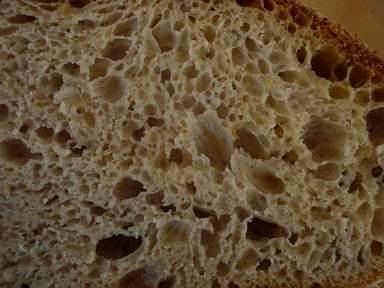
          and more crumb

Throughout the whole time I was aware that over-fermenting/proofing would mean:

  • no oven spring
  • the dough may collapse
  • the crust may be baked to a ghostly pale color
  • the crumb may taste like glue
  • the taste may be overly sour

In this sourdough,

  • there was a good oven spring
  • the dough held up really well, with no "bread improver" of any sort
  • the crust color was perfect to my liking
  • the crumb tastes mildly chewy and springy
  • there is an assertive sourness, but not excessive.

In fact, the formula and the steps here yielded a complex crumb flavor, far more than the humble ingredients list would have you believed.


Morale (if there is such a thing):  What I learned in this bake is that I have to know my starter to do sourdough well.   As Dan Lepard said,

... a ... baker recognizes that the doughs he makes are living things with individual identities, that they ultimately create themselves.  The baker's skill is to encourage natural developments, and the bread that results from this understanding will always taste better....

If I simply follow recipes without understanding my starter, my dough, and my environment (I mean, the environment the starter and the dough is in), no recipe can guarantee any good sourdough. 

It's near bed time as I was signing off.  My son danced out of his bedroom and asked, "Come on, mum, where is the music?"


Shiao-Ping


Susan's picture
Susan

63% Hydration Sourdough

A pretty loaf; more fluffy crumb and less sour than my Ultimate loaf, well-risen, excellent thinner crispy crust.  I suspect retarding overnight would increase the sour somewhat. 

60 grams 100% starter
180g water
300g high-gluten flour
6g salt

Mix starter and water, add flour and salt.  Mix until rough.  Cover and rest 10 minutes.  Fold from bottom to top around tub.  Cover and ferment until doubled (~7 hours@lower 70'sF).  Stretch and fold.  Let relax.  Shape and put in linen-lined colander until floured finger leaves an indentation (~2.5 hours).  Place in 530F oven, covered, for 10 minutes.  Reduce heat to 430F.  Remove cover at 20 minutes.  Continue baking for 12-15 minutes.  Turn off oven and leave for 10 minutes.  Cool on rack. 


dmsnyder's picture
dmsnyder

Susan from San Diego's "Original Sourdough" -


Susan from San Diego, of “Magic Bowl” fame, has posted two of her basic sourdough bread recipes. These have been on my lengthy “to bake list” for a long time. The photos of her breads are stunning, and many other TFL members have baked from her recipes and enthused about their results.

This weekend, I baked two boules of her “Original Sourdough” - to be distinguished from her “Ultimate Sourdough.” The latter can be found here:

http://www.thefreshloaf.com/node/6927/well-i-finally-did-it

I made some modifications in procedures which I will describe, but Susan's original “Original Sourdough” formula can be found here:

http://www.thefreshloaf.com/node/8884/susan039s-original-sourdough-3262007


David's Un-original Sourdough after Susan from San Diego's Original Sourdough

Note: This recipe involves 3 “builds” - a “starter,” a “sponge” and the “dough.”

Starter

Active starter 1Tablespoon

Water           15 gms

Bread flour    25 gms


Sponge

Water           240 gms

Bread flour    173 gms

Whole wheat flour 50 gms (I used KAF White Whole Wheat.)

Starter All of the above


Dough

Bread flour      284 gms

Water              60 gms

Olive oil           14 gms

Salt                7.5 gms


Procedures

(I did my mixing in a KitchenAid Accolade.)

Make the Starter by dissolving the active starter in the water in a small bowl, adding the flour and mixing until all the flour is well hydrated. Cover tightly and allow to ferment for about 8 hours. It should be puffy and slightly bubbly. Refrigerate for up to 3 days if you are not ready to use it immediately.

Make the Sponge by dissolving the Starter in the water in a medium-sized bowl. Mix the flours and add them to the dissolved starter. Mix thoroughly and then cover the bowl tightly. Allow the Sponge to ferment until it is bubbly and has expanded - about 8 hours.

Make the dough by dissolving the Sponge in the water and mix in the olive oil in the bowl or your mixer. Mix the flour and salt, add it to the wet ingredients and mix with a spoon or spatula or with the paddle at Speed 1 to a shaggy mass. Cover the bowl and let it rest for 20 minutes to an hour. (This will allow the flour to hydrate and the gluten to start developing.)

Switch to the dough hook and mix at Speed 2 until you have moderate gluten development. (This took me about 10 minutes.) The dough should clean the sides of the bowl but stick to the bottom with a diameter of about 6 inches.

Scrape the dough onto your lightly floured bench and do a couple of stretch and folds. Transfer the dough to a lightly oiled bowl and cover tightly. (I use a 8 cup glass measuring “cup” with a tight-fitting plastic cover.) Stretch and fold the dough 3 times at 30 minute intervals, then allow to rise in the bowl until double the original volume – about 4 hours in my coolish kitchen.

Divide the dough into 2 equal parts and pre-shape into rounds. Cover and allow to rest for 10-15 minutes. Then, shape the pieces into boules and place each in a floured banneton. Cover with plastic wrap, a towel or place the bannetons in food grade plastic bags.

At this point, you can either allow the loaves to proof until 1.5 times their original size or retard them for 8-12 hours in the refrigerator. (For this bake, I proofed and baked one boule immediately and retarded the other.) If you retard the loaves, allow an extra hour or two for proofing – about 4 hours from when you take them out of refrigeration until you bake them.

Forty-five minutes (or 45-60 minutes, if using a baking stone) before baking, pre-heat your oven to 480F with a sheet pan or baking stone in the oven. (Make sure your sheet pan is large enough to form a base for the cover you will be placing over the loaf. See below. I used a heavy-gauge black steel, non-stick sheet pan that is larger than the standard “half sheet” size.)

When the loaf is proofed, transfer it to a peel dusted with semolina or corn meal, load it onto your sheet pan or stone and immediately cover it with a stainless steel bowl that has been pre-heated with hot tap water. (Dump the water but do not dry the bowl just before loading the loaf in the oven.)

Bake for 15 minutes, then remove the bowl from the oven, close the door and lower the temperature to 450F. Bake for another 15-18 minutes until the loaf is nicely colored and its internal temperature is at least 205F. Turn off the oven and leave the door ajar with the loaf in it for another 5-10 minutes to dry the crust.

Cool the loaf on a rack completely before slicing.


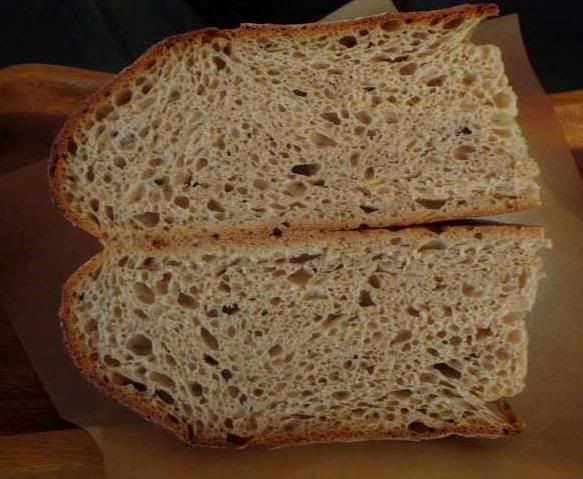
The loaf that was baked without overnight cold retarding was much like a French pain au levain. Right after cooling, it was only very mildly sour and had a nice wheaty flavor. Thirty-six hours later, it had a more pronounced but still mild sourness. The flavors had melded and were improved, to my taste. As you can see, the crust was rather light-colored. There was almost no coloration at the point I removed the bowl. The boule had moderate oven spring but great bloom. This is typical of the results I get when I bake loaves covered in this manner. The crust was crisp, and the crumb was nice and open but chewy.
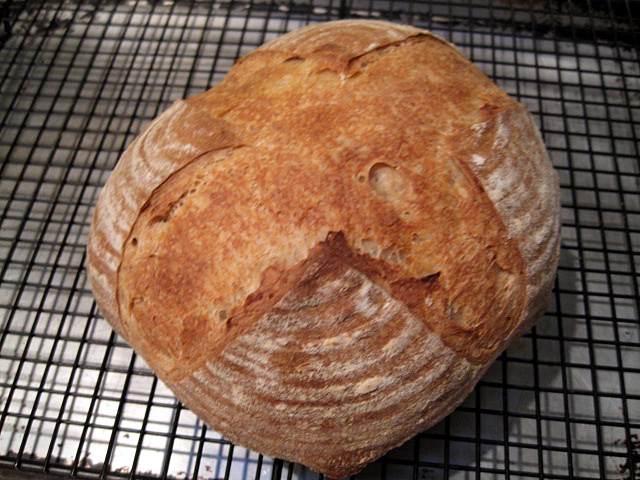
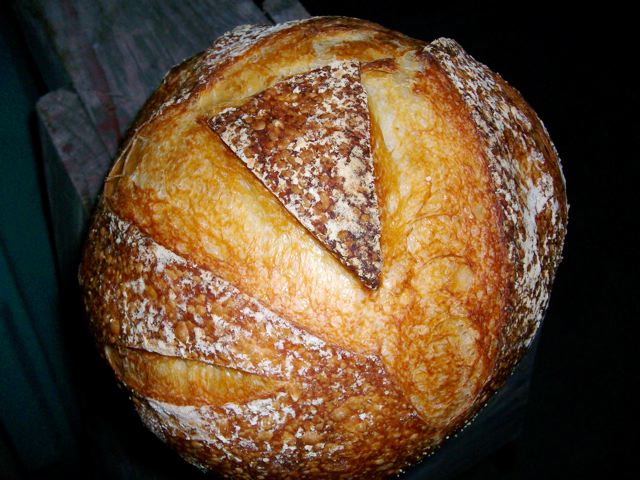
Susan from San Diego's SD boule

Susan from San Diego's Sourdough (Not cold retarded)
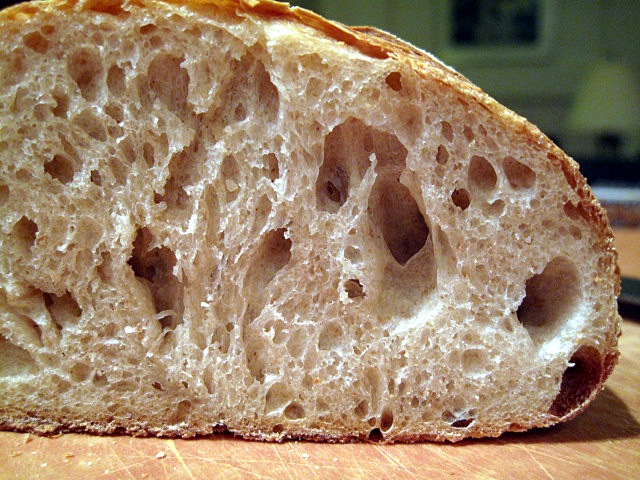
Susan from San Diego's Sourdough (Not cold retarded) Crumb

I baked the cold retarded loaf the next day. This time, I baked the loaf covered for the first 15 minutes, but on a baking stone rather than a sheet pan. Also, I preheated the oven to 500F then turned it down after loading the loaf. I baked at 450F for 30 minutes total, then left the loaf in the turned off oven with the door ajar for another 5 minutes.

As you can see, the second loaf had significantly greater oven spring. I think this was due to the hotter initial temperature and, maybe, the stone. Also, the crust is significantly darker, which I prefer in this type of bread.
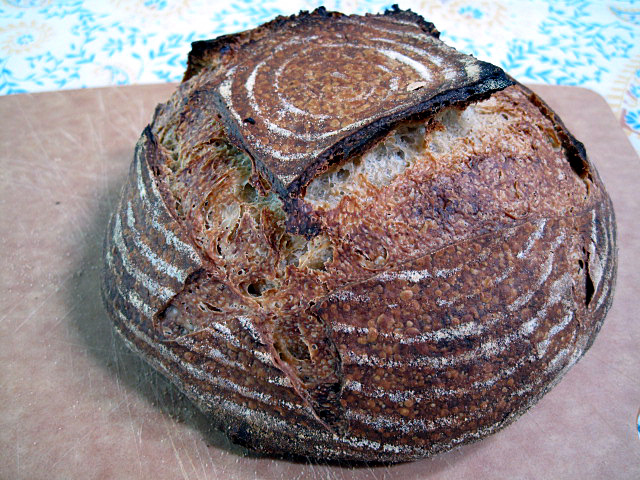
Susan from San Diego's "Original Sourdough" baked after cold retardation.
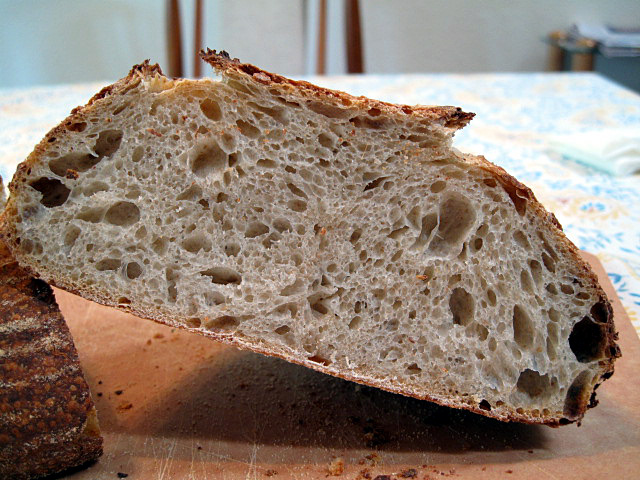
Susan from San Diego's "Original Sourdough" baked after cold retardation - Crumb

This loaf had a crunchier crust and significantly more sour flavor than the loaf that had not been cold retarded. The crumb was chewy but maybe a bit less than the loaf baked the night before.  To my taste, this loaf was just about perfect - very close to my personal ideal sourdough bread. I bet it's going to be even better the next day.

Thanks Susan!

David


Ciabatta with Poolish

JMonkey

This traditional Italian bread is made from a very wet dough and is barely shaped. As a result, it’s full of nice, big holes. Great with olive oil or a good-tasting vinegar, and some pasta. This recipe was adapted from “Bread” by Jeffrey Hammelman.

Formula:
    * White flour: 100%
    * Water: 73%
    * Salt: 2%
    * Instant yeast: 0.36%
    * 30% of the flour is pre-fermented as a poolish at 100% hydration with .07% yeast

Poolish:

    * White flour: 136 grams or about 1 cup
    * Water: 136 grams or about ½ cup
    * Instant yeast: Just an eeny weeny pinch (about 1/32 of a tsp or 1/10 of a gram)

Final dough:
    * All of the poolish
    * White flour: 318 grams or two generous cups
    * Water: 195 grams or 1.25 cups +1 Tbs
    * Salt: 9 grams
    * Instant yeast: A heaping 1/8 tsp or .5 grams

The night before: Preferment
The night before, dissolve the yeast into the water for the poolish, and then mix in the flour. Cover and let it ferment at room temperature for 12-16 hours. Once the poolish has bubbles breaking on top and has started to wrinkle, it's ready. It'll also smell ... really nice - sweet and nutty.
   
Mixing and dough development
For the final dough, measure out the water and pour it into the poolish to loosen it up. Then pour the entire mixture into a bowl. Mix together the salt, yeast and flour, and then add it to the bowl as well. Mix it all up with a spoon and let it sit for one hour. At one hour, give it a stretch and fold, followed by two more every 30 minutes. Then let it ferment for another hour or  two, for a total of 3-4 hours bulk fermentation.

Shaping
Remove the dough onto a well-floured surface, and gently pat it out into a rectangle, carefully degassing any truly gigantic bubbles that you notice. That’s it. No more shaping required. Let it rest, covered, for about 90 minutes.
 
Baking

Dimple the loaf with wet fingers all the way across and almost all the way through to the bottom of the loaf. Load onto a hot stone at 460 degrees with steam and bake for about 35 to 40 minutes. Let it rest one hour before slicing.

Keeping Starter on the Counter

NOTE: This method works well for those who bake sourdough bread muliple times during the week, and who also like making other baked goods with leftover starter. In this chapter, a stiff starter (60 percent hydration) is discussed, but these techniques will work just as well for a wet starter (100% hydration). This personal account was written by JMonkey.

This is how I maintain my own starter, which I created in 2005. I'm a telecommuter who works from home, and I bake bread for the family two to three times a week. Occasionally, I'll make a loaf with commercial yeast, but typically, I make sourdoughs. Also, on the weekend, I like to make sourdough English muffins and sourdough waffles.

Keeping my starter in the fridge meant I was constantly trying to remember when I needed to take the stuff out to rev it up for bread, and I'd often realize too late that I didn't have enough starter for the muffins or waffles.

After some tinkering, I finally decided to keep the starter on the counter and feed it once or twice a day, which means I've always got at least enough active starter for my overnight whole grain sourdough, and, if I'll need more for a daytime sourdough, I've got enough to seed a bigger amount that can ripen while I sleep. The regimen that I now follow also has the advantage of not wasting anything, because I use all the extra starter stored in the fridge to make all the waffles and English muffins I want. Since both of these recipes derive most of their rise from the interaction of acids and baking soda, using week-old starter from the fridge has enough oomph for leavening and flavor, given that it's gotten pretty acidic already.

Anyway, I'm not saying this is the way to maintain a starter - it's just what works for me at this time in my life.

I usually feed it twice a day, once in the morning and once again before bed. Sometimes I forget, though, and only feed it once a day, but it doesn't seem to mind much. I keep it at 60% hydration, which is pretty stiff, but I find it's less messy and stands up a bit better that the wet stuff would to a missed feeding here and there, due to my forgetful nature. Here's how I feed it (it's a 1-3-5 ratio for starter-water-flour by weight).

In the morning, it hasn't risen much, but it feels puffy, and when I break it open, it's clearly aerated inside. Sometimes, it actually blows the lid off the plastic container.

It weighs about 45 grams, so I take 5 grams of it (about the size of a small marble) and put the rest in my fridge bowl. These leftovers will find their way into waffles or English muffins later in the week.

Then I add 15 grams (1 Tbs) of water and mush it up until it's soft and the water has turned somewhat milky in color.

Then I add 25 grams (2 heaping Tbs or 2 Tbs + 1 tsp) of whole wheat flour.

(If you're maintaining a wet starter, simply increase the water to 25 grams)

Finally, I mix it all up with a spoon, take it out and knead it a bit in my hands, which consists of folding it over on itself four or five times. I then roll it into a ball, snap on the lid and let it work.

That's it. I've found it's not that much of a hassle to feed it twice a day and is much less annoying than realizing I can't make a sourdough because I forgot to take my starter out of the fridge and feed it.

Appendix A: Glossary

ABAA: Artisan Baking Across America, by Maggie Glezer. A book featuring profiles of artisan bakers and recipes for some of their breads.

Autolyse: a technique for improving gluten development without heavy kneading. Combine the flour and water from your recipe in a bowl and mix until the flour is fully hydrated. Cover the bowl and let the flour hydrate for 20 minutes, then mix in remaining ingredients. The result is development comparable to a dough that has been kneaded for 5 or 10 minutes with less oxydation (which leads to a yellow crumb).

Baker's percentage:a convention for listing the ingredients in a dough in which the quantity of each ingredient is expressed a percentage of the total amount of flour. Example: 1000g flour, 660g water, 20g salt, 10g yeast is expressed in baker's percentage as 100% flour, 66% water, 2% salt, 1% yeast. Note that this always adds up to more than 100%.

BBA: The Bread Baker's Apprentice, a book by Peter Reinhart. By far the most popular book among amateur artisan bakers in the United States. If you don't have it, buy it.

Banneton: a woven basket, sometimes lined with linen, used to hold a shaped loaf while it is proofing.

Batard: a loaf that has an oval or oblong shape.

Biga: a term used variously as a very stiff (~50% hydration preferment), or as a generic term for preferment.

Boule: a round loaf (French for "ball").

Brotform: a coiled cane basket used to hold a shaped loaf while it is proofing.

Couche: heavy linen fabric used to hold formed loaves for proofing. The fabric can be pleated around the loaves to help them hold their shape.

Crumb: When a baker talks about the crumb they are talking about the pattern of holes inside of a loaf.

Fermentation: (1) the process by which yeast metabolizes sugars to produce carbon dioxide and alcohol (2) (aka bulk fermentation, first fermentation) the period of time the dough rests after mixing and before dividing/shaping.

Folding: one of the best ways of encouraging gluten development in slack doughs. Folding the dough consists of taking a wet dough out of the bowl, spreading it out a little on a clean, well-floured surface, folding it in thirds like a letter, rotating it 90 degrees and folding it up again, picking it up and dusting the loose flour off of it, and then returning the dough to the bowl and covering it again. Like punching down, folding degases the dough some, but it also encourages gluten development.

Gluten: "A tenacious elastic protein of wheat flour that gives cohesiveness to dough." Gluten is what allows bread dough to develop those long, beautiful strands and create large open pockets of air (think about the inside of a loaf of Ciabatta compared to the inside of a muffin). Bread flours tend to be made from hard wheats that are higher in protein than regular flour, providing more gluten.

Hamelman, Jeffrey: bakery director at King Arthur Flour and author of Bread: A Baker's Book of Techniques and Recipes, a comprehensive book aimed at both professional and home bakers.

Hydration: the ratio of liquid ingredients (primarily water) to flour in the dough. A dough with 500g of flour and 340g of water has a hydration of 68% (340/500).

KA: Kitchen Aid or King Arthur.

KAF: King Arthur Four.

Lame: a thin blade on a handle, used to score (slash) loaves before baking.

Levain: usually used as a synonym for sourdough.

Leonard, Thom: A baker featured in ABAA whose Country French Bread is popular with many members of The Fresh Loaf.

Pâte fermentée (aka prefermented dough): a type of preferment in which the ingredients (flour, water, yeast, salt) are mixed in the same proportion as (usually) a basic white bread dough at about 65% hydration.

Poolish: A type of sponge. Typically quite wet, an equal weight of water and flour with an extremely small amount of yeast. For my batch of two French Bread loaves, I typically use 8 ounces of water, 8 ounces of bread flour, and 1/8 teaspoon a instant yeast. Mix it, cover the bowl, and leave it at room temperature overnight.

Proof: (1) the final rise of the shaped loaves before baking (2) the hydration of dry active yeast in water before it is added to the dough

RLB: Rose Levy Beranbaum, author of The Bread Bible, a book aimed at the home bread baker.

Score (aka slash or dock): to cut the surface of the loaf prior to baking. This provides for controlled expansion of the loaves during baking so they do not "break" undesirably. Scoring is also used to enhance the appearance of the bread.

Sourdough: a preferment that is a culture of wild yeast and bacteria that is perpetuated by the periodic addition of flour and water, or a bread leavened in whole or part by this culture.

Sponge: Also known as a "preferment," a sponge is a portion of the ingredients that is mixed ahead of time, typically overnight. Using a sponge extends the fermentation process longer and generally releases more complex flavors in your loaf. It can also be used to soften dry ingredients (such as whole grains) and release sugars from the grains.


nbicomputers's picture
nbicomputers

Double knot roll

with all the flour i bought i  cant just let it sit there so i made two dozen of these . i gave one dozen to a friend and this is the other

knot1

knot2


Pages