The Fresh Loaf

A Community of Amateur Bakers and Artisan Bread Enthusiasts.

Most bookmarked

Juergen Krauss's picture
Juergen Krauss

German baking day

At my son's school we are starting a German expat's learning group to give our children some idea of German culture, like watching Biene Maja, playing Mau Mau and .. of course... German supper, usually some bread with different toppings such as sausage and cheeses and cold meats.

This gave me the push to start investigating how to make tge breads I miss over here. It's not the multigrain ones - I have a craving for different kinds of "Mischbrot" - bread that is made up of (light) rye flour, and wheat flour. Usually it is leavened with a rye sourdough, and some yeast is added in the final mix.

The overall percentage of rye can  vary from 30 to 99% (100% would be a rye bread, "Roggenbrot") If there is more than 50% rye it's called Roggen-Mischbrot, if it's less than it's a Weizen-Mischbrot.

Meister Suepke gives in his Sourdough blog a general formula for the process called "Detmolder Einstufen-Fuehrung", bread made with sourdough which has been made in a single stage (as opposed to the intricate Detmolder 3 stage process), and he also gives hints how to scale this to different wheat contents.

I found that his formula corresponds very well with many of the rye formulas in Hamelman's "Bread", so I played a bit with the ratios and was very pleased with the outcome.

== Update 23/06/2011: Added some new photos and formulas at the end

== Update 12/05/2012: Added link to Google Docs spreadsheet

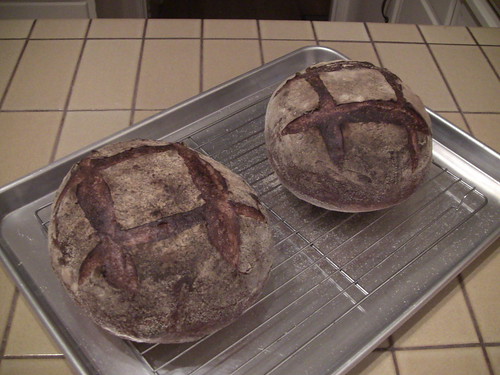
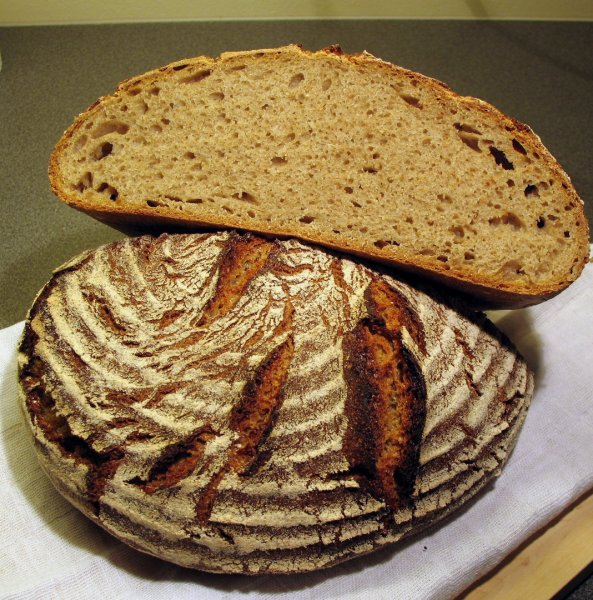
Enough words for now - here is a photo of what I made for the supper tomorrow: 80% rye with soaker according to Hamelman (tin loafs, could have baked a bit longer), 60% rye after Suepke (ovals) and 30% rye after Suepke (fendu)

Here the procedure:

All breads use the same sourdough:

100% wholemeal rye

80% water

5% ripe starter

The sourdough has fermented at 23-25C for 14 hours

The doughs (The percentages are in a table below):

Ingredient80% Rye60% Rye30% Rye
Wholegrain rye136  
Wholegrain rye from soaker111g  
Light rye 196g69g
Wheat flour110g226g402g
Water125g192g213g
Water from soaker111g  
Salt9.9g11.3g11.5g
Instant Yeast2.7g1.8g1.8g
Sourdough381g257g

186g

The procedure is roughly the same for all breads:

Mix and work the dough, rest for 30 minutes, shape, proof for 40 to 60 minutes, bake at 220C for 25 to 35 minutes (500g loaves)

The soaker for the 80%rye is prepared at the same time as the sourdough: pour boiling water over the flour, mix and cover.

The doughs with more wheat should show some gluten development.

/* Update */

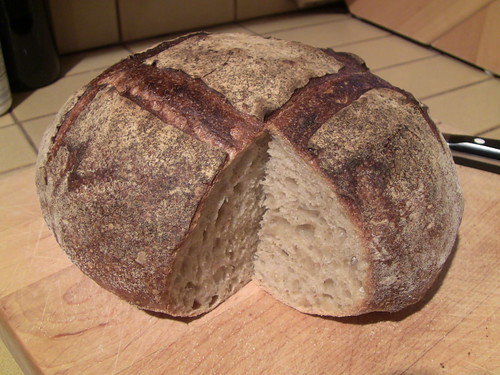
On the evening of the bake I couldn't wait - I cut the breads and posted the crumbshots above.

And I tasted them - the lighter breads are very satisfactory - beautiful elastic crumb and a rich taste with a good level of acidity - this is what I wanted.

The 80% turned out lighter color than I expected - I think I baked a bit too early and not long enough, but the taste is very promising (this bread should be cut and eaten at least 24 hours after the bake, it will get darker by then).

For reference here is the table with the percentages following Suepke's formula. I scaled the water down to 70% for 20% rye Mischbrot which works well. Sourdough as above.

Rye

100%

90%

80%

70%

60%

50%

40%

30%

20%

Wheat

0%

10%

20%

30%

40%

50%

60%

70%

80%

Water

78%

77%

76%

75%

74%

73%

72%

71%

70%

Salt

2%

2%

2%

2%

2%

2%

2%

2%

2%

Fresh yeast

1%

1%

1%

1%

1%

1%

1%

1%

1%

Fermented flour

28%

26%

24%

22%

20%

18%

16%

14%

12%

Yield

181%

180%

179%

178%

177%

176%

175%

174%

173%


Here is the aabove table in Google Docs:

https://docs.google.com/spreadsheet/ccc?key=0AkcYHhPxccKtdERlMzlWOEhBQ2Z5c1Z0MUZYRGVTZlE

You can export the spreadsheet as Excel (with all the formulas) and scale the dough according to your needs.

You can adjust the expected dough weight, hydration of starter, surplus amount of starter and scaling weight.

Happy Baking,

Juergen

Variations

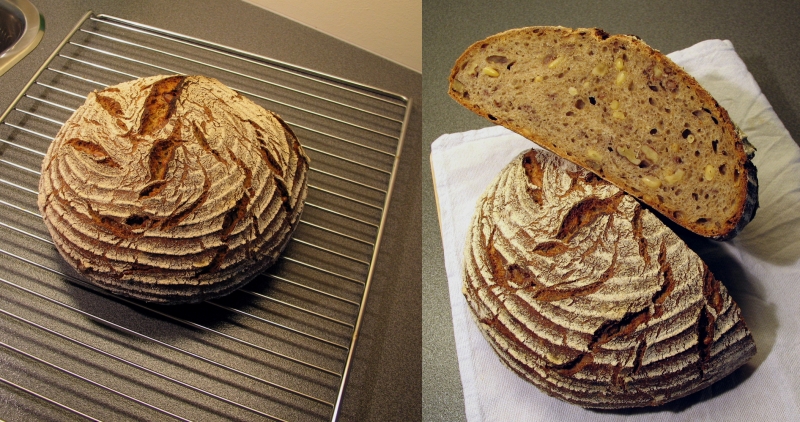
Using the above percentages and procedures I made 3 different "Mischbrot" variations:

1. 30% Rye using wholegrain rye starter and flour and caraway (about 2%)

2. 50% Rye using light rye starter and flour, and  bread flour

3. 50% Rye using wholegrain rye and wholegrain wheat.  The flours for the final dough and the water have been mixed and left to soak overnight.

Here a photo:

The 30% rye is among the most delicious breads I've made so far. Light and hearty, and goes well even with jams, despite the caraway. (I get the feeling that I will have to bake lots of those in the coming weeks...)

The 50% mixes were inspired by my search for Kommissbrot (German army bread), which has been introduced during WW1, but found its way into the shops (and is still there). Originally it was - according to WiKi - a 50:50 wholegrain rye/wheat mix with sourdough and yeast.

The 50% rye with light flours is not bad, but a bit boring, but the wholegrain version certainly will stay in my repertoire: A very rich, complex taste with a strong wheat component and quite a bit of acid, like a mix between a 100% rye  and a levain with wholegrain. The crumb feels light and springy, despite its look. I'm very pleased.


GSnyde's picture
GSnyde

Spring is in the Air…and in the Oven

Mixed Flowers and Mixed Flours

IMG_2250

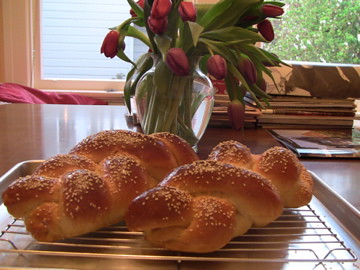
Our plum tree blossoms  are gone and it’s leafing out (background of challah pic below).  And Daylight Savings Time stole an hour today.  So it must be Spring (despite the drizzle outdoors).   The baking this weekend followed the dinners.  Roast Chicken calls for Challah.  Fresh Pasta and Lamb Ragu calls for Sourdough.

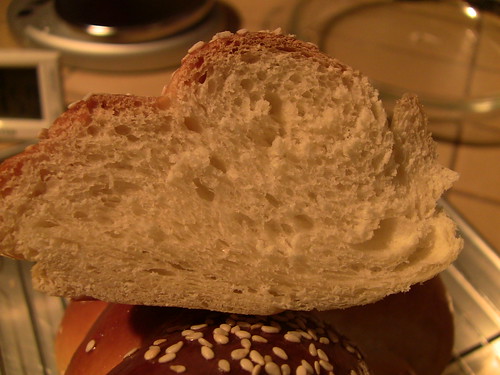
The Challah bake was just the usual. No experiments.  Maggie Glezer’s recipe is perfect enough.  Always reliable and always delicious.

IMG_2234

IMG_2238

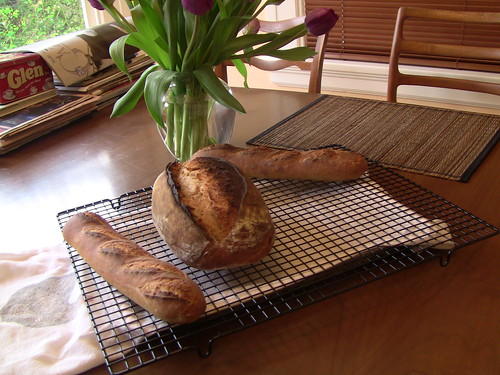
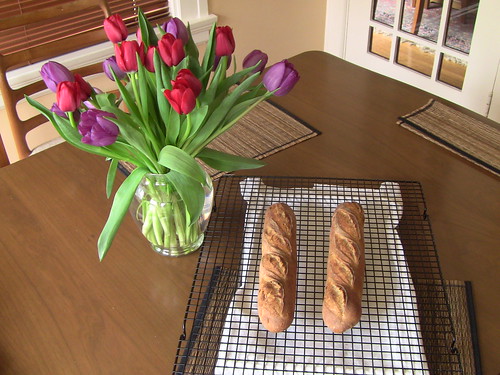
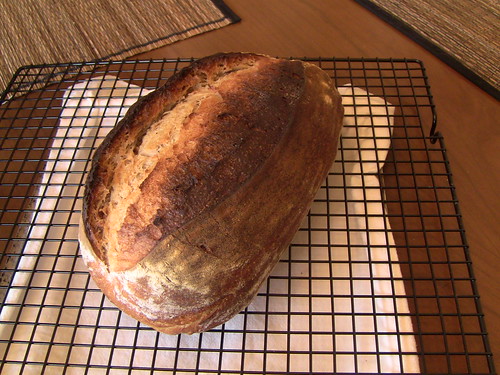
The Sourdough bake involved some tinkering with my “San Francisco Country Sourdough” formula.  It had been a couple months since I’d last played with this part-whole-grain pain au levain.   I upped the percentage of whole wheat to 11%.   I used Central Milling Organic Artisan Baker’s Craft (enriched) white flour.  I baked it into a large batard (one kilo) and two mini-baguettes.

IMG_2244]

IMG_2239

I think the evenness of the crust color on the baguettes may be due, in part to the malted barley flour in the Central Milling Organic Artisan Baker’s Craft flour, and in part to the thorough pre-heating of my oven and stone.   The darker edge of the grigne on the batard shows I forgot to turn the oven down after the loaf went in until I removed Sylvia’s Magic Towel set-up (d’Oh!).

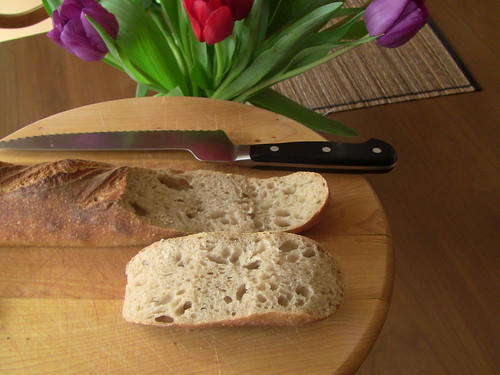
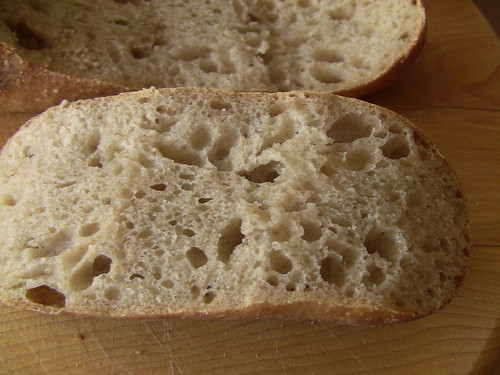
The crumb texture is very nice, moist and medium airy, just as I like it.  It has a good sour flavor.  I let the liquid levain ripen for 16 hours and the dough retarded for about 16 hours.  My sourdough-lovin’ spouse describes her ideal sourdough simply as “fairly- but not super-sour, moist and chewy inside, crispy outside”.  She says this one hit the mark.  One baguette gone already.

IMG_2246

IMG_2251

Here’s the tweaked formula:

San Francisco Country Sourdough (Sourdough Pain de Campagne) version 3-13-11

Yield: Two 750g  Loaves; or Three Mini-Baguettes (235g each) and one 800g Loaf; or One 1000g loaf and two 250g baguettes; or…   

Ingredients

LIQUID-LEVAIN BUILD

100 grams   AP flour

24 grams  Whole Wheat flour

12 grams  Whole rye flour

170 grams   Water, luke warm

28     Mature culture (75% hydration)

FINAL DOUGH (67% hydration, including levain)

640 grams   All-Purpose flour (83%)*

85 grams  Whole wheat flour (11%)**

45 grams   Whole rye flour (6%)

435 grams   Water at room temperature (56%)

17 grams   Salt (2%)

306     Liquid levain  (48%)   

* 3-13 used CM Artisan Baker’s Craft (malted)

** 3-13 used CM Organic Hi-protein fine whole wheat

Directions

1. LIQUID LEVAIN:  Make the final build 12 to 16 hours before the final mix, and let stand in a covered container at about 70°F

2. MIXING: Add all the ingredients to the mixing bowl, including the levain, but not the salt. Mix just until the ingredients are incorporated into a shaggy mass. Correct the hydration as necessary.  Cover the bowl with plastic and let stand for an autolyse phase of 30 to 60 minutes. At the end of the autolyse, sprinkle the salt over the surface of the dough, and finish mixing 5 minutes. The dough should have a medium consistency. 

3. BULK FERMENTATION WITH S&F:  3 hours. Stretch and fold the dough in the bowl twice 30-strokes at 45-minute intervals.  Place dough ball in lightly oiled bowl, and stretch and fold on lightly floured board at 45 minutes.  If the dough has not increased in size by 75% or so, let it go a bit longer.

4. RETARDED BULK FERMENTATION (optional):  After second S&F on board, form dough into ball and then place again in lightly oiled bowl.  Refrigerate 8-20 hours, depending on sourness desired and scheduling convenience.

5. DIVIDING AND SHAPING: [Note: if bulk retarded, let dough come to room temperature for 30-90 minutes before pre-shaping.]  Divide the dough into pieces and pre-shape.  Let sit on board for 30-45 minutes, and then shape into boules or batards or baguettes.

6. PROOFING: Approximately 1.5 to 2.5 hours at 72° F. Ready when poke test dictates.  Pre-heat oven to 500 with steam apparatus in place.

7. BAKING: Slash loaves.  Bake with steam, on stone.  Turn oven to 460 °F after it hits 500F after loading loaves.  Remove steaming apparatus after 12 minutes (10 for baguettes). Bake for 35 to 40 minutes total (for 750g loaves; less for smaller loaves).   Rotate loaves for evenness as necessary.  When done (205 F internal temp), leave loaves on stone with oven door ajar 10 minutes.

Happy Spring!

Glenn


dmsnyder's picture
dmsnyder

SFBI Artisan II Workshop - Day 2

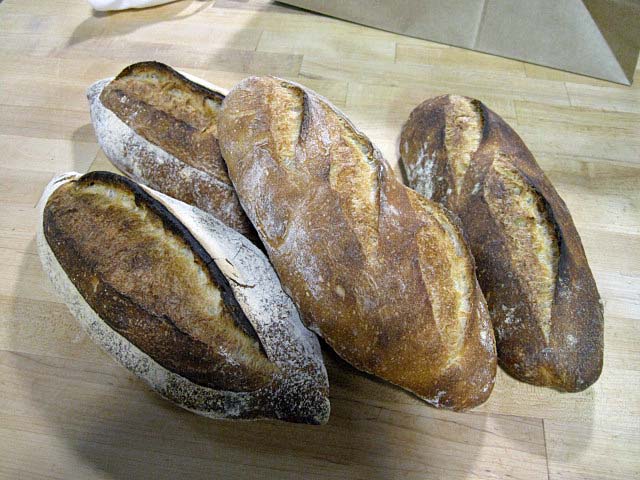
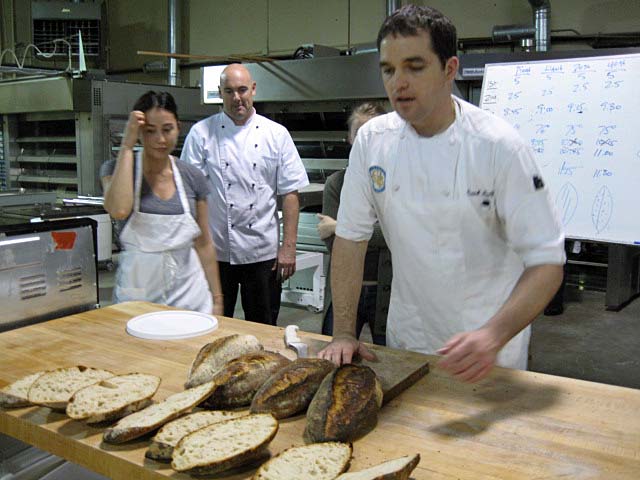
Some of the breads I baked on Day 2

The second day of the Artisan II workshop was spent mostly baking the breads for which we had fed the levains and scaled the ingredients yesterday. We also mixed levains and scaled for tomorrows bakes. Classroom time was bits and pieces between dough foldings and during fermentation, but the content was very good.

The instructional goal of today's baking was to see the effects of different types and proportions of levains on flavor. We baked four breads which differed only in these respects.

  1. Bread made with a levain fed once a day. (All the others were made with levain fed twice a day.) This bread was notably more sour than any of the others.

  2. Bread made with liquid levain at 100% hydration. (All the others were made with firm levain at 50% hydration.) This bread had notably less acetic acid tang and a noticeable milky lactic acid flavor – very pleasant.

  3. Bread made with 40% firm levain.

  4. Bread made with 70% firm levain.


The last two were not very different from each other in sourdough tang, but the 70% levain bread had a less pleasant, “metallic” after taste, according to some. I didn't perceive the after taste myself. The main take away lesson was that the frequency of starter feeding has more impact on bread flavor than the amount of levain used in the final dough and that the use of liquid versus firm starter really does make a difference in the balance of acetic versus lactic acid flavor in the bread.

Preparing to taste the breads

In the classroom today, Frank reviewed the application of baker's math to breads made with levains and the SFBI's recommendations for levain maintenance for home bakers. I won't go over the baker's math topic, but I'm sure the recommendations for levain maintenance are of interest to many.

The SFBI staff clearly favors keeping liquid levains and twice a day feedings. They also favor keeping your mother/stock starter at 400-500 g. They say smaller amounts result in poorer flavor. However, they also favor feeding your starter in a manner which minimizes the amount of starter you end up discarding. This is accomplished by determining exactly how much starter to feed to get the amount of levain you need to make your dough and not making too much excess.

For a liquid levain feeding, the recommended formula is:

Flour 100% (75% AP flour + 25% WW)

Water 100%

Starter 40%

Again, it is recommended that you feed every 12 hours and that you do two feeding prior to mixing your final dough.

For a firm levain feeding, the recommended formula is:

Flour 100% (same mix as above)

Water 50%

Starter 50%

For the weekend baker, it is recommended that you feed your levain (liquid or firm) as follows:

Flour 100%

Water 50%

Starter 25%

And refrigerate this immediately after the feeding. Activation prior to baking should done with 2 feedings (as described above) at 12 hour intervals. In other words, to mix a dough on Saturday morning, the refrigerated starter should be fed Friday morning and Friday evening.

Frank told us that all of these recommendations derived from extensive experimentation with different formulas and schedules. SFBI staff believes that they result in the best tasting bread. (Need I say that, if your taste differs, you come out of this workshop knowing just what you need to change to get the flavor you prefer?)

At the lunch break, I asked Frank about the formula for miche in AB&P which violates almost all these recommendations. I have described this previously in my TFL blog. He thought this was interesting enough to provide the answer in the next class session.

Michel Suas' intension with his miche formula was to reproduce a bread as close to the traditional miche as possible, and that required knowledge of traditional French village home baking. In the old days – say 150 or more years ago – home made bread was mixed at home but taken to a communal oven or to the village baker to bake in a wood fired oven. The loaves were huge, by today's standards, because baking was a once-a-week chore. So, after the dough was mixed (before adding salt), a portion was removed to perpetuate the culture. This was fed through the week every day, without discarding any of the growing levain. On baking day, some additional flour and water were added, as well as the salt. But, the bulk of the dough consisted of the built up levain. Little additional fermentation was needed. The resulting loaf was very large, very dense and very, very sour. (Frank describes this with a look of disgust on his face.)

While today's breads were baking, we mixed the levains and scaled ingredients for tomorrow's bakes. We will be baking a variety of breads with levain that were made with commercial yeast during the Artisan I class: A whole wheat bread, multi-grain bread, rye bread and challah. We also fed our “from scratch” starters with which we will make breads Friday.

David

GSnyde's picture
GSnyde

Shall We Call It San Francisco Country Sourdough ?


Or maybe World Series Sourdough?!! [Go, Giants!!]

I have enjoyed Acme Bread’s Pain de Campagne a couple times recently.  It’s a moderately sour boule with a thin toothsome crust and a somewhat fluffy, but chewy crumb.  I think it has some whole rye flour and some whole wheat flour.  It's about my favorite bread ever.

So, today I tried to bake something like it.  I used the formula and procedure for Hamelman’s Vermont Sourdough as a starting point, but used KA European Style flour and some KA whole wheat flour and used a longer bulk ferment.

I studied dmsnyder’s boule-shaping tutorial and did my best to follow his tutelage and was very pleased with my shaping effort.  I got good oven spring and a nice crust crackles.  The crumb is just what I was  going for--light but chewy.  And the flavor is also pretty close to the Acme Pain de Campagne—nutty and complex and just a little sour.  I think this is the best tasting Sourdough I’ve made.

IMG_1706

IMG_1703

IMG_1712

IMG_1709

Here’s the formula:

San Francisco Country Sourdough 

Yield: Two 1.5 lb Loaves

Ingredients

LIQUID-LEVAIN BUILD

100 grams   AP flour

24 grams  Whole Wheat flour

12 grams  Whole rye flour

170 grams   Water, luke warm

28  grams   Mature culture (75% hydration)


FINAL DOUGH (66% hydration, including levain)

680 grams   KAF European-Style Artisan Bread flour (88%)

45 grams  Whole wheat flour (6%)

45 grams   Whole rye flour (6%)

425 grams   Water at room temperature (55%)

17 grams   Salt (2%)

306     Liquid levain  (40%)


Directions

1. LIQUID LEVAIN:  Make the final build 12 to 16 hours before the final mix, and let stand in a covered container at room temperature (about 70 F).

2. MIXING: Add all the ingredients to the mixing bowl, including the levain, but not the salt. Mix just until the ingredients are incorporated into a shaggy mass. Correct the hydration as necessary.  Cover the bowl with plastic and let autolyse for 30 to 60 minutes. At the end of the autolyse, sprinkle the salt over the surface of the dough, and finish mixing 5-7 minutes. 

3. BULK FERMENTATION WITH S&F:  3 hours. Stretch and fold the dough in the bowl twice 30-strokes at 45-minute intervals.  Place dough ball in lightly oiled bowl, and stretch and fold on lightly floured board at 45 minutes.

4. RETARDED BULK FERMENTATION (optional):   After second s&F on board, form dough into ball and then place again in lightly oiled bowl.  Refrigerate 8-20 hours, depending on sourness desired and scheduling convenience. [I skipped this step this time].

5. DIVIDING AND SHAPING: Divide the dough into two  pieces and pre-shape.  Let sit on board for 30 minutes, and then shape into boules or batards.

6. PROOFING: Approximately 2 to 2 1/2 hours at room temperature (about 70° F).  Ready when poke test dictates.  Pre-heat oven to 500 F with steam apparatus in place. 

7. BAKING: With steam, on stone.  Turn oven to 460 °F after steaming.  Remove steaming apparatus after 12 minutes. Bake for 35 to 40 minutes to

tal.   Rotate loaves for evenness as necessary.  When done (205 F internal temp), leave loaves on stone with oven door ajar 10 minutes.


I recommend this bread to anyone who likes sourdough with a moderate amount of whole grain.


Glenn


txfarmer's picture
txfarmer

Tartine Basic Country Loaf - just pour all that water in and stand back!

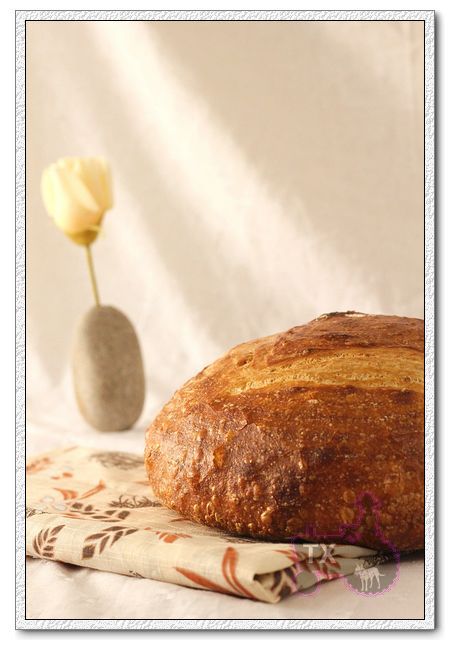
I received my copy of the new "Tartine Bread Book" last week, flipping through the book, I was struck by two things: 1. I want Chad Robertson's life (especially the part about living in the French hills with artisan bakers/cheese makers/farmers, living and doing what he loves along the coastline of beautiful Northern CA, oh yeah, let's not forget the part where he and his friend surf in the morning and bake in the afternoon!); 2. I have been making those 36 hour sourdough baguettes with high hydration, no kneading but S&F, long fermentation, and Chad Roberton's method is very similar in these aspects.

I made his basic country loaf this past weekend with great result. The formula and procedure have been well documented in detail here, and the following are my "study notes":

1. He is after a bread with balanced flavor without too much sourness (I guess his French study is showing), so he ues a levain (a.k.a.  sourdough preferment, sourdough poolish) that's very young. In fact, he says to use it when it has JUST started to float in water, only expanded 20% in volume. He accomplishes that by adding a lot of water and flour to a very small amount of starter (100%), and leave it overnight at a very cool temperature (65F). This is dfferent from the usual practice of using the levain when it has reached the peak volume.

2. He use a very small amount of levain in the main dough: 200g of levain at 100% in 1000g of flour, which means only 9.1% of the total flour is in the levain.

3. He uses relatively warm water to mix the main dough, and the bulk rise temp is pretty warm too (78F to 82F), which counter-balance point 1 and 2 above, to speed up the bulk rise somewhat

4. At the end of bulk rise, he only aims for a 20% to 30% volume increase in his main dough. That takes 3 to 4 hours at the warm-ish temp he describled in the basic flow, but can also be modified according to preference. For instance, lower the water temp to 65F, and keep the dough at 60F, the bulk rise could take 10 to 12 hours, a convenient overnight schedule. (Food for thought: I often wonder how much bulk rise a dough really needs. I know it needs some to build up basic strength and falvor, but I have seen and tried a variety of fermentation schedules, some put more time in bulk rise less in proofing, some do the opposite. Of couse each can be successful, IF it satsify some basic rules, and each would produce breads with different flavors. My conclusion so far is that different style of breads would prefer different fermentation schedule. For instance, the book mentions an example where a pan bread that would have support thoughout proofing and baking could have a very short bulk rise since the dough needs less strength, while a free form loaf may require longer bulk rise. In addition, I think a fuller bulk rise would change the crumb structure too.)

5. The dough is very wet. He says the basic formula is 75% hydration, but he's not counting the 100% levain, it's actually 77%+, wetter than my usual baguette dough. I used all the water (two addition, the last 50g is added after autolyse), the dough felt silky and easy to handle - yes, it's wet and sticky, but I have been making very wet baguettes every week, so I am used to the "wet glob" kind of dough. The "let time and fermentation do their job" method works well here again, don't be freaked out by the initial puddle of mess, give it a couple of hours and some S&F, you will see how it will turn into a beautiful silky cohensive "puddle".

6. After I posted about the 36 hour baguettes, some have asked me about how to S&F such a wet dough. As I mentioned in that thread, I simply take the dough out, hold it in my hands, left hand strentching out, then fold back. Repeat with right hand. Put back in the container. The key is to have the container and hands well oiled. When I do that with my baguette dough, it was easy, and quick, and efficient. However, when I tried to do that with this dough, I immediately realized that it's not the best way - because the dough is much larger. My baguette dough has 500g of flour, this one has 1100g, and I have small hands. If I try to do the same thing with this dough, it would try to slip off, so I had to dig my fingers into the dough a bit to grab on, which hurts the dough. So I changed to Chad's method describled in the book: folding the dough in the container. My point is that it's not important to known how exactly a S&F is done, it's important to know the principle. YOu need to stretch out and fold the dough back GENTLY. Once - in a way that's most convenient for you.

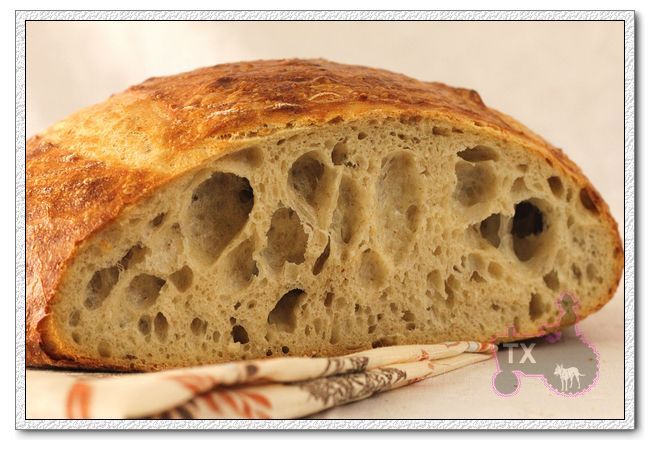
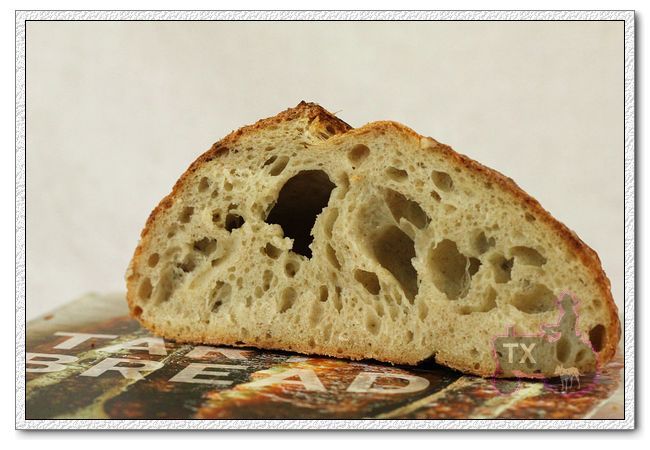
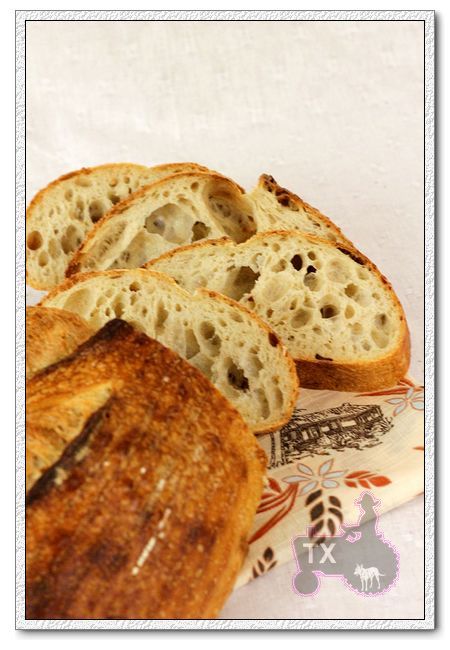
7. With such a wet dough, it's the best to make simple shapes. I made a boule and a batard, both have very open crumb, but the boule has more and larger holes, because it was handled less during shaping. (Who's up for shaping this dough into baguettes? I can't get the thought out of my head, there's something wrong with me! The funny thing is that Chad's baguette formula has LESS water than this country loaf.)

8. I retarded the shaped dough overnight at 40F, put them at room temp for another hour the 2nd morning to finish proofing, then baked. The book says I can proof and bake on the same day of bulk rise, but I never seem to have that much time in one day, and I like the flavor better after a long proof.

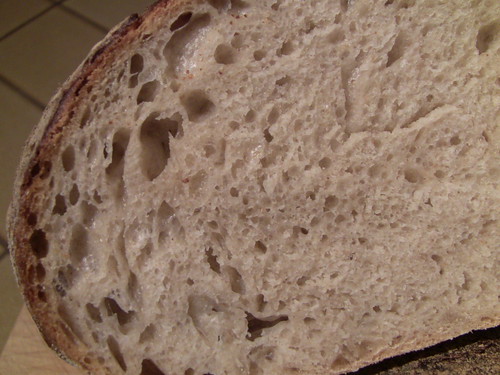
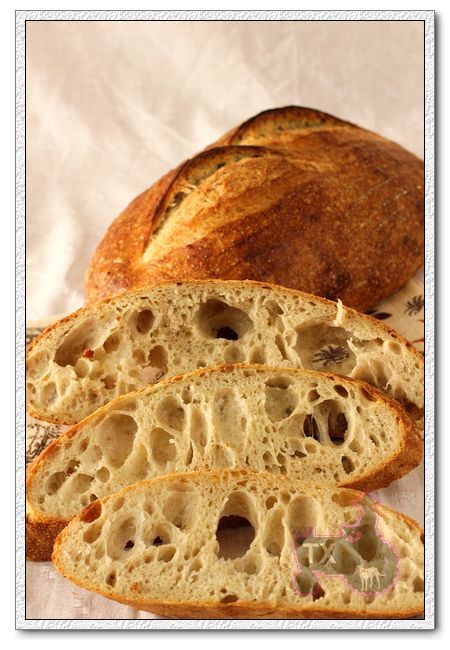
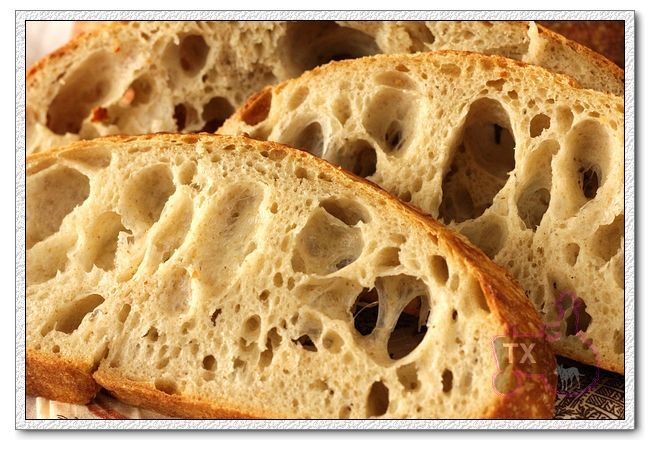
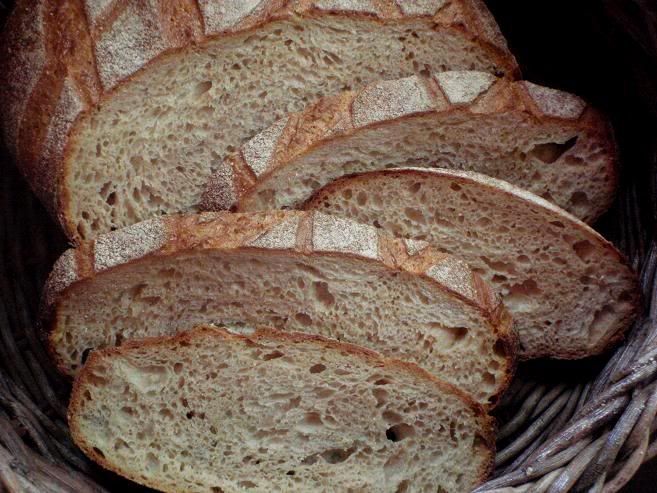
9. The crumb is VERY open, to the point that it's hard to slice. Especially the boule, which has a large crosssection and the crispy crust is thin, I think I need an electric slicer to cut through those airholes cleanly, now I know why hole-y baguettes are shaped long and thin, so there's more crust support and easier to cut!

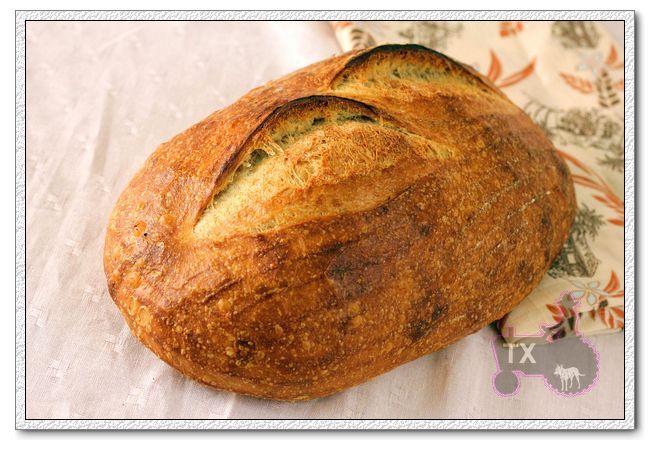
10. The book ueses a cast iron dutch oven set to bake the bread in, I don't have such things, so I baked them on my stone with steam. I can see how they spreaded out a bit on the stone in the first few minutes, but then quickly sprung up beautifully to give great volume. However, I can see how a vessel with limited space can contain the shape even better to give a higher/rounder shape. Next time I may try a higher baking temp for the first few minutes.

11. The flavor is sensational. Very moist, cool crumb, matched well with crackling thin crust. What struck me the most is the sweetness. Even after a night of retarding, there's barely any sourness, but the sweetness of the wheat is very apparent. My husband and I both loved it.

Next up: I want to try the WW loaf in the book, even MORE water!


Submitting this to Yeastspotting.


jlewis30's picture
jlewis30

Perfect English Muffins - light, lofty and full of HOLES


The dough is really just a few steps up from batter. The high hydration ensures the muffins will be light and lofty rather than dense, creating medium to fine “nooks and crannies”.


INGREDIENTS

2c            Warm Water
1T           Yeast
1/2c         Honey
1/2c         Sour Cream
4c            Bread Flour
2t            Salt
1c            Yellow Corn Meal


MIX DOUGH

Pour warm water in a large bowl and sprinkle with yeast. Add honey and whisk until dissolved. Add sour cream and continue to whisk until uniform, there may be some small pea sized bits of sour cream, which is fine. Combine flour and salt and start adding to the liquid. The amount of flour used will vary, the key is to get a dough that is very wet (cannot quite form a ball, but pulls away from the side of the bowl when worked). To mix and knead the dough I continually dip my hand in warm water and smoosh it about, the dough is about right when it is sticky but my hand will stay clean for two or three “smooshes” while I am kneading (to knead this dough I keep it in the bowl ). Knead for 5 minutes.


Cover and let rise, some cooking spray will help keep the dough from sticking to the cover and make it easier to push down while proofing. Let dough rise until double in size (about an hour), scrape sides and mix dough down. Repeat three or four times then cook.


COOKING

I use a large electric griddle to cook the muffins (Presto Tilt n Drain Big Griddle, awesome tool), any flat griddle should work. The dough is sticky, I dip my fingers in water between each muffin to help.


Sprinkle the griddle generously with corn meal. Cut apple size balls of dough and gently place them on the griddle, DO NOT over work the dough. You can pinch the edges to make a rounder shape, I never use rings. Spray tops with oil and sprinkle generously with corn meal.  Turn the griddle on high (appx. 450), cook the first side until it is golden brown on the bottom and the muffins have a nice loft. Gently flip the muffin taking care not to deflate it. Let cook on high for 5 min then reduce heat to medium (appx. 350) and continue cooking until the muffin is cooked through, will sound hollow to tap, about 15 minutes.


Barmaley's picture
Barmaley

Sourdough stages

As I understand, there are two major stages in sourdough baking: first they make sponge and then they make dough. In reallity, sponge is a form of dough. Sponge raises and bubbles the same way as dough would. At the same time some fuel for bubble generation is used ny yeasts. So, what is the reason to make sponges, why just not make gough in one step?

Shiao-Ping's picture
Shiao-Ping

Miche, Pointe-à-Callière

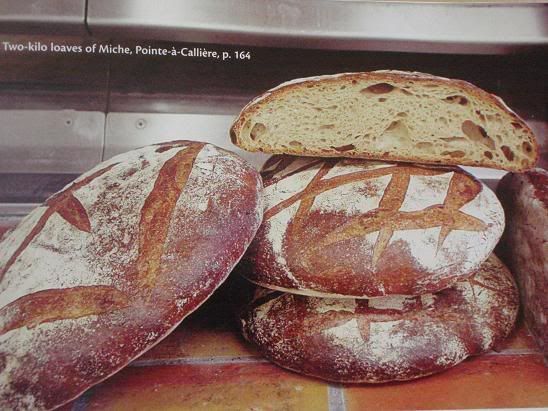
To continue on my last post, I experimented the gentle S&F technique on this classic recipe from Hamelman's Bread, page 164.  


                                                                      © Jeffrey Hamelman's Bread

There is nothing new about this technique - the slow and gentle (and at the same time, firm and assertive) stretch and folds on the dough over the entire length of time of the bulk fermentation to try to build up its strength, slowly but steadily.  Whether or not we have consciously applied this technique is another issue. 

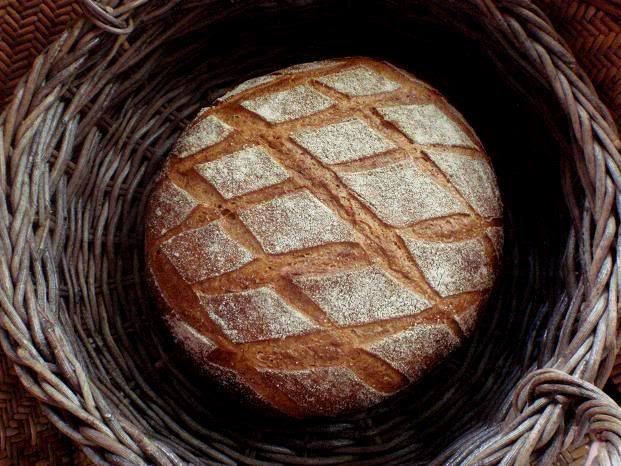
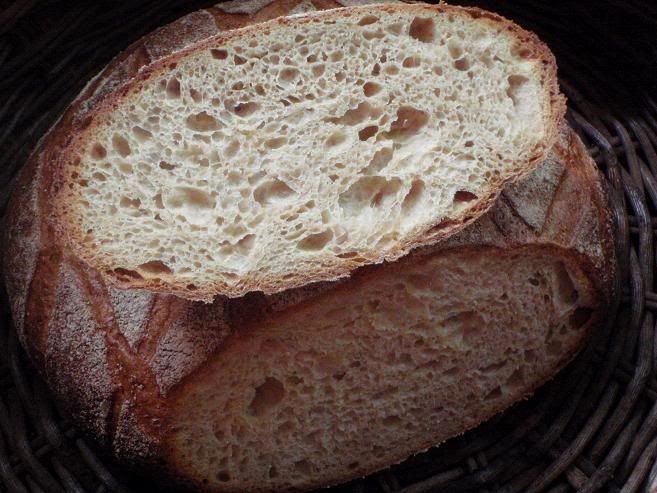
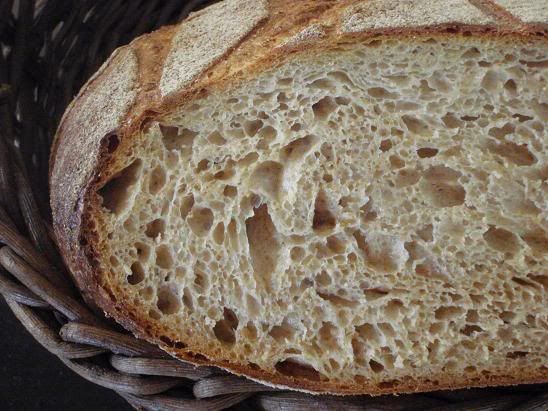
My purpose was to develop dough strength slowly along side dough fermentation, so as to see how much volume I could get for my loaf and how open the crumb structure could be on this classic recipe.   Here is my Miche, Pointe-à-Callière:


I followed Hamelman's list of ingredients but I did not use his procedure.   My ingredients were:

  • 289 g just ripe 60%-hydration levain (40% baker's percentage)
  • 725 g high-extraction whole-wheat flour (as suggested by Hamelman, 86% whole wheat flour and 14% plain flour were substituted for the high-extraction flour, which is not available in my area)
  • 634 g water
  • 17 g salt

Total dough weight was 1,665 g and overall dough hydration was 84%.


My procedure:

Mix only the flour and water.  Autolyse for an hour.  Then, mix in the levain and the salt.  Up to this point, the procedure was as instructed by Hamelman; thereafter I broke away from Hamelman's instruction and started my experiment as follows: 

  1. 0:00  When all the ingredients are combined, do the first set of stretch and folds of 35 strokes.  Dab some oil on the edge and bottom of the dough all round where the dough meets the bowl (so that the dough doesn't stick to the bowl when you do the next set of S&F's).
  2. 0:30  2nd set of S&F of 25 strokes.  Again, dab some oil on the edge and bottom of the dough as above.
  3. 1:00  3rd set of S&F of 25 strokes.  (My dough already felt silky and smooth.)  Again, dab some oil on the edge and bottom of the dough as above).
  4. 1:30  4th set of S&F of 25 strokes.  (My dough felt very bouncy and left the side of the mixing bowl in a cohesive whole.  With each stroke, the dough felt stronger.)  Dab some oil on the edge and bottom of the dough as above.
  5. 2:00  5th set of S&F of 25 strokes.  (The gluten had developed very nicely.)  Dab some oil on the edge and bottom of the dough as above.  Sprinkle ample flour on the work bench.
  6. 2:30  6th set of S&F of 25 strokes and, at the end of the last stroke, grab the whole dough and lift it out of the bowl in one swift movement and drop the dough on the floured surface (what was at the bottom of the mixing bowl is now against the floured surface and it is the right side).  Cover the dough with the mixing bowl.
  7. 3:00  1st pre-shaping.  Gather the edges to the centre, turn it over (so the right side is now up), and tighten it.  Cover.
  8. 3:10  2nd pre-shaping.  (As my dough was a bit wobbly and extended out a lot as it rested, I decided to do a 2nd pre-shaping.  You don't have to if your dough doesn't need it ).  Turn the dough over so the right side is now down, gather the edges to the centre, turn it over to tighten it.  Cover.
  9. 3:20  shape it into a boule.  I placed the boule on a dusted kitchen towel.  Cover and place it in a plastic bag.
  10. 3:30  place the dough in the fridge for retarding.  (Total fermentation time was 3 1/2 hours for me at room temperature of 26 - 27C.  Adjust your fermentation time if your room temperature differs.)
  11. Retarding in the refrigerator for 12 hours.
  12. Bake as normal.


Verdict:  There appears to be more volume in my bread compared to Hamelman's bread (first picture above).  With a dough hydration of 84% (even allowing for the type of flour used for this formula), you would expect the bread profile to be somewhat flat, as seen in Hamelman's bread above.  However, the stretch and fold regime as outlined above in my procedure seems to have developed the gluten structure very nicely and, as a result, my bread seems to have more volume than Hamelman's bread.   

What this tells me is that for a high hydration dough, a slow and steady gluten development is better than a one-shot 2 1/2 minutes or 4 minutes (or whatever it is) kneading in the machine with just one or two sets of S&F's.  For a low hydration dough, you don't need to worry about the dough strength; it develops easily anyway.   Next time if I am doing a high hydration dough again, I will definitely give this method another try.


Shiao-Ping 

dmsnyder's picture
dmsnyder

Greek Bread - Improved

A couple weeks ago, I made Greek bread (Horiatiko Psomi) for the first time (See: Greek Bread - I finally make it with my Greek daughter-in-law). I based it on this recipe, which my Greek daughter-in-law said seemed closest to the bread she had had in Greece. It was good, but I felt it could be improved. I had intended to make the bread with some durum flour, but forgot to use it. Although everyone enjoyed the bread, I felt the crumb suffered from slight under-development of the gluten. Everything I'd heard or read said this was supposed to be a dense bread, but I felt it would be better, even if less authentic, with a more aerated crumb.

Today, I made another batch. I remembered to use some durum flour this time. I used a combination of mechanical mixing and stretch and fold to develop the gluten. I had planned on making it as a sourdough, but, because of time constraints, I did spike it with some instant yeast. I think it turned out well.

Horiatiko Psomi (pronounced hoh-ree-AH-tee-koh psoh-MEE)


Liquid levain


Ingredients

Amounts

Mature sourdough starter

28 gms (2 T)

Bread flour

85 gms

Water

113 gms


Final Dough


Ingredients

Amounts

Durum flour

200 gms

Bread flour

775 gms

Water

600 gms

Milk

2 T

Olive oil

2 T

Honey

2 T

Salt

1 T

Levain

All of above

Instant yeast (optional)

½ tsp

Sesame seeds

About 1 T


Method

  1. To make the liquid levain, in a medium bowl, dissolve the mature starter in the water. Add the flour and mix thoroughly. Cover the bowl tightly and ferment at room temperature for 8-12 hours.

  2. To make the final dough, mix the water, instant yeast (if used), milk, oil, honey and levain in the bowl of a stand mixer.

  3. Mix the salt with the flour and add 2/3 of it to the liquids. Mix until smooth. Add the rest of the flour and mix to a shaggy mass. Cover and allow to rest for 20-60 minutes.

  4. Mix at 2nd speed until you have an early window pane. (About 4-6 minutes in a Bosch Universal Plus mixer.)

  5. Transfer the dough to a lightly floured board and do one stretch and fold. Form the dough into a ball and transfer to a large, lightly oiled bowl. Roll the dough in the oil. Cover the bowl.

  6. Ferment the dough until doubled in bulk with one stretch and fold after an hour. (About 2-2 ½ hours)

  7. Divide the dough into two equal pieces and pre-shape as balls.

  8. Cover the pieces and let them rest to relax the gluten for 10-15 minutes.

  9. Shape the pieces into boules and place them in floured bannetons.

  10. Proof the boules until they have expanded to 1.5-1.75 times their original size.

  11. 45-60 minutes before baking, pre-heat the oven to 500ºF with a baking stone and your steaming method of choice in place.

  12. Pre-steam the oven.

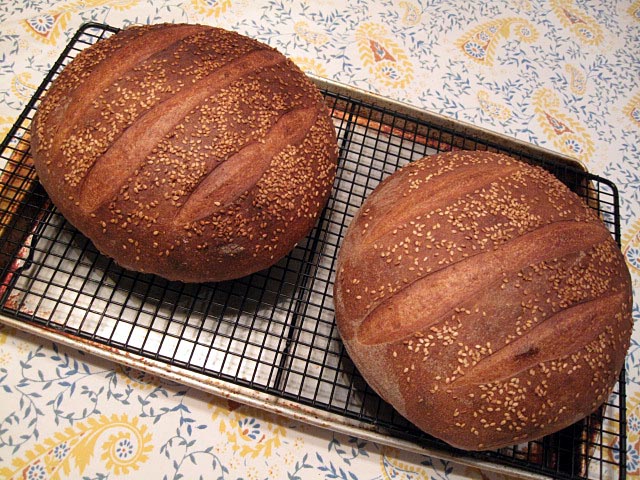
  13. Transfer the loaves to a peel or to parchment paper on a cookie sheet. Brush the loaves with water and sprinkle them with sesame seeds. Score the loaves with 3 parallel cuts about ½ inch deep.

  14. Transfer the loaves to the baking stone. Immediately steam the oven. Close the oven door, and turn the temperature down to 450ºF.

  15. After 12 minutes, remove the steam source. Continue baking for another 20-25 minutes. Check the loaves every so often, and, if they appear to be darkening too fast, turn the over down to 430-440ºF. (Note: I did not turn the oven down from 450ºF, and the loaves turned out a bit darker than I wanted.)

  16. The loaves are done when the bottom sounds hollow when thumped and their internal temperature is 205ºF.

  17. When the loaves are done, turn off the oven but leave the loaves on the stone with the oven door ajar for 10 minutes to dry the crust.

  18. Transfer the loaves to a cooling rack.

  19. Cool thoroughly before slicing and serving.

As noted above, the breads turned out a bit darker than I had wished. Next time, I'll bake at a lower temperature or turn the oven down a bit half way through the bake.

The crust was thin and chewy with a nice flavor from the sesame seeds. The crumb was quite open, considering the low hydration. It was very pleasantly chewy but did not have a dense mouth feel. The flavor was marvelous! It had a mildly sweet flavor from the honey and nuttiness from the durum flour.

I'm not sure I'd change anything, other than baking at a lower temperature and having my daughter-in-law here to tell me how far I'd strayed from Greek authenticity.

David

Submitted to YeastSpotting.

hansjoakim's picture
hansjoakim

Sourdough rye and sourdough rye with walnuts

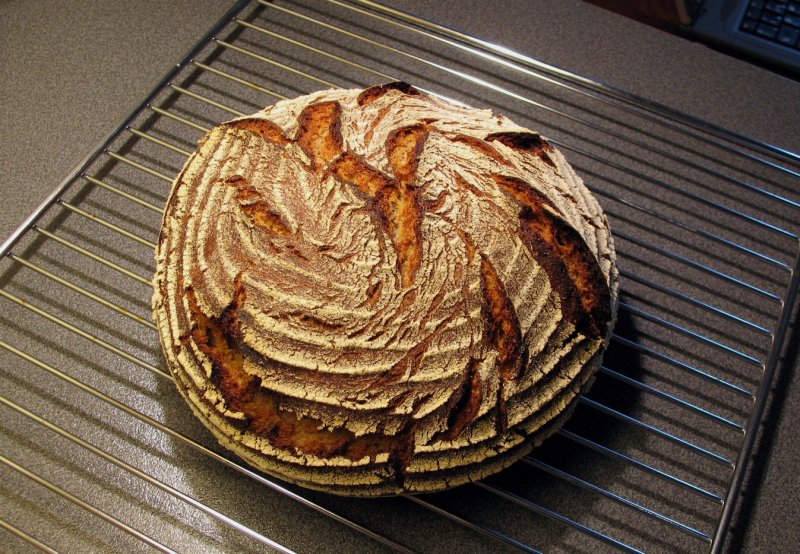
The cover of "Bread" and plate 21 "Assorted Rye Breads from Chapter 6" depict a delicious, rustic looking rye bread that's not slashed. I love the look of this dark, "lava rock" with deep fissures running in random lines along the top of the bread. I wanted to bake a loaf with similar cracks on top, so I prepared the dough for my favourite 70% rye. I'm using medium rye flour, and pre-ferment half of the rye in a sourdough. The remaining 30% is AP flour. I do not put any commercial yeast in this one, so it's important that the rye sourdough is ripe before mixing the final dough. I try to keep this one pretty wet, and usually aim for a hydration around 75%. I mix it very gently in the mixer, approx. 3 mins. on 1st speed followed by 1.5 mins. to 2 mins. on 2nd speed. The dough has some strength to it, although it's more like a thick paste than a "proper" dough at this stage.

Without commercial yeast, I've found 1hr. bulk and 2 hr. final proof to work well for this dough. You know your sour best, however, so these times might be too long or too short for your culture. So: Poke before loading :)

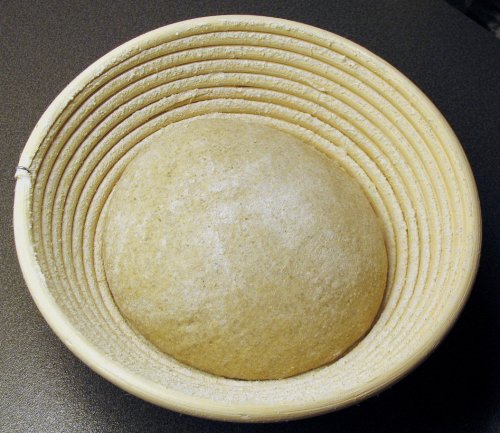
To get the fissures on top, I did the final proof with the seam side down in the brotform. Here's the dough just after final shaping:

70 percent rye

And here are two snaps of the final loaf after 60 mins. in the oven - first 15 mins @ 250dC then 45 mins at temperature gradually falling to 205dC.

70 percent rye

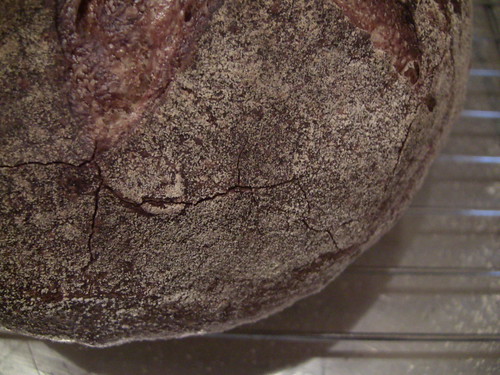
I really like the way the loaf turned out. There's some rustic, unique look to it that I love. As I mentioned, this is probably my favourite rye formula as well - a very simple recipe that has a clean taste and a notable sour due to the longer proofing time, and a loaf that keeps very well with the relatively high hydration. It's a bit tricky to work with, but the crumb and flavour make it worth the extra effort.

70 percent rye

Added Sep. 13th:

Craving more, yesterday I baked the sourdough rye with walnuts from "Bread". This is a 50% whole-rye flour recipe with a substantial amount of walnuts - the walnuts weigh in at 25% of the overall flour weight. I had some lovely chevre already in the fridge, so there was really no excuse not to bake the walnut rye. Five minutes prior to mixing, however, I realised that I was just slightly short on walnuts. I added some pine nuts to get the desired 25% weight. The nuts were lightly toasted, and I followed the procedure for the 70% rye loaf above: a) AP flour instead of high-gluten flour, b) made away with the commercial yeast and increased final proof to 2 hrs., and c) increased the overall hydration from 68% to 75%. Initially I thought 68% would be terribly dry for this kind of dough, so I aimed at 72% at first. Even that didn't cut it, so I gradually mixed in more water until I reached 75% hydration and the desired stickiness. Once again, baked seams side up:

Sourdough rye with walnuts

The crumb was nice and tender, and the whole-rye flour provides a more notable rye taste than if medium rye would've been used.

Pages